• Skip to secondary menu
  • Skip to main content
  • Skip to primary sidebar

Putting The Pretty In Preschool

Finding Beauty In Everyday Early Childhood Experiences

  • Home
  • About Me
  • Winter
  • Chinese New Year
  • Blog
  • Valentine’s Day
  • Contact Me
  • Easter Activities

experiment

Color Explosion Science Experiment

January 1, 2021 by Annette Kaminsky Leave a Comment

A simple color explosion science experiment with dramatic results. Just three kitchen supplies are needed to carry out this experiment.

_______

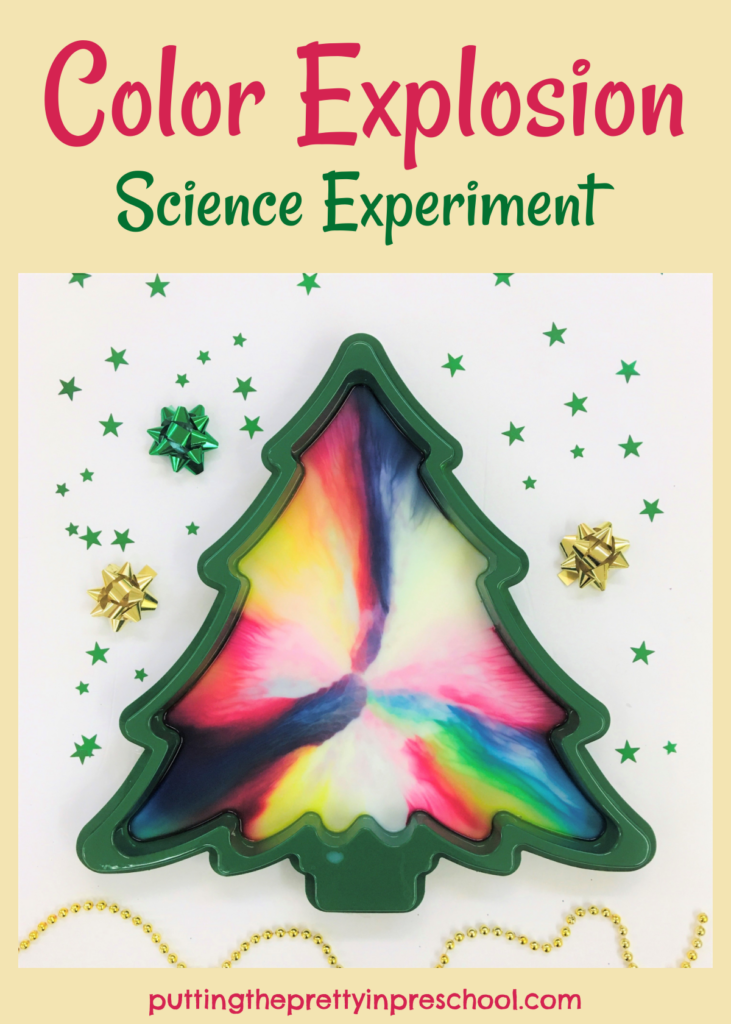
This dramatic color explosion science experiment is one of the simplest ones you will find. It uses ingredients you probably have in your home, is easy to set up, and shows stunning, instant results.
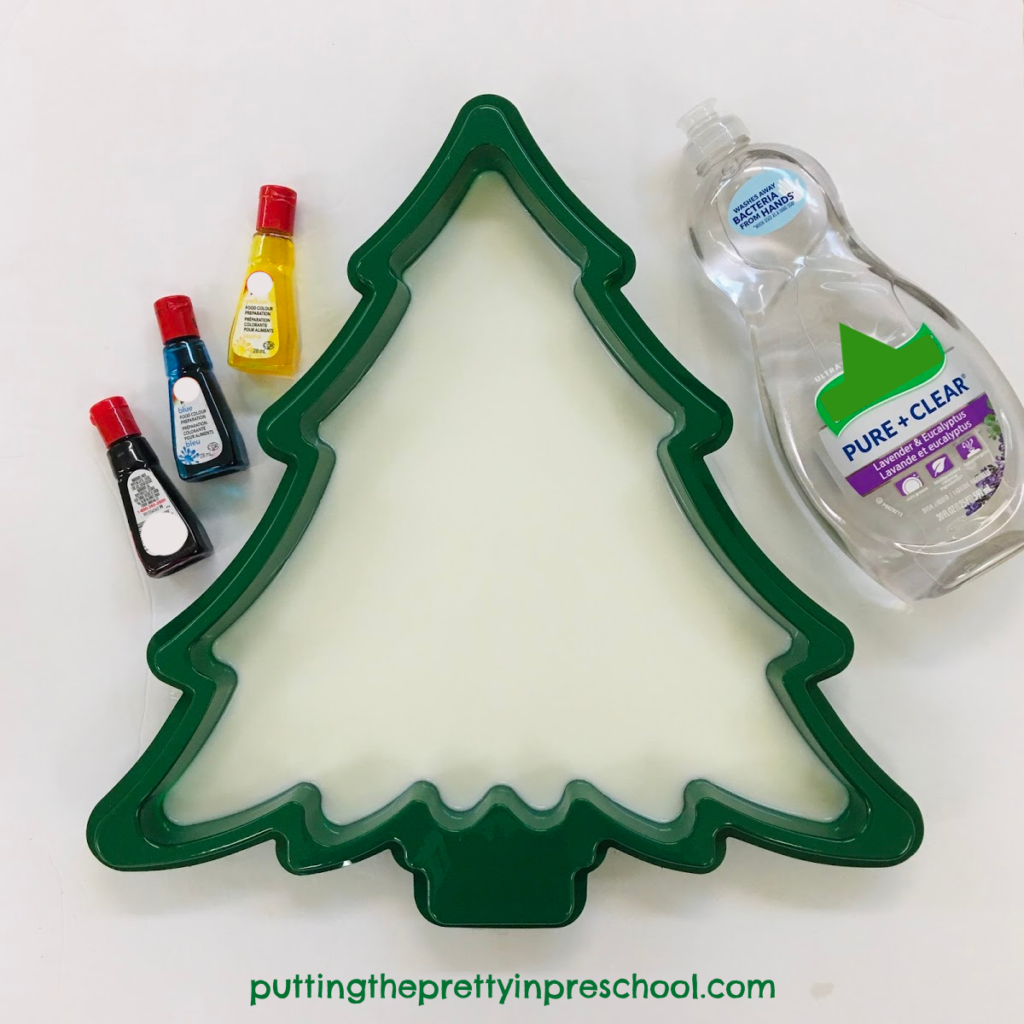
_______

Supplies To Collect

  • serving tray
  • milk
  • food coloring (1 – 4 colors)
  • liquid dish soap
Kitchen supplies to carry out the color explosion milk experiment.

_______

Conducting The Experiment

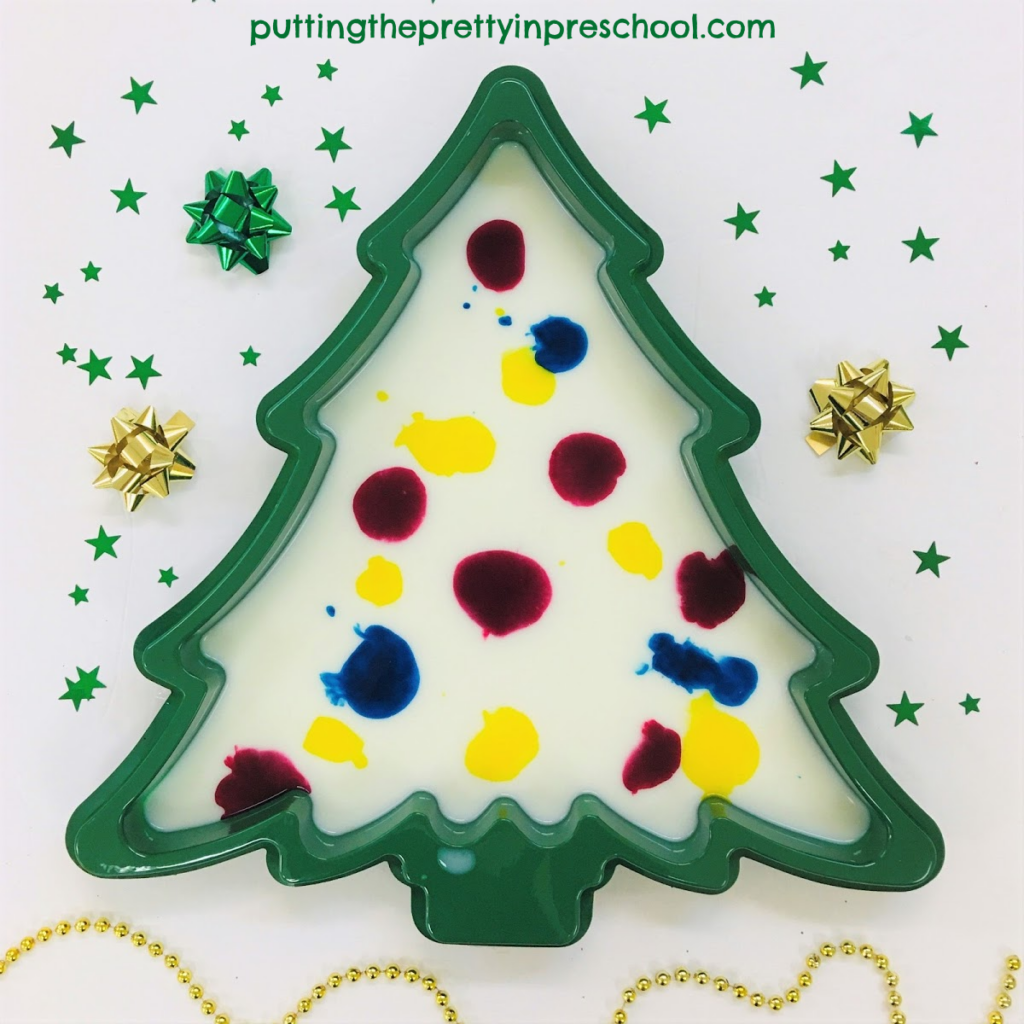
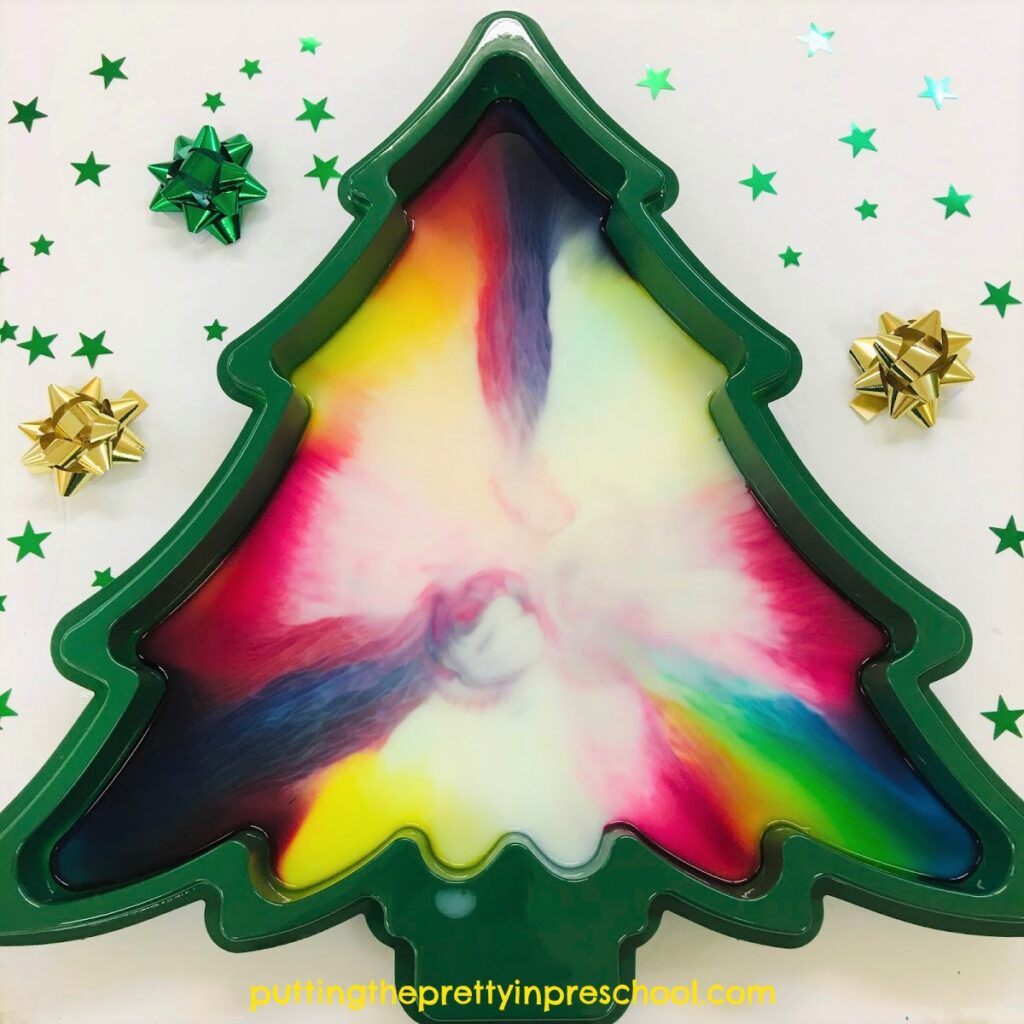
Pour a thin layer of milk into a serving tray placed on a table. I use an inexpensive 12-inch x 12-inch tree-shaped vegetable tray to add interest to the experiment. About three cups of milk will provide a nice layer in a serving tray this size.

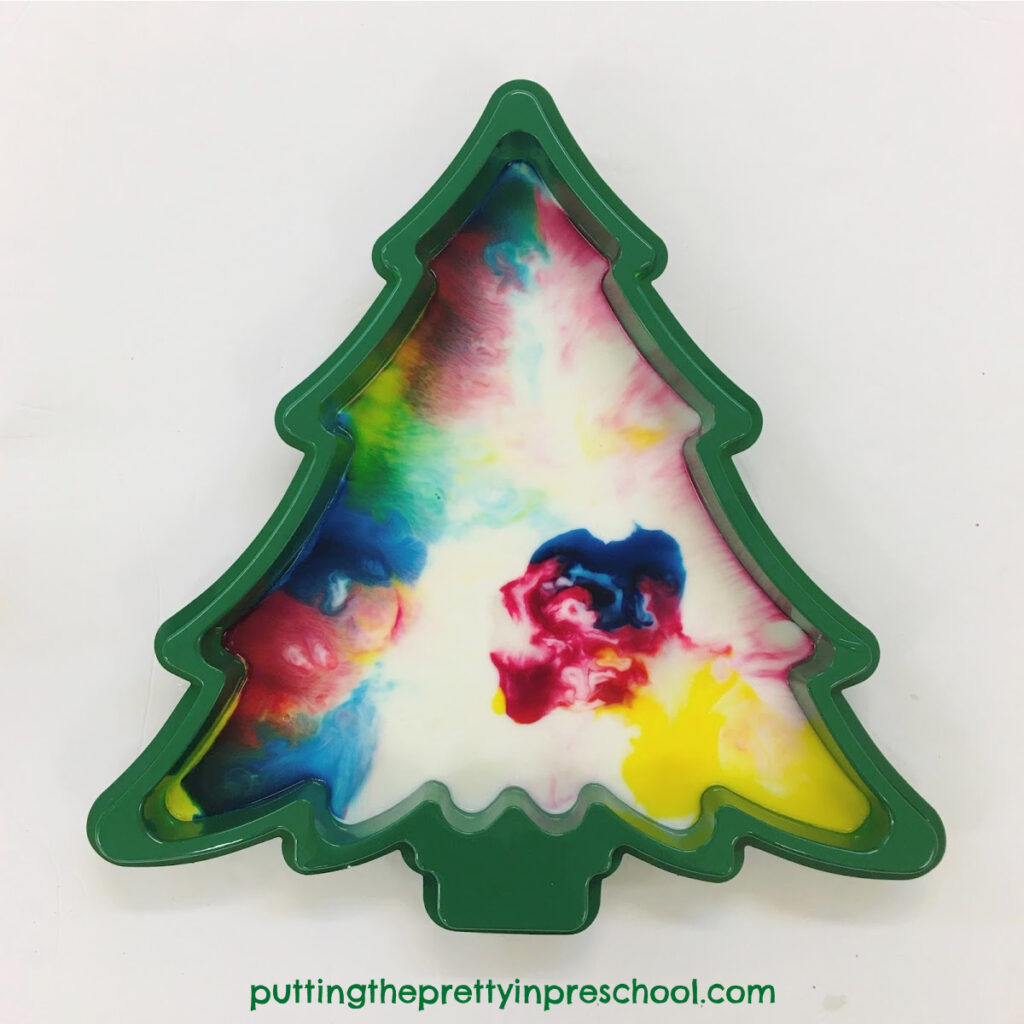
Squeeze drops of food coloring in different parts of the tray. Use one, two, three, or even four colors. Primary colors work well.

Squirt a little dish soap in a few color pools.

_______

Pools of food coloring in the color explosion milk experiment.

_______

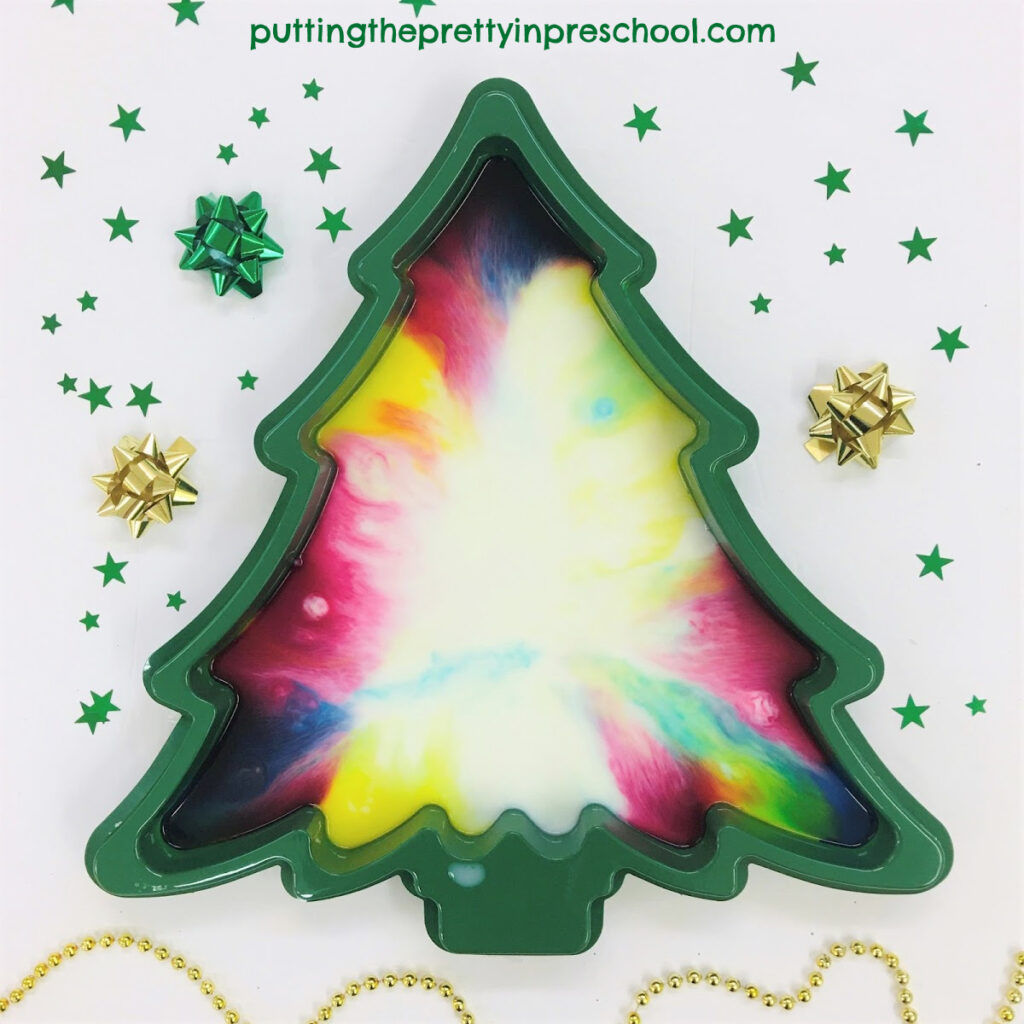
The food coloring immediately explodes to the tray edges, blending and making new colors.

Try adding a bit more food coloring, and one more squirt of dish soap. I add a little more blue, red, and yellow to the bottom right section because most of the color has moved to other areas of the tray. I squirt a tad more soap on top. There isn’t a noticeable change right away. In fact, after the initial color burst, nothing much seems to happen.

A second dose of food coloring and dish detergent are added in this color explosion milk experiment.

_______

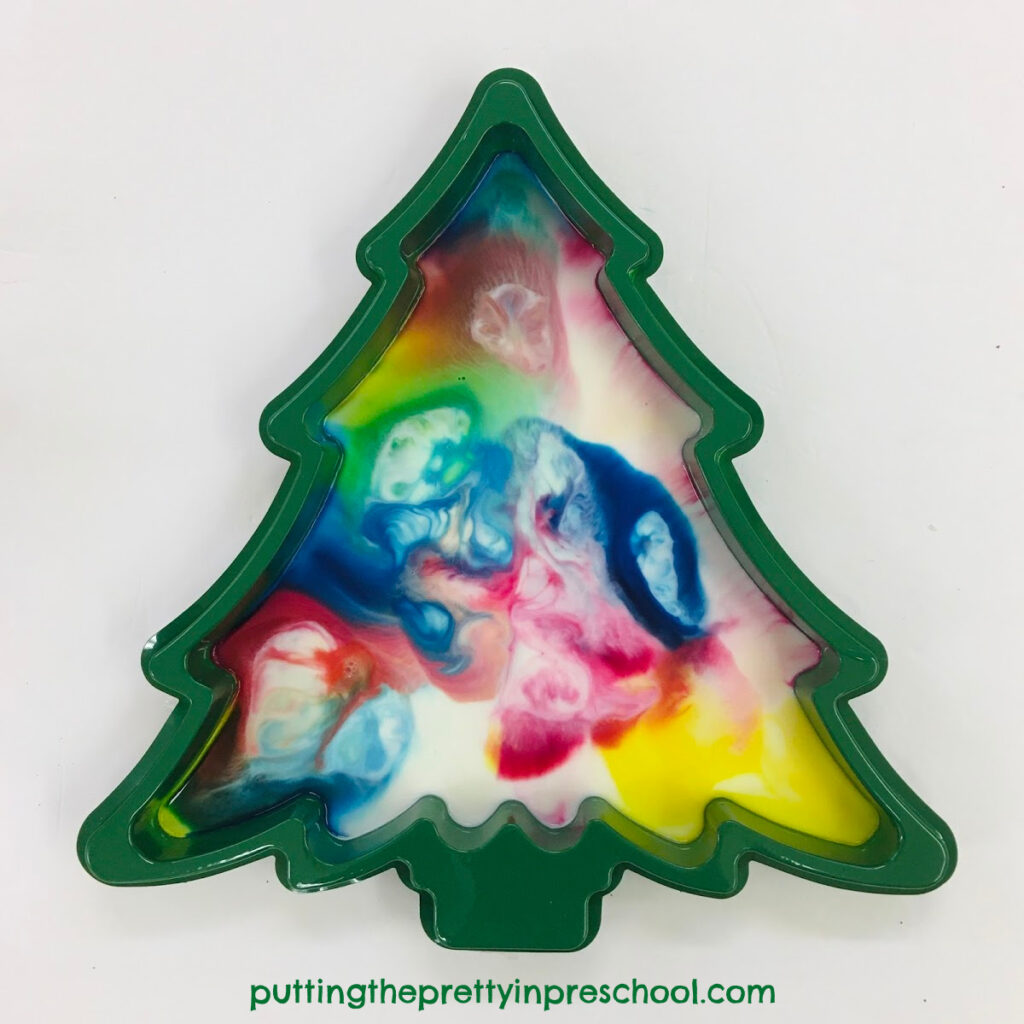
But wait! The experiment doesn’t end here. Leave the tray on the table undisturbed, and check back a few times over the next half-hour. The food coloring slowly moves through the milk and fills the tray.

Each time you look, new color designs are visible on the surface of the milk.

A monster appears in this color explosion milk experiment.

_______

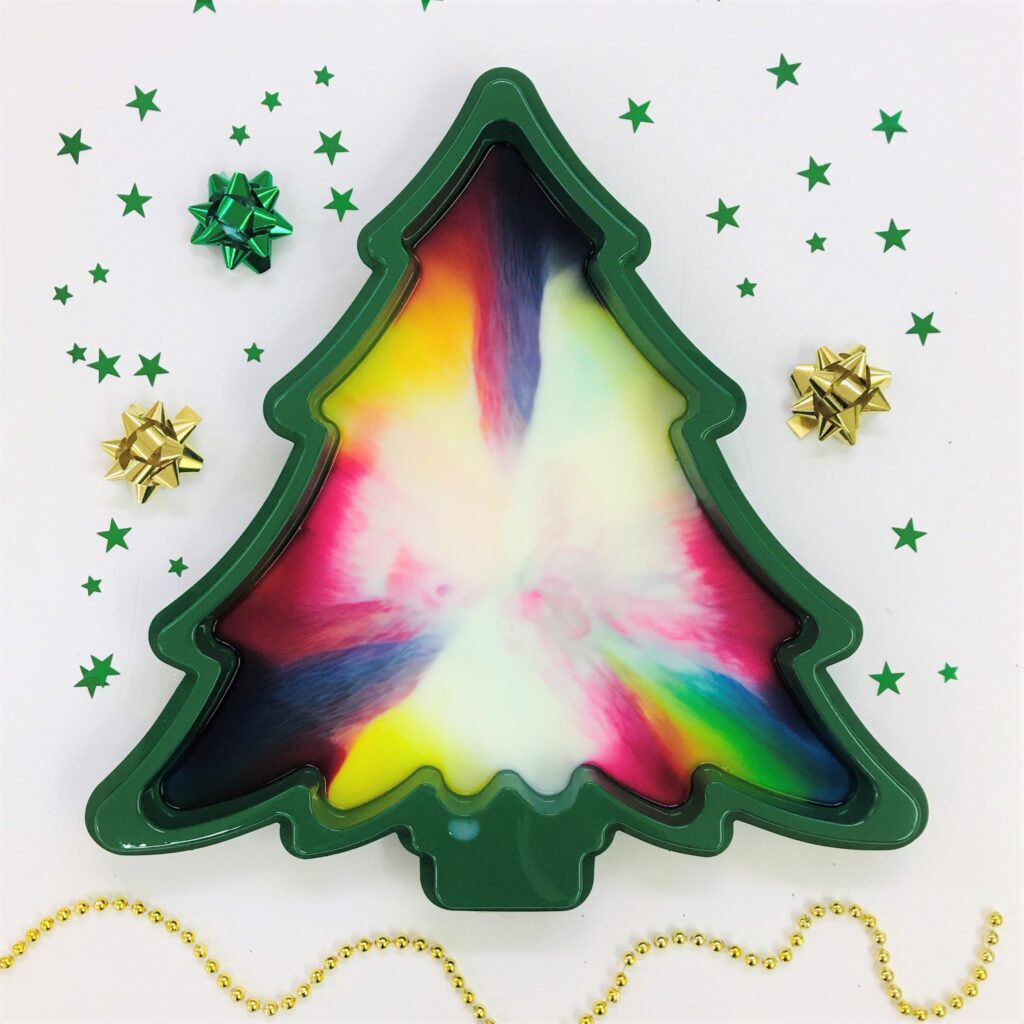
Gradually, the whole tray is color-infused.

Red, blue, yellow, and green colors fill the tray in this color explosion milk experiment.

_______

This color explosion science experiment is perfect for introducing to a group of early learners. At preschool, I like to set it out just before snack time and have students take a second look at what has happened after they are done eating. Then everyone has another look at the tray just before going home.

_______

Related: Pumpkin Color Changing Milk Experiment

_______

Color Explosion Experiment Take Two

In the above demonstration of the science project, I use 2% milk. Below, I show the results of the same experiment done with 1% milk. This time I add drops of color and a squirt of dish soap only once. The food coloring added is generous.

Food coloring pools in the color explosion milk experiment.

_______

In checking back in ten minutes after the initial explosion, the color has moved away from the edge of the tray towards the center.

Bright colors start to spread from the edges of the tray in this color explosion milk experiment.

_______

In twenty minutes the tray looks like this:

Color spreads on the surface of a milk filled tray after dish detergent and fat molecules bond. The food coloring shows the movement of the molecules.

_______

The colors spread further.

Bright colors take over in this color explosion milk experiment.

_______

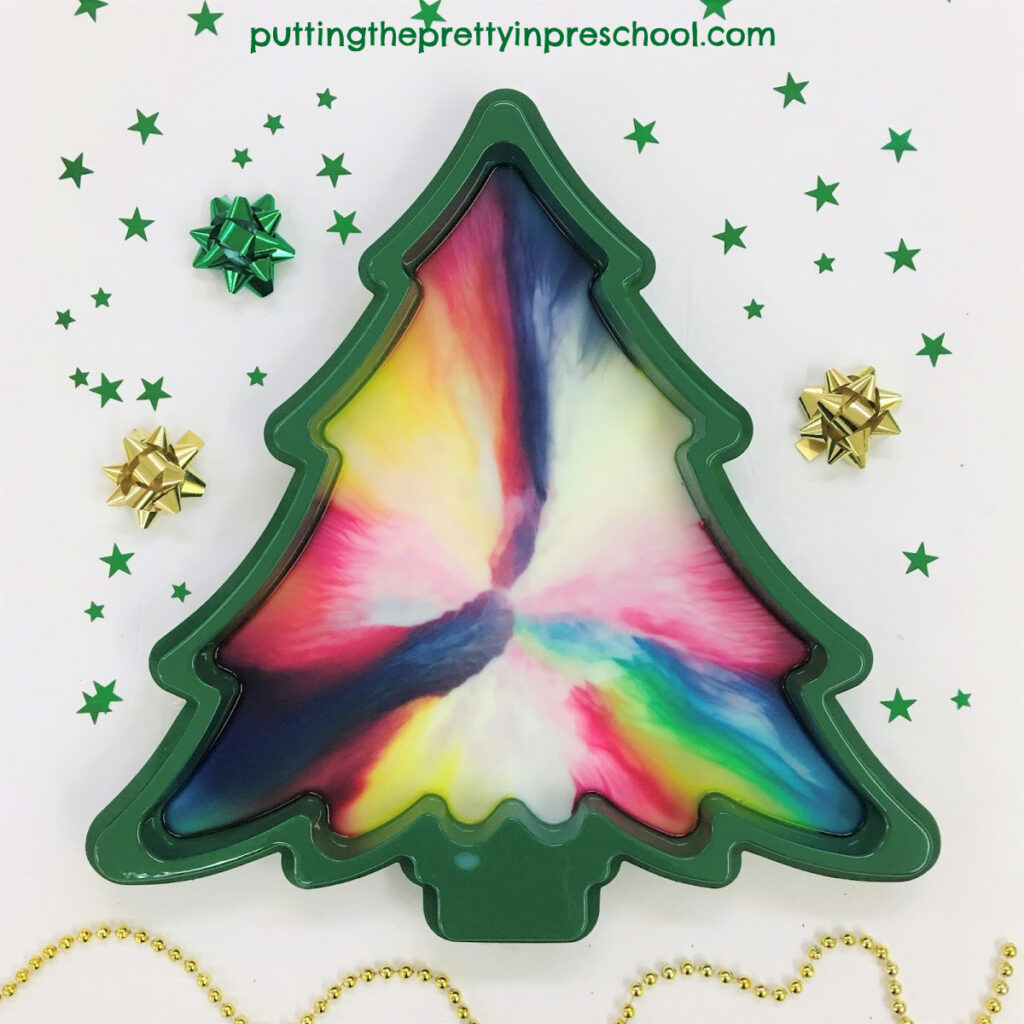
Finally, they settle in pastel shades.

Pastel colors settle in this color explosion milk experiment.

_______

Tip: Save milk that has expired for this experiment. I successfully use milk five weeks past the expiration day for this second demo.

_______

The Science Behind The Color Explosion Experiment

Although milk is made of mostly water, it also contains fat and protein. These are both sensitive to changes in the milk. When dish soap is added to the tray, it breaks up the surface tension of the milk and is attracted to the fat molecules. The fat molecules try to scurry away but end up bonded with the soap molecules. The movement of the food coloring makes this process visible. As more and more soap and fat molecules bond, the color movement slows down and eventually stops.

Since fat content in milk is super important in this experiment, homo milk works the best. But as seen above, 2% and 1% milk (which I had handy) also show stunning results.

Color-changing experiment using milk, food coloring, and dish detergent.

_______

[Read more…] about Color Explosion Science Experiment

Filed Under: Christmas, preschool, science, sensory, trees Tagged With: colors, experiment, trees

Celery Science Experiment

October 14, 2020 by Annette Kaminsky 2 Comments

Celery and food coloring science experiment.

_______

This classic and colorful celery science experiment is easy to do and has quick results. It works well as a “color-changing celery tree” activity in autumn but is awesome to perform at any time of the year. Your early learner will be thrilled with the speedy and dramatic results of the experiment.

_______

Supplies To Collect

  • leafy celery stalks
  • glasses or jars
  • food coloring hues
  • pitcher with water
  • knife
  • cutting board
Celery and food coloring experiment supplies.

_______

Procedure

Cut the bottoms from celery stalks.

Invite your early learner to generously squirt food coloring hues into glasses or jars, and add about 4 centimeters of water to each one.

Have your child place a celery stalk in each container, and use it to stir the liquids.  

Set the jars or glasses with celery on a table or windowsill.

Celery xylem are clearly visible in this closeup photo.

_______

Invite your little learner to look at the celery after a couple of hours. There will be a noticeable change in celery stalk and leaf colors.

Observe the celery with your child the following day. The leaves will be a darker shade of the water hue their stalk was set in than the day before. Colored lines running from the bottom of the stalks to the leaf tips will be clearly visible.

Add a little more water to each container if needed. Study the celery together a day or two later. The leaves and lines on the stalks will be a deeper color still.

Try the experiment with other food coloring hues. The leafy inner stalks below are dipped in turquoise, purple, and green-colored water.

Celery and food coloring experiment using turquoise, fuschia, and green colored water.

_______

Admire the transformed celery.

Color change in celery as a result of adding food coloring to the water.

_______

Variation Of The Celery Science Experiment

Cut off the ends of celery stalks, and split the bottom half of the stalks into two parts.

Celery stalks with ends cut off.

_______

Invite your child to squirt blue, yellow, and red food coloring into glasses or jars, and mix each hue with a bit of water.

Carefully place a section of one split celery stalk in red water, and the other in yellow. Put the bottom halves of another split celery stalk into yellow and blue water.

Celery stalks placed in two different jars of colored water.

_______

Observe the celery with your little one after a couple of hours, the next day, and two days later.

You will see colored lines that extend from the bottoms of the celery stalks to the leaves. Each stalk will have lines and leaves in two different colors.

Color change in celery as a result of adding food coloring to the water.

_______

The Science Behind The Celery Color Change Experiment

Celery stalks lose water through their leaves. More water gets pulled up from their roots to thirsty leaf tips through a network of hollow tubes called xylem.

The normally invisible process of water transport becomes visible when water accessible to celery stalks is colored.

Color change in celery as a result of adding food coloring to the water.

_______

The little dots on these celery slices are xylem tubes.

The colored dots on these celery slices are xylem tubes that transport water.

_______

Color change in celery as a result of adding food coloring to the water.

_______

[Read more…] about Celery Science Experiment

Filed Under: autumn, gardening, science, sensory, trees Tagged With: celery, color, experiment

Reptile Egg Science

September 10, 2019 by Annette Kaminsky Leave a Comment

Reptile egg science activities. Make a rubbery reptile egg and use turtle and snake figurines with egg matching play mats.

_______

Animal eggs come in different colors, shapes, sizes, and shell textures. Bird eggs feel hard. Snakes and many turtles lay soft-shelled eggs with a rubbery feel. Snake eggs are usually oval; turtle eggs are round to slightly oblong.

_______

Make A Reptile Egg

Here’s an easy-to-do Science experiment to transform an unshelled, boiled egg into a rubbery reptile egg!  It’s perfect for the classroom or to do with your children at home. 

A container of cider vinegar and an egg.

_______

Supplies Needed:

  • one unshelled, boiled egg
  • 1 ½ cups / 375 ml cups of cider vinegar
  • clear 2 cup / 500 ml jar
  • tablespoon
  • dessert plate

_______

Boil the egg and let it cool. Ask children to describe the color and feel the hardness of the egg.

Place the unshelled, boiled egg in a jar of cider vinegar.  Discuss the color of the liquid…yellow, red, and orange are words children might use for the hue. I suggest the word amber.

Put the jar in the fridge.

A boiled egg immersed in a jar half-filled with cider vinegar.

_______

After a couple of days, take the jar with the egg out of the fridge and have everyone view it. The cider vinegar will look a little foamy.

Scoop the egg out of the jar, place it on a dessert plate, and invite children to feel it. The egg will be tinged with brown residue. Ask children to describe the texture, which has turned rubbery.

A boiled egg taken out of cider vinegar after two days.

_______

New Discovery

The above egg is the result of the second time I tried this experiment! The first egg I used was not boiled, as I forgot to do it! I left the unshelled egg (in a jar of cider vinegar) in the fridge for two weeks before noticing it!  When I finally took it out, it had a neat visual appeal. The outside of the uncooked egg felt rubbery, just as the boiled one did. When I poked it, soft insides spilled out. It was a happy accident that led to a new discovery!

An unboiled egg after being immersed in cider vinegar for two weeks.
Forgotten Reptile Egg

_______

An unboiled egg placed in cider vinegar for two weeks, then pricked with a fork to show the soft inside.
Forgotten Reptile Egg Insides

_______

Reptile Egg Science Printable

Extend the Science experiment by setting out this printable with reptile egg shapes to decorate and cut, or use as a play mat for matching turtle and snake figurines.

Reptile egg shapes printable to color and cut. Or invite children to place snakes and turtles in the circle, oval and oblong-shaped eggs.

_______

Match snakes and turtles to their corresponding egg shapes.

_______

Reptile Egg Shapes Free PrintableDownload

(This printable was created in PicMonkey and is for personal or one classroom use only.)

_______

Do you have a favorite experiment to do with eggs? I’d love to hear about it!

_______

To view a video showing a snake hatching from an egg on the DK website, click here.

_______

[Read more…] about Reptile Egg Science

Filed Under: preschool, reptiles, science, sensory Tagged With: eggs, experiment, snakes, turtles

Primary Sidebar

Subscribe Via Email

Recent Posts

  • Salt and Ice Science Experiment May 20, 2025
  • Airplane Rice Sensory Bin May 16, 2025
  • Salt Painting Planet Art May 3, 2025
  • Spring Bunny Sensory Bin April 19, 2025
  • Tin Foil Egg Printing April 17, 2025
  • Lentil Easter Bunny Sensory Bin April 15, 2025
  • Unicorn Store Dramatic Play Center March 25, 2025
  • Easter Store Dramatic Play Center March 23, 2025
  • Origami Heart Wreath February 28, 2025
  • Black History Month Mixed Media Art February 26, 2025

Categories

Topics

block play bunnies butterflies Chinese New Year Christmas Christmas craft color colors dramatic play Easter flowers hearts holiday jewelry leaves leprechauns light table loose parts painting paper crafts playdough pretend play printables printmaking process art pumpkins rice bin scented playdough science experiment scissor skills sensory bin sensory play sensory tray shamrocks skeletons snakes snowflakes spiders spring St. Patrick's Day sunflowers tablescapes trees Valentine's Day water play

Copyright © 2025 · Lifestyle Pro on Genesis Framework · WordPress · Log in