• Skip to secondary menu
  • Skip to main content
  • Skip to primary sidebar

Putting The Pretty In Preschool

Finding Beauty In Everyday Early Childhood Experiences

  • Home
  • About Me
  • Winter
  • Chinese New Year
  • Blog
  • Contact Me
  • Black History Month
  • SHOP
  • Valentine’s Day

colors

Blue Candy Cane Science Experiment

January 23, 2022 by Annette Kaminsky 1 Comment

Tweet
Share
Share
Pin
This easy-to-do blue candy cane science experiment is perfect for winter and transitions nicely into Valentine's Day.

_______

This blue candy cane science experiment is an offshoot of an earlier candy cane science post. I purposely saved blue striped candy canes to use in a few winter-themed variations of the easy-to-perform experiment. And yes…I am permanently hooked on candy cane science!

_______

Supplies To Collect

This blue candy cane snowflake experiment will wow little learners. It is easy to set up and shows immediate results.

_______

First up is a blue candy cane snowflake version of the experiment. To perform it gather the following three supplies:

  • six blue and white striped candy canes
  • large clear, white, or cream-colored plate with a rim
  • measuring cup (or cup) of warm water

_______

The Candy Cane Snowflake Experiment

Set the candy canes on a large plate in a six-sided snowflake design.

Let the science experiment begin with this blue candy cane snowflake!

_______

Slowly pour in warm water to partially cover the candy canes.

Invite participants to watch what happens.

An easy-to-do candy cane snowflake science experiment. All you need is water, candy canes, and a plate.

_______

While little learners watch the colors in the water spread during the experiment, slip in a few snowflake facts from the list below.

_______

Ten Fast Facts About Snowflakes

  • Snowflakes are made of many snow crystals that are stuck together.
  • The six-sided flakes come in symmetrical, hexagonal shapes.
  • About 200 ice crystals make up one snowflake.
  • There are six basic types of snowflakes.
  • Combinations of these types make 35 recognizable snowflake designs.
  • A snowflake’s shape is determined by the temperature and amount of moisture in the air when it was formed.
  • Snowflakes range in size, from teeny tiny to penny-sized.
  • Because they reflect light, snowflakes appear white. But they are actually translucent.
  • Every second, billions of snowflakes float down to earth.
  • Snowflakes fall at 3- 4 miles per hour or about 5 – 6.5 km per hour.

_______

Try this easy-to-do candy cane snowflake experiment today. It uses simple supplies and has immediate results. Snowflake facts are included.

___________

Early learners may wish to have a little taste of the resulting blue liquid. Unlike the strong mint taste of the Christmas candies, the blue water has a pleasant berry flavor.

Tip: If you have other candy cane colors available rather than blue striped ones, use them in the experiment instead. Snowflakes look beautiful in all colors!

_______

Blue Candy Cane Heart Experiment

For a simpler but equally striking version, form two candy canes into a heart shape on the plate. When water is slowly added, little learners will notice a different color pattern developing.

This blue candy cane heart science experiment fits into winter and transitions nicely into Valentine's Day.

_______

A pretty blue candy cane science experiment that will wow little learners.

_______

The Science Behind The Color Movement

The candy canes are made of sugar. The water breaks the sugar molecules apart. Then the food colors move through the water away from areas of higher sugar concentration (near the candy) to areas with less sugar. When the sugar concentration is the same in all areas, the colors stop moving.

_______

Blue Candy Cane Sensory Tube

If you have broken candy canes saved that weren’t suitable to display or hand out over the holidays, use them in a sensory tube.

Candy cane winter sensory tube with ice cubes and snowflakes.

_______

To make the winter-themed tube above, freeze ice cubes and add them to a clear tube with a wide mouth.

Next, sprinkle in blue and white foam and gem snowflakes.

Gently drop in blue-striped candy cane pieces.

Then fill the sensory tube with cool water and tightly screw on the lid.

Invite little learners to play with the tube.

An icy blue candy cane winter sensory tube doubling as a float and sink experiment.

_______

Because the water in the tube is cool, it changes color at a slower pace than in the snowflake and heart versions of the experiment.

Float and sink experimentation happens naturally with this candy cane tube. The snowflake gems and candy cane pieces sink to the bottom and hang out there, while the foam shapes congregate at the top.

This eye-appealing blue candy cane sensory tube doubles as a float and sink experiment.

_______

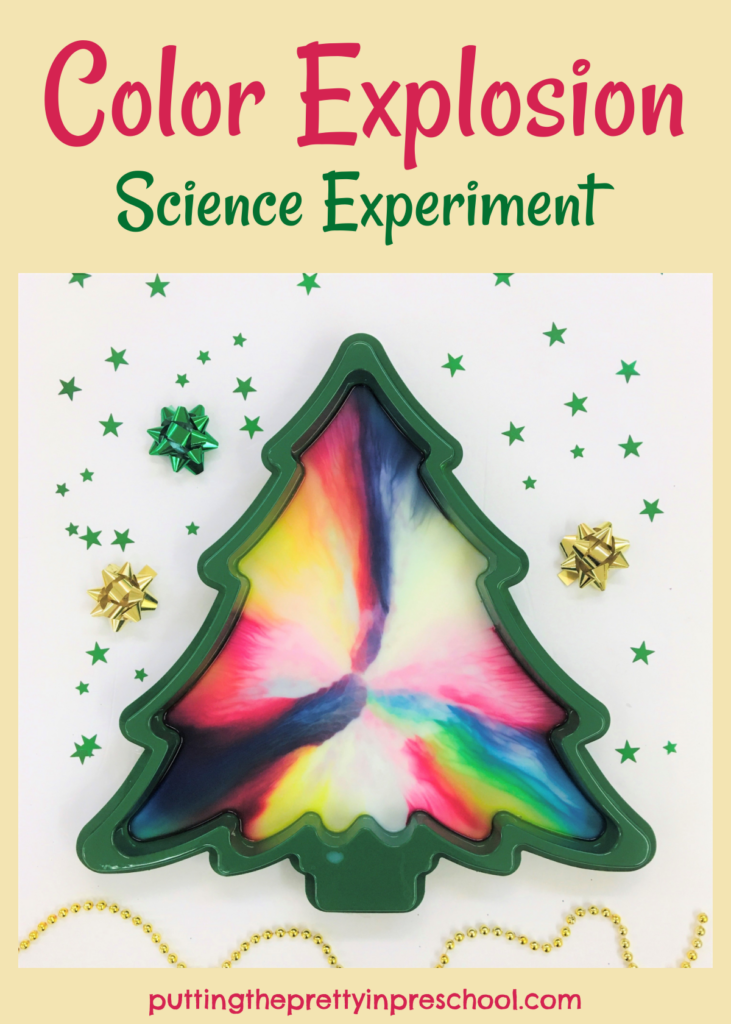
Related: Color Explosion Science Experiment
_______

[Read more…] about Blue Candy Cane Science Experiment
Tweet
Share
Share
Pin

Filed Under: preschool, science, sensory, winter Tagged With: candy canes, colors, science experiment, sensory tubes

Candy Cane Science Experiment

January 1, 2022 by Annette Kaminsky Leave a Comment

Tweet
Share
Share
Pin
This easy-peasy candy cane science experiment shows immediate results and brings the WOW factor, perfect for little learners!

_______

This Christmas I went on a candy cane hunt, primarily to add a few of these festive treats to my preschoolers’ party bags. Although easy to find in the past, I visited three different stores before I spotted some.

Candy canes had been brought up in class discussions, so I thought the children would be excited to discover them in their party bags. As I tried to give one child extra candy canes for his siblings, I noticed that he was furiously trying to give his original ones away. It turned out that he immensely dislikes them! So needless to say, there were a few candy canes leftover at school after the holiday celebrations.

So then came Plan B…the decision to use some for this easy-peasy candy cane science experiment.

_______

Supplies To Collect

Gather just three supplies for an easy-to-perform candy cane or candy experiment with a WOW factor.

_______

The supplies for this science experiment couldn’t be any simpler. Gather the following three things:

  • white or cream-colored dinner plate with a rim
  • cup of warm water
  • two large candy canes

_______

Conducting The Candy Cane Science Experiment

Try this candy cane Science experiment today! It is easy to do and has immediate results.

_______

Place two candy canes in the center of the plate in a heart shape.

Slowly pour in warm water to a level just beneath the plate rim.

The food coloring will immediately diffuse from the candy canes, and the color patterns will change right before your eyes!

This experiment can be tried with other colors of these treats. The red, pink, and white color scheme below would work perfectly for Valentine’s Day.

This easy to perform heart-themed candy cane science experiment is perfect for Valentine's Day. Give it a try!

_______

Variation Of The Candy Cane Experiment

There was a second candy escapade this holiday season, as a type of striped, spherical, Christmas candies I purchased turned out to be much too hard. I tasted one, and it just wouldn’t dissolve in my mouth. I imagined students choking on the candy on the drive home from preschool, and didn’t want to risk that. As you might have guessed, the super hard candies didn’t make the treat bag cut.

Conveniently, these holiday candies work in the same science experiment. In the picture below, the candies are arranged next to the rim of a plate. When warm water is added, green and red food colors slowly move through the liquid away from the candies. The process is so slow, the colors blend to make a rich brown hue soon after they spread. Since little learners love mixing colors to make brown, they would be excited to see this!

An oh-so-easy Christmas candy science experiment. Can't you smell the candy already?

_______

The candies can be placed a little farther apart around the plate rim, so the colors don’t mix as quickly when water is added.  Or they can be spread apart as in the picture below. Then moving red and green colors are visible a little while after warm water is added.

Try this Christmas candy Science experiment today! It is easy to do and has immediate results.

_______

Tip: If the colors in the candies dissolve at a snail’s pace, as in one of my experiments, you can choose to use hot water. This will speed up the scientific process. Make sure little learners observe what happens only with their eyes, keeping their hands and bodies away from the plate.

After the science experiment is finished and the liquid is cool, you may wish to let your little charges taste a teaspoon of colored water. It will have a strong mint taste.

_______

A simple Christmas candy science experiment with quick results. Can't you smell the candy already?

_______

Explanation Of This Candy Cane/Candy Experiment

The candy canes and candies are made of sugar. The water breaks the sugar molecules apart. Then the food colors move through the water from areas of higher sugar concentration (near the candy) to areas with less sugar (the center of the plate.) When the sugar concentration is the same in all areas, the colors stop moving.

Water temperature is a variant in this experiment. Sugar dissolves quicker in warm water, and food coloring moves at a faster pace.

This science experiment is so easy to set up and has immediate results, perfect for little learners. And participants get to use their senses of sight, smell, taste, and touch. Try it today with candies or candy canes!

Related: Color Explosion Science Experiment
_______

This easy-peasy candy cane heart science experiment shows immediate results and brings the WOW factor, perfect for little learners!

_______

More Christmas Activities

Christmas Village Tuff Tray

Orange-scented Playdough Invitation

Santa Claus Sensory Bin

Chocolate Mint Playdough

Plaid-themed Christmas Rice Bin

Lemon-scented Christmas Playdough

Easy S’mores Bars

Christmas Tree Decorating Center

Christmas Sensory Play

Handprint Angel Christmas Keepsake

Llama Christmas Sensory Bin

_______

[Read more…] about Candy Cane Science Experiment
Tweet
Share
Share
Pin

Filed Under: Christmas, party, preschool, science, sensory, Valentine's Day Tagged With: candy canes, Christmas, colors, hearts, science experiment

Coffee Filter Sunflower Craft

November 6, 2021 by Annette Kaminsky 3 Comments

Tweet
Share
Share
Pin
Create stunning coffee filter sunflowers in two different ways. An easy to do, all-ages craft and science project.

_______

Although it is early November in Alberta, this coffee filter sunflower craft shows that we are not done with color! The fall season in our area of the world is filled with bright, flamboyant hues. But it goes by quickly, and we often get early snows we are not quite ready for.

Aside from being colorful, this craft is easy for little learners to do. And toddlers can join in too!

_______

Supplies To Collect

As with many of my craft ideas, the supplies for this project are easy to find. Gather together the following:

  • coffee filters
  • non-permanent felt pens in yellow, red, orange, and brown
  • orange craft foam
  • yellow, red, and orange fade-resistant cardstock or construction paper
  • water spray bottle
  • 12-inch x 12-inch white or complementary hued cardstock
  • glue stick
  • plastic tub

_______

Creating The Coffee Filter Sunflower Craft

Steps to creating coffee filter heads.

_______

Invite little learners to color coffee filters with non-permanent felt pens. If interested, they can color more than one.

Afterward, each child can take a turn spraying their works of art with a few squirts of water. Placing the designs in a plastic tub helps contain the liquid. Everyone will love this color blending phase!

Let the moistened coffee filter canvases dry on a flat surface.

Tip: Children enjoy the squirting phase so much that they are tempted to blast all the color out of their masterpieces. That’s why encouraging your little charges to decorate at least two coffee filters works well. Then they could wet one design with about five squirts of water, and save it to craft a sunflower with. And they could squirt the rest of their designs with as much liquid as they like.

Cut large circles from the orange foam. Ask little learners to use a glue stick or white glue to adhere a circle to the middle of one of their artsy coffee filters.

Next, have everyone glue a stem and two leaves precut from construction paper to a 12-inch x 12-inch piece of cardstock. Children can choose one color or a variety of colors for these sunflower parts. The printable below may be a helpful template.

Pattern to make a papercraft butterfly.

_______

Sunflower Pattern DownloadDownload

This printable is for individual or one classroom use only.

_______

To finish the project off, have them glue on the sunflower head.

This coffee filter sunflower craft looks stunning displayed.

_______

Bright sunflower art with felt pens and coffee filters.

_______

Felt pen-decorated coffee filter sunflowers that are easy to make.

_______

Variation Of This Coffee Filter Sunflower Craft

Steps to creating a sunflower with a scrunched tissue center.

_______

Instead of a foam center, have children glue brown tissue squares to a large sunflower middle cut from similar colored construction paper. They can scrunch the squares, dip them into white glue, and stick them to the circle. When dry, the crafts can be completed as above.

_______

——-

________

Thanksgiving Printables

Shop Thanksgiving printables in my Etsy shop “Skills N Smiles“:

_______

_______

More Sunflower Activities:

Activities With Sunflowers

Corn Syrup Paint Sunflowers

Sunflower Seed Sensory Bins

Butterfly Sunflower Paper Craft

[Read more…] about Coffee Filter Sunflower Craft
Tweet
Share
Share
Pin

Filed Under: art, crafts, fall, preschool Tagged With: colors, paper crafts, science experiment, sunflowers

Felt Marker Chromatography Experiment

October 30, 2021 by Annette Kaminsky Leave a Comment

Tweet
Share
Share
Pin

_______

This felt marker chromatography experiment uses supplies from the kitchen, has quick results, and can be tailored to a variety of topics. Creativity and center play are easily incorporated. And the experiment is super family-friendly.

_______

Basic Felt Marker Chromatography Experiment

See what colors felt pens are really made up of with this felt pen chromatography experiment.

_______

The simplest version of this experiment is to draw three filled-in circles with nonpermanent felt pens near the bottom of a section of paper towel.

Add a thin layer of water with 2.5 ml salt stirred into a measuring cup or jar. Place the towel with the colored side down into the container. The water level should sit just below the felt pen colors.

Simply watch what happens!

After the color movement stops, remove the paper towel from the container and let it dry flat. Discuss the color changes/new color results.

_______

Felt Marker Chromatography Experiment Scary House

Scary house imaginative play with a felt pen experiment chromatogram.

_______

Although I am not into scary things and don’t do much frightening stuff with my preschool students, this version of the experiment produces a house that bats and spiders might like to inhabit. And here’s where the creative element kicks into high gear.

Draw the outline of a house on a paper towel section with a black nonpermanent felt marker. Trim the edges with scissors. Then add a thin line of black to the bottom of the house with the marker. Pour a little water with a bit of salt added into an ice cream pail. Position the paper towel so it reaches the bottom of the pail but does not slide in. Watch the immediate results. Then check back periodically to note more color changes.

This easy-to-do felt pen chromatography experiment has stunning results.

_______

When the colors have finished spreading, take the paper towel out of the pail, and dry it flat.

The color on my paper towel chromatogram stopped just short of the top of the house. I decided to wet the top a bit so the color filled in completely. That made the design ready to be a placemat for pumpkins, bats, and spiders.

Try this easy-to-do felt pen chromatography "scary house" experiment. It has possibilities for art and imaginaive play.

_______

Two Different Marker Chromatography Experiment

Try this easy felt pen chromatography experiment using a permanent and nonpermanent felt pen.

_______

Using both permanent and nonpermanent black felt markers produces nice results too. For this second version, draw the house on the paper towel with a black permanent marker. Then fill in the thin line of color at the bottom with a nonpermanent felt one. Finish the experiment with the same process as above.

As with the first project, the resulting colors did not spread to the very top of the paper towel house. So I wet the top of this chromatogram too. The color record looks like a house on fire to me, so adding people, pets, firefighters, and orange, black, and clear gems creates another imaginative play invitation.

Sensory and imaginative play with a felt pen experiment chromatogram.

_______

Firefighter diorama created with a felt pen experiment chromatogram.

_______

Interpreting The Felt Marker Chromatography Experiment

The Merriam-Webster dictionary defines chromatography as “a process in which a chemical mixture carried by a liquid or gas is separated into components as a result of differential distribution of the solutes as they flow around or over a stationary liquid or solid phase.”

Although each felt marker appears to be just one color, the hues are actually made up of different chemicals called pigments. As saltwater seeps up stationary paper towels, the pigments move up with it. New colors appear because some pigments travel faster than others, and certain colors are less soluble and/or adhere to the paper towel more.

Each color-infused paper towel is called a chromatogram, a graphic record of the separation of colors into different pigments by chromatography.

_______

[Read more…] about Felt Marker Chromatography Experiment
Tweet
Share
Share
Pin

Filed Under: art, autumn, fall, preschool, pretend play, science, sensory Tagged With: bats, colors, loose parts, pumpkin, science experiment, sensory play, spiders

Apple Print Activities

October 16, 2021 by Annette Kaminsky Leave a Comment

Tweet
Share
Share
Pin
Apple print activities. Dip and paint apple halves and slices and press them onto art paper. Save some prints for fingerplays and counting.

_______

Apples are so plentiful in fall and come in many sizes and colors. Besides enjoying the crunchy, juicy fruits in pies, squares, and drinks, set aside some for apple print activities.

To start off, show early learners a selection of apples in contrasting colors. A green Granny Smith, a yellow golden delicious, and a red royal gala apple make good fruits to set out and discuss. They are also easy to find in stores.

Little learners would be excited to taste the apples. Cut some into chunks and invite children to taste apples in all three colors.

Follow me on Pinterest for more early learning ideas.

Pick an inexpensive apple to use for the craft. I picked a smaller-sized apple on sale at a local produce store. Cut some apples in half from top to bottom, and slice others horizontally. Have early learners notice the seeds, and count them. Highlight the star shape in the horizontally cut apples.

Then invite children to use the apples for printmaking.

_______

Supplies To Collect

  • green, red, and yellow tempera paints
  • 12-inch x 18-inch sturdy art paper
  • small plates or trays
  • paintbrushes
  • apple halves

_______

Making Apple Prints

Pour a little red, green, and yellow paint in small flat dessert dishes or disposable plates. Add a little yellow to the green paint to lighten and brighten the color.

Allow little ones to dip apples into the paints, and make prints on the paper.

Fun and easy printmaking with apples.

_______

Another way to do this activity is to have early learners paint the apple halves instead, and then press them on the paper. It is easier to control the amount of paint on the apples this way.

Apple printmaking with green, red, and yellow tempera paints.

_______

Tip: After each painting experience, apple pieces can be rinsed and used again by another child.

_______

More Apple Print Activities

Apples often come in two different colors, like red and green, or yellow and red. To extend the painting experience, invite children to paint each apple half in a different color, and make prints with them.

Add some fun by making apple prints in two different colors.

_______

Thin the paints. Invite little learners to make prints on sections of paper towel roll. The absorbency and texture of the towels give the prints a unique look.

Make two-colored apple prints on absorbant paper towel.

_______

Instead of using apple halves, set out apple slices for the children to use. They work well too!

Printmaking using apple slices on a section of absorbant paper towel.

_______

After the paintings are dry, cut out a few prints to use in fingerplays and counting activities.

Cut apple paint prints used in fingerplays and counting activities.

_______

And the apple prints would make great additions to an apple tree or a wreath craft.

_______

[Read more…] about Apple Print Activities
Tweet
Share
Share
Pin

Filed Under: apples, art, autumn, Math, preschool Tagged With: apples, colors, counting, printmaking

  • « Go to Previous Page
  • Page 1
  • Page 2
  • Page 3
  • Go to Next Page »

Primary Sidebar

Hi, I'm Annette Kaminsky, a preschool teacher who loves sharing learning through play activities for young children. Thanks for visiting my site. Feel free to stay awhile!

Subscribe Via Email

Recent Posts

  • Earth Day Spin Painting April 21, 2026
  • Easter Bunny Scavenger Hunt April 4, 2026
  • Celebrate Diversity Coloring Pages March 1, 2026
  • Lunar New Year Lantern Craft February 11, 2026
  • Black History Month Positive Affirmations Art January 29, 2026
  • Snowflake Cafe Dramatic Play Set January 19, 2026
  • Pastel Christmas Letterhead and Envelope December 20, 2025
  • December Kindness Activities November 30, 2025
  • Fall Forest Sensory Bin November 30, 2025
  • DIY Turkey Bowling Game November 25, 2025

Categories

Topics

apples bunnies butterflies Chinese New Year Christmas Christmas craft color colors dramatic play Easter fall flowers hearts holiday jewelry leaves leprechauns light table loose parts painting paper crafts playdough pretend play printables printmaking process art pumpkins rice bin scented playdough science experiment scissor skills sensory bin sensory play sensory tray shamrocks skeletons snakes snowflakes spiders spring St. Patrick's Day sunflowers tablescapes Valentine's Day water play

Copyright © 2026 · Lifestyle Pro on Genesis Framework · WordPress · Log in