• Skip to secondary menu
  • Skip to main content
  • Skip to primary sidebar

Putting The Pretty In Preschool

Finding Beauty In Everyday Early Childhood Experiences

  • Home
  • About Me
  • Winter
  • Chinese New Year
  • Blog
  • Contact Me
  • Black History Month
  • SHOP
  • Valentine’s Day

art

Spring Bunny Wreath Craft

April 14, 2022 by Annette Kaminsky Leave a Comment

Tweet
Share
Share
Pin
Make this adorable spring bunny paper plate craft with easy-to-find supplies. A jelly bean necklace is a finishing touch.

_______

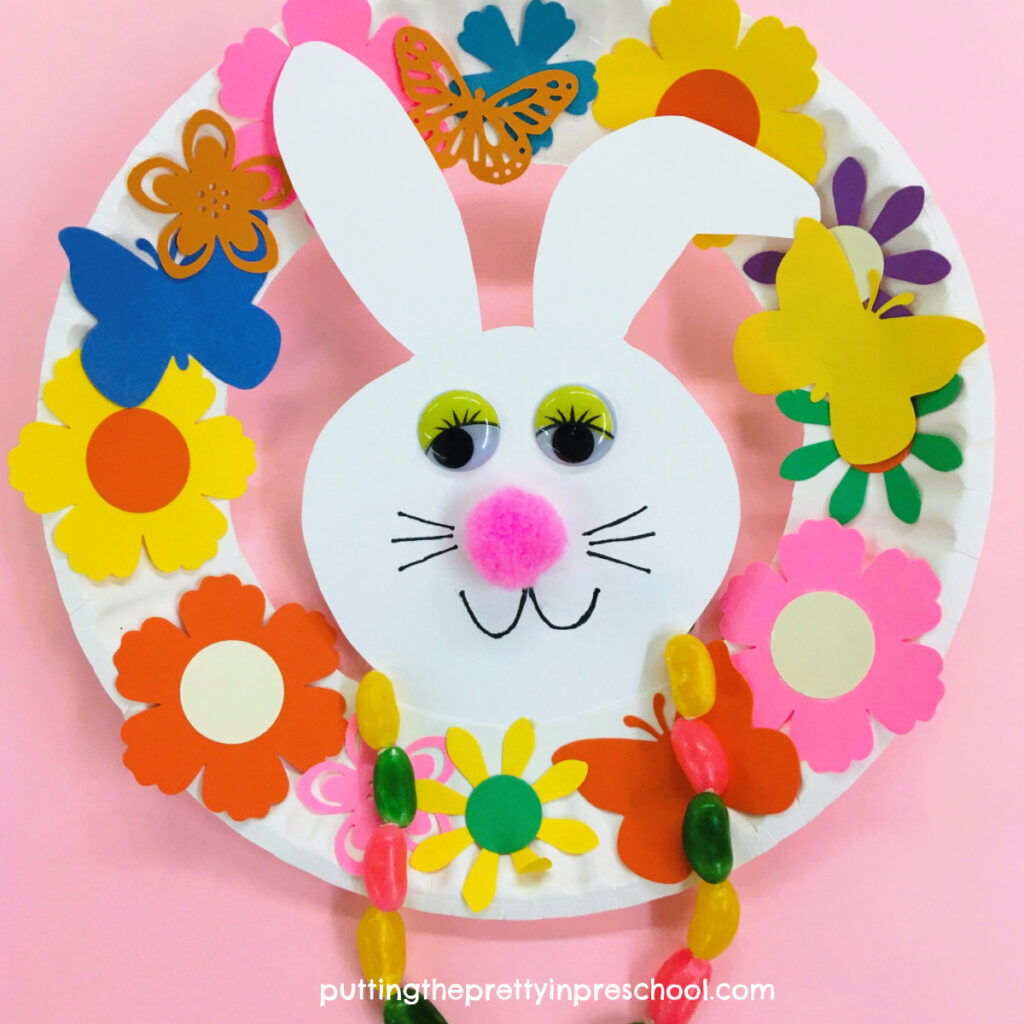
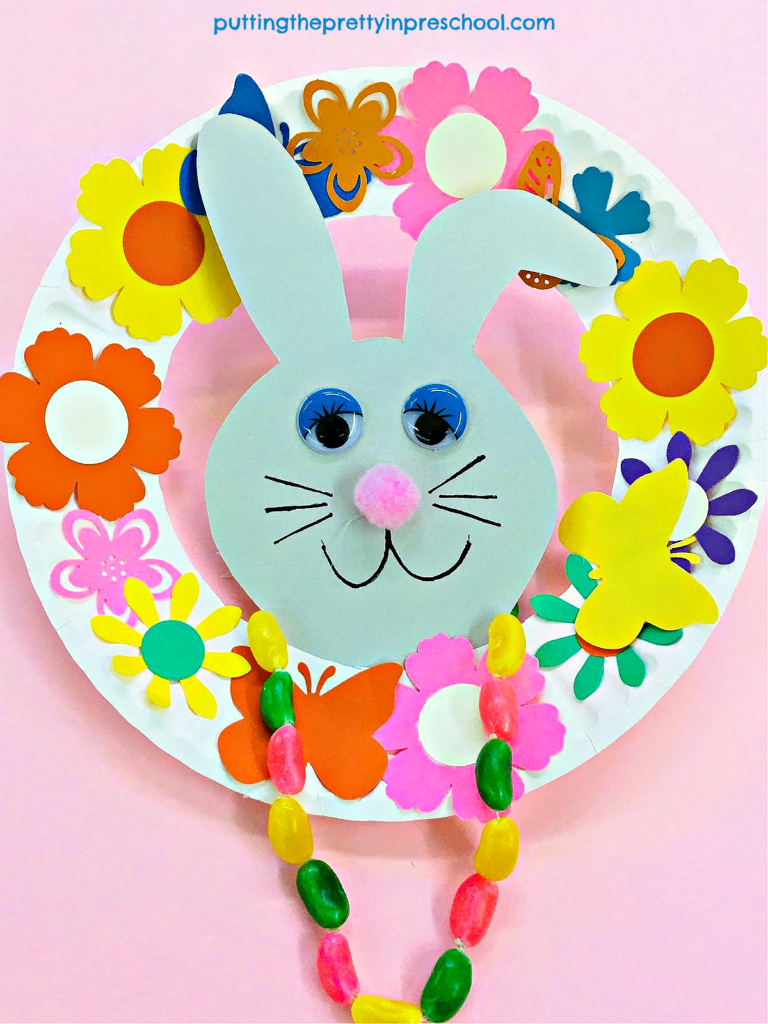
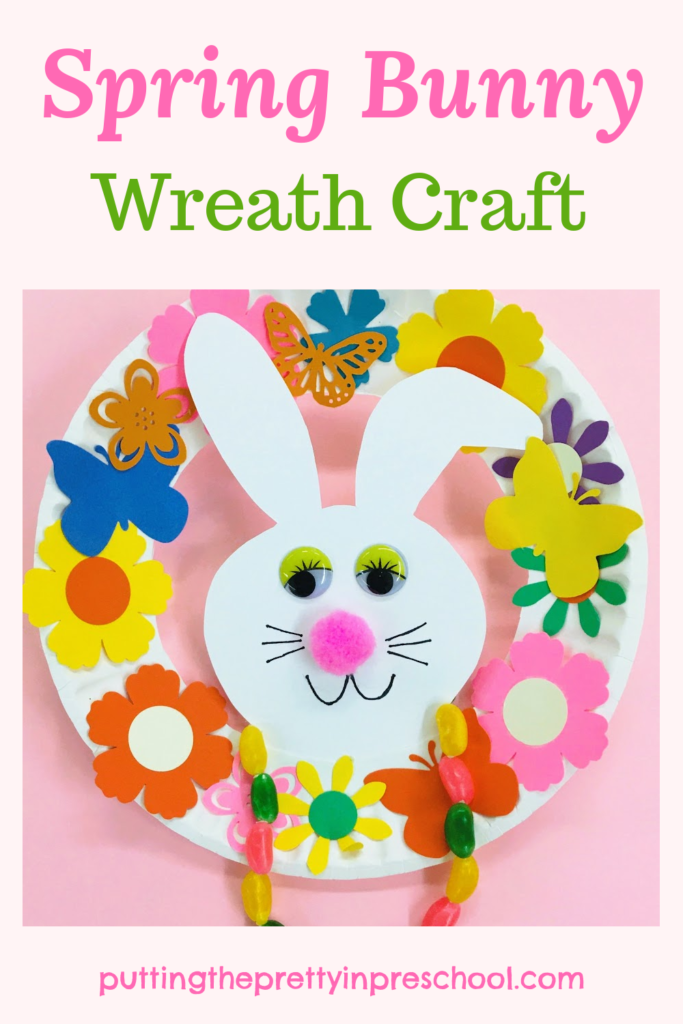
Here’s a simple spring bunny wreath craft that’s perfect for the Easter season, but also celebrates spring. Along with a bunny, flowers, and butterflies, it incorporates jelly beans, fitting for National Jelly Bean Day!

_______

Supplies To Collect

Easy to gather supplies to make an adorable spring bunny wreath craft.

_______

Follow me on Pinterest for more ideas.

_______

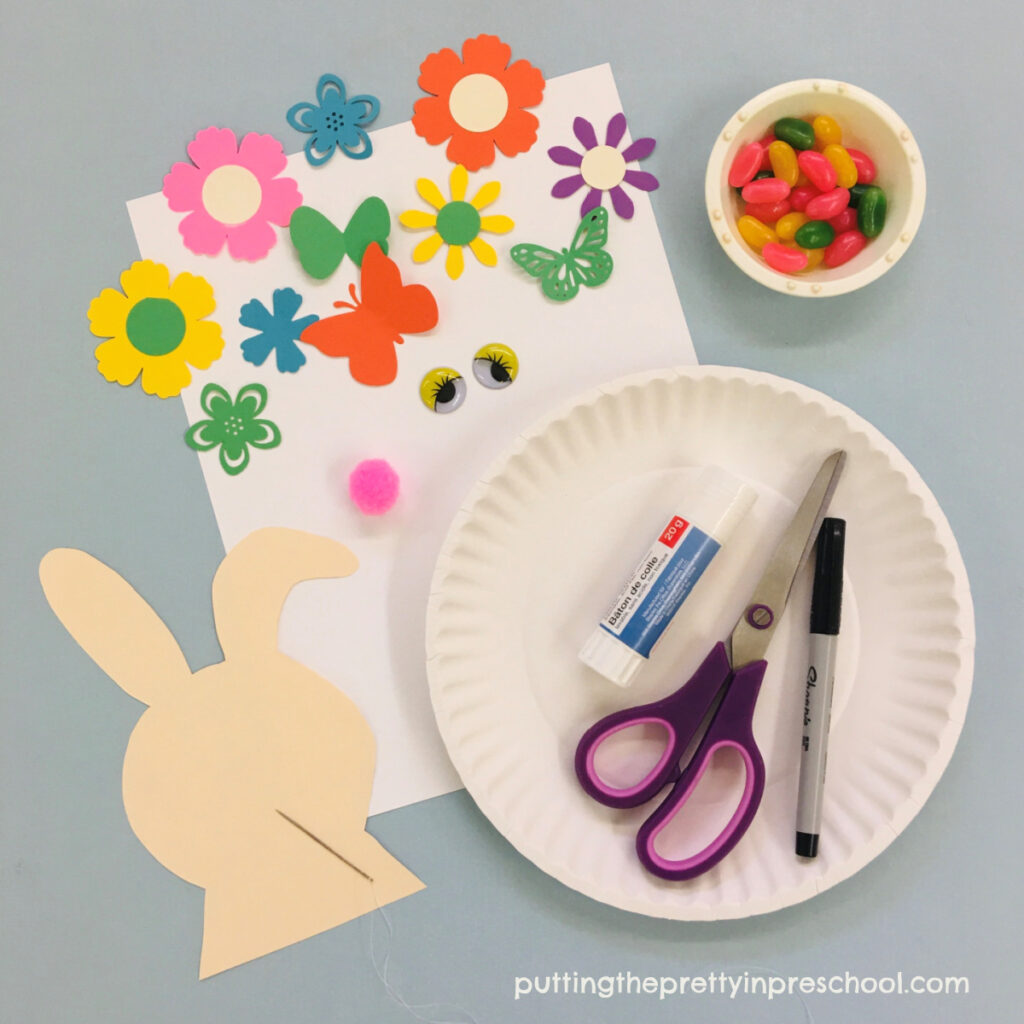
For this sweet, floral craft project, gather the following:

  • white paper plate
  • cardstock in spring colors
  • flower, butterfly, and circle paper punches
  • white or tan cardstock
  • pink pompom
  • wiggly eyes
  • needle and thread
  • jelly beans
  • glue stick
  • white glue or glue gun
  • scissors
  • thin black felt pen

_______

Making The Spring Bunny Wreath Craft

Craft this adorable spring bunny wreath with easy-to-find supplies.

_______

First, cut the center from a paper plate.

Next, punch flowers, butterflies, and circles from spring-colored cardstock. Using a glue stick, adhere contrasting circle centers to some of the flowers.

Then glue butterflies and flowers around the paper plate rim.

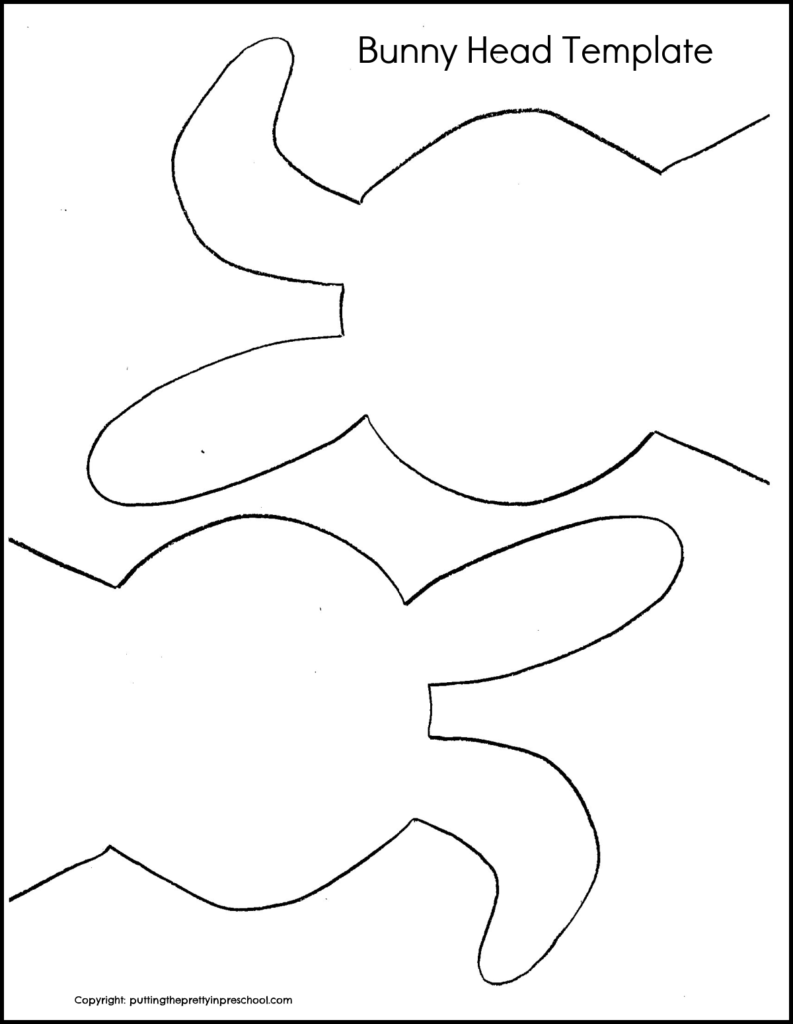
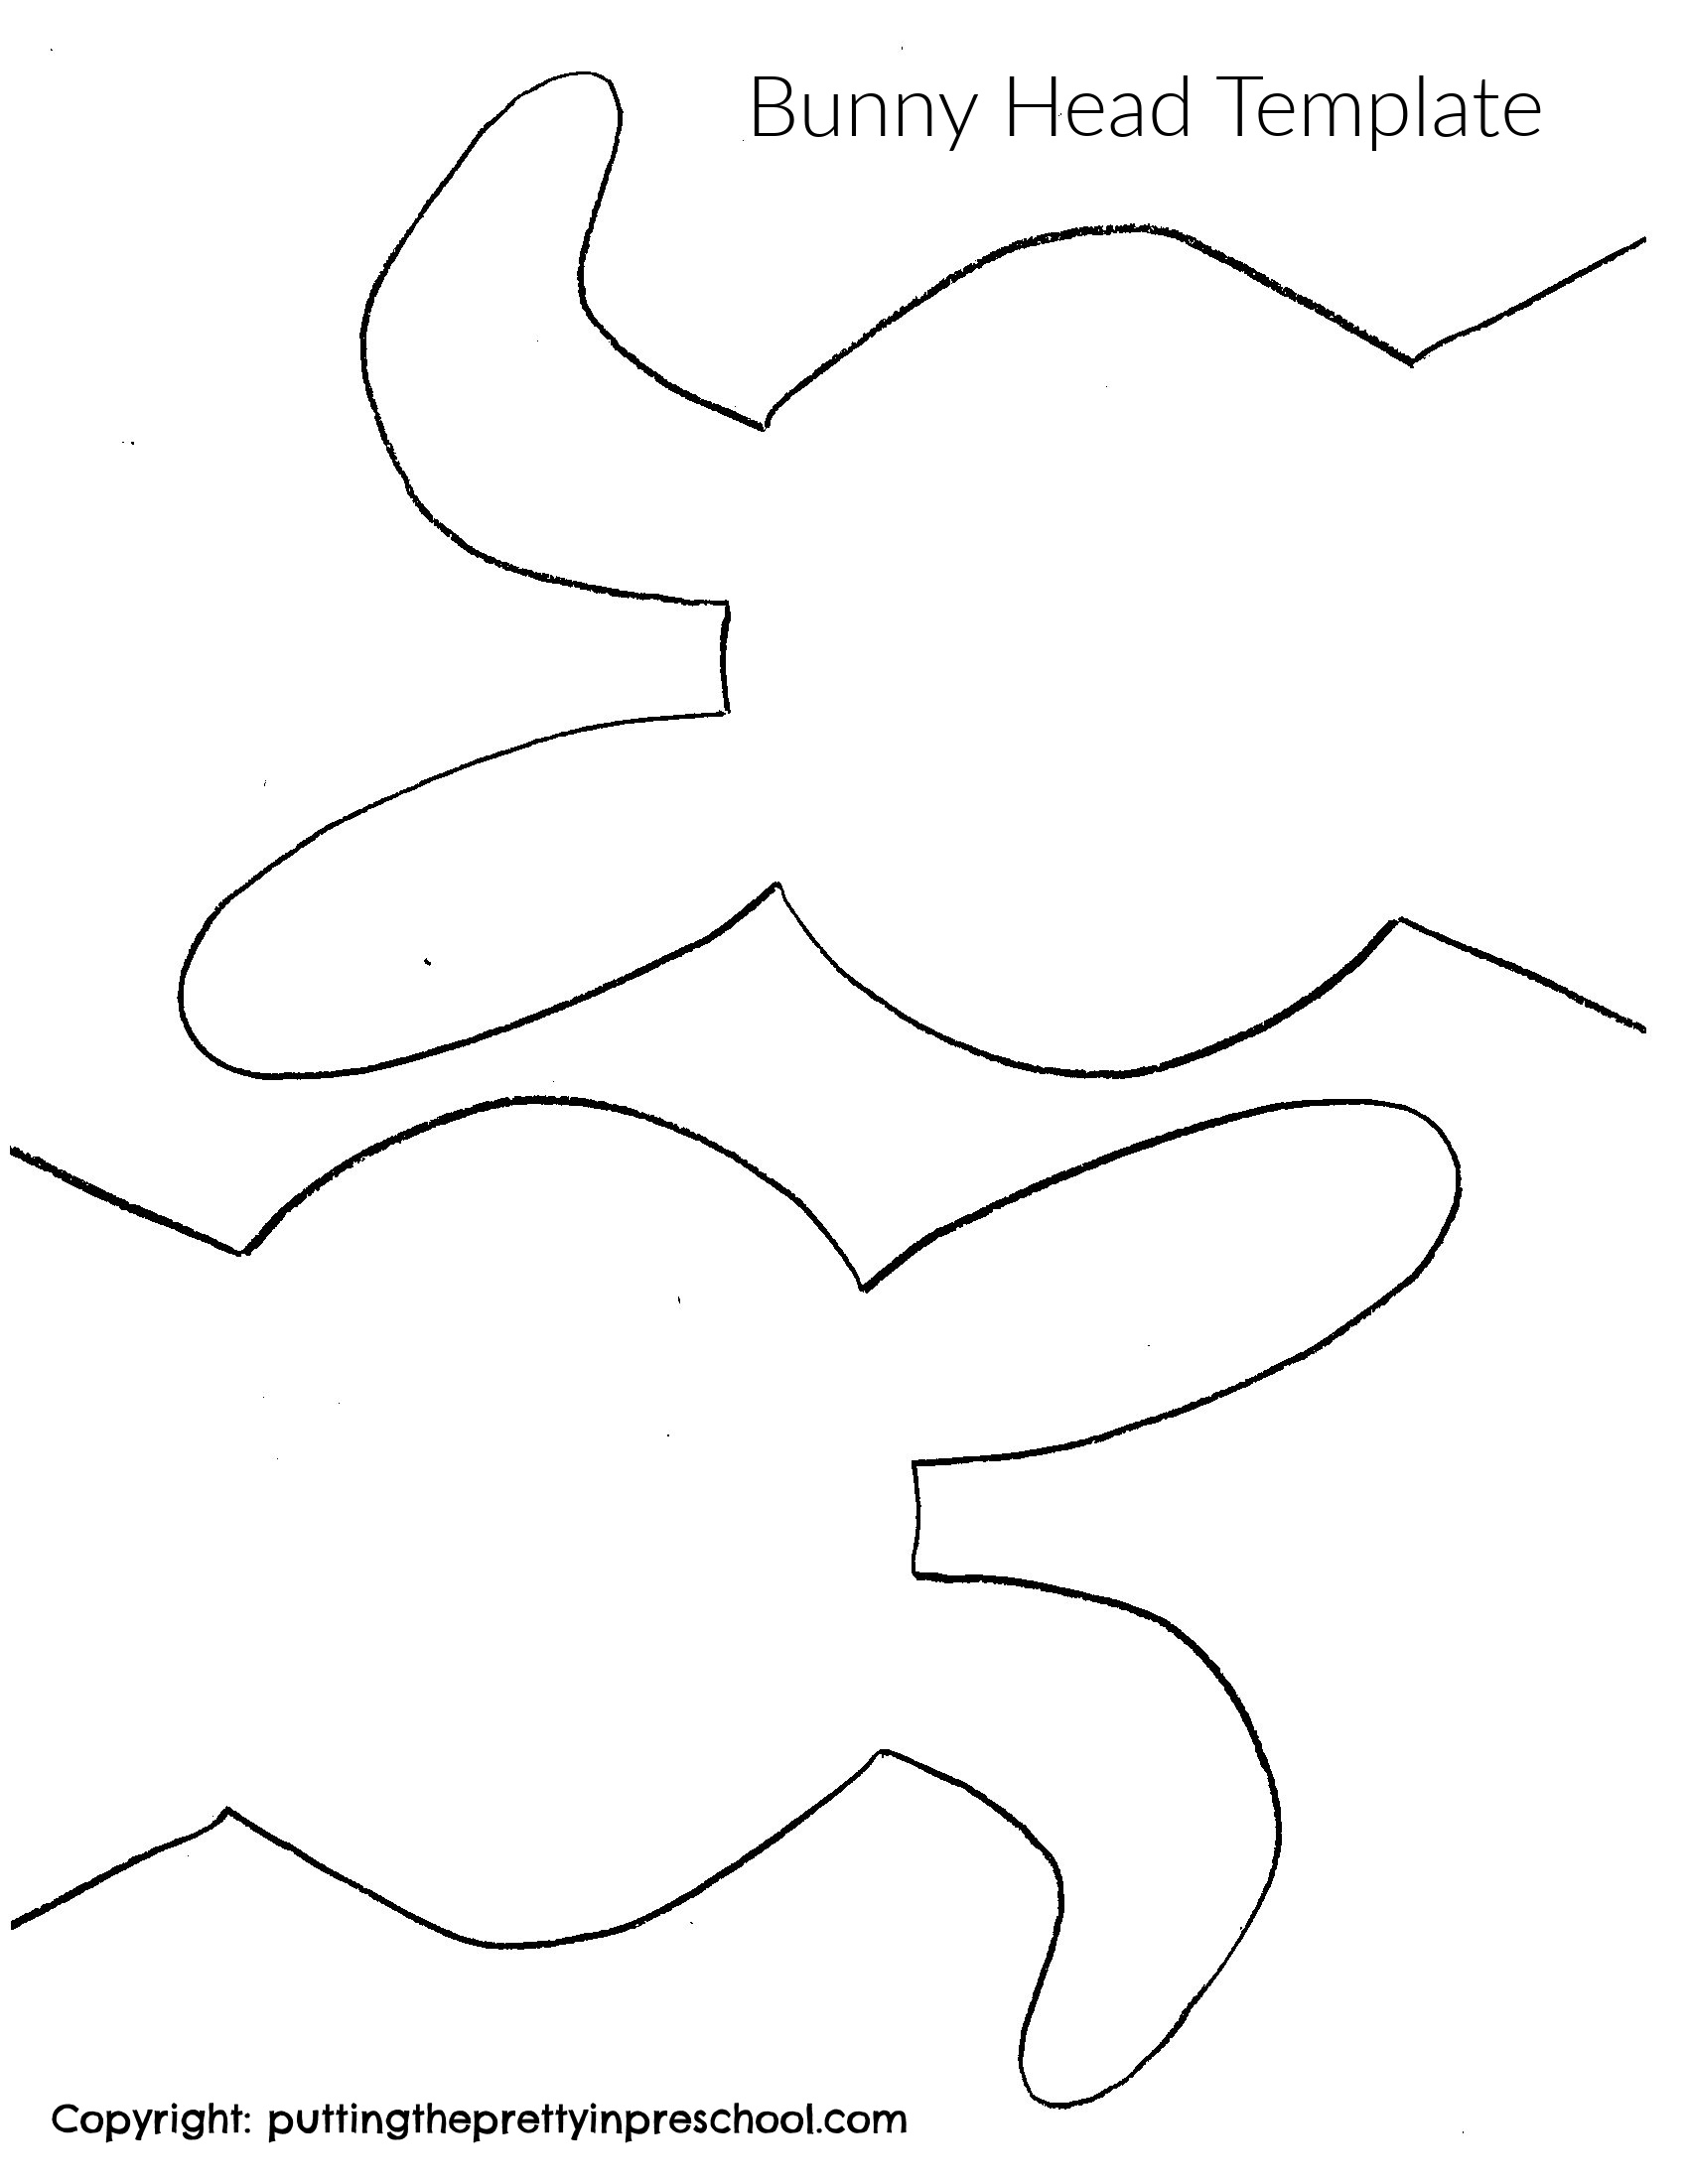
Trace and cut a bunny head from white or tan cardstock. (A white bunny is perfect for Easter, but a grey or brown one will take the craft into spring.) Download this free template if desired.

Download this bunny head template to make a spring bunny wreath craft.

_______

Bunny Head PrintableDownload

This printable is for individual or one classroom use only.

_______

Then draw two curved lines for the bunny mouth, and add whiskers.

Afterward, glue on the wiggly eyes and a pink pompom nose.

Lastly, adhere the paper bunny to the bottom back of the wreath using white glue or a glue gun.

Make this adorable spring bunny paper plate craft with easy-to-find supplies. A jelly bean necklace is a finishing touch.

_______

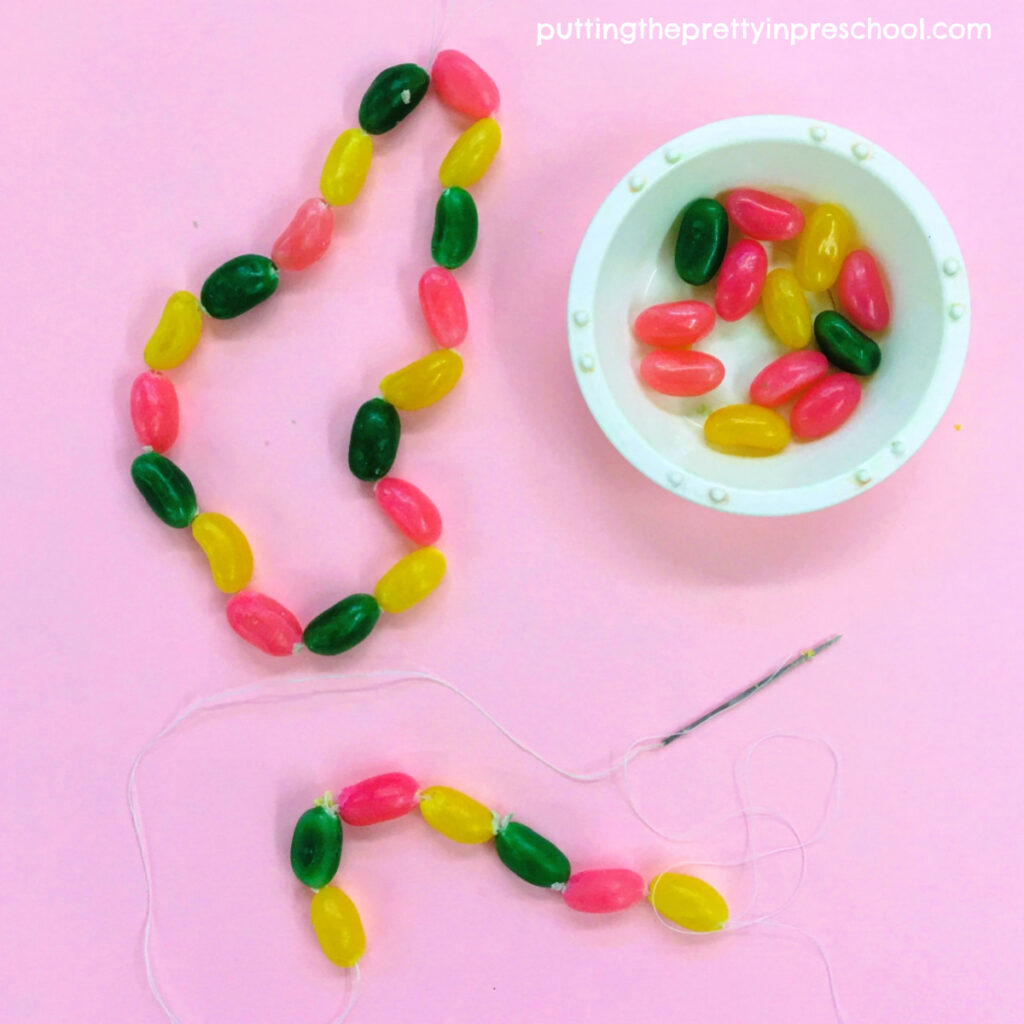
Adding The Jelly Bean Necklace

For a unique crafting experience, make a colorful and tasty jelly bean necklace for the bunny:

  • Pull a long piece of thread through a sturdy sewing needle.
  • Thread on jelly beans in a pattern of choice, or add them randomly.
  • Tie off the ends of the thread when the necklace is the desired length.
  • String the necklace around the bunny’s neck.
String a jelly bean necklace to wear or use in a craft. A super fun activity with pattern-making possibilities.

_______

Tip: For young children, the necklace could be prepared in advance. Or little learners could dictate which color jellybeans to thread on a necklace as you make one for them.

_______

Making this jelly bean necklace was easier than I thought it would be. I was sure that I would poke my fingers more than once. But thankfully I didn’t!

_______

This paper plate bunny wreath will brighten up any space, The jelly bean necklace is the highlight of the craft.

_______

This paper plate bunny wreath will brighten up any space, The jelly bean necklace is the highlight of the craft.

_______

Craft this adorable spring bunny wreath with easy-to-find supplies. A jelly bean necklace is a finishing touch.

_______

Related: Jelly Bean Theme

_______

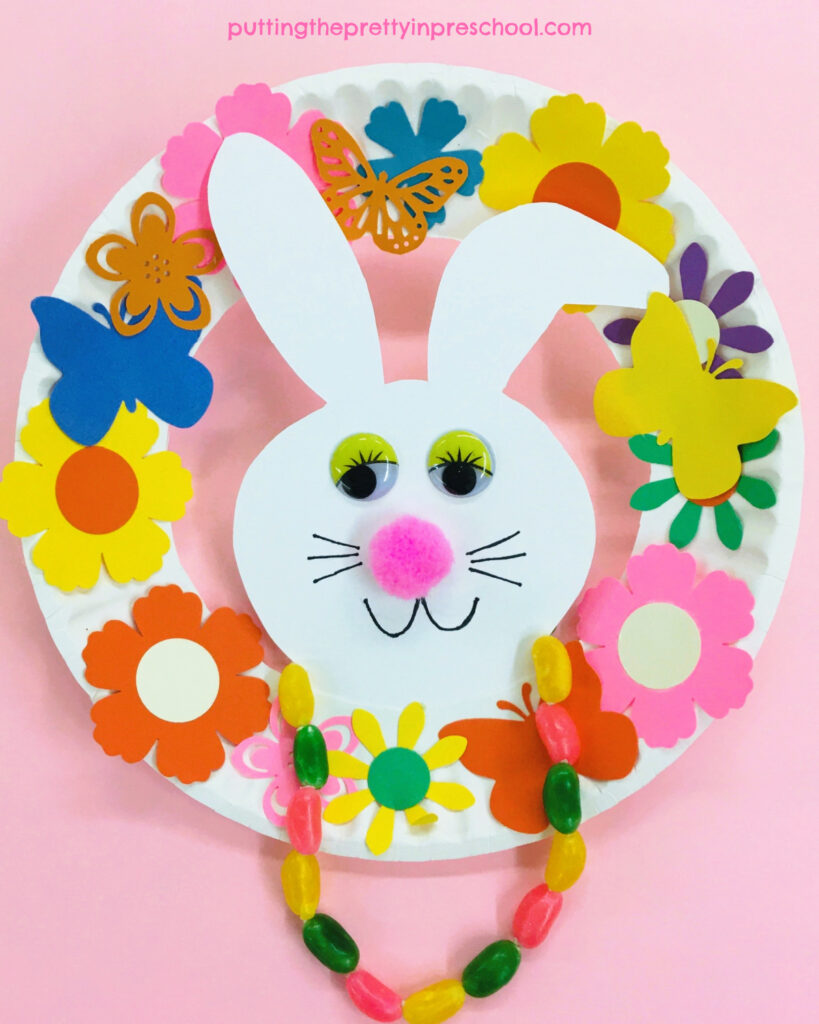
The spring colors in the wreath are so welcome at a time of year when some days are bright and sunny, but others are grey and overcast. And I’m so ready for flowers and butterflies since we’ve had more than our share of snow this year!

_______

[Read more…] about Spring Bunny Wreath Craft
Tweet
Share
Share
Pin

Filed Under: art, crafts, Easter, preschool, spring Tagged With: bunnies, Easter, flowers, paper crafts, paper plate crafts, spring

Earth Day Heart Art

April 2, 2022 by Annette Kaminsky Leave a Comment

Tweet
Share
Share
Pin
How to do two Earth Day heart art activities using paper towel sheets. Both are super fun process art projects that display beautifully.

_______

Here are two Earth Day heart art activities children of every age will love, love, love to do. As with most of my activities, they use easy-to-find supplies and are inexpensive to make. And best of all, they are open-ended process art projects where every child can succeed, and each result is beautiful.

_______

Follow me on Pinterest for more early learning ideas.

_______

Supplies To Collect

Gather the following supplies for the earthy art activities:

  • white paper towel roll
  • water-based markers
  • green and blue food coloring or liquid watercolors
  • paint pots or baby food jars
  • white cardstock paper
  • scissors
  • pencils
  • eyedroppers or pipettes
  • spray bottle with water
  • glue sticks
  • glue gun
  • plastic tablecloth

_______

Eyedropper Heart Earth Art

Trace and cut out large hearts from paper towel sheets. It works out well for the center of the hearts to overlap the tear portion of the towels.

How to do an eyedropper heart earth art project using paper towel sheets. It's a super fun process art activity that displays beautifully.

_______

Mix a few drops of blue food coloring in small jars or paint pots filled with water. Do the same with green.

Set out one paper towel heart and pot of green and blue food coloring on a covered table for each participant, along with eye droppers or pipettes.

Invite participants to drop colored water all over their hearts. They’ll enjoy the way this technique spreads color over the towels.

After having dried, help each child tear the painted paper towel shapes on the tear line.

Have everyone write the words “I Love Earth” on a cardstock strip. A drawn red heart can be substituted for the word “Love.”

Then invite them to glue their top and bottom heart sections with the word strip positioned in the middle to a cardstock sheet of paper slightly bigger than the heart and word design.

How to do an eyedropper heart earth art project using common kitchen supplies. Everyone in the family will enjoy this super fun process art activity.

_______

How to do an eyedropper heart earth art project using common kitchen supplies. Everyone in the family will enjoy this super fun process art activity.

_______

Alternately, the hearts can stay as one unsplit shape, and the cardstock strip words can be glued above each heart on the paper.

Make this super fun eyedropper heart Earth Day project today! Everyone in the family will enjoy giving it a try.

_______

Sprayed Marker Heart Earth Art

Use the same-sized paper towel hearts for this second art project.

How to make a sprayed marker heart earth art project using paper towel sheets. It's a super fun process art activity that displays beautifully.

_______

Set out a heart and a green and blue water-based marker for each participant on a covered table. Have everyone color most or all of their hearts in patches of green and blue.

Fill a spray bottle with water.

Have participants take turns spraying their hearts with just enough water to wet their designs thoroughly. This is the part everyone will most likely love the most.

Or each child can use a pipette to drop water on their projects, also very satisfying.

Let the decorated, water-applied hearts dry.

Finish the project in one of the same two ways as with the first art activity.

Make this sprayed marker heart earth art project today! It's a super fun process art activity that displays beautifully.

_______

Related: Coffee Filter Sunflower Craft

_______

[Read more…] about Earth Day Heart Art
Tweet
Share
Share
Pin

Filed Under: art, Earth Day, preschool Tagged With: Earth Day, eyedropper art, painting, process art

Painting With Construction Vehicles

March 29, 2022 by Annette Kaminsky Leave a Comment

Tweet
Share
Share
Pin
Your little learners will love this painting with construction vehicles process art activity. They'll get to make muddy tire tracks on paper.

_______

Painting with construction vehicles has to be one of the most fun process art activities there is to do. It is easy, messy, and involves heavy-duty vehicles, so what child wouldn’t dive right in? And the art invitation can be set up in minutes.

_______

Supplies to Collect

There are just a few supplies to gather for this out of the box art activity:

  • black and brown tempera paint
  • paint pots
  • spoons
  • newspapers or plastic tablecloth
  • 18-inch x 24-inch manila paper
  • toy heavy-duty construction vehicles

_______

Follow me on Pinterest for more early learning ideas.

_______

Your little learners will love this messy painting activity. They'll get to make muddy tracks with a toy construction vehicle.

_______

The Painting With Construction Vehicles Process

First, cover a table with newspaper or a plastic tablecloth.

Then give participants a large sheet of sturdy paper. I usually choose manila because it comes in various sizes, holds tempera paint well, and is inexpensive to buy.

Add black and brown tempera paint to pots and insert a spoon into each one.

Allow everyone to use the spoons to scoop up paint and drip blobs of it on their paper.

Then invite them to choose a construction vehicle to “drive” through the paint, making “muddy tracks” as they go. Take the opportunity to discuss the names of the heavy vehicles, and how they help out at a construction site. A good blog post to use as a reference is 16 Types Of Heavy Duty Equipment Used In Construction.

Your little learners will love this construction vehicle process art activity. They'll get to make lots of muddy tracks on paper.

_______

Tip: Save a set of economical construction vehicles to use for this art project. And repurpose them in other messier activities. For instance, we reuse ours in winter to play in the snow.

Your little learners will love this heavy vehicle process art painting activity. They'll get to make lots of muddy tracks on paper with toy construction vehicles.

_______

Allow time to help the children wash up after the painting activity is over. And make sure to clean the heavy-duty vehicles in soapy water.

Adding a construction vehicle cut from a magazine or catalog to the dried projects would be a nice finishing touch.

_______

Variations Of This Construction Vehicle Painting Activity

Try one of these simple variations of this super fun activity:

  • Offer the art invitation on a paper roll spread over a table. Or use a plastic tablecloth as a canvas for the vehicles to make muddy tracks.
  • Substitute primary paint colors (or another color scheme) for black and brown.
  • Use toy cars or recreational trucks instead of construction vehicles.
  • Do this painting activity in an active world tray, either indoors or outside.

_______

Your little learners will love this messy painting activity. They'll get to make muddy tracks with toy construction vehicles.

_______

This construction vehicle painting activity is one I introduce to my preschoolers every year, as it is important to me to include messy and fun process art painting opportunities. And it is a hit every single time.

_______

Related: Painting With Corn Cobs

_______

[Read more…] about Painting With Construction Vehicles
Tweet
Share
Share
Pin

Filed Under: art, construction vehicles, preschool Tagged With: construction vehicles, painting

Floating Egg Science Experiment

March 25, 2022 by Annette Kaminsky Leave a Comment

Tweet
Share
Share
Pin
How to perform a simple floating egg science experiment with easy-to-gather supplies. Decorated eggs add artistic flare to this activity.

_______

In a whole range of egg colors with expressive faces drawn on, this floating egg science experiment includes a dose of art and drama. The experiment is simple to do and promises to be a huge hit with your little learners.

_______

Supplies To Collect

The supplies for this dramatic science experiment are easy to procure, as you probably already have them in your home. Gather the following:

  • eggs
  • salt
  • pitcher of water
  • egg carton
  • two 500 ml glass jars
  • tablespoons
  • egg dipper
  • store-bought egg dying kit
  • black permanent felt pen

_______

Follow me on Pinterest for more early learning ideas.

_______

Performing The Floating Egg Science Experiment

Steps to perform a simple floating egg science experiment with easy-to-gather supplies. Drawing and egg coloring are included in this activity.

_______

With a permanent felt pen, carefully draw chick feet and a worried face on one side of the eggs selected for the experiment. Draw feet and a happy face on the other side of each egg.

Note: Crayons can be used instead to decorate the eggs.

Then dye the eggs in different colors. I use color tablets from a store-bought kit for the eggs, but you could use a home recipe.

Carefully drop the color-dyed eggs back in the egg carton, using an egg dipper if available. Let the eggs dry.

Pour 1½ cups water into two jars.

Add 3 tablespoons salt to one jar, and stir it into the liquid. Add no salt to the other.

Pick a decorated egg to gently drop into the unsalted jar of water. Observe if it floats or sinks. Then scoop the egg out of the liquid and have participants pick the feeling the “chick egg” might be experiencing: (worried, scared.)

Simple and fun floating egg science experiment with easy-to-gather supplies. Egg decorating adds an artistic element to this activity.

_______

Carefully drop the same egg into the saltwater jar. Observe if the egg now floats or sinks again. Have participants pick the feeling the “chick egg” is probably experiencing: (relief, happiness.)

Simple and fun floating egg science experiment with easy-to-gather supplies. Egg decorating adds an artistic element to this activity.

_______

Try this science experiment with other colored eggs. Participants may enjoy picking an egg in their favorite color to drop in the jars.

_______

Related: Reptile Egg Science Experiment

_______

The Science Behind This Experiment

An egg is denser than water, so it sinks. But when salt is added to water, it increases the density of the liquid. When enough salt is added, a raw egg will float.

How to perform a simple floating egg science experiment with easy-to-gather supplies. Decorated eggs add artistic flare to this activity.

_______

Floating Egg Experiment Extensions

This floating egg experiment could be extended by:

  • using large and small-sized eggs, and recording how much salt needs to be added to a jar for each one to float.
  • dying the eggs in different methods.
  • reading a picture book about feelings before or after performing the experiment.

_______

[Read more…] about Floating Egg Science Experiment
Tweet
Share
Share
Pin

Filed Under: art, Easter, literacy, preschool, science, sensory Tagged With: eggs, feelings, science experiment, sensory play

Crayon Resist Watercolor Shamrock

March 17, 2022 by Annette Kaminsky Leave a Comment

Tweet
Share
Share
Pin
Try this simple crayon resist watercolor shamrock activity that explores variety in line, shape, and color.

_______

They say “variety is the spice of life,” and it is certainly true in this art project. The crayon resist watercolor shamrock features variety in line, shape, and color. The project is easy for little learners to do, and is great for language development.

_______

Follow me on Pinterest for more early learning ideas.

_______

Supplies to Collect

  • 12 inch x 18 inch manila paper
  • crayons in shades of green
  • tempera blocks (paint pucks) in gold and shades of green
  • paint cups
  • paint brushes and pots
  • scissors

_______

The Crayon Resist Watercolor Shamrock Process

Cut large shamrocks out of manila paper. (This is a sturdy cream-colored paper that comes in larger sizes and is economical to buy.)

Note: Cardstock or construction paper can be substituted for manila paper.

Use crayons in shades of green to decorate a sample shamrock with dots, lines, and shapes.

Explore variety in line and shape through a crayon resist art technique.

_______

In my demo, there are wavy and curvy lines and straight ones. There are dots and circles, and stripes and dashes. A heart fills the center.

Show the crayoned shamrock to your little learners, highlighting the variety of lines and shapes.

Invite little learners to draw their own crayon designs on a shamrock.

A tempera block paint set-up for a crayon resist art technique.

_______

Then have them add watercolors using tempera block paints in yellow and shades of green. Encourage children to rinse their brushes in water between colors.

Draw attention to darker and lighter paint shades. Discuss hues with words such as lime green, apple green, emerald green, and forest green. Use descriptive words that match the paint colors you have available.

Offer this simple crayon resist watercolor shamrock activity that explores variety in line, shape, and color.

_______

Note: Liquid watercolors or water with food coloring mixed in can be used instead of tempera paint blocks.

After the paintings dry, you could add on an Irish St. Patrick’s Day blessing.

This is a simple two-step art activity that all children can do. A younger child’s paint added scribble drawing looks just as stunning as an older child’s project with more defined lines and shapes. This is especially true if a variety of shades of crayons and paints are used.

Offer this simple crayon resist watercolor shamrock activity that explores variety in line, shape, and color.

_______

Related: Shamrock Rolling Pin Art

_______

[Read more…] about Crayon Resist Watercolor Shamrock
Tweet
Share
Share
Pin

Filed Under: art, literacy, preschool, St. Patrick's Day Tagged With: painting, shamrocks, St. Patrick's Day

  • « Go to Previous Page
  • Page 1
  • Interim pages omitted …
  • Page 17
  • Page 18
  • Page 19
  • Page 20
  • Page 21
  • Interim pages omitted …
  • Page 35
  • Go to Next Page »

Primary Sidebar

Hi, I'm Annette Kaminsky, a preschool teacher who loves sharing learning through play activities for young children. Thanks for visiting my site. Feel free to stay awhile!

Subscribe Via Email

Recent Posts

  • Expanding Balloon Science Experiment May 18, 2026
  • Earth Day Spin Painting April 21, 2026
  • Easter Bunny Scavenger Hunt April 4, 2026
  • Celebrate Diversity Coloring Pages March 1, 2026
  • Lunar New Year Lantern Craft February 11, 2026
  • Black History Month Positive Affirmations Art January 29, 2026
  • Snowflake Cafe Dramatic Play Set January 19, 2026
  • Pastel Christmas Letterhead and Envelope December 20, 2025
  • December Kindness Activities November 30, 2025
  • Fall Forest Sensory Bin November 30, 2025

Categories

Topics

apples bunnies butterflies Chinese New Year Christmas Christmas craft color colors dramatic play Easter fall flowers hearts holiday jewelry leaves leprechauns light table loose parts painting paper crafts playdough pretend play printables printmaking process art pumpkins rice bin scented playdough science experiment scissor skills sensory bin sensory play sensory tray shamrocks skeletons snakes snowflakes spiders spring St. Patrick's Day sunflowers tablescapes Valentine's Day water play

Copyright © 2026 · Lifestyle Pro on Genesis Framework · WordPress · Log in