• Skip to secondary menu
  • Skip to main content
  • Skip to primary sidebar

Putting The Pretty In Preschool

Finding Beauty In Everyday Early Childhood Experiences

  • Home
  • About Me
  • Winter
  • Chinese New Year
  • Blog
  • Contact Me
  • Black History Month
  • SHOP
  • Valentine’s Day

art

Skull And Crossbones Art

September 15, 2022 by Annette Kaminsky Leave a Comment

Tweet
Share
Share
Pin

Most years a pirate theme finds its way into our curriculum offerings. The theme involves action figures, boats, and lots of treasure, so what’s not to love? This year we included skull and crossbones art, which led to interesting discussions!

_______

Oh, so easy skull and crossbones art project your little learners will love. Two free printables are included for the scissor skill activity.

_______

Follow me on Pinterest for more ideas.

_______

What I like most of all about a pirate theme is the way it enhances children’s language. Near the beginning of the school year, dramatic pirate language (demonstrated in storybooks) helps draw children out of their shells as they practice it in pretend play. Later on, it presents opportunities to work on sounds children may still be having difficulty with (think letter R / “arrr”.)

_______

International Talk Like A Pirate Day

An International Talk Like A Pirate Day is held every year on September 19. Celebrating it in the classroom fits in well with the benefits of imitating pirate talk at the beginning of the school term (which is in September where I live.}

_______

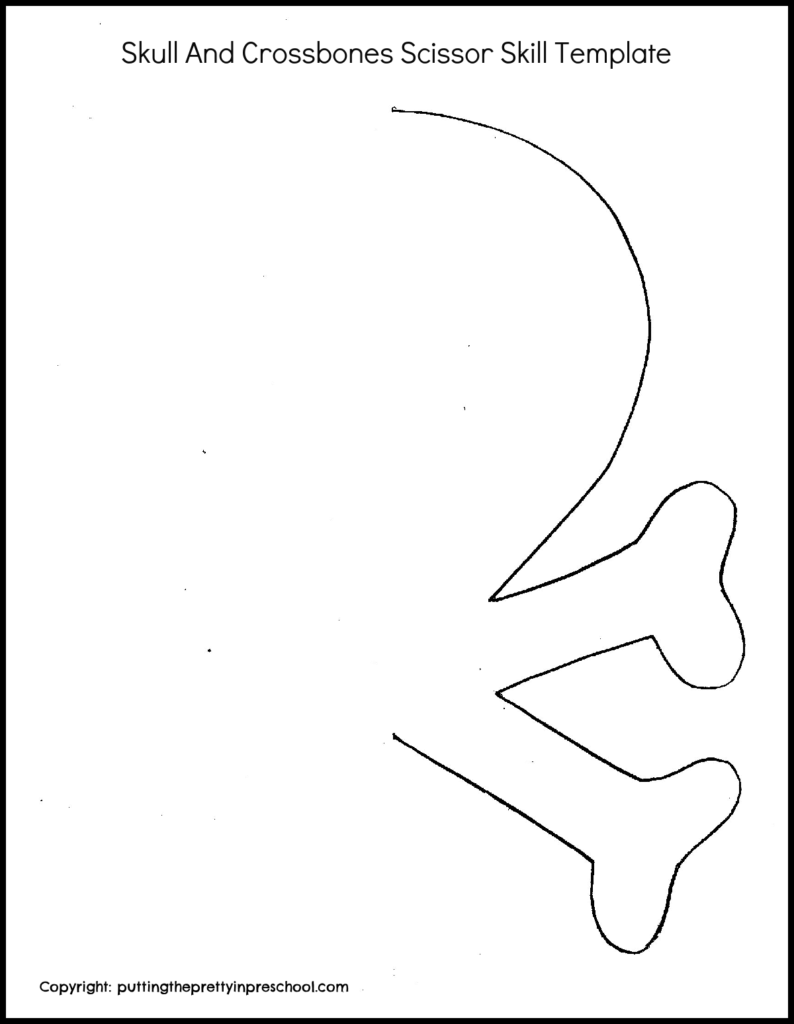
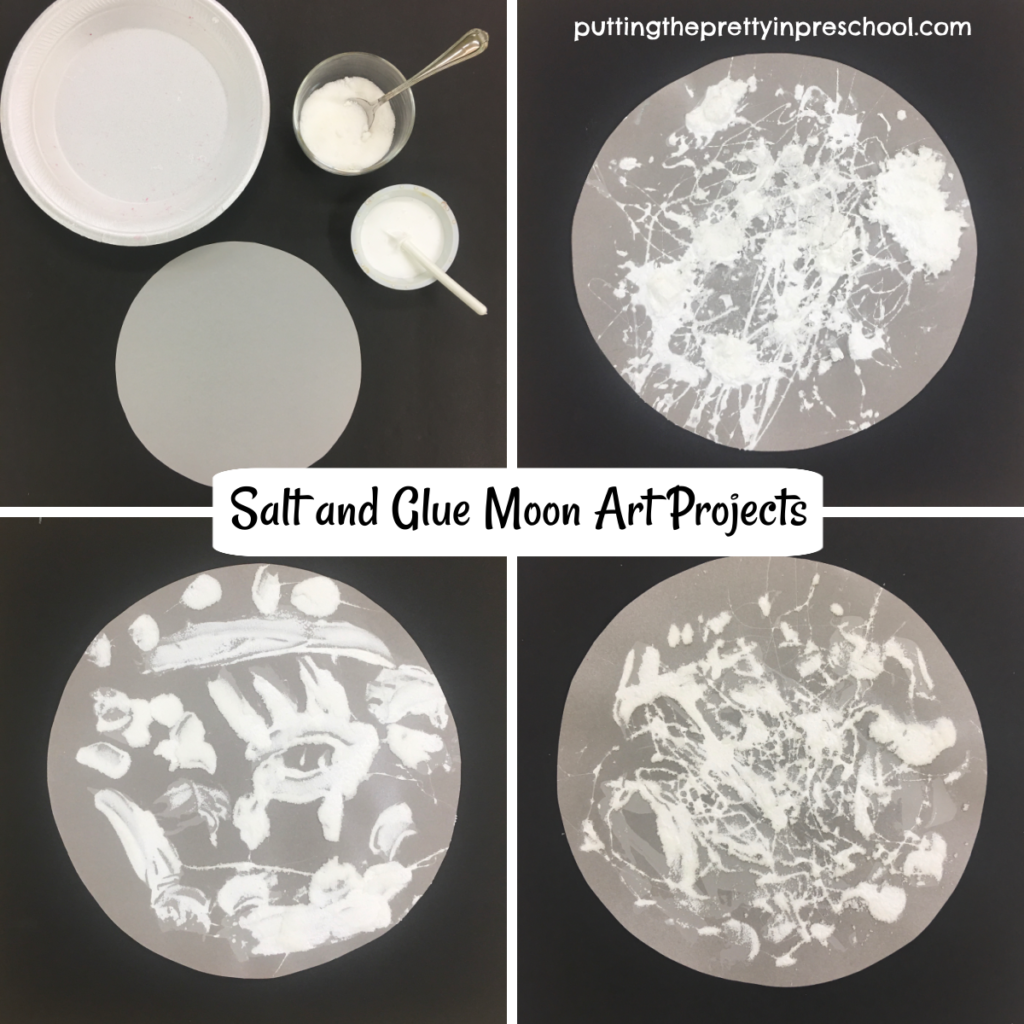
The Skull And Crossbones Art Project

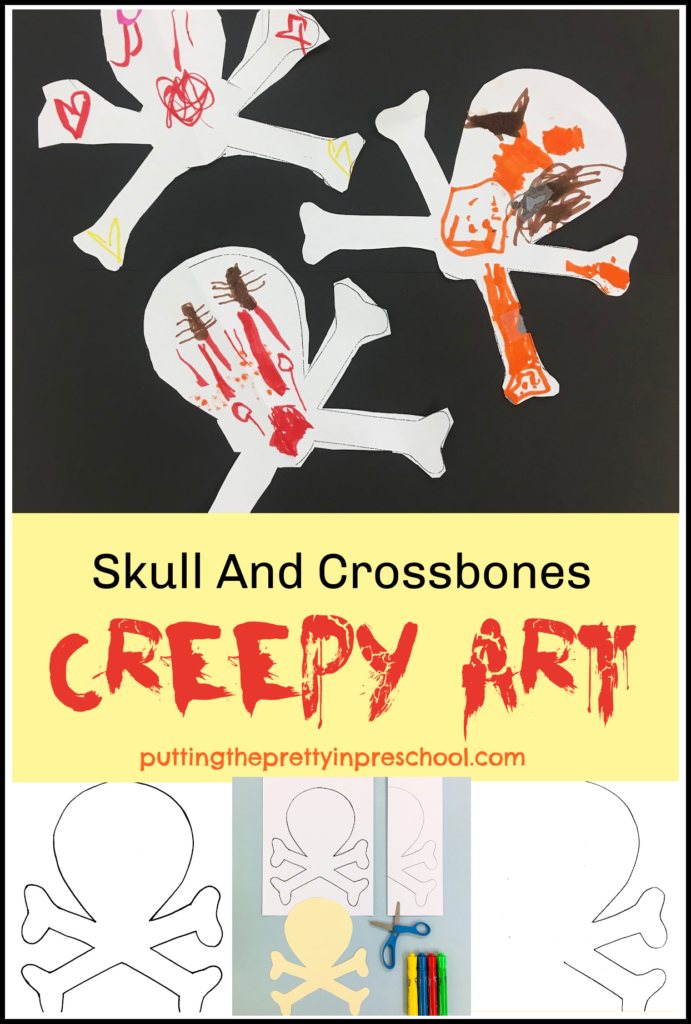
Near the end of my latest pirate theme, I offered a little skull and crossbones art activity. (A skull and crossbones symbol was one of the designs used on pirate ships.)  Although the main goals were to discuss symmetry and practice scissor skills, the activity also inspired lively group conversation.

Oh, so easy skull and crossbones "creepy art" activity your little learners will love. Two free printables are included for the scissor skill ainvitation.

_______

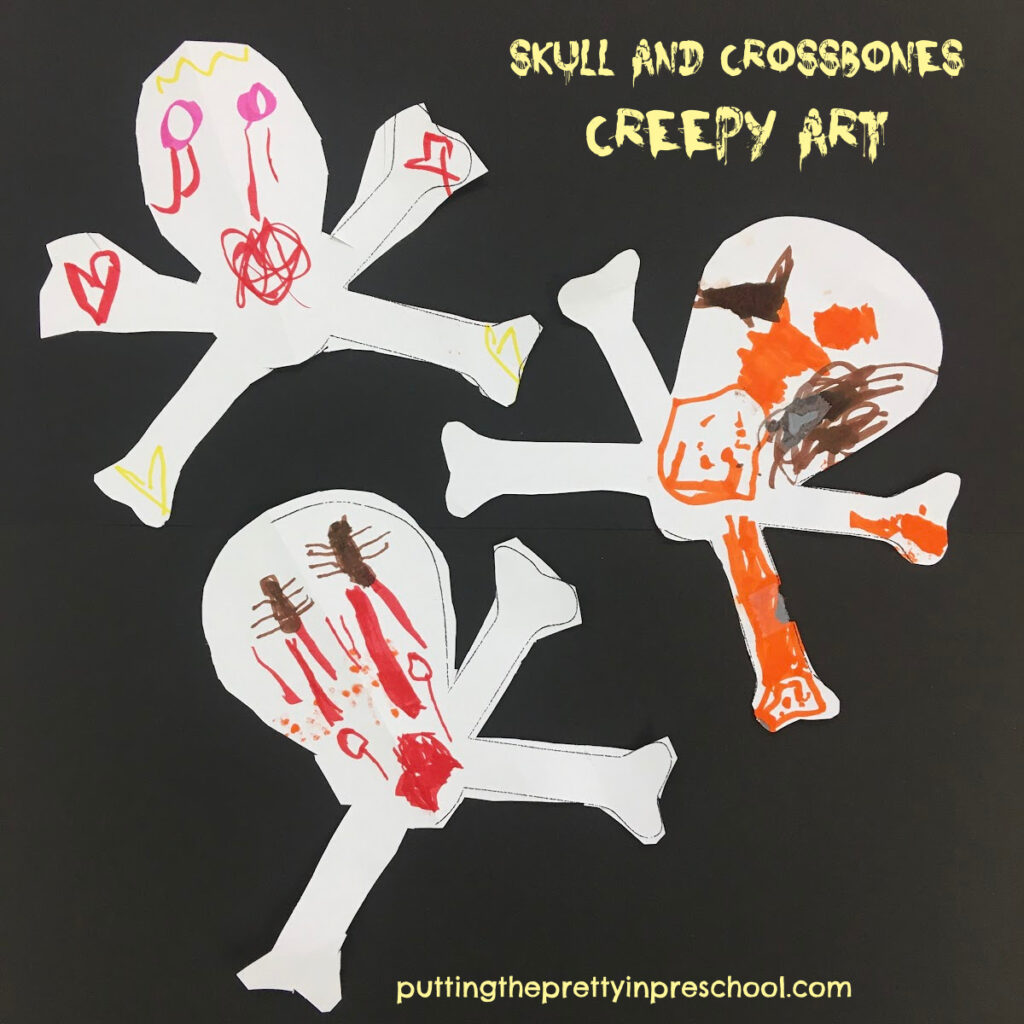
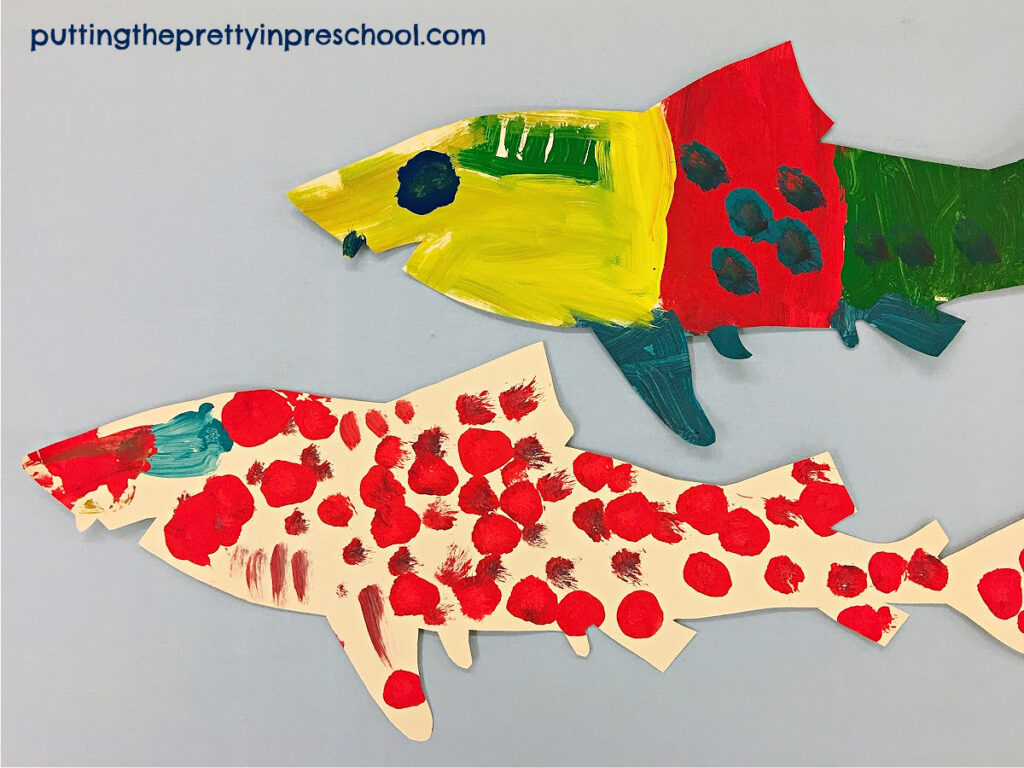
Children cut out a skull and crossbones from a printable and then used felt markers to decorate it.

Invitation to create "creepy art" with two free skull and crossbones printables. Scissor skill practice is also a goal.

_______

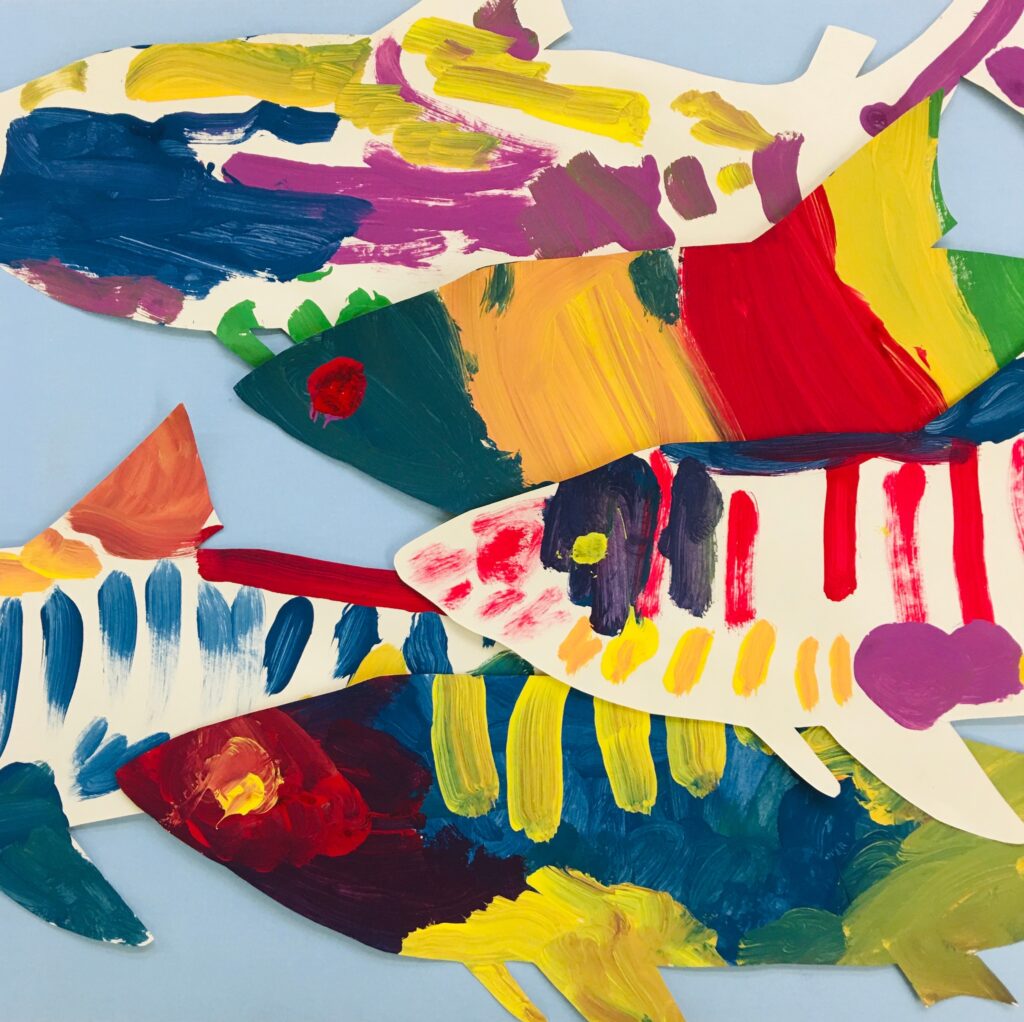
My preschoolers loved the decorating phase. And they called their designs “creepy art.”  That term (which rolled off their tongues numerous times) was the inspiration for drawing spiders and dripping blood. (There were a few hearts to soften the look.)

This led me to tell them that there is such a thing as creepy art and that it is perfectly legitimate. Skull and crossbones art fits the label, and some of it is even described as “gorgeous” and “pretty” online.

_______

Skull And Crossbones Printables

The simple pirate-themed art activity was so well-received that I thought it was worth sharing in a blog post. It’s easy to pull out on International Talk Like A Pirate Day, or any time of the year.

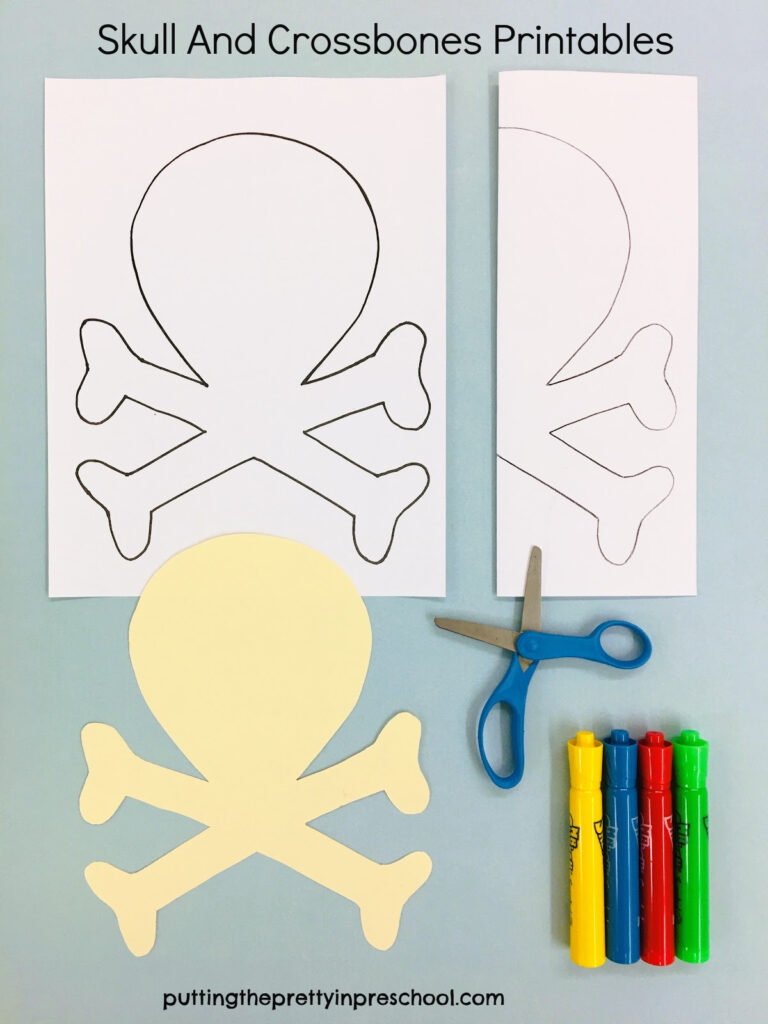
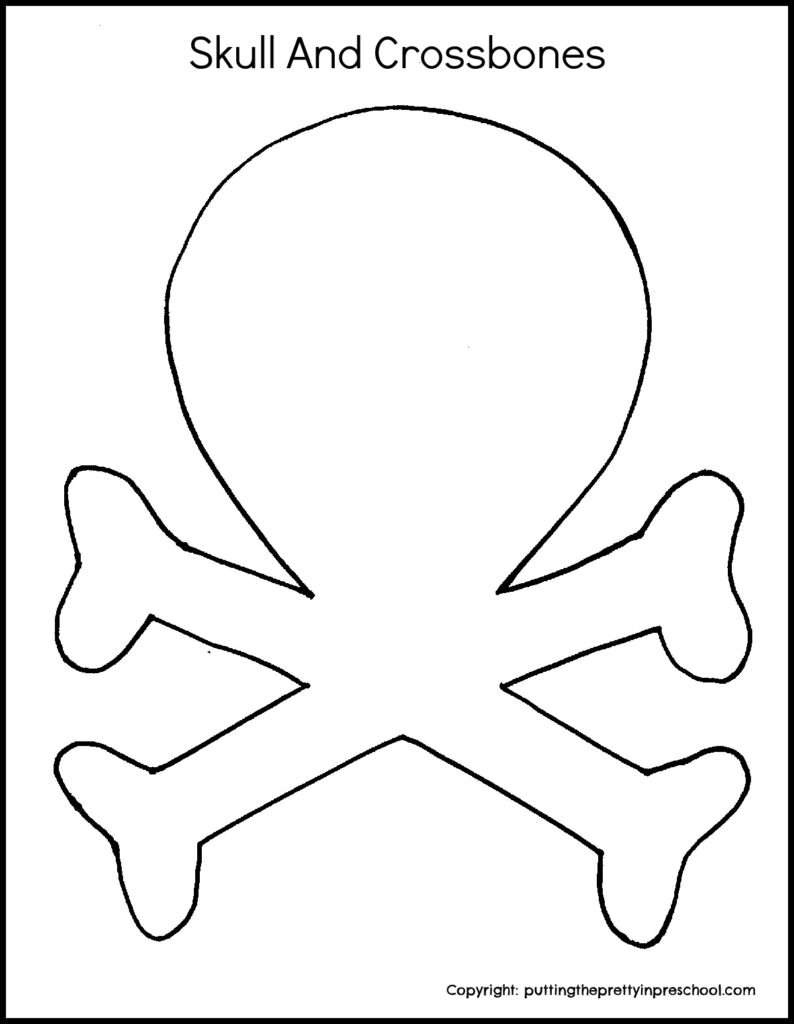
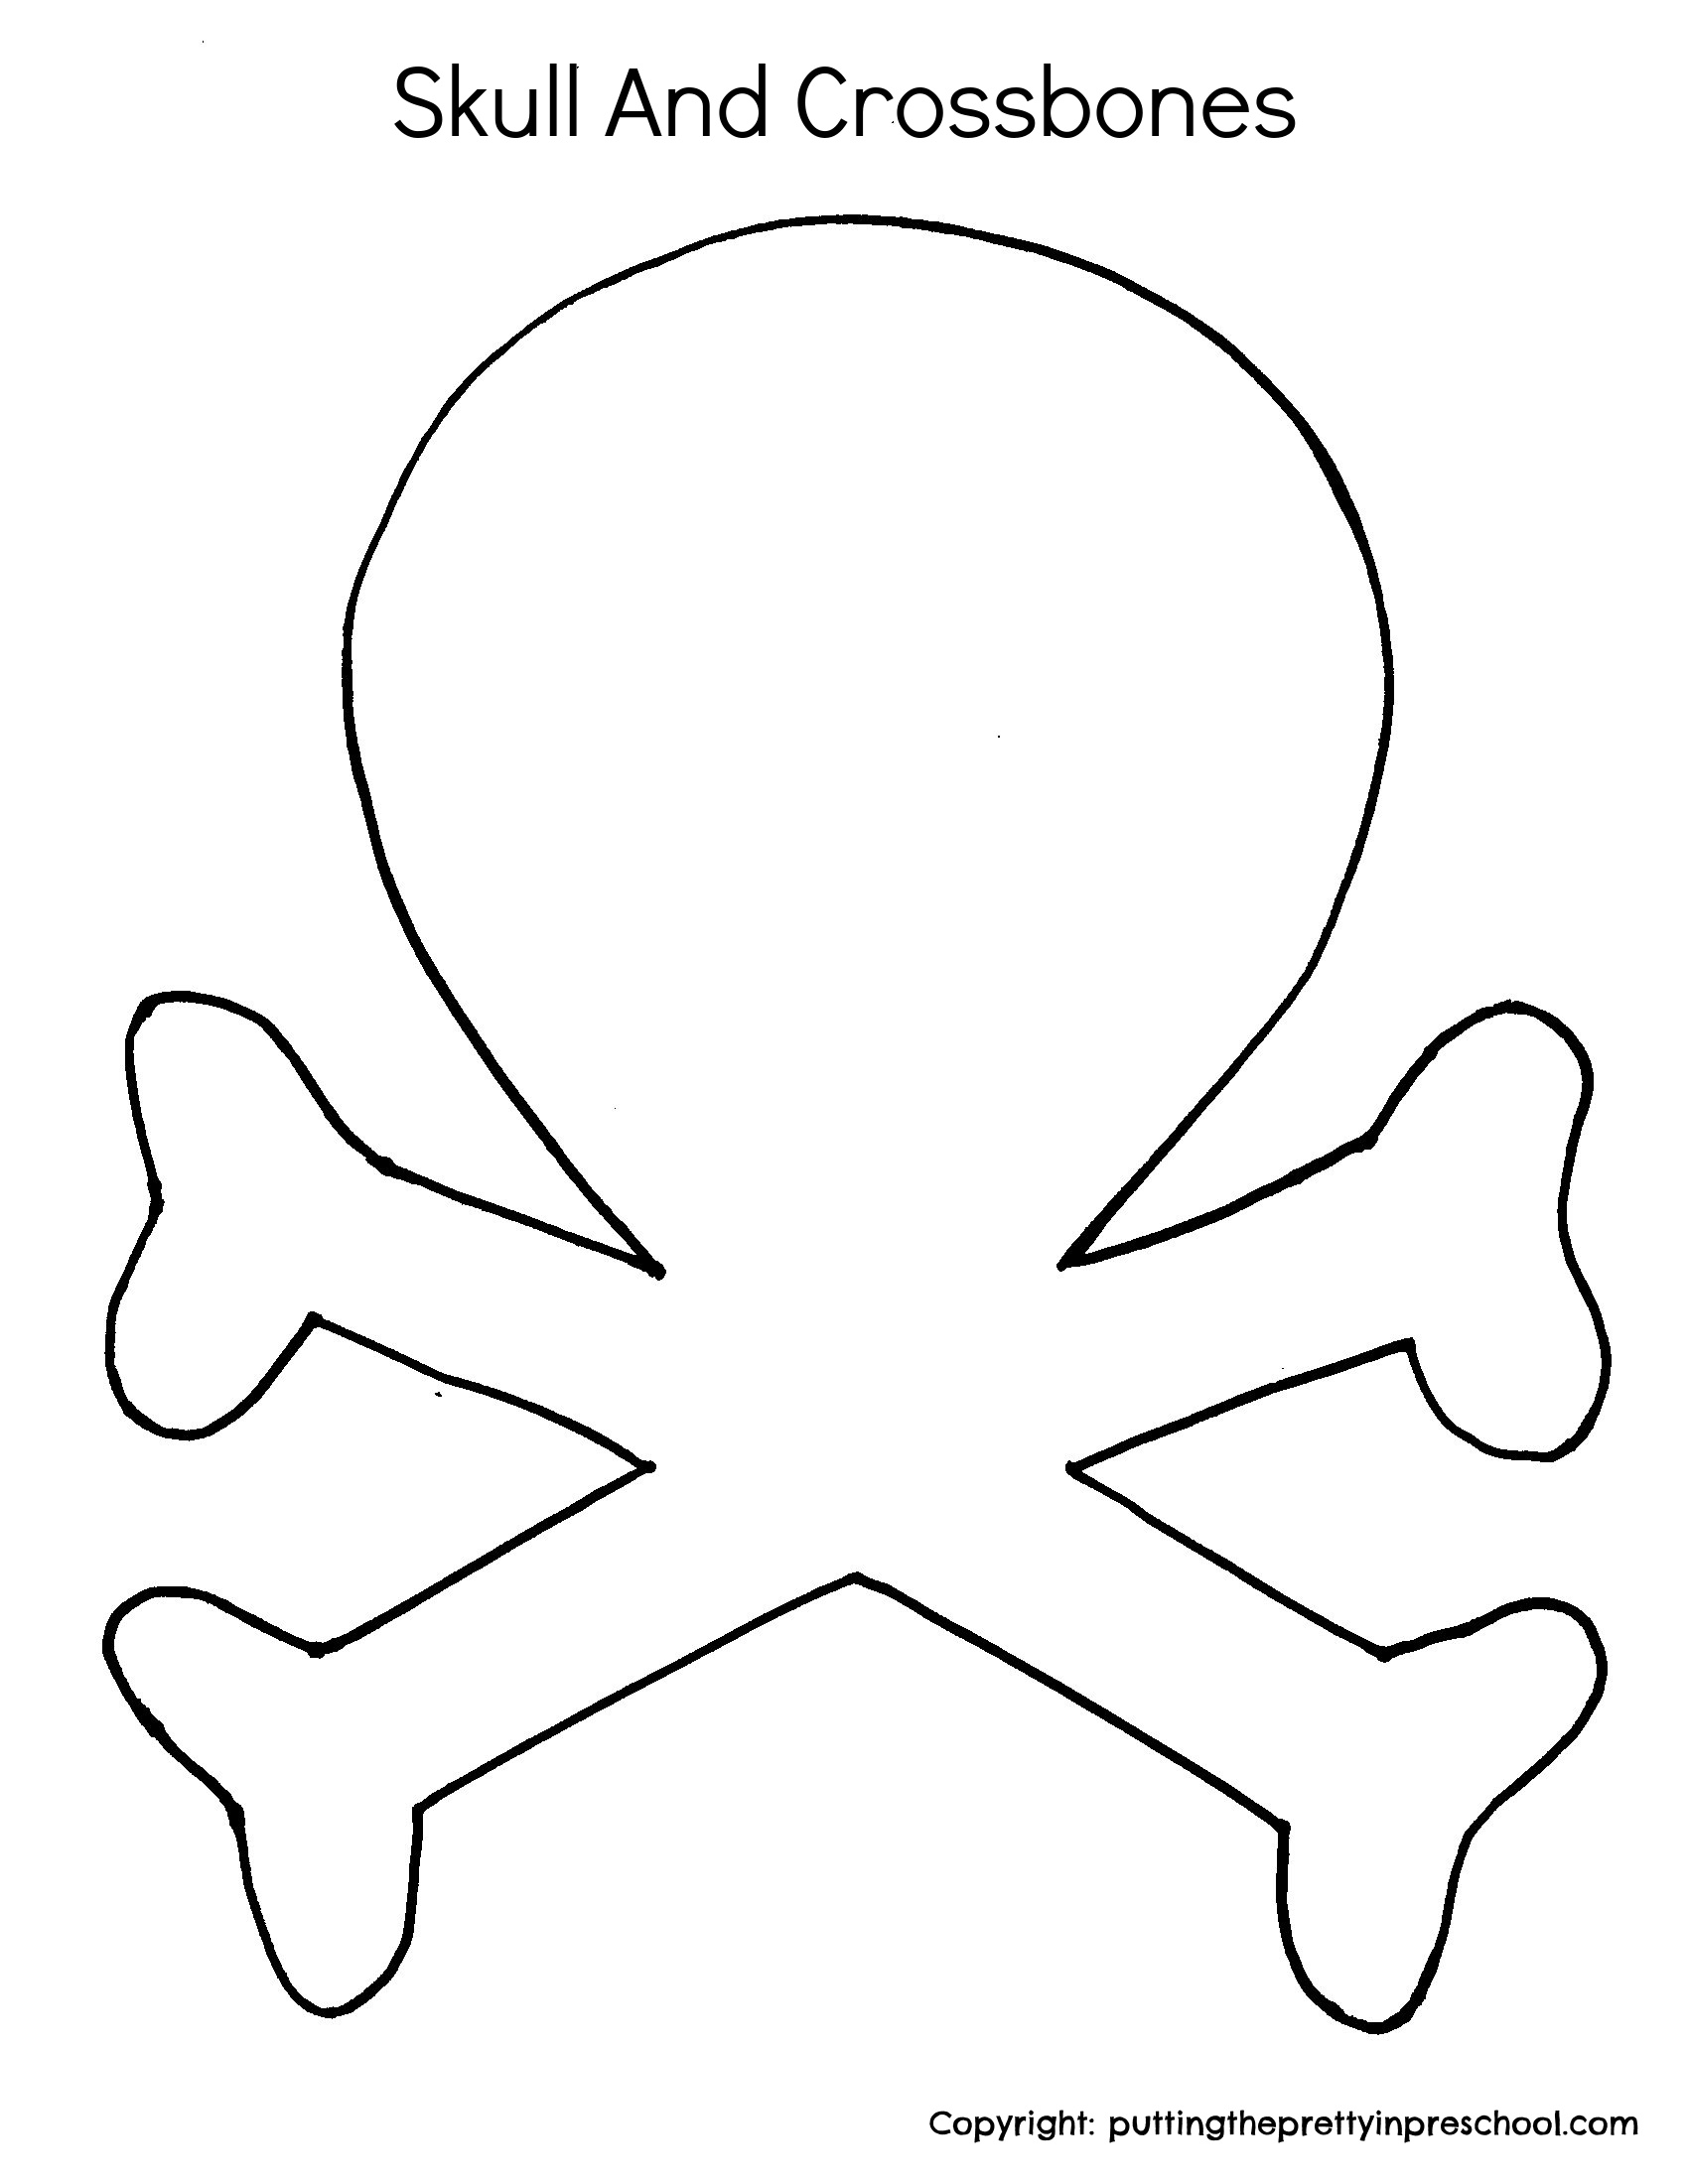
Here are two free printables to download so your little learners can make creepy art too.

This first printable can be cut out and decorated. Or you can skip the cutting phase.

Skull and crossbones template to download for scissor skill practice and art.

_______

Skull And Crossbones PrintableDownload

This printable is for individual or one classroom use only.

_______

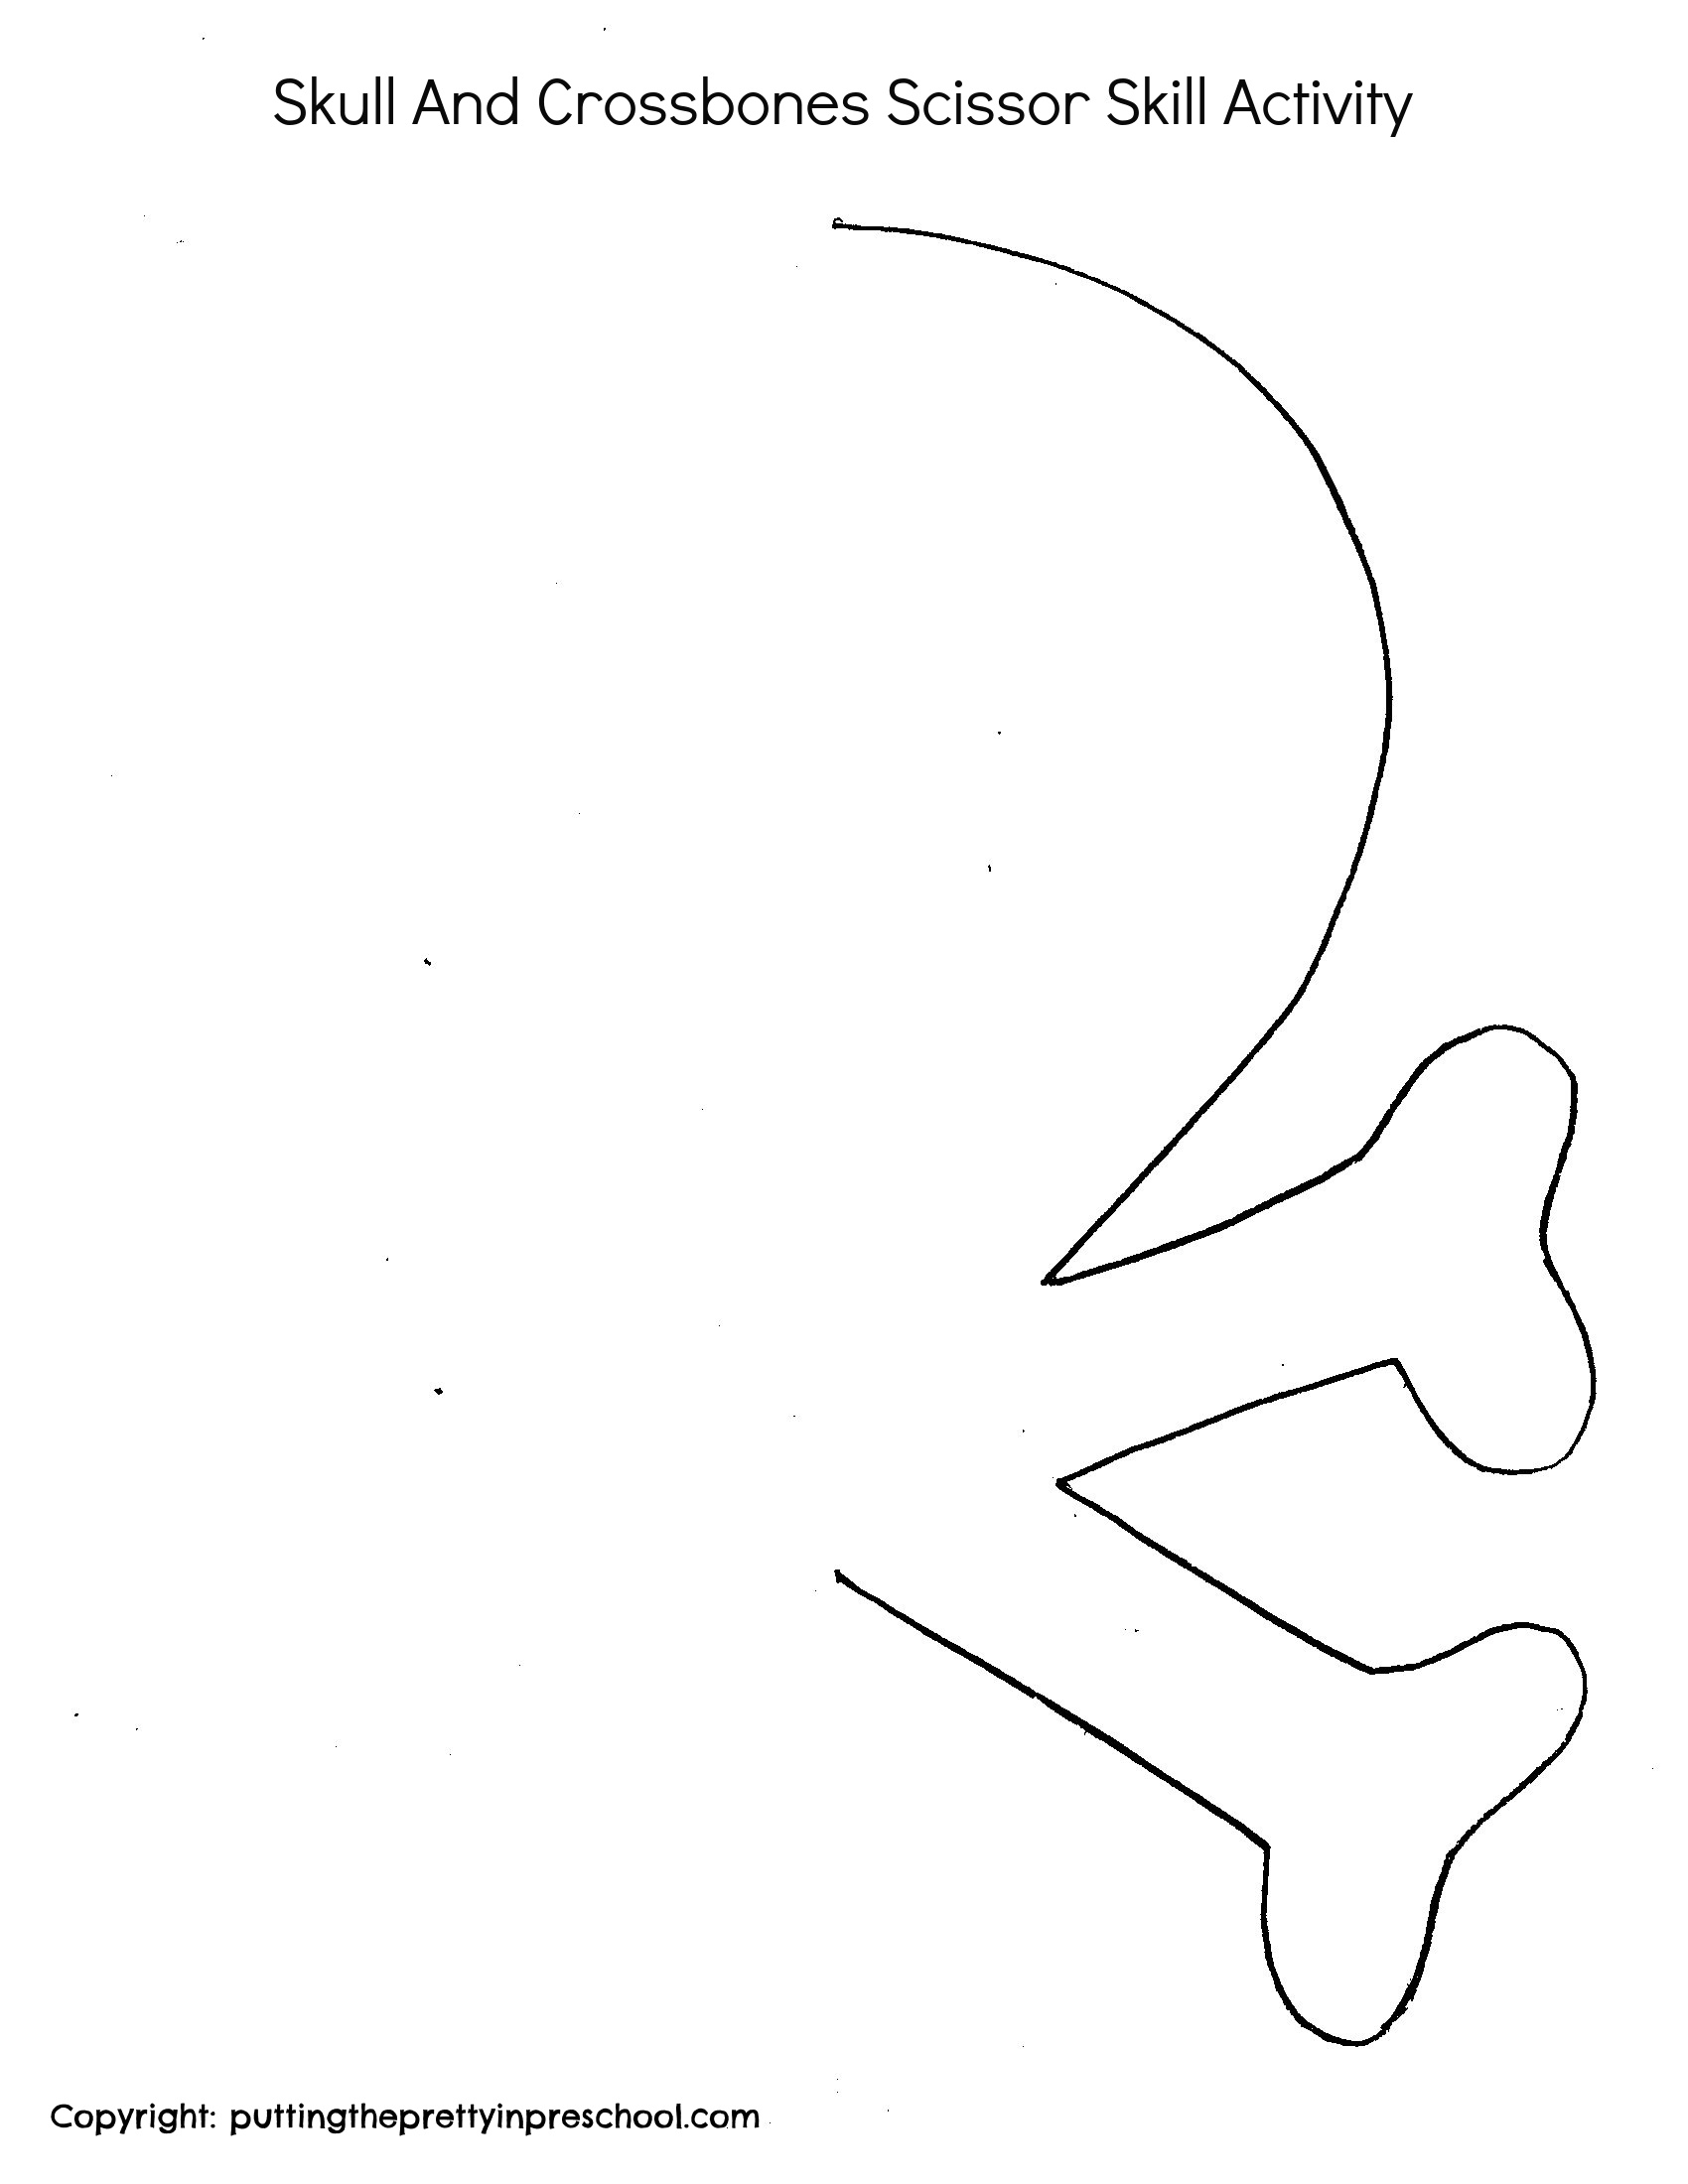
The second printable is designed to be folded in half lengthwise and then cut. It’s a good activity to discuss symmetry.

Skull and crossbones template to download for scissor skill practice and art. Learning about symmetry is also a possibility.

_______

Skull And Crossbones Scissor Skill PrintableDownload

This printable is for individual or one classroom use only.

_______

The work of Salvador Dali is an example of exquisite creepy art. An artist theme on Dali would be a great follow-up to this skull and crossbones art activity.

_______

And for more pirate-themed fun, try this “Exploding Treasure Chests” science experiment by FUN-A-DAY.

_______

Related: Pirate Treasure Bin

_______

[Read more…] about Skull And Crossbones Art
Tweet
Share
Share
Pin

Filed Under: art, literacy, Math, pirates, preschool Tagged With: art, pirates, scissor skills

Bubble Wand Painting Activity

August 22, 2022 by Annette Kaminsky Leave a Comment

Tweet
Share
Share
Pin
This bubble wand painting activity gives early learners a fun new way to spread paint on paper or canvas. It is process art at its best!

_______

Variety is the spice of life, and this is so true with painting activities. Although paintbrushes are most commonly used to spread paint on canvasses, little learners delight in experimenting with other tools. Offering this bubble wand painting activity gives them an exciting new way to do just that!

_______

Supplies To Collect

Gather the following supplies for this super fun art activity:

  • jumbo bubble wands and trays
  • tempera paint colors of choice
  • 12-inch x 18-inch art paper or canvas
  • plastic tarp or table cover

_______

Follow me on Pinterest for more early learning ideas.

_______

The Bubble Wand Painting Process

Painting with bubble wands is a fun way to experiment with unique tools for spreading paint. Follow these steps for the process art activity.

_______

For this activity, pour tempera paint into bubble wand trays, or use trays that are just larger than the wands.

Tip: Tempera paint can be a little dark when used straight from the bottle. Lighten and brighten hues by mixing in a little white and/or yellow paint.

Next, cover a large table with a plastic table cover or tarp.

Then set out big sheets of art paper or canvasses, along with the paint trays. For this project, I feature a budget-friendly stretched canvas purchased at a dollar store.

Have each participant dip a bubble wand in paint, and press it onto the canvas. If the wand is used as a fly swatter, the paint will splatter, adding to the fun.

Repeat the process using additional bubble wands, trays, and paint colors.

It's easy to fill a canvas with a bubble wand painting technique. Give this all-ages super fun art project a try!

_______

Note: This is a messy activity! Make sure participants wear play clothes and a painting apron, and that your art station can accommodate splattering paint. As an alternative, offer the painting activity outside.

If only a few bubble wand sets are available, have little learners take turns doing this painting activity. Wash the bubble wands and trays before adding each new color.

Big sheets of paper or canvases can seem overwhelming to little learners, but the jumbo bubble wands make painting on a large canvas easy to do.

It's easy to fill a canvas with a bubble wand painting technique. Give this all-ages super fun art project. a try!

_______

Related: Printmaking With Apples

_______

[Read more…] about Bubble Wand Painting Activity
Tweet
Share
Share
Pin

Filed Under: art, preschool, summer Tagged With: bubble wand painting, painting, process art

Watercolor Planets With Markers

August 17, 2022 by Annette Kaminsky Leave a Comment

Tweet
Share
Share
Pin
This stunning "watercolor planets with markers" art project is a must-try. It's an all-ages process art activity that displays well.

_______

Creating watercolor planets with markers is an easy and satisfying process art activity with stunning results. Your little learners will absolutely love doing it. And if you need a quick, beautiful bulletin board or wall display, this project checks that box.

_______

Supplies To Collect

Gather the following supplies for this art activity:

  • 8-inch diameter paper basket coffee filters
  • water-based markers
  • 12-inch x 12-inch black cardstock paper
  • spray bottle
  • plastic tub
  • hot glue gun

_______

Follow me on Pinterest for more early learning ideas.

_______

Creating Watercolor Planets With Markers

First, flatten basket-shaped coffee filters, and set them on a table with water-based markers.

Invite little learners to decorate their paper circles any way they wish.

Steps to create stunning watercolor planets with markers. This all-ages process art looks beautiful displayed together.

_______

Tip: Offer analogous colors, which are groups of three colors positioned next to each other on the color wheel. Because these colors complement each other, they work well in process art projects.

Create watercolor earth art with just markers and water. A quick and easy process art project everyone will love.
Planet Earth With Blue and Green Markers

_______

Create watercolor planet Jupiter art with just markers and water. A quick and easy process art project everyone will love.
Planet Jupiter With Red, Orange, and Yellow Markers

_______

Afterward, have everyone take turns wetting their project with a spray bottle filled with water. When doing this, place the decorated circles in a small tub to be sprayed.

Tip: Your little charges may want to soak their circular canvas with lots of water, but just giving the colorful coffee filters a few squirts results in nice art pieces for display.

Next, dry the paper circles on a flat surface covered with a plastic tablecloth or tarp.

Finally, mount the round planets on a 12-inch x 12-inch square piece of black cardstock, or sturdy paper that is 8 ½ x 11 inches in size. Using a hot glue gun works well.

This process art project looks amazing displayed in a group.

_______

Create watercolor earth art with just markers and water. A quick and easy process art project everyone will love.

_______

More Watercolor Planet Process Art

Because little learners love the spraying water part of this art activity, invite them to make more colorful planets without restrictions. They may spray the color right out of the circles after decorating them, but they enjoy doing this soooo much. Have them try black or dark green markers. Early learners are sure to be excited about the new colors that will be revealed.

_______

More Space Theme Activities

Earth Day Heart Art

Scented Moon Playdough

Salt and Glue Moon Art

Outer Space Pretend Play

Space Theme Loose Parts Play

Starry Sky Sensory Bin

Moon Colors Art Project

Space Restaurant Dramatic Play

Space Father’s Day Craft

Earth Day Bead Craft

_______

[Read more…] about Watercolor Planets With Markers
Tweet
Share
Share
Pin

Filed Under: art, display, Earth Day, preschool, space Tagged With: earth craft, Earth Day, painting, planets, process art, space

Salt And Glue Moon Art

August 8, 2022 by Annette Kaminsky Leave a Comment

Tweet
Share
Share
Pin
Try this stunning salt and glue moon art activity. It's a process art project that displays well. Ten moon facts are included in the post.

_______

This salt and glue moon art activity is a simple way to create a realistic moon in its natural colors. It’s easy for little learners to do, and looks showy when displayed.

To help set the tone for the art activity, here are ten fun facts about the moon’s surface to share.

_______

Ten Moon Facts

  • The moon usually appears bright whitish, silvery gray, or pale yellow. This is because its surface is illuminated by the sun.
  • Close up, the moon is colored in shades of gray, with a little bit of black and white. There are tinges of orange, blue, or green in some parts.
  • The moon is rocky and bumpy.
  • There are light and dark areas on it’s surface.
  • The dark areas are huge craters filled primarily with basalt lava that has cooled and formed smooth, dark plains. Much of the lava is rich in magnesium and iron, which is the reason for the dark color.
  • The lighter areas are highlands with mountains and many craters. The highlands are low in iron and rich in calcium, giving them a lighter color.
  • There are volcanic domes and shield volcanoes, as well as channel-like depressions on the moon.
  • The moon is covered in a thin layer of moon dust, which is a dark grey color.
  • There are traces of water in the form of water ice at the moon’s poles. Water molecules have recently been discovered on the sunlit side of the moon.
  • From earth, we always see the same side of the moon.
An easy-to-do moon art activity with a salt and glue technique. The art project looks stunning on display.

_______

Powerful telescopes, space probes that orbit or land on the moon, spacecraft that circle the moon, and robotic rovers are some ways the moon is regularly explored. Twelve astronauts have had the chance to walk on the moon and see it up close.

_______

Moon Art Supplies

Just a few supplies are needed for this striking moon art project:

  • 8 ½ inch x 11- inch gray cardstock paper
  • 12 x 12-inch black cardstock paper
  • white glue
  • glue paddles
  • disposable plates
  • table salt
  • small bowls or paint cups
  • spray adhesive
  • hot glue gun

_______

The Salt And Glue Moon Art Process

To prepare for the activity, cut circles about 8 ½ inches in diameter from gray cardstock.

Next, set up a station for each child participating with a

  • gray cardstock paper circle
  • small bowl of salt and a teaspoon
  • container of white glue and glue paddle
  • disposable plate
Stunning moon art made with a salt and glue art technique. Teach facts about the moon while doing this process art activity.

_______

Invite little learners to drizzle white glue on their circle-shaped paper.

Then have them sprinkle salt from a teaspoon over the glue, and shake excess salt onto their disposable plate.

Let the art projects dry overnight.

An easy-to-do moon art activity with a salt and glue technique. The art project looks stunning on display.

_______

To help preserve the moon art, spray each salted circle with adhesive spray. Hairspray works fine for this task too.

When thoroughly dry, adhere each paper moon to a black cardstock or construction paper background using a hot glue gun.

Display the stunning art projects on a bulletin board or wall. They will look amazing!

_______

Follow me on Pinterest for more early learning ideas.

_______

Little learners may have their own thoughts about the art they are creating. One of my students pretended he was making “The North Pole.” This led to a discussion about who was on Santa’s nice and naughty list!

Another student asked if he could taste the salt. After saying it was ok to taste a little of it, we discussed that it is a good choice to ask if it is safe to taste an art supply before doing it. We also talked about how there is a lot of salt in many playdough recipes, but we only use a little bit to season food.

Try this stunning salt and glue moon art activity. It's a process art project that displays well. Ten moon facts are included in the post.

_______

Related:

Scented Moon Playdough

Starry Sky Sensory Bin

Space Father’s Day Craft

Space Restaurant Dramatic Play

Watercolor Planets With Markers

Outer Space Pretend Play

Earth Day Heart Art

Earth Day Craft

Moon Colors Art Project

Space Loose Parts Play

Space Theme Light Table

_______

[Read more…] about Salt And Glue Moon Art
Tweet
Share
Share
Pin

Filed Under: art, display, preschool, science, space Tagged With: moon, process art

Painting Striped And Spotted Sharks

August 1, 2022 by Annette Kaminsky Leave a Comment

Tweet
Share
Share
Pin

Painting striped and spotted sharks is an effective way for young children to incorporate simple design elements into the art process. And tiger and leopard sharks are the perfect subjects to encourage early learners to paint stripes and spots. These sharks are especially interesting because of their unique coloring.

Painting striped and spotted sharks are an easy way for early learners to incorporate simple design elements into the art process. Tiger and leopard shark facts are included.

_______

It is common knowledge that early learners just love, love, love to mix colors when painting. They never seem to tire of mixing paints.  Oh so quickly, they will swirl paint around to make a mediocre brown or another dull hue, and be left with muddied paints to work with.

As they get a little older, I like to encourage children to try something a little more challenging. I say, “Try this challenge on your first painting. Then on your next ones you can paint any which way you like.” This is usually effective. Sometimes little learners choose to make a second or even a third painted piece. Other times they are ready to move on to another activity in the classroom after the first one.

With these shark painting activities, children are challenged to keep colors somewhat separate and add stripes and spots to their paintings.

_______

Painting Striped Tiger Sharks

Tiger sharks provide inspiration for painting stripes on fish art projects.

_______

To prepare for the art activity, draw and cut large tiger sharks from 12 x 18-inch paper. Manila or construction paper works well.

Then set out tempera paint colors of choice. The paint palette can feature a variety of colors, or monochromatic ones, such as black, gray, and white.

Next, add a paintbrush and paper towel section to each participant’s station.

To introduce the painting activity, read a picture book featuring different kinds of sharks. 

Next, focus on tiger sharks. Show pictures of them from books and/or online sources, and share interesting facts. The information further on in this post may be helpful.

Invite early learners to decorate their sharks, making sure to add some stripes to them. Encourage them to dab excess paint on a paper towel when switching paint colors.

Ten fun facts about tiger sharks. These fascinating sharks inspire little artists to paint stripes.

_______

10 Tiger Shark Facts

  • Tiger sharks are the fourth largest shark. Only the whale shark, basking shark, and great white shark are bigger.
  • These striking sharks have spots and vertical lines on the sides of their bodies, similar to the stripes on land tigers. The markings fade over time.
  • Their striped grey coloring camouflages the sneaky sharks in the water.
  • Preferring warmer waters, the large sharks live near coasts in tropical and subtropical areas around the world.
  • Tiger sharks have excellent eyesight and hearing and are slow-moving swimmers.
  • Not fussy about prey, the nocturnal hunters will eat almost anything whole, even garbage!
  • The food they commonly eat is invertebrates, other fish, dolphins, sea turtles, and seals.
  • Their broad jaws and strong, sharp, serrated teeth help them cut through their prey.
  • The orca whale is the only predator of tiger sharks.
  • Being very curious, these sharks will come close to humans and occasionally bite them.
  • Shark babies, called pups, hatch from individual eggs inside the mother’s body and are born live. There is an average of 30 – 35 pups per litter.

_______

Tiger sharks provide inspiration for painting stripes on fish art projects.

_______

Painting Spotted Leopard Sharks

With this second painting activity, draw and cut out leopard sharks from oversized sheets of sturdy paper.

Introduce little learners to the spotted sharks by showing pictures of them and sharing facts. Interesting leopard facts are listed below.

Invite participants to paint their sharks, adding spots to them.

Leopard sharks provide inspiration for painting spots on fish art projects.

_______

10 Leopard Shark Facts

  • Leopard sharks are smaller than tiger sharks, but also live near the shore.
  • The sharks live year-round in the Pacific Ocean from Oregon to the Gulf Of California.
  • The dark spots on their backs have a likeness to those of real leopards.
  • The narrow-headed mid-sized sharks have three pointed teeth that are good for smashing food.
  • The spotted sharks hunt on the bottom of the ocean at night.
  • Favorite prey is crabs, fish eggs, shrimp, clams, octopus, and fish. The sharks sometimes eat other small sharks.
  • Leopard sharks are active, strong swimmers, but will sink when not moving.
  • Being shy and skittish, they often hide before humans can spot them.
  • Like tiger sharks, leopard shark pups are born live after hatching from egg capsules in the mother’s uterus.
  • Loss of habitat is the biggest threat to leopard sharks.

_______

Painting stripes and spots on sharks are an easy way for early learners to incorporate simple design elements into the art process. Tiger and leopard shark facts are included.

_______

Follow me on Pinterest for more early learning ideas.

_______

More Ways To Create With Spots

In addition to brush-painted spots, eye-catching spots can be added to an art piece by:

  • fingerpainting
  • using dot markers
  • adhering circle stickers
  • gluing on paper circles

_______

Artist Yayoi Kusama

A famous artist who often uses circles/spots in her art is Yayoi Kusama. Her “obliteration room” collaborative projects are especially amazing!

_______

Related: Watermelon-Inspired Banner Craft

_______

[Read more…] about Painting Striped And Spotted Sharks
Tweet
Share
Share
Pin

Filed Under: art, ocean, preschool, science Tagged With: painting, sharks

  • « Go to Previous Page
  • Page 1
  • Interim pages omitted …
  • Page 15
  • Page 16
  • Page 17
  • Page 18
  • Page 19
  • Interim pages omitted …
  • Page 35
  • Go to Next Page »

Primary Sidebar

Hi, I'm Annette Kaminsky, a preschool teacher who loves sharing learning through play activities for young children. Thanks for visiting my site. Feel free to stay awhile!

Subscribe Via Email

Recent Posts

  • Expanding Balloon Science Experiment May 18, 2026
  • Earth Day Spin Painting April 21, 2026
  • Easter Bunny Scavenger Hunt April 4, 2026
  • Celebrate Diversity Coloring Pages March 1, 2026
  • Lunar New Year Lantern Craft February 11, 2026
  • Black History Month Positive Affirmations Art January 29, 2026
  • Snowflake Cafe Dramatic Play Set January 19, 2026
  • Pastel Christmas Letterhead and Envelope December 20, 2025
  • December Kindness Activities November 30, 2025
  • Fall Forest Sensory Bin November 30, 2025

Categories

Topics

apples bunnies butterflies Chinese New Year Christmas Christmas craft color colors dramatic play Easter fall flowers hearts holiday jewelry leaves leprechauns light table loose parts painting paper crafts playdough pretend play printables printmaking process art pumpkins rice bin scented playdough science experiment scissor skills sensory bin sensory play sensory tray shamrocks skeletons snakes snowflakes spiders spring St. Patrick's Day sunflowers tablescapes Valentine's Day water play

Copyright © 2026 · Lifestyle Pro on Genesis Framework · WordPress · Log in