• Skip to secondary menu
  • Skip to main content
  • Skip to primary sidebar

Putting The Pretty In Preschool

Finding Beauty In Everyday Early Childhood Experiences

  • Home
  • About Me
  • Winter
  • Chinese New Year
  • Blog
  • Contact Me
  • Black History Month
  • SHOP
  • Valentine’s Day

sensory

Salt and Ice Science Experiment

May 20, 2025 by Annette Kaminsky Leave a Comment

Tweet
Share
Share
Pin

_______

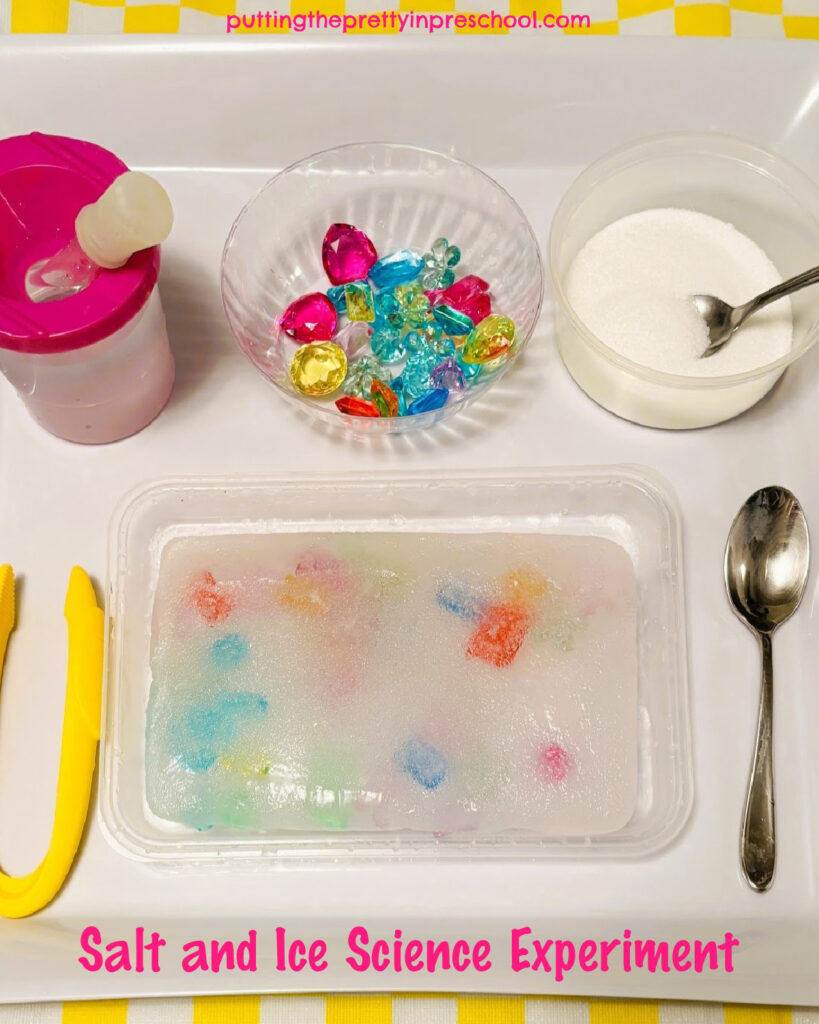
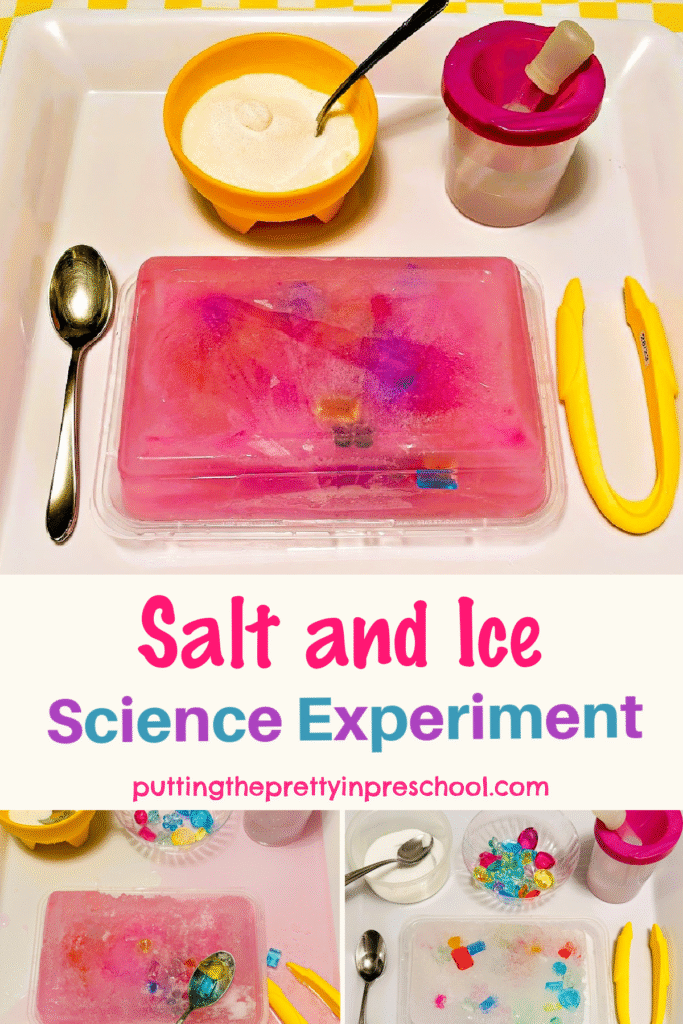
This salt and ice science experiment is simple to set up and fun to do. Just a few supplies are needed for this ice-cold science activity. It’s perfect on a hot day, and makes a good pirate theme or Mother’s Day activity.

_______

Supplies to Collect

Gather the following supplies for this ice and salt science experiment:

  • food storage trays
  • food coloring
  • acrylic gems
  • bowl with salt
  • teaspoons
  • paint pot with water
  • eye droppers or pipettes
  • play tweezers
  • tray
  • safety glasses
  • waterproof table cover

_______

_______

Preparing the Salt and Ice Science Experiment

To prepare this science experiment, freeze gems in ice for two or three days.

Start by adding a layer of water with a few squirts of food coloring stirred in to the bottom of a food storage tray.  Liquid watercolor paint also works well to tint the water.

Next, spread a handful of acrylic gems in the liquid. Then, carefully set the tray in the freezer.

Remove the tray from the freezer and add more water and gems the following day. Freeze the tray overnight again.

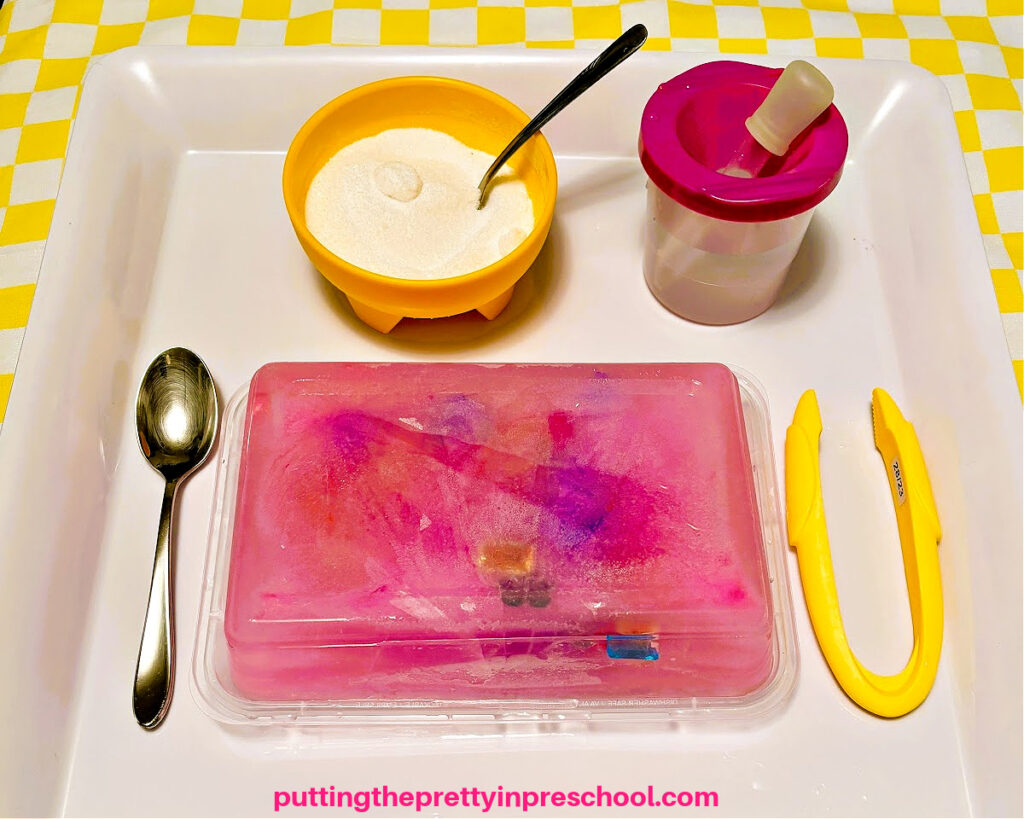
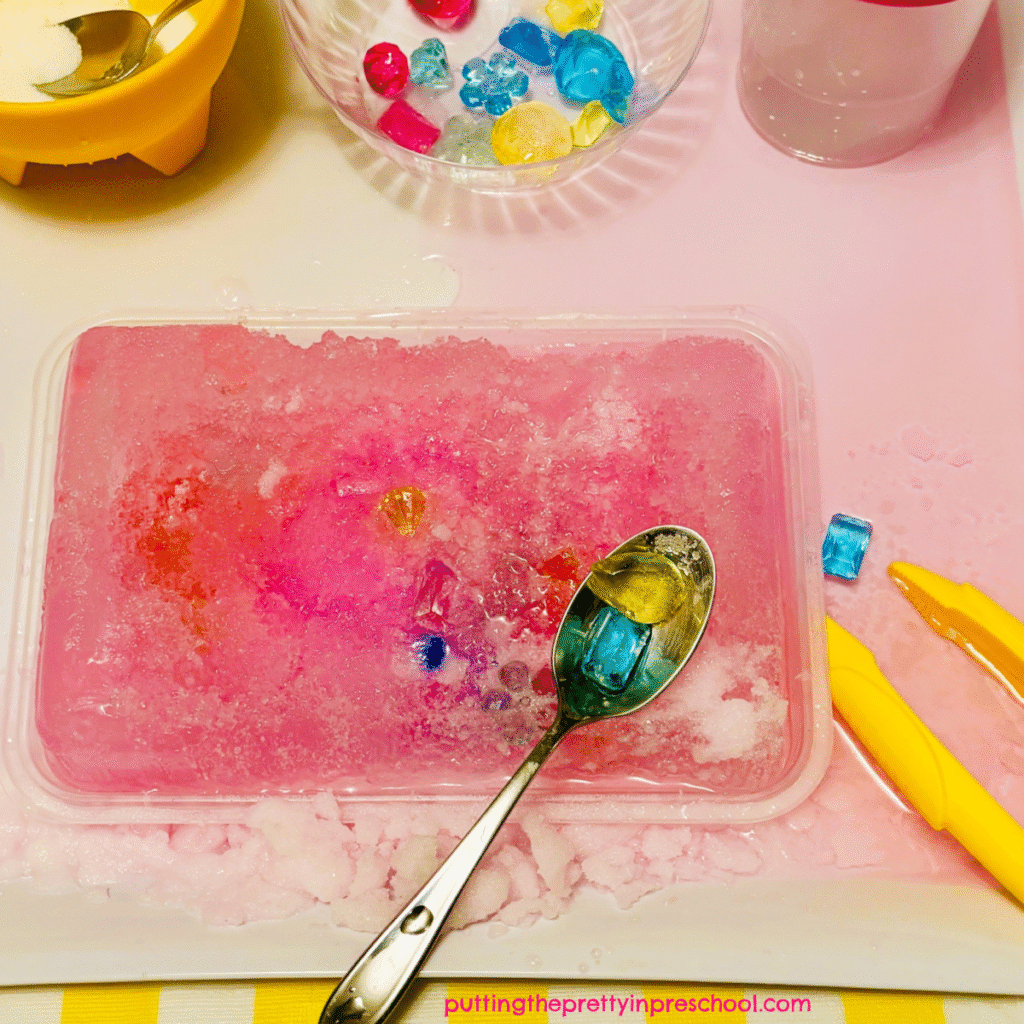
The third day, the ice is ready for the science and sensory activity. Many gems will be near the surface of the ice, and some may be sticking out a little. This is fine for younger children.
_______

To add more challenge for older children, pour a thin layer of water over the frozen gem-filled ice and freeze the tray again before setting out the activity.

_______

The Salt and Ice Science Experiment

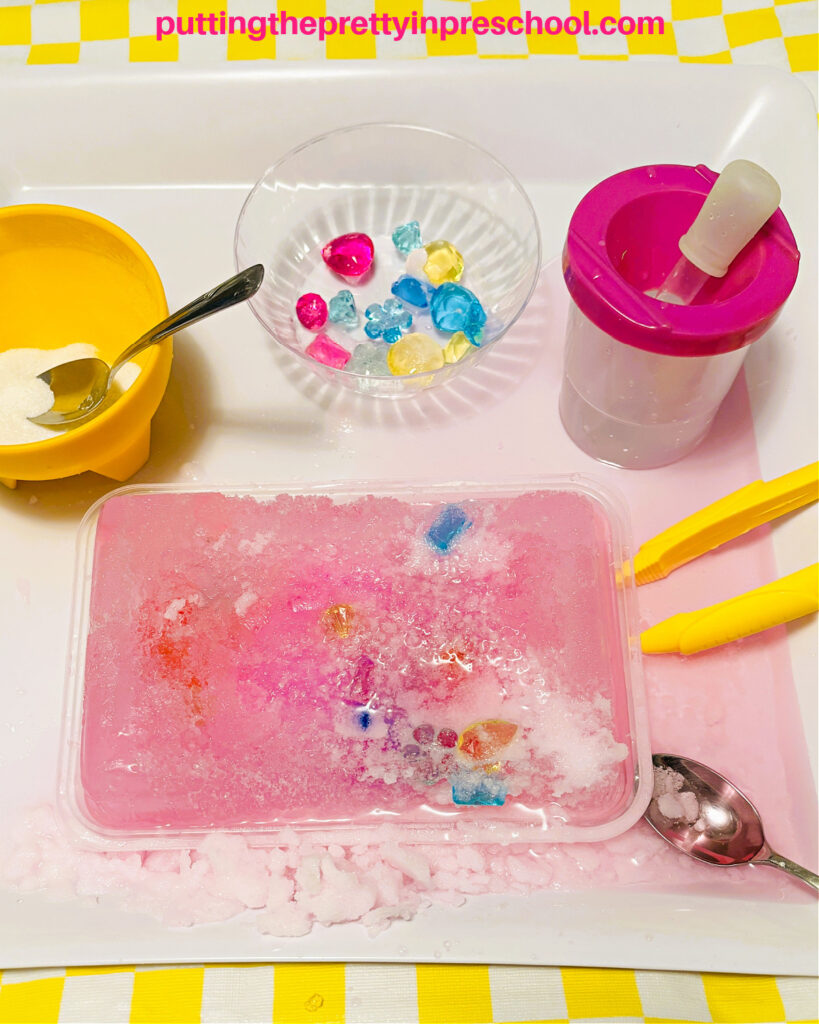
When the layers of water are frozen, remove the ice from the food storage tray and set it on a large, edged tray placed on a table protected with a waterproof table cover.
_______

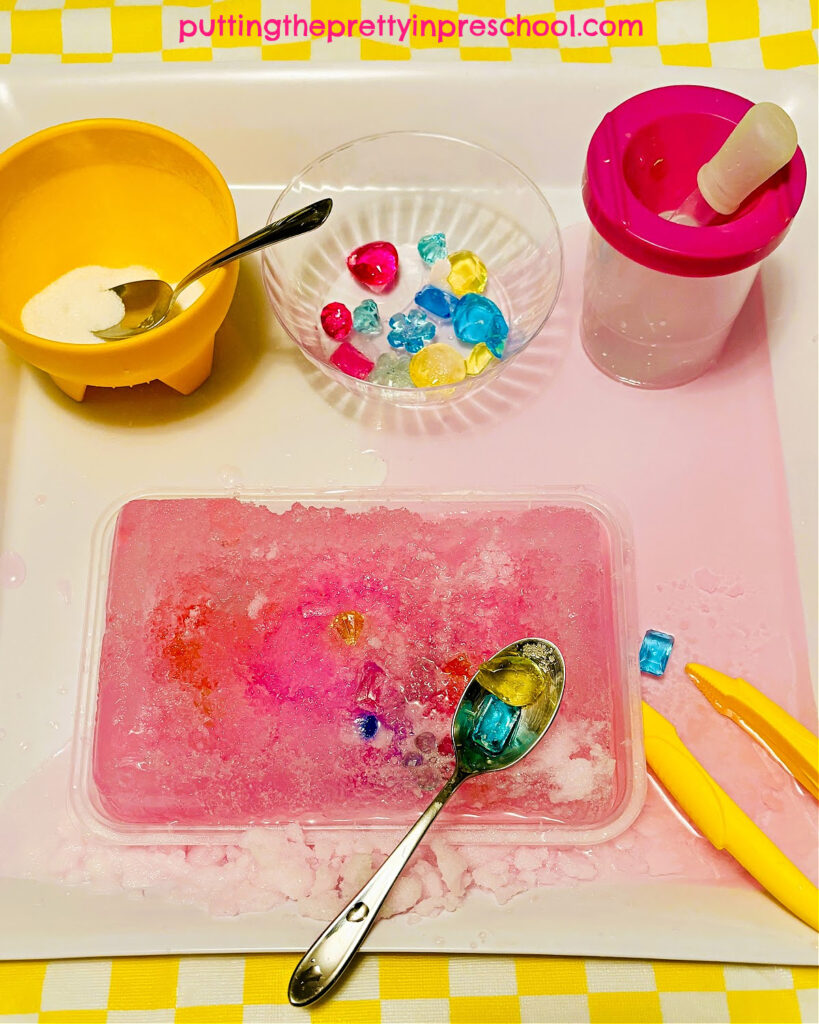
Add a bowl of salt with a teaspoon, an eye dropper or pipette in a paint pot filled with water, and a small bowl ready for freed gems. Include a set of play tweezers and a second teaspoon on the tray.

Drip water and sprinkle salt on the ice, and pry out the gems using teaspoons and tweezers. The salt and ice help melt the ice, making the removal of gems quicker and easier. Note: Safety glasses are recommended for this activity as gems may pop out of the ice. Check freed gems for broken edges and discard them.
_______

Follow me on Pinterest for more early learning ideas.

_______

Variations of the Salt and Ice Science Experiment

For variety or to use supplies on hand, replace the acrylic gems in this salt and ice science experiment with pom poms or animal figurines. Ocean animal figurines are a popular choice for this activity.

_______

Skip adding food coloring to the water during the freezing process. Note: The ice will be a little clearer if you use filtered or distilled water.

Offer the activity to a group of children by freezing four or more trays of gem-filled water and setting the supplies for each participant in a large active world tray.

_______

Explaining the Salt and Ice Science Experiment

Salt lowers the temperature of water. For this to happen, it must be in a solution with liquid water. The salt and water solution created in this experiment melts the ice quicker than letting the ice liquify on its own.
_______

Tying In Mother’s Day

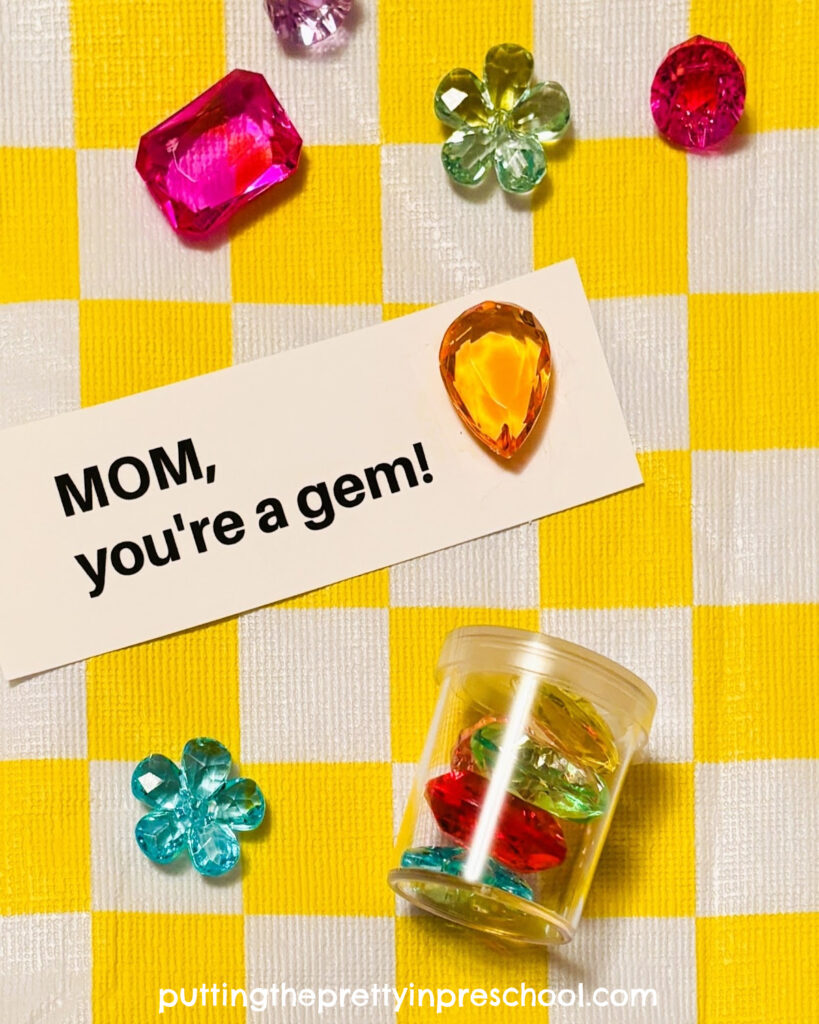
This salt and ice science experiment is a perfect Mother’s Day activity. After freeing gems from ice, allow participants to pick one to glue to a Mother’s Day greeting that says “Mom, you’re a gem.” Allow them to save more gems in a small container to add to their treasure collection.
_______

_______

Snowflake Cafe Dramatic Play Center

Bring wintertime fun into your classroom or playroom with this Snowflake Café Dramatic Play Center Printable Set! Perfect for cold-weather learning, this cozy café invites children to step into imaginative play as bakers, servers, and customers—offering winter-themed cookies and warm cups of hot chocolate.

This engaging, winter-themed pretend play resource

  • is ideal for preschool, kindergarten, and early elementary classrooms
  • supports dramatic play, counting, writing, and social skills
  • is great for winter units, indoor recess, or learning centers
  • is perfect for a play date
  • is excellent activity to pack on trips
  • is easy to prep—just print, cut, and play
  • is easy to store

_______

What’s Included in This Printable Set

  • 9 winter-themed cookie choices
  • Cookies in cookie pans
  • 3 hot chocolate choices
  • Snowflake Café signs
  • Open & Closed signs
  • Price list/menu
  • Daily Special sign
  • Two styles of order forms (perfect for different ages and skill levels)
  • Store labels for organizing your café setup
  • Play money
  • Recipe suggestion form
  • 40 printables in all

Whether you’re creating a seasonal dramatic play center, adding fresh excitement to your winter curriculum, or introducing a fun winter activity at home, the Snowflake Café printable set is a delightful way to keep children learning and playing throughout the season.

_______

More Activities With Ice

Hockey Game Small World

Paint Pour Ice Cake Sensory Play

Ice Drum Musical Instruments

Painting Ice and Snow

_______

[Read more…] about Salt and Ice Science Experiment
Tweet
Share
Share
Pin

Filed Under: Mother's Day, preschool, science, sensory, winter Tagged With: ice, science experiment, sensory play, sensory tray

Airplane Rice Sensory Bin

May 16, 2025 by Annette Kaminsky Leave a Comment

Tweet
Share
Share
Pin

_______

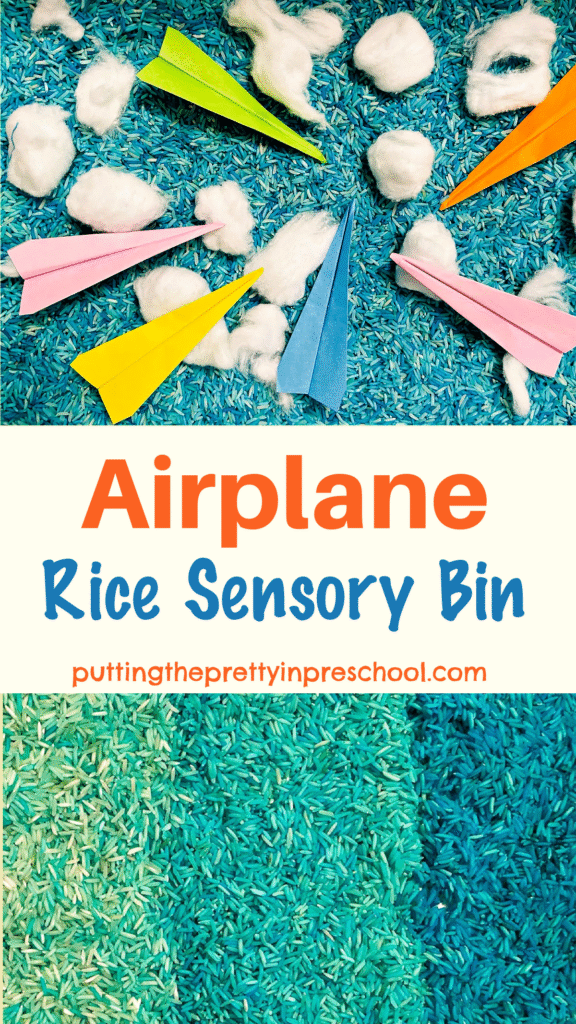
This airplane rice sensory bin is easy to set up and pleasing to the eye. Putting it together is the perfect opportunity to practice how to dye rice in gorgeous blue hues.

_______

How to Dye Rice

_____

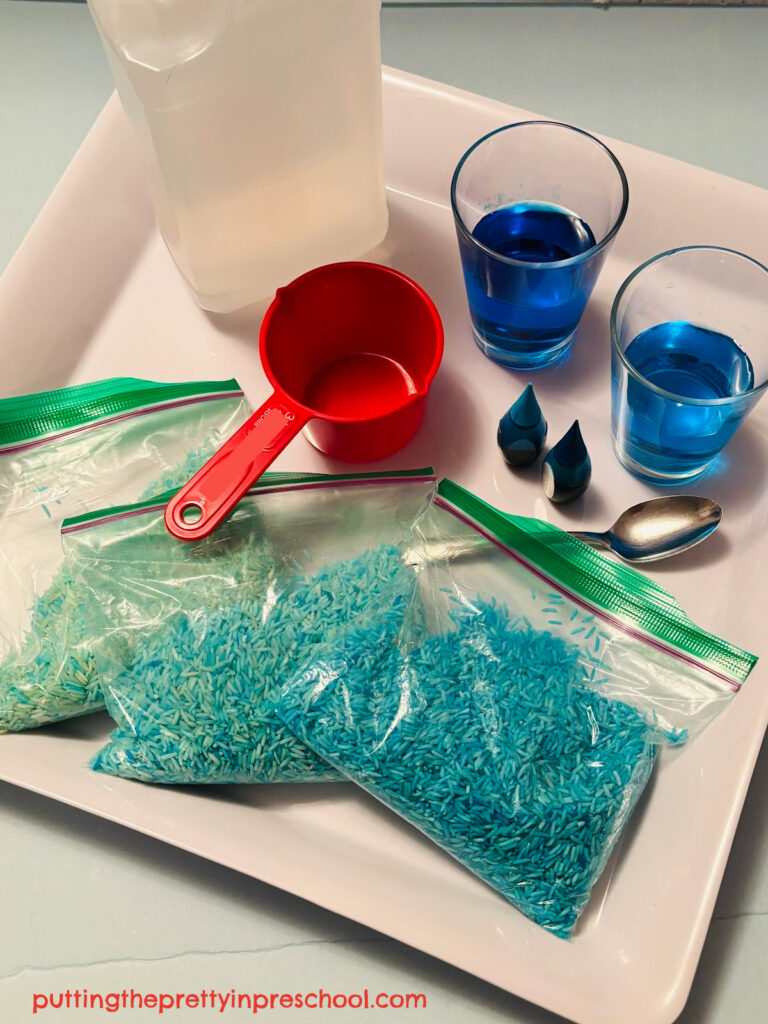
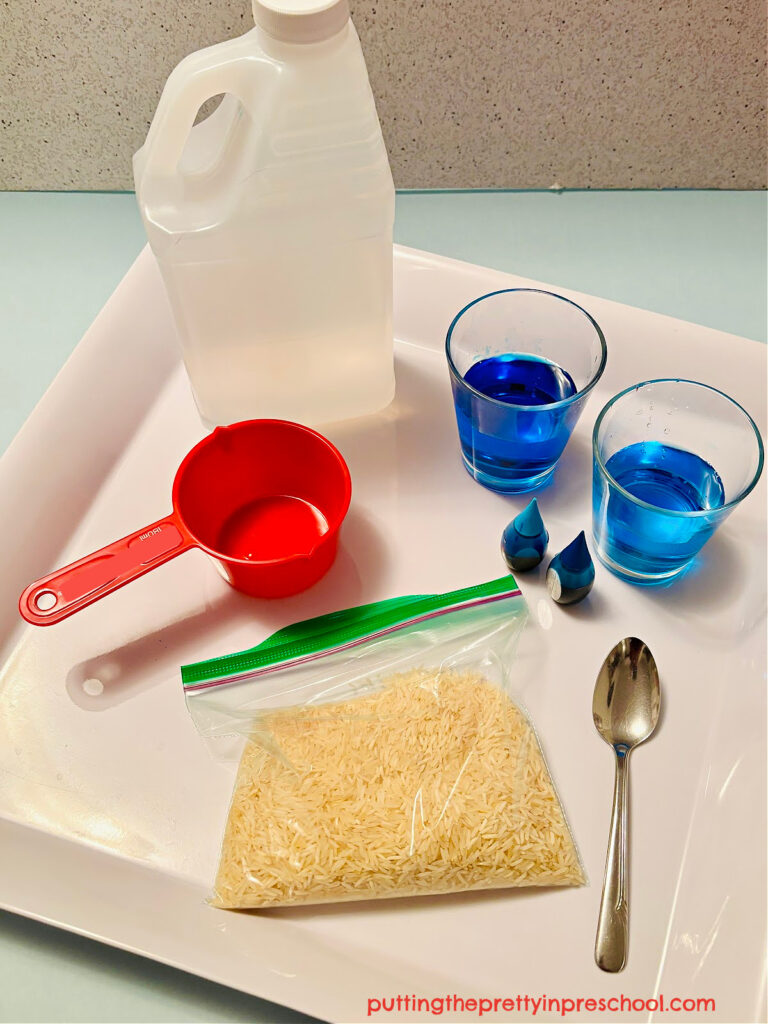
The process of dying rice is super simple and very satisfying! Gather the following supplies:

  • white rice
  • blue food coloring
  • vinegar
  • measuring cup
  • closable sandwich bags
  • teaspoon
  • parchment paper
  • large tray

_______

The Rice Dyeing Process

Dyeing rice is a quick process as rice doesn’t need much drying time. I feature basmati rice for the task, but any kind of white rice will work.

The first step in dyeing the grain is to measure one cup of rice into a closable sandwich bag.

_______

Next, drop in a teaspoon of vinegar.

Afterward, add three generous drops of blue or turquoise food coloring.

Seal the bag and shake and squeeze the contents until the blue color distributes evenly.
Note: An alternative to this method is to add a few teaspoons of vinegar to a jar and stir in the food coloring. Then spoon a teaspoon of colored vinegar into the rice-filled sandwich bag.

If the blue shade of the rice isn’t as dark as you would like, simply add a little more food coloring and vinegar to the bag and shake it some more.

_______

Lastly, spread the colored rice on a large serving tray covered with a sheet of parchment paper and leave it to dry for about twenty minutes. If you do not have parchment paper, just spread the rice on the tray. Any excess food color should wipe off pretty easily with a wet cloth.

The closable sandwich bag is reusable, and more batches of rice can be colored in it.

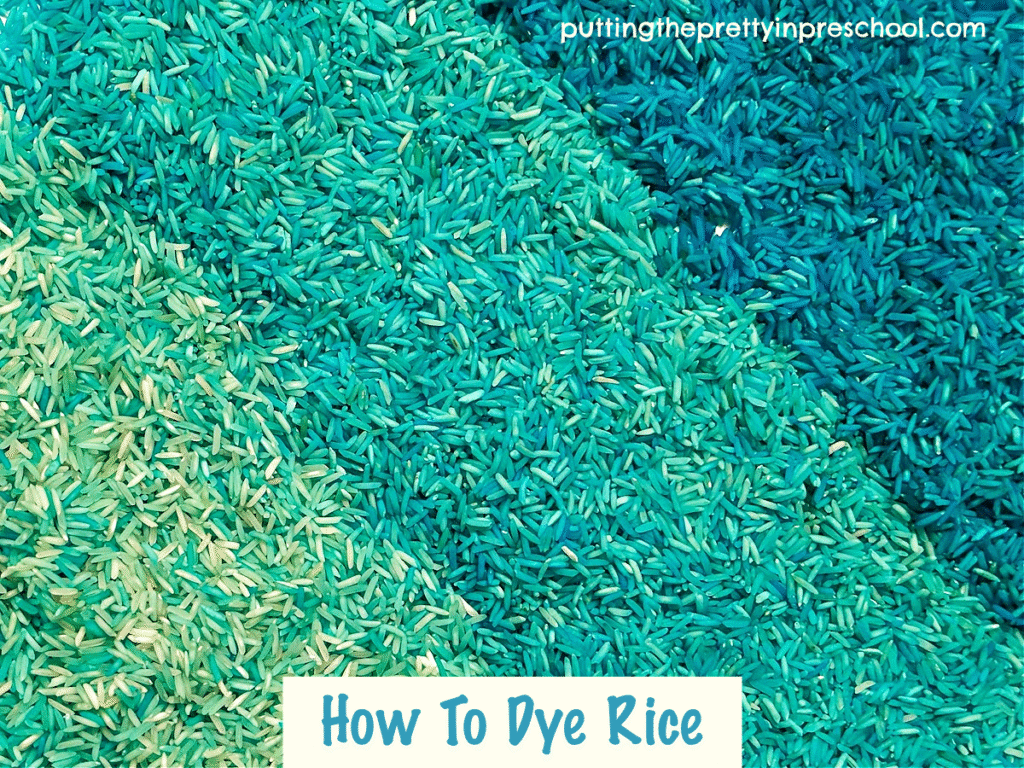
To add variety when dying multiple batches of rice, add a little more vinegar and food coloring to some bags. The mix of lighter and darker hues will add interest to a sensory bin. Using blue and turquoise food colors in different batches also adds contrast.

This activity is perfect for children to participate in, and it is bound to be a hit. Give each child a closable sandwich bag to measure in rice and color it. Or offer them a plastic storage container with a lid to dye the rice. As the ingredients are mixed, the container makes a shaker, adding a musical experience to the activity.

_______

The Airplane Rice Sensory Bin

_______

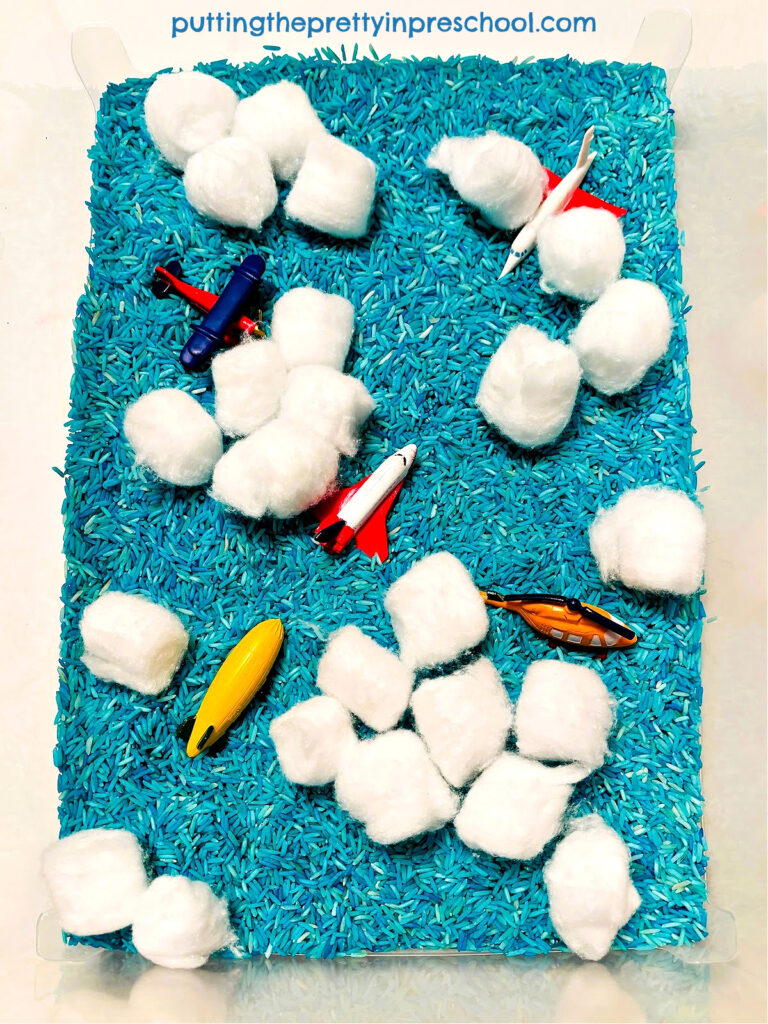
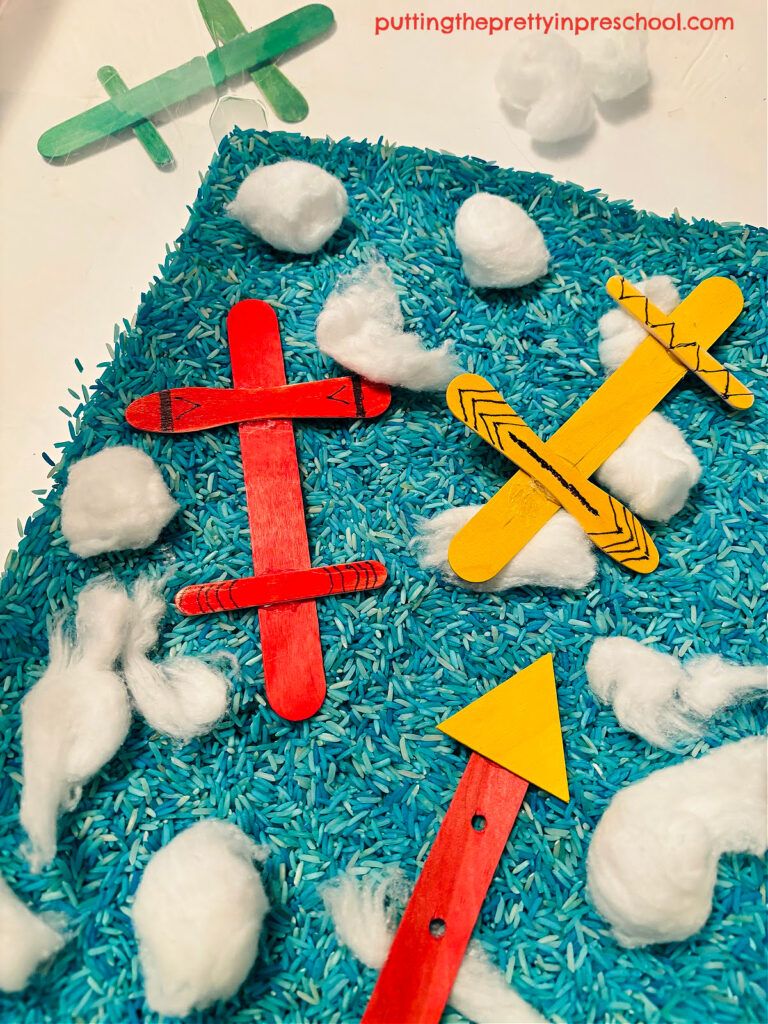
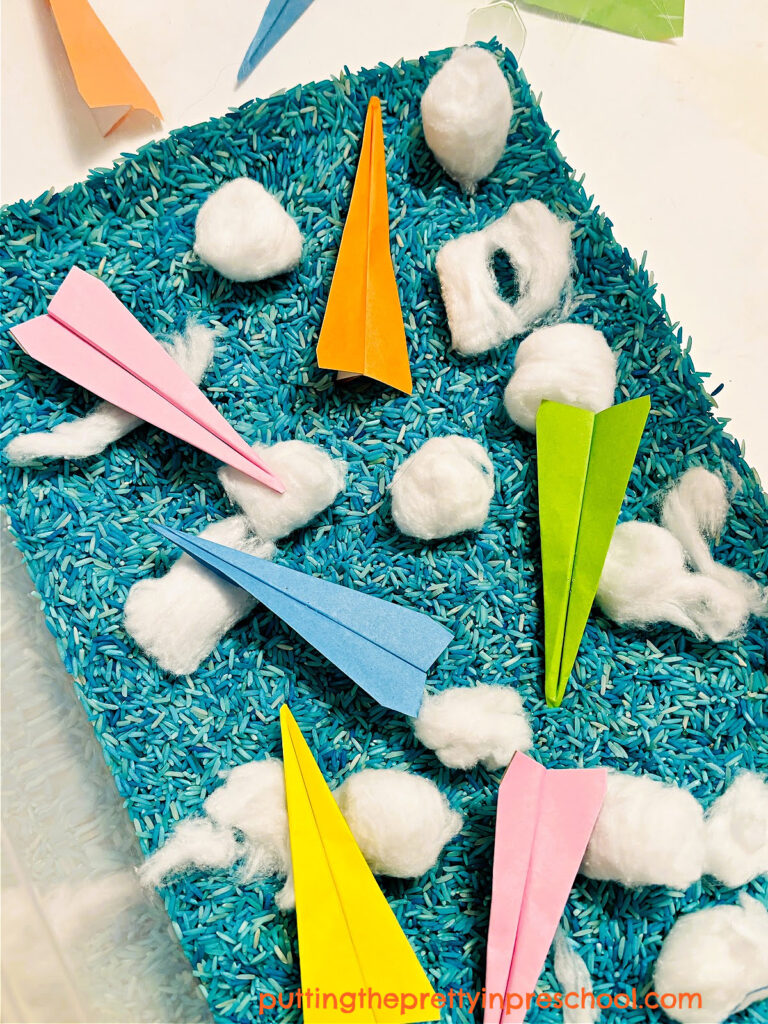
Putting together the airplane rice sensory bin is as easy as dying the rice. Simply pour the rice into a small storage bin. Add a few airplane figurines and some cotton balls for clouds. Or instead of the figurines, add popsicle stick or mini paper planes.

_______

_______

Follow me on Pinterest for more early learning ideas.

_______

More Sensory Bins:

Starry Sky Sensory Bin

Bee and Sunflower Sensory Bin

Lucky Cat Sensory Bin

Unicorn Theme Sensory Play

Easter Bunny Sensory Bins

_______

[Read more…] about Airplane Rice Sensory Bin
Tweet
Share
Share
Pin

Filed Under: preschool, pretend play, science, sensory, transportation Tagged With: airplanes, rice bin, sensory bin

Spring Bunny Sensory Bin

April 19, 2025 by Annette Kaminsky Leave a Comment

Tweet
Share
Share
Pin

_______

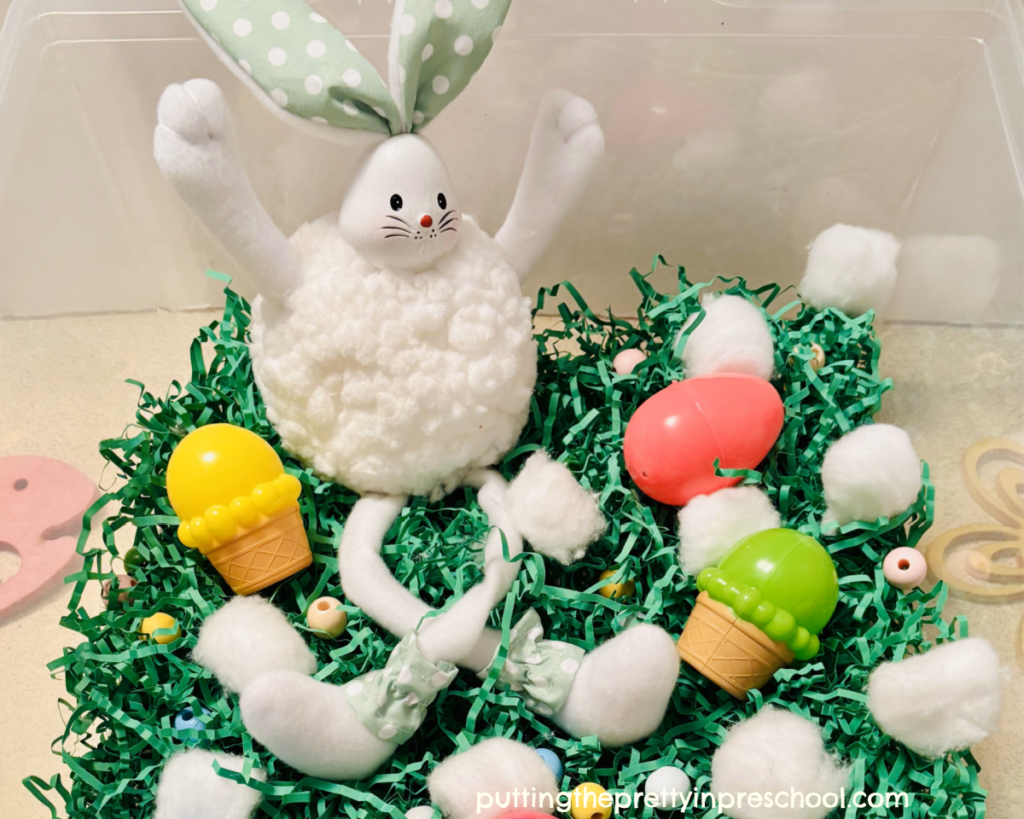
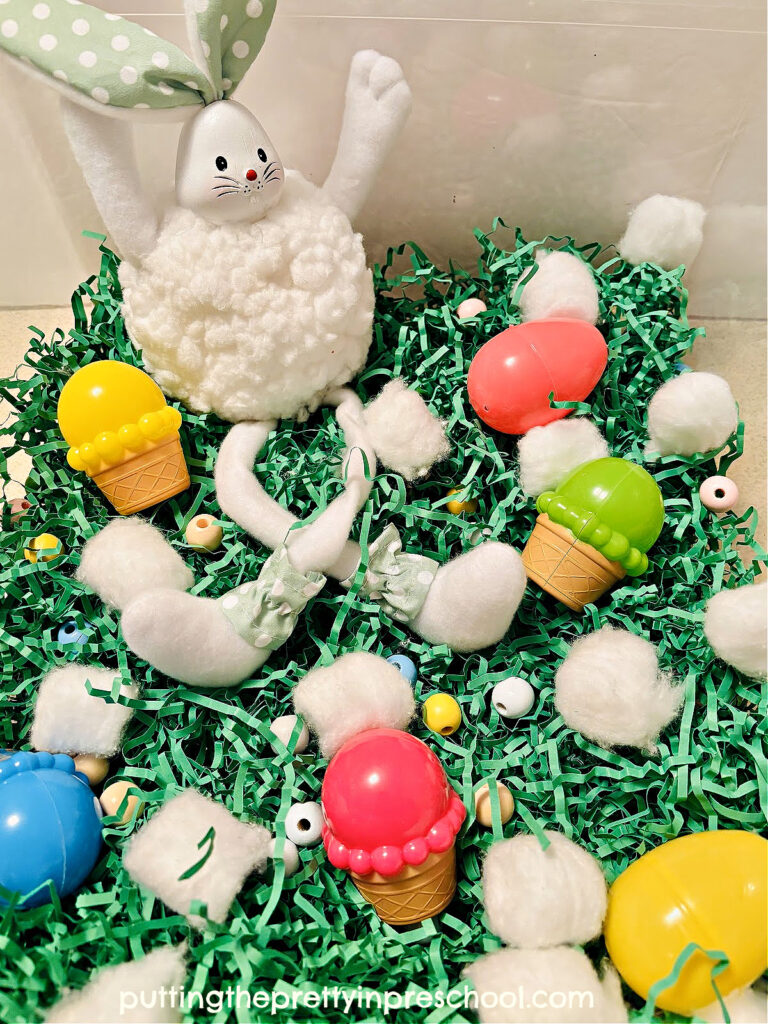
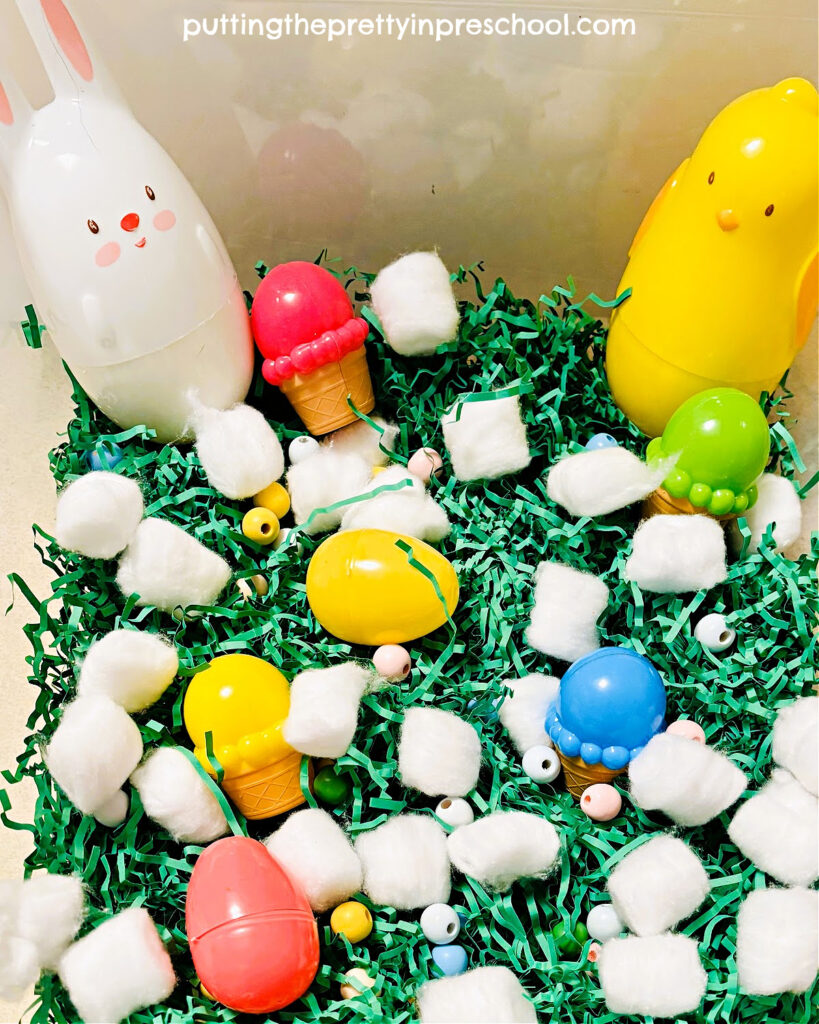
This spring bunny sensory bin is so easy to set up, making it a great last-minute activity. Just a few supplies are needed to make the colorful bin a hit with little learners.

_______

Supplies To Collect

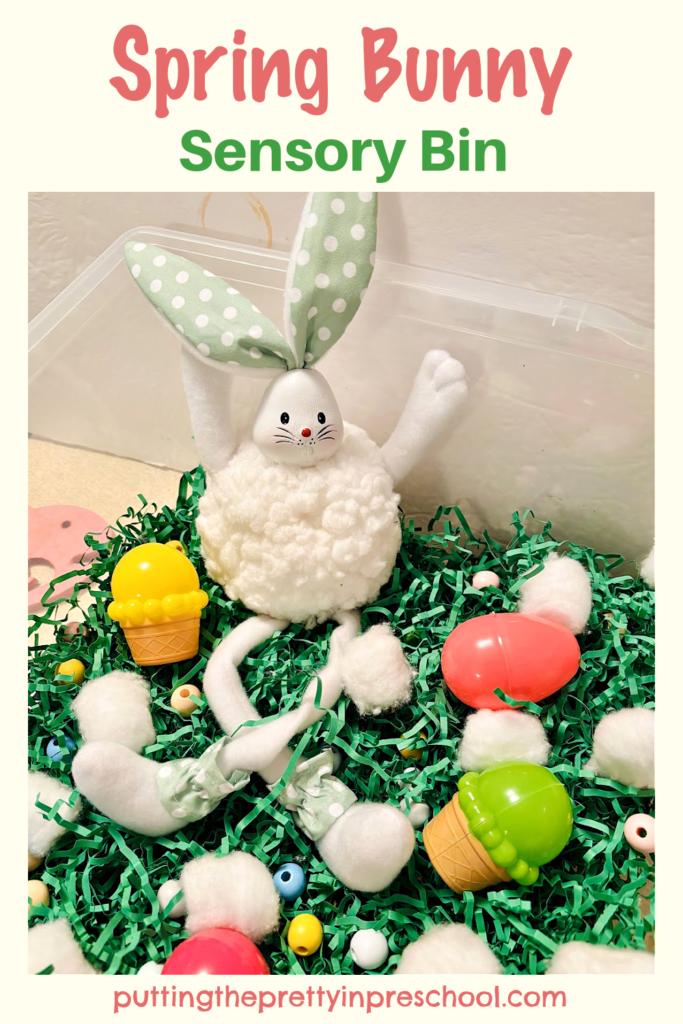
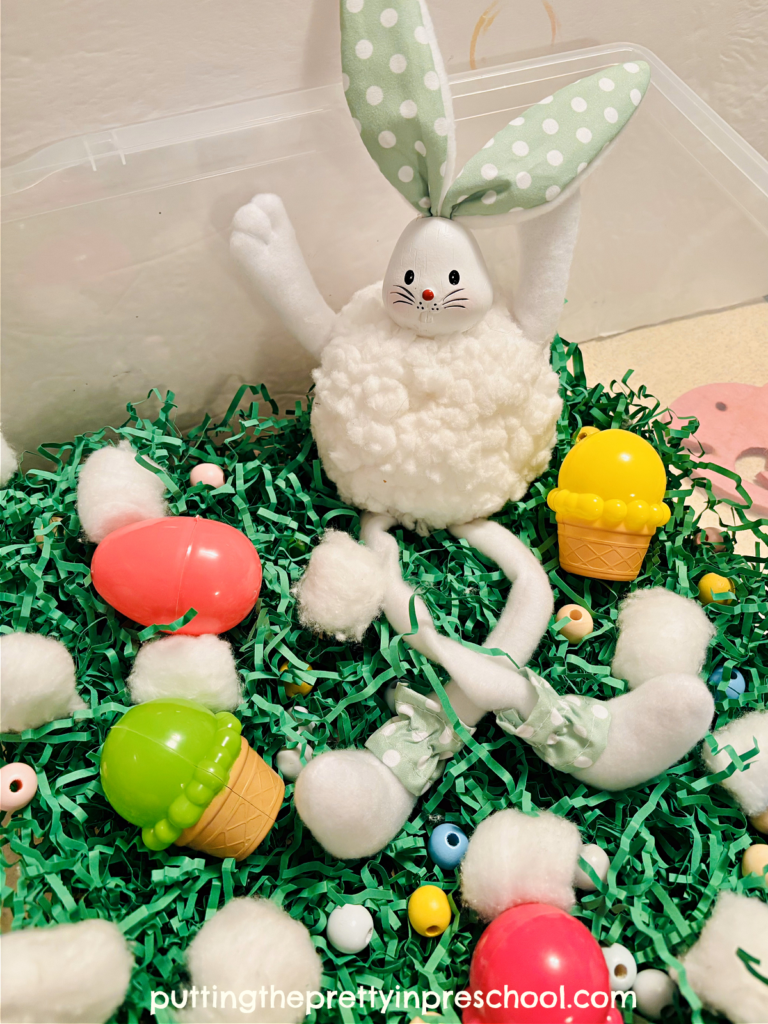
The following supplies are in this oh-so-fun sensory bin, perfect for an Easter or Spring theme:

  • small storage tub
  • green Easter grass
  • ice cream cone-shaped treat holders
  • fillable eggs
  • wooden beads
  • stuffed bunny

_______

_______

The Spring Bunny Sensory Bin

A small, clear storage tub holds the supplies in this bin. This size is ideal for taking sensory activities on the road.

A package of bright green paper Easter grass is the base. Fluffed up, it spreads over the bottom of the bin nicely.

_______

Ice cream cone-shaped treat holders, a new find this year, provide fine motor control opportunities. They would also be fantastic in an ice cream stand center, extending their value as a play accessory.

Cotton balls are a reminder of bunny tails, and can be reimagined as ice cream.

Pastel-hued small wooden beads give participants a chance to practice eye-hand coordination.

_______

A white and green long-legged stuffed bunny is the star of the spring sensory bin.

_______

Follow me on Pinterest for more early learning activities.

_______

Variation of the Spring Bunny Sensory Bin

_______

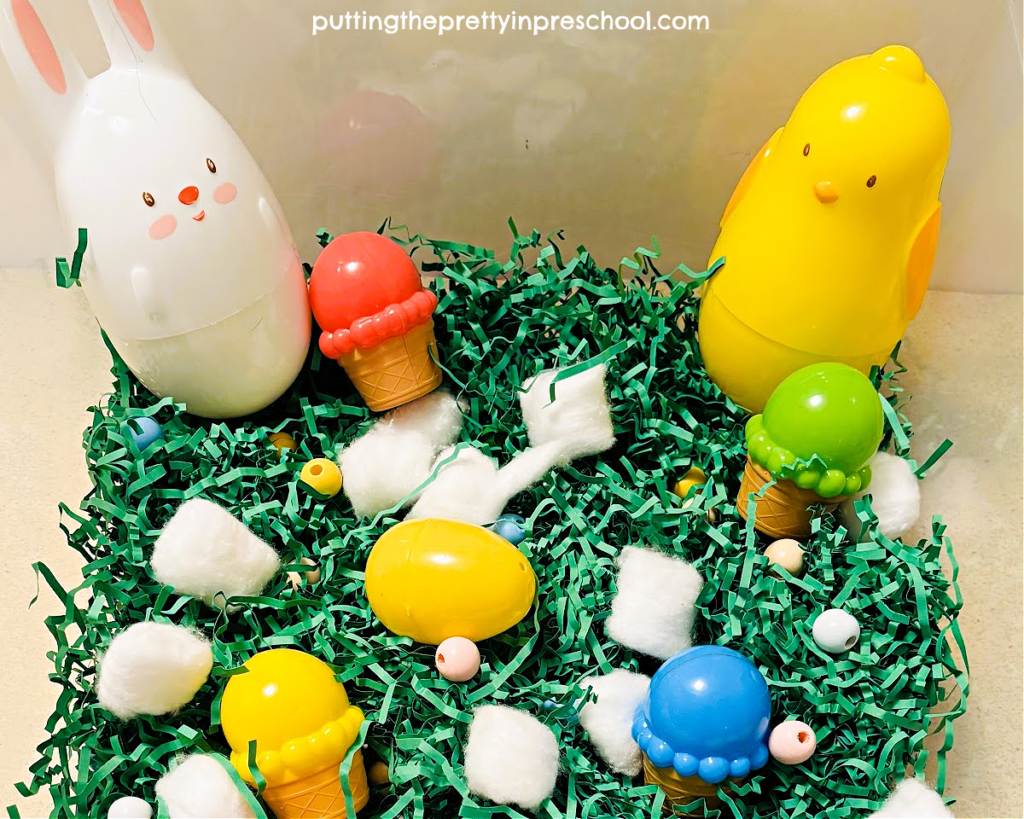
When this sensory bin is set out for a few days, small changes add interest. This second bin features large bunny and chick treat holders instead of the stuffed bunny.

_______

[Read more…] about Spring Bunny Sensory Bin
Tweet
Share
Share
Pin

Filed Under: Easter, preschool, sensory, spring Tagged With: bunnies, Easter, sensory bin, sensory play, spring

Lentil Easter Bunny Sensory Bin

April 15, 2025 by Annette Kaminsky Leave a Comment

Tweet
Share
Share
Pin

_______

Bright pastel pink, turquoise, yellow, green, and purple colors are common in Easter activities and décor, but Easter eggs come in many themes and color combinations. A set of natural, fillable, camouflage eggs inspired this lentil Easter bunny sensory bin.

_______

Supplies in the Easter Bin

Just the following few supplies were collected for this simple spring sensory bin:

  • storage tub
  • red lentils
  • bunny and carrot treat holders
  • pom pom bunnies
  • fillable camouflage eggs
  • foam Easter beads
  • green bunny-shaped erasers
  • small wooden bunnies
  • spoons

_______

_______

Follow me on Pinterest for more early learning activities.

_______

The Lentil Easter Bunny Sensory Bin

A small, clear storage tub holds the supplies in this bunny-themed bin. This sized tub is ideal for on-the-go sensory activities as it is easy to pack up and transport.

Tiny disc-shaped red lentils (which are actually orange) provide the sensory base. They are packed with color, so no dying ingredients are needed. So easy!

_______

Large green camouflage fillable eggs, a pink bunny, and an orange carrot allow filling and pouring activities. When closed, they make excellent shakers.

_______

White rubber pom pom bunnies, green foam Easter beads, green bunny erasers, and small wooden bunnies are fun fillers for the treat holders.

Spoons are always a welcome addition to sensory bins.

_______

What do you think about this activity?

_______

Related: Easter Art Activities

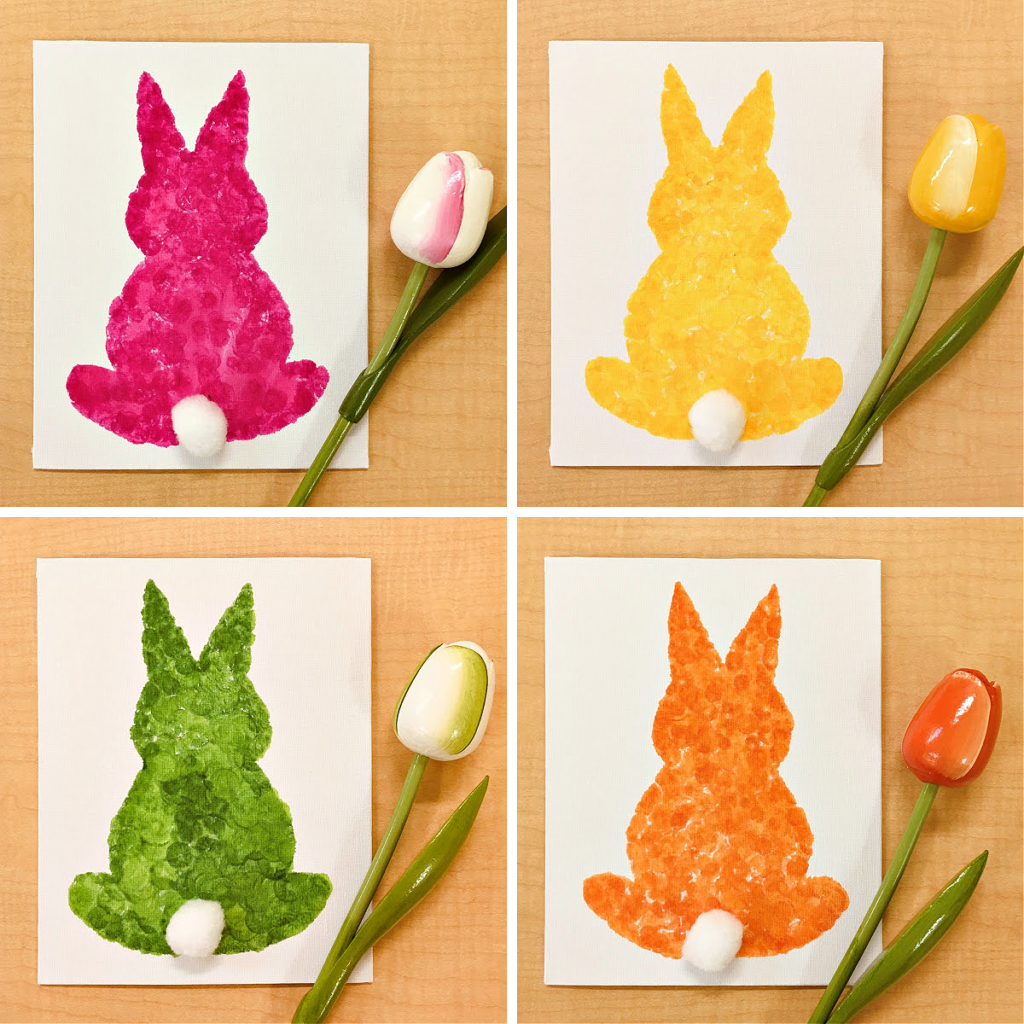
Silhouette Bunny Art
Easter Transient Art
Bunny Rolling Pin Art
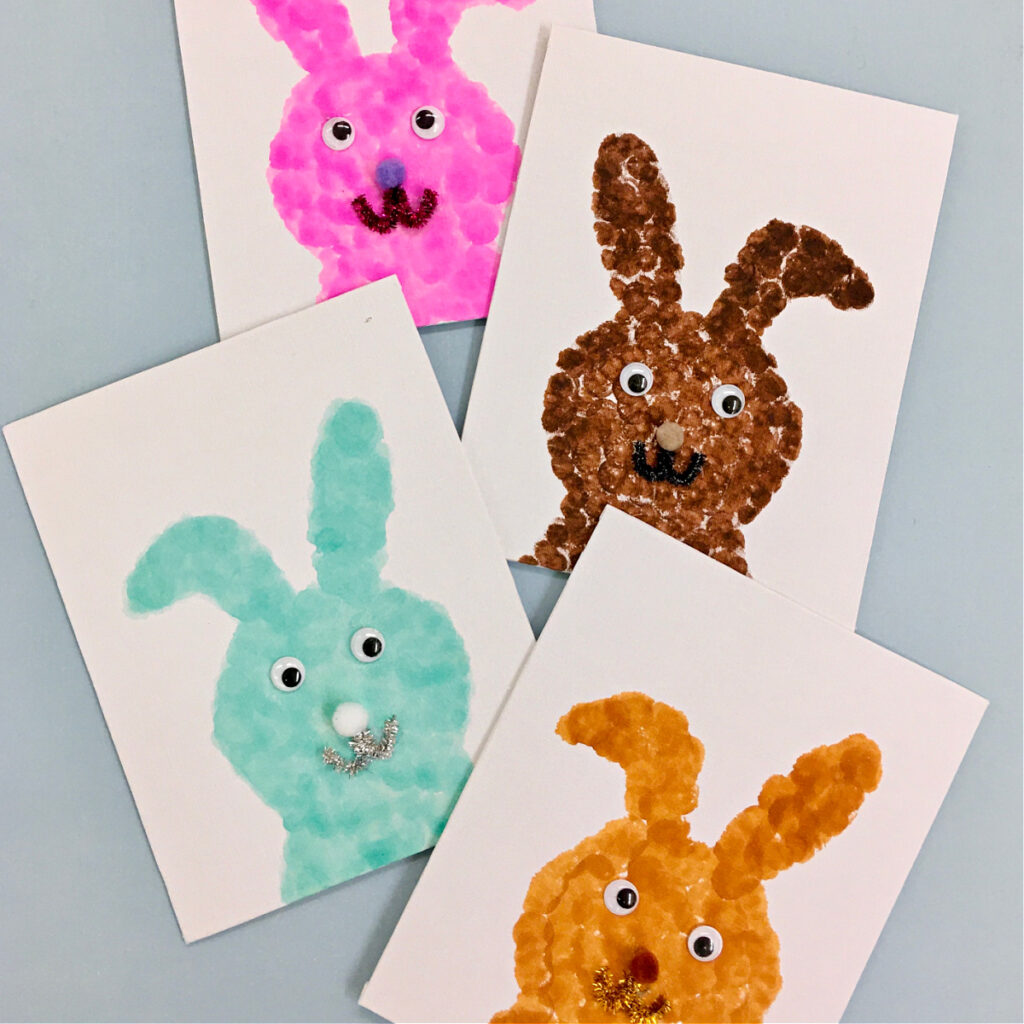
Dot Marker Easter Bunnies
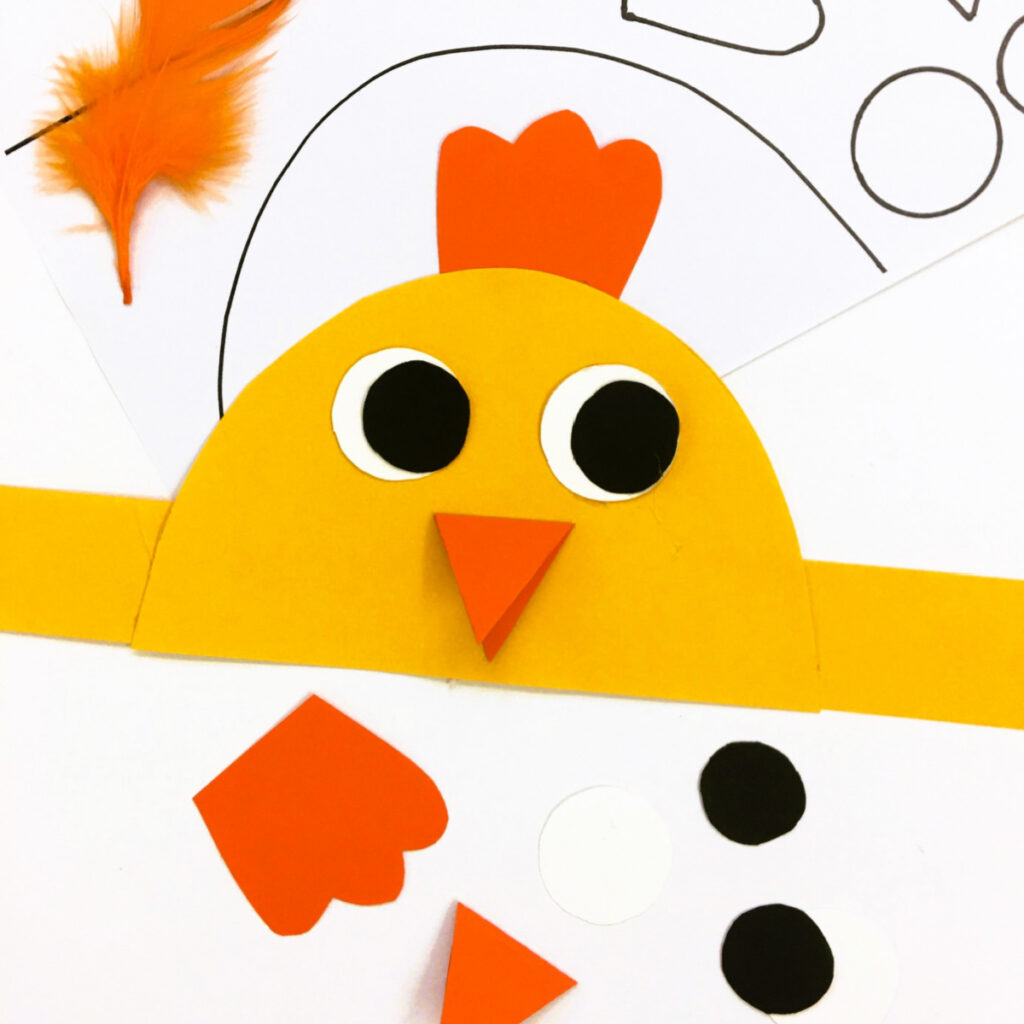
Chick Headband Craft
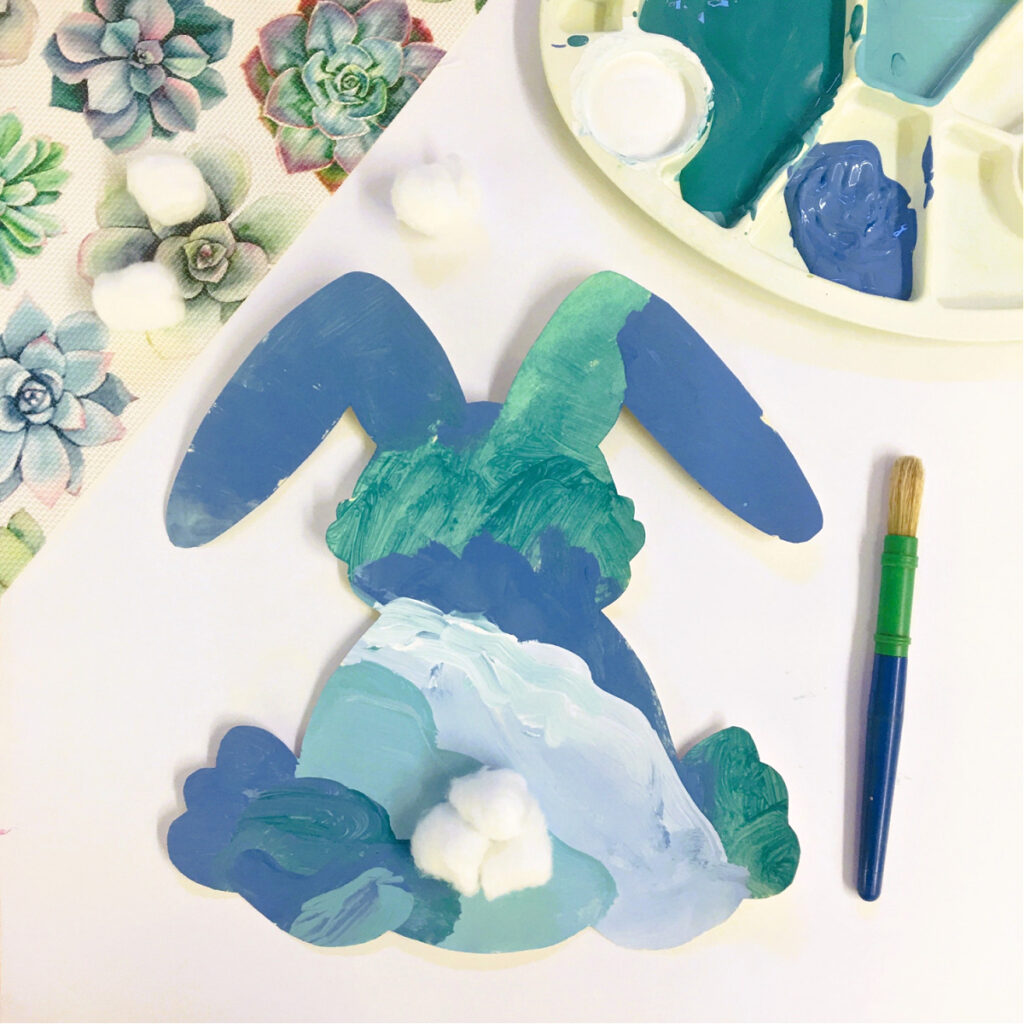
Bunny Ombre Art

_______

[Read more…] about Lentil Easter Bunny Sensory Bin
Tweet
Share
Share
Pin

Filed Under: animals, Easter, preschool, sensory, spring Tagged With: bunnies, Easter, lentils, sensory bin, sensory play, spring

Black History Month Mixed Media Art

February 26, 2025 by Annette Kaminsky Leave a Comment

Tweet
Share
Share
Pin

_______

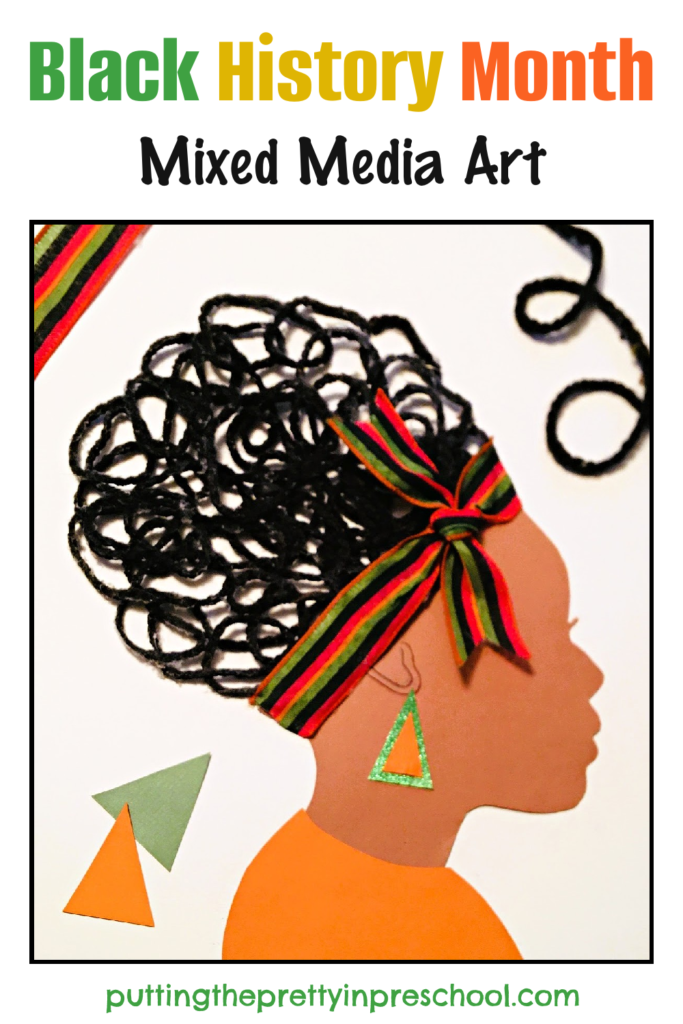
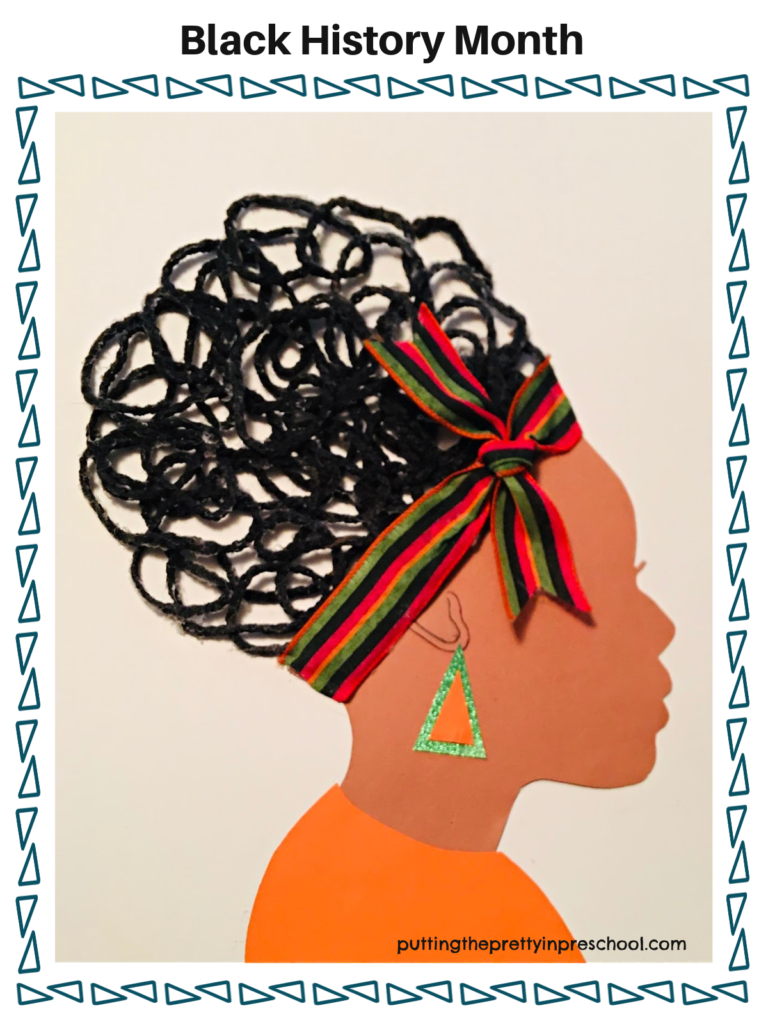
Black History Month is observed in February in the United States and Canada. It is a time to celebrate the creativity and achievements of Black people and their communities by participating in activities and discussions. This Black History Month mixed media art project draws attention to the beauty of black women’s hair. The craft features a unique technique for creating curly hair.

_______

Supplies To Collect

For this mixed media art project that pays homage to Black History Month, gather the following:

  • black yarn
  • brown, orange, and green construction paper
  • 14-inch x 16-inch sheet of white construction paper
  • 1 ½ inch wide wired craft ribbon
  • white glue
  • black fine point marker
  • parchment paper
  • scissors and pencil
  • glue stick and glue gun
  • disposable plate
  • measuring cup
  • spoon
  • tray

_______

Starting the Mixed Media Art Project

_______

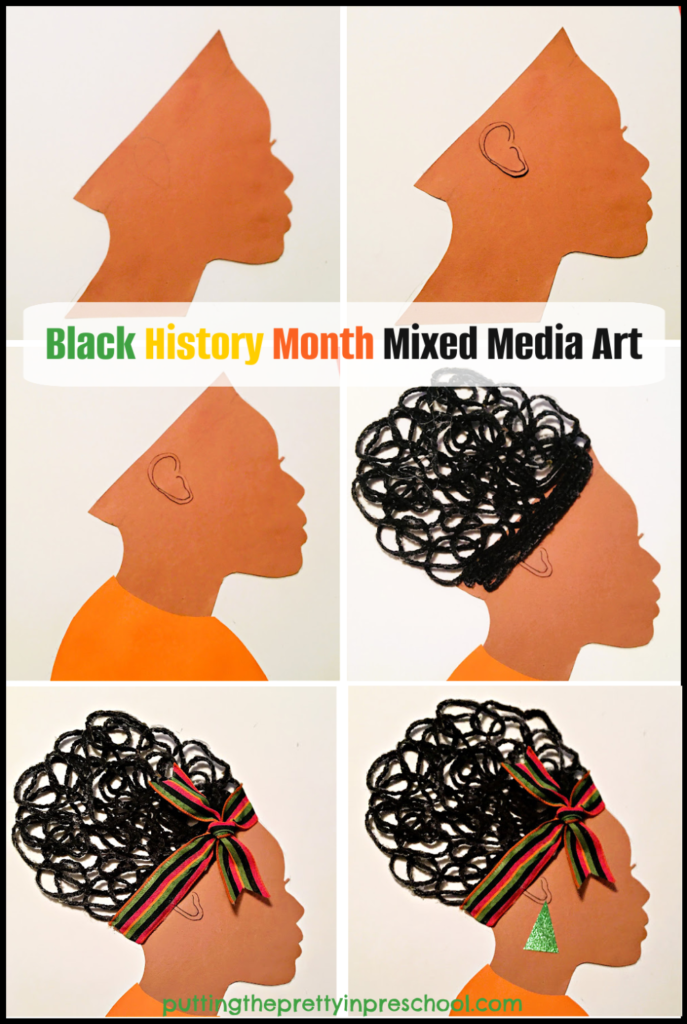
To begin this art project, draw a side view of a woman’s head on brown construction paper and cut it out.

Next, draw and cut out one ear from the same sheet of paper, and the top of a t-shirt from orange construction paper.

Then draw a few lines on the ear with a black fine-point marker to add detail.

After this step, cut two small triangles from green and orange sturdy paper to fit together as an earring.

Then cut two strips of wired craft ribbon, one measuring 12 inches long, and the other measuring 9 inches long.

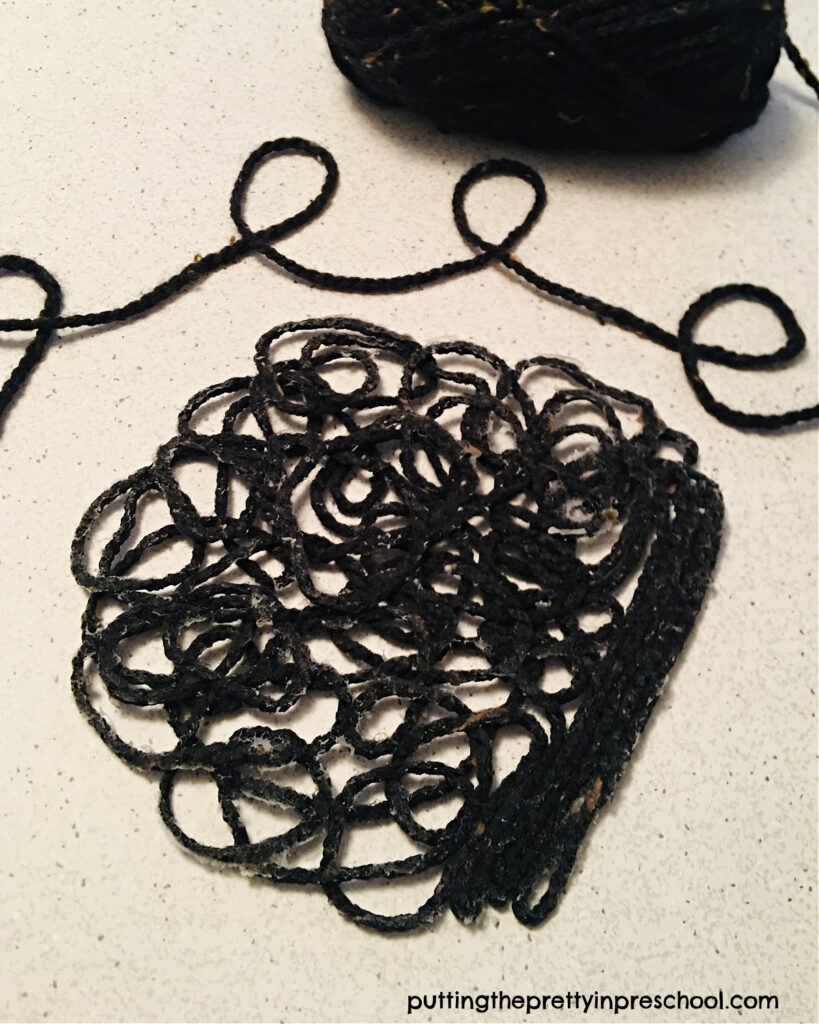
Next comes the part that may be the most fun: creating the curly yarn hair. To fashion the hair, complete the following steps:

1) Draw a silhouette outline of the hair in the middle of a large sheet of parchment paper. Then place the parchment paper on a tray.

2) Mix one-half cup of white glue with one-half cup of water on a disposable plate.

3) Using a spoon, press down a long piece of black yarn in the gooey white mixture to completely cover it in glue.

_______

4) Slowly lift the yarn out of the thinned glue and spread it around the hair outline in swirls. Add a second layer of swirled yarn and gently press it down on the first layer so the yarn sticks to itself when dry. Add a few straight lines at the hairline.

5) Let the sculptured yarn hair dry for one or two days. When dry it lifts off the parchment paper easily.
Note: The glue-soaked yarn hair may look grey at first, but will appear black again as it dries.

This swirled yarn art process was a must-try for me after viewing an informative September 4. 2024 Instagram post by mykidsartbox.

_______

Follow me on Pinterest for more early learning ideas.

_______

Assembling the Black History Month Art

Now it is time to assemble the gorgeous art activity. Complete the following steps:

1) Select a large piece of sturdy paper to glue all the arty shapes onto. I feature paper cut to a 14-inch x 16-inch size.

2) Position the crafted pieces on the background paper and note where they look best. Drawing light pencil lines to mark the perfect spot for each shape makes this easier and the lines can be erased at the end.

_______

3) Use a glue stick to adhere the head, ear, triangular earring, and shirt portion to the paper.

4) Carefully affix the curly hair over and above the face with a glue gun.

_______

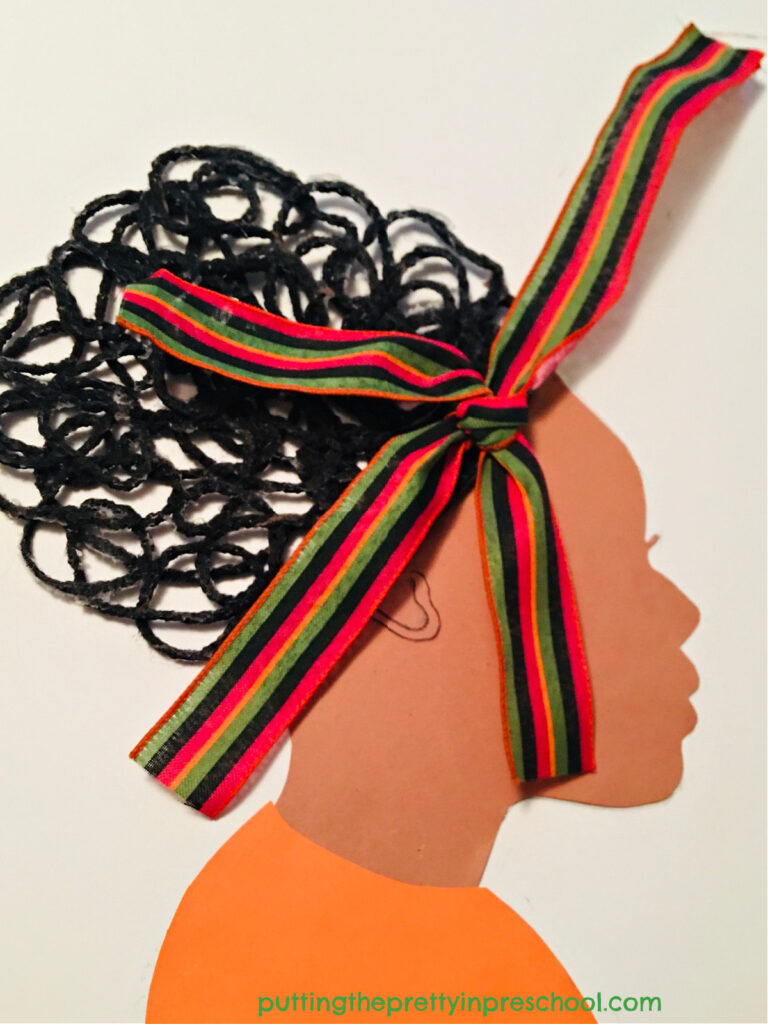
5) Fashion two strips of wired craft ribbon into a knotted headband. Cut the ribbon ends to the correct size and fold in the outer edges to fit around the yarn hair above the hairline.

6) Use the glue gun to adhere the headband over and above the bottom edge of the curly hair.

7) Add a caption for Black History Month if desired.

_______

When making the Black History Month mixed media art project, feel free to work with a color scheme of your choice. What do you think of this activity?

_______

_______

Black History Month Positive Affirmations

This Black History Month printable set has coloring pages with 18 positive affirmations and 4 editable pages. Many creative patterns inspired by African art are possible, all with basic art supplies. Two bulletin board headers make displaying the stunning finished artwork super easy. Download this easy-to-use printable set at my Etsy Skills N Smiles shop for an everyday low price.

_______

See the blog post Black History Month Positive Affirmations Art for more infomation.

_______

_______

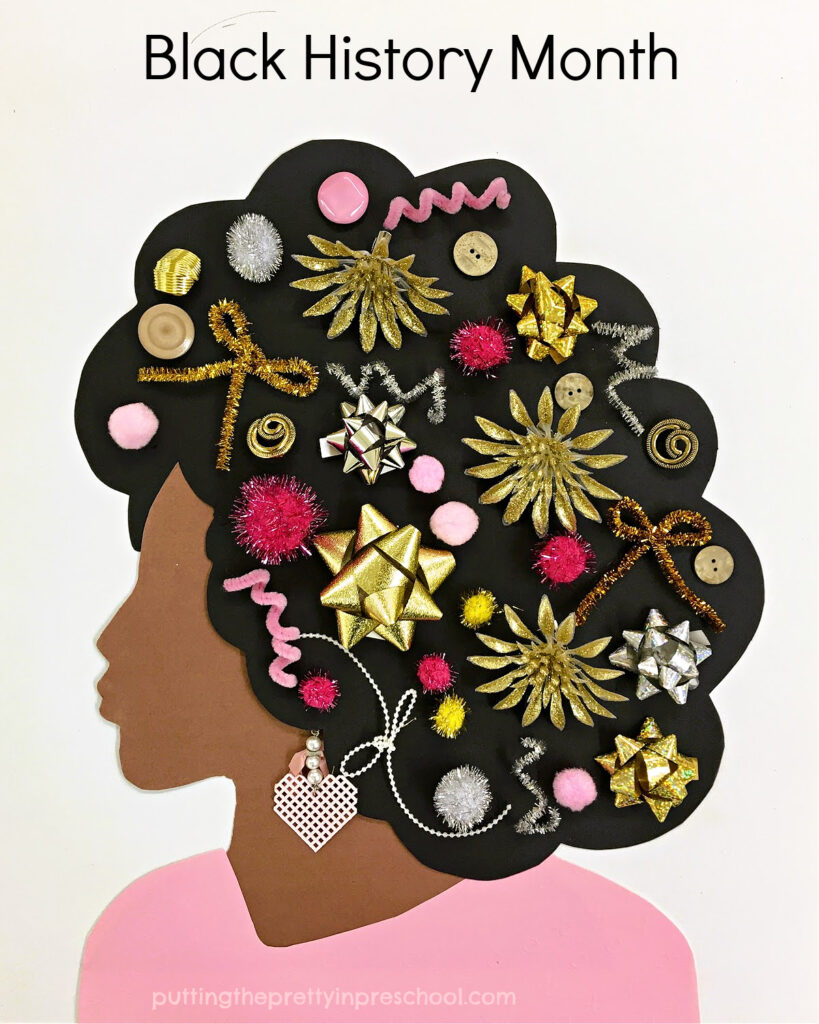
Related: Black History Month Hair Decorating Art

_______

[Read more…] about Black History Month Mixed Media Art
Tweet
Share
Share
Pin

Filed Under: art, Black History Month, crafts, preschool, sensory Tagged With: art, Black History Month

  • « Go to Previous Page
  • Page 1
  • Page 2
  • Page 3
  • Page 4
  • Page 5
  • Page 6
  • Interim pages omitted …
  • Page 42
  • Go to Next Page »

Primary Sidebar

Hi, I'm Annette Kaminsky, a preschool teacher who loves sharing learning through play activities for young children. Thanks for visiting my site. Feel free to stay awhile!

Subscribe Via Email

Recent Posts

  • Teacher Appreciation A to Z Alphabet June 21, 2026
  • Expanding Balloon Science Experiment May 18, 2026
  • Earth Day Spin Painting April 21, 2026
  • Easter Bunny Scavenger Hunt April 4, 2026
  • Celebrate Diversity Coloring Pages March 1, 2026
  • Lunar New Year Lantern Craft February 11, 2026
  • Black History Month Positive Affirmations Art January 29, 2026
  • Snowflake Cafe Dramatic Play Set January 19, 2026
  • Pastel Christmas Letterhead and Envelope December 20, 2025
  • December Kindness Activities November 30, 2025

Categories

Topics

apples bunnies butterflies Chinese New Year Christmas Christmas craft color colors dramatic play Easter fall flowers hearts holiday jewelry leaves leprechauns light table loose parts painting paper crafts playdough pretend play printables printmaking process art pumpkins rice bin scented playdough science experiment scissor skills sensory bin sensory play sensory tray shamrocks skeletons snakes snowflakes spiders spring St. Patrick's Day sunflowers tablescapes Valentine's Day water play

Copyright © 2026 · Lifestyle Pro on Genesis Framework · WordPress · Log in