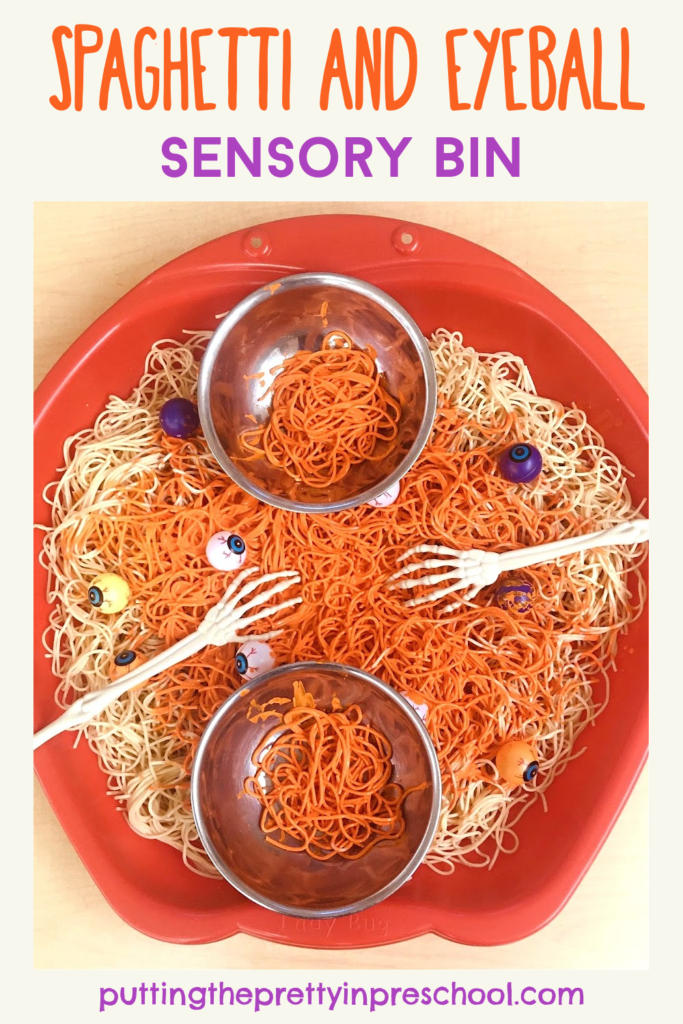
_______
On a recent trip to a Dollar store, I picked up a pair of skeleton arms to add to my growing supply of bony resources. In the checkout line, a man turned around, smiled, and announced “Grandma’s spaghetti scoops.” I took the comment in humor, and immediately thought it would be fun to use the skeleton props in a spaghetti and eyeball sensory bin. The sensory invitation was a hit with my little learners, and I highly recommend trying it.
_______
Follow me on Pinterest for more early learning ideas.
_______
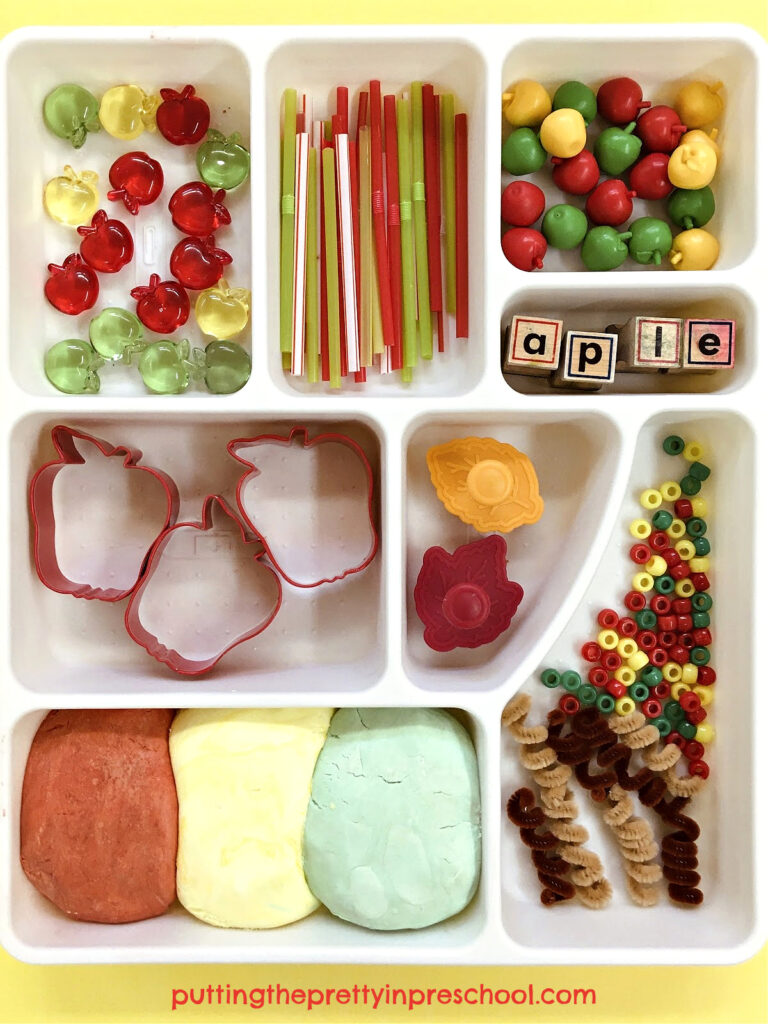
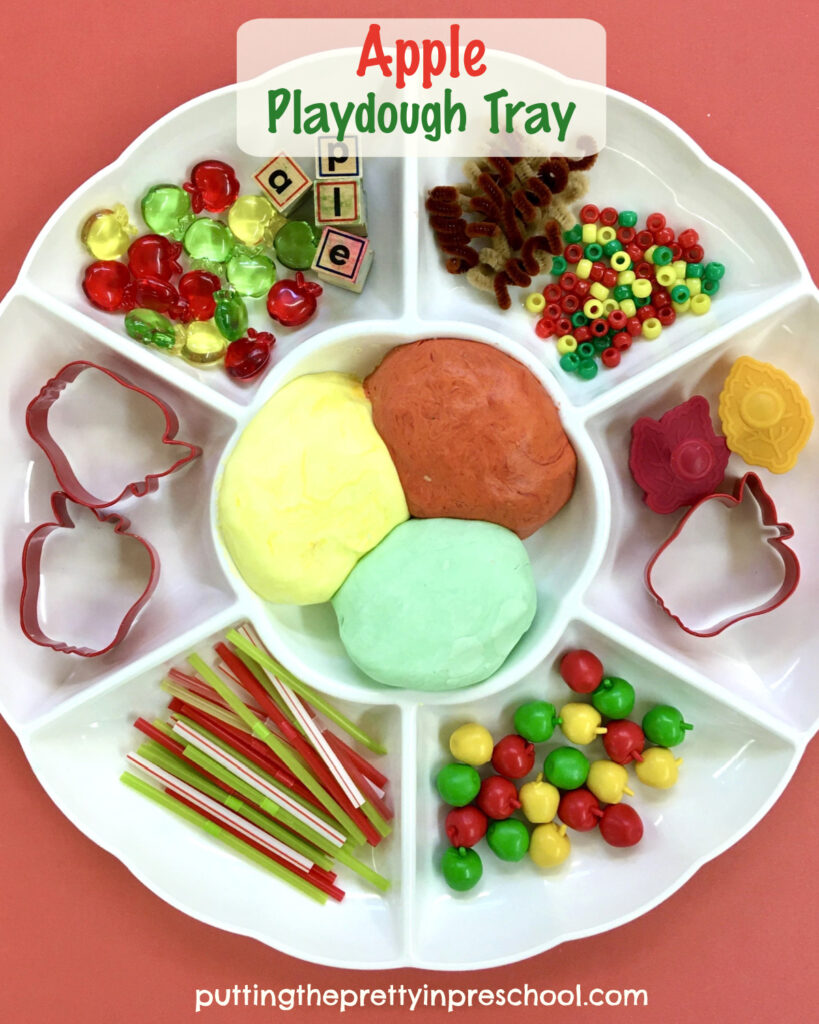
Supplies To Collect
For this ooey-gooey sensory bin, gather the following supplies:
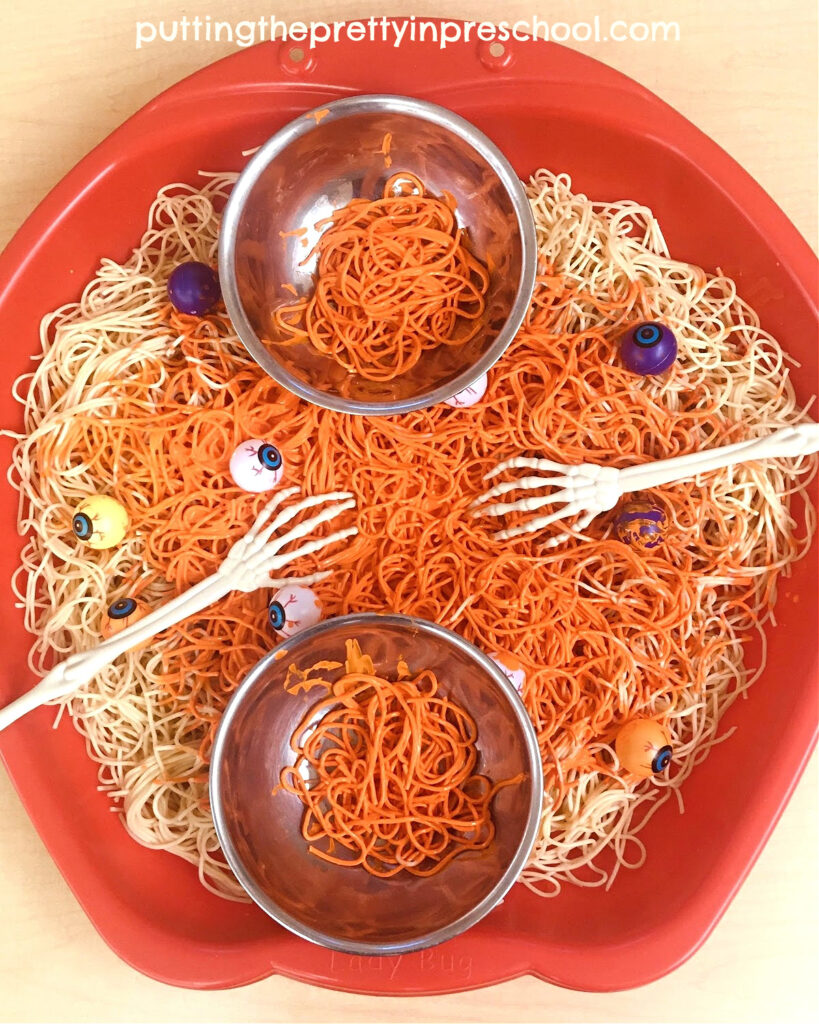
- saucer sled
- large package of spaghetti noodles
- big pot
- orange tempera paint
- toy eyeballs
- pair of skeleton arms
- two bowls
- painting aprons
_______
Spaghetti and Eyeball Sensory Bin Preparation
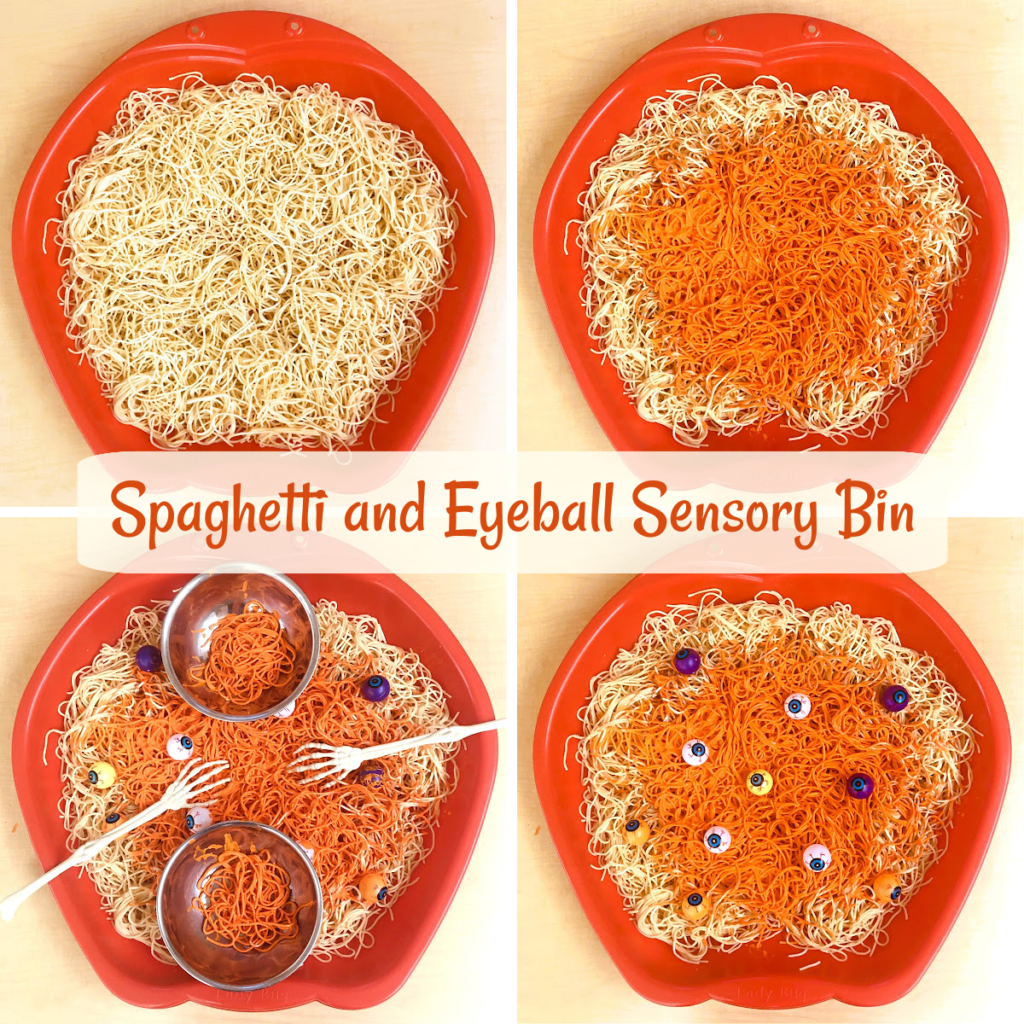
_______
To prepare this slimy sensory bin, cook a large package of spaghetti noodles in a big pot.
Next, pick a bin or tray to hold the cooked noodles. A saucer sled is a good size for this sensory invitation. It is neither too small nor too large to hold this amount of noodles. A bus bin or similar-sized storage tub would work nicely too.
Then slide the noodles into your bin of choice, and spread them around.
_______
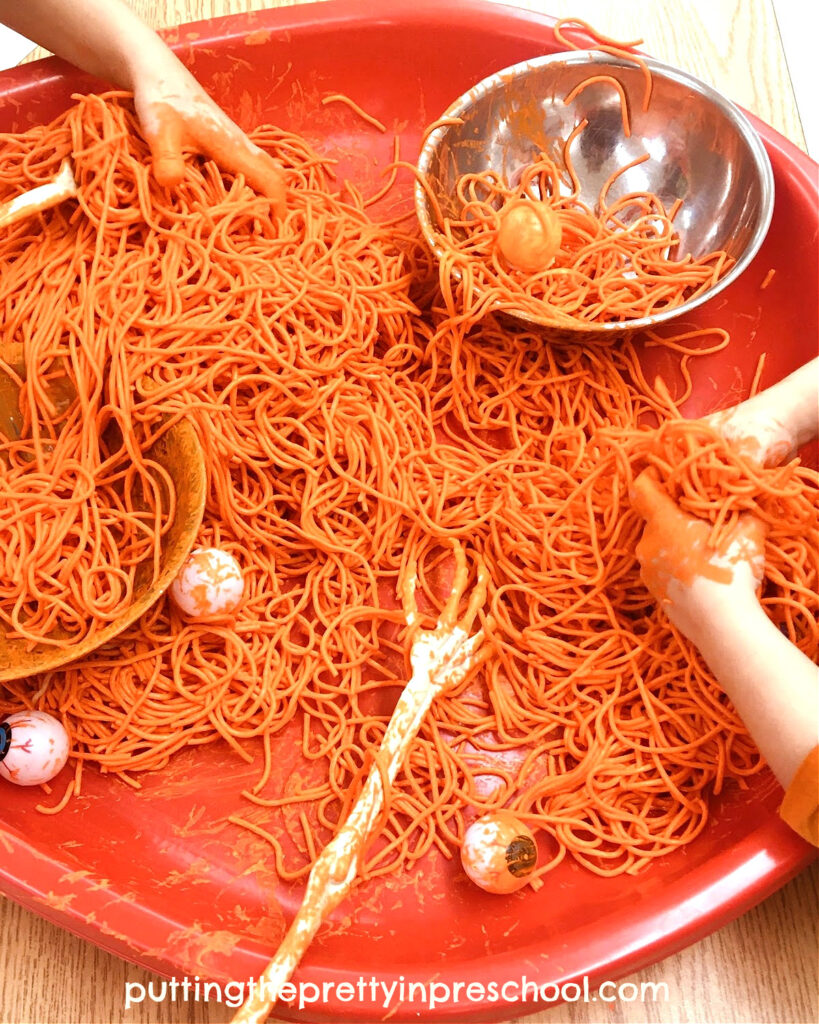
Afterward, mix three parts of orange tempera paint with one part of water. Pour the thinned paint over the noodles so that it looks like spaghetti sauce.
Next, add toy eyeballs to the bin to represent meatballs.
Finally, place two bowls and a pair of skeleton arms in the slippery, mushy bin. The skeleton arms will serve as spaghetti scoops.
_______
The Spaghetti and Eyeball Sensory Bin
In offering this noodle-based sensory bin to little learners, you’ll find out which children love to get covered in paint, and which ones prefer not to. Not everyone will want to explore the bin, but it will likely be a huge hit with most.
A saucer sled sensory bin is perfect for two children to play in at a time.
_______
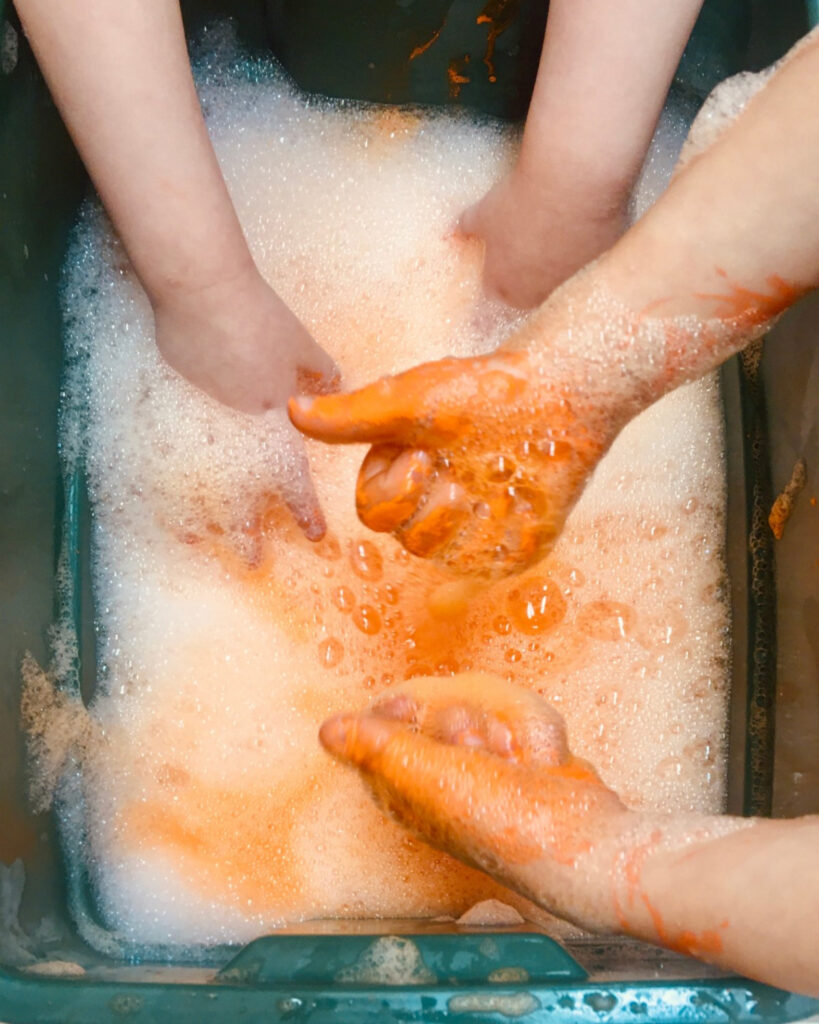
Having participants wear a painting apron is encouraged, as well as setting up a hand washing station close by.
Washing hands in a tub after exploring the noodle bin is as fun as playing in it. The orange water and bubbles created by handwashing will delight little learners and add to the sensory experience.
_______
Taste-Safe Spaghetti Sensory Bin
To make this spaghetti and eyeball sensory bin taste safe, use a mildly spiced spaghetti sauce instead of tempera paint for the noodle-based sensory activity.
_______
More Skeleton Activities
Skeleton and Eyeball Waterplay
_______
[Read more…] about Spaghetti and Eyeball Sensory Bin