_______
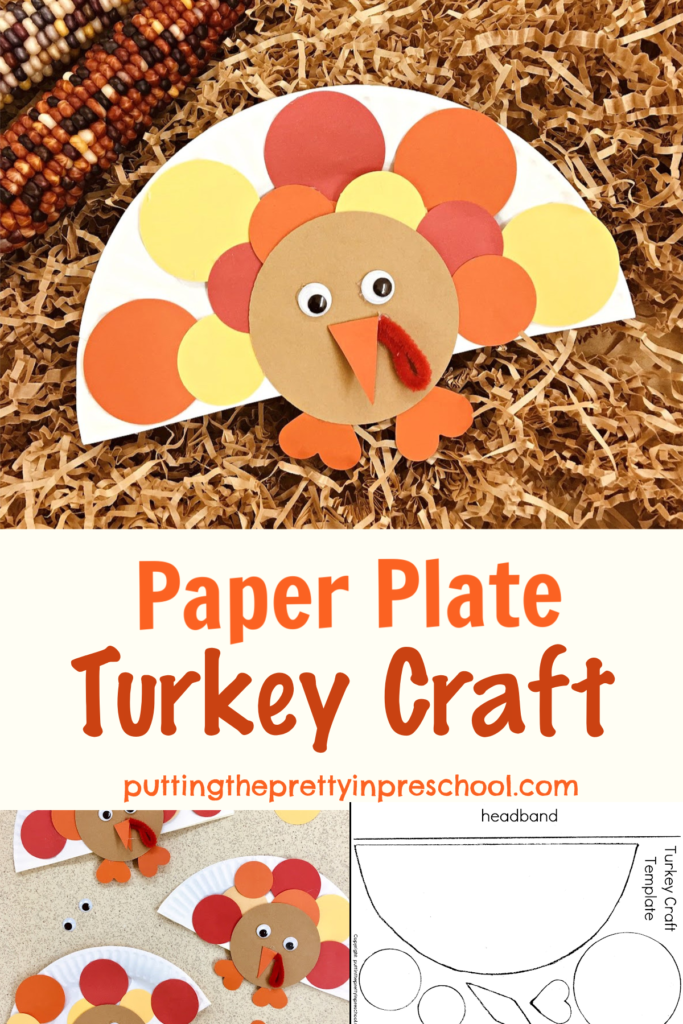
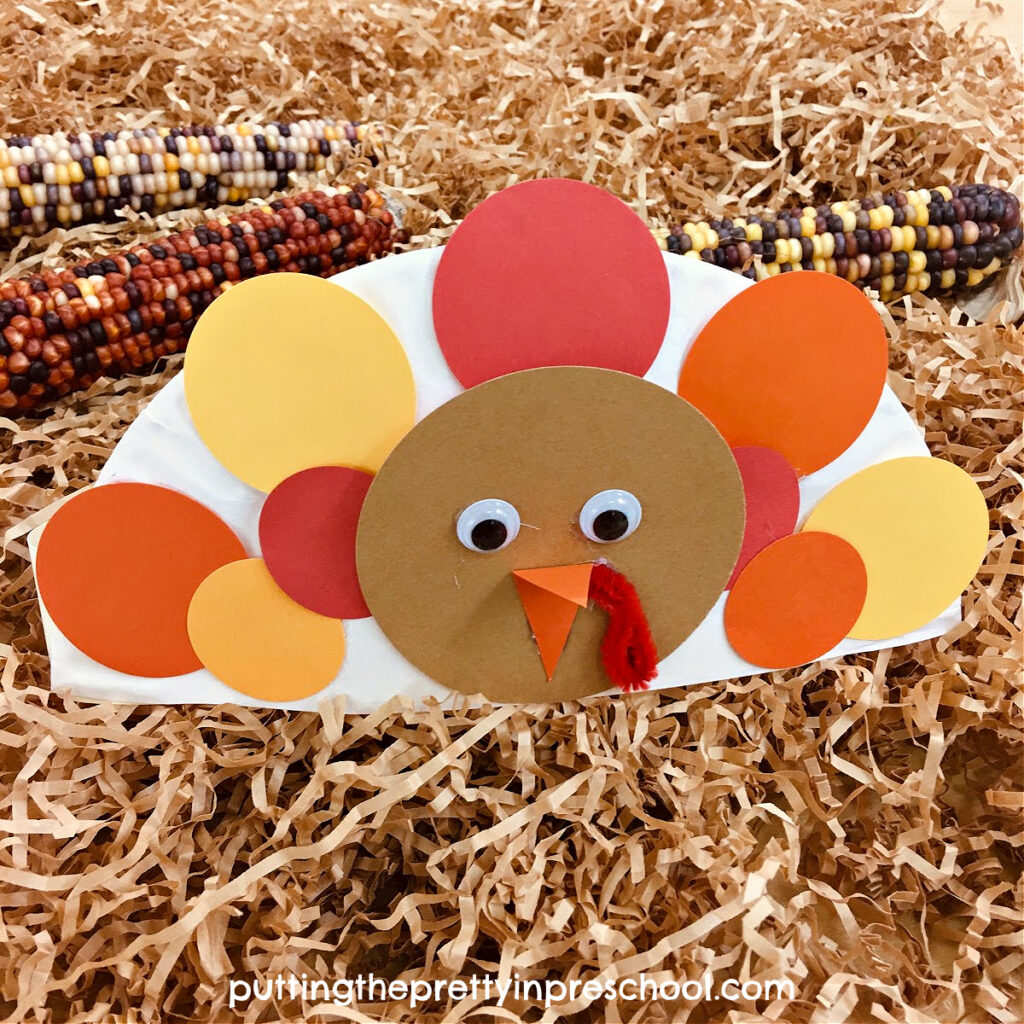
Paper plate crafts are always a hit, and this paper plate turkey craft is a super cute one. Fit it during a farm animal theme or letter T mini-theme, or save it for a Thanksgiving Day celebration. Download the free turkey template to prepare this craft with ease.
_______
Follow me on Pinterest for more early learning ideas.
_______
Supplies To Collect
For this adorable farm animal craft, gather the following supplies:
- large paper plate
- red, yellow, orange, and brown construction paper or cardstock
- red pipe cleaner
- wiggly eyes
- white glue and glue paddle
- glue stick
- glue gun
_______
Paper Plate Turkey Prep
_______
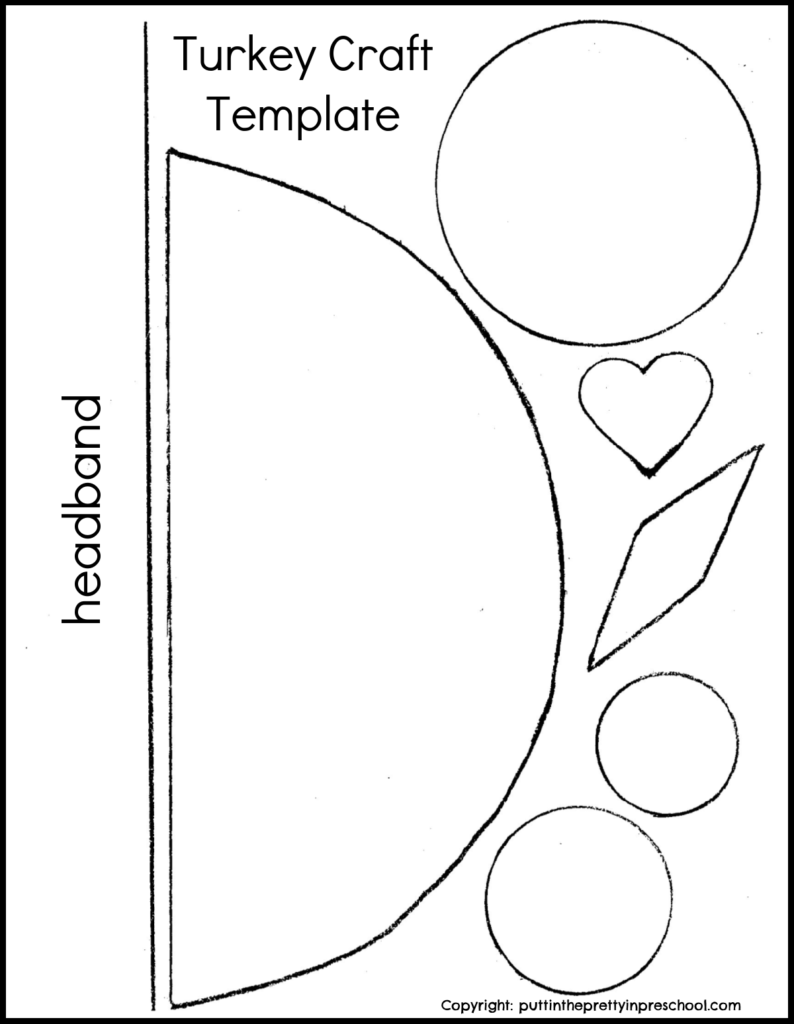
To prepare this animal craft, first cut a paper plate in half.
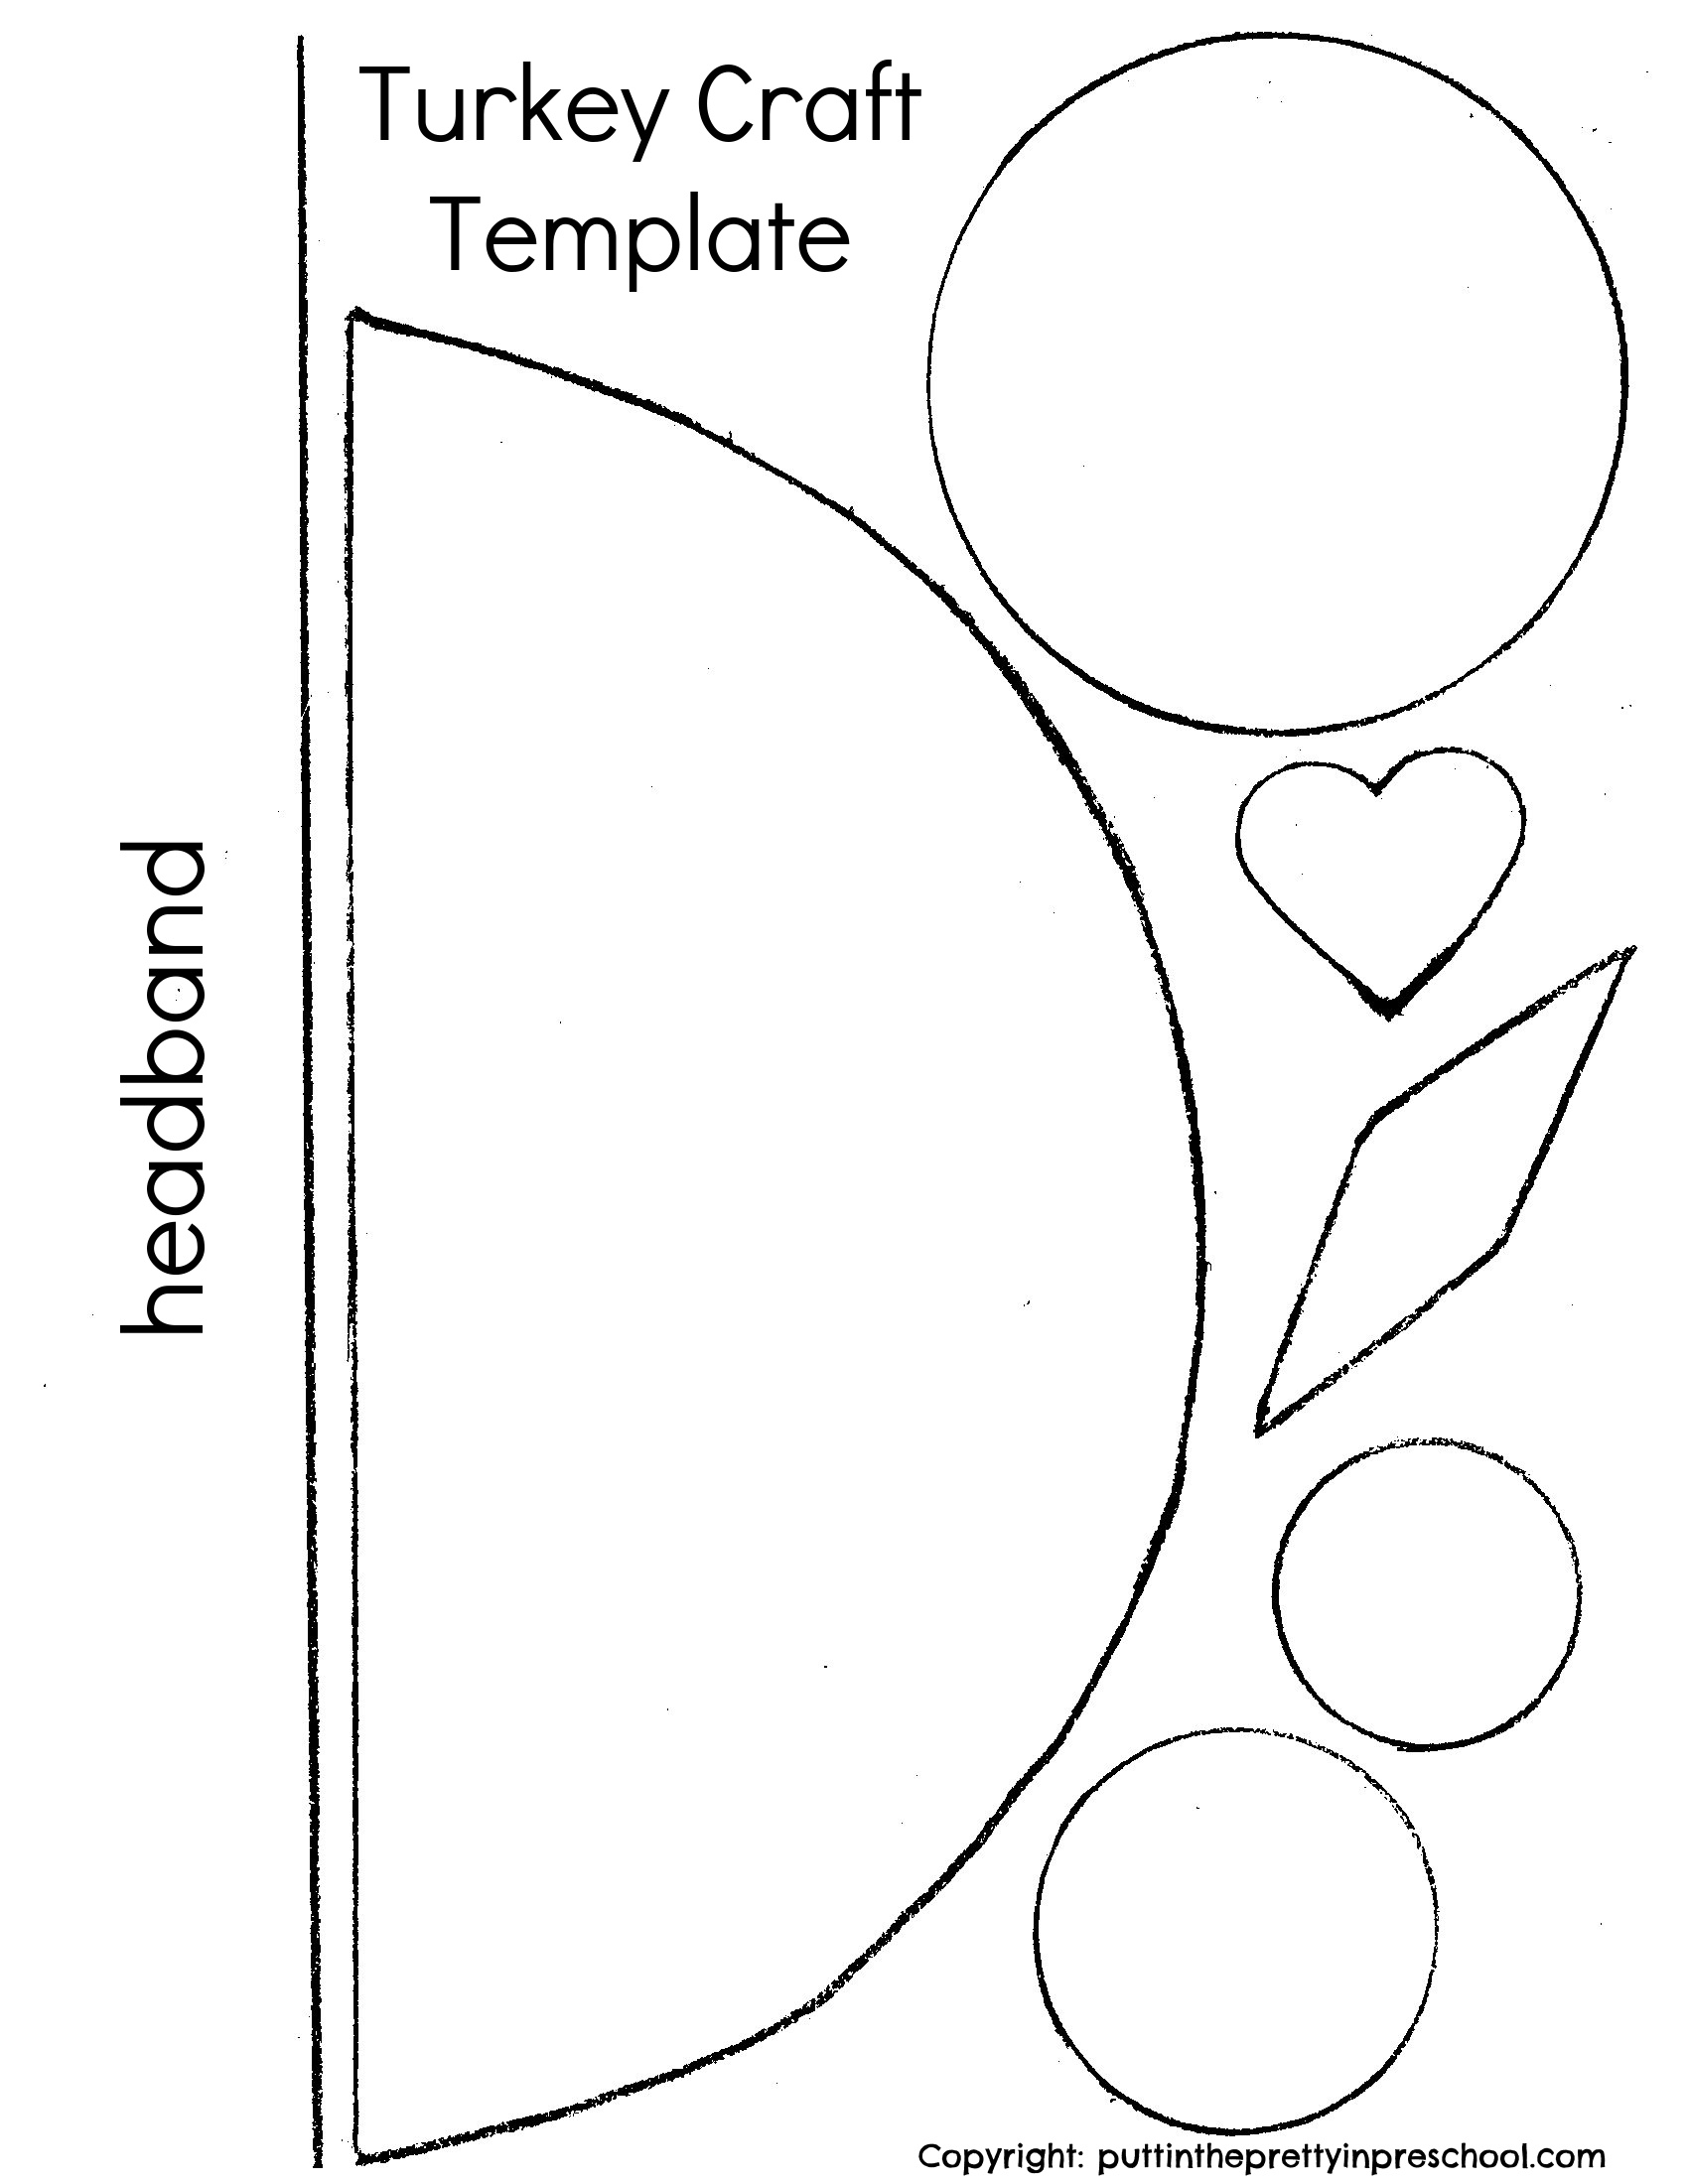
Next, cut a large circle from brown construction paper or cardstock, and two sizes of smaller circles from red, orange, and yellow sturdy paper.
Then cut a narrow diamond and two small hearts from orange paper.
The last thing to do is snip a three-inch strip from a red pipe cleaner.
To make things easier, download this free turkey craft template to use for cutting out the shapes.
_______
This printable is for individual or one classroom use only.
_______
Tip: Paper punches are very helpful in preparing this craft.
_______
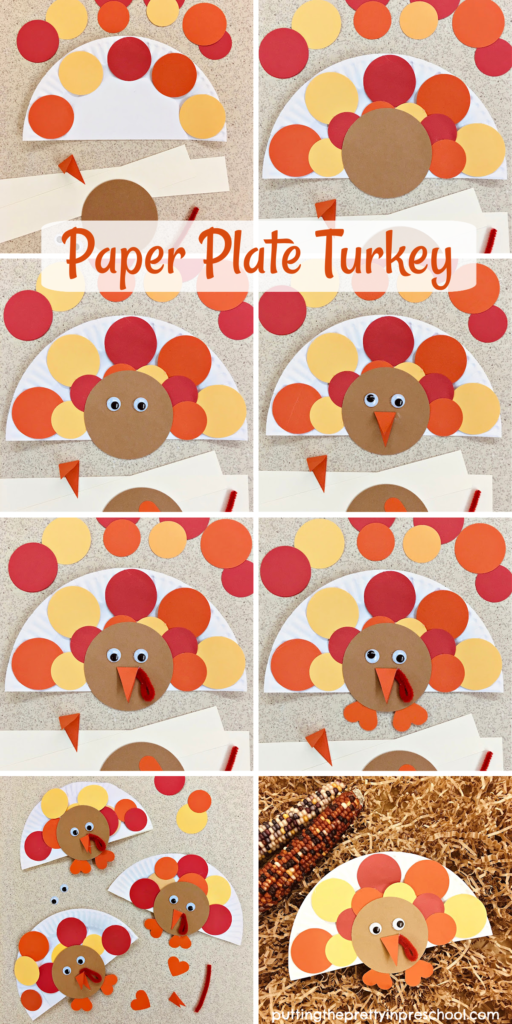
Making The Paper Plate Turkey Craft
To make this cute turkey craft, start by using white glue and a glue paddle to adhere red, orange, and yellow circles to the semi-circular plate.
Next, glue the brown circle to the bottom middle of the straight edge of the plate, allowing a little bit of the circle to fall below the edge. This will be the turkey head.
_______
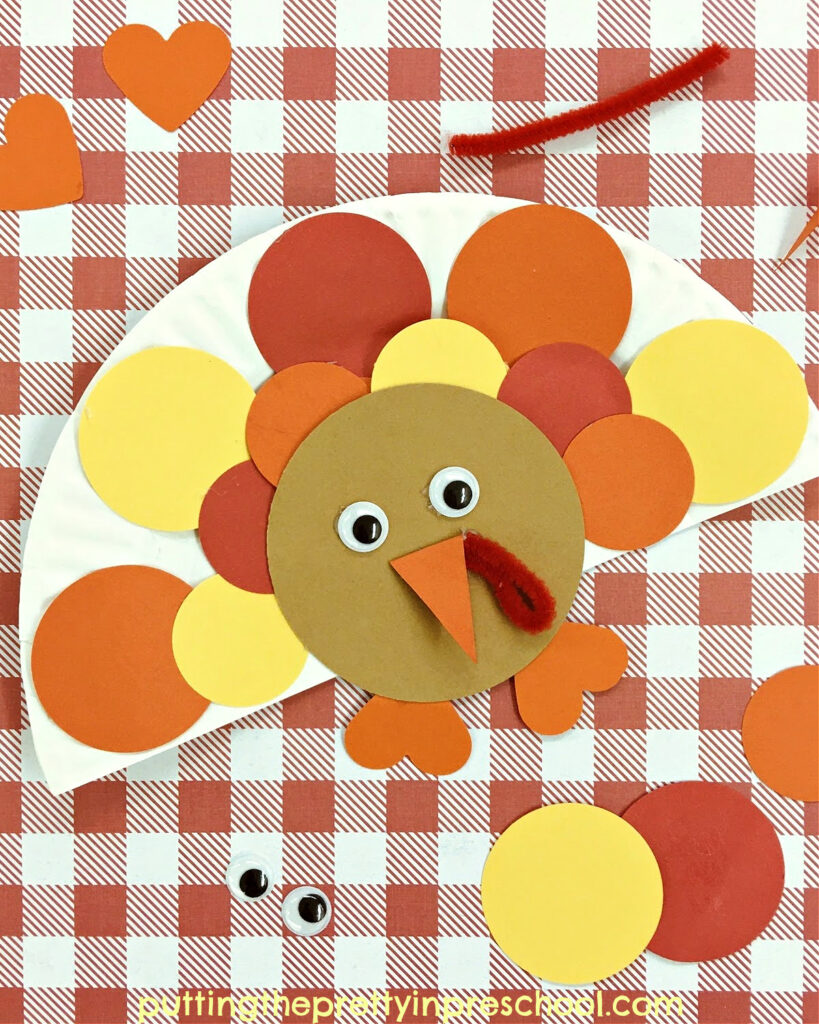
Then glue two wiggly eyes to the large circle.
Afterward, fold the narrow diamond shape in half to make a beak. Glue the folded bottom half of the beak underneath the eyes.
Then fashion the red pipe cleaner strip into a narrow loop. Glue the loop to the beak so that it hangs down as a snood.
Finally, glue two heart-shaped feet to the bottom of the turkey head.
Let the crafted turkey dry overnight and it will be ready for display.
Note: A glue stick or glue gun will also work to adhere the shapes in this craft.

_______
This paper plate turkey is made entirely of geometric shapes, so the craft presents a great opportunity to discuss and review them.
_______
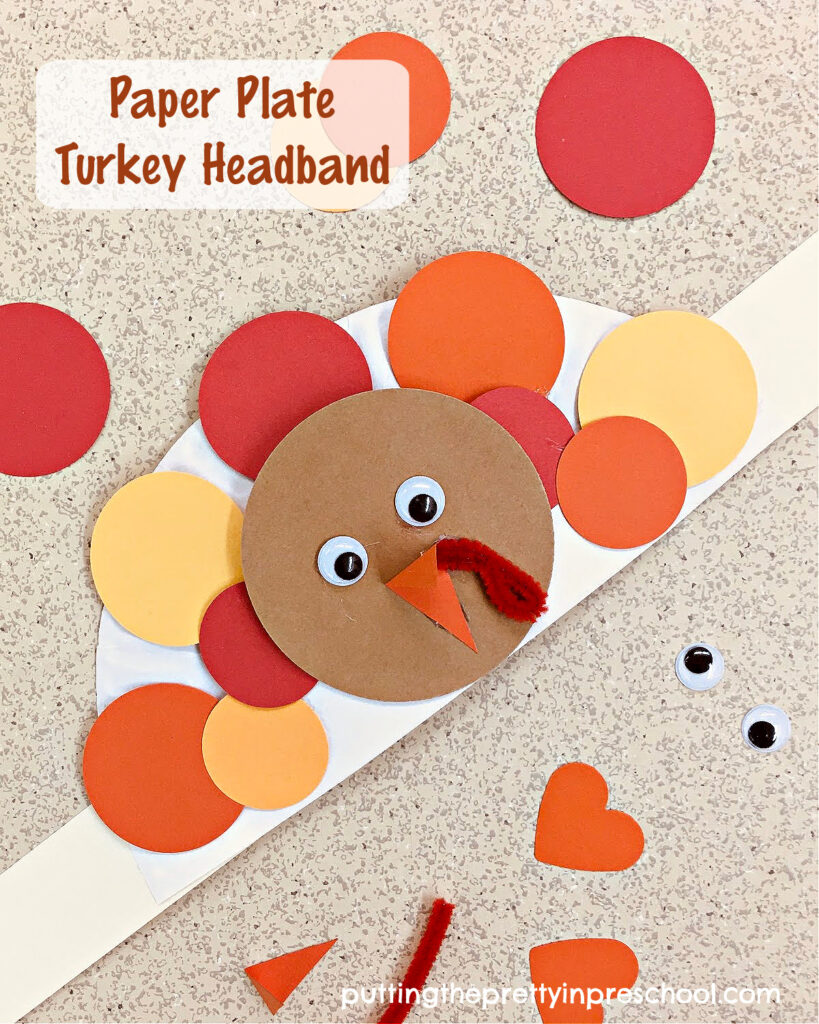
Paper Plate Turkey Headband
For a fun twist to this craft, turn the paper plate turkey into a headband.
_______
First, make sure to adhere the bottom edge of the turkey head to the straight edge of the semi circle.
Next, glue on the eyes, beak, and snood as in the first craft.
Then cut two 1 ½ x 11 inch strips from a piece of cardstock. Glue the two strips together on one side, and then adhere the paper plate turkey on top, lining it up with the bottom edge.
Measure the headband to fit the wearer, and glue the remaining two ends together.
_______
More Turkey Activities
Thanksgiving Tablescape Pretend Play
_______
[Read more…] about Paper Plate Turkey Craft

