• Skip to secondary menu
  • Skip to main content
  • Skip to primary sidebar

Putting The Pretty In Preschool

Finding Beauty In Everyday Early Childhood Experiences

  • Home
  • About Me
  • Winter
  • Chinese New Year
  • Blog
  • Contact Me
  • Black History Month
  • SHOP
  • Valentine’s Day

process art

Fall Leaf Salad Spinner Art

October 27, 2022 by Annette Kaminsky Leave a Comment

Tweet
Share
Share
Pin
This fall leaf salad spinner art activity is perfect for showcasing the bright colors of the season. It is easy and fun for little learners to do.

_______

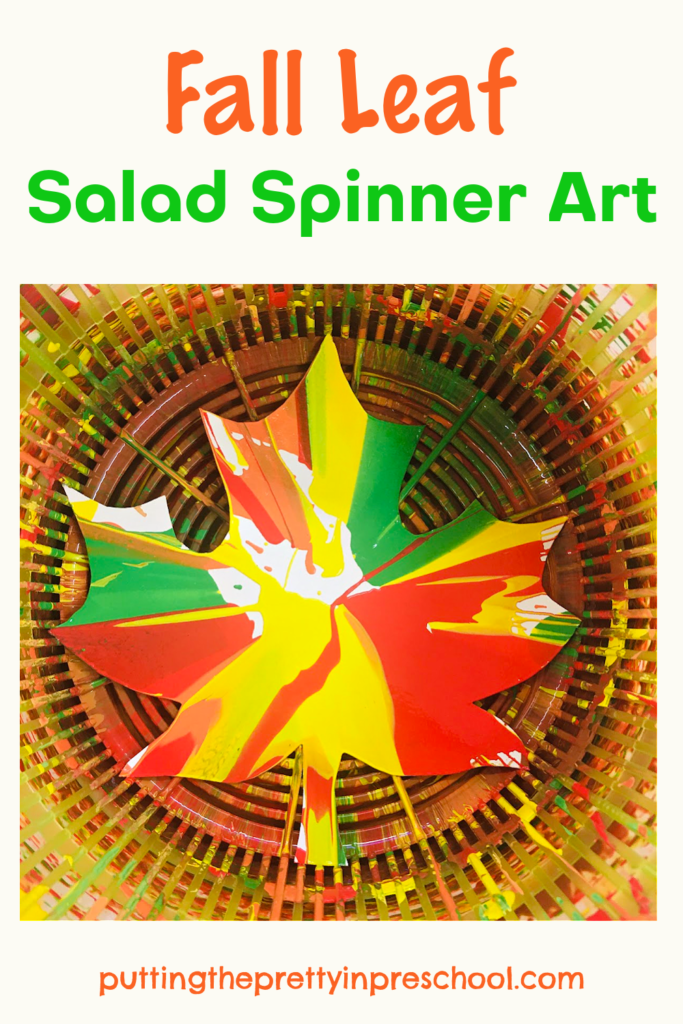
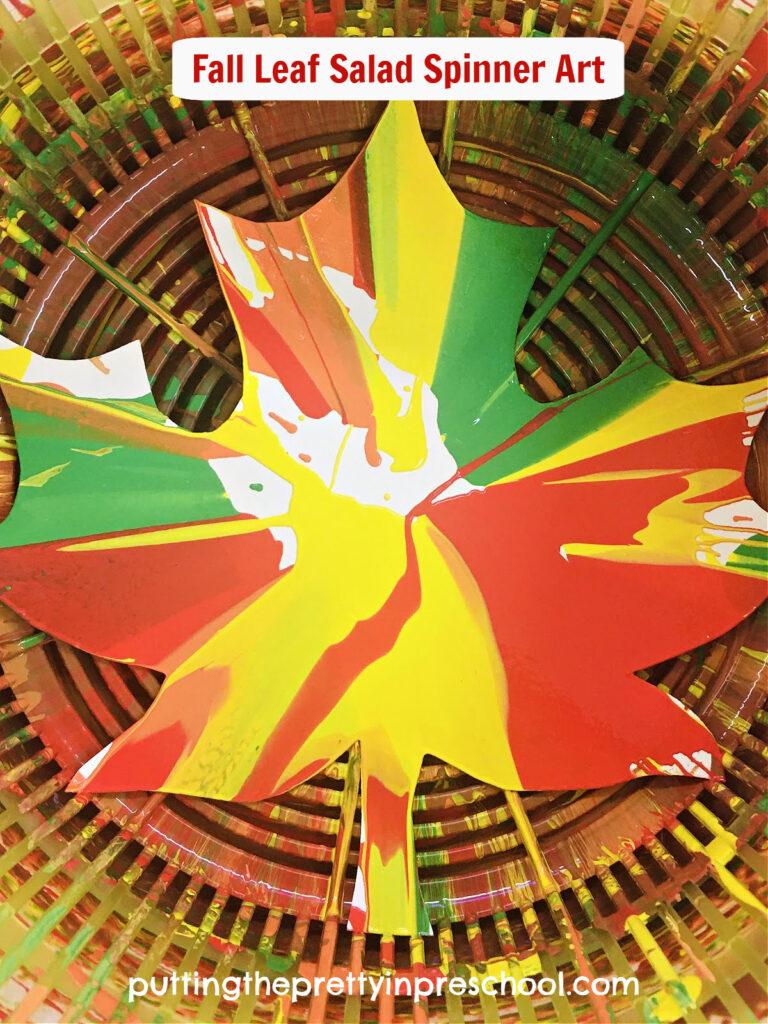
Fall is well underway in our area of the world, and the leaves on the trees have turned bright shades of red, orange, and yellow in the past few weeks. The colorful leaves provide wonderful inspiration for art projects, and this fall leaf salad spinner art activity is one of my favorites.

_______

Follow me on Pinterest for more early learning ideas.

_______

Supplies to Collect

For this fun and easy art project, gather the following supplies:

  • salad spinner
  • white cardstock paper
  • red, yellow, green, and orange tempera paint
  • paint pots
  • teaspoons
  • leaf tracer
  • pencil
  • scissors

_______

A beautiful painted leaf made with a salad spinner painting technique. This process art project is bound to be a hit with your little learners.

_______

The Fall Leaf Salad Spinner Art Project

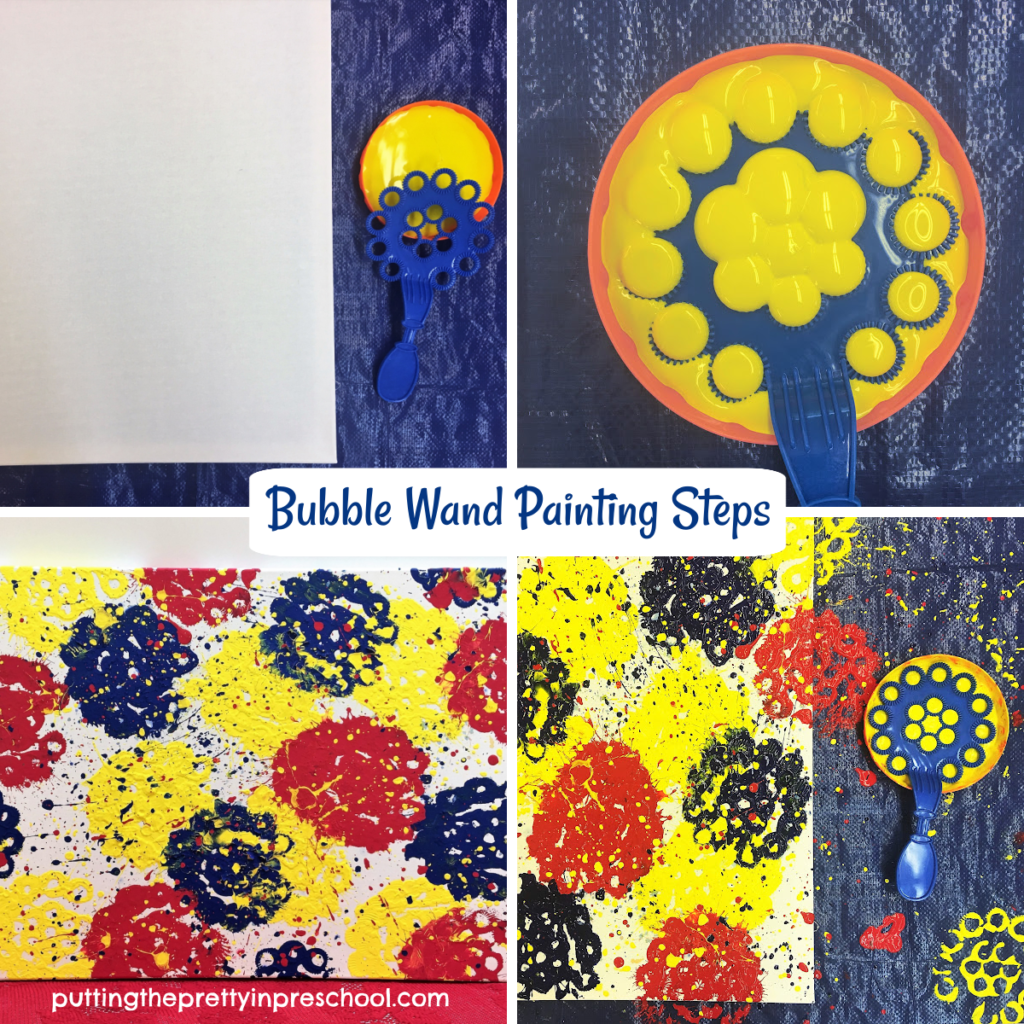
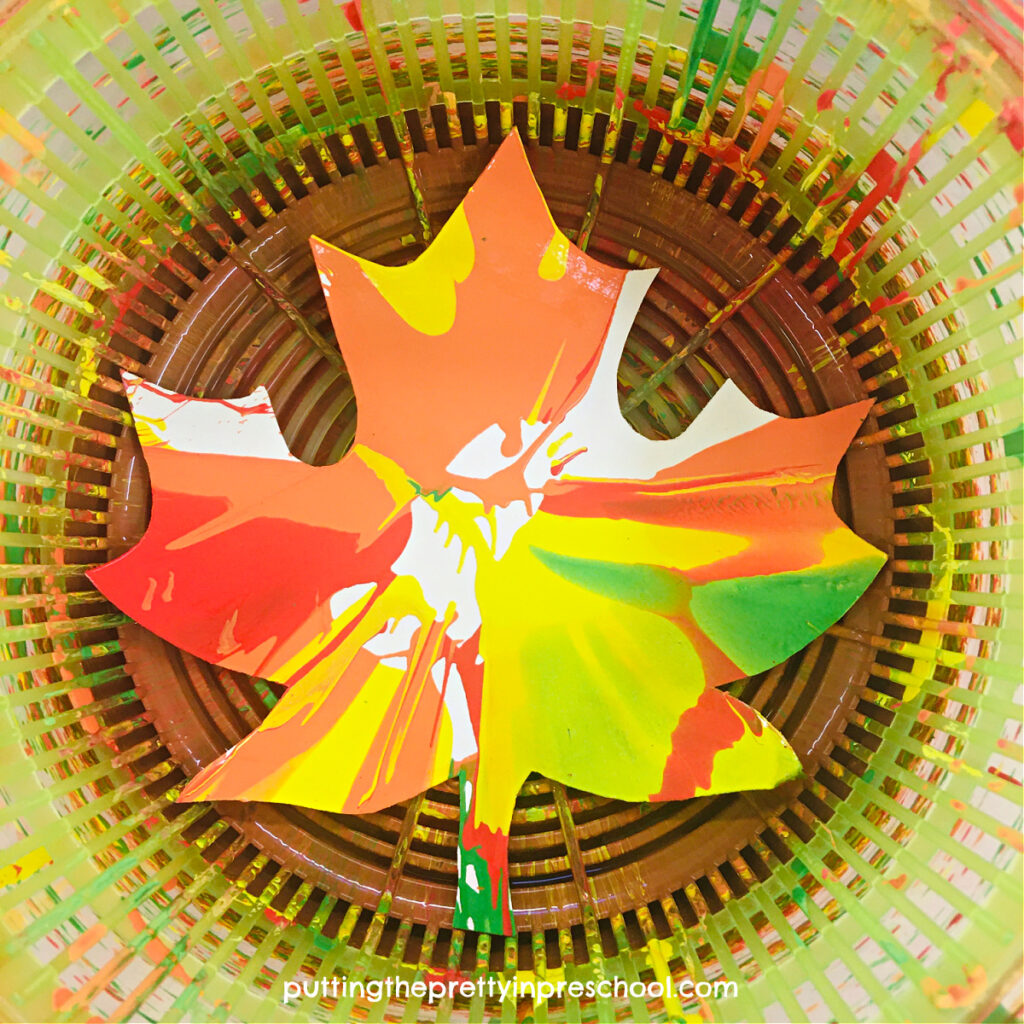
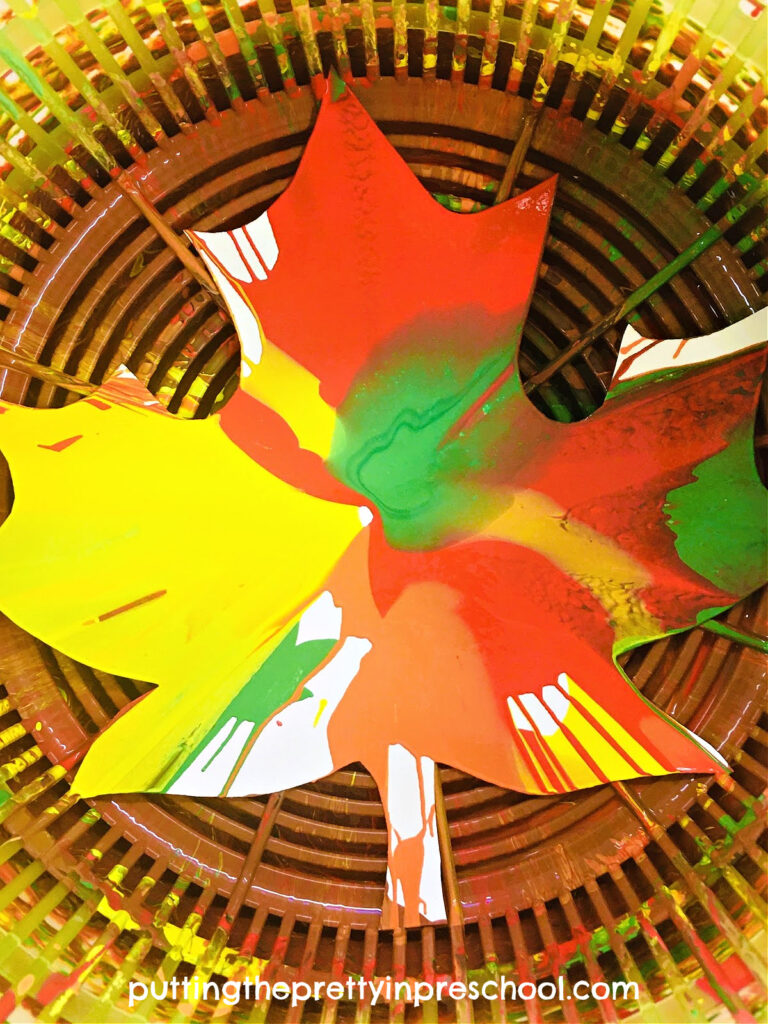
To do this art project, pick a leaf to trace and cut from white cardstock. I feature a maple leaf, as it fits nicely in a salad spinner and has an interesting shape. Cut out a few paper leaves for each child participating.

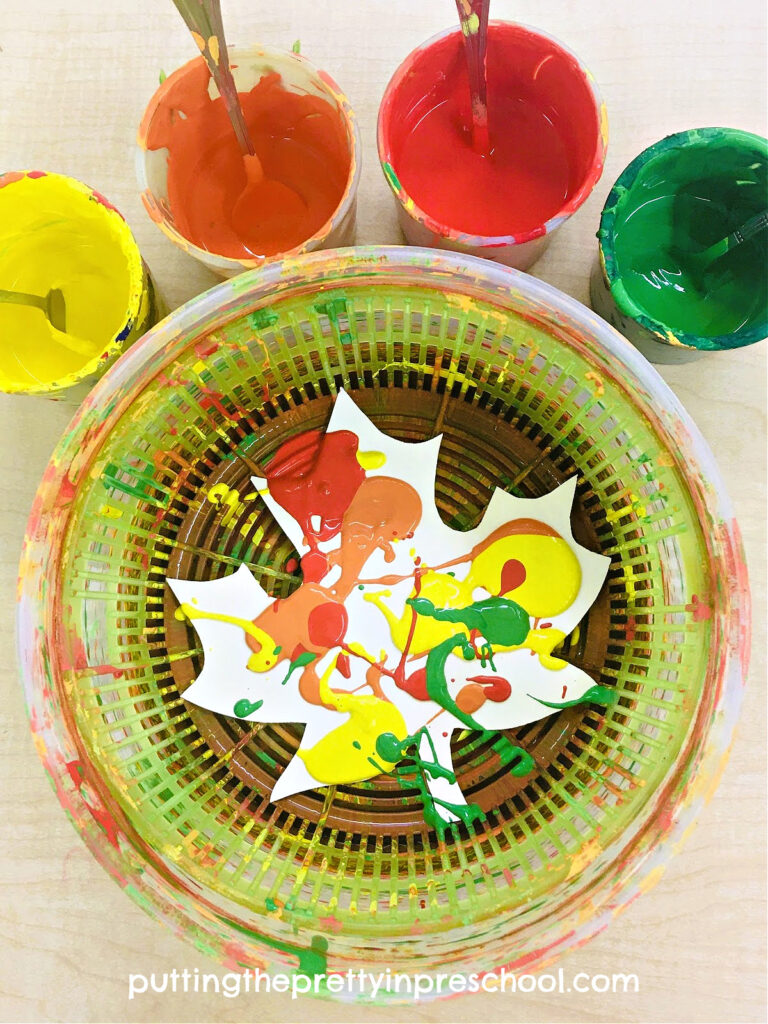
Next, pour red, yellow, orange, and green paint into small containers, and add a teaspoon to each paint pot.

Then have participants take turns placing a paper leaf in the spinner, dripping paint colors on top, and spinning the salad spinner as fast as they can.

How to make beautiful fall leaves with a salad spinner painting technique. An easy and fun all-ages art project.

_______

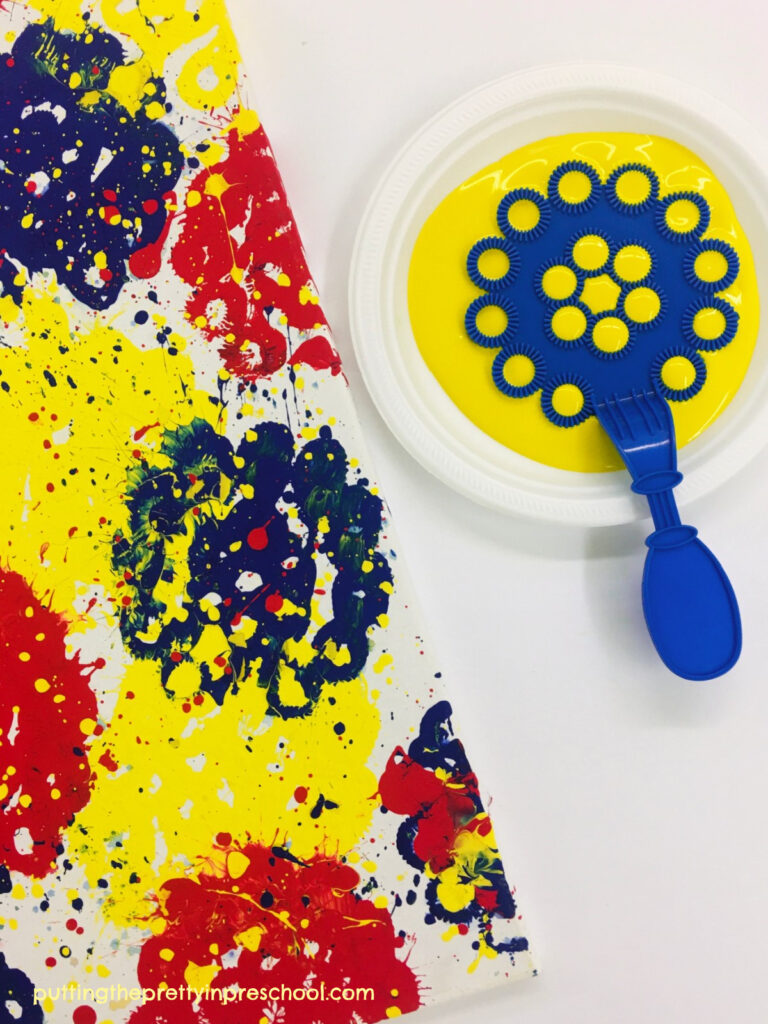
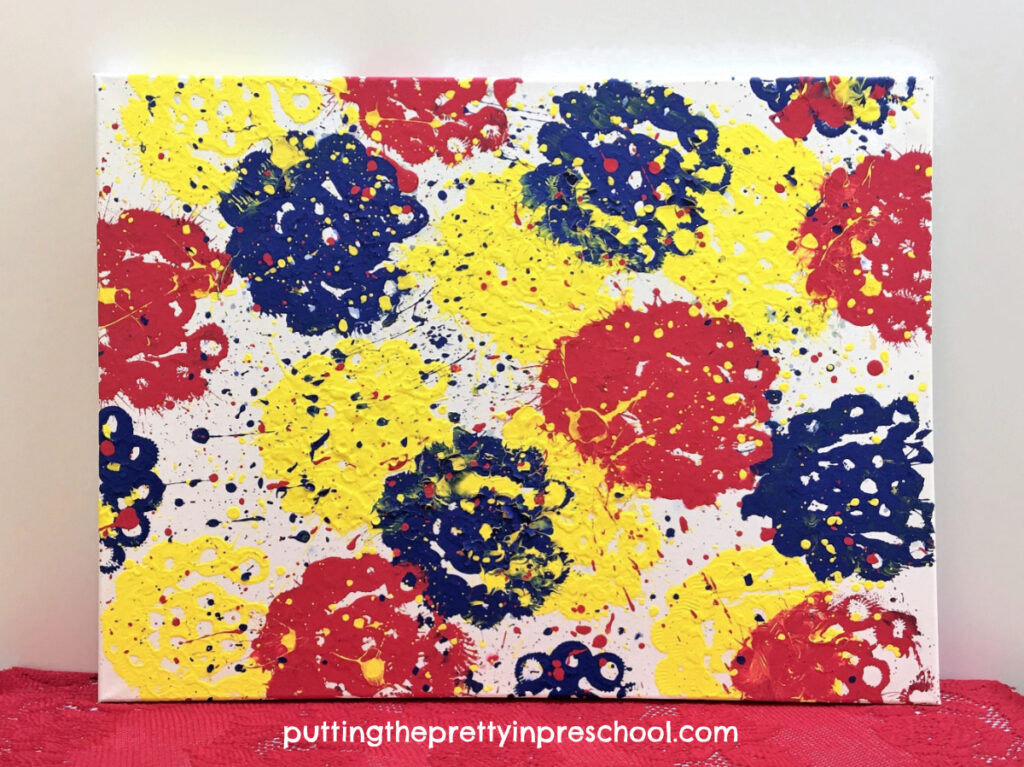
The resulting paint patterns are always a delightful surprise, and the arty leaves are display-worthy. And they make a great addition to year-end school memory albums.

A beautiful way to create painted fall leaves using a salad spinner technique. And it's so easy and fun.

_______

Note: I previously featured maple leaf salad spinner art in a Canada Day post. You can download a leaf template (available in that post) to use for this art activity if you wish.

_______

Beautiful fall leaves created with a salad spinner painting technique. The arty leaves are display-worthy and would be a great additions to year-end school memory albums.

_______

The salad spinner cleans up surprisingly well with soap and water at the end of the art session.

_______

_______

More Leaf Activities

Fall Leaf Crown Paper Crafts

Make a gorgeous leaf crown craft with one of these leaf crown printables.

_______

Maple Leaf Theme Activities

Light Table Leaf Exploration

Horse Chestnut Leaf Art Activities

Dinosaurs and Sweet Potato Vine Activities

Eye Dropper Leaf Art

_______

[Read more…] about Fall Leaf Salad Spinner Art
Tweet
Share
Share
Pin

Filed Under: art, autumn, fall, preschool, trees Tagged With: fall, painting, process art, spin art

Bubble Wand Painting Activity

August 22, 2022 by Annette Kaminsky Leave a Comment

Tweet
Share
Share
Pin
This bubble wand painting activity gives early learners a fun new way to spread paint on paper or canvas. It is process art at its best!

_______

Variety is the spice of life, and this is so true with painting activities. Although paintbrushes are most commonly used to spread paint on canvasses, little learners delight in experimenting with other tools. Offering this bubble wand painting activity gives them an exciting new way to do just that!

_______

Supplies To Collect

Gather the following supplies for this super fun art activity:

  • jumbo bubble wands and trays
  • tempera paint colors of choice
  • 12-inch x 18-inch art paper or canvas
  • plastic tarp or table cover

_______

Follow me on Pinterest for more early learning ideas.

_______

The Bubble Wand Painting Process

Painting with bubble wands is a fun way to experiment with unique tools for spreading paint. Follow these steps for the process art activity.

_______

For this activity, pour tempera paint into bubble wand trays, or use trays that are just larger than the wands.

Tip: Tempera paint can be a little dark when used straight from the bottle. Lighten and brighten hues by mixing in a little white and/or yellow paint.

Next, cover a large table with a plastic table cover or tarp.

Then set out big sheets of art paper or canvasses, along with the paint trays. For this project, I feature a budget-friendly stretched canvas purchased at a dollar store.

Have each participant dip a bubble wand in paint, and press it onto the canvas. If the wand is used as a fly swatter, the paint will splatter, adding to the fun.

Repeat the process using additional bubble wands, trays, and paint colors.

It's easy to fill a canvas with a bubble wand painting technique. Give this all-ages super fun art project a try!

_______

Note: This is a messy activity! Make sure participants wear play clothes and a painting apron, and that your art station can accommodate splattering paint. As an alternative, offer the painting activity outside.

If only a few bubble wand sets are available, have little learners take turns doing this painting activity. Wash the bubble wands and trays before adding each new color.

Big sheets of paper or canvases can seem overwhelming to little learners, but the jumbo bubble wands make painting on a large canvas easy to do.

It's easy to fill a canvas with a bubble wand painting technique. Give this all-ages super fun art project. a try!

_______

Related: Printmaking With Apples

_______

[Read more…] about Bubble Wand Painting Activity
Tweet
Share
Share
Pin

Filed Under: art, preschool, summer Tagged With: bubble wand painting, painting, process art

Watercolor Planets With Markers

August 17, 2022 by Annette Kaminsky Leave a Comment

Tweet
Share
Share
Pin
This stunning "watercolor planets with markers" art project is a must-try. It's an all-ages process art activity that displays well.

_______

Creating watercolor planets with markers is an easy and satisfying process art activity with stunning results. Your little learners will absolutely love doing it. And if you need a quick, beautiful bulletin board or wall display, this project checks that box.

_______

Supplies To Collect

Gather the following supplies for this art activity:

  • 8-inch diameter paper basket coffee filters
  • water-based markers
  • 12-inch x 12-inch black cardstock paper
  • spray bottle
  • plastic tub
  • hot glue gun

_______

Follow me on Pinterest for more early learning ideas.

_______

Creating Watercolor Planets With Markers

First, flatten basket-shaped coffee filters, and set them on a table with water-based markers.

Invite little learners to decorate their paper circles any way they wish.

Steps to create stunning watercolor planets with markers. This all-ages process art looks beautiful displayed together.

_______

Tip: Offer analogous colors, which are groups of three colors positioned next to each other on the color wheel. Because these colors complement each other, they work well in process art projects.

Create watercolor earth art with just markers and water. A quick and easy process art project everyone will love.
Planet Earth With Blue and Green Markers

_______

Create watercolor planet Jupiter art with just markers and water. A quick and easy process art project everyone will love.
Planet Jupiter With Red, Orange, and Yellow Markers

_______

Afterward, have everyone take turns wetting their project with a spray bottle filled with water. When doing this, place the decorated circles in a small tub to be sprayed.

Tip: Your little charges may want to soak their circular canvas with lots of water, but just giving the colorful coffee filters a few squirts results in nice art pieces for display.

Next, dry the paper circles on a flat surface covered with a plastic tablecloth or tarp.

Finally, mount the round planets on a 12-inch x 12-inch square piece of black cardstock, or sturdy paper that is 8 ½ x 11 inches in size. Using a hot glue gun works well.

This process art project looks amazing displayed in a group.

_______

Create watercolor earth art with just markers and water. A quick and easy process art project everyone will love.

_______

More Watercolor Planet Process Art

Because little learners love the spraying water part of this art activity, invite them to make more colorful planets without restrictions. They may spray the color right out of the circles after decorating them, but they enjoy doing this soooo much. Have them try black or dark green markers. Early learners are sure to be excited about the new colors that will be revealed.

_______

More Space Theme Activities

Earth Day Heart Art

Scented Moon Playdough

Salt and Glue Moon Art

Outer Space Pretend Play

Space Theme Loose Parts Play

Starry Sky Sensory Bin

Moon Colors Art Project

Space Restaurant Dramatic Play

Space Father’s Day Craft

Earth Day Bead Craft

_______

[Read more…] about Watercolor Planets With Markers
Tweet
Share
Share
Pin

Filed Under: art, display, Earth Day, preschool, space Tagged With: earth craft, Earth Day, painting, planets, process art, space

Salt And Glue Moon Art

August 8, 2022 by Annette Kaminsky Leave a Comment

Tweet
Share
Share
Pin
Try this stunning salt and glue moon art activity. It's a process art project that displays well. Ten moon facts are included in the post.

_______

This salt and glue moon art activity is a simple way to create a realistic moon in its natural colors. It’s easy for little learners to do, and looks showy when displayed.

To help set the tone for the art activity, here are ten fun facts about the moon’s surface to share.

_______

Ten Moon Facts

  • The moon usually appears bright whitish, silvery gray, or pale yellow. This is because its surface is illuminated by the sun.
  • Close up, the moon is colored in shades of gray, with a little bit of black and white. There are tinges of orange, blue, or green in some parts.
  • The moon is rocky and bumpy.
  • There are light and dark areas on it’s surface.
  • The dark areas are huge craters filled primarily with basalt lava that has cooled and formed smooth, dark plains. Much of the lava is rich in magnesium and iron, which is the reason for the dark color.
  • The lighter areas are highlands with mountains and many craters. The highlands are low in iron and rich in calcium, giving them a lighter color.
  • There are volcanic domes and shield volcanoes, as well as channel-like depressions on the moon.
  • The moon is covered in a thin layer of moon dust, which is a dark grey color.
  • There are traces of water in the form of water ice at the moon’s poles. Water molecules have recently been discovered on the sunlit side of the moon.
  • From earth, we always see the same side of the moon.
An easy-to-do moon art activity with a salt and glue technique. The art project looks stunning on display.

_______

Powerful telescopes, space probes that orbit or land on the moon, spacecraft that circle the moon, and robotic rovers are some ways the moon is regularly explored. Twelve astronauts have had the chance to walk on the moon and see it up close.

_______

Moon Art Supplies

Just a few supplies are needed for this striking moon art project:

  • 8 ½ inch x 11- inch gray cardstock paper
  • 12 x 12-inch black cardstock paper
  • white glue
  • glue paddles
  • disposable plates
  • table salt
  • small bowls or paint cups
  • spray adhesive
  • hot glue gun

_______

The Salt And Glue Moon Art Process

To prepare for the activity, cut circles about 8 ½ inches in diameter from gray cardstock.

Next, set up a station for each child participating with a

  • gray cardstock paper circle
  • small bowl of salt and a teaspoon
  • container of white glue and glue paddle
  • disposable plate
Stunning moon art made with a salt and glue art technique. Teach facts about the moon while doing this process art activity.

_______

Invite little learners to drizzle white glue on their circle-shaped paper.

Then have them sprinkle salt from a teaspoon over the glue, and shake excess salt onto their disposable plate.

Let the art projects dry overnight.

An easy-to-do moon art activity with a salt and glue technique. The art project looks stunning on display.

_______

To help preserve the moon art, spray each salted circle with adhesive spray. Hairspray works fine for this task too.

When thoroughly dry, adhere each paper moon to a black cardstock or construction paper background using a hot glue gun.

Display the stunning art projects on a bulletin board or wall. They will look amazing!

_______

Follow me on Pinterest for more early learning ideas.

_______

Little learners may have their own thoughts about the art they are creating. One of my students pretended he was making “The North Pole.” This led to a discussion about who was on Santa’s nice and naughty list!

Another student asked if he could taste the salt. After saying it was ok to taste a little of it, we discussed that it is a good choice to ask if it is safe to taste an art supply before doing it. We also talked about how there is a lot of salt in many playdough recipes, but we only use a little bit to season food.

Try this stunning salt and glue moon art activity. It's a process art project that displays well. Ten moon facts are included in the post.

_______

Related:

Scented Moon Playdough

Starry Sky Sensory Bin

Space Father’s Day Craft

Space Restaurant Dramatic Play

Watercolor Planets With Markers

Outer Space Pretend Play

Earth Day Heart Art

Earth Day Craft

Moon Colors Art Project

Space Loose Parts Play

Space Theme Light Table

_______

[Read more…] about Salt And Glue Moon Art
Tweet
Share
Share
Pin

Filed Under: art, display, preschool, science, space Tagged With: moon, process art

Earth Day Heart Art

April 2, 2022 by Annette Kaminsky Leave a Comment

Tweet
Share
Share
Pin
How to do two Earth Day heart art activities using paper towel sheets. Both are super fun process art projects that display beautifully.

_______

Here are two Earth Day heart art activities children of every age will love, love, love to do. As with most of my activities, they use easy-to-find supplies and are inexpensive to make. And best of all, they are open-ended process art projects where every child can succeed, and each result is beautiful.

_______

Follow me on Pinterest for more early learning ideas.

_______

Supplies To Collect

Gather the following supplies for the earthy art activities:

  • white paper towel roll
  • water-based markers
  • green and blue food coloring or liquid watercolors
  • paint pots or baby food jars
  • white cardstock paper
  • scissors
  • pencils
  • eyedroppers or pipettes
  • spray bottle with water
  • glue sticks
  • glue gun
  • plastic tablecloth

_______

Eyedropper Heart Earth Art

Trace and cut out large hearts from paper towel sheets. It works out well for the center of the hearts to overlap the tear portion of the towels.

How to do an eyedropper heart earth art project using paper towel sheets. It's a super fun process art activity that displays beautifully.

_______

Mix a few drops of blue food coloring in small jars or paint pots filled with water. Do the same with green.

Set out one paper towel heart and pot of green and blue food coloring on a covered table for each participant, along with eye droppers or pipettes.

Invite participants to drop colored water all over their hearts. They’ll enjoy the way this technique spreads color over the towels.

After having dried, help each child tear the painted paper towel shapes on the tear line.

Have everyone write the words “I Love Earth” on a cardstock strip. A drawn red heart can be substituted for the word “Love.”

Then invite them to glue their top and bottom heart sections with the word strip positioned in the middle to a cardstock sheet of paper slightly bigger than the heart and word design.

How to do an eyedropper heart earth art project using common kitchen supplies. Everyone in the family will enjoy this super fun process art activity.

_______

How to do an eyedropper heart earth art project using common kitchen supplies. Everyone in the family will enjoy this super fun process art activity.

_______

Alternately, the hearts can stay as one unsplit shape, and the cardstock strip words can be glued above each heart on the paper.

Make this super fun eyedropper heart Earth Day project today! Everyone in the family will enjoy giving it a try.

_______

Sprayed Marker Heart Earth Art

Use the same-sized paper towel hearts for this second art project.

How to make a sprayed marker heart earth art project using paper towel sheets. It's a super fun process art activity that displays beautifully.

_______

Set out a heart and a green and blue water-based marker for each participant on a covered table. Have everyone color most or all of their hearts in patches of green and blue.

Fill a spray bottle with water.

Have participants take turns spraying their hearts with just enough water to wet their designs thoroughly. This is the part everyone will most likely love the most.

Or each child can use a pipette to drop water on their projects, also very satisfying.

Let the decorated, water-applied hearts dry.

Finish the project in one of the same two ways as with the first art activity.

Make this sprayed marker heart earth art project today! It's a super fun process art activity that displays beautifully.

_______

Related: Coffee Filter Sunflower Craft

_______

[Read more…] about Earth Day Heart Art
Tweet
Share
Share
Pin

Filed Under: art, Earth Day, preschool Tagged With: Earth Day, eyedropper art, painting, process art

  • « Go to Previous Page
  • Page 1
  • Page 2
  • Page 3
  • Page 4
  • Go to Next Page »

Primary Sidebar

Hi, I'm Annette Kaminsky, a preschool teacher who loves sharing learning through play activities for young children. Thanks for visiting my site. Feel free to stay awhile!

Subscribe Via Email

Recent Posts

  • Earth Day Spin Painting April 21, 2026
  • Easter Bunny Scavenger Hunt April 4, 2026
  • Celebrate Diversity Coloring Pages March 1, 2026
  • Lunar New Year Lantern Craft February 11, 2026
  • Black History Month Positive Affirmations Art January 29, 2026
  • Snowflake Cafe Dramatic Play Set January 19, 2026
  • Pastel Christmas Letterhead and Envelope December 20, 2025
  • December Kindness Activities November 30, 2025
  • Fall Forest Sensory Bin November 30, 2025
  • DIY Turkey Bowling Game November 25, 2025

Categories

Topics

apples bunnies butterflies Chinese New Year Christmas Christmas craft color colors dramatic play Easter fall flowers hearts holiday jewelry leaves leprechauns light table loose parts painting paper crafts playdough pretend play printables printmaking process art pumpkins rice bin scented playdough science experiment scissor skills sensory bin sensory play sensory tray shamrocks skeletons snakes snowflakes spiders spring St. Patrick's Day sunflowers tablescapes Valentine's Day water play

Copyright © 2026 · Lifestyle Pro on Genesis Framework · WordPress · Log in