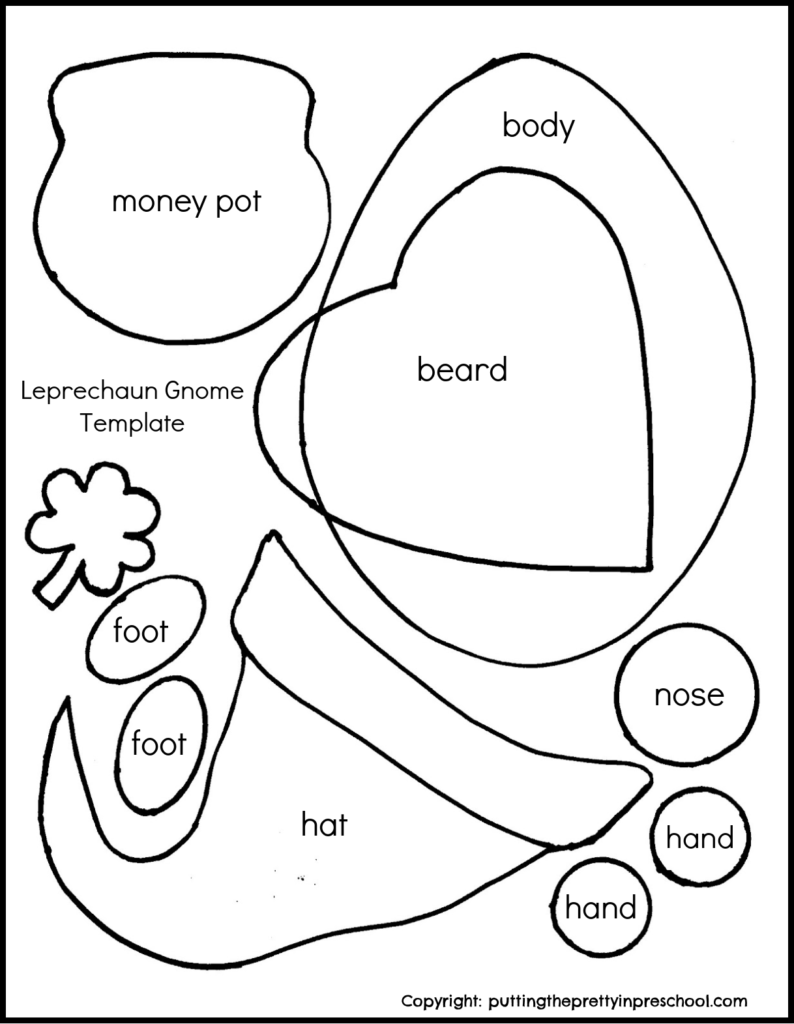
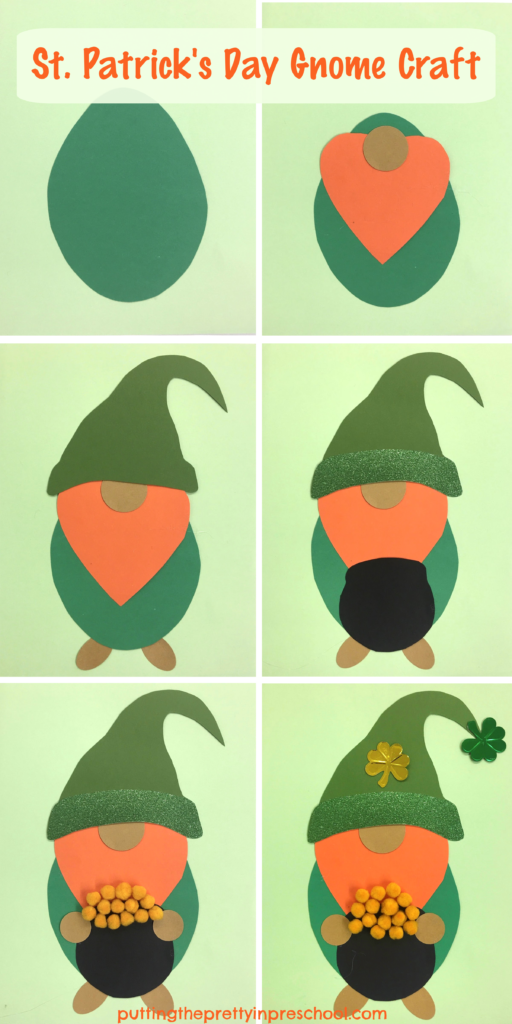
_______
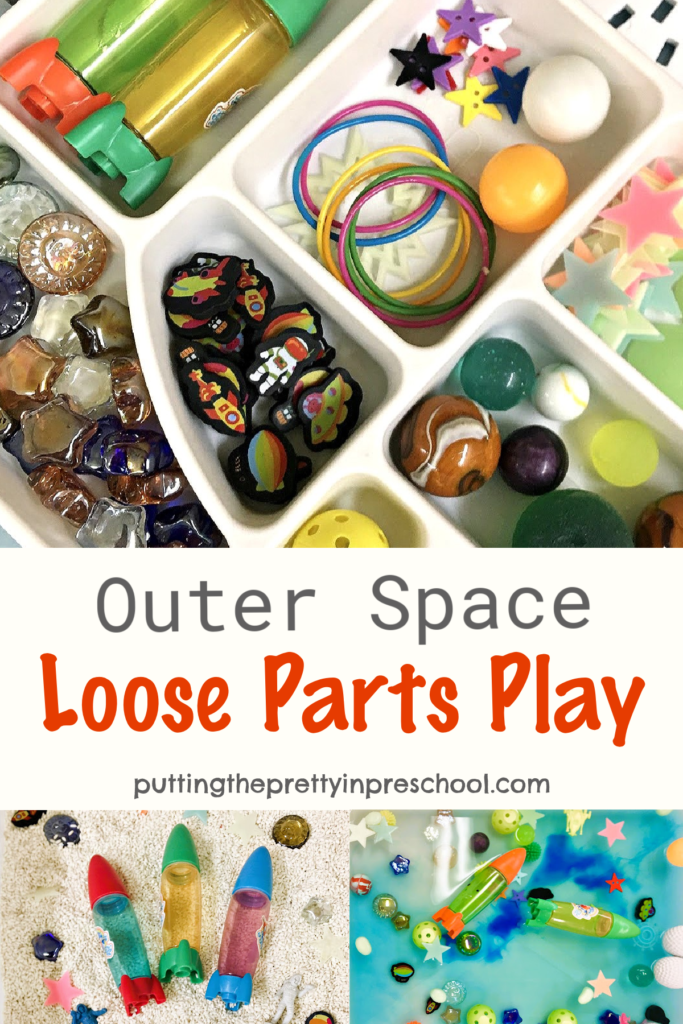
Loose parts are a highlight in any play center, and they certainly shine in a space theme. Sorted in a tray, they are ready for all kinds of outer space loose parts play. The outer space-themed supplies can be added to a rice bin, water play bin, or playdough invitation. The out-of-this-world loose parts have other great uses as well.
_______
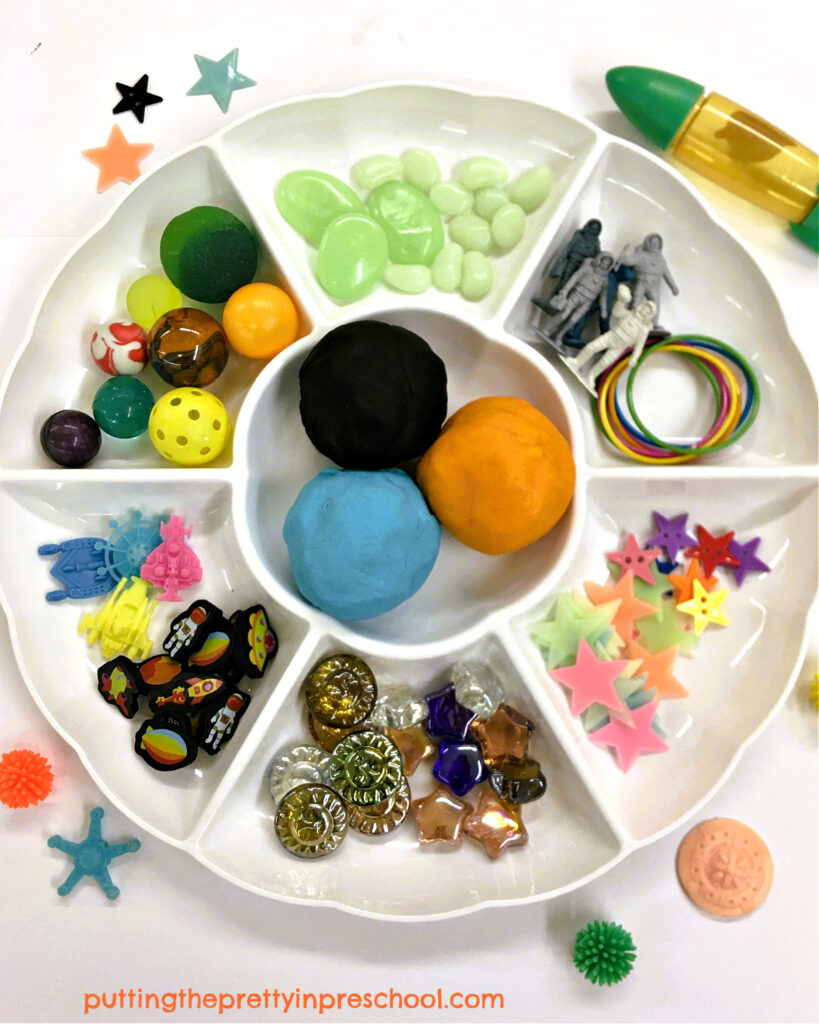
Space Loose Parts Supplies
_______
The following economical and easy-to-find supplies are in the space loose parts tray:
- space-ship shaped bubble blowing containers
- star-shaped buttons
- thin bracelets
- orange and white ping pong balls
- glow in the dark stars, stones, and pebbles
- space-themed erasers
- marbles
- rubber balls
- sun and star-shaped acrylic gems
- yellow pickleball balls
- astronaut and spaceship toys
_______
Follow me on Pinterest for more early learning ideas.
_______
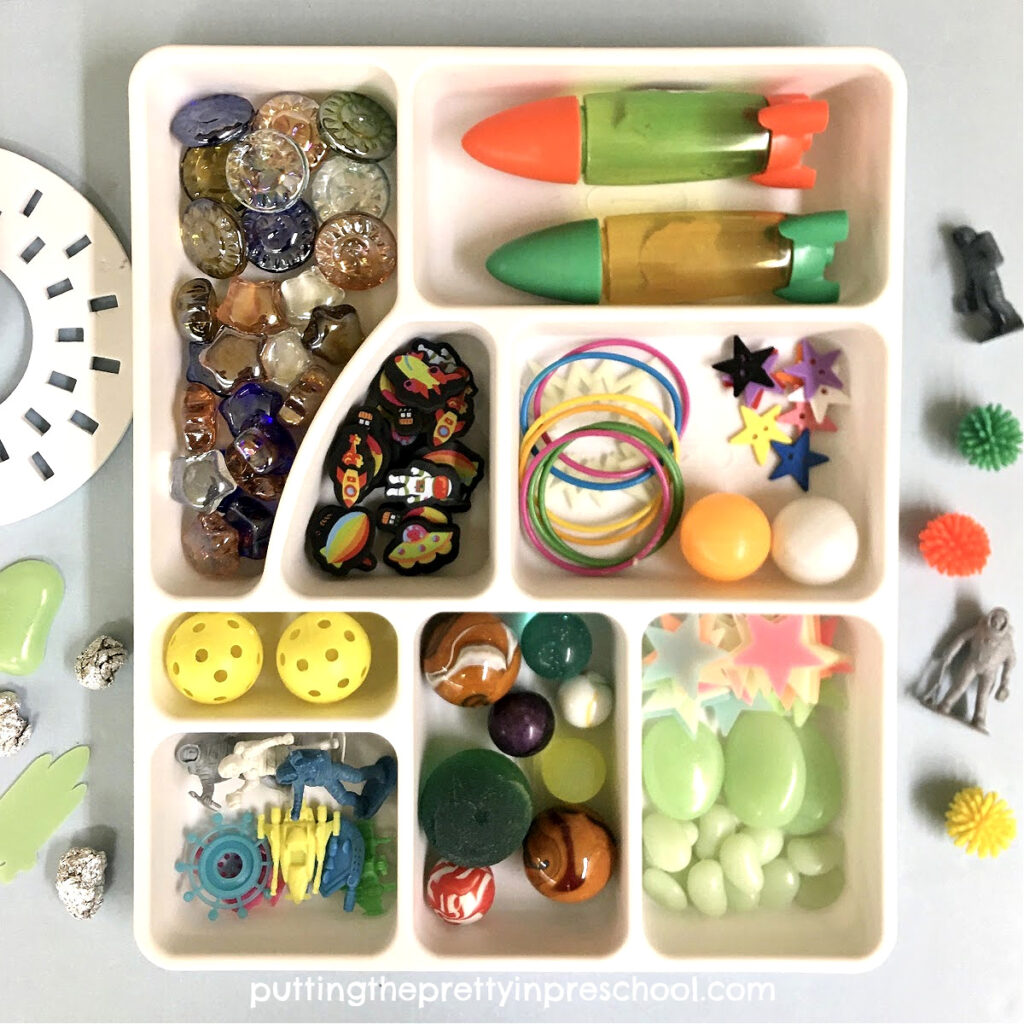
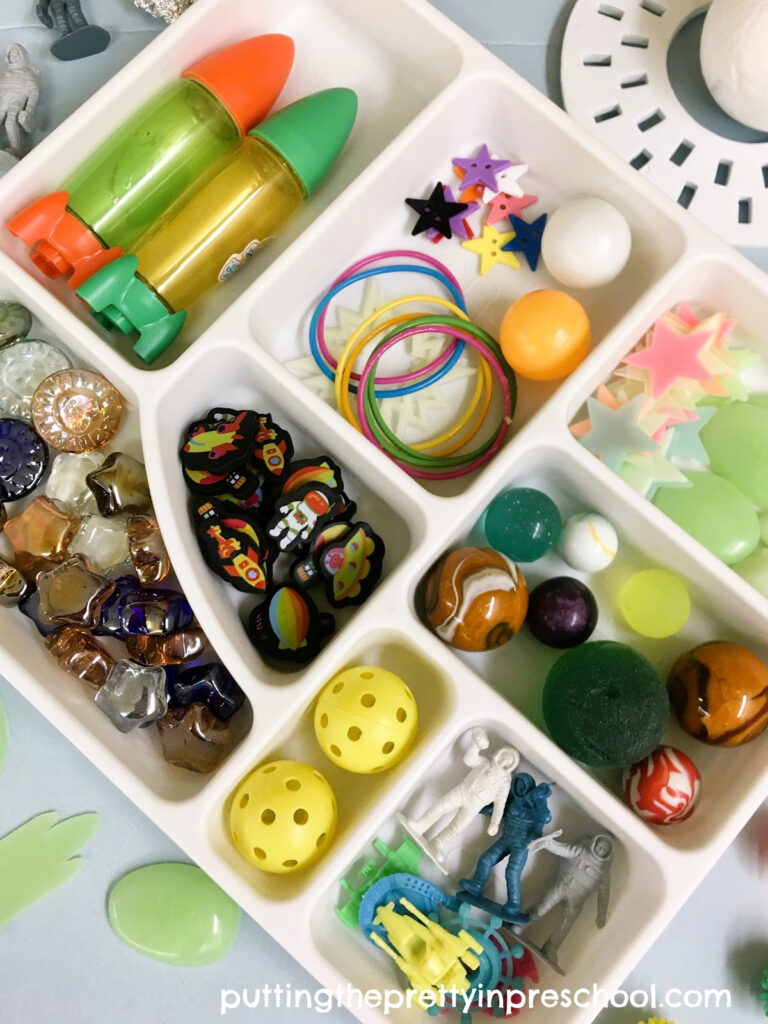
The Space Loose Parts Tray
_______
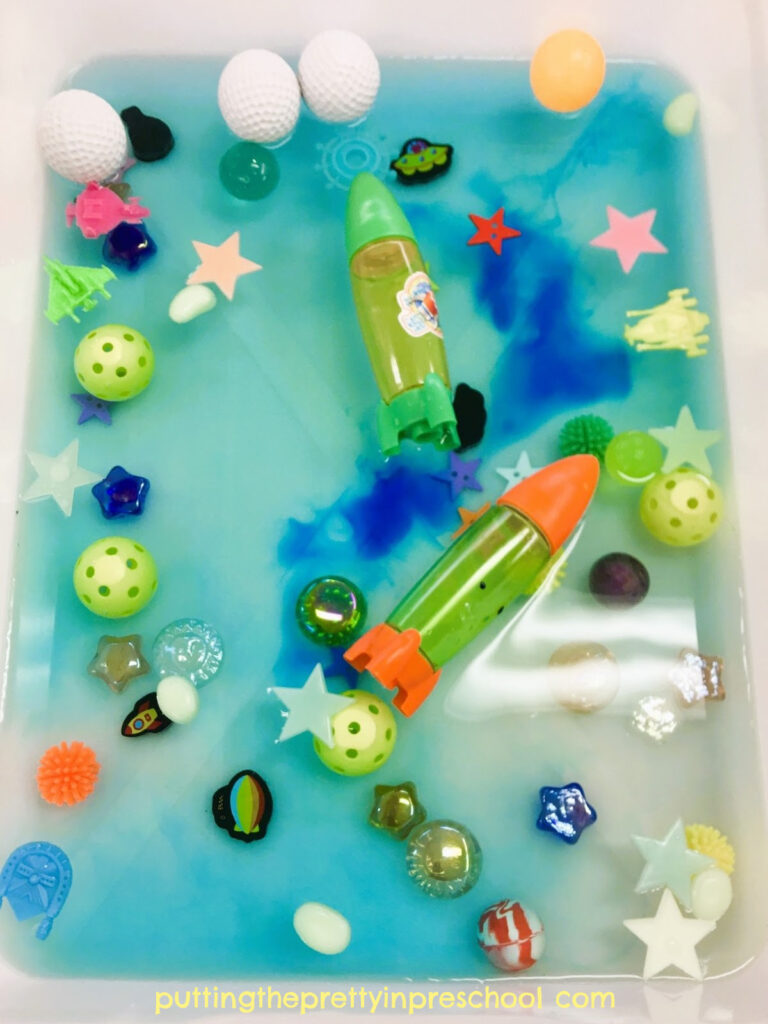
Repurposed spaceship-shaped bubble blowing containers with screw-top lids work well in sensory bin activities and are super fun to use.
Glow-in-the-dark stars and star-shaped buttons help create vivid night skies. The stones and pebbles serve as space rocks.
Yellow pickleball balls represent a lighted, crater-filled moon.
Various kinds and colors of small balls and marbles can be reimagined as planets or moons, and the bracelets make great planetary rings.
Iridescent sun and star-shaped acrylic gems add beauty to outer space play activities.
Mini astronaut and spaceship toys and erasers extend imaginative play.
_______
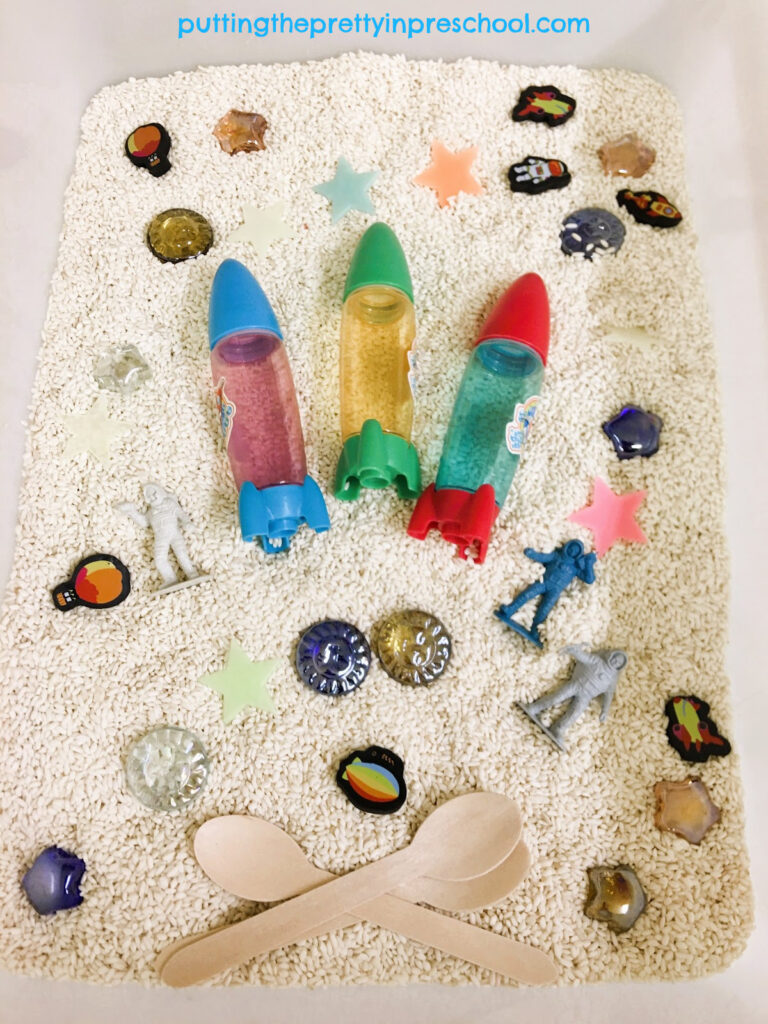
Space Loose Parts Play
The colorful rubber balls in the space loose parts play tray can be used in large motor activities.
The space-themed buttons, glow-in-the-dark stars, rocks, bracelets, erasers, and acrylic gems make great loose parts in outer space pretend play.
The supplies in the tray are perfect for a space-themed transient art invitation.
_______
The outer space supplies shine in a rice sensory bin or water play setup.
_______
And the supplies are tantalizing in a playdough invitation.
_______

_______
[Read more…] about Space Loose Parts Play


