• Skip to secondary menu
  • Skip to main content
  • Skip to primary sidebar

Putting The Pretty In Preschool

Finding Beauty In Everyday Early Childhood Experiences

  • Home
  • About Me
  • Winter
  • Chinese New Year
  • Blog
  • Contact Me
  • Black History Month
  • SHOP
  • Valentine’s Day

crafts

Unicorn Watercolor Art

July 11, 2023 by Annette Kaminsky Leave a Comment

Tweet
Share
Share
Pin
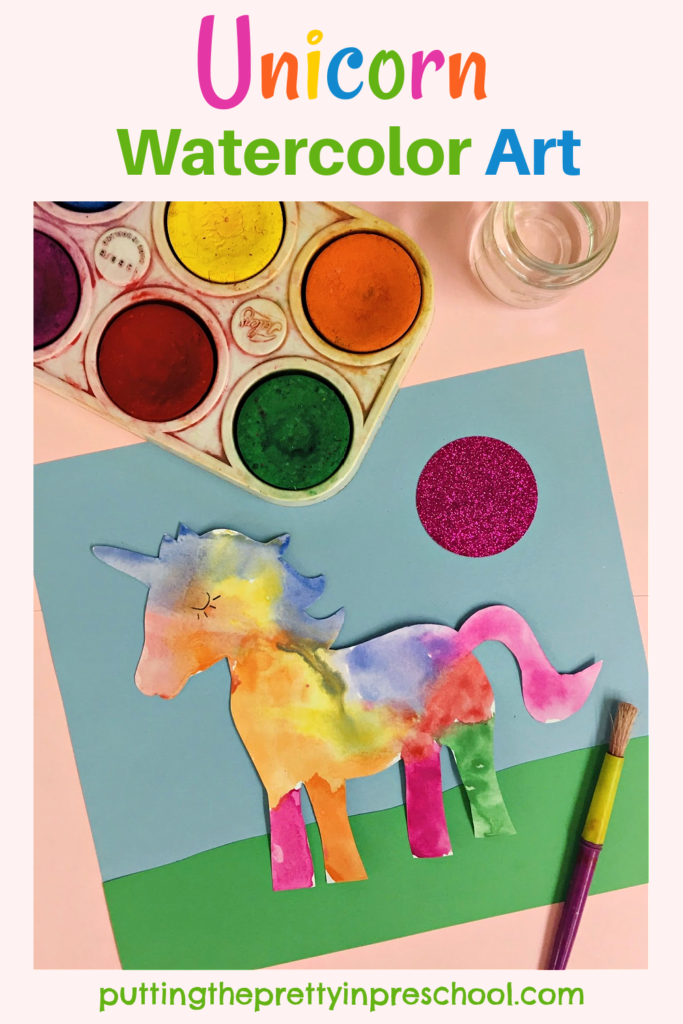
Beautiful unicorn watercolor art project with non-toxic tempera paint pucks and fadeless construction paper. Free unicorn printable to download.

_______

Tempera paint pucks are a great medium for decorating a unicorn template, as they have a whimsical watercolor look. They come in a variety of bright, vibrant hues, and an added bonus is that the paint dries quickly. In this unicorn watercolor art project, painted unicorns are included in a pretty paper craft scene.

_______

Follow me on Pinterest for more early learning ideas.

_______

Supplies To Collect
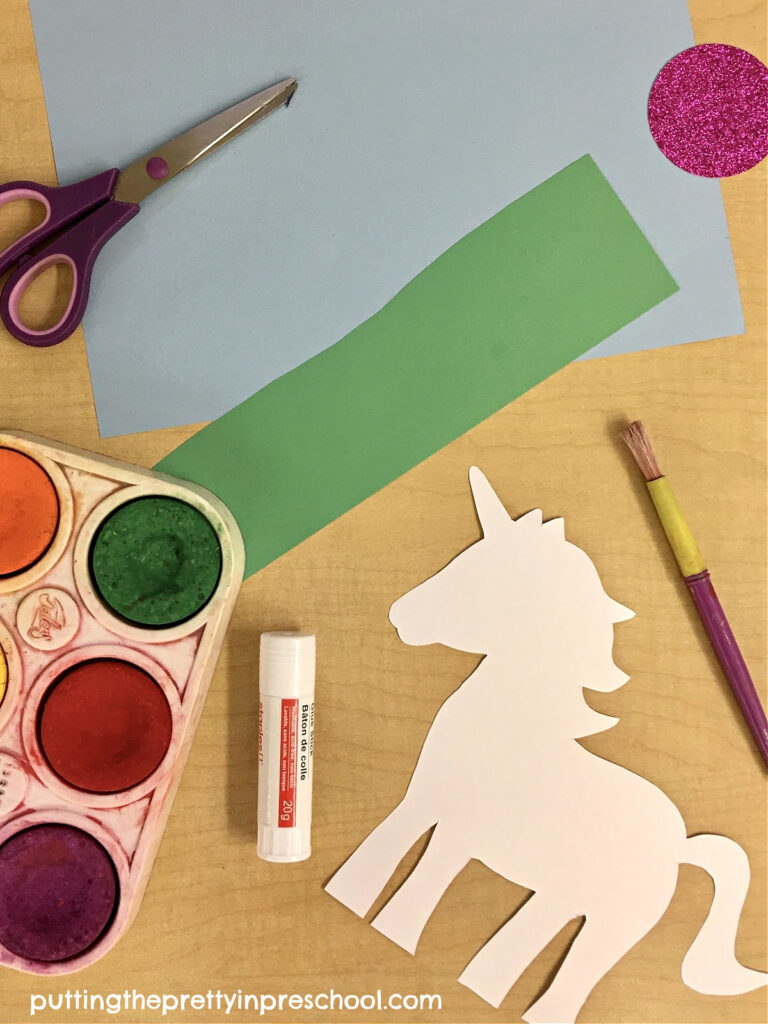
Supplies to create a stinning unicorn scene with tempera paint pucks and fadeless construction paper. A free unicorn template is available to download.

_______

Gather the following supplies to complete the beautiful unicorn scene:

  • non-toxic tempera paint pucks in a variety of colors
  • paint cake trays or muffin tins
  • paintbrushes and pots
  • 8 ½ inch x 11 inch white cardstock paper
  • 8 ½ x 11 inch green and light blue cardstock paper
  • metallic cardstock
  • circle paper punch
  • pencil and scissors
  • glue stick or glue gun
  • waterproof tablecloth or newsprint

_______

The Unicorn Watercolor Art Project

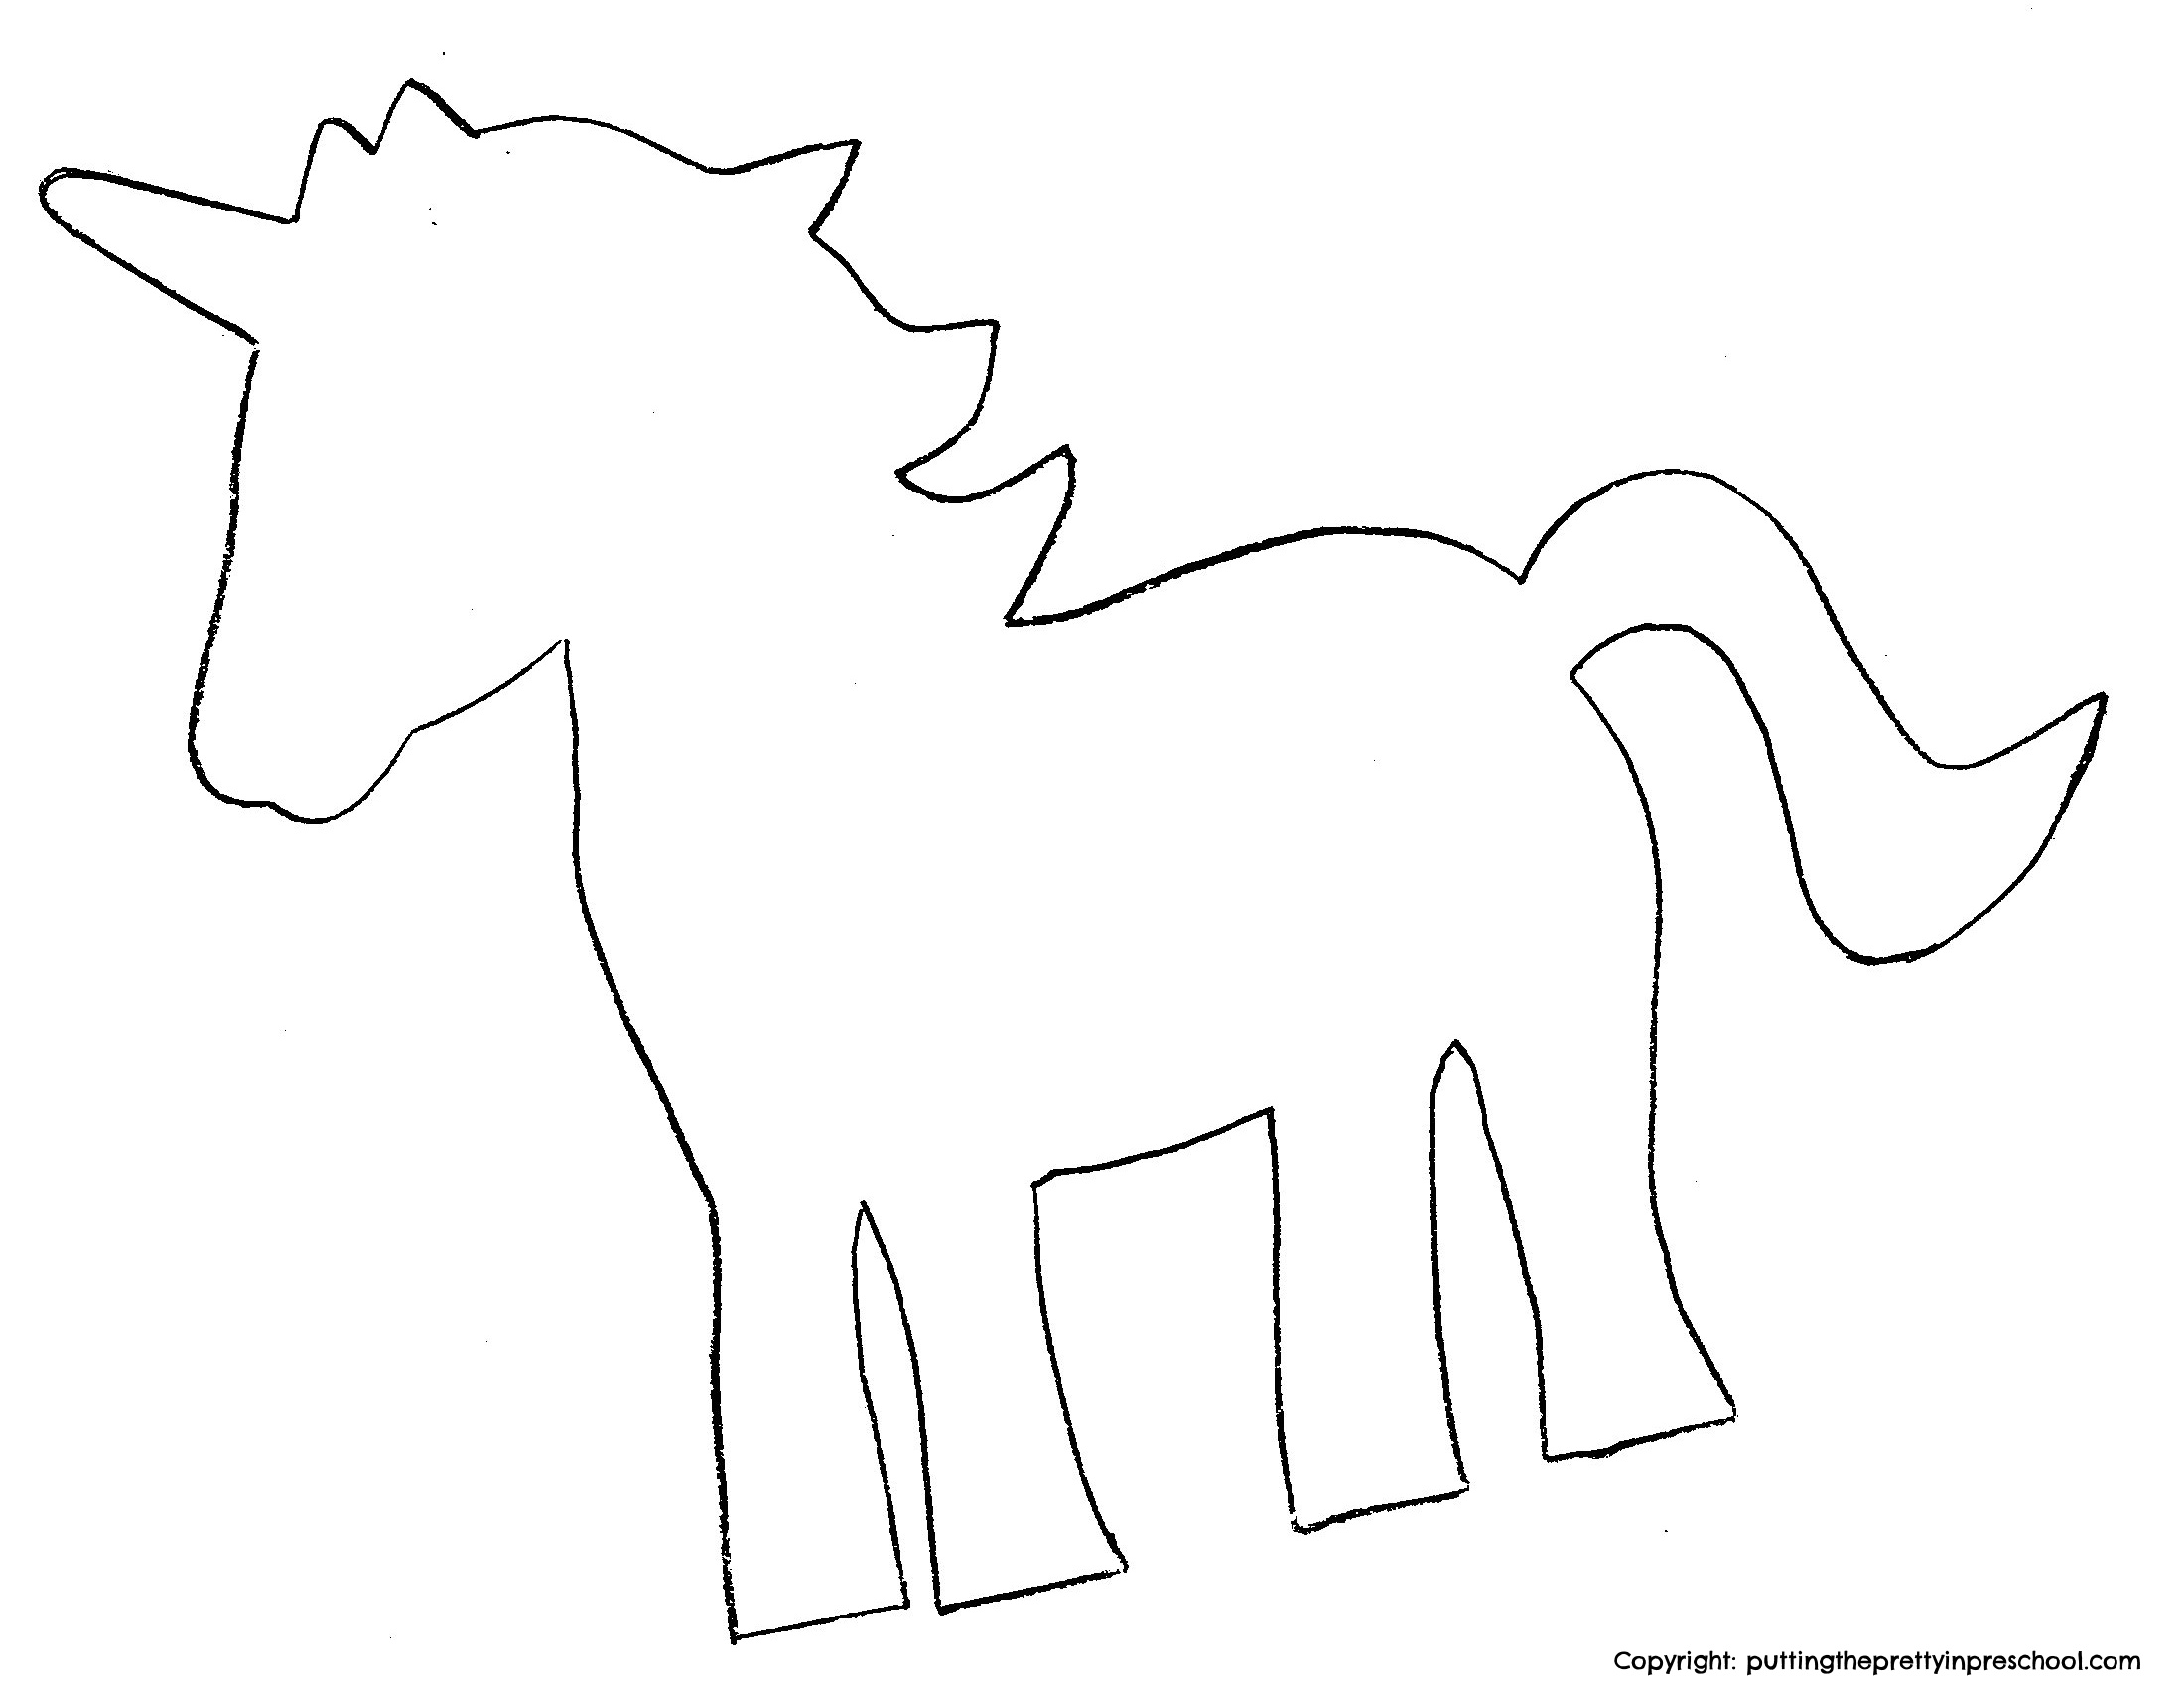
To start this stunning mythical-themed art project, first trace and cut out unicorns from white cardstock paper. Download the free template below for the activity, or choose your own design.
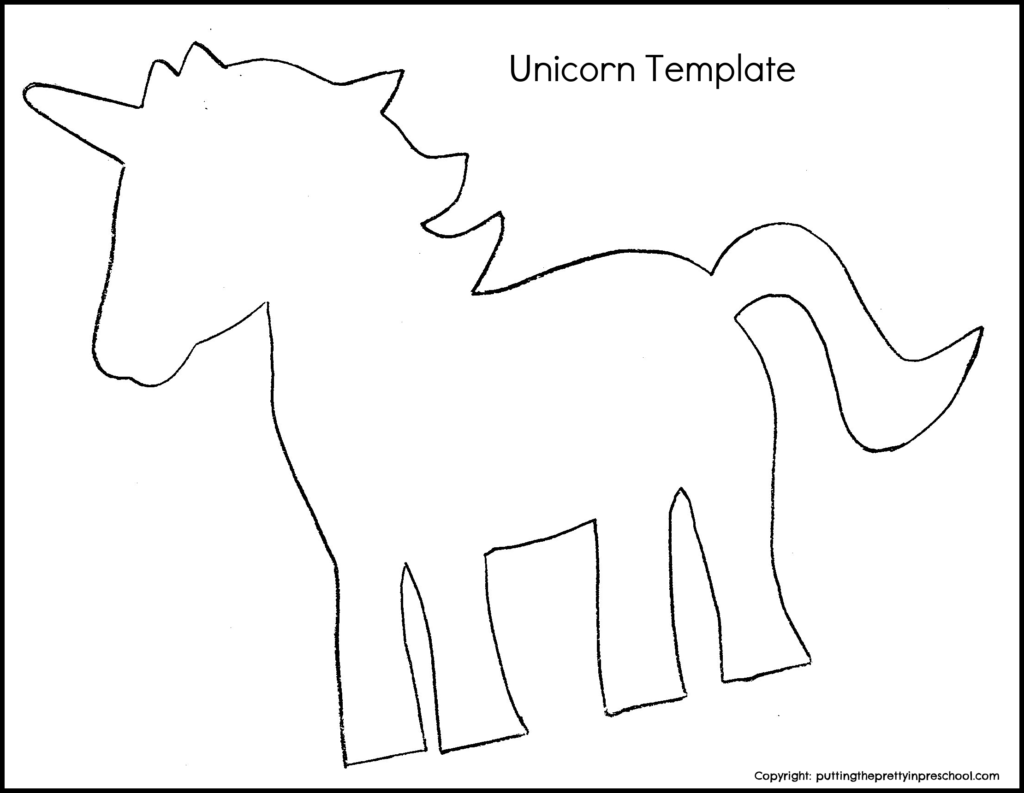
Download this free unicorn template for art and craft projects.

_______

Unicorn PrintableDownload

This printable is for individual or one classroom use only.

_______

Next, cover a table with a waterproof tablecloth or newsprint.

Then set up stations with a paper unicorn, paintbrush, paint pot filled with water, and tray with tempera paint pucks in bright hues.

Invite each participant to dip their paintbrush in water and generously wet a paint puck, and then begin painting their unicorn. Between colors, paintbrushes should be rinsed in a pot of water.

Tip: Prewetting tempera pucks with a paintbrush and water makes this activity easier for little learners and helps them get off to a good start.

When completed, set aside the decorated unicorns to dry. This will take under an hour. 

If there is time, participants may enjoy more watercolor painting on a rectangular or square piece of cardstock or copy paper.

After everyone has finished, rinse off the paint trays, pat them with a paper towel to remove excess water, and let them dry.
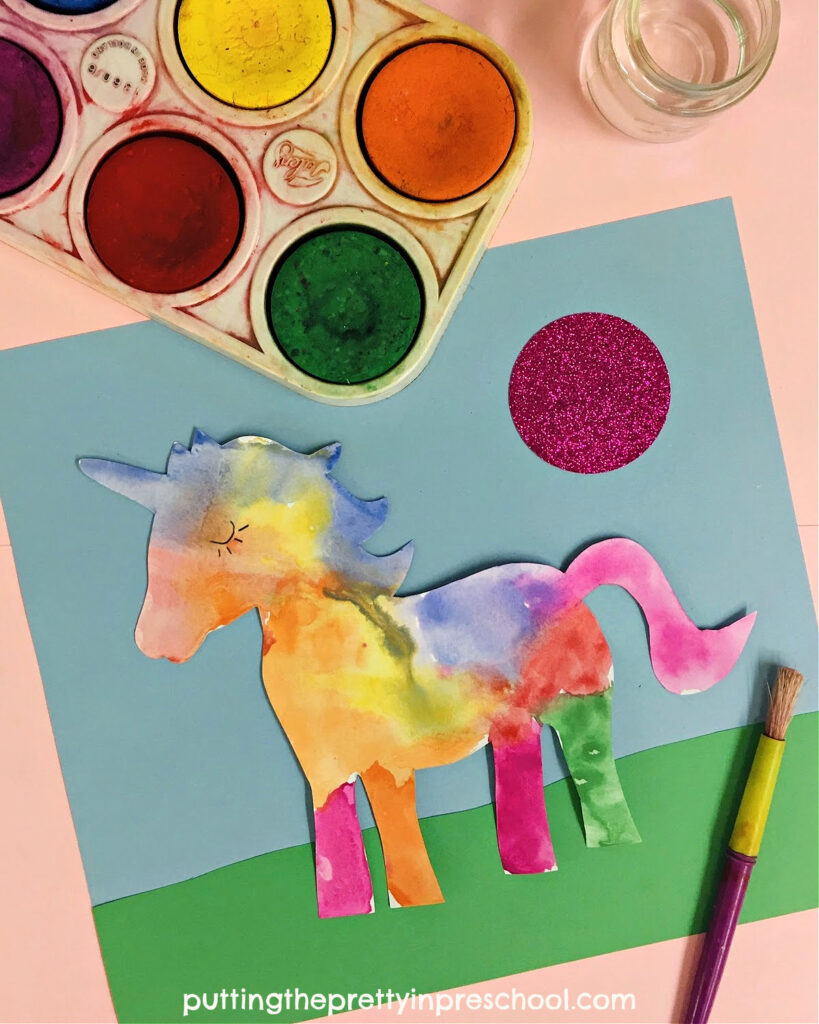
Beautiful unicorn watercolor art project with non-toxic tempera paint pucks and fadeless construction paper. Free unicorn printable to download.

_______

Creating A Unicorn Scene

To create a beautiful unicorn scene for each painted creature, cut a narrow, green strip from fadeless construction paper to represent grass.

Using a glue gun or glue stick. adhere the green strip to the bottom of a piece of light blue construction paper.

Then punch or cut a circular sun from metallic cardstock in a hue that complements the painted unicorn.

Finally, glue a sun and unicorn to the blue and green construction paper background, and pencil in a unicorn eye.

Note: Older children can complete these unicorn scene steps on their own.
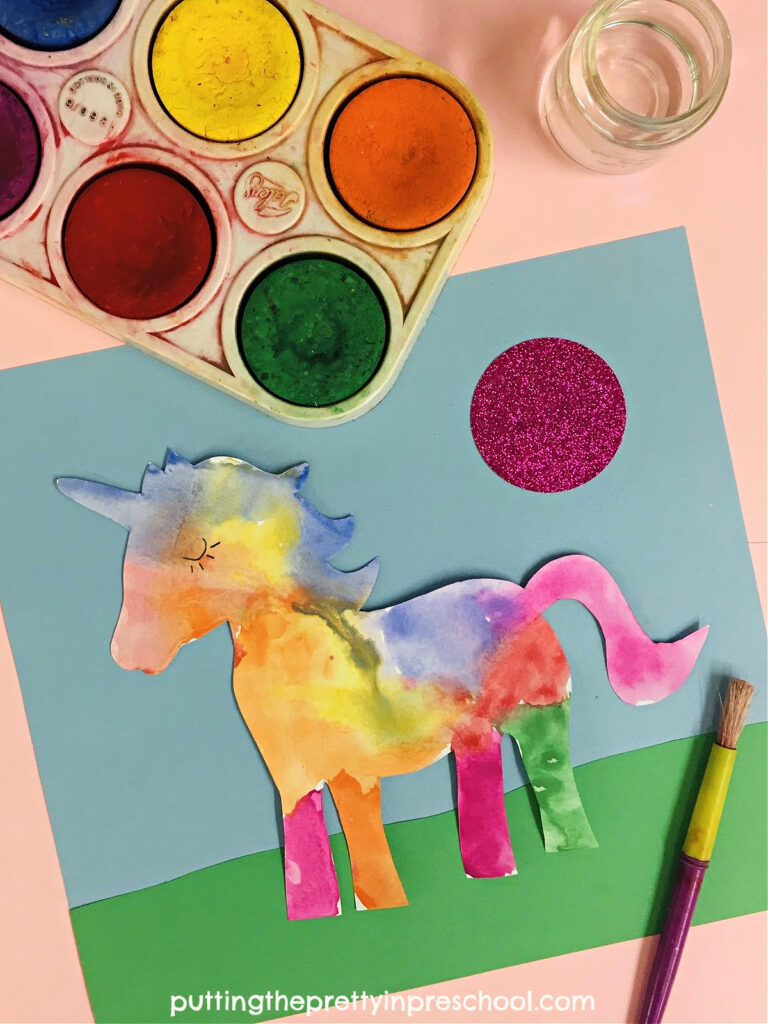
A stunning unicorn art project with tempera paint pucks and fadeless construction paper. Download a free unicorn template for the activity.

_______

Watercolor-painted cardstock or copy paper would also work nicely as a backdrop for a painted unicorn.
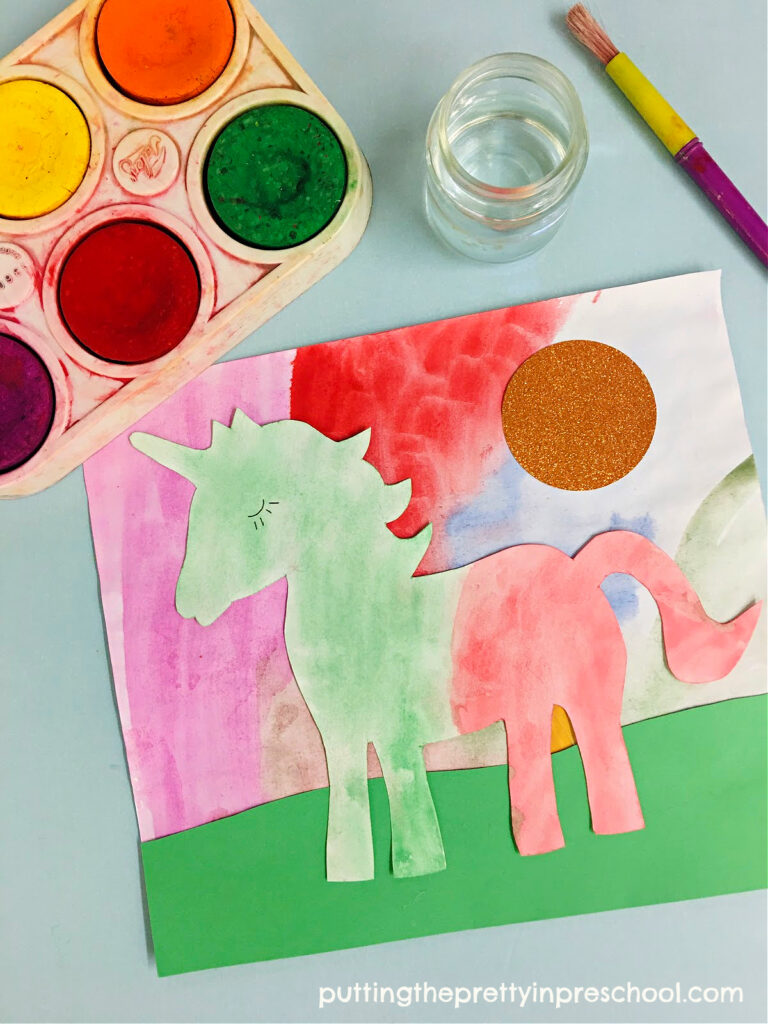
A stunning unicorn art project with tempera paint pucks and fadeless construction paper. Download a free unicorn template for the activity.

_______

Non-Toxic Paint Pucks

Non-toxic tempera paint pucks are a nice resource to have in your collection of art supplies. Here is a little more information about them:

  • Tempera paint pucks are watercolor paints in a puck or cake form.
  • These easy-to-use paints come in many beautiful hues.
  • Color possibilities are limitless, as the paints can be mixed to make new hues.
  • The paint cakes sit nicely in art trays or standard muffin tins that stack easily and take very little room when stored.
  • The non-permanent paints can be used on paper, cardboard, fabric, and wood.
  • Adding differing amounts of water to the cakes results in different effects and lighter and darker shades.
  • Crayons and oil pastels work beautifully with the tempera paint pucks.
  • This art medium requires minimal preparation and clean-up time and is easy to use with a large group or classroom of students.
  • The tempera pucks and trays are inexpensive to buy and last a long time.

_______

Related:

Unicorn Playdough Tray

Unicorn Puppet Craft

_______

[Read more…] about Unicorn Watercolor Art
Tweet
Share
Share
Pin

Filed Under: art, crafts, preschool, pretend play, unicorns Tagged With: painting, paper crafts, unicorns

Popcorn Spice Mother’s Day Craft

May 13, 2023 by Annette Kaminsky Leave a Comment

Tweet
Share
Share
Pin
A simple and aromatic Mother's Day craft that is super fun to make. Use spices, sesonings or herbs for this sensory craft activity,

_______

This simple and aromatic popcorn spice Mother’s Day craft is so fun to make. And it really caters to the sense of smell. Warning: there may be a few sneezes while doing this activity!

_______

Follow me on Pinterest for more early learning ideas.

_______

Supplies Used In The Craft

The following easy-to-find supplies are used in this spicy craft:

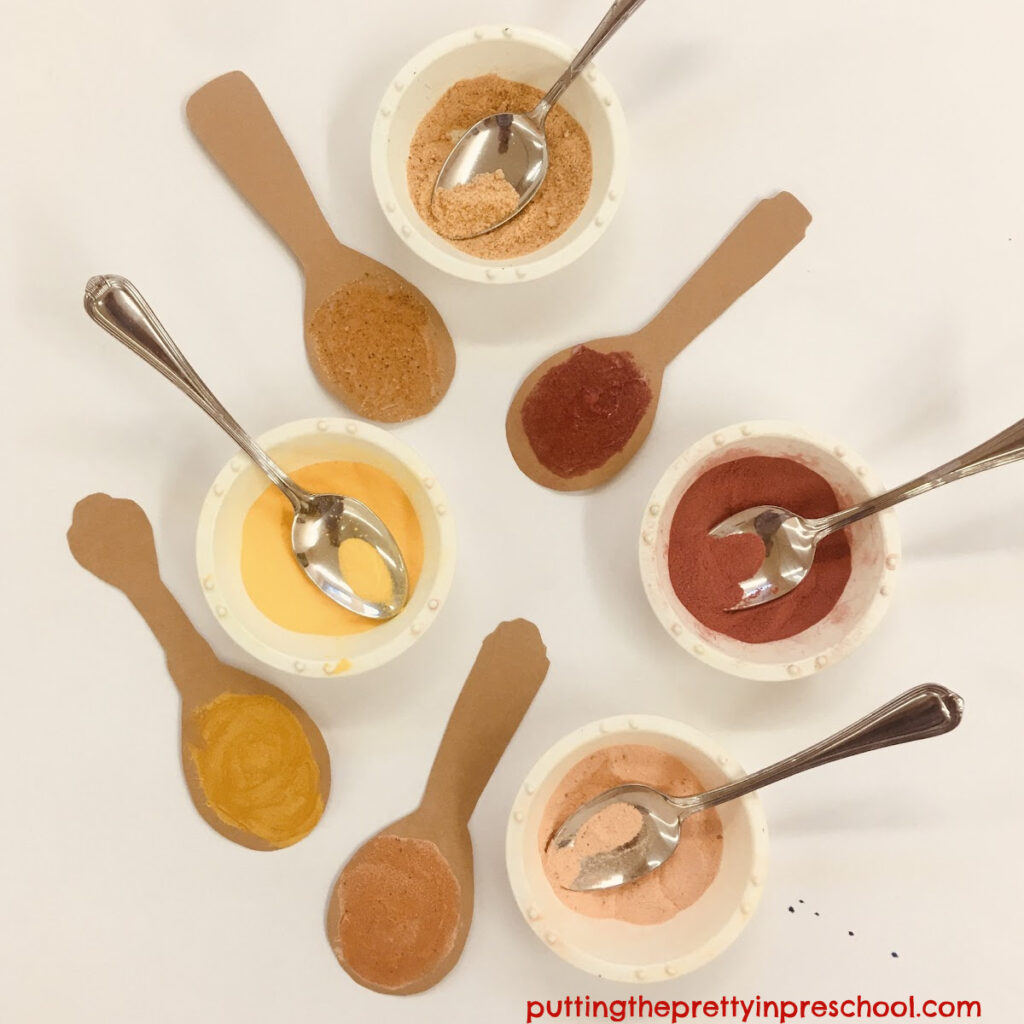
  • popcorn seasonings: butter salt, jalapeno cheddar, ketchup, and all dressed
  • small bowls and spoons
  • dessert plates
  • brown cardstock paper
  • cream-colored cardstock paper
  • scissors and pencil
  • glue stick
  • tablecloth

_______

The Popcorn Spice Mother’s Day Craft

To make this craft, first, cover a table with a washable tablecloth.

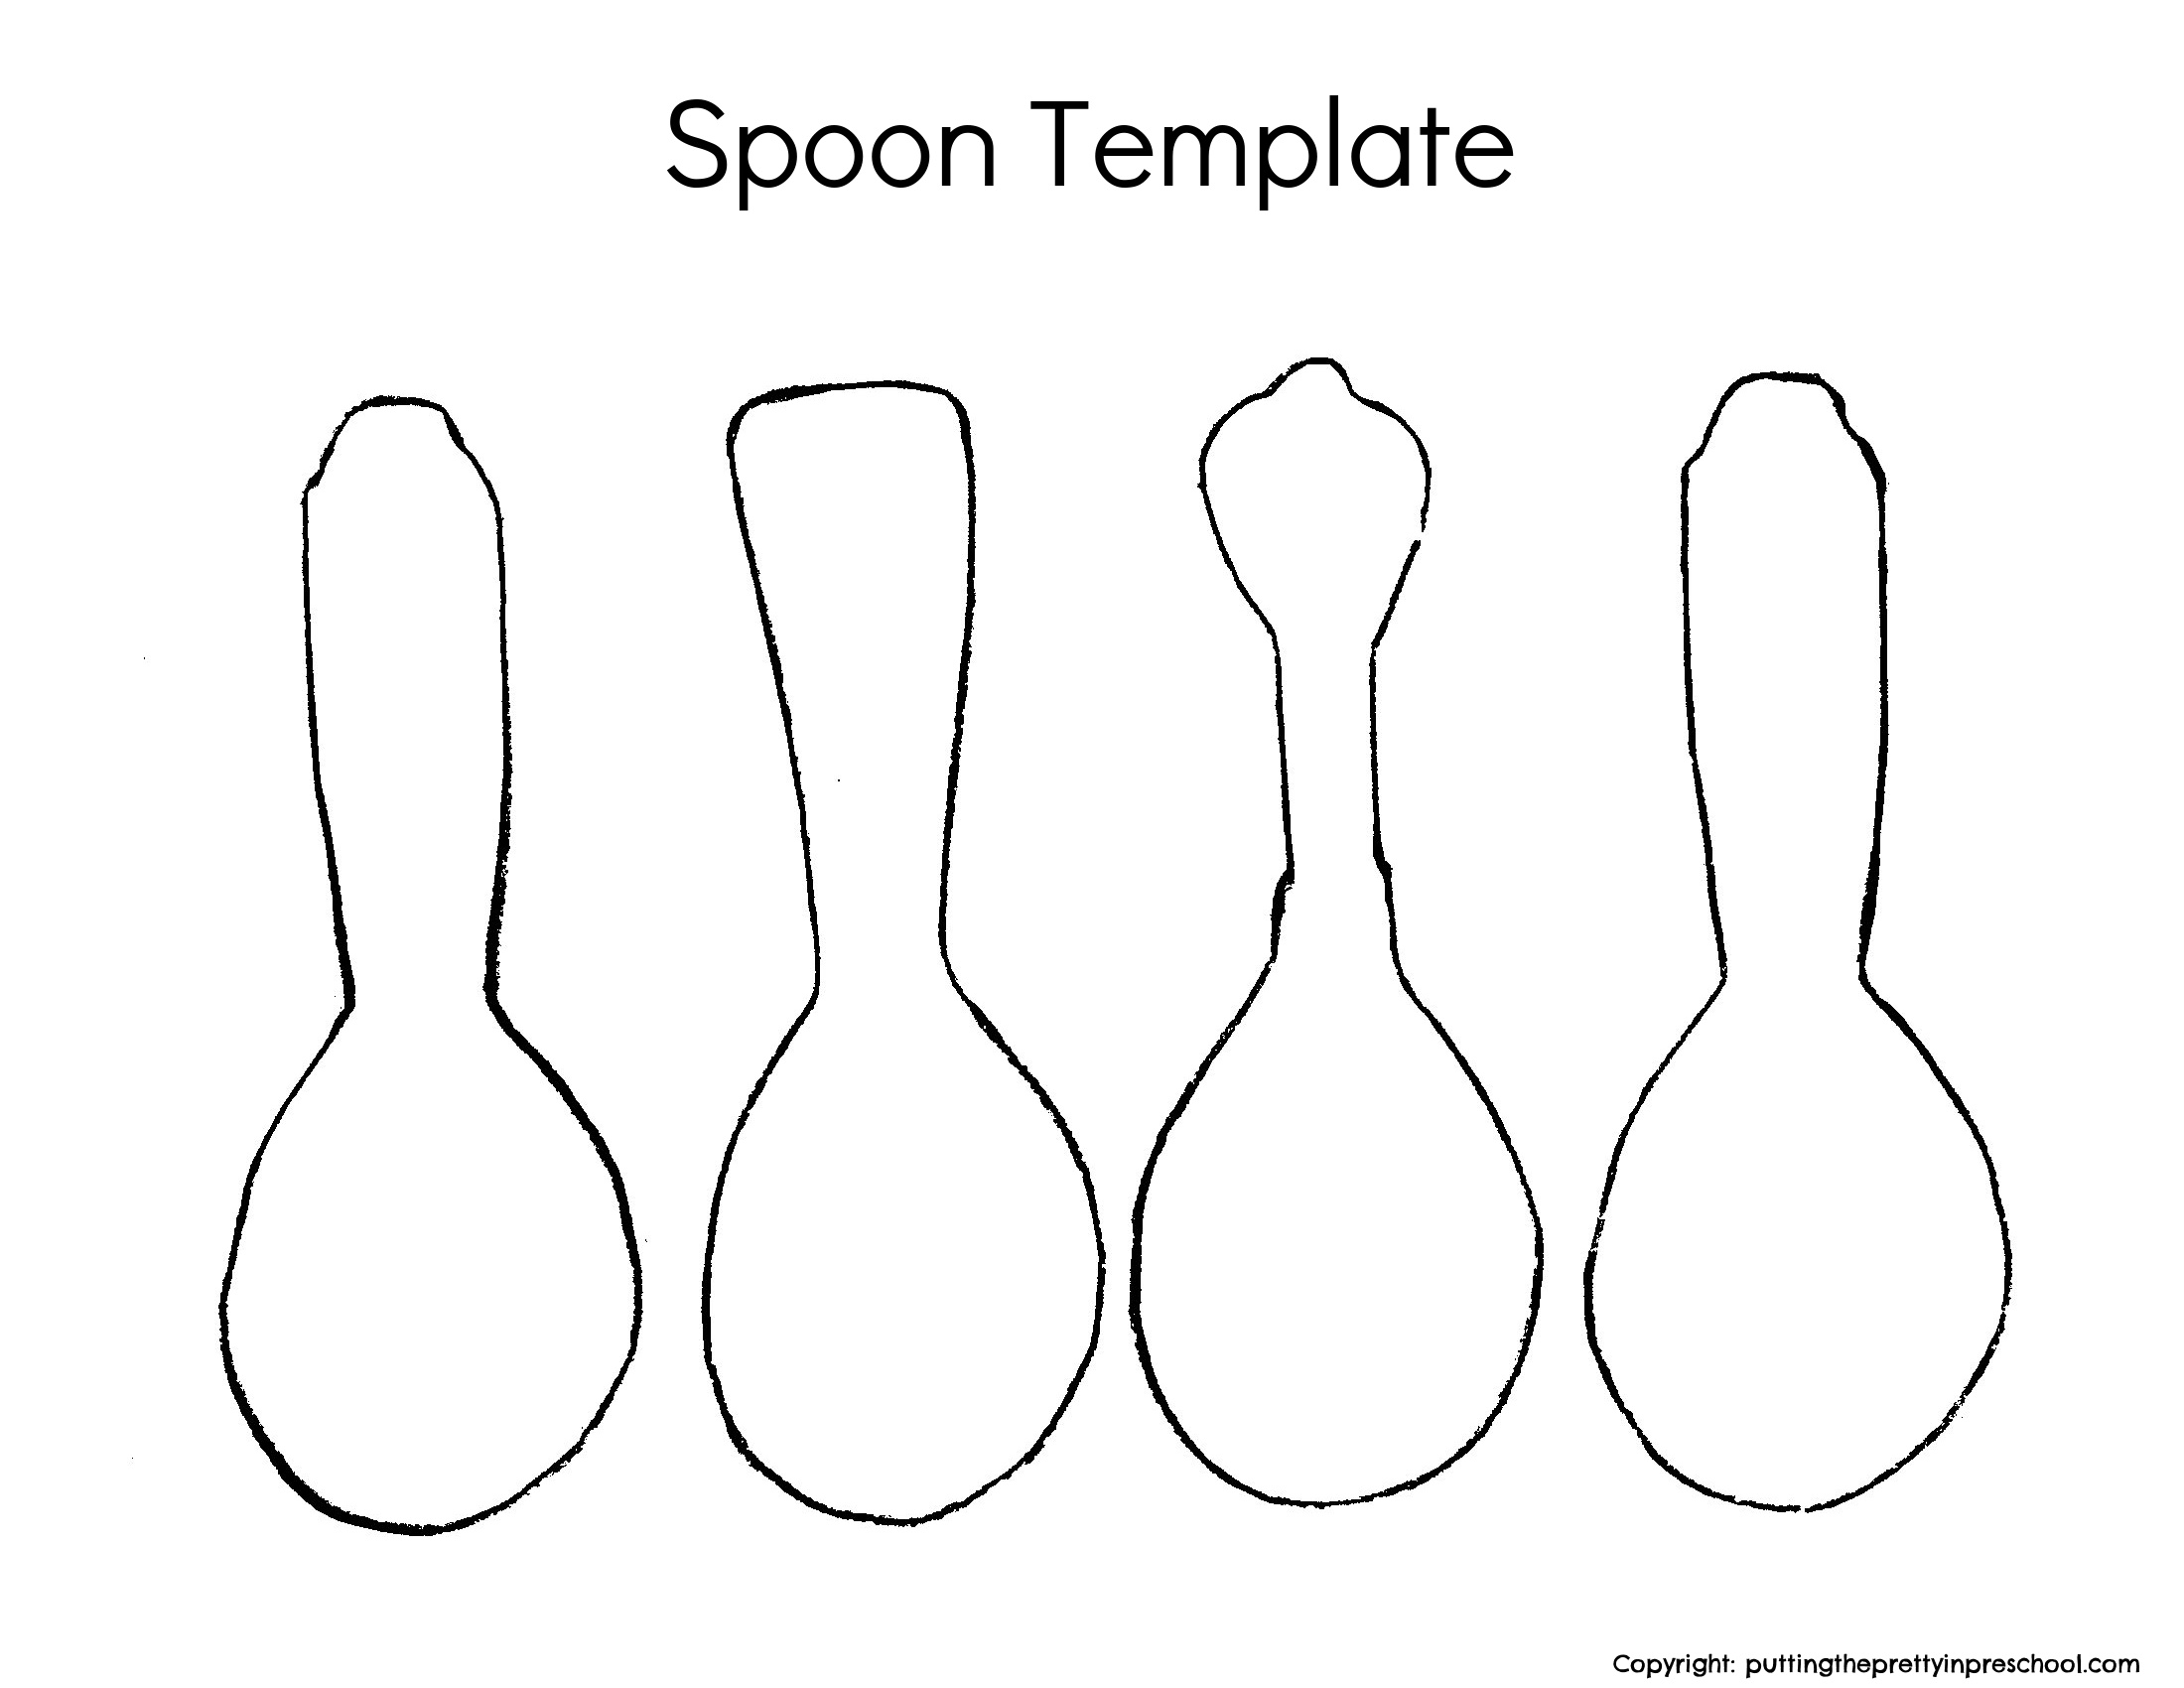
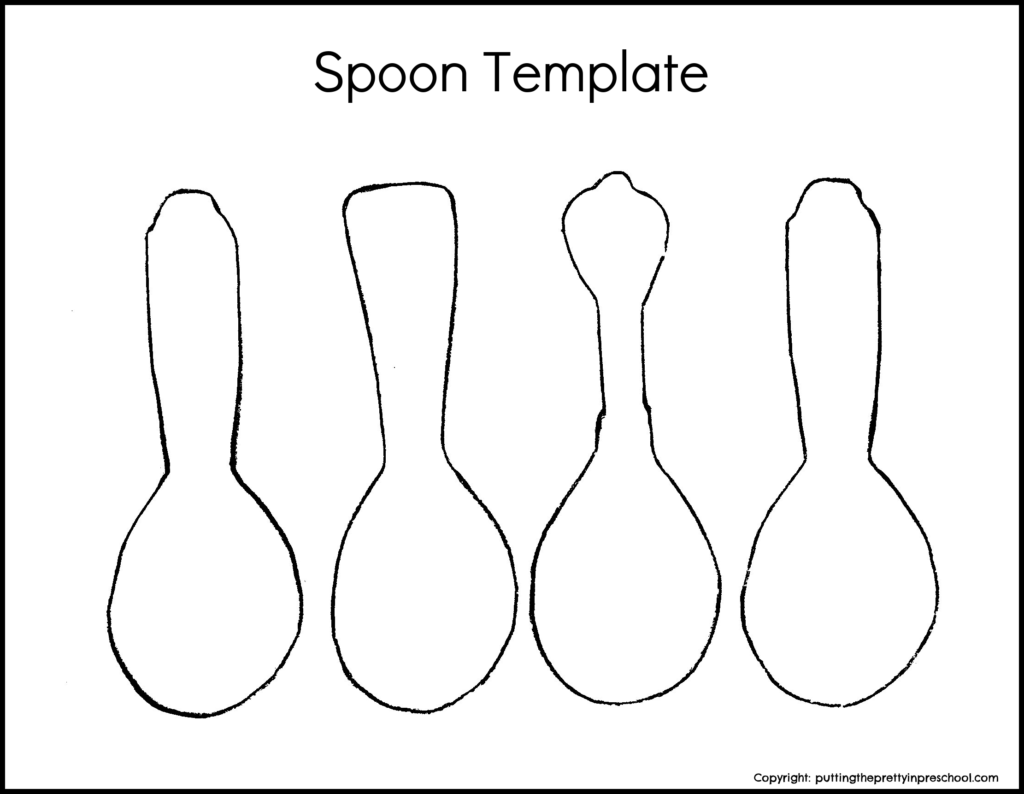
Next, trace and cut out four “wooden spoons” from brown cardstock paper. Use the printable below for the spoons or design your own.

A spoon template for crafting.

_______

Spoon PrintableDownload

_______

Then spoon popcorn seasonings into small bowls.

Four popcorn seasoning flavors for an aromatic Mother's Day craft project.

_______

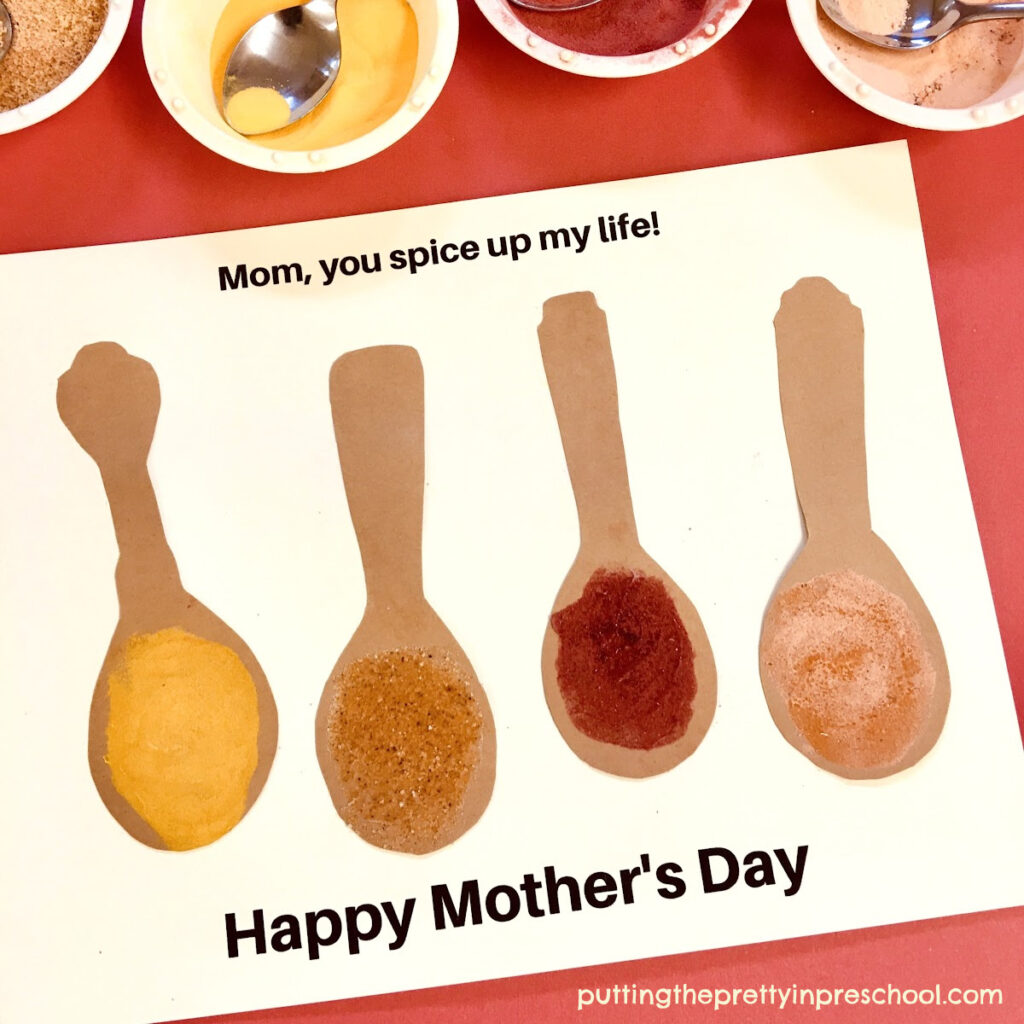
Afterward, use a glue stick to spread a thick layer of glue on the head of a spoon.

Next, hold the paper spoon over a dessert-sized plate and sprinkle a generous amount of popcorn seasoning on it.

Then shake off excess seasoning and let the spoon dry.

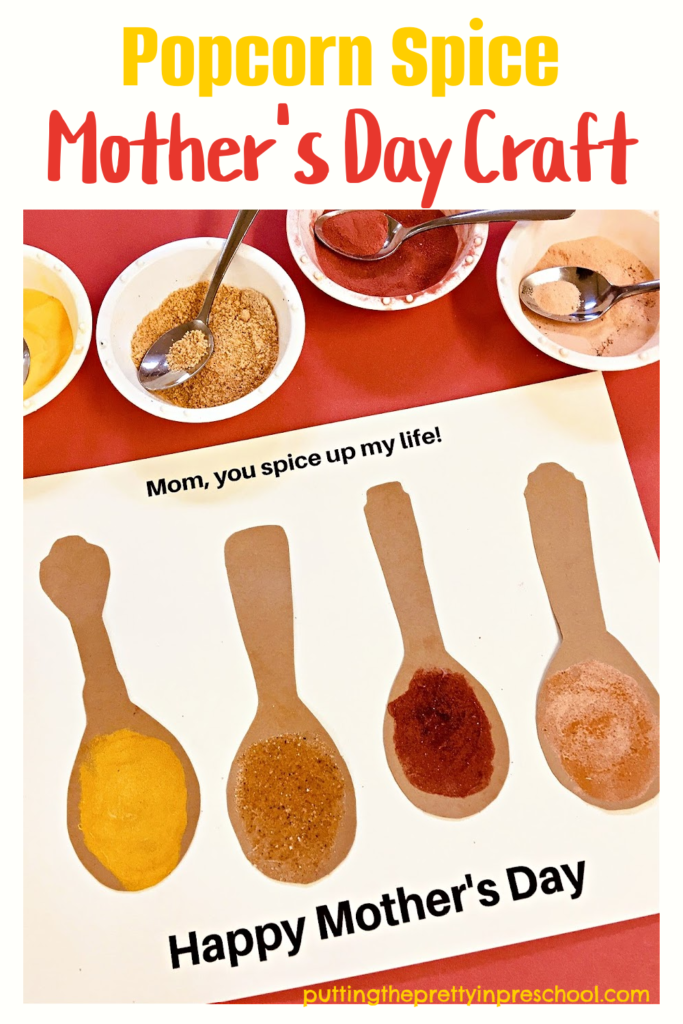
An oh-so-easy and fun popcorn seasoning Mother's Day craft to do in one sitting. Explore the sense of smell with this aromatic craft activity.

_______

Repeat the process with all the spoons and seasonings.

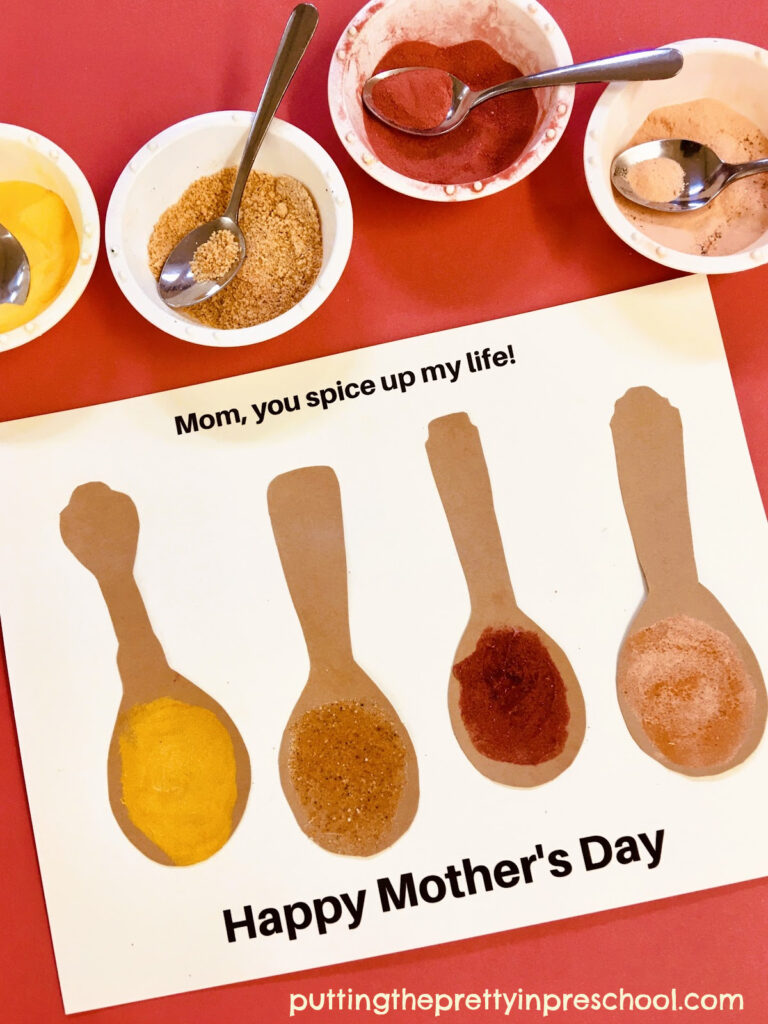
Then use the glue stick to affix the spoons to a paper background.

A simple and aromatic Mother's Day craft that is super fun to make. Use spices, sesonings or herbs for this sensory craft activity,

_______

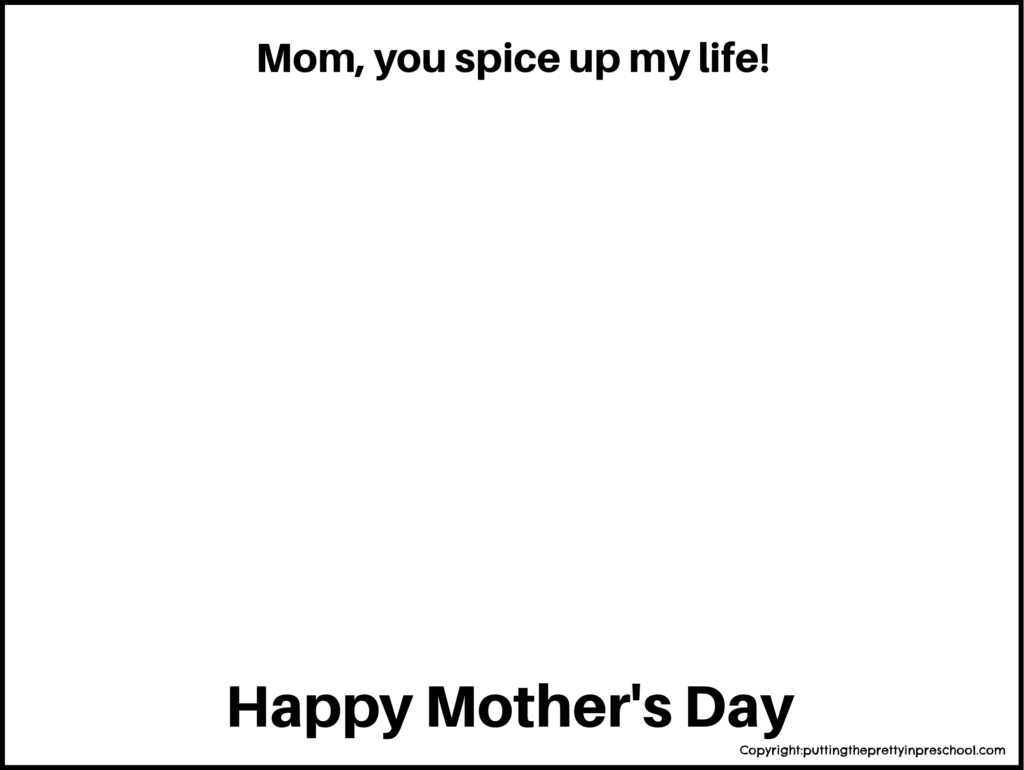
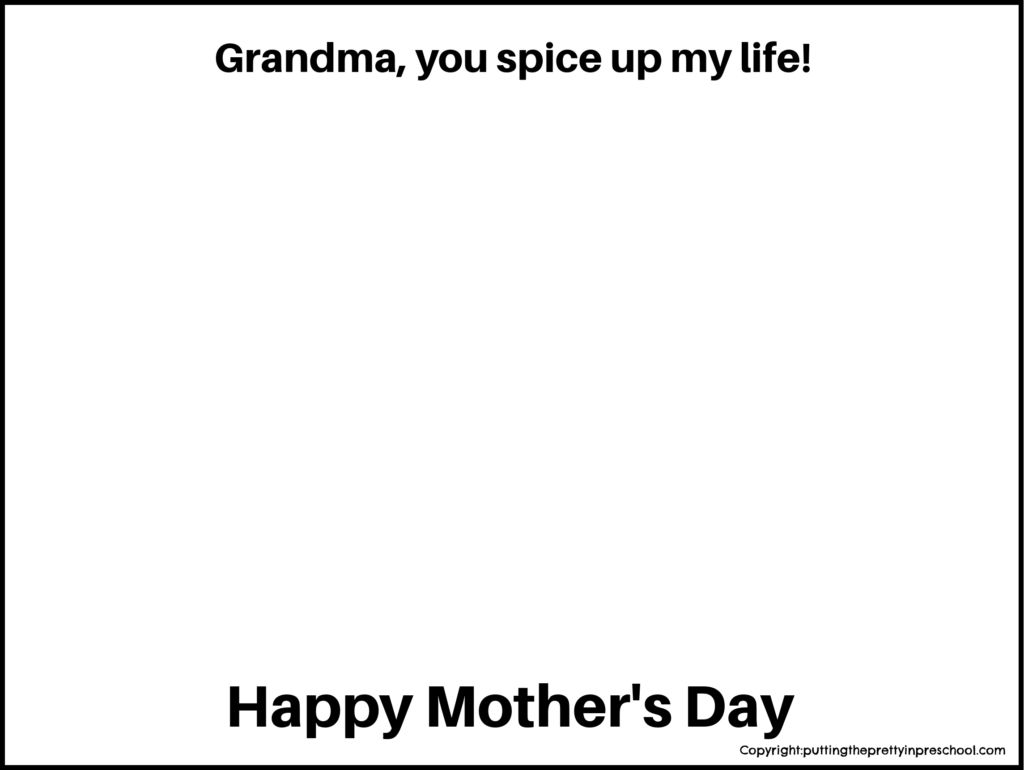
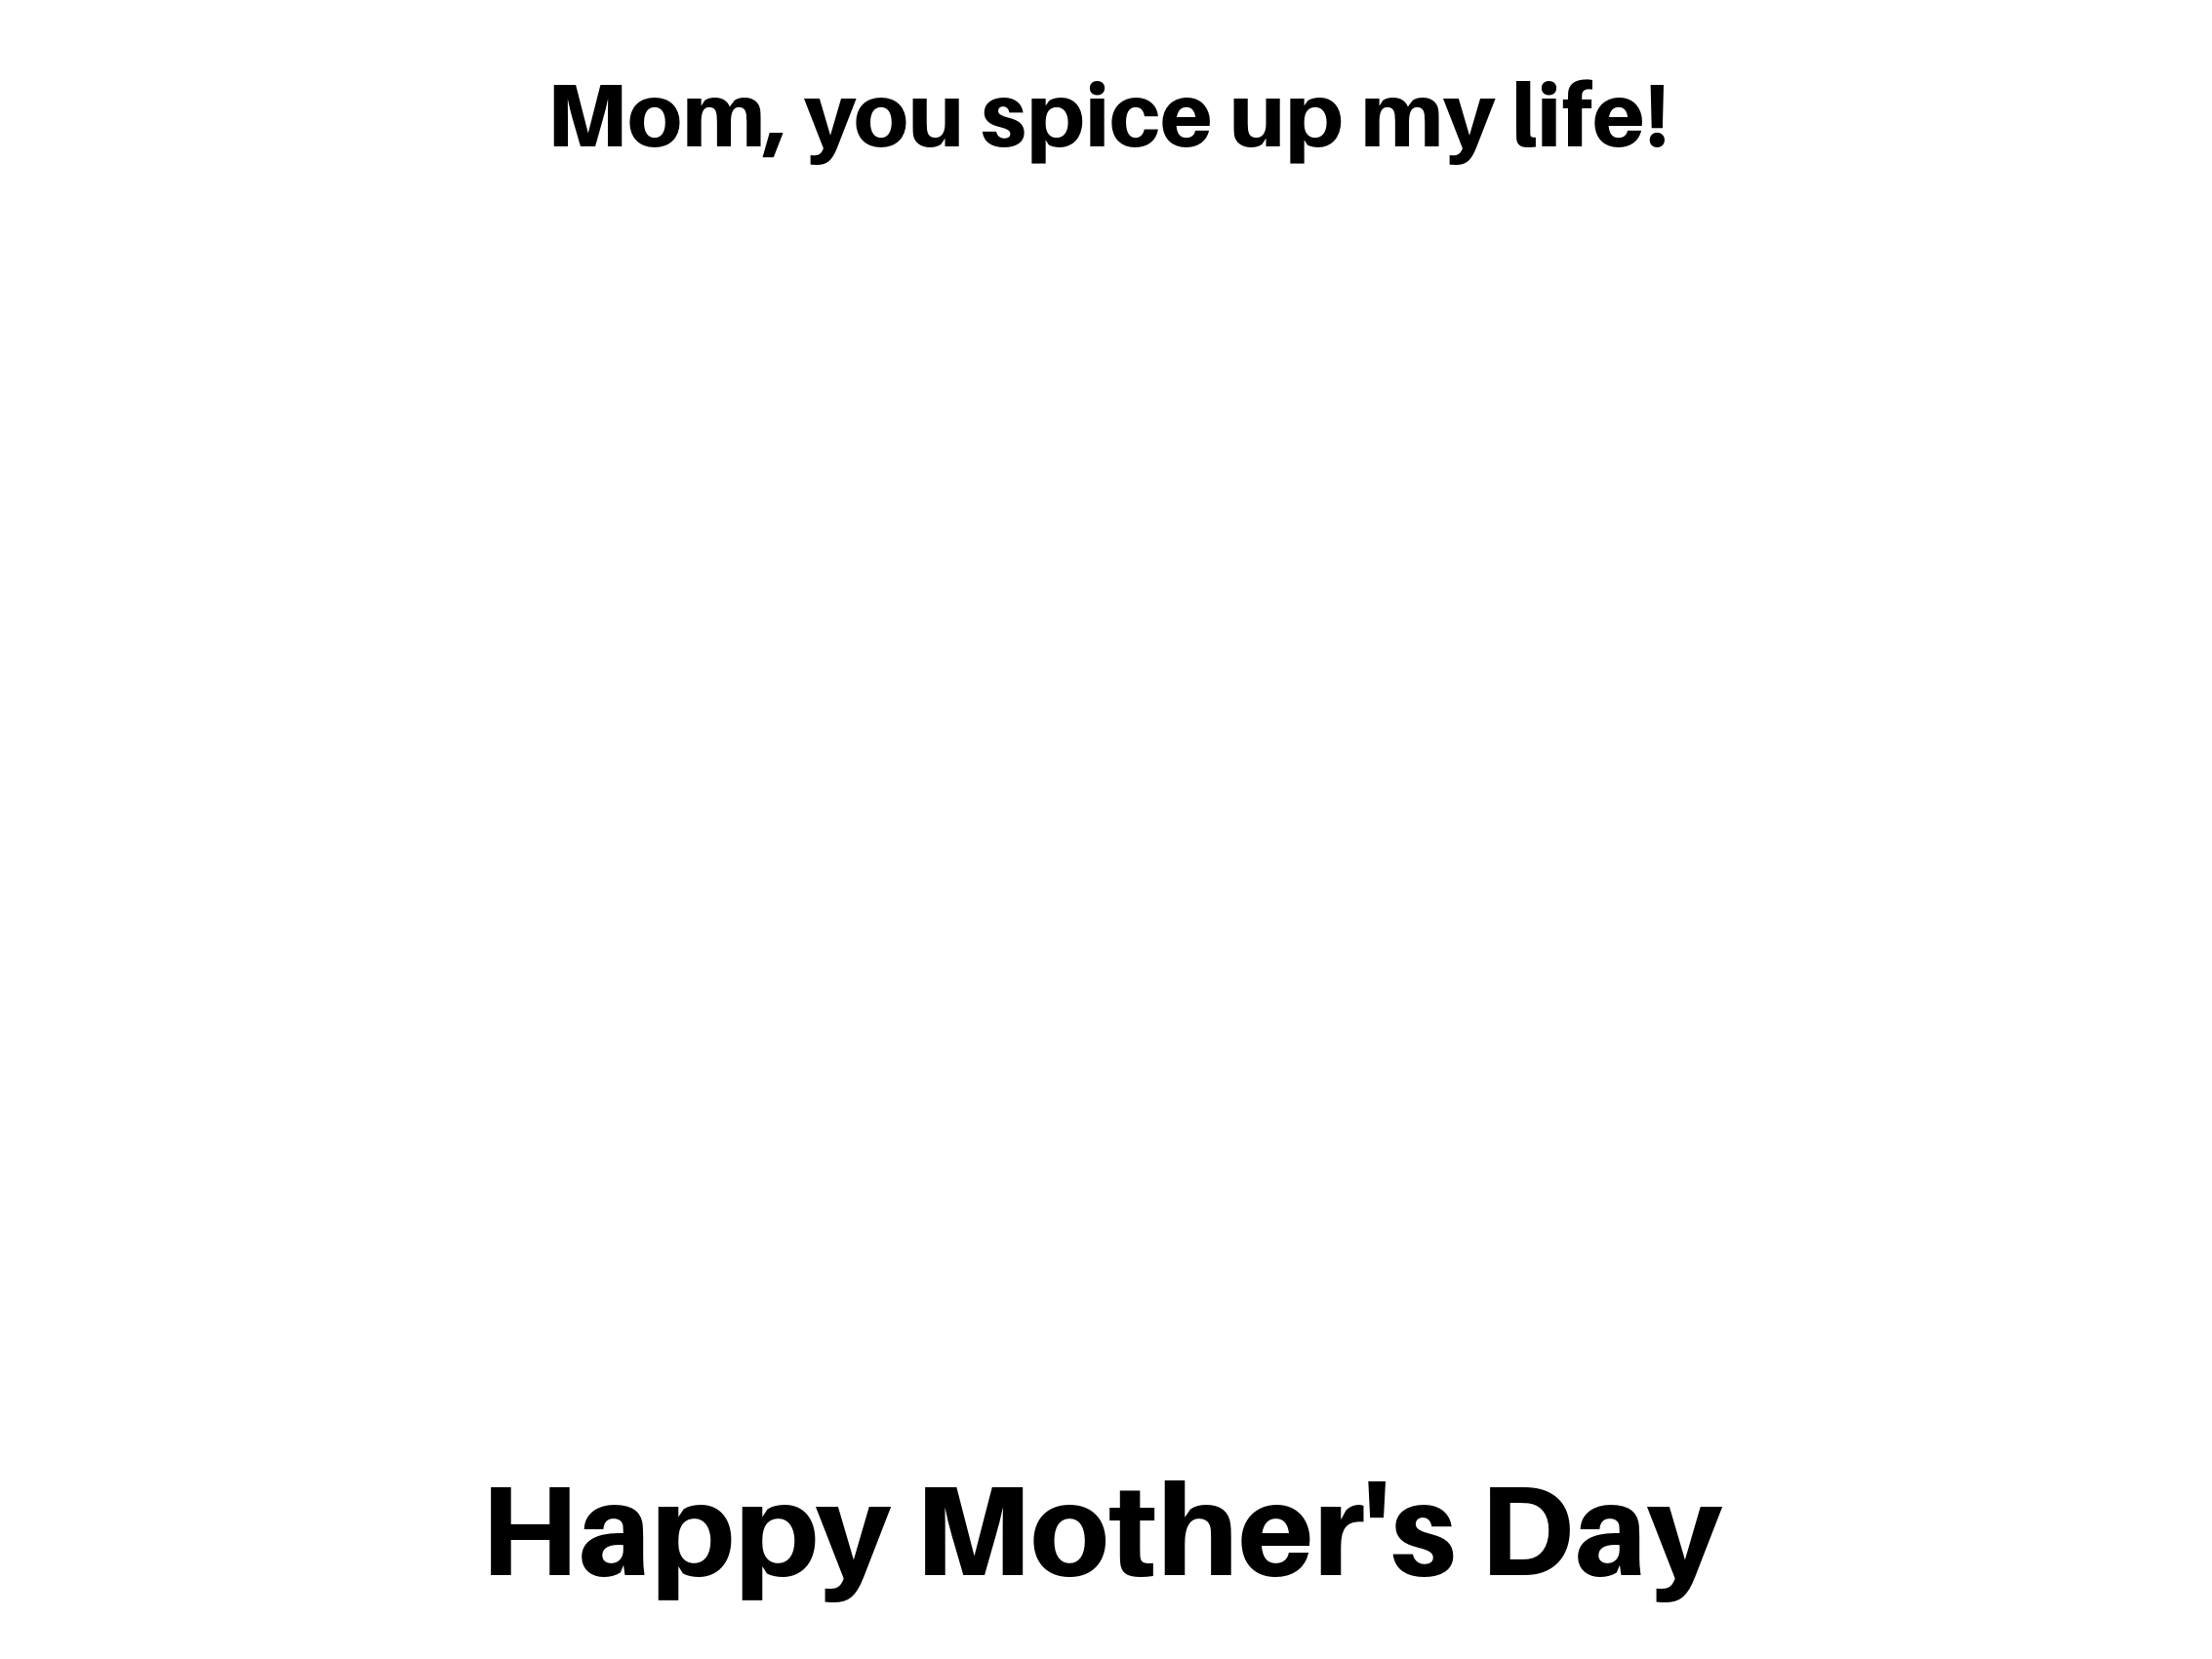
Finally, add the words “You Spice Up My Life” and “Happy Mother’s Day.” Feel free to use the template below for this craft.

Mother's Day craft template for an aromatic keepsake project for mom.

_______

Spiced Mother’s Day Craft PrintableDownload

_______

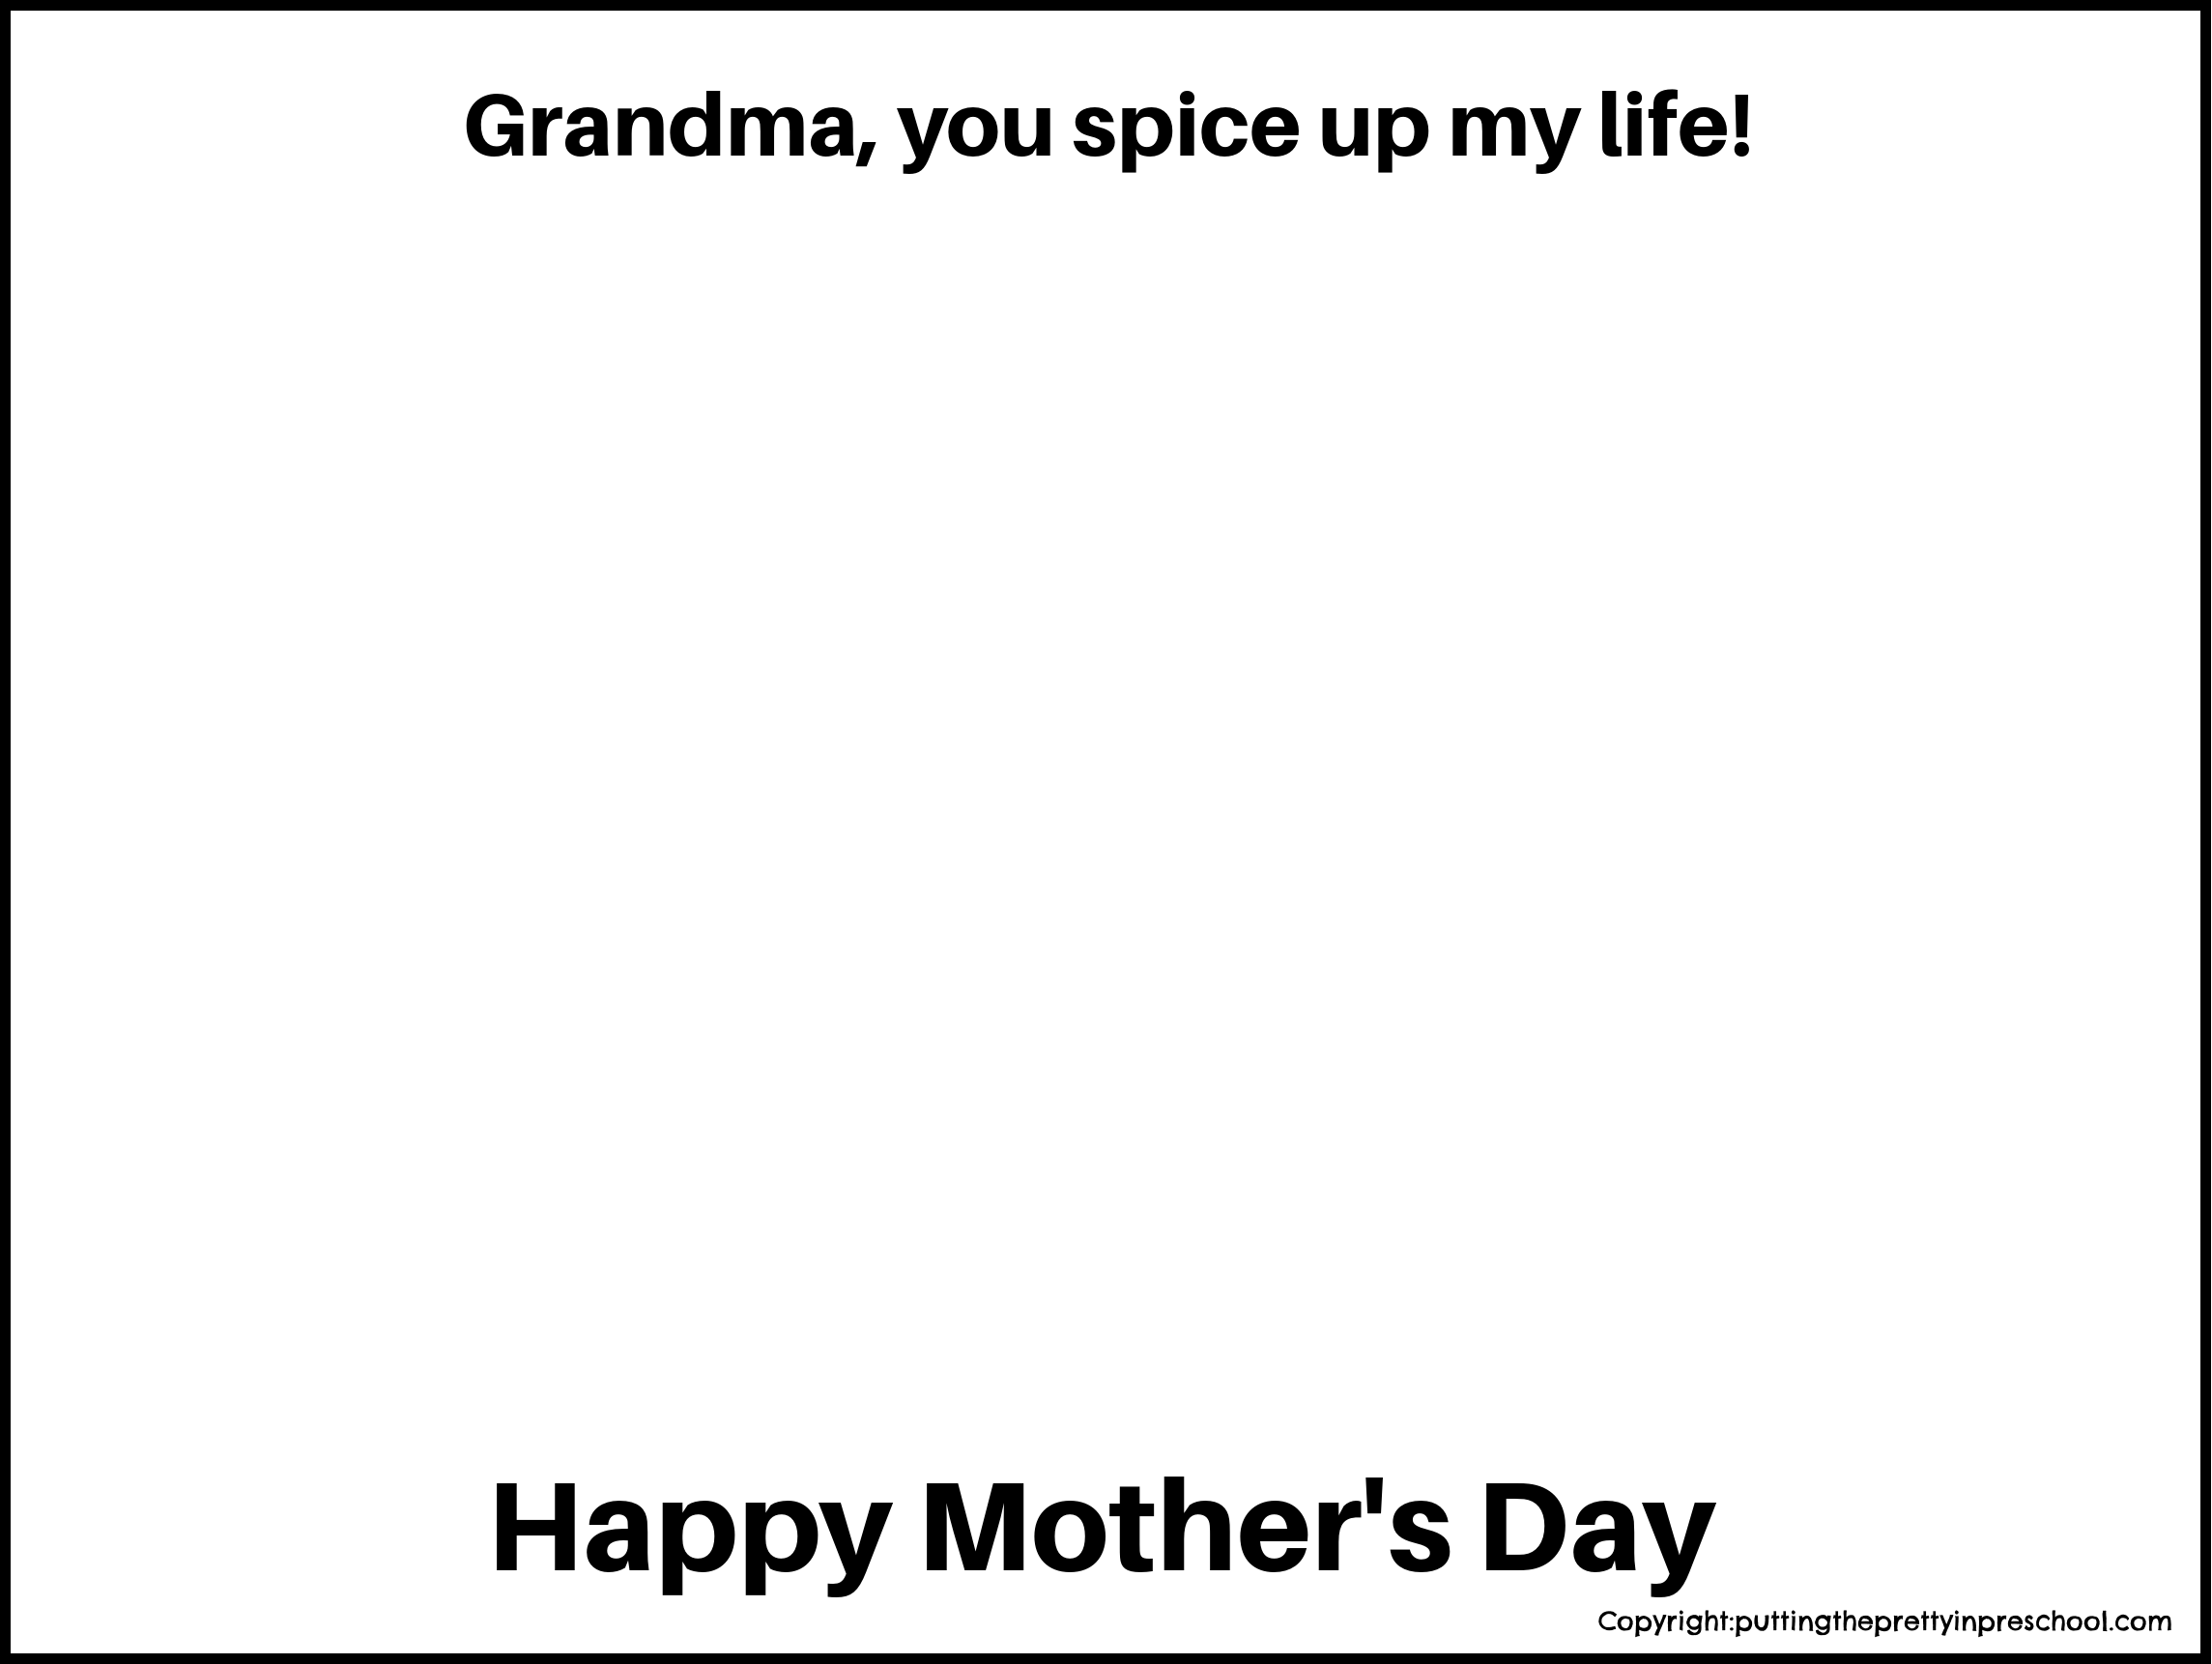
This template is perfect for grandma.

Mother's Day craft template for an aromatic keepsake project for grandma.

_______

Spicy Mother’s Day Craft TemplateDownload

_______

The bright yellow butter salt and ketchup seasonings add pops of color to the craft. Herbs or other spices could be substituted. What seasonings would you use?

A simple and aromatic Mother's Day craft that is super fun to make. Use spices, sesonings or herbs for this sensory craft activity,

_______

Related:

Mother’s Day Floral Craft

Mother’s Day Crafts And Gifts

_______

[Read more…] about Popcorn Spice Mother’s Day Craft
Tweet
Share
Share
Pin

Filed Under: art, crafts, Mother's Day, preschool, sensory Tagged With: Mother's Day craft, paper crafts, printables, sensory play

Paper Plate Easter Basket

April 2, 2023 by Annette Kaminsky Leave a Comment

Tweet
Share
Share
Pin
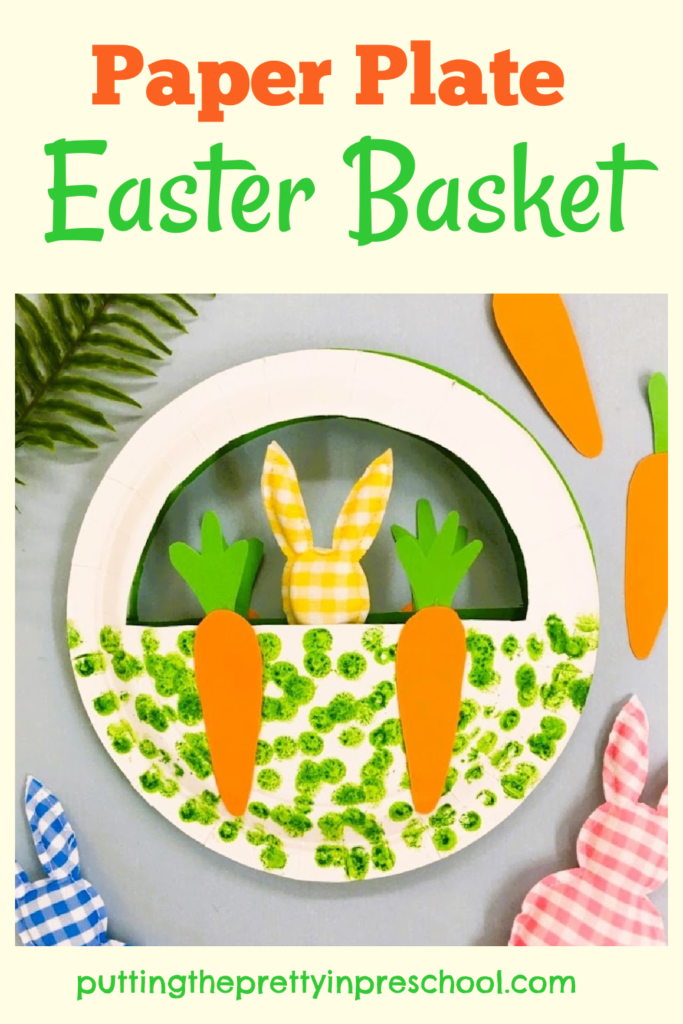
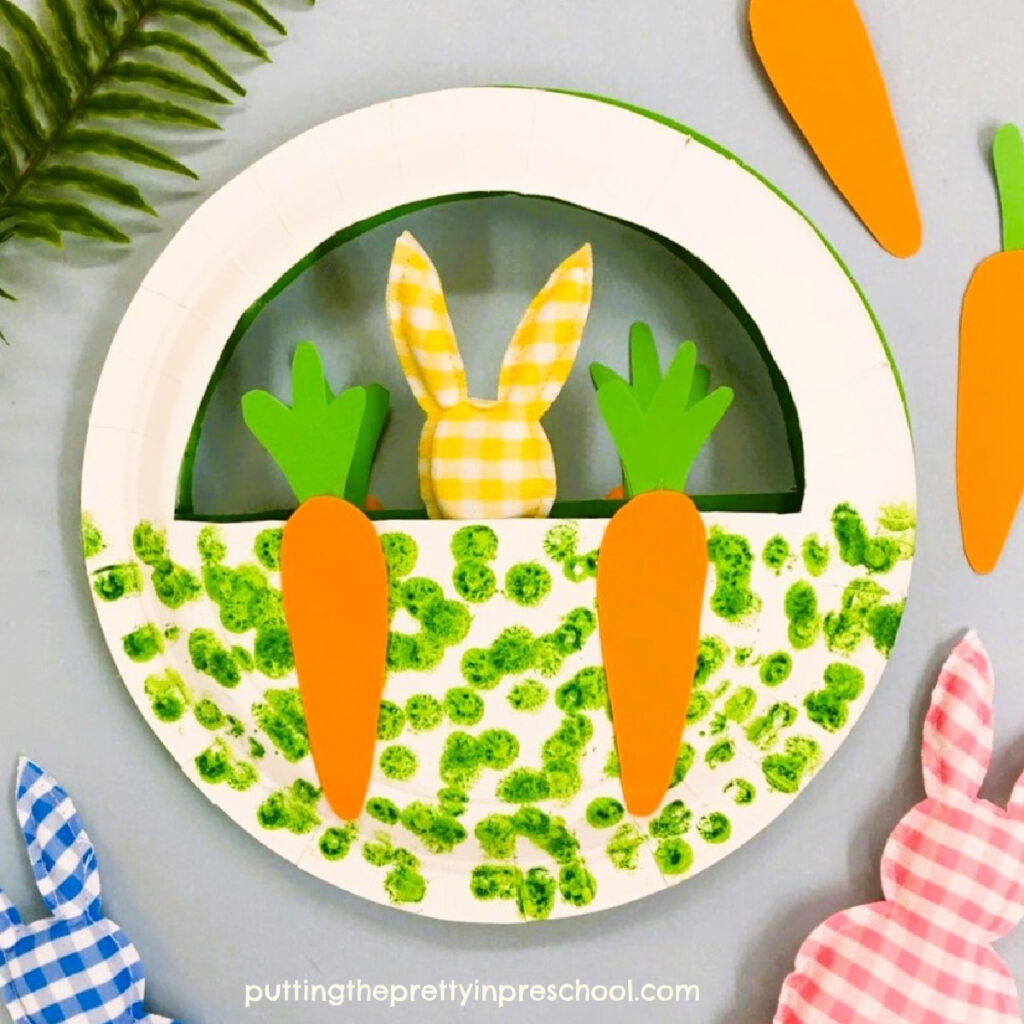
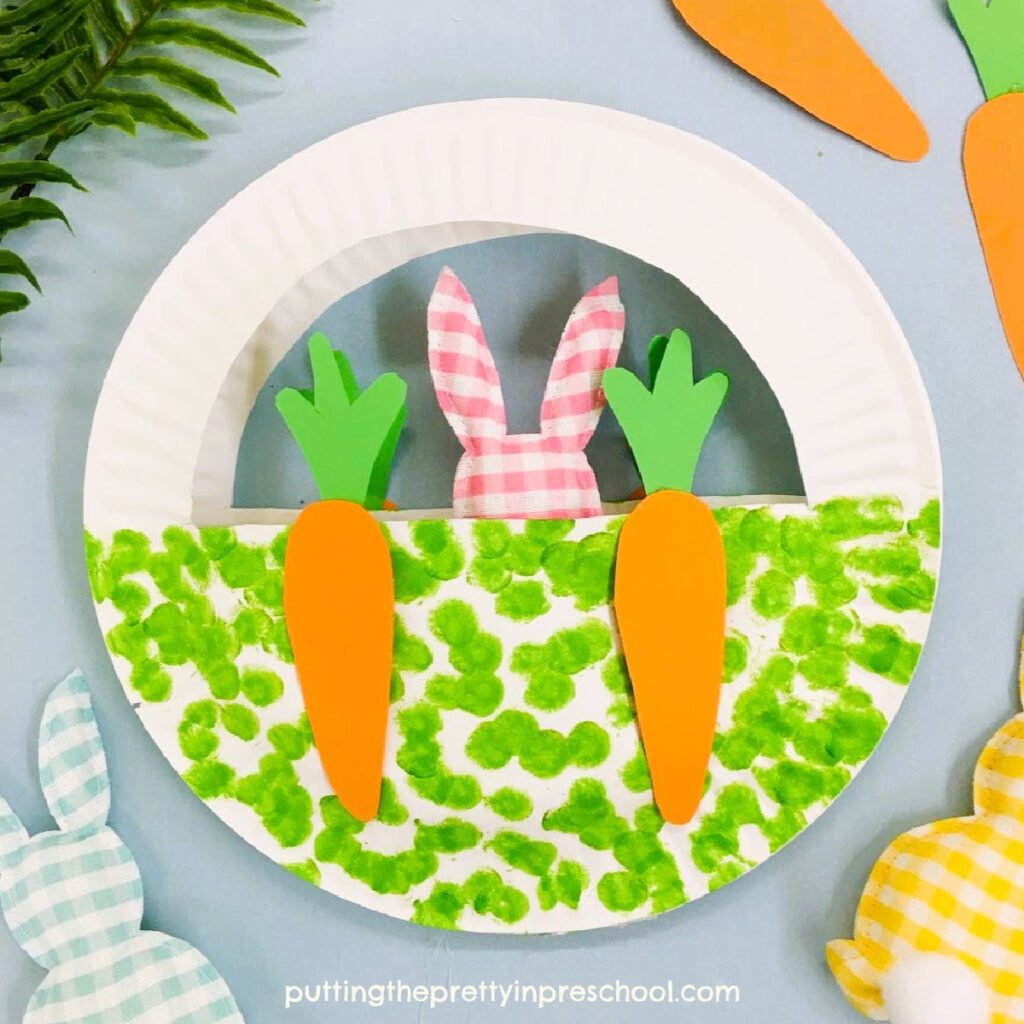
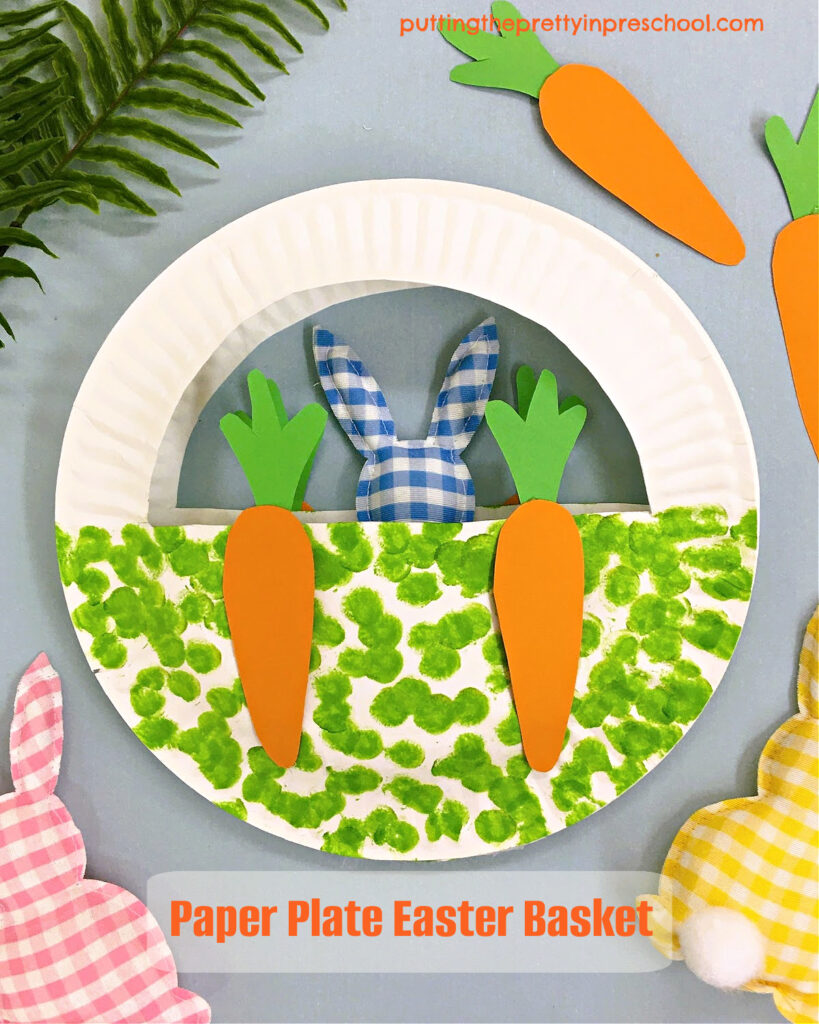
This bunny-themed paper plate Easter basket is easy to make and makes a great party favor or gift idea for your little learners.

_______

This paper plate Easter basket craft is inspired by an Easter purse spotted on a shopping trip. I wanted to make one for each of my preschoolers as part of their Easter party favors, and here’s what I came up with.

_______

Follow me on Pinterest for more early learning ideas.

_______

Supplies To Collect

There are only a few supplies to collect for this bunny and carrot-themed craft. Gather the following items:

  • paper plates
  • green dot markers
  • orange and green construction paper
  • stuffed bunnies
  • scissors, ruler, and pencil
  • glue stick and glue gun
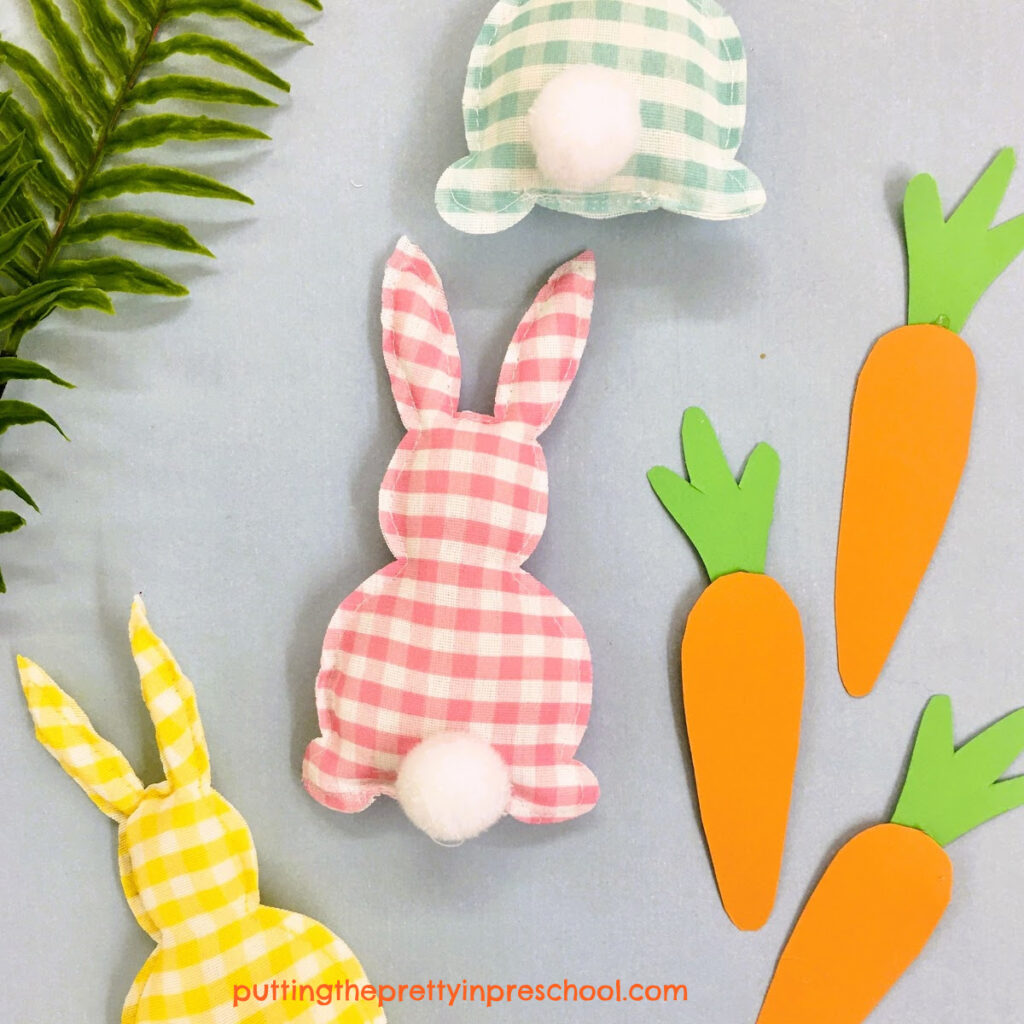
Stuffed bunnies cut from garland and paper carrots are highlights of a paper plate Easter basket craft that is sure to please.

_______

Making The Paper Plate Easter Basket Craft

The first thing to do in making a few of these paper plate Easter baskets is to cut out sections of paper plates to create half-circle openings and handles. There are different kinds of paper plates, and I recommend choosing a sturdy version.

This bunny-themed paper plate Easter basket is easy to make and makes a great party favor or gift idea for your little learners.

_______

Next, give two of the plates to each child who will get a basket, and ask the little charges to decorate the bottom half of their plates with a green dot marker.

Note: Instead of using dot markers, participants can decorate the basket sides with crayons, paint, and/or Easter stickers.

Afterward, cut carrots from orange construction paper, and carrot tops from green construction paper. With a glue gun or glue stick, adhere the carrot tops to the carrots.

Just insert Easter grass and a few chocolate eggs into this paper plate Easter basket. It is sure to be a big hit as a party favor.

_______

Cutting and putting together the paper carrots take a little time. When this task is done, the basket sides will be dry and ready to be assembled. Use a glue gun to carefully adhere the decorated half of each pair of cut plates together so that the openings and basket handles match. Leave the handles unglued.

Then glue two carrots on each side of every basket. Make sure the carrots on one side of the baskets align with the carrots on the other side.

Next add a small stuffed bunny to each basket. My bunnies are from a disassembled Easter garland snapped up at a party store. Fortunately, it was easy to remove each bunny from the garland, and the yellow, pink, and blue stuffies are safe to use in the paper plate Easter baskets.

Before handing out the baskets to your little charges, add Easter grass and wrapped chocolate eggs to them. The children will be delighted with the craft and treats!

Just insert Easter grass and a few chocolate eggs into this paper plate Easter basket. It is sure to be a big hit as a party favor.

_______

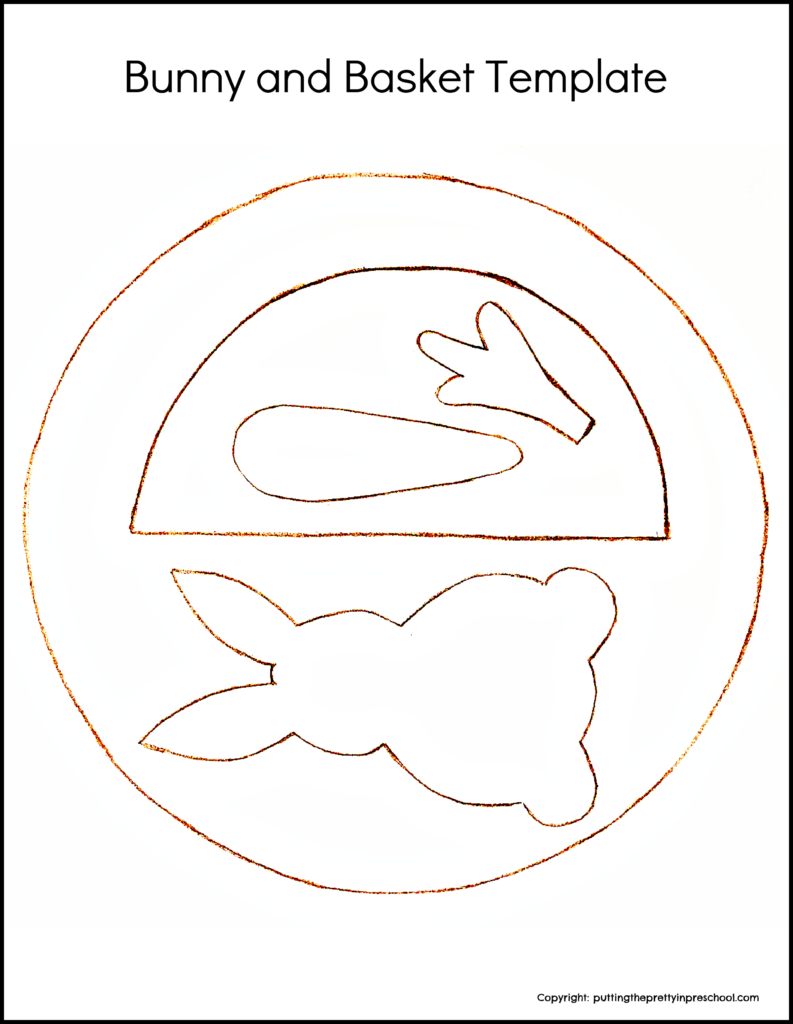
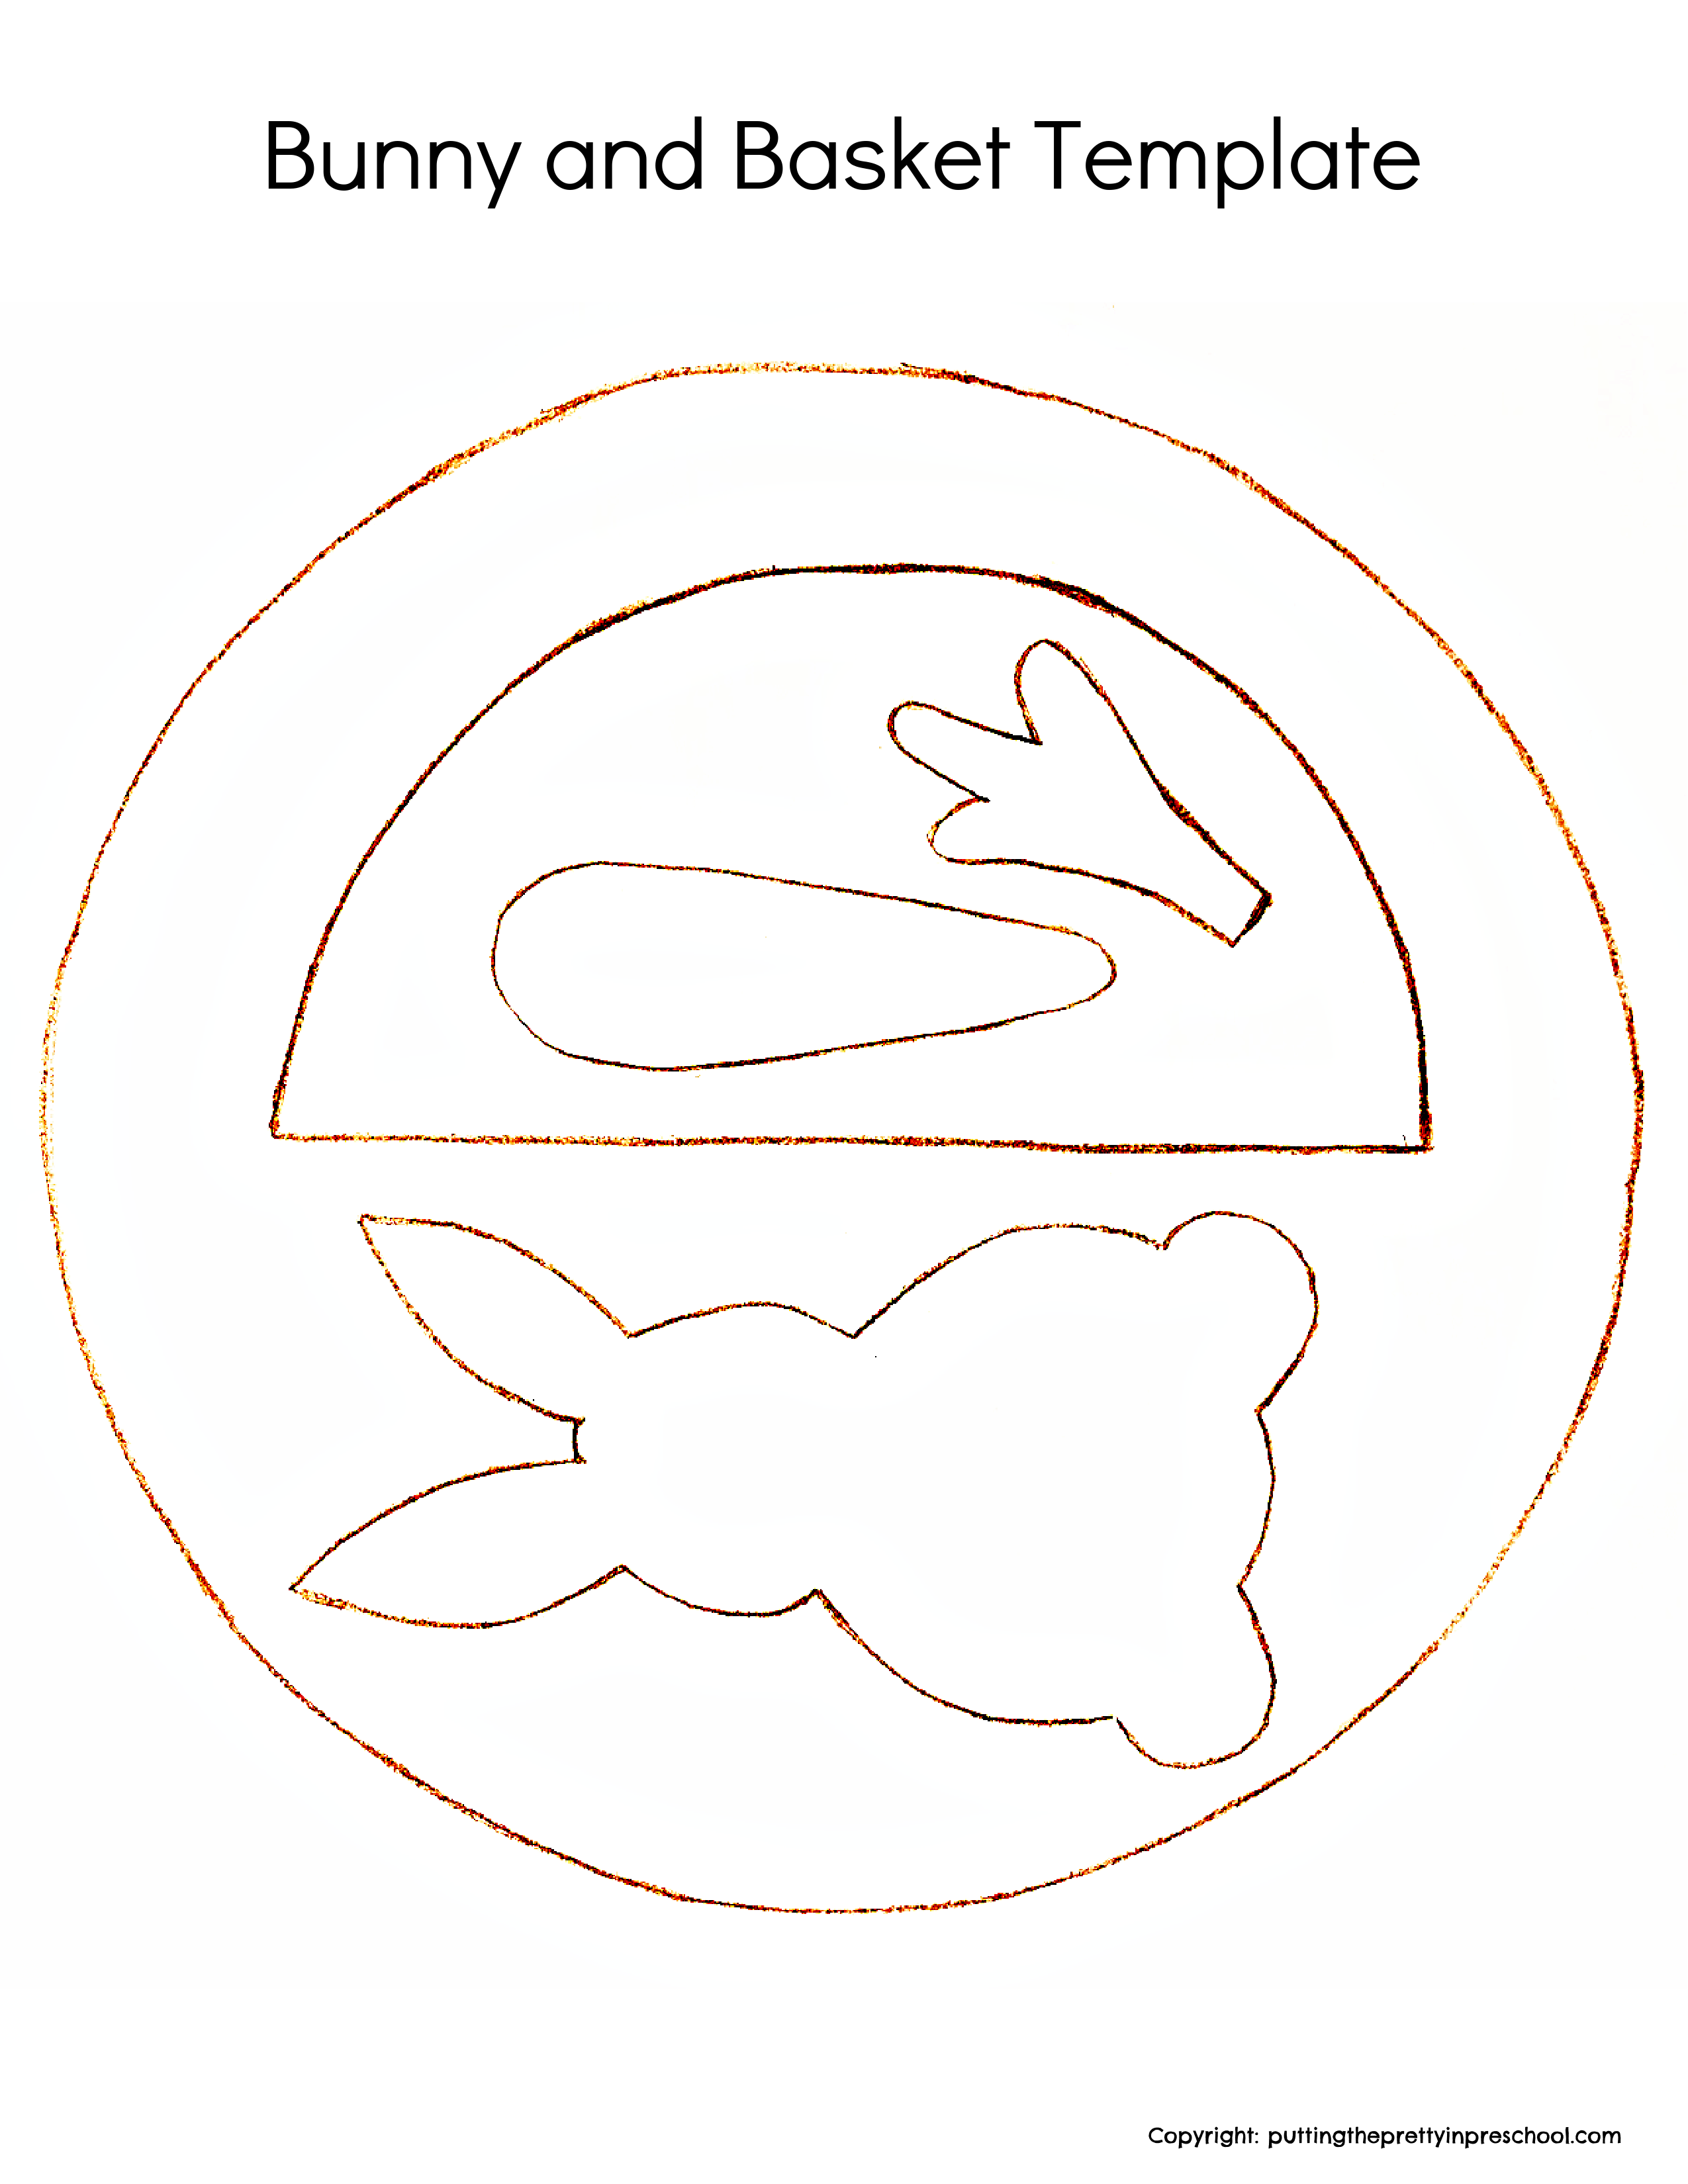
To help make this craft, feel free to download this basket, bunny, and carrot template to use as a guideline. Happy crafting!

A free Easter basket template to make a paper basket with carrot decorations and a bunny inside.

_______

Bunny and Basket PrintableDownload

This printable is for individual or one classroom use only.

_______

Related: 

Spring Basket Cupcakes

Bunny Candy Art
_______

[Read more…] about Paper Plate Easter Basket
Tweet
Share
Share
Pin

Filed Under: art, crafts, Easter, party, preschool, spring Tagged With: bunnies, Easter, paper crafts, party

Easter Peeps Houses

April 1, 2023 by Annette Kaminsky 2 Comments

Tweet
Share
Share
Pin
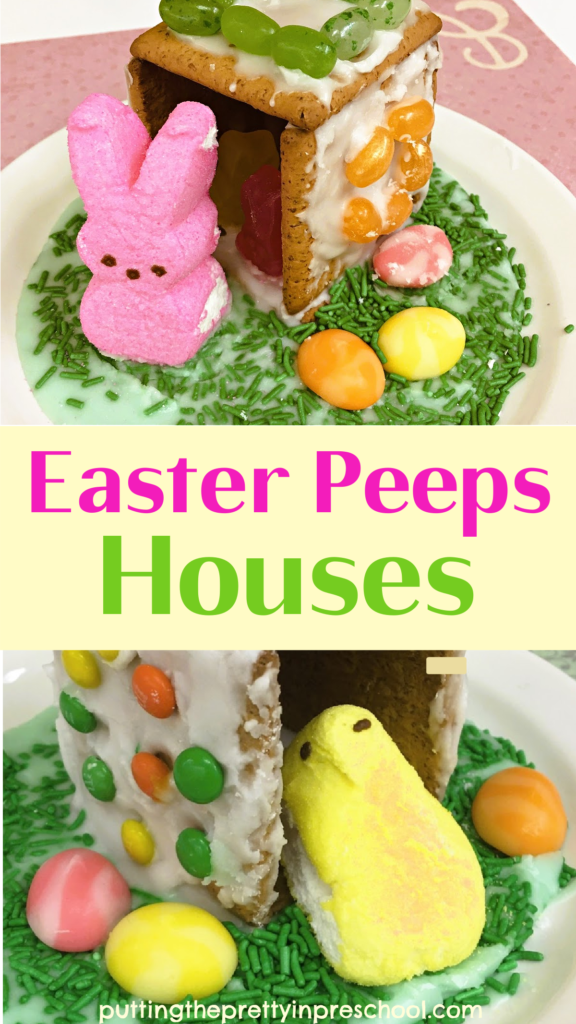
Make two different Easter peeps houses with graham crackers and chick and bunny peeps. Create one with your little learner today!

_______

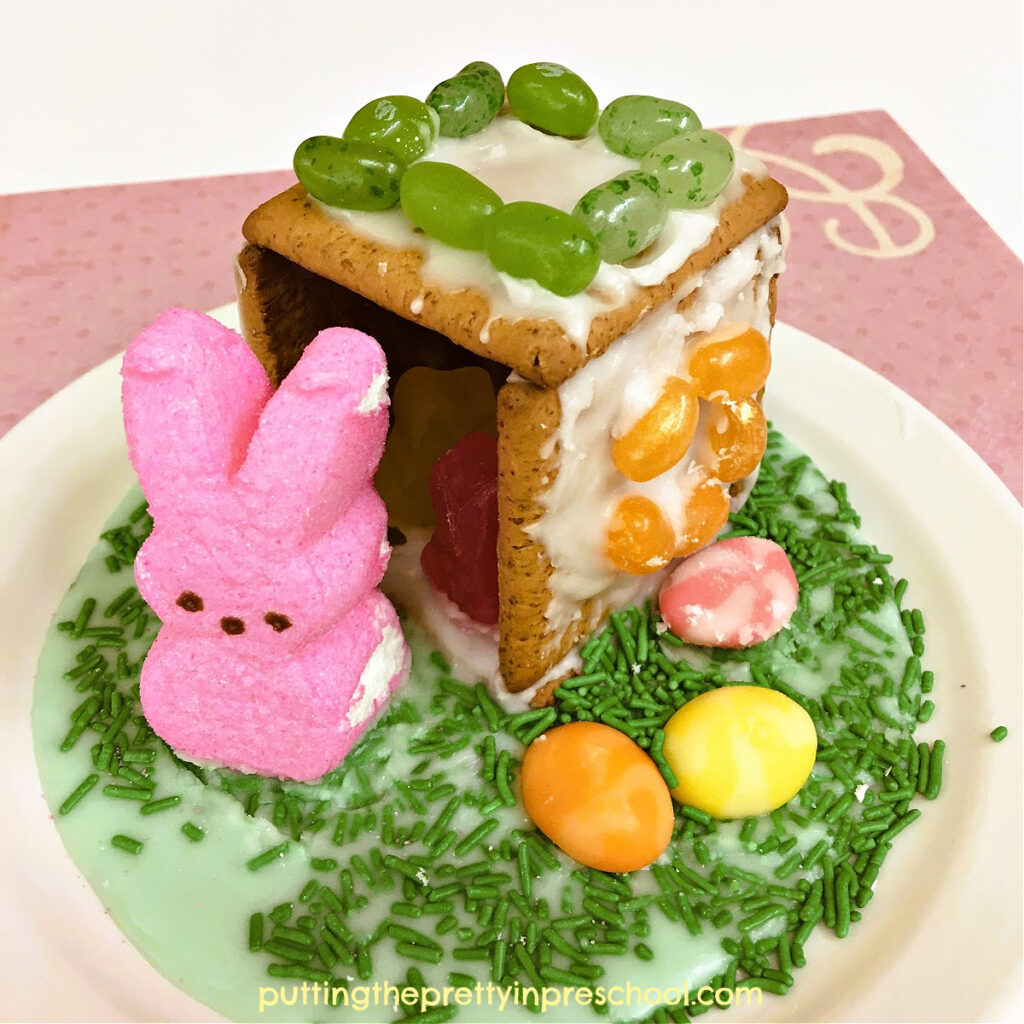
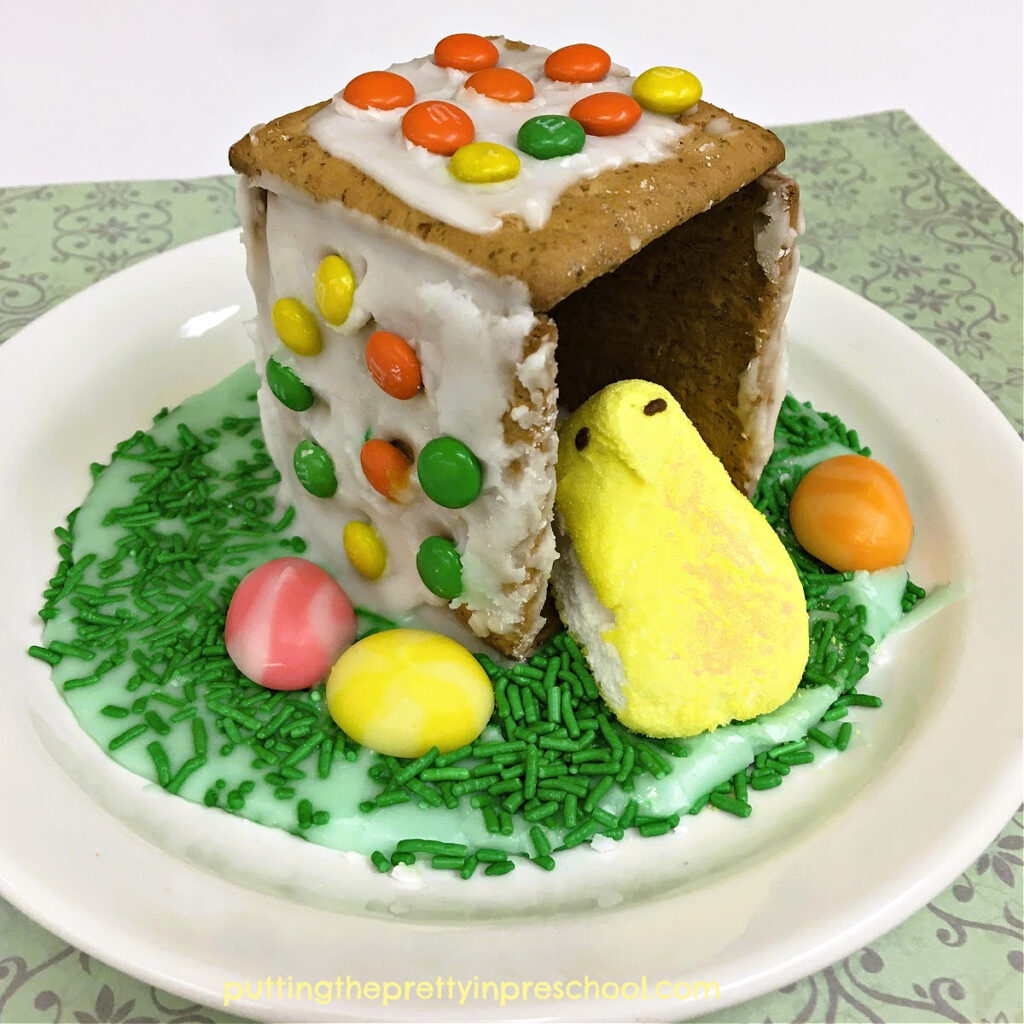
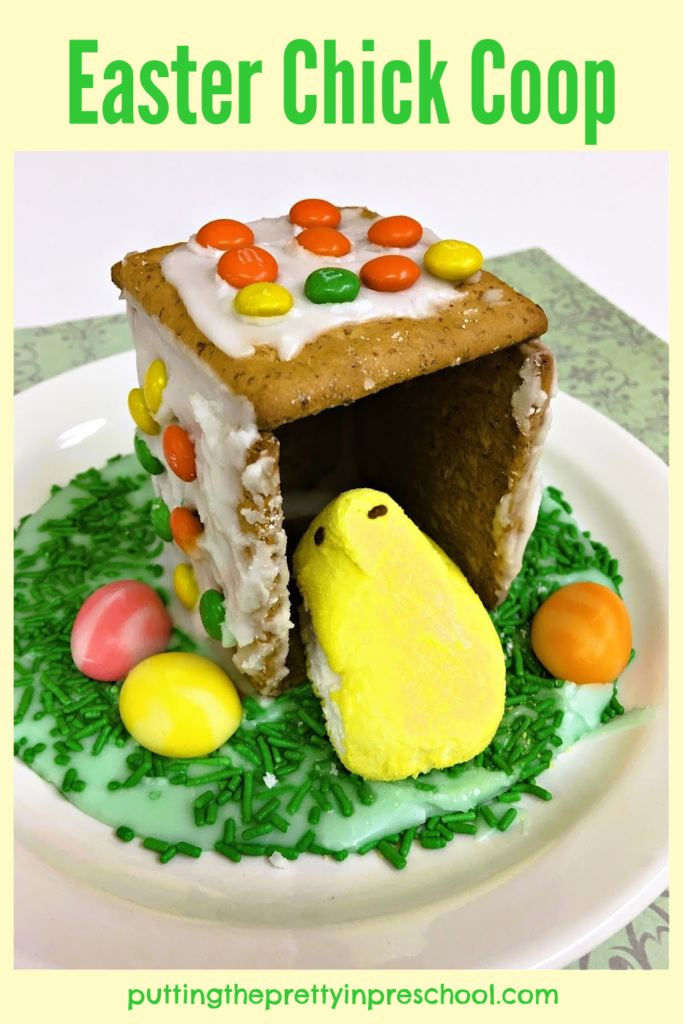
These cute Easter peeps houses take gingerbread house-making into the Easter season. And the chick peep coop and bunny peep hutch are easy-peasy to make together with little learners.

_______

Follow me on Pinterest for more early learning ideas.

_______

Supplies To Collect

Gather the following supplies to make these sweet graham cracker houses:

  • bunny and chick peeps
  • Easter bunny rabbit jubes
  • graham crackers
  • powdered sugar icing
  • cornstarch
  • water
  • assortment of candies
  • green candy sprinkles
  • green gel icing color
  • mixer or whisk
  • plates, spoons, and disposable knives

_______

Making The Easter Peeps Houses

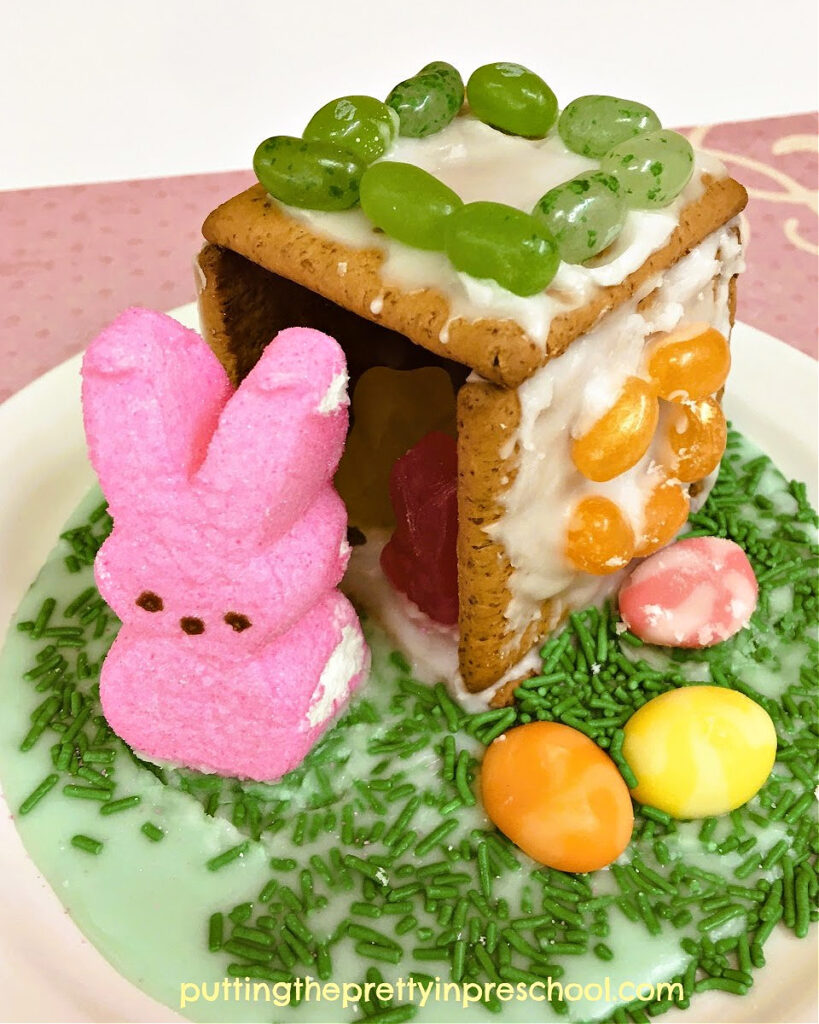
An oh-so-tasty graham cracker Easter bunny hutch everyone will enjoy making. A sure-to-please Easter activity.

_______

For this activity, I use powdered sugar icing, a little cornstarch, and water to make the icing.  It’s ideal to have powdered gingerbread house icing available, but I couldn’t find any on short notice.

Start by mixing a few scoops of powdered sugar icing, a teaspoon of cornstarch, and a little water in a bowl. Blend ingredients with a mixer or whisk for a couple of minutes. The icing mixture should be thick and tacky. Add a little more icing sugar if the mixture is too thin, or add a tad more water if it is too thick.

Then set aside some of the icing in a bowl and stir in a tiny bit of green gel icing color.

Next, spread plain icing on the edges of graham crackers and gently assemble them together to make five sides of a cube, leaving one side open. Disposable knives are a good size for little learners to work with.

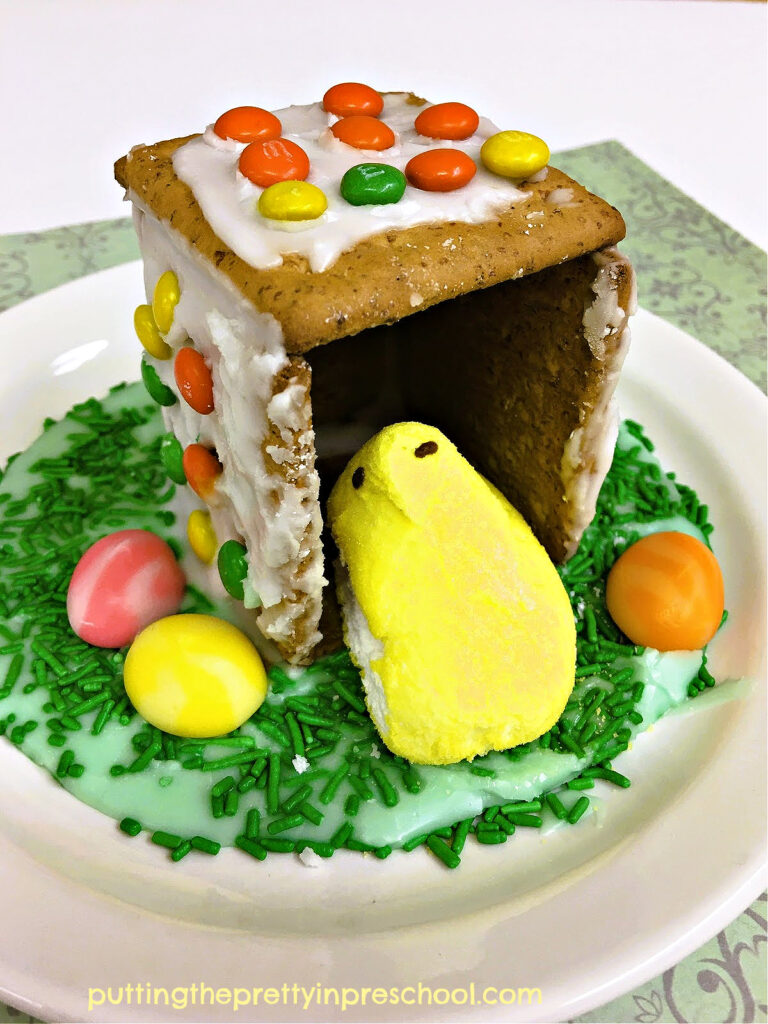
An oh-so-tasty graham cracker Easter chick coop craft everyone will enjoy making. A sure-to-please Easter activity.

_______

Note: Name-brand graham crackers are best to use because they are sturdier, don’t break as easily, and come in bigger pieces. Featured here is a no-name brand.

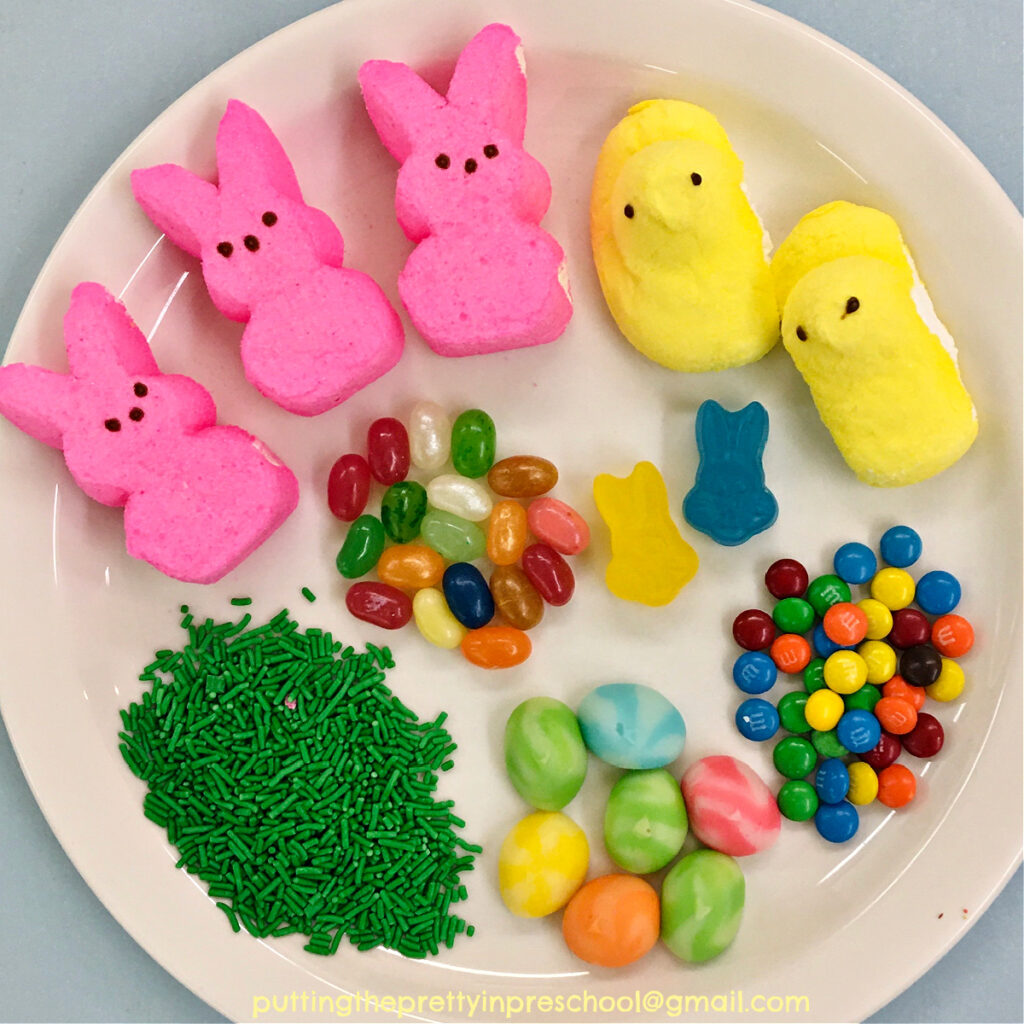
Afterward, select candies to decorate the Easter peeps house with. I feature miniature M&M’s and jelly bellies.

Easter peeps and an assortment of candy to make graham cracker Easter peeps houses.

_______

Then spread icing on the sides and tops of the graham cracker house and decorate with candies of choice.

If little learners are participating, allow some snacking while working. There will be interesting discussions about candy types, colors, and tastes!

_______

A Peep Bunny Hutch Or Chick Coop

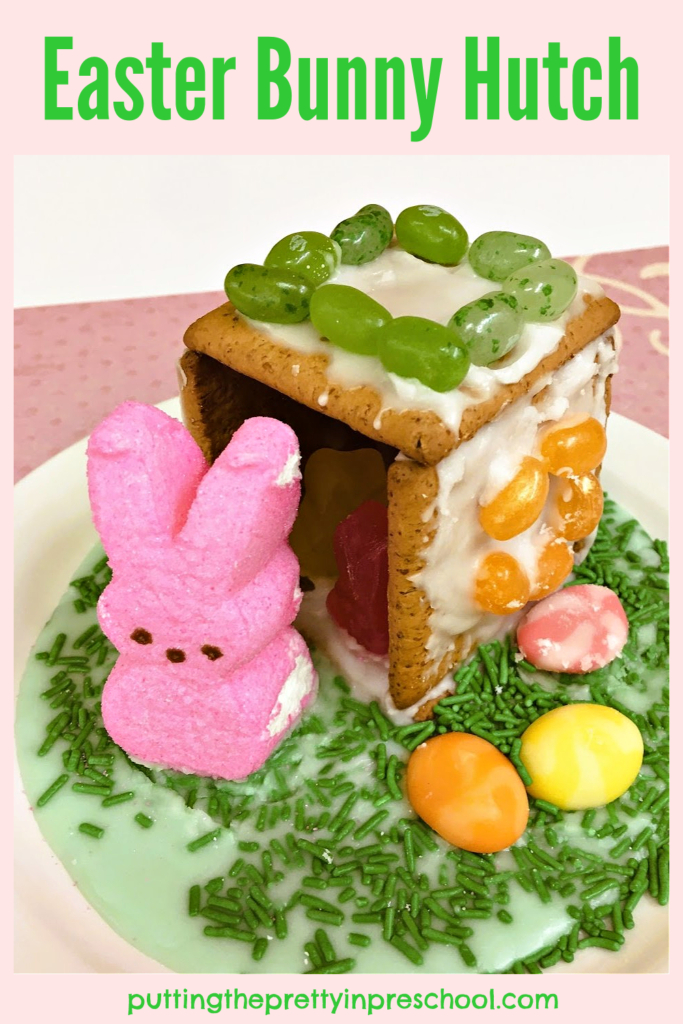
Create this cute Easter bunny hutch with graham crackers, a peeps bunny, and candy treats. It's an all-ages craft sure to be enjoyed.

_______

To make an edible bunny hutch scene, spoon a layer of green icing on a plate. Make sure the plate is disposable if participants are taking their tasty creation home.

Then set in the graham cracker “hutch.” Add a few candy sprinkles around it.

Spread a generous amount of icing on the floor of the house and set in two Easter bunny rabbit jubes. These can be bunny babies.

Finally, drop candy sprinkles on the green icing to look like grass, and add an Easter bunny peep and a few gummy eggs.

Create this cute Easter chick coop with graham crackers, a peeps chick, and candy treats. It's an all-ages craft sure to be enjoyed.

_______

For the chick peep coop scene, set the coop on a plate with green icing, and add candy sprinkles and gummy eggs. Then place the Easter chick peep in the coop.

Create this cute Easter bunny hutch with graham crackers, a peeps bunny, and candy treats. It's an all-ages craft sure to be enjoyed.

_______

These Easter peeps houses are sure to delight little learners and their families. Do you have any suggestions for how to make them? Leave a comment below.

An oh-so-tasty graham cracker Easter chick coop craft everyone will enjoy making. A sure-to-please Easter activity.

_______

Related:

Bunny Candy Art

Valentine’s Day Gingerbread Cookies

Easy S’Mores Bars

_______

[Read more…] about Easter Peeps Houses
Tweet
Share
Share
Pin

Filed Under: crafts, desserts, Easter, Food Art, preschool, sensory, spring Tagged With: Easter, food art, spring

Five Black History Month Crafts

January 28, 2023 by Annette Kaminsky 2 Comments

Tweet
Share
Share
Pin
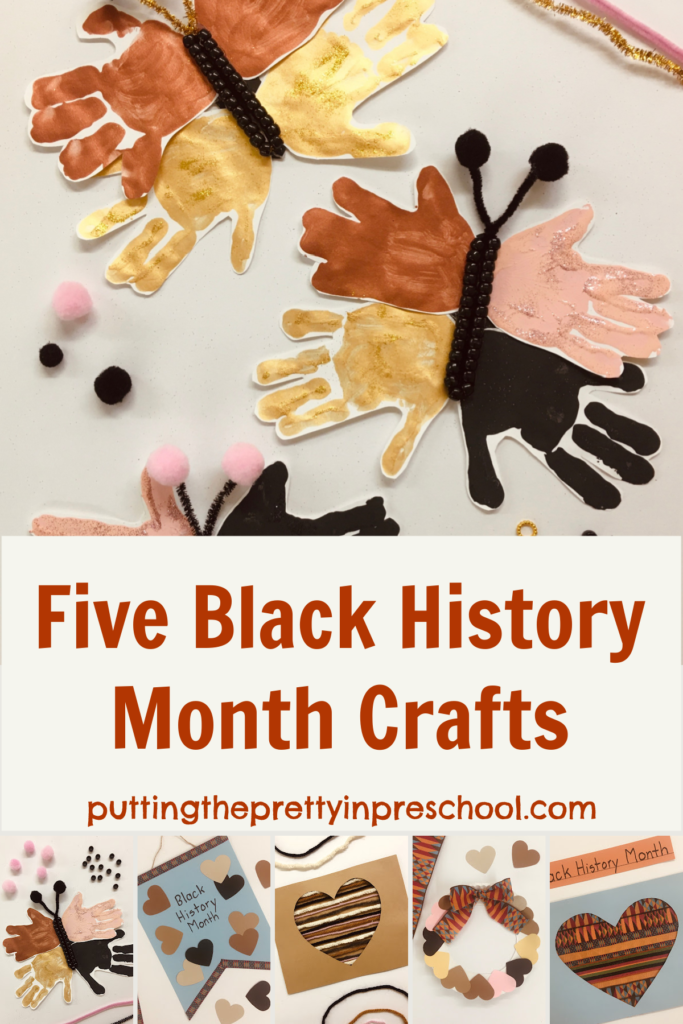
Five gorgeous Black History Month crafts that celebrate diversity. Easy-to-make crafts the whole family can do.

_______

Black History Month, a time set aside to remember notable black people and their achievements, is just around the corner. It is celebrated in the United States and Canada during the month of February. Here are five Black History Month crafts to help children engage in the celebration.

_______

Follow me on Pinterest for more early learning ideas.

_______

Celebrate Diversity Butterflies

To make these striking butterflies that represent celebrating diversity, gather the following supplies:

  • metallic gold and bronze tempera paint
  • pink, black, and white paint
  • light pink, black, bronze, and gold glitter
  • black pipe cleaners and pony beads
  • white cardstock paper
  • black cardstock paper
  • pie tins or disposable plates
  • white glue
  • glue gun

_______

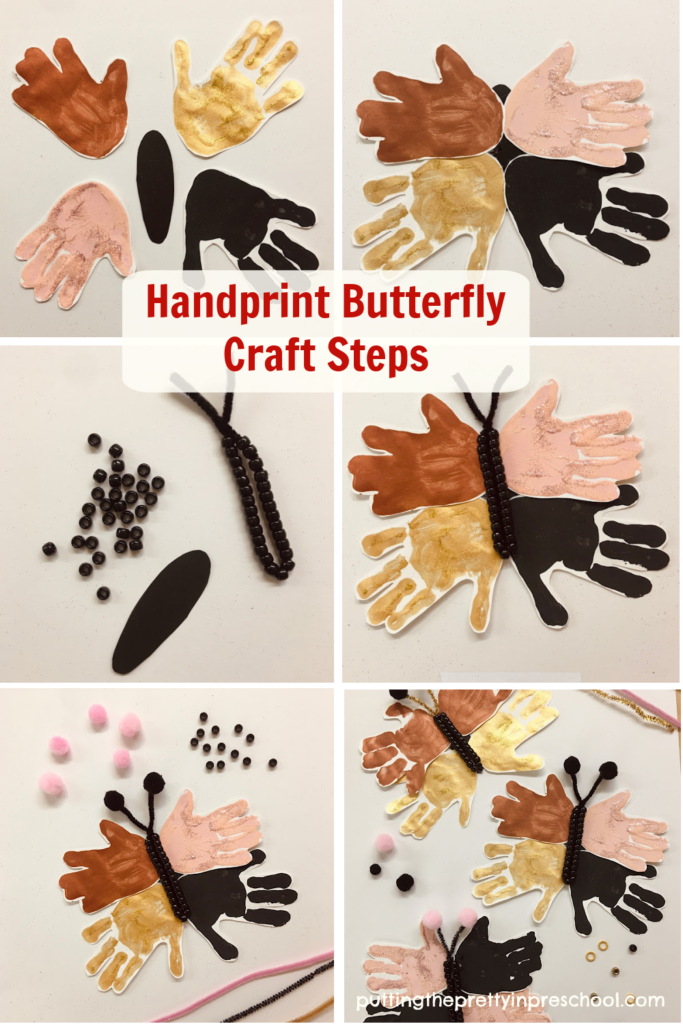
Steps to make a handprint butterfly craft to recognize and celebrate Black History Month.

_______

Making The Handprint Butterflies

To start off, pour skin-toned tempera paints into pie tins or disposable plates. You may want to add a little white to the black paint to soften its hue.

Have participants dip a hand in a paint color and press it onto white cardstock paper. I use metallic gold and bronze for two of the skin tone shades. Regular tempera paints in these hues would work fine too.

If you have the shades available, sprinkle a similar color glitter onto each handprint.

After the handprints dry and extra glitter is shaken off, cut around the edges.

Next, cut long narrow ovals from black cardstock paper to represent butterfly abdomens.

Bend black pipe cleaners in half and have participants string black beads onto them, leaving a little section open for the butterfly antennae. Twist the pipe cleaners just above the beads to make sure they stay on.

Assembling The Butterflies

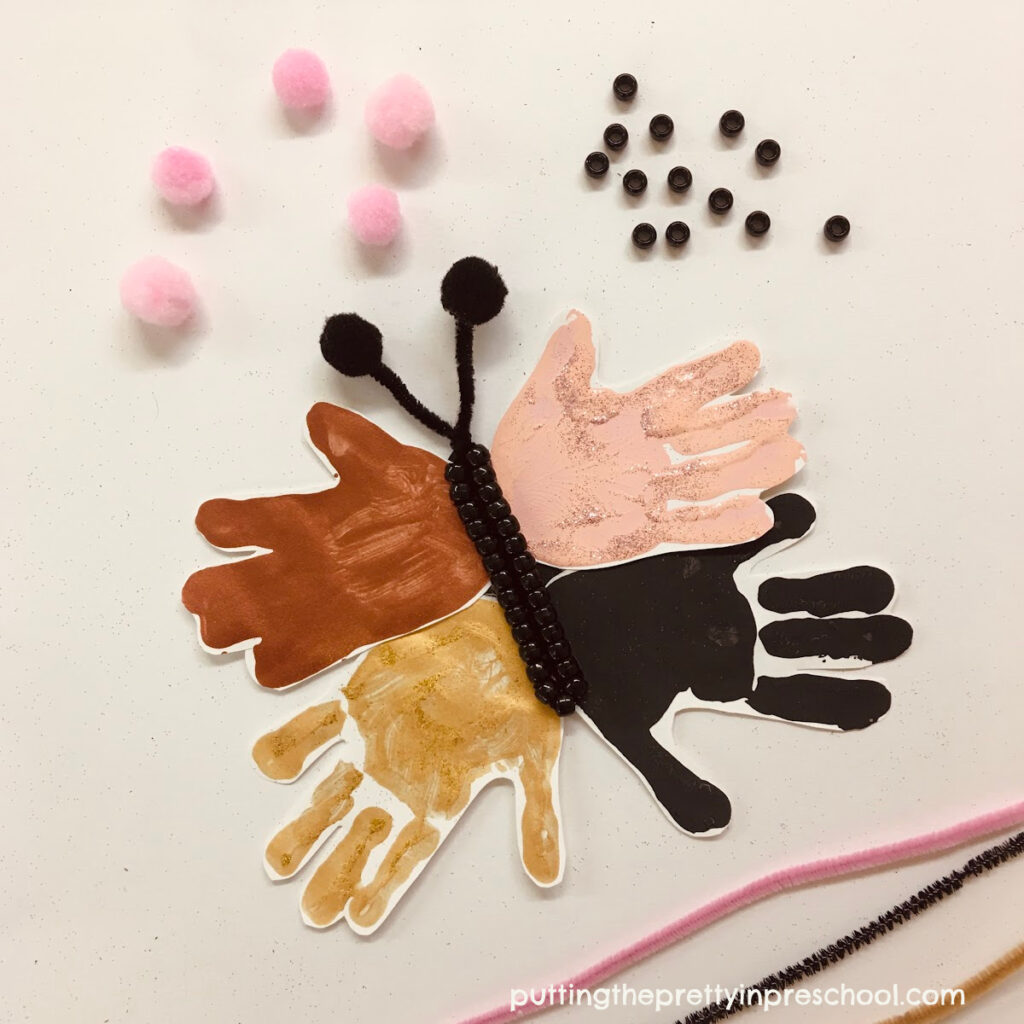
Make this gorgeous handprint butterfly craft to recognize Black History Month and celebrate diversity.

_______

Using white glue or a hot glue gun, add black or pink pompoms to the antennae.

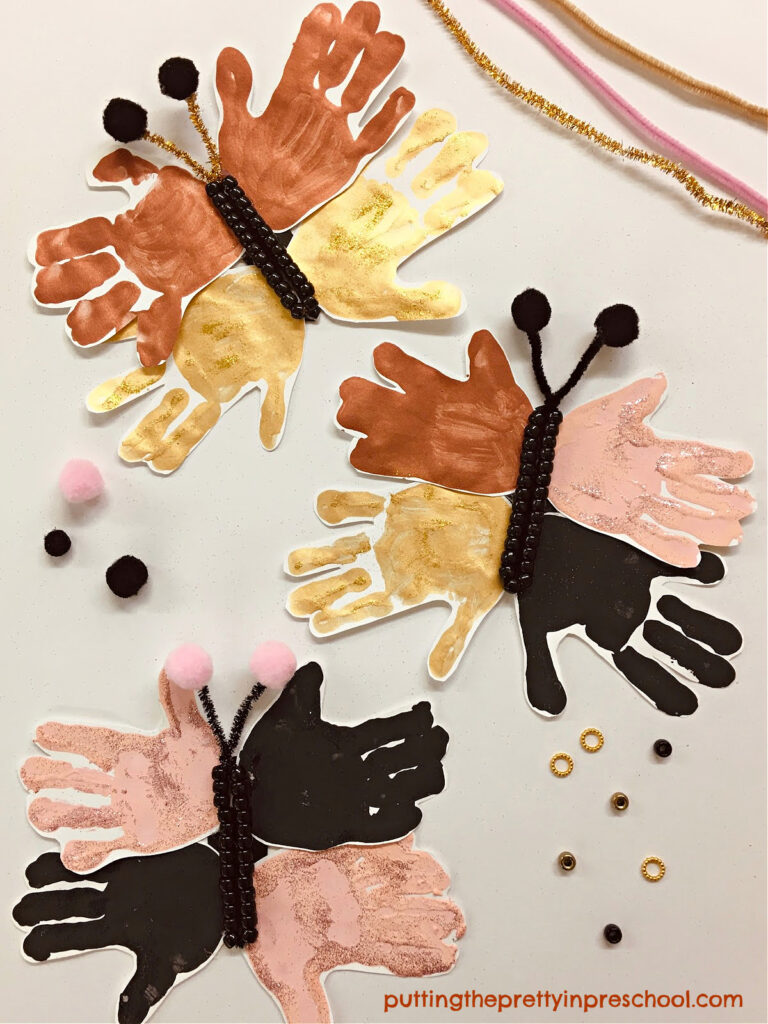
Then use white glue or a hot glue gun to affix four handprint “wings” onto each abdomen. The butterflies can be designed in different kinds of color combinations.

Next, glue the beaded pipe cleaners to the butterfly abdomens. Now the “celebrate diversity” butterflies are ready to be displayed!

Make these gorgeous handprint butterfly crafts to recognize Black History Month and celebrate diversity.

_______

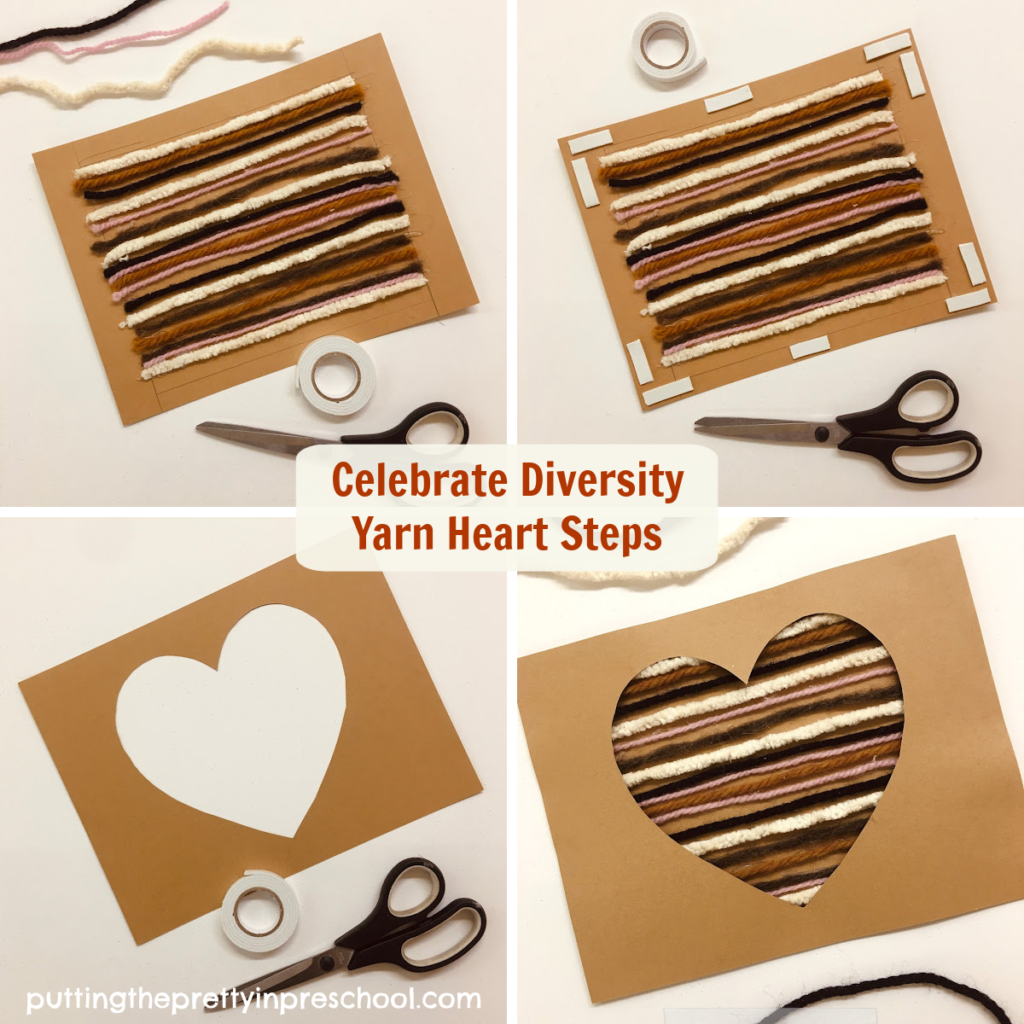
Celebrate Diversity Yarn Heart

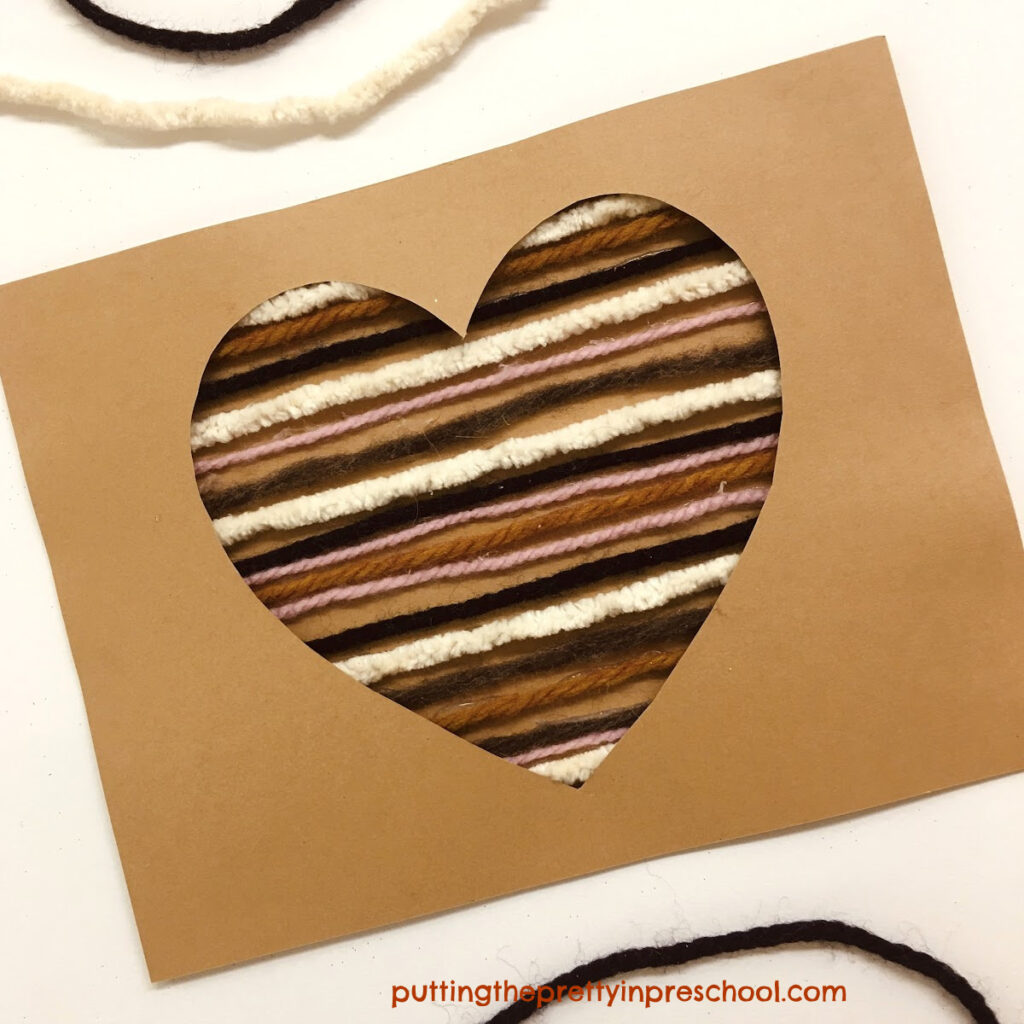
Different shades of skin-toned yarn represent diversity in this textured yarn heart craft.

Make this gorgeous skin-toned yarn heart craft to recognize Black History Month and celebrate diversity.

_______

Supplies to Collect

  • yarn in a variety of thicknesses and skin tones
  • 8 ½ x 11-inch golden-brown cardstock paper
  • white glue or hot glue gun
  • double-sided tape
  • ruler
  • scissors
  • heart template

_______

Steps to make a gorgeous skin-toned yarn heart craft to recognize Black History Month and celebrate diversity.

_______

To make this gorgeous yarn heart craft, start by cutting skin-toned yarn into 7 ½ inch strips. Using different thicknesses of yarn adds variety to the craft.

Next, glue the strips of yarn in rows onto a sheet of 8 ½ x 11-inch cardstock using white glue or a glue gun. Leave a small border around the edge of the paper.

Then add pieces of double-sided tape around the edges of the paper.

Afterward, cut a large heart in the center of a second piece of cardstock.

Finally, gently position the cardstock paper with the heart cut out on top of the yarn-covered piece, making sure the double-sided tape adheres to it.

_______

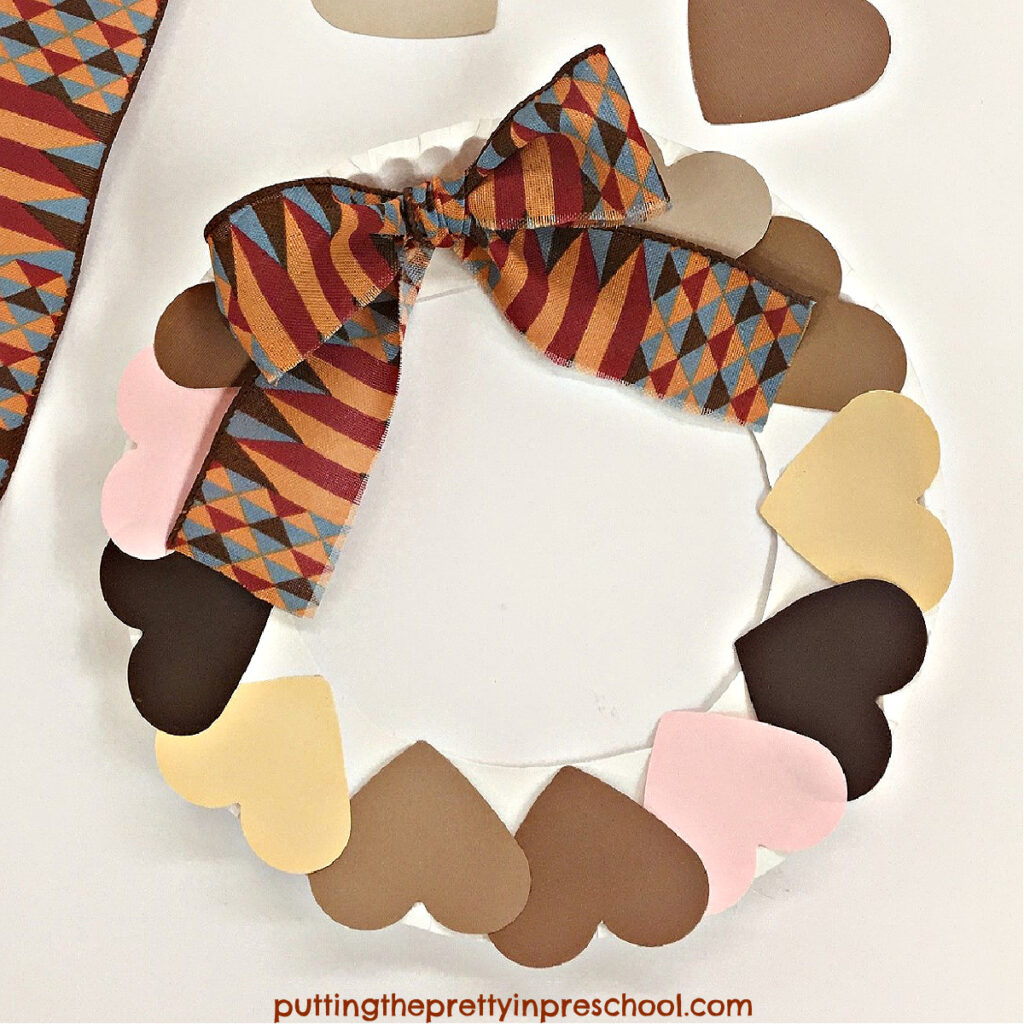
Kindness Heart Wreath

This kindness heart wreath with cardstock skin-toned hearts and a geometric bow communicates that all lives matter and that everyone should be treated with kindness.

Black History Month ribbon and skin-toned hearts are the highlights of this easy-to-make "kindness" wreath craft.

_______

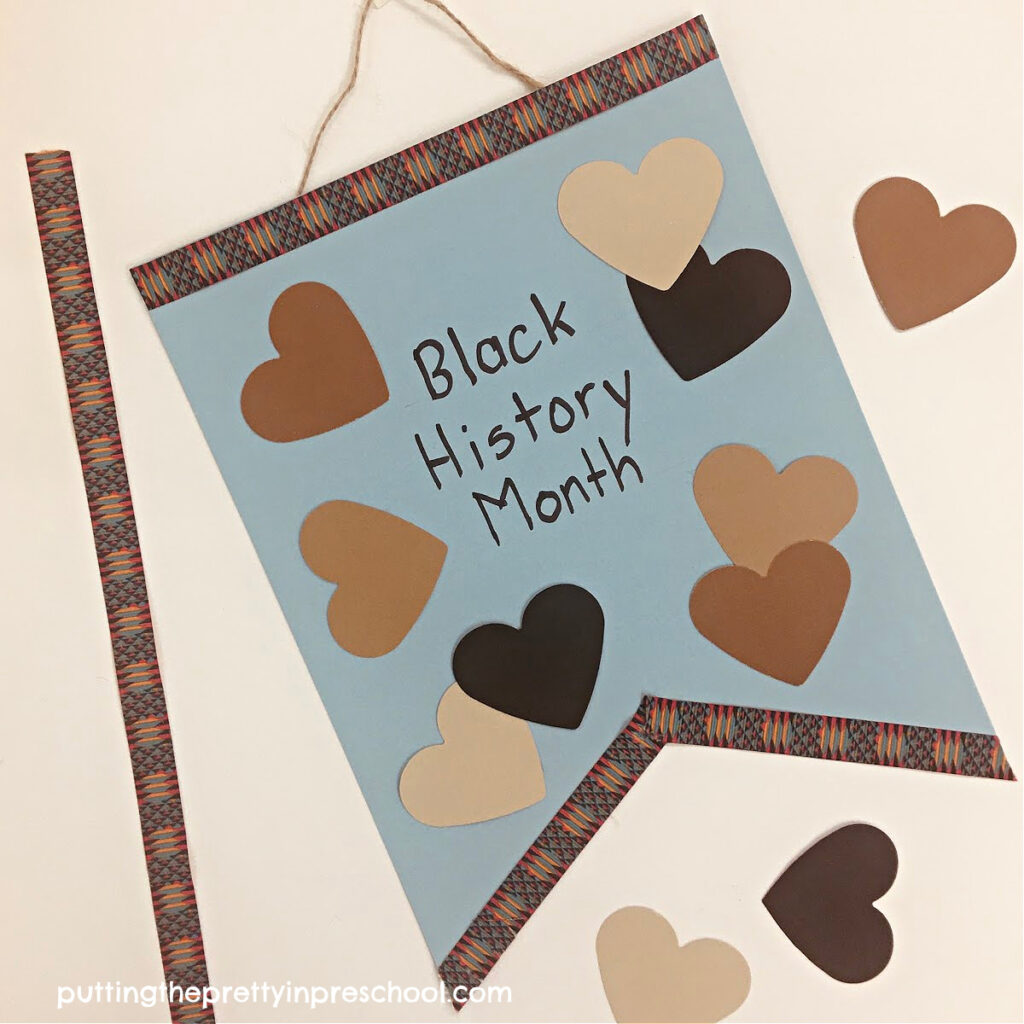
Black History Month Heart Banner

In this craft, skin-toned hearts are used to decorate an attractive, geometric ribbon-edged banner honoring Black History Month.

Black History Month ribbon and skin-toned paper hearts are the highlights of this easy-to-make banner craft.

_______

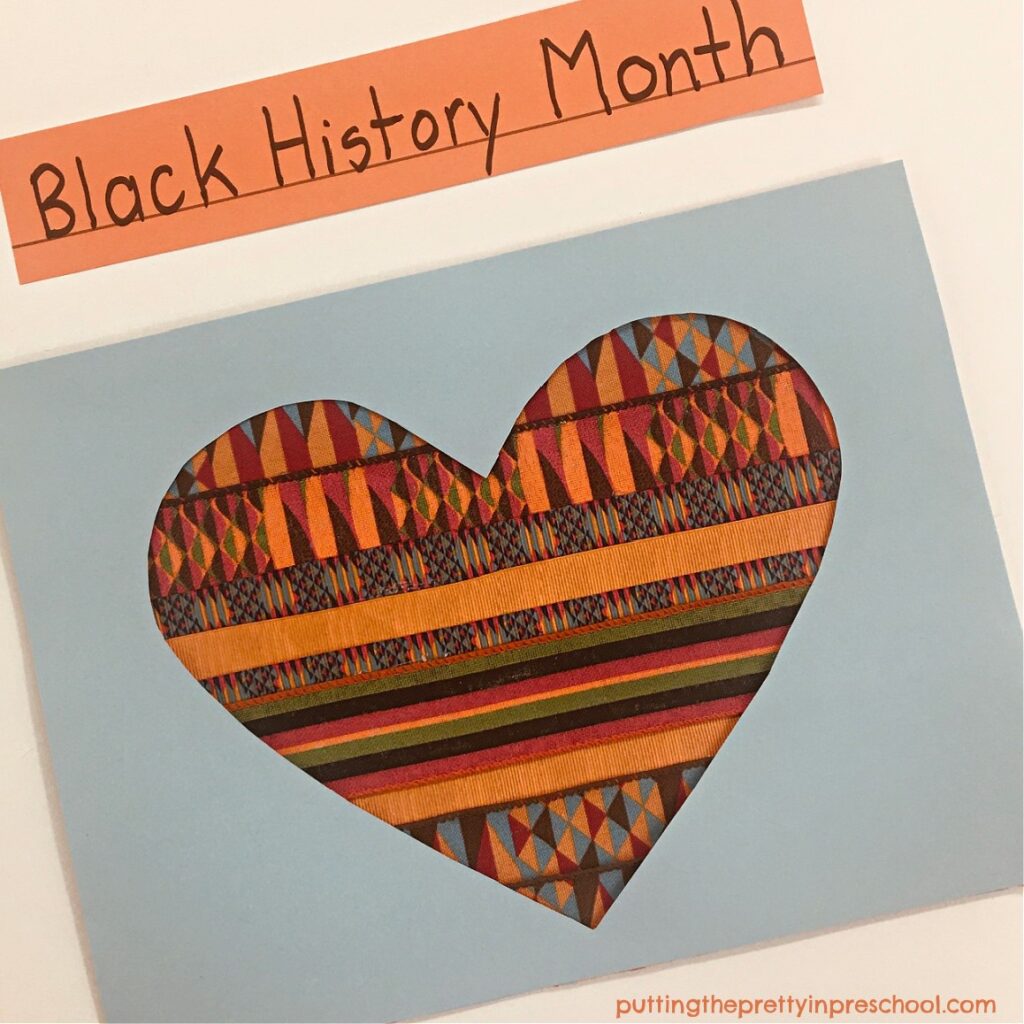
Black History Month Ribbon Heart

This heart craft takes full advantage of vibrant, geometrically patterned ribbon, and looks striking on display.

Make this stunning Black History Month heart craft to honor this important annual celebration.

_______

Which one of these five Black History Month crafts will you try? Let me know in a comment below.

_______

_______

Black History Month Positive Affirmations

This Black History Month printable set has coloring pages with 18 positive affirmations and 4 editable pages. Many creative patterns inspired by African art are possible, all with basic art supplies. Two bulletin board headers make displaying the stunning finished artwork super easy. Download this easy-to-use printable set at my Etsy Skills N Smiles shop for an everyday low price.

_______

See the blog post Black History Month Positive Affirmations Art for more infomation.

_______

_______

More Celebrate Diversity Crafts

Celebrate Diversity Heart Art

Celebrate Diversity Paper Craft

Black History Month Hair Decorating Art

_______

[Read more…] about Five Black History Month Crafts
Tweet
Share
Share
Pin

Filed Under: art, Black History Month, crafts, preschool Tagged With: Black History Month, butterflies, hearts, papercrafts, wreaths

  • « Go to Previous Page
  • Page 1
  • Interim pages omitted …
  • Page 7
  • Page 8
  • Page 9
  • Page 10
  • Page 11
  • Interim pages omitted …
  • Page 13
  • Go to Next Page »

Primary Sidebar

Hi, I'm Annette Kaminsky, a preschool teacher who loves sharing learning through play activities for young children. Thanks for visiting my site. Feel free to stay awhile!

Subscribe Via Email

Recent Posts

  • Teacher Appreciation A to Z Alphabet June 21, 2026
  • Expanding Balloon Science Experiment May 18, 2026
  • Earth Day Spin Painting April 21, 2026
  • Easter Bunny Scavenger Hunt April 4, 2026
  • Celebrate Diversity Coloring Pages March 1, 2026
  • Lunar New Year Lantern Craft February 11, 2026
  • Black History Month Positive Affirmations Art January 29, 2026
  • Snowflake Cafe Dramatic Play Set January 19, 2026
  • Pastel Christmas Letterhead and Envelope December 20, 2025
  • December Kindness Activities November 30, 2025

Categories

Topics

apples bunnies butterflies Chinese New Year Christmas Christmas craft color colors dramatic play Easter fall flowers hearts holiday jewelry leaves leprechauns light table loose parts painting paper crafts playdough pretend play printables printmaking process art pumpkins rice bin scented playdough science experiment scissor skills sensory bin sensory play sensory tray shamrocks skeletons snakes snowflakes spiders spring St. Patrick's Day sunflowers tablescapes Valentine's Day water play

Copyright © 2026 · Lifestyle Pro on Genesis Framework · WordPress · Log in