• Skip to secondary menu
  • Skip to main content
  • Skip to primary sidebar

Putting The Pretty In Preschool

Finding Beauty In Everyday Early Childhood Experiences

  • Home
  • About Me
  • Winter
  • Chinese New Year
  • Blog
  • Contact Me
  • Black History Month
  • SHOP
  • Valentine’s Day

crafts

Edible Playdough Turkey Craft

November 22, 2023 by Annette Kaminsky Leave a Comment

Tweet
Share
Share
Pin

_______

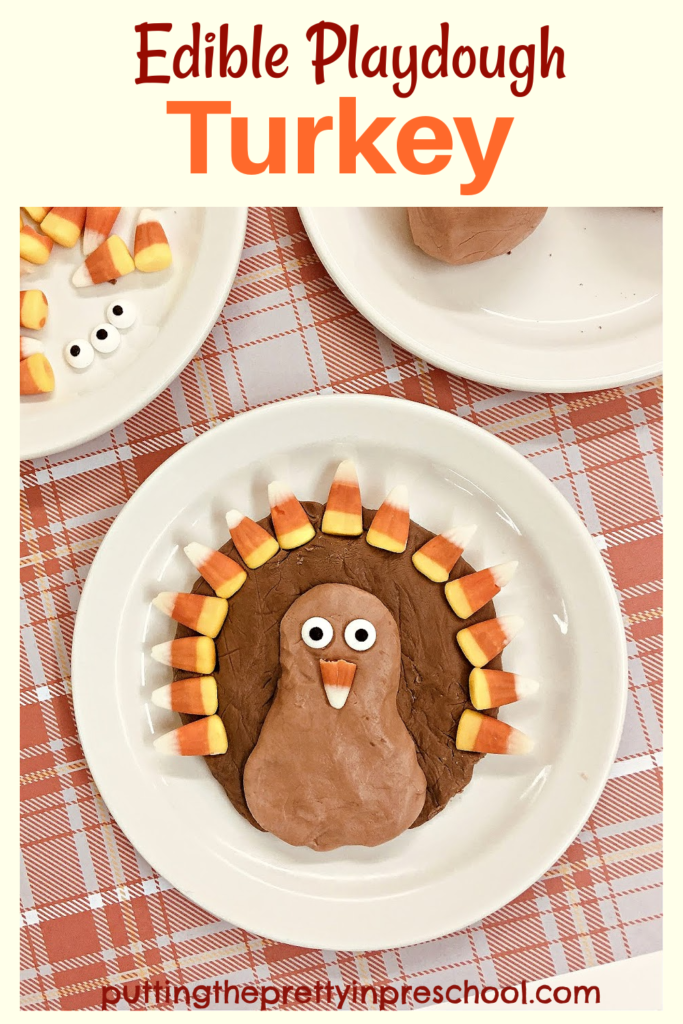
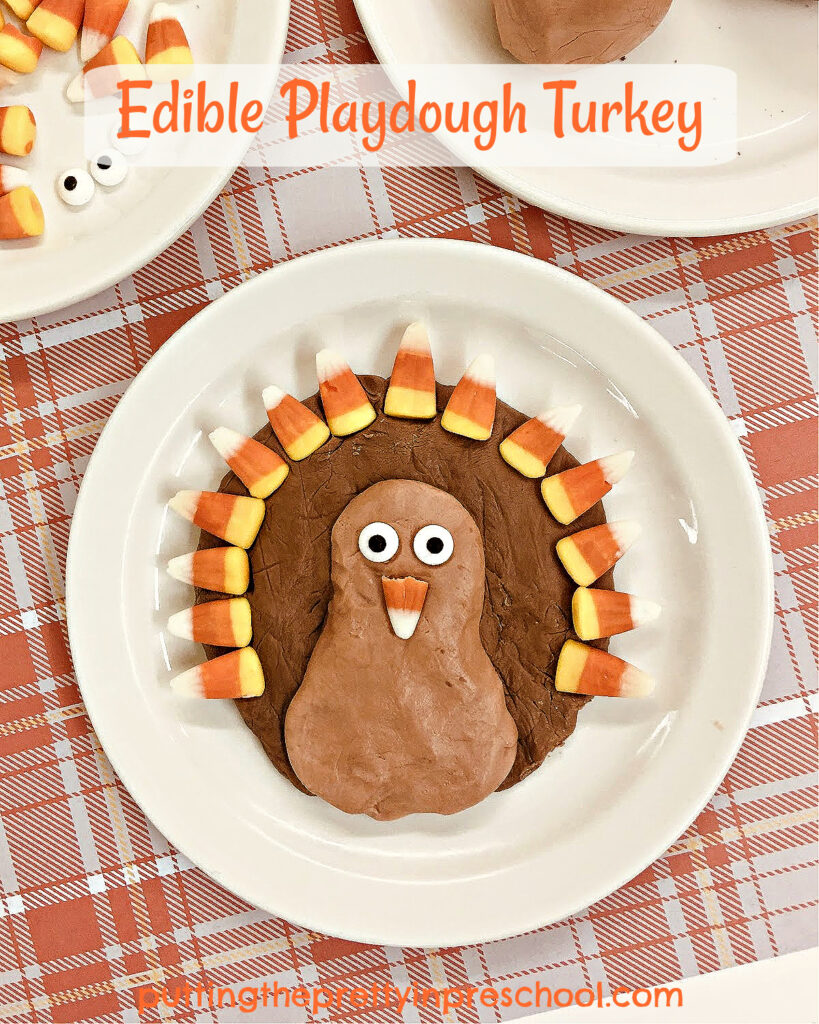
Here’s a sweet, edible playdough turkey craft just in time for Thanksgiving Day. It is suitable any time of the year for a farm animal theme. It is simple to make and uses five easy-to-find ingredients.

_______

Follow me on Pinterest for more early learning ideas.

_______

Supplies To Collect

Gather the following supplies for this color-infused playdough turkey:

  • chocolate frosting
  • vanilla frosting
  • powdered sugar
  • candy corn
  • white candy eyes
  • small serving plate
  • large mixing bowl
  • large spoon for stirring
  • knife

_____

Making The Edible Playdough
_______

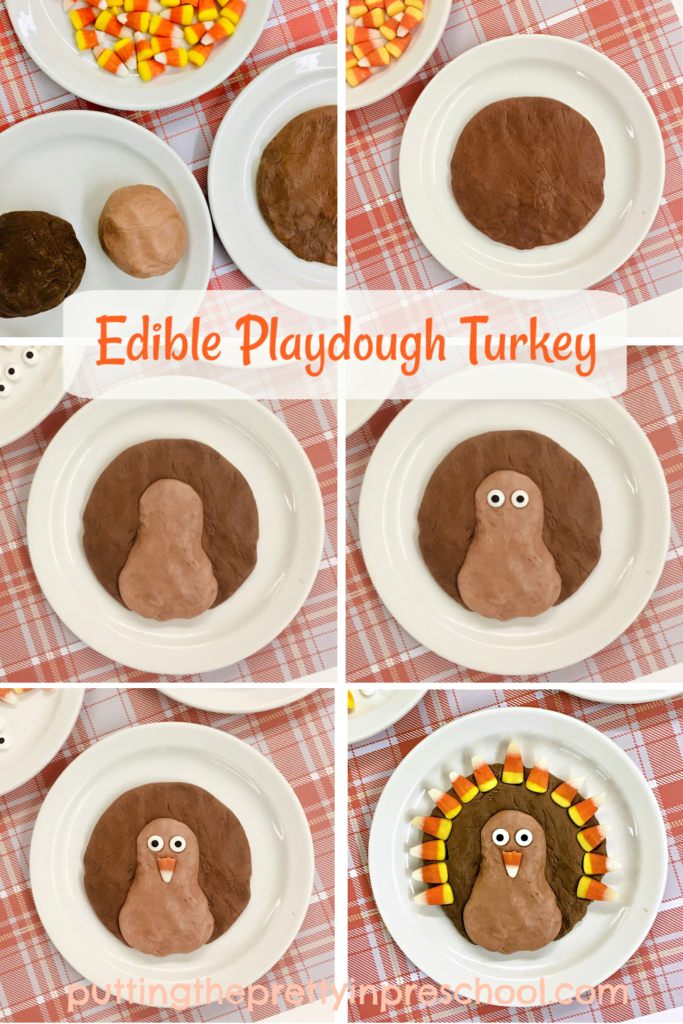
To make this edible playdough, first select a large bowl for the ingredients.

Next, empty half a container of vanilla frosting into the bowl.

Then scoop in an equal amount of powdered sugar.

With a large spoon, stir the powdered sugar and frosting together.

Afterward, knead the ingredients thoroughly, adding more powdered sugar or frosting if necessary, until the dough is a non-sticky playdough consistency.

Make a similar batch of playdough using chocolate frosting, incorporating powdered sugar with the brown icing.

Then form a ball of vanilla playdough and a smaller one of chocolate. Knead the two balls together to get a light brown shade.

Finally, add a little vanilla playdough to a ball of chocolate. Knead them together to get the medium brown shade.
_______

Little learners will love to help make this tasty edible playdough, and will especially enjoy the kneading part. Discussions about color mixing, spheres, and small and large sizes can be introduced during the playdough and turkey-making process.

_______

The Edible Playdough Turkey

Fashioning the playdough turkey is almost as easy as making the two colors of dough.

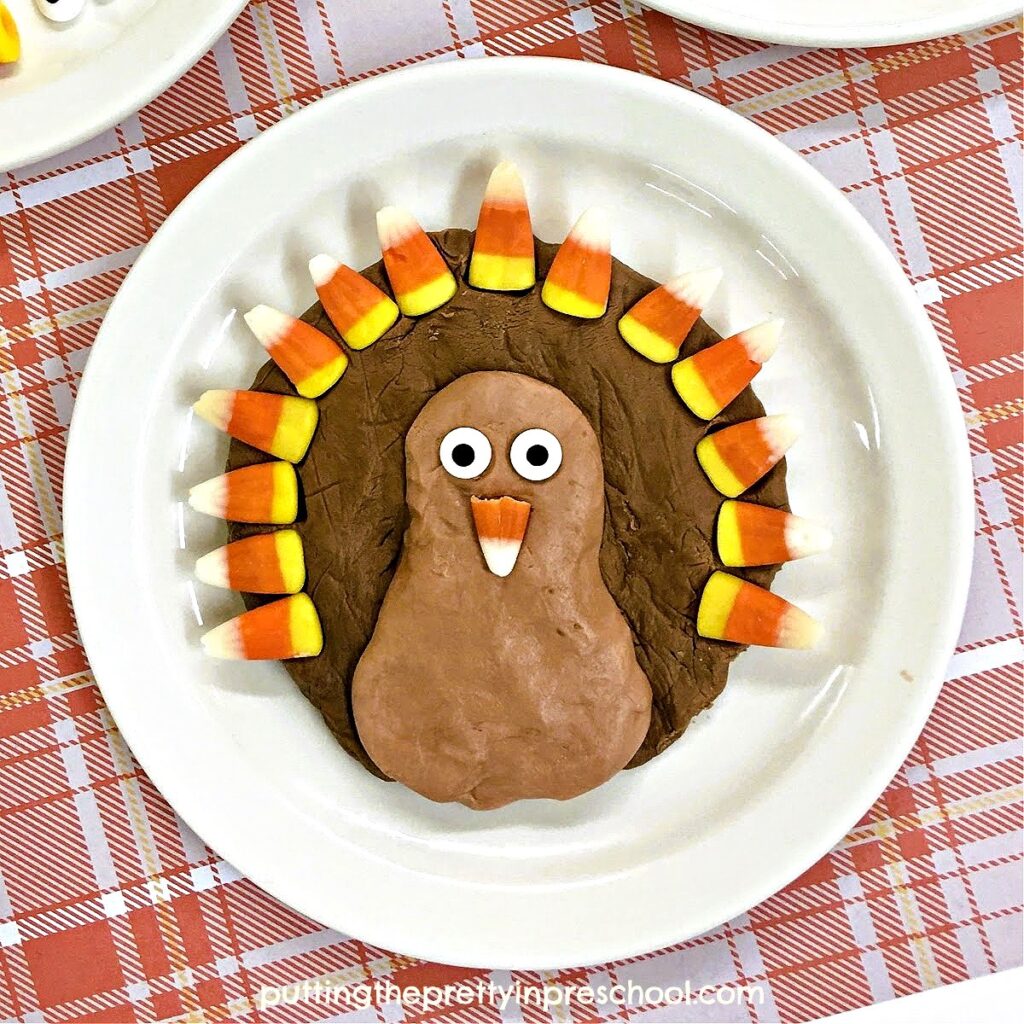
First, form a ball of medium brown playdough and flatten it into a circle on a dessert plate.

Next, make a light bulb shape from the light brown playdough and press it on top of the circle, designing a turkey head and neck.

Then add two candy eyes and a candy corn beak.

Tip: Slice off the wide end of a piece of candy corn with a knife to make a shorter beak if desired.

Finally, position candy corn pieces all around the edge of the large playdough circle.
_______

You may have noticed that this playdough is super sweet. It’s a good idea to encourage participants to design their turkey first and then snack on some of the extra supplies.

After the turkeys are made and participants have had the chance to do a little snacking, wrap leftover frosting playdough in saran wrap and place it in a jar or plastic bag. Store the playdough and part containers of frosting in the fridge to use another time.

_______

Festive Graham Cracker Turkeys
_______

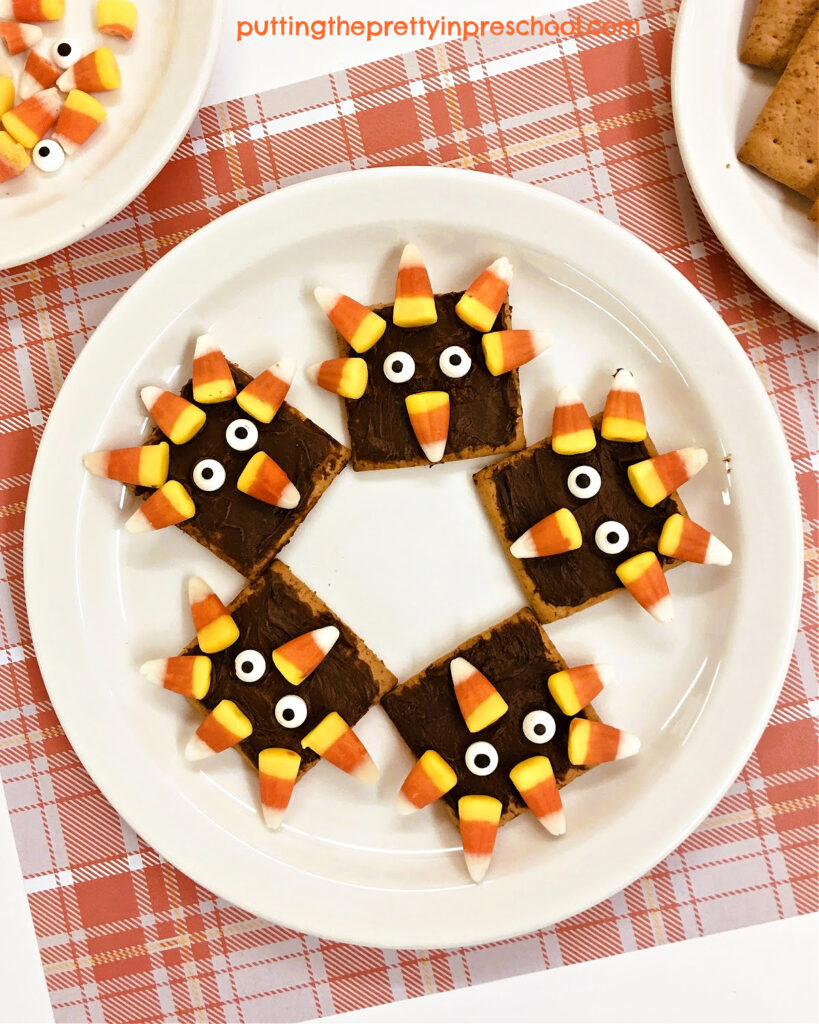
The leftover frosting and candy eyes will come in handy for desserts, so nothing will go to waste. One idea is to spread a thin layer of chocolate or vanilla frosting on graham crackers. Add two candy eyes to each one, and five candy corn pieces around the upper edges. Slice off the wider end of some of the candy corn pieces and place them under the eyes for beaks. You’ll end up with festive turkey treats that will quickly be gobbled up by your little charges.

_______

Non-Edible Playdough Turkey

The tasty turkey can be made with a basic playdough recipe instead of the sweet, edible dough. You can leave the playdough uncolored to create a white farm turkey or add varying amounts of brown gel icing color to small batches of playdough to get similar turkey colors as with the edible playdough turkey.

_______

_______

Thanksgiving Printables

Shop Thanksgiving printables in my Etsy shop “Skills N Smiles“:

_______

_______

More Turkey Activities

Paper Plate Turkey Craft

Turkey Sensory Tubes

Coffee Playdough Turkey

Turkey Playdough Tray

_______

More Playdough Recipes and Activities

Apple Playdough Tray

Scented Playdough Activities

Pumpkin Playdough Activities

Orange-scented Playdough Invitation

Chocolate Mint Playdough

Santa Claus Playdough Tray

Valentine’s Day Playdough Activities

St. Patrick’s Day Playdough Tray

Easter Playdough Tray

_______

[Read more…] about Edible Playdough Turkey Craft
Tweet
Share
Share
Pin

Filed Under: art, autumn, crafts, desserts, farm animals, Food Art, playdough, preschool, Thanksgiving Day Tagged With: playdough, snacks, turkeys

Q-tip Skeleton Craft

October 28, 2023 by Annette Kaminsky Leave a Comment

Tweet
Share
Share
Pin

_______

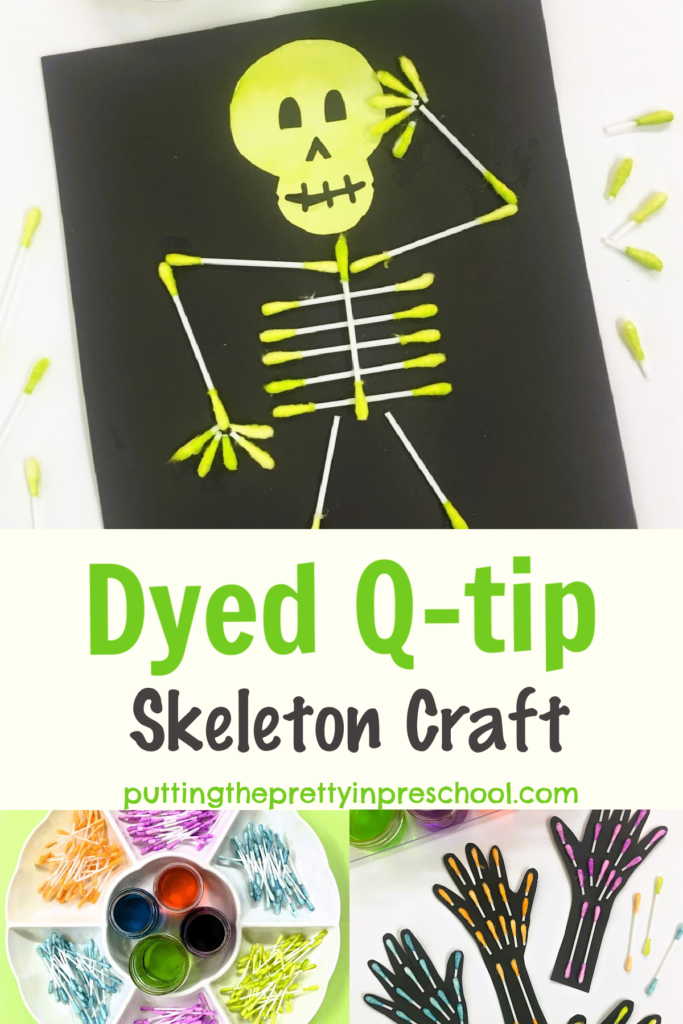
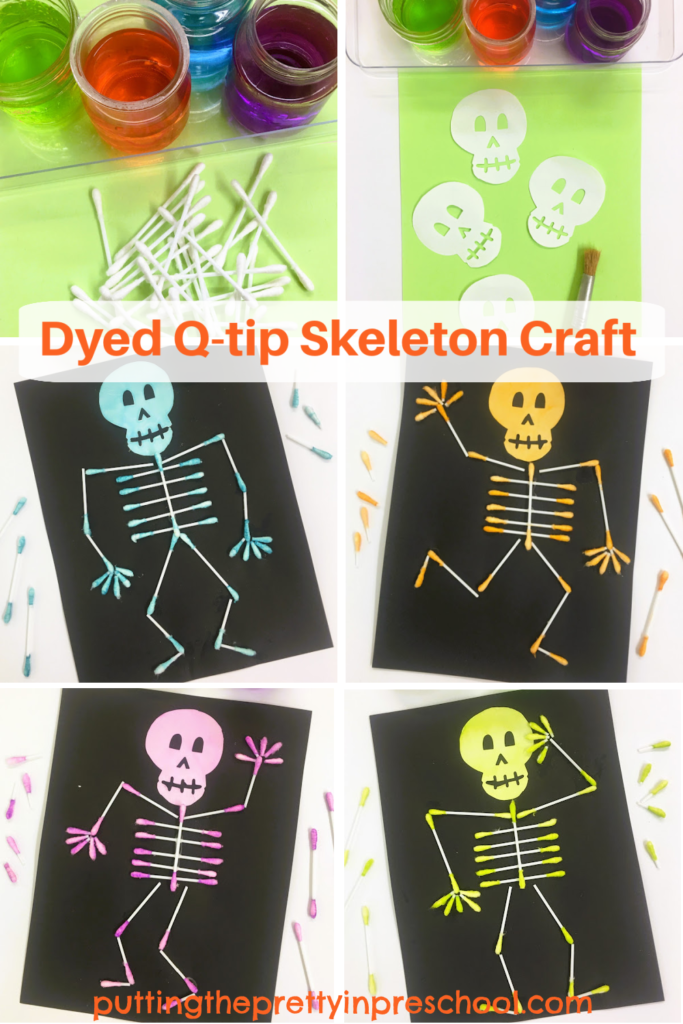
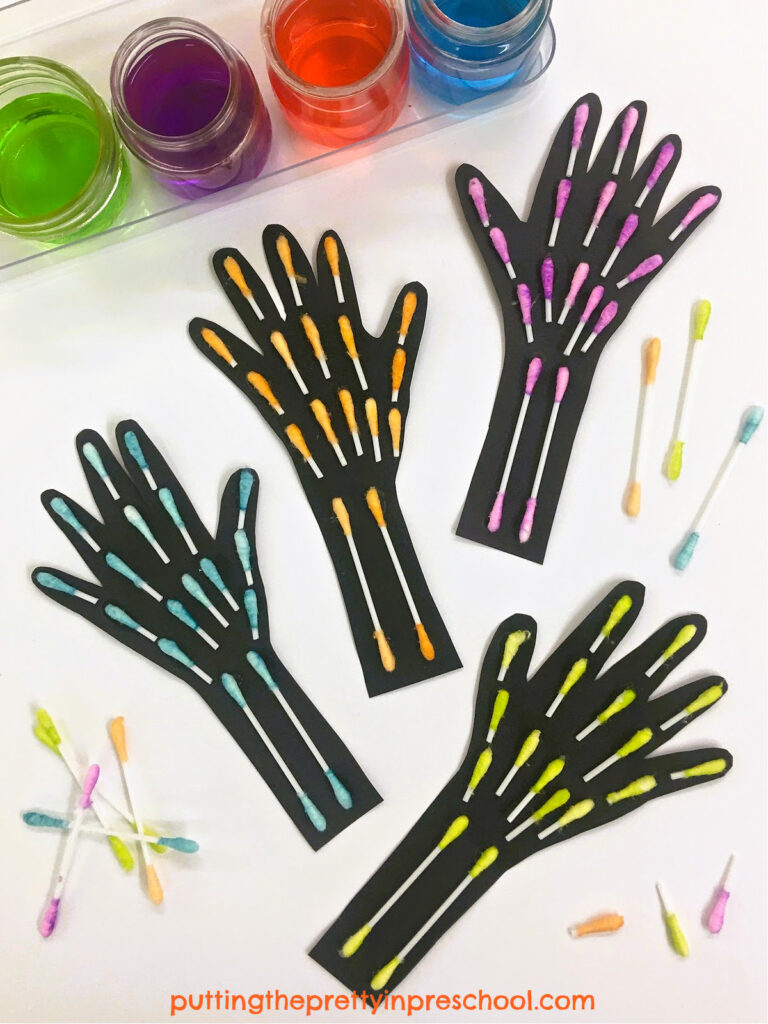
Out shopping this fall, I couldn’t help but notice the beautiful skull art in craft and home décor stores. Pastel skull heads were one of my favorite finds, and this colorful dyed Q-Tip skeleton craft is inspired by them. It is super fun to do, so why not give it a try.

_______

Follow me on Pinterest for more early learning ideas.

_______

Supplies To Collect

_______

For this cute skeleton craft, gather the following supplies:

  • Q-tips
  • liquid food coloring
  • paint pots or small jars
  • paint brushes
  • black fadeless construction paper
  • white paper
  • paper in pastel shades
  • thin marker
  • scissors
  • paper towel roll
  • white glue
  • glue stick
  • glue paddle

_______

How To Dye Q-Tips

_______

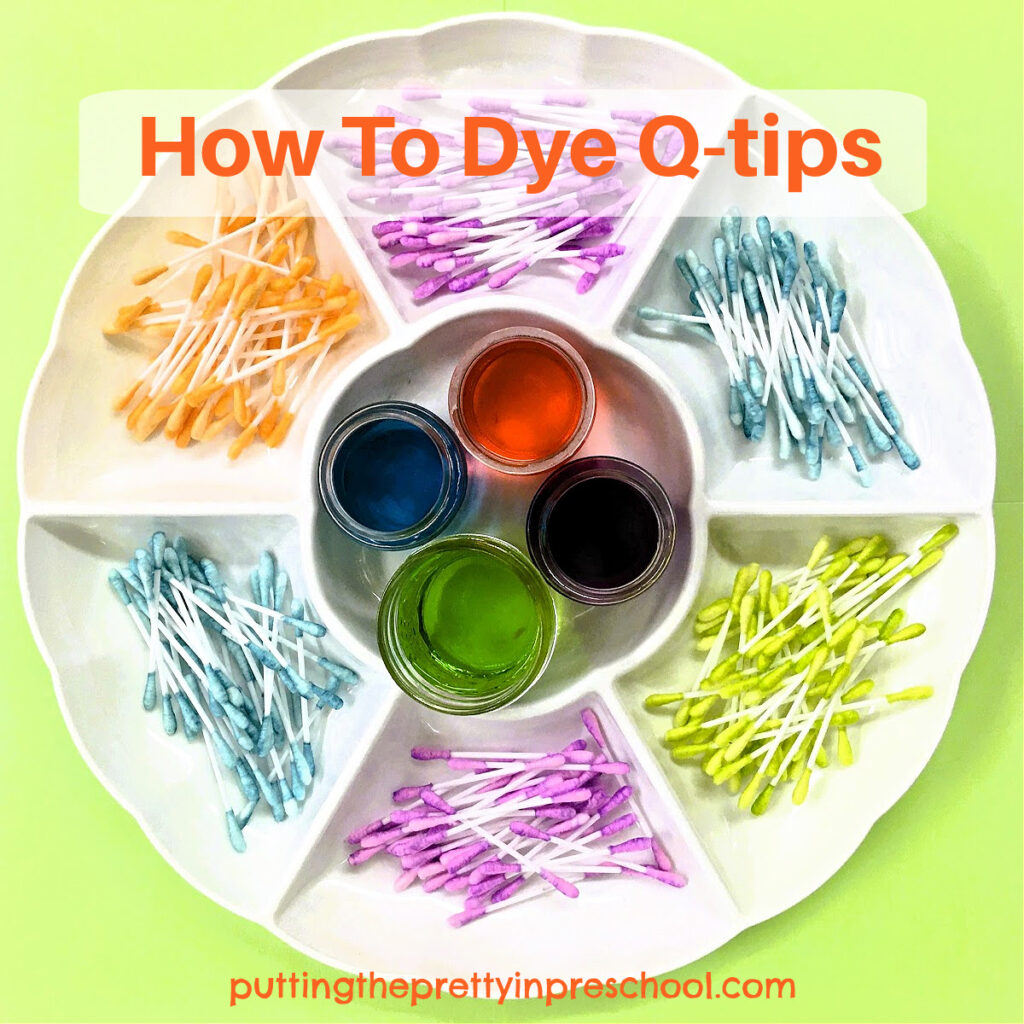
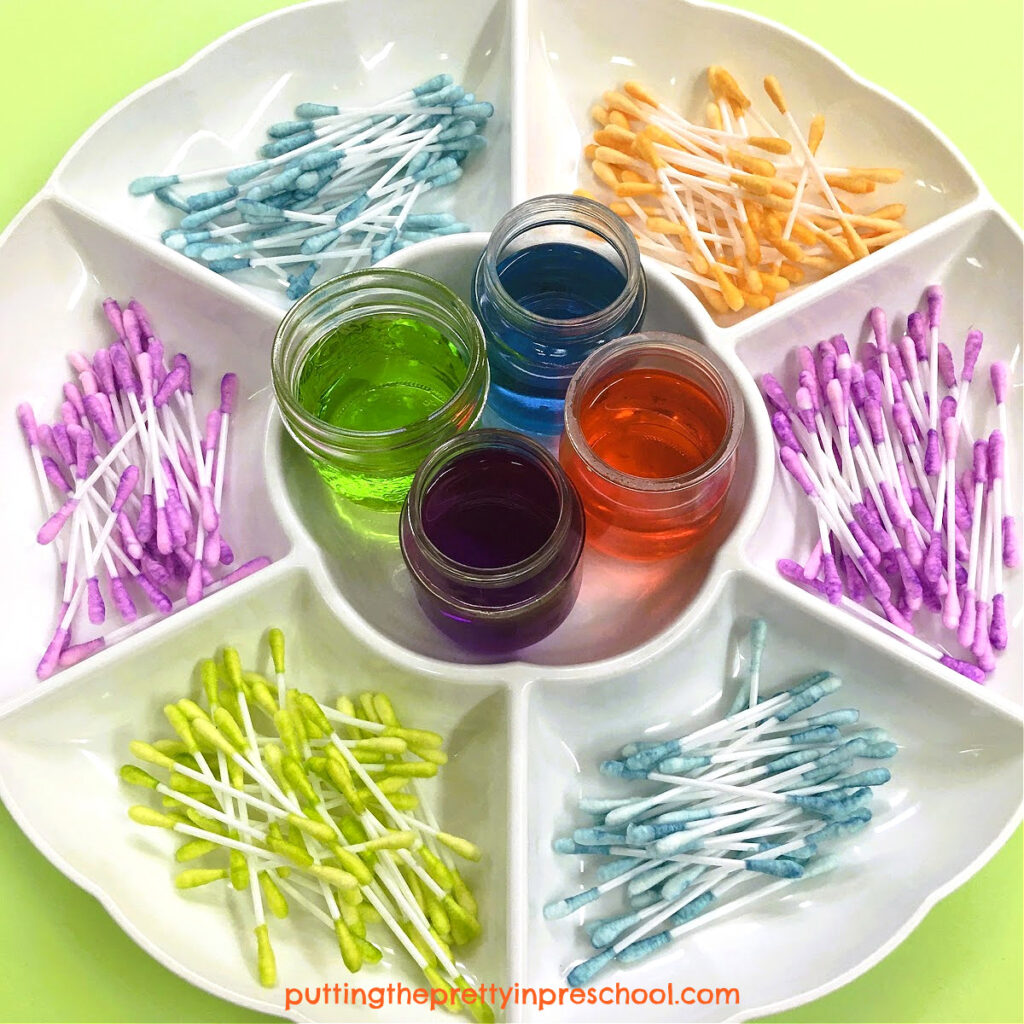
Before setting out supplies for this craft, dye a package of Q-tips in various pastel shades.

To dye Q-tips, pour liquid food colors of choice into small paint pots or jars, and mix in a little water. My chosen colors were turquoise, orange, violet, and neon green.

Next, quickly dip each soft Q-tip end into a jar of liquid color and lay the Q-tips out to dry onto paper towel strips.

When dry, gather the Q-tips and sort them by color into a compartment tray.

_______

The Q-tip Skeleton Craft

The first thing to do when making a Q-tip skeleton is to select or craft a skull to use. Here are three options:

  • Draw a skull on white or pastel paper using a marker, and fill in the eye socket and teeth details. Then cut it out.
  • Select a sticker or crafted skull.
  • Use a skull rubber stamp/ink pad to print the skull.

On a last-minute shopping trip, I was happy to find a package of skull-themed paper doilies, from which I cut a few skull heads. They work perfectly for the craft as they can be painted.

_______

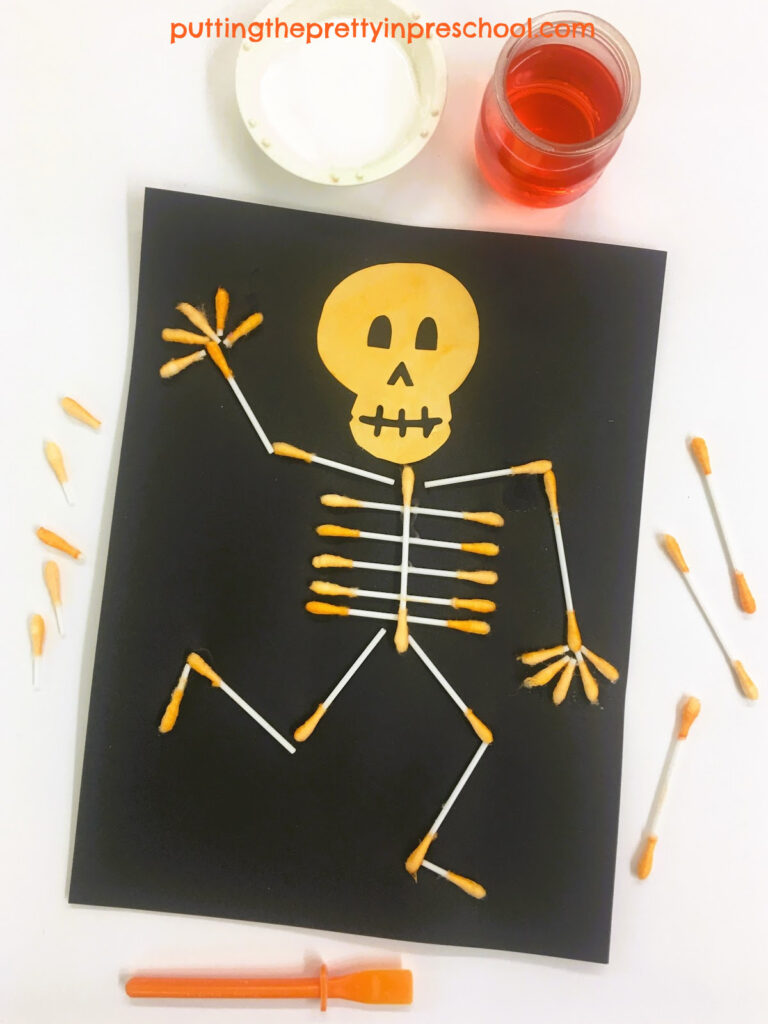
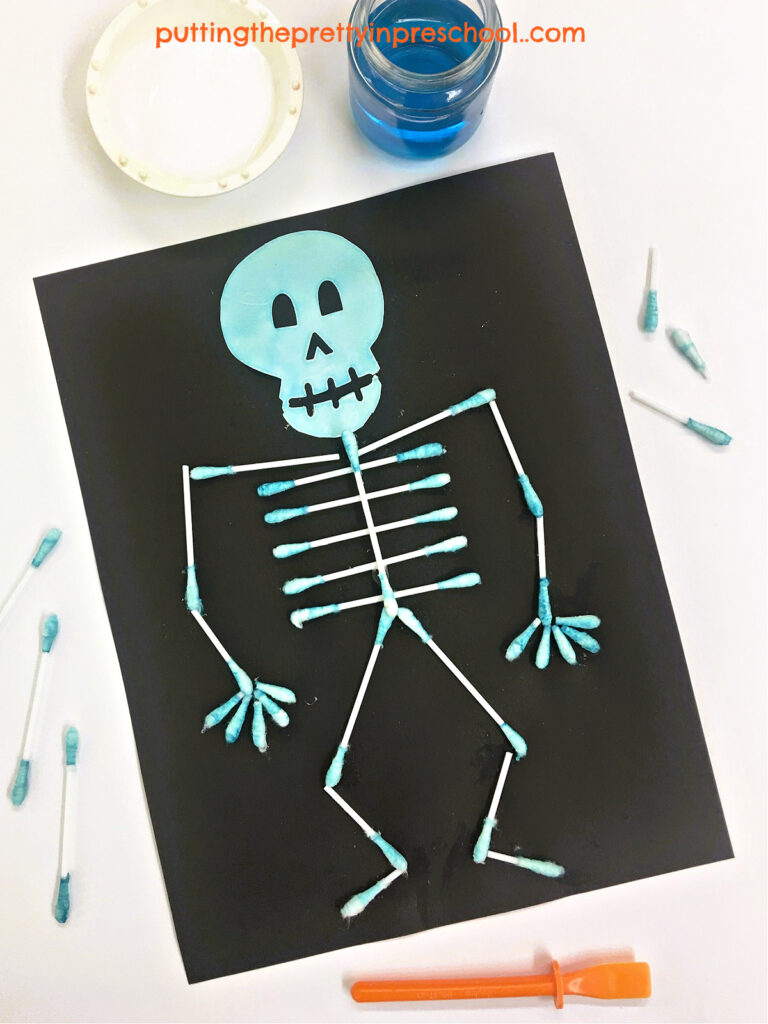
After picking out a skull design and painting it with a pastel shade if desired, use white glue or a glue stick to tack it near the top of a black piece of fadeless construction paper.

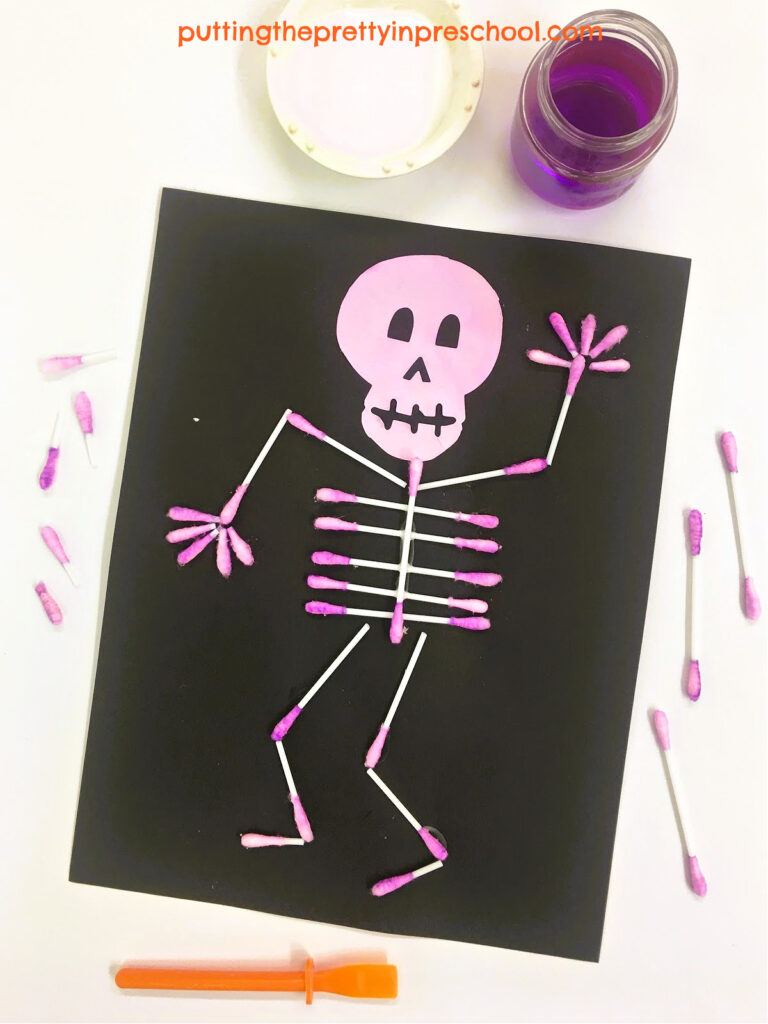
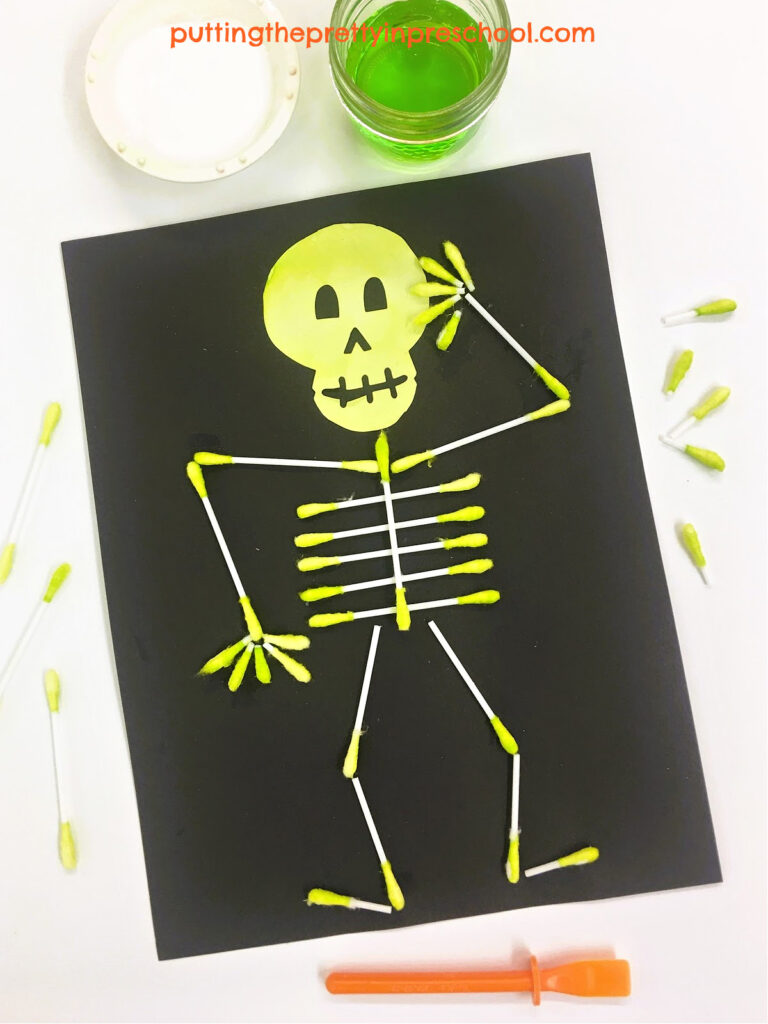
Next, lay out Q-tips in the shape of a skeleton below the skull. Whole Q-tips work fine for the rib cage and backbone, and Q-tips cut into various lengths with a pair of scissors are best for the arms and legs. Q-tip ends are perfect for the little fingers.

_______

When you have a design that you are happy with, use a glue paddle to add white glue to the Q-tip ends, and carefully affix them one by one to your skeleton design.

_______

A group of crafted Q-Tip skeletons would be eye-catching if displayed together, as each pose is bound to look different.

_______

Q-tip Skeleton Arm

Instead of making a whole skeleton out of Q-tips, trace an arm from black construction paper, cut it out, and glue Q-tip pieces to it. This Q-tip craft version draws attention to the many bones in the hands, and the two bones in the lower arm.

_______

Q-tip Skeleton Transient Craft

If you are short on time but would still like to offer a Q-tip skeleton-building experience, this craft project could be set up as a transient craft invitation.

_______

More Skeleton Activities

Skeleton Preschool Theme

Glam Skeleton Sensory Bin

Skeleton and Eyeball Waterplay

Glam Skeleton Playdough Tray

Floral Decorated Skeleton

Skeleton Treasure Blocks

Spaghetti and Eyeball Sensory Bin

_______

[Read more…] about Q-tip Skeleton Craft
Tweet
Share
Share
Pin

Filed Under: art, crafts, fall, preschool, science, sensory Tagged With: color experiment, skeletons

Paper Plate Turkey Craft

October 8, 2023 by Annette Kaminsky Leave a Comment

Tweet
Share
Share
Pin

_______

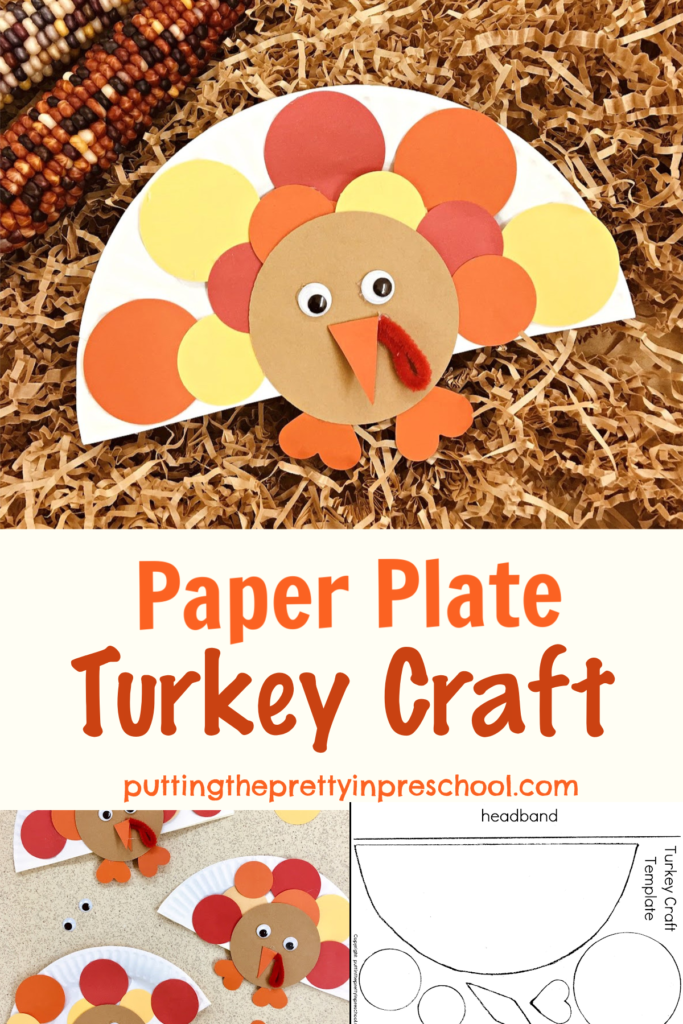
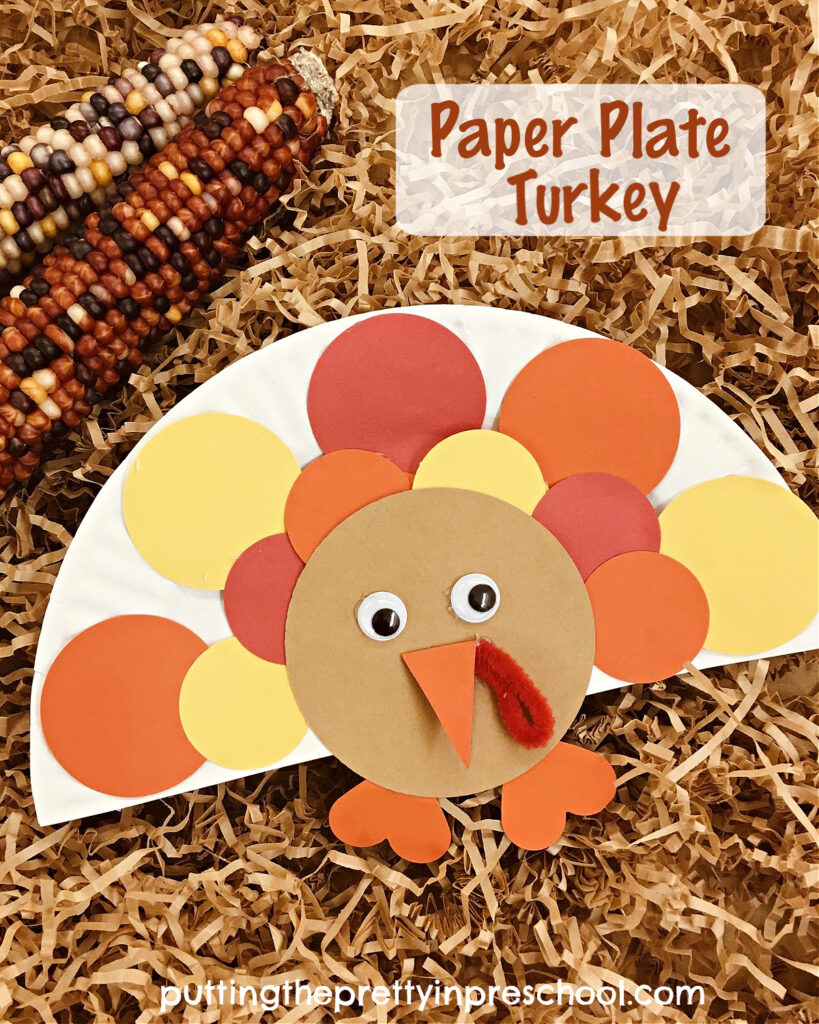
Paper plate crafts are always a hit, and this paper plate turkey craft is a super cute one. Fit it during a farm animal theme or letter T mini-theme, or save it for a Thanksgiving Day celebration. Download the free turkey template to prepare this craft with ease.

_______

Follow me on Pinterest for more early learning ideas.

_______

Supplies To Collect

For this adorable farm animal craft, gather the following supplies:

  • large paper plate
  • red, yellow, orange, and brown construction paper or cardstock
  • red pipe cleaner
  • wiggly eyes
  • white glue and glue paddle
  • glue stick
  • glue gun

_______

Paper Plate Turkey Prep

_______

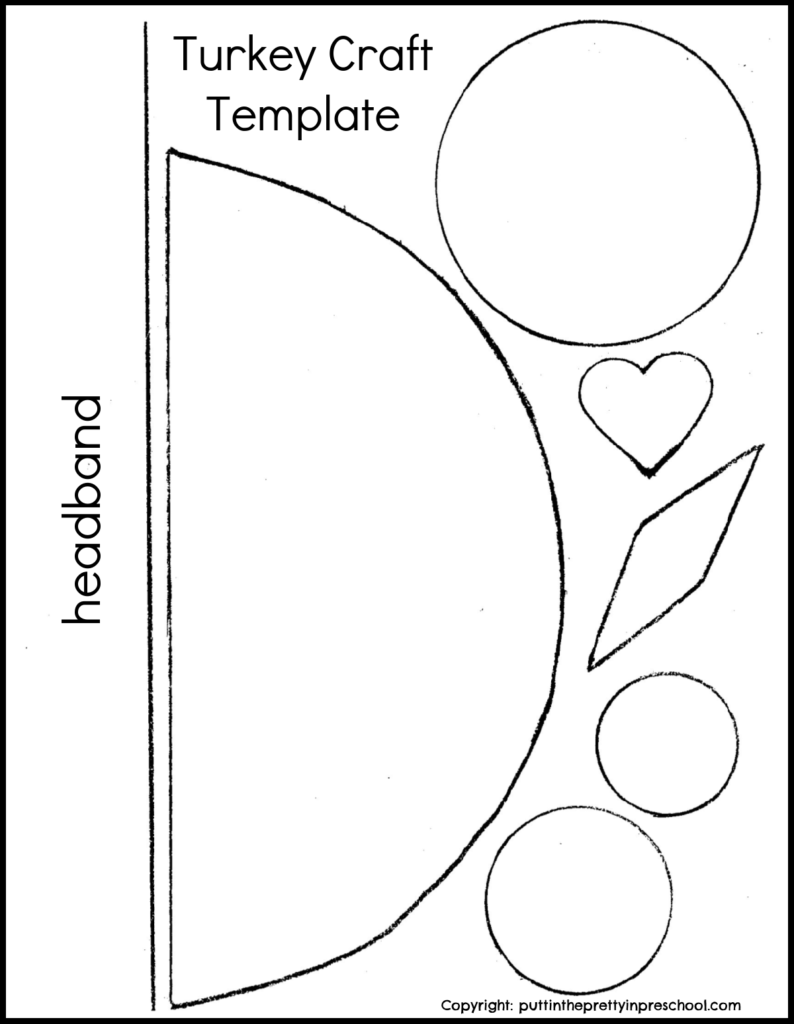
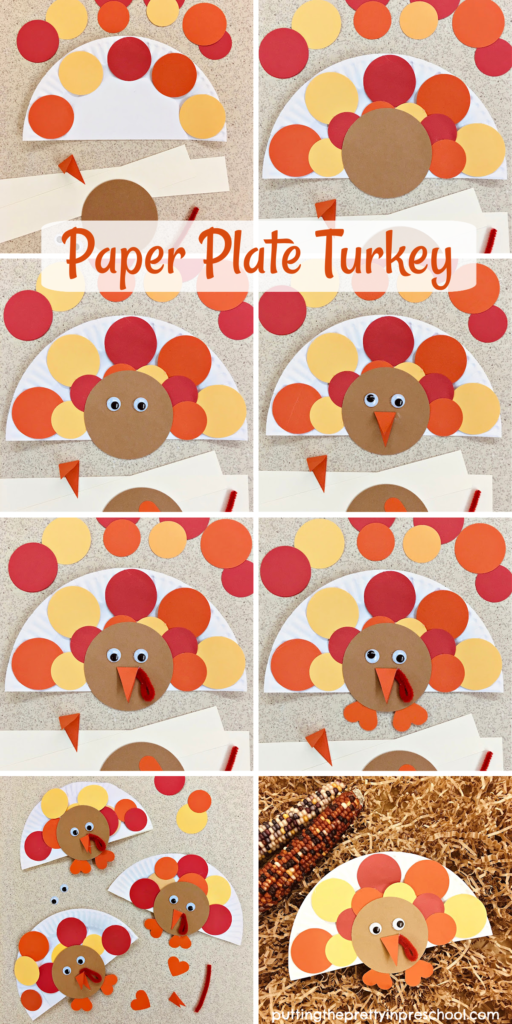
To prepare this animal craft, first cut a paper plate in half.

Next, cut a large circle from brown construction paper or cardstock, and two sizes of smaller circles from red, orange, and yellow sturdy paper.

Then cut a narrow diamond and two small hearts from orange paper.

The last thing to do is snip a three-inch strip from a red pipe cleaner.

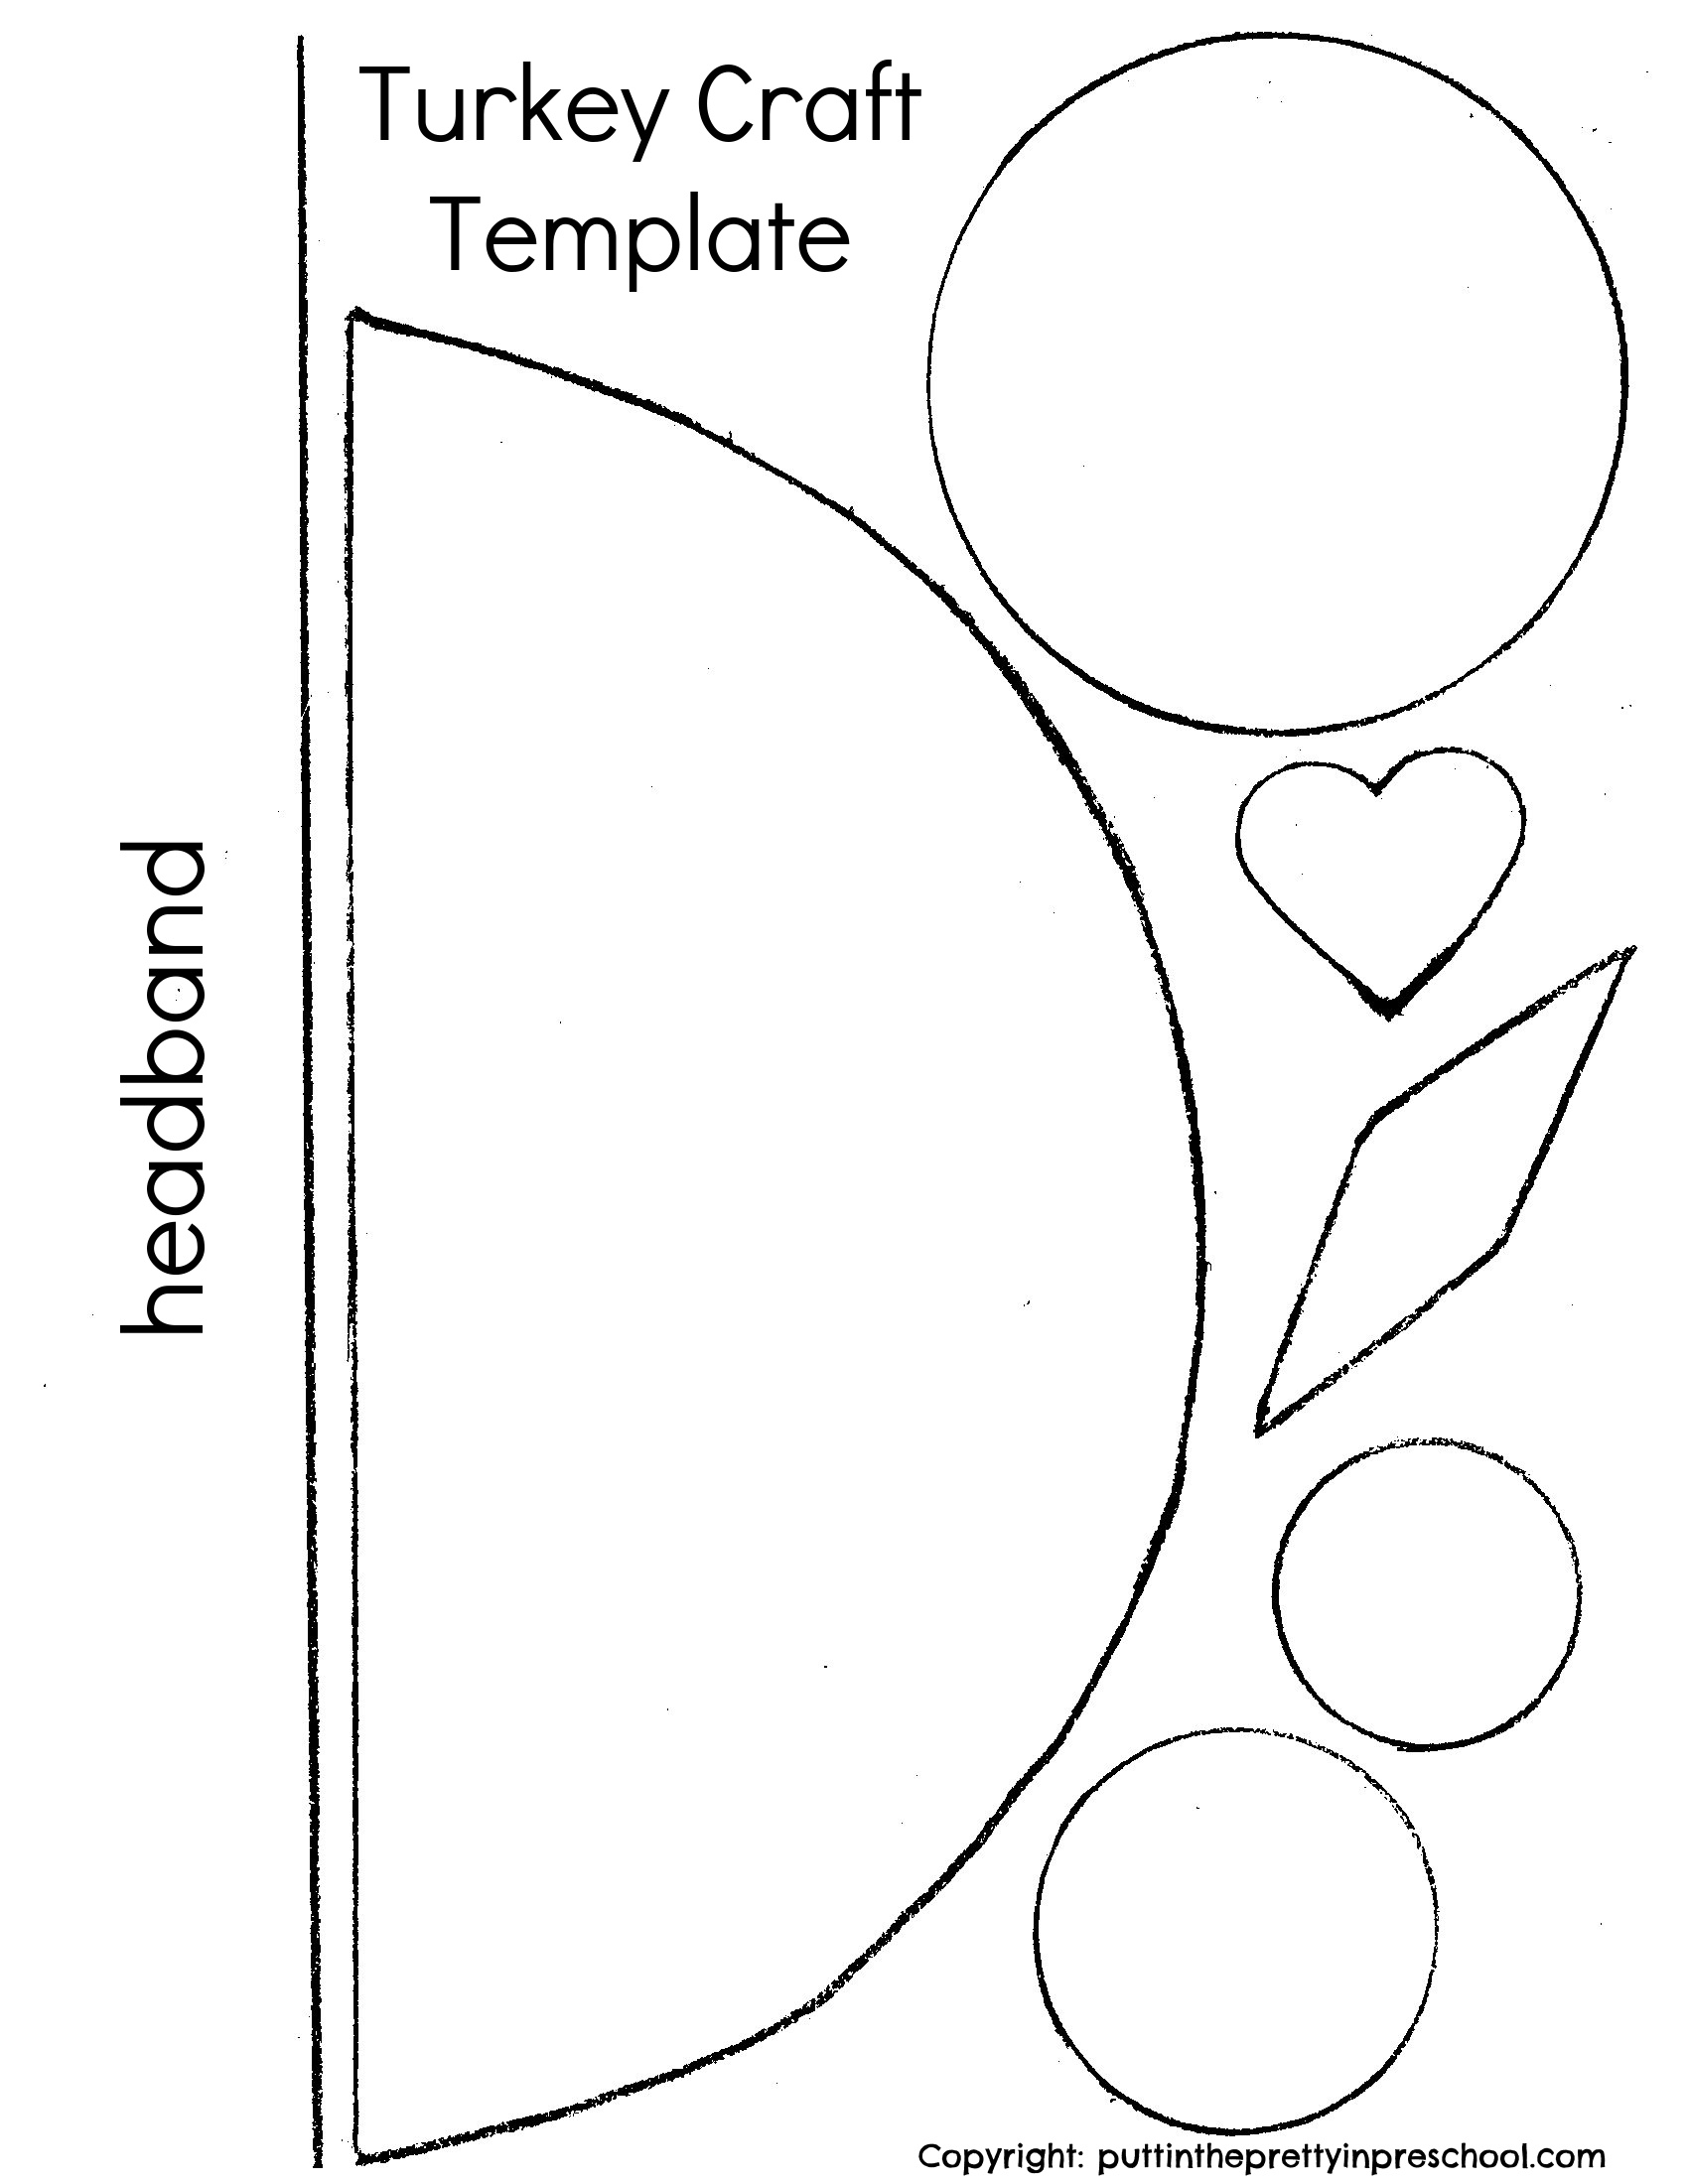
To make things easier, download this free turkey craft template to use for cutting out the shapes.

_______

Paper Plate Turkey PrintableDownload

This printable is for individual or one classroom use only.

_______

Tip: Paper punches are very helpful in preparing this craft.

_______

Making The Paper Plate Turkey Craft

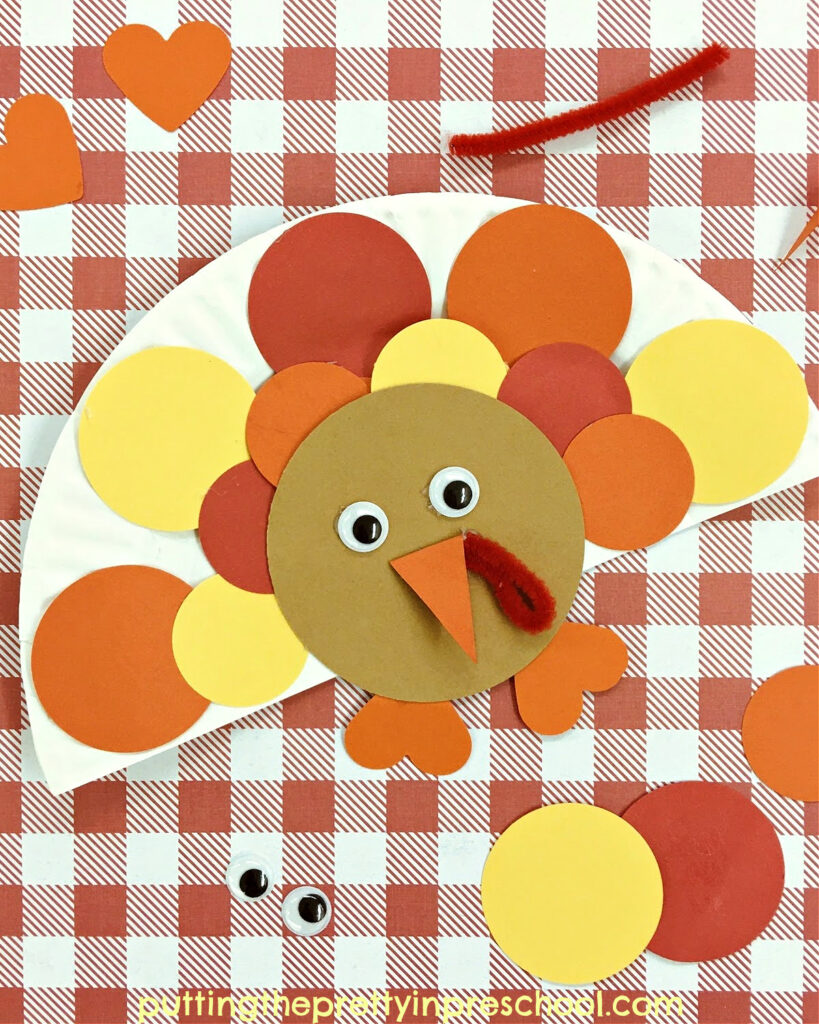
To make this cute turkey craft, start by using white glue and a glue paddle to adhere red, orange, and yellow circles to the semi-circular plate.

Next, glue the brown circle to the bottom middle of the straight edge of the plate, allowing a little bit of the circle to fall below the edge. This will be the turkey head.

_______

Then glue two wiggly eyes to the large circle.

Afterward, fold the narrow diamond shape in half to make a beak. Glue the folded bottom half of the beak underneath the eyes.

Then fashion the red pipe cleaner strip into a narrow loop. Glue the loop to the beak so that it hangs down as a snood.

Finally, glue two heart-shaped feet to the bottom of the turkey head.

Let the crafted turkey dry overnight and it will be ready for display.

Note: A glue stick or glue gun will also work to adhere the shapes in this craft.

_______

This paper plate turkey is made entirely of geometric shapes, so the craft presents a great opportunity to discuss and review them.

_______

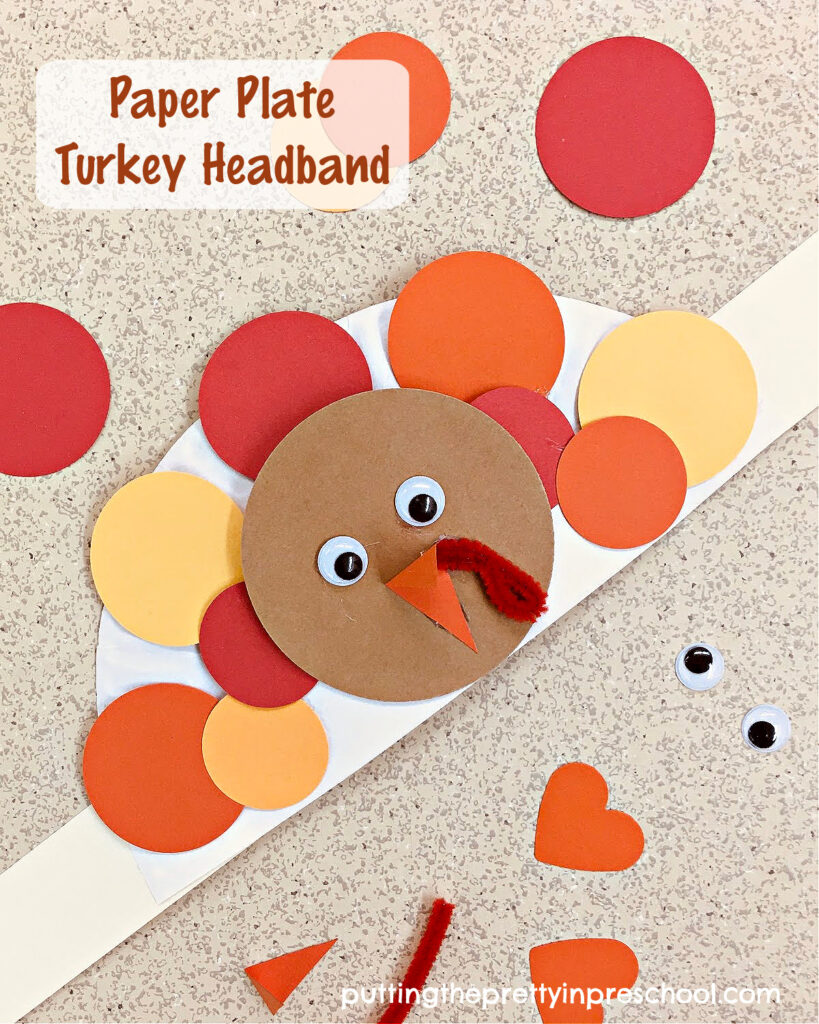
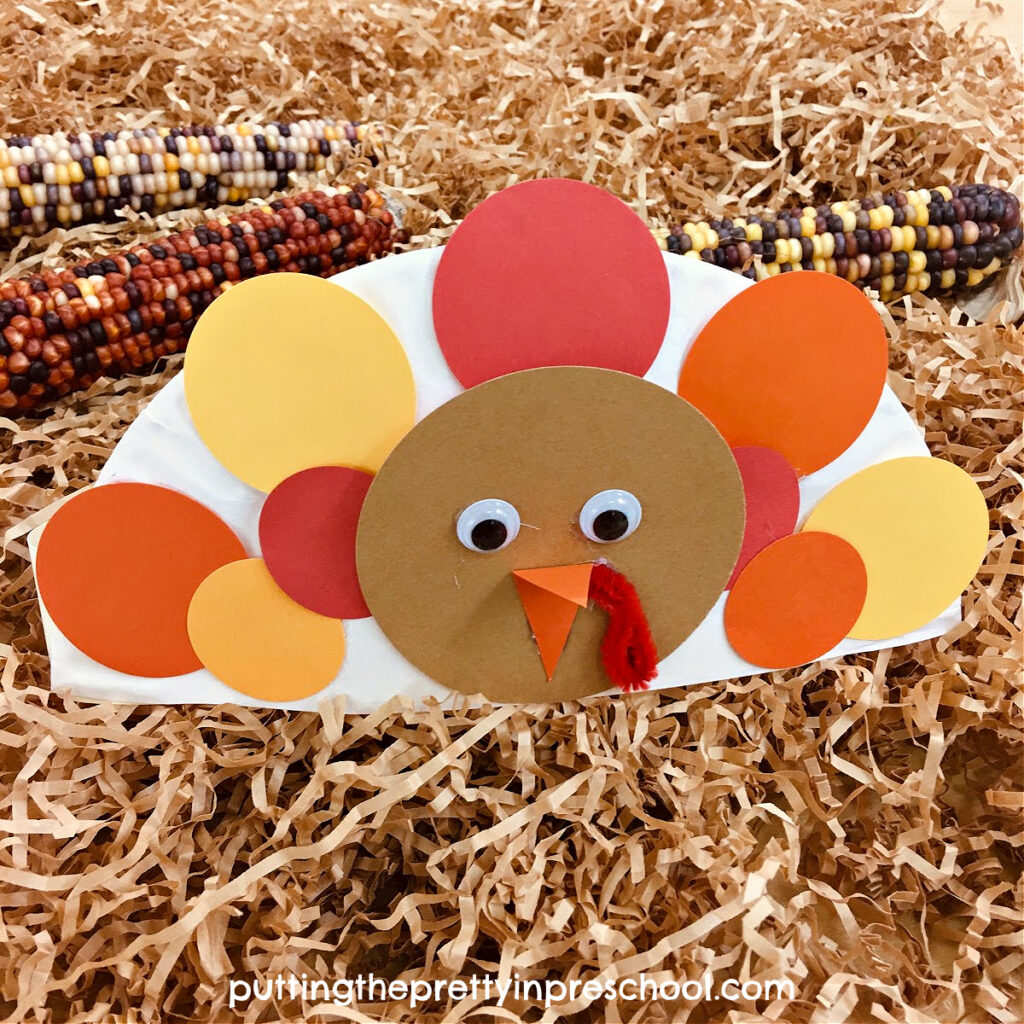
Paper Plate Turkey Headband

For a fun twist to this craft, turn the paper plate turkey into a headband.

_______

First, make sure to adhere the bottom edge of the turkey head to the straight edge of the semi circle.

Next, glue on the eyes, beak, and snood as in the first craft.

Then cut two 1 ½ x 11 inch strips from a piece of cardstock. Glue the two strips together on one side, and then adhere the paper plate turkey on top, lining it up with the bottom edge.

Measure the headband to fit the wearer, and glue the remaining two ends together.

_______

_______

Thanksgiving Printables

Shop Thanksgiving printables in my Etsy shop “Skills N Smiles“:

_______

_______

More Turkey Activities

Coffee Playdough Turkey

Thanksgiving Tablescape Pretend Play

_______

[Read more…] about Paper Plate Turkey Craft
Tweet
Share
Share
Pin

Filed Under: autumn, crafts, dramatic play, fall, preschool, pretend play, Thanksgiving Day Tagged With: dramatic play, paper crafts, turkeys

Cauliflower Theme Activities

September 17, 2023 by Annette Kaminsky Leave a Comment

Tweet
Share
Share
Pin
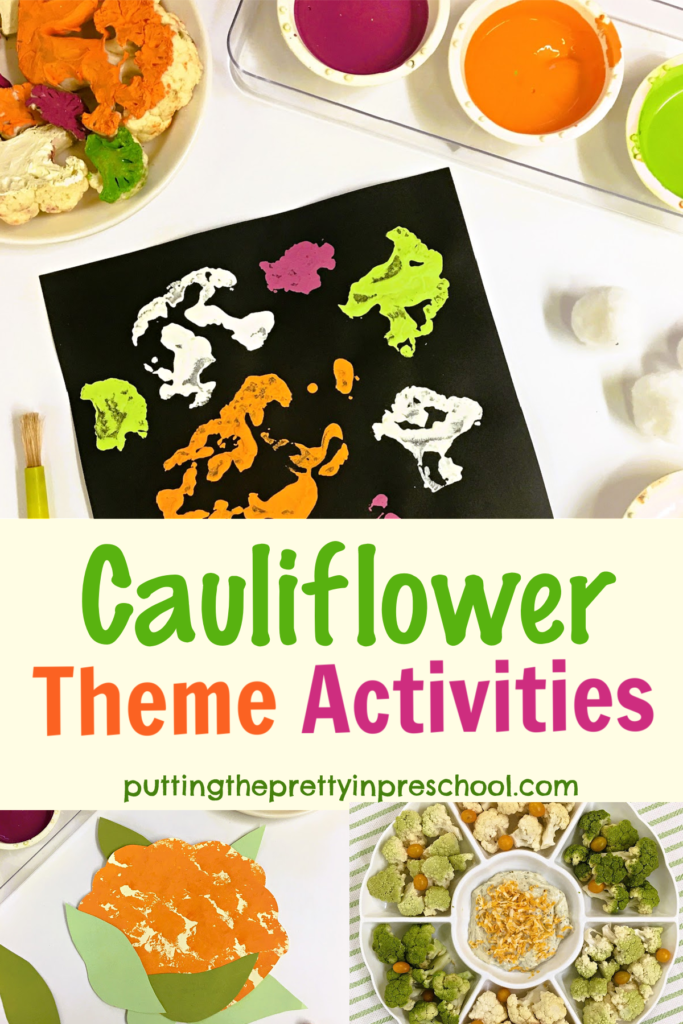
Easy and fun cauliflower theme activities. Art, craft, science and snack ideas are included in this hands-on vegetable theme.

_______

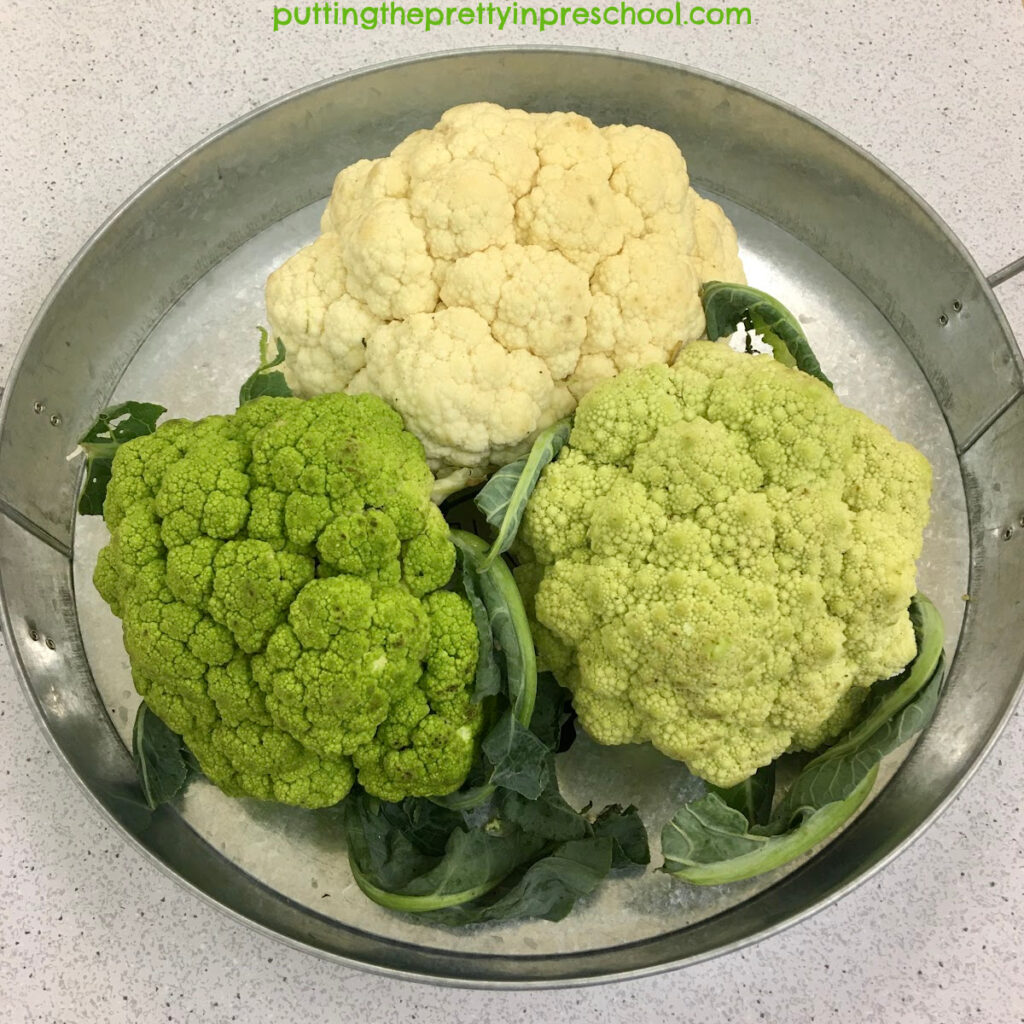
Beans in a variety of colors weren’t the only thing I discovered on a recent street market stroll. I also stumbled upon a delightful vegetable stall with three different colors of cauliflower. The uniquely hued vegetables are the inspiration for cauliflower theme activities to try, including super easy raw and cooked cauliflower snacks, cauliflower science, and arts and crafts activities.

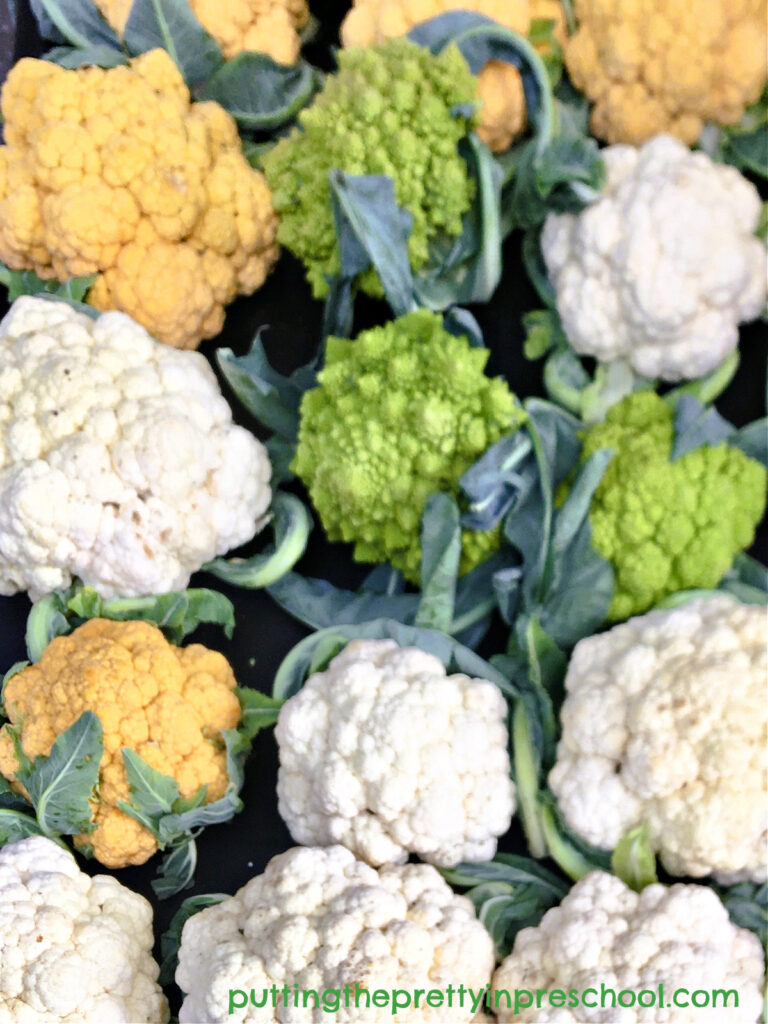
The easiest cauliflower to find is white, but did you know that this popular vegetable also comes in green, orange, and purple colors? These additional hues have recently popped up at vegetable stands. They add variety to food offerings and would certainly be a conversation piece at any gathering.

Three cauliflower colors spotted at a farmer's market to use in a vegetable tray or a roasted dish.

_______

Follow me on Pinterest for more early learning ideas.

_______

The cauliflower colors I feature in the snacks below are cream, light green, and medium green.

Note: On another street market stroll I came across an orange variety, shown in a photo below. I am still on the hunt for purple and look forward to being able to find it.

_______

Cauliflower Snacks

Cauliflower is a versatile vegetable and can be used in many different dishes. Two easy ways to introduce cauliflower are in a vegetable tray or as a roasted dish.

Cauliflower Vegetable Tray

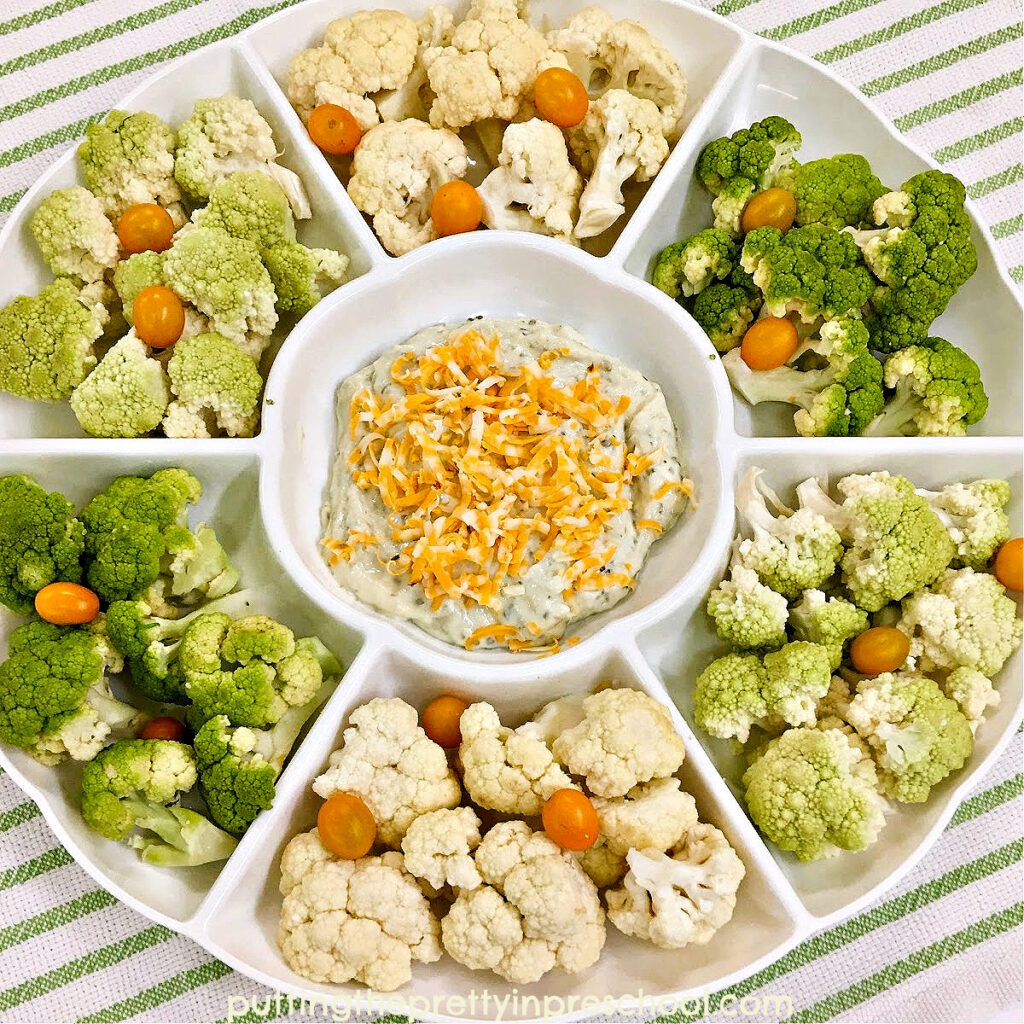
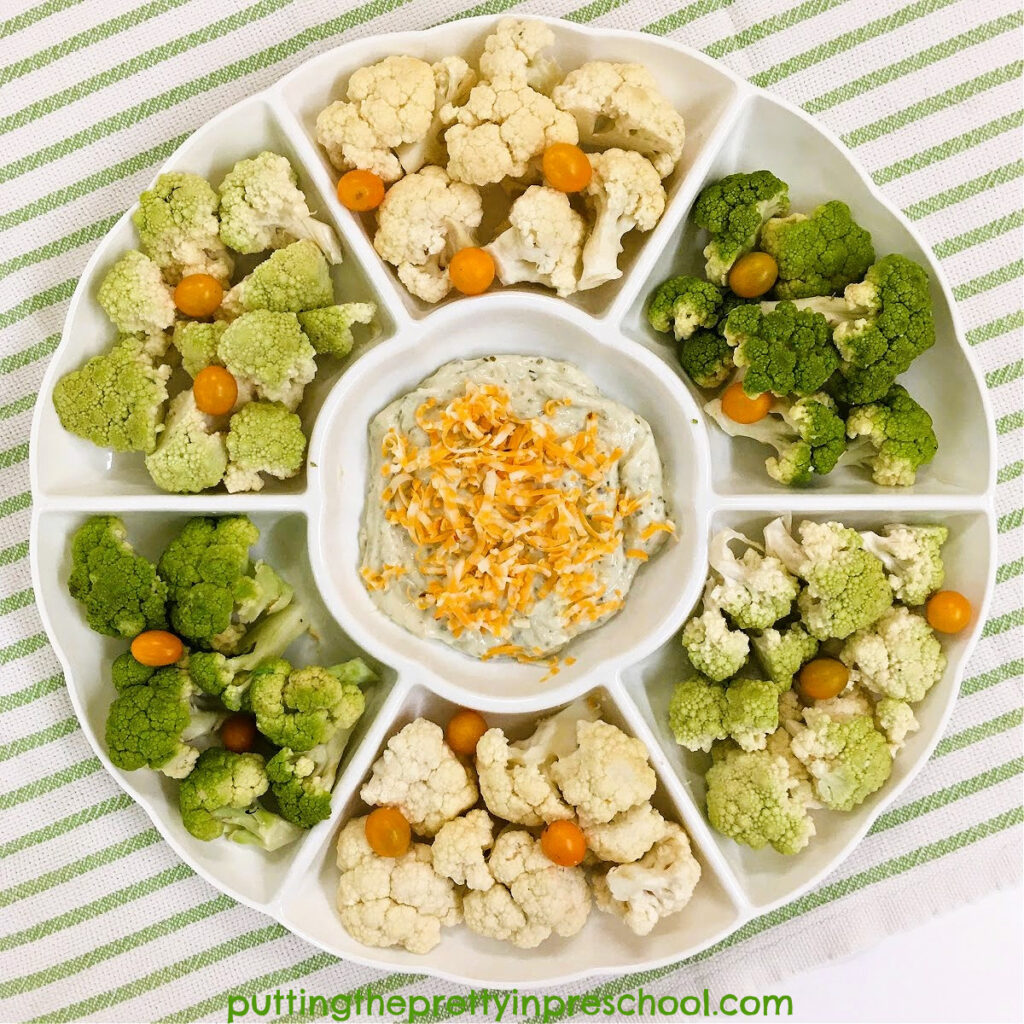
An eye-appealing vegetable tray with cream and green cauliflower and orange cherry tomatoes.

_______

To give them a moment to shine, include different-hued cauliflower florets in a vegetable tray. Add a favorite dip in the middle of the eye-appealing snack. A little shredded cheese sprinkled on top of the dip and a few cherry tomatoes placed around the cauliflower add pops of color to the tray.

An eye-appealing vegetable tray with cream and green cauliflower and orange cherry tomatoes.

_______

Roasted Cauliflower

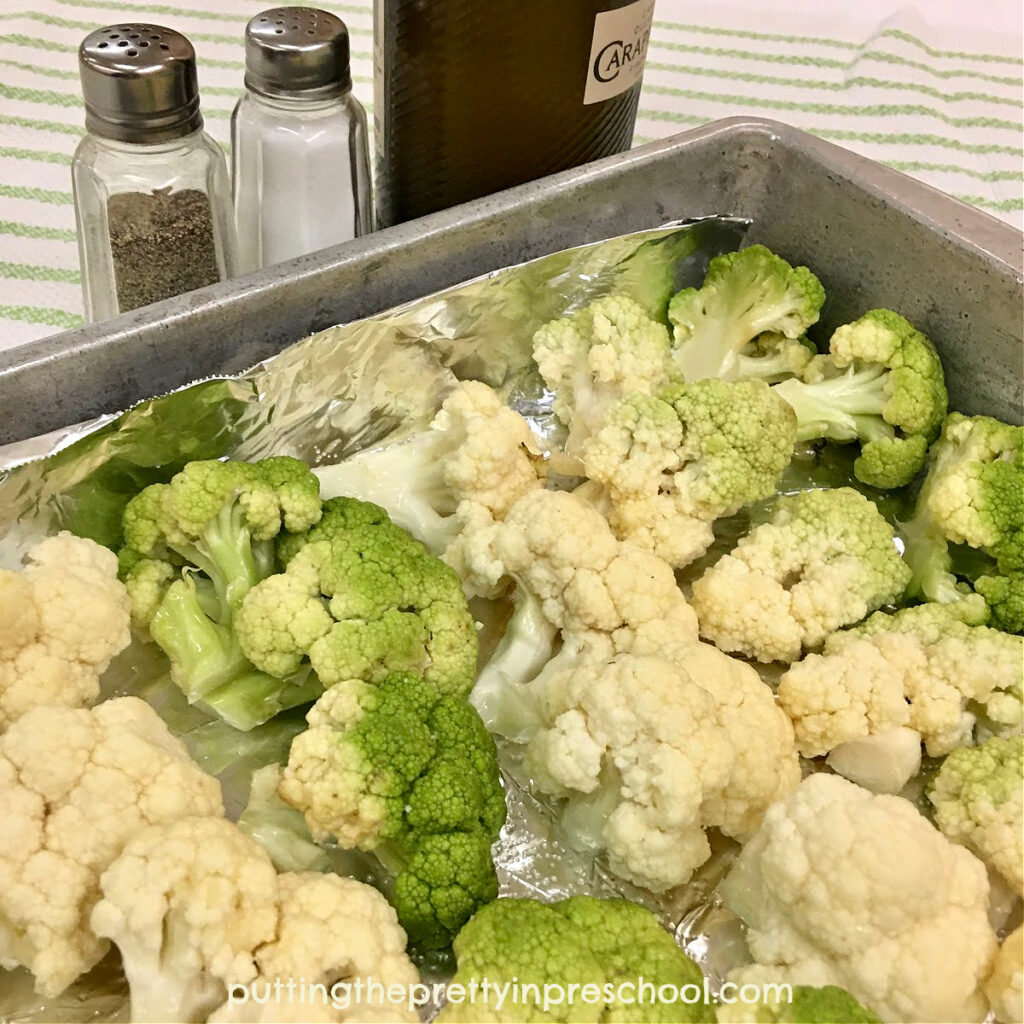
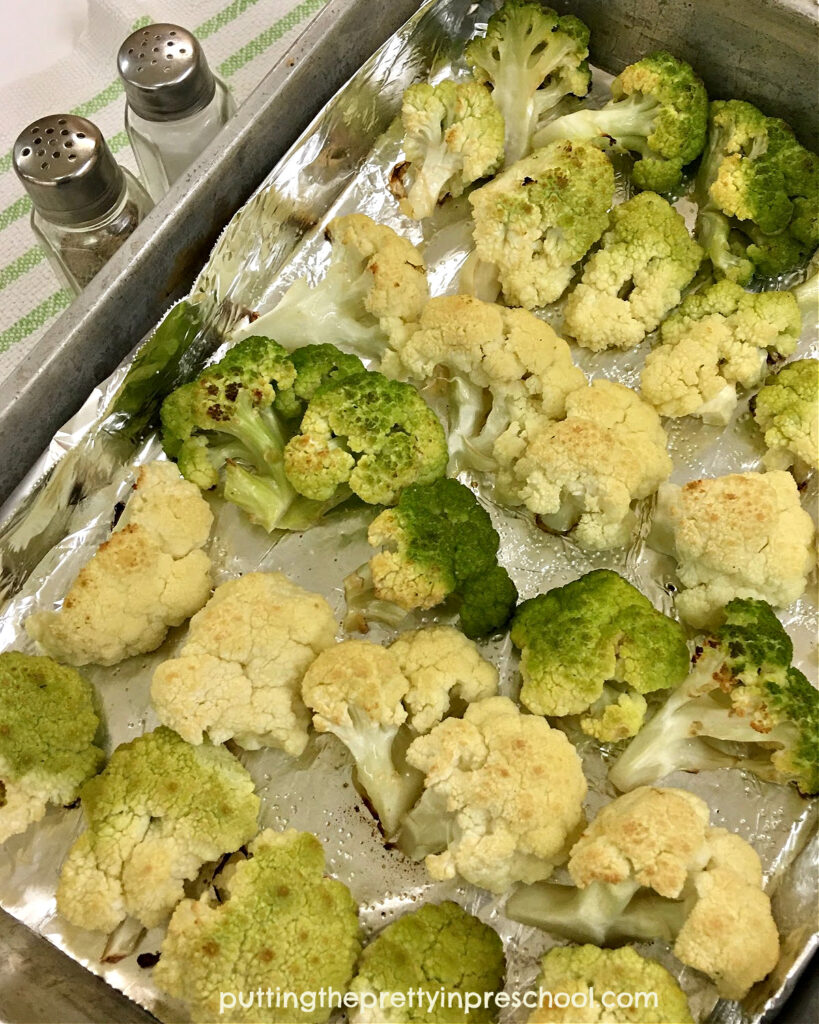
How to make a roasted cauliflower vegetable dish. Three different hues of cauliflower are featured in this easy-to-make recipe.

_______

Offer different colored cauliflower varieties in an easy-to-make roasted dish. First, pour a little olive oil in a bowl. Then cut the heads of cauliflower into florets and toss them in the oil. Spread the cut pieces in a baking pan lined with parchment paper or aluminum foil. Finally, sprinkle a little salt and pepper on the florets and bake them in an oven heated to 400 degrees for about 25 minutes.

How to make a roasted cauliflower vegetable dish. Three different hues of cauliflower are featured in this easy-to-make recipe.

_______

Cauliflower Science

Before cutting a few different colors of cauliflower into florets, set them on a table for participants to view. Discuss cauliflower parts such as the head and stem leaves.

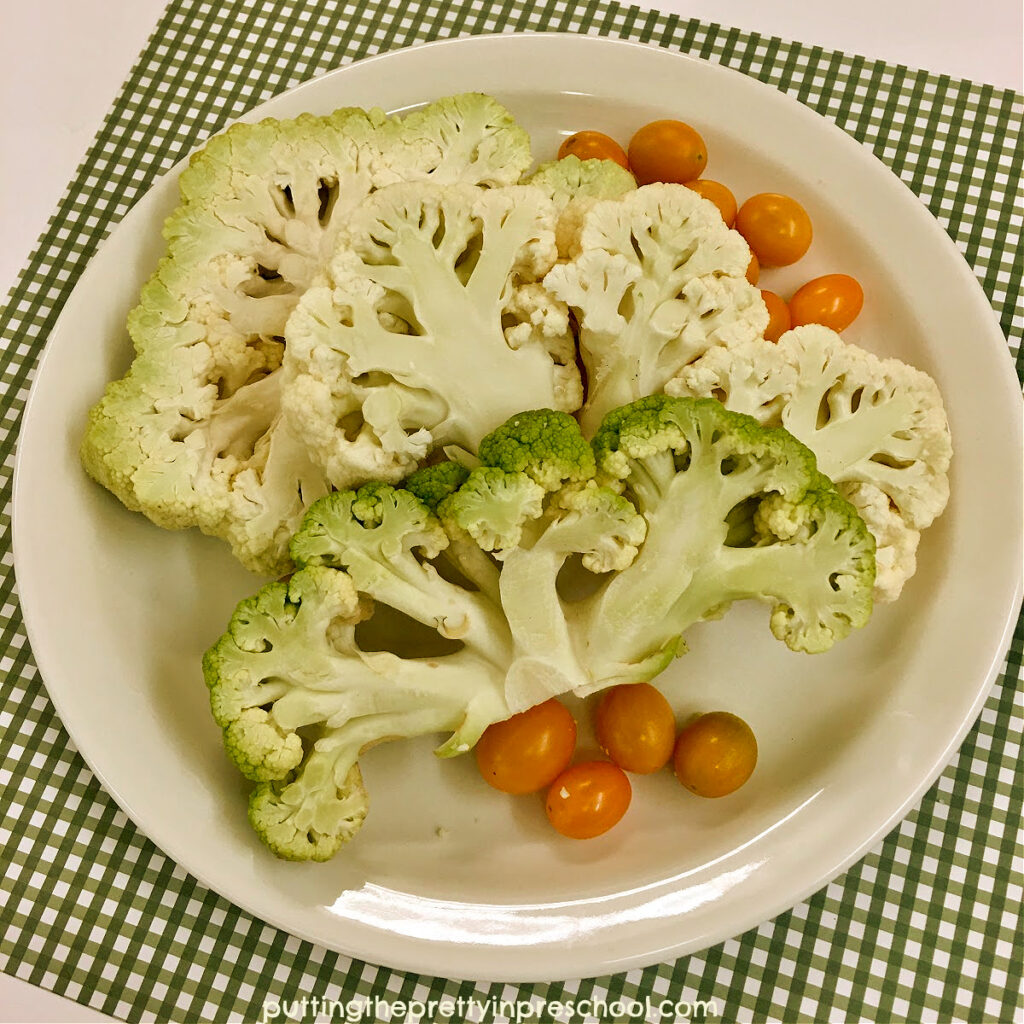
Green and cream cauliflower cut lengthwise into slabs to compare inside and outside colors.

_______

Next, slice a cauliflower into wedges to see cross sections of the cruciferous vegetable. View the stem and florets. If the cauliflower is green, orange, or purple, note if the insides of the cauliflower slabs are the same color as the outsides.

Discuss that this nutrient-rich vegetable has lots of vitamins and minerals, and is very healthy to eat.

_______

Cauliflower Arts And Crafts

You may not be able to find purple and orange cauliflower at your local grocery store, but their hues can certainly be included in cauliflower art and craft projects. In addition to green and cream, they are eye-catching colors to introduce in arty activities.

Vegetable Printing With Cauliflower

Create interesting, unexpected designs by using cauliflower florets as printmaking tools.

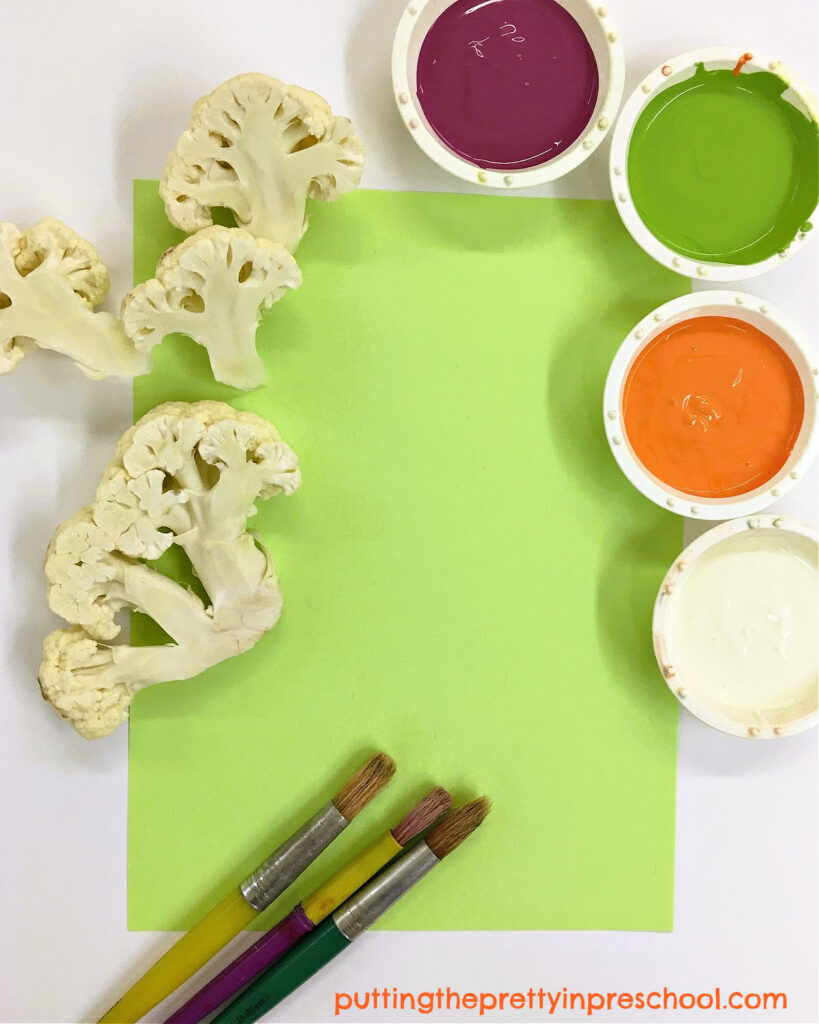
First, cut cauliflower into different-sized florets.

An invitation to make vegetable prints with cauliflower florets and orange, purple, green, and cream tempera paints.

_______

Next, paint the flatter sides of the florets with tempera paint. Cauliflower hues are a standout in this painting activity.

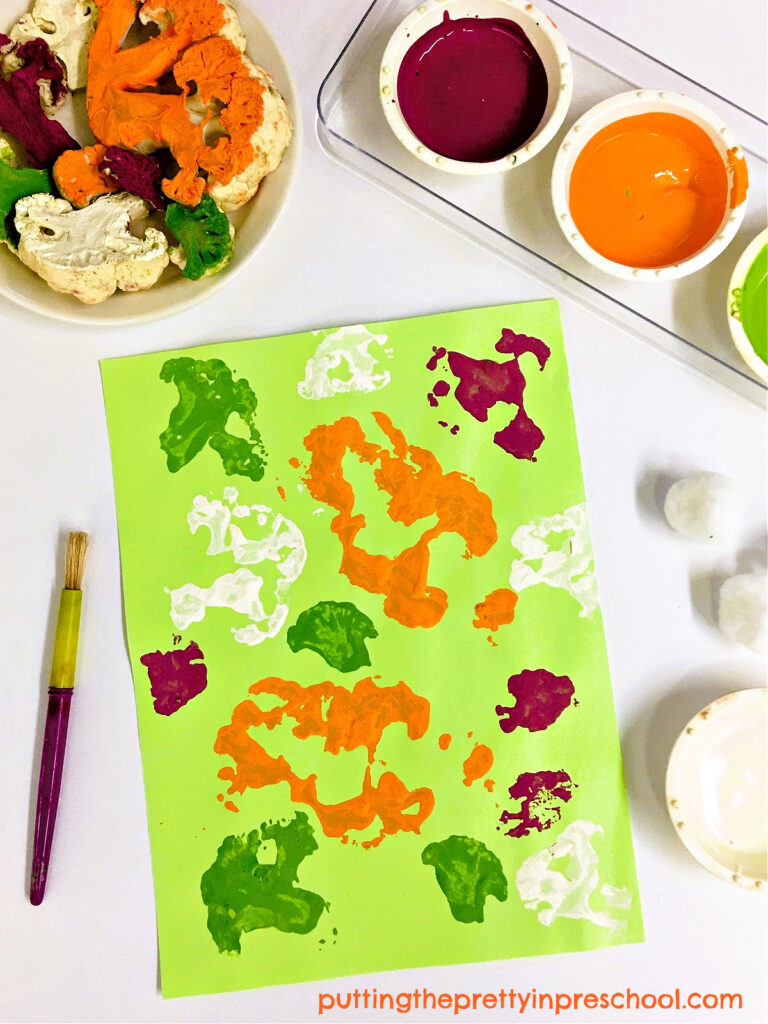
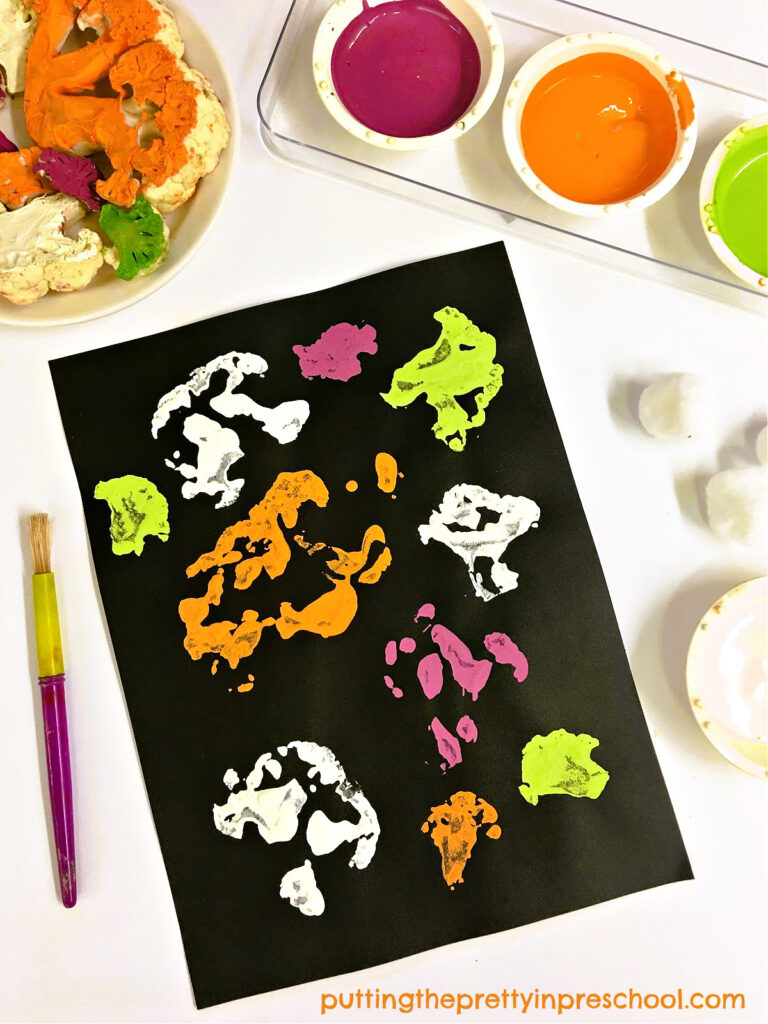
Then press down the florets onto a piece of sturdy art paper to make vegetable prints. Black and green fade-resistant construction paper work nicely for this cauliflower printmaking project.

How to make vegetable prints with cauliflower florets and orange, purple, green, and cream tempera paints.

_______

Paint Mixing Tips:

  • Add a drop of yellow tempera paint in the white to make a lovely cream color.
  • Mix a little yellow paint into green to make a lighter and brighter hue.
  • Drop in a teaspoon or two of white paint into purple and orange to make softer hues.

_______

How to make vegetable prints with cauliflower florets and orange, purple, green, and cream tempera paints.

_______

Cauliflower Paper Craft
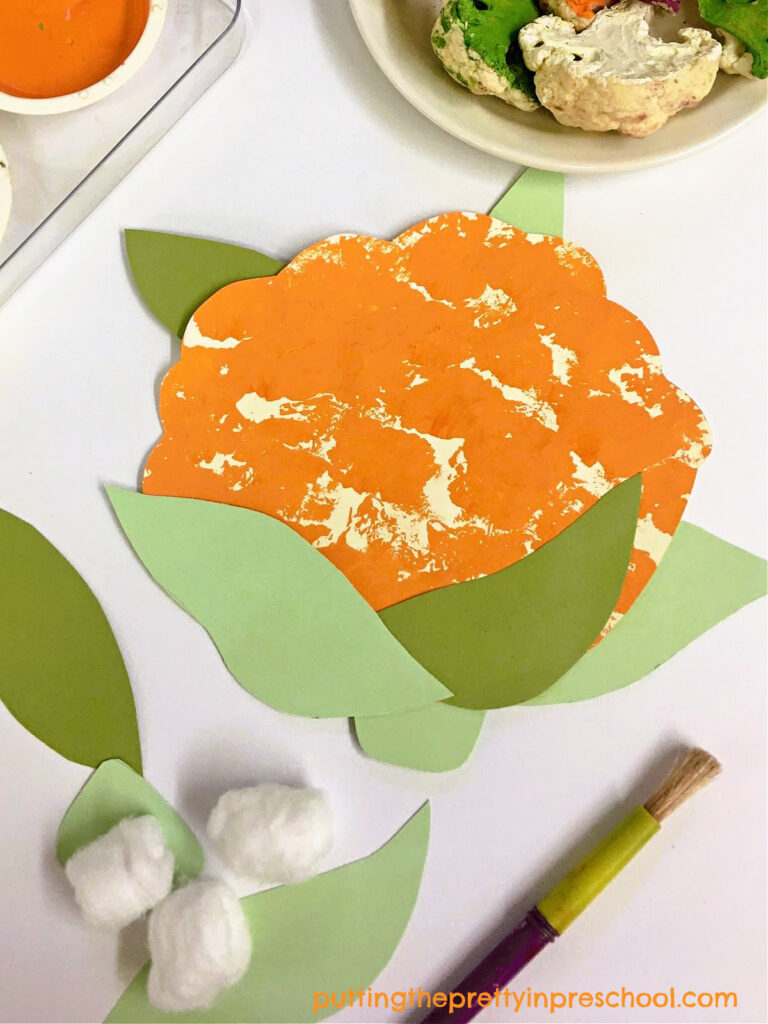
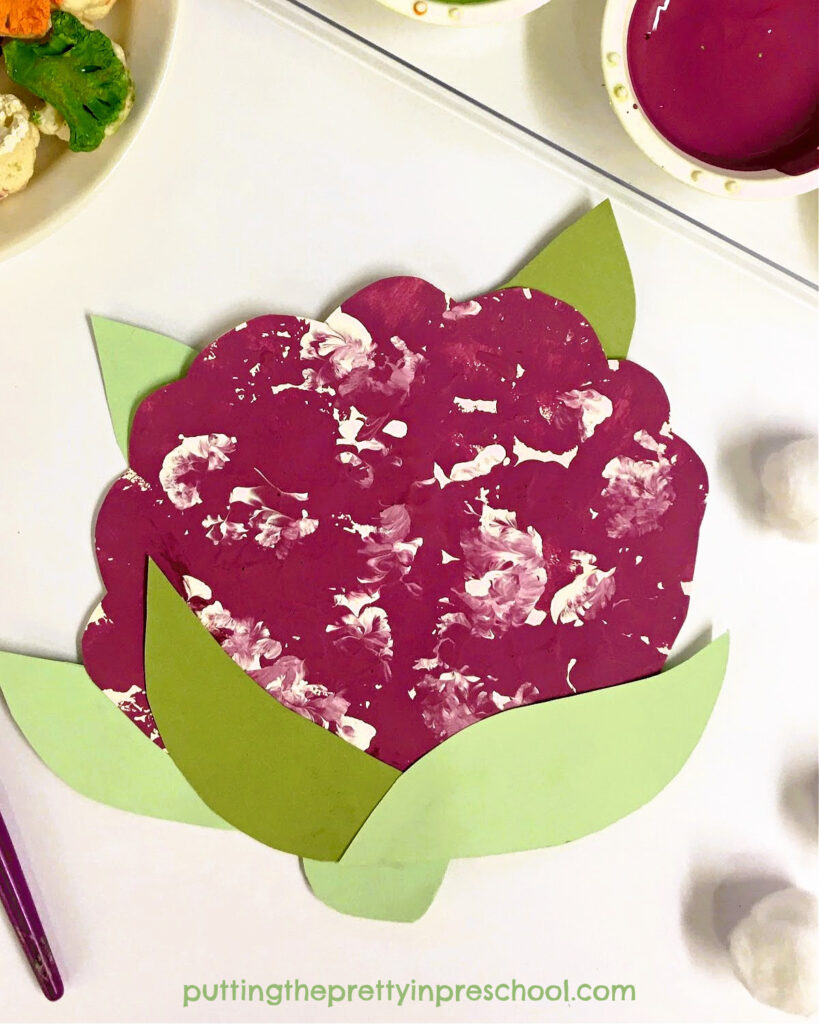
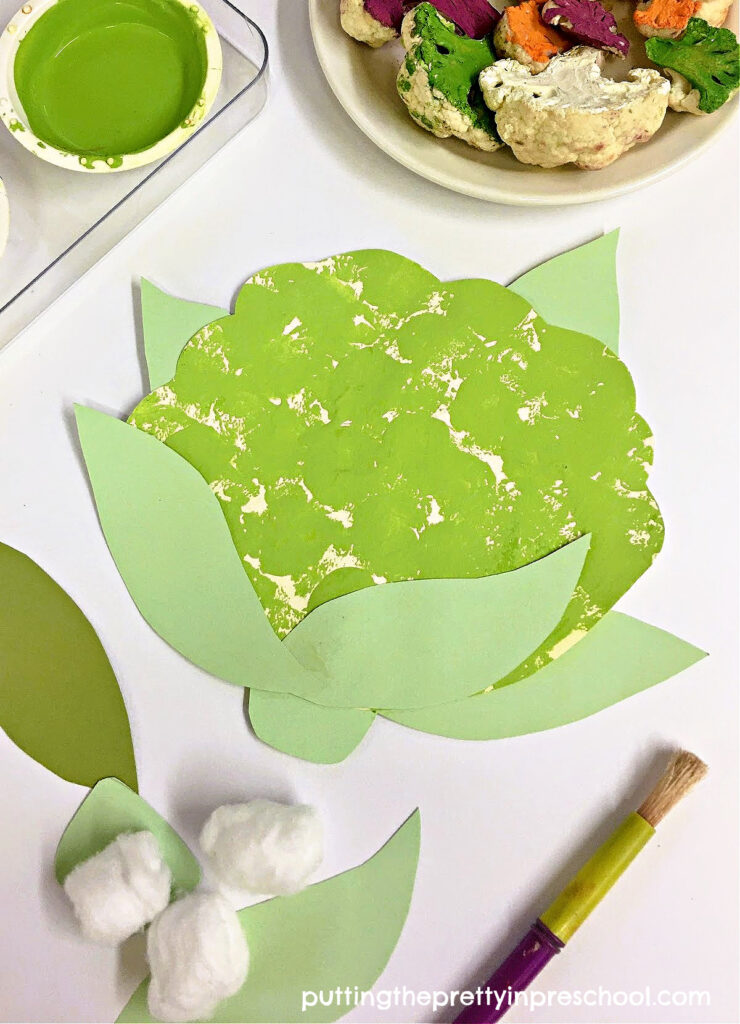
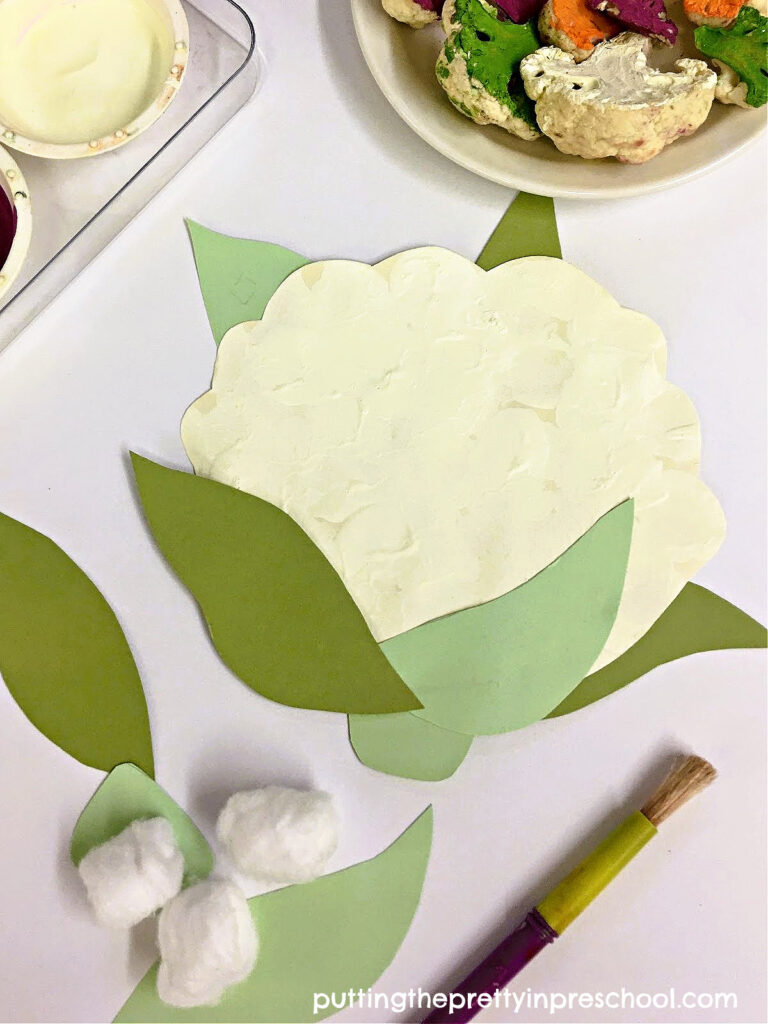
How to make cauliflower paper crafts in green, orange, purple, and cream hues. These crafts incorporate a cotton ball painting technique.

_______

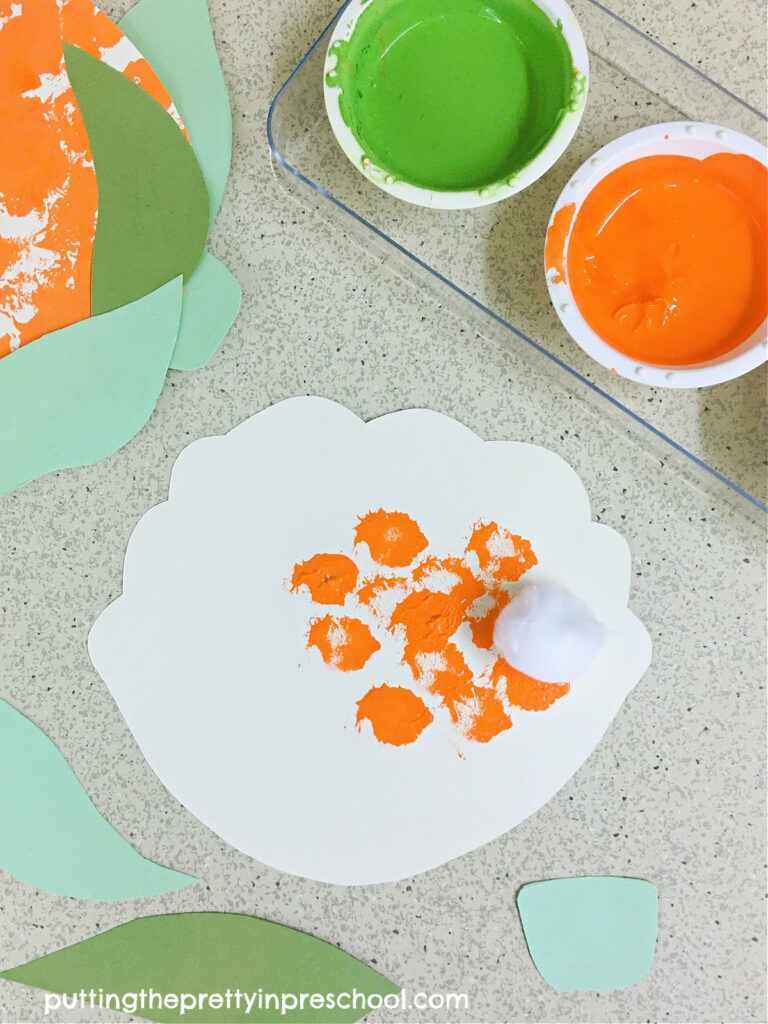
This cute cauliflower paper craft also includes printmaking.

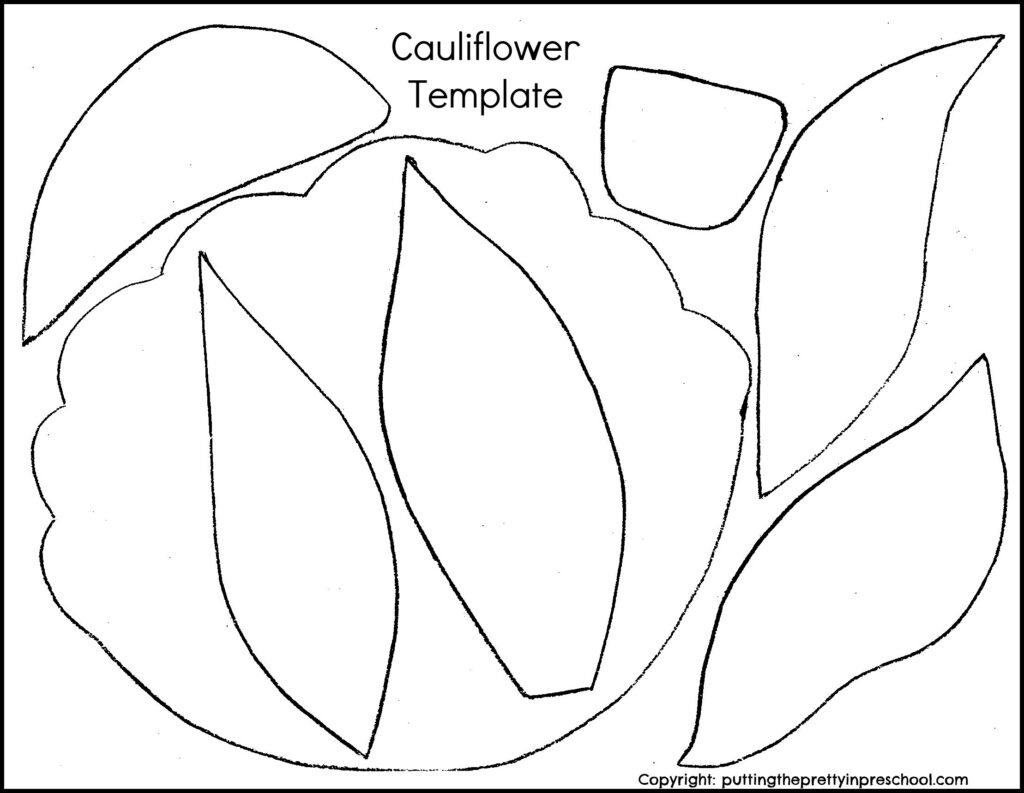
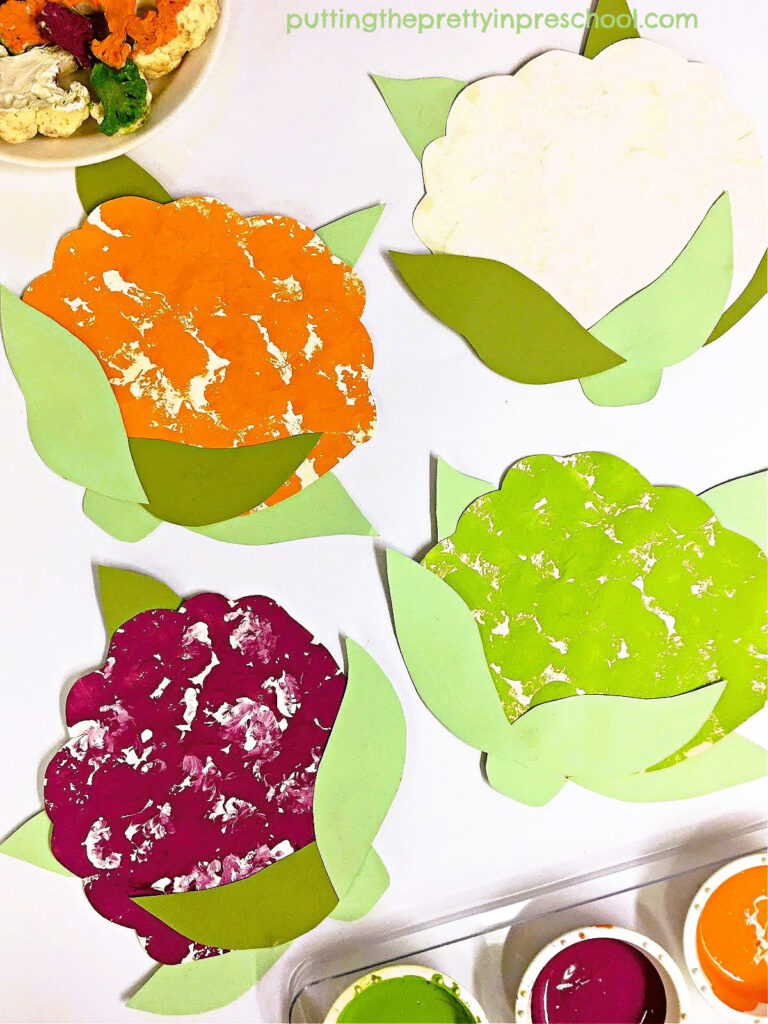
To do the craft, first cut cauliflower heads from manilla tag or cream construction paper, and humps and stem leaves from one or two shades of green cardstock or construction paper. Choosing fadeless paper for the project is recommended.

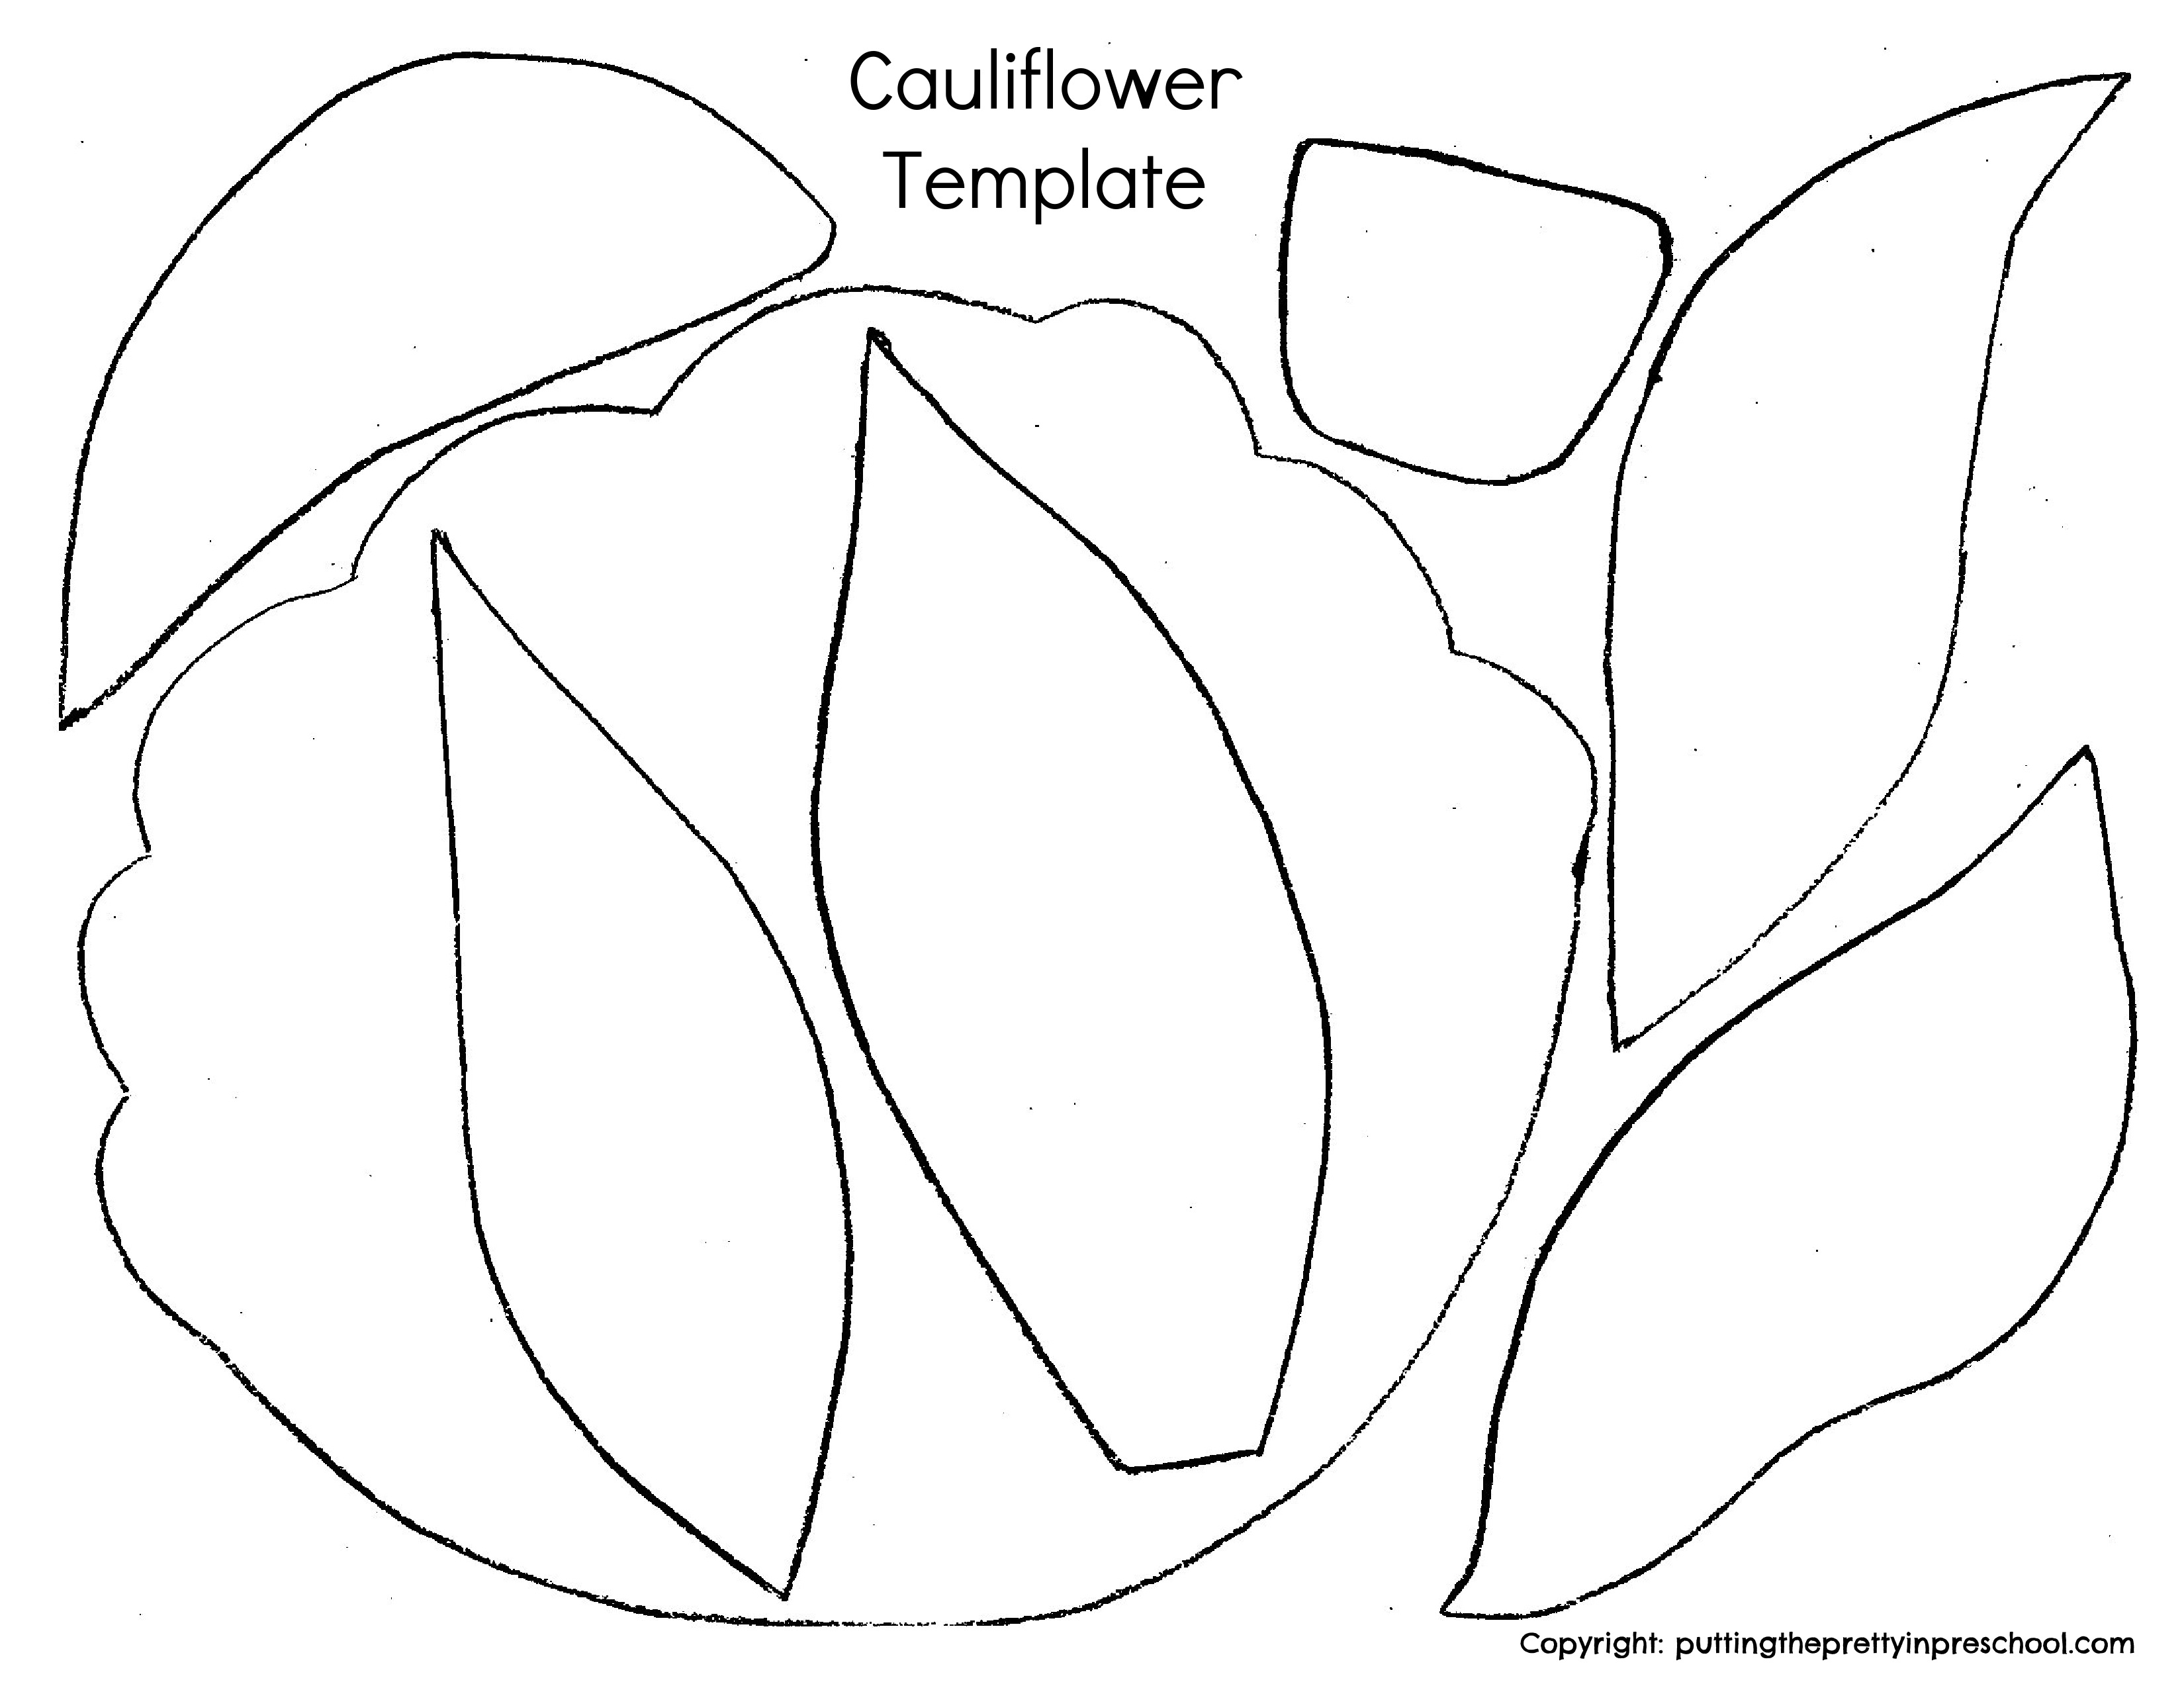
Feel free to download this template for the vegetable craft project.

Download this free cauliflower vegetable template to use for arts and crafts activities. Make purple, orange, green, and cream cauliflower paper crafts.

_______

Cauliflower PrintableDownload

This printable is for individual or one classroom use only.

_______

Next, print color onto the paper cauliflower heads in hues of cream, green, orange, and purple using painted florets. Or simply use cotton balls dipped in tempera paint for the printmaking process.

How to make an orange cauliflower paper craft. This craft incorporate a cotton ball painting technique.

_______

After the painted cauliflower heads are dry, use a glue stick to affix a hump to the back of each one.

Finally, glue two or three paper stem leaves onto each side of the cauliflower heads.   

How to make an orange cauliflower paper craft. This craft incorporates a cotton ball painting technique.

_______

How to make a purple cauliflower paper craft. This craft incorporates a cotton ball painting technique.

_______

How to make a green cauliflower paper craft. This craft incorporates a cotton ball painting technique.

_______

How to make a cauliflower vegetable paper craft. This craft incorporates a cotton ball painting technique.

_______

These cauliflower theme activities celebrate the vegetable’s vibrant colors and are perfect for a fall or garden theme.

_______

Related:

Corn Theme Activities

Beet Science And Sensory Activities

Carrot Theme Activities

Pumpkin Color Activities

_______

[Read more…] about Cauliflower Theme Activities
Tweet
Share
Share
Pin

Filed Under: art, crafts, gardening, preschool, science, summer Tagged With: cauliflower, gardening, painting, paper crafts, snacks

Jellyfish Theme Activities

August 29, 2023 by Annette Kaminsky Leave a Comment

Tweet
Share
Share
Pin
Jellyfish theme with art, math, scissor skill, water play, and light table activities. Interestng jellyfish facts and free printables included.

_______

It was clear jellyfish that got me interested in this unique sea creature, and are the inspiration behind this jellyfish theme post. Three transparent jellyfish crafts are included in the theme, along with scissor skills, math, and water play ideas.

Sea jelly is the proper name for jellyfish since these creatures are not fish. Fish have a face, brains, tails, fins, and backbone, which sea jellies don’t have. But since most people still use the term jellyfish and find activities by searching this name, I’m using both words in my facts and activities.

_______

Follow me on Pinterest for more early learning ideas.

_______

Fascinating Jellyfish Facts

Here are ten interesting facts about jellyfish:

  • Sea jellies are found in waters all over the world: cold or warm, shallow or deep, near shore or deep in the ocean.
  • These graceful creatures have a bell-shaped body, with oral arms and tentacles that look like streamers.
  • Jellyfish come in many colors and are often luminescent.
  • The tiny stinging cells on their tentacles capture prey. The tentacles can also sting people.
  • Inside the bell, sea jellies have a mouth to eat food with.
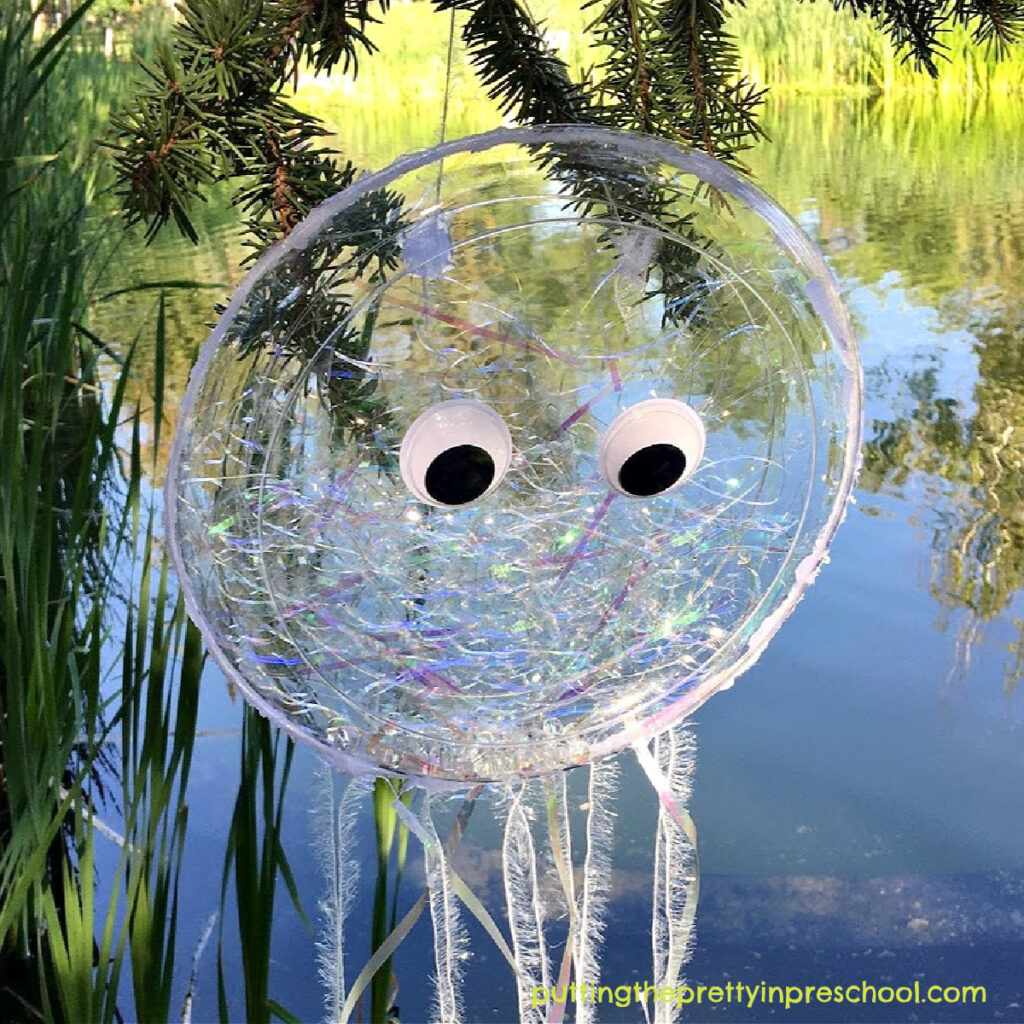
Make this sparkly iridescent jellyfish craft that doubles as an ocean drum and movement prop, It displays beautifully indoors or outdoors.

_______

  • These floaty creatures eat fish, crabs, shrimp, tiny plants, and zooplankton.
  • Their predators are large fish, sea turtles, and sometimes other jellyfish.
  • Sea Jellies are slow swimmers, pulsing along. They often get overpowered by strong currents that carry them along.
  • From small to humungous, sea jellies come in many different sizes and shapes.
  • The Portuguese Man Of War is the biggest sea jelly. Nomeus fish live in their deadly tentacles and do not get eaten. The tiny fish help attract large prey that this massive sea jelly ends up eating.
  • Jellyfish live for just under two days to under a year.

For more facts about sea jellies, view the blog post “Jellies” on montereybayaquarium.org.

_______

Iridescent Jellyfish Crafts

These three jellyfish crafts are inspired by the moon jelly, which has a transparent, umbrella-shaped bell. Iridescent craft supplies shine in the stringy crafts.

Supplies To Collect

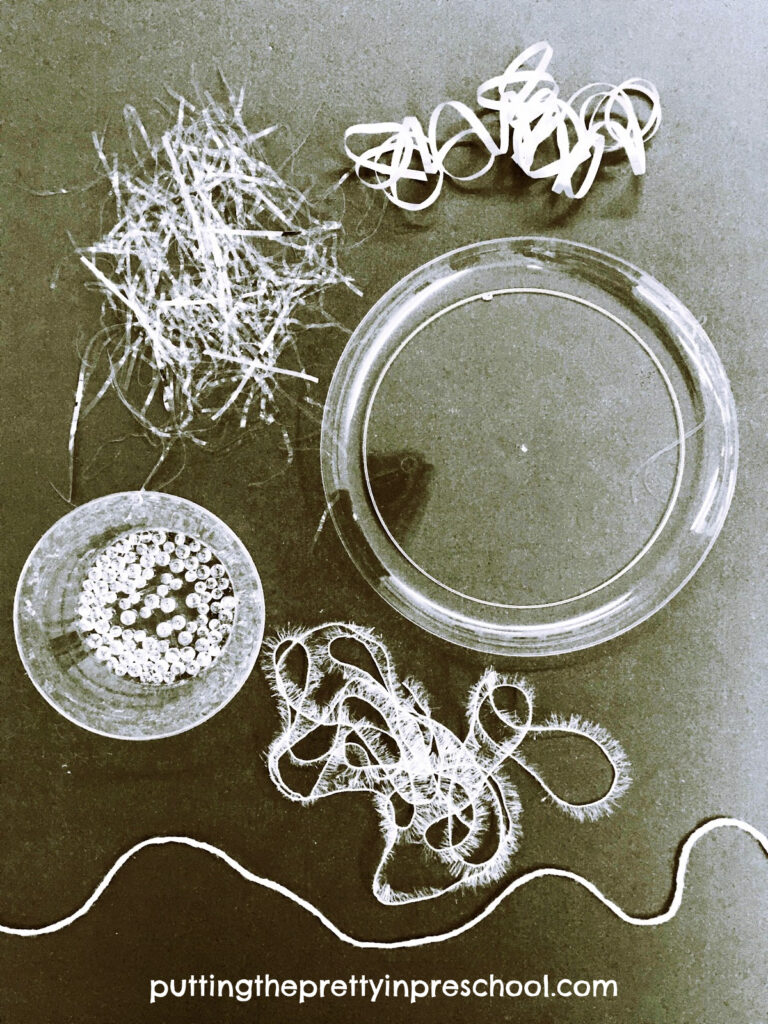
Simple supplies to create three different transparent jellyfish crafts. Iridescent craft supplies take center stage in the projects.

_______

Gather the following supplies for the transparent sea jelly crafts:

  • two clear disposable dinner plates
  • opaque or clear transparent disposable drinking cup
  • clear dessert bowl
  • iridescent beads
  • two kinds of sparkly, textured, thin yarn
  • iridescent curly ribbon
  • iridescent metallic shreds
  • glue gun
  • wiggly eyes

_______

Clear Plate Jellyfish

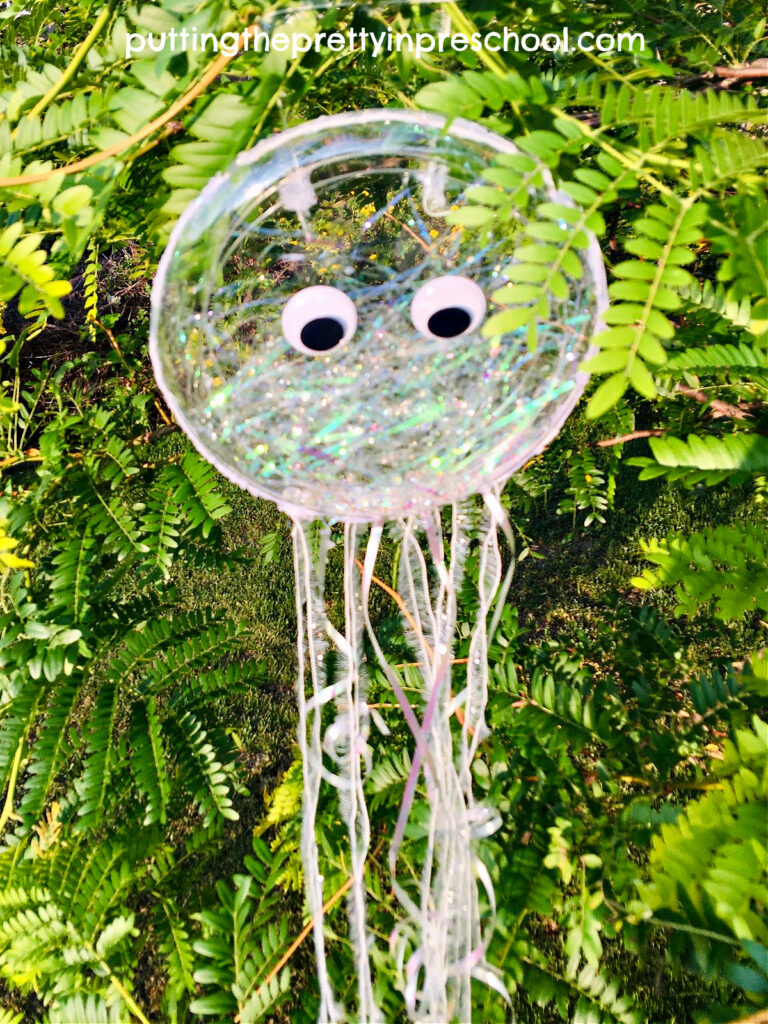
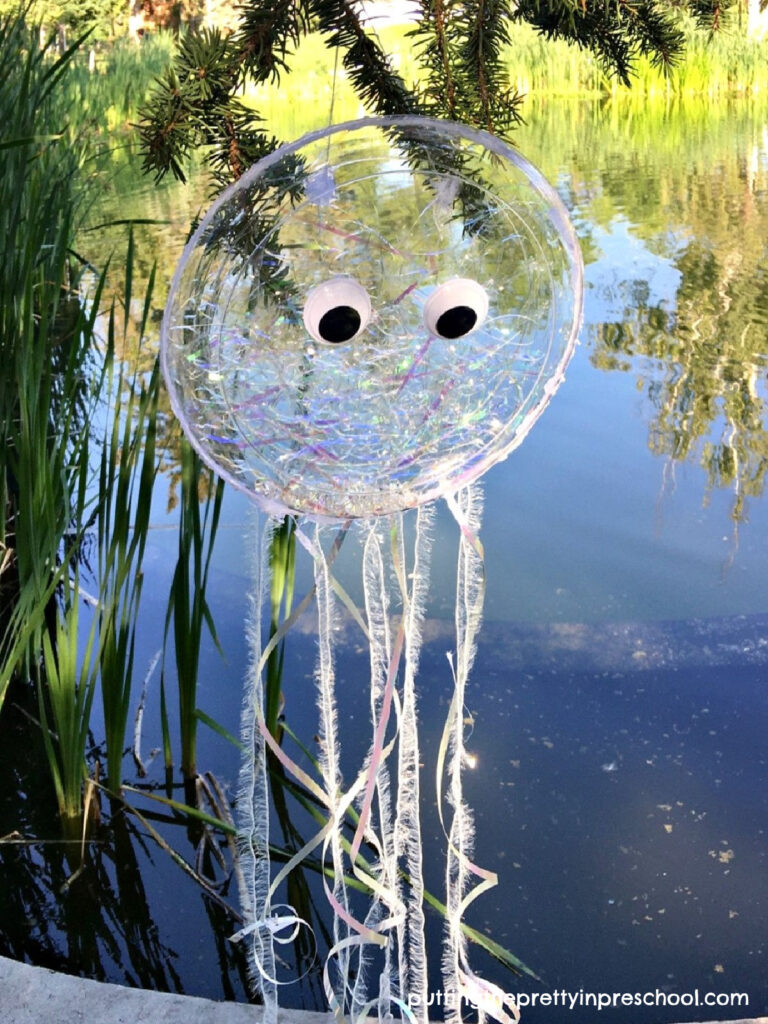
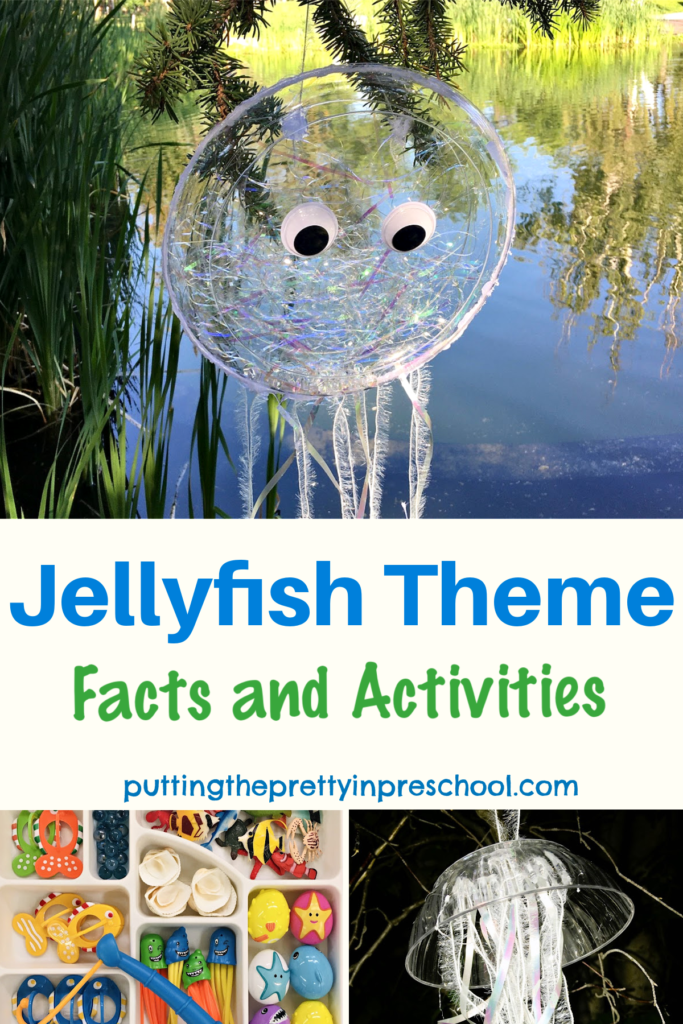
Create this stunning iridescent jellyfish craft using clear disposable plates and iridescent craft supplies. Great for music, movement, and language arts activities.

_______

To make this large jellyfish, start by positioning one clear dinner plate right side up, and laying metallic shreds and a small handful of iridescent beads on it.

Next, cut strips of sparkly and /or iridescent yarn and curly ribbon and glue them in a row at the bottom of the plate using the glue gun.

Then glue the second dinner plate upside down on top of the first one by applying hot glue to the edge of one or both plates.

Lastly, glue two large wiggly eyes to one of the plates, and affix a yarn strip to hang the jellyfish on the other side.

Make this sparkly iridescent jellyfish craft that doubles as an ocean drum and movement prop, It displays beautifully indoors or outdoors.

_______

This jellyfish looks beautiful displayed in the classroom in a sunny spot, or outside on a tree. The crafted jellyfish also makes an ocean drum musical instrument and can be a unique accessory for language arts. music, and movement activities.

_______

Dessert Bowl Jellyfish

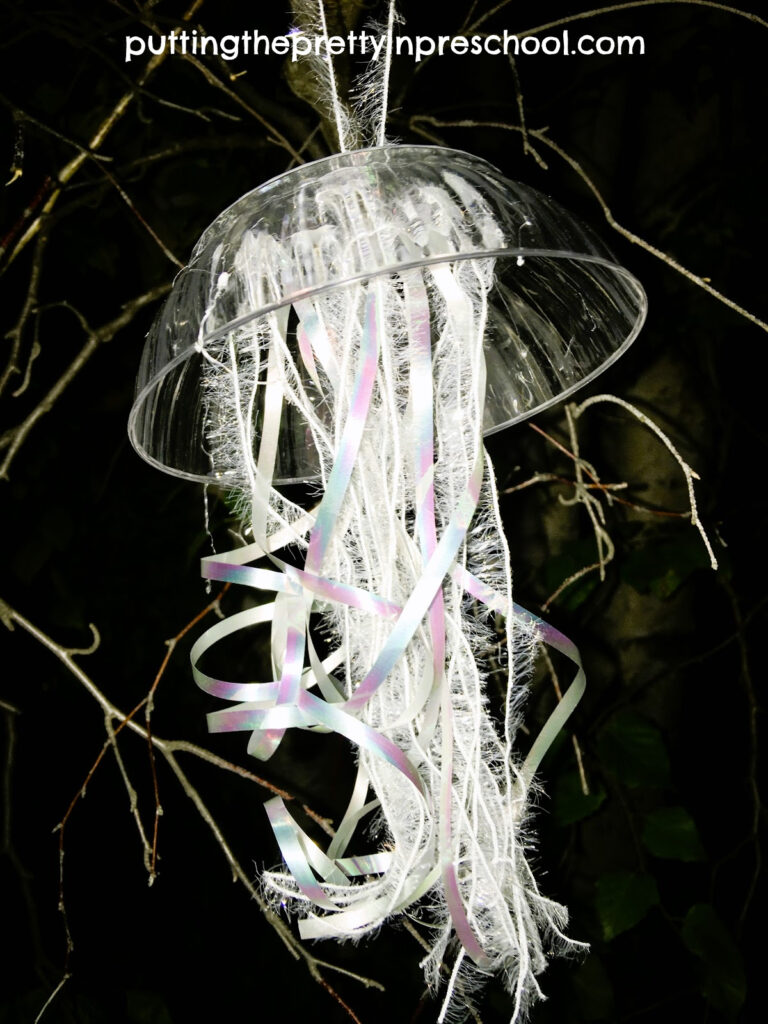
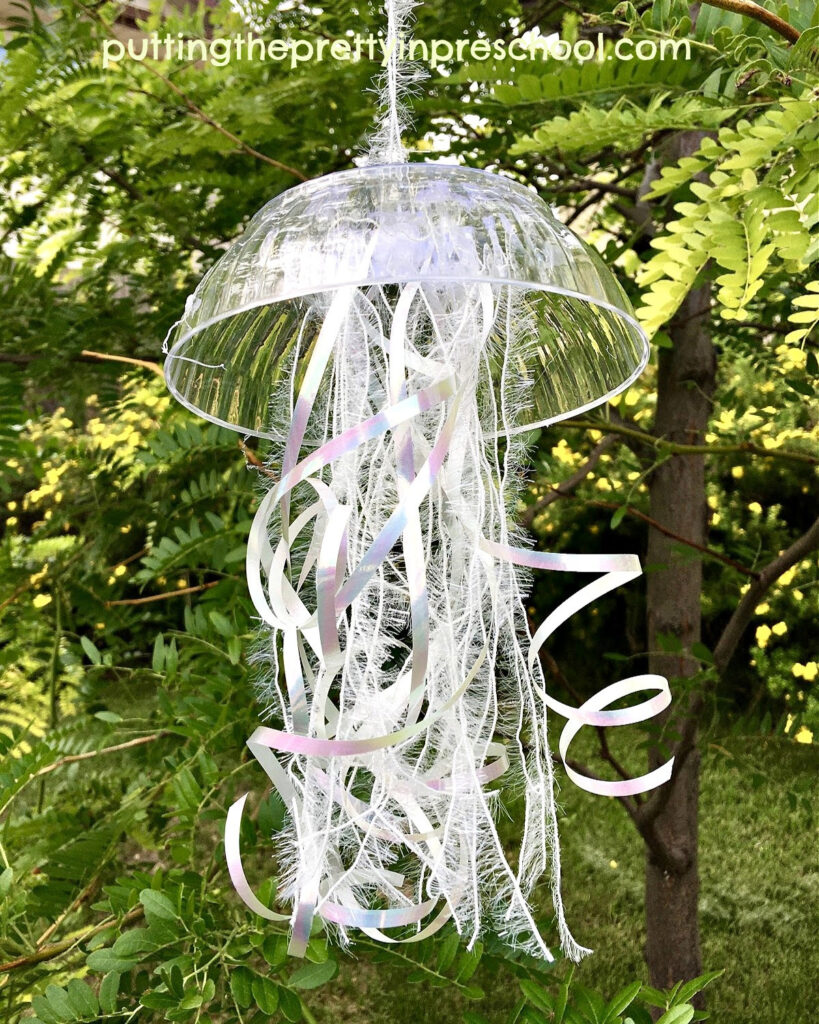
Design this simple hanging jellyfish craft using gorgeous, iridescent supplies. Display it is a sunny location for maximum shine.

_______

This second jellyfish craft most replicates the moon jelly shape and is so easy to make. Just glue one end of the yarn and curly ribbon strips to the inside of the bowl so that they hang down like jellyfish arms and tentacles. Affix a loop to hang on the bottom of the bowl, and this sea jelly is ready to be displayed.

Hanging outside at night, it looks like a sea jelly floating deep in the ocean.

Design this hanging jellyfish craft using gorgeous, iridescent supplies. Displayed at night, it looks like a sea jelly floating in deep ocean waters.

_______

Disposable Cup Jellyfish

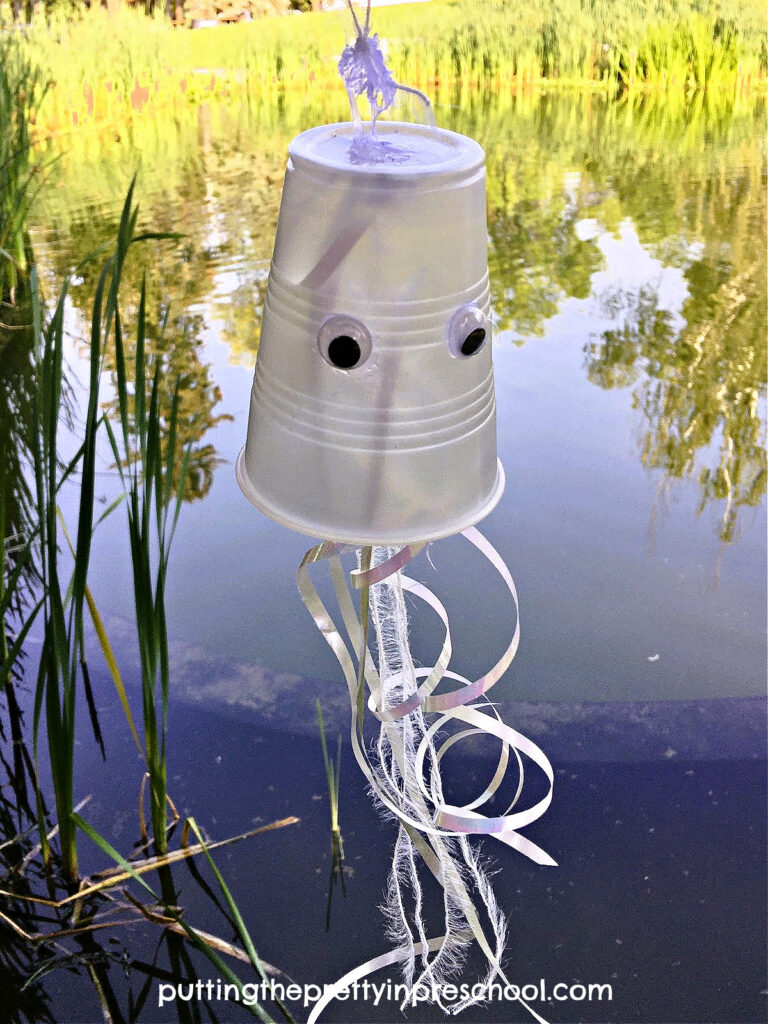
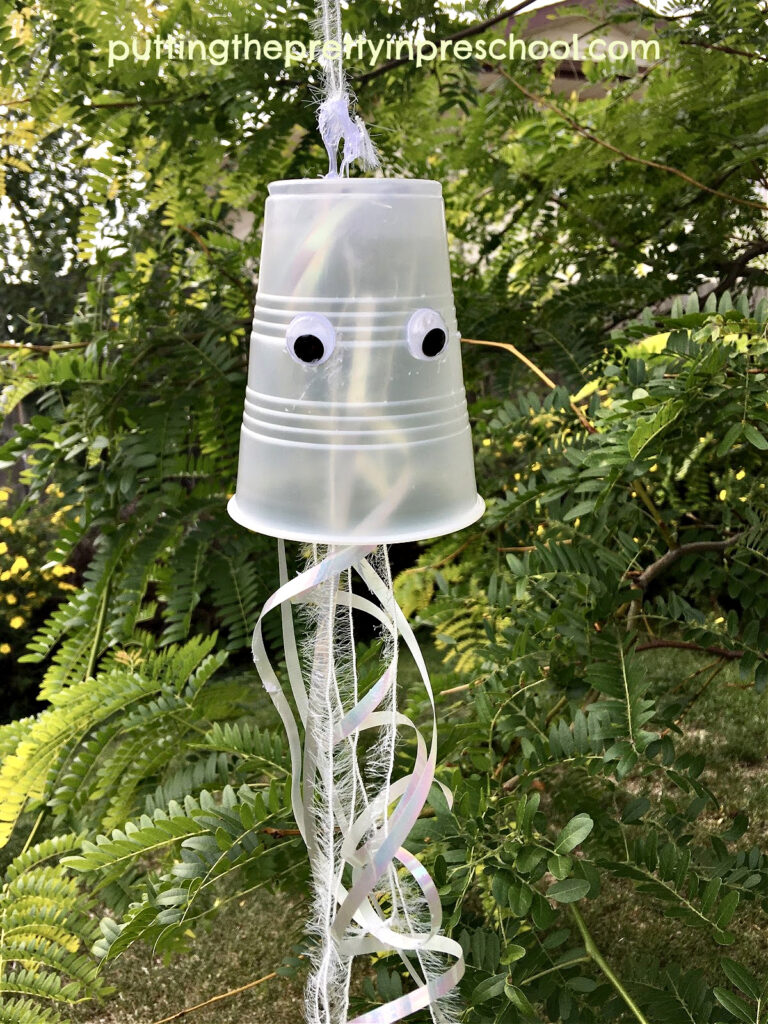
Design this cute jellyfish cup craft using iridescent supplies. Display it indoors or outdoors to add ambiance to an ocean creature theme.

_______

Make this craft just like the one above using a clear or opaque disposable cup instead of the dessert bowl. Add wiggly eyes for the finishing touch.

Design this simple jellyfish cup craft using gorgeous, iridescent supplies. Display it is a sunny location for maximum shine.

_______

More Jellyfish Activities

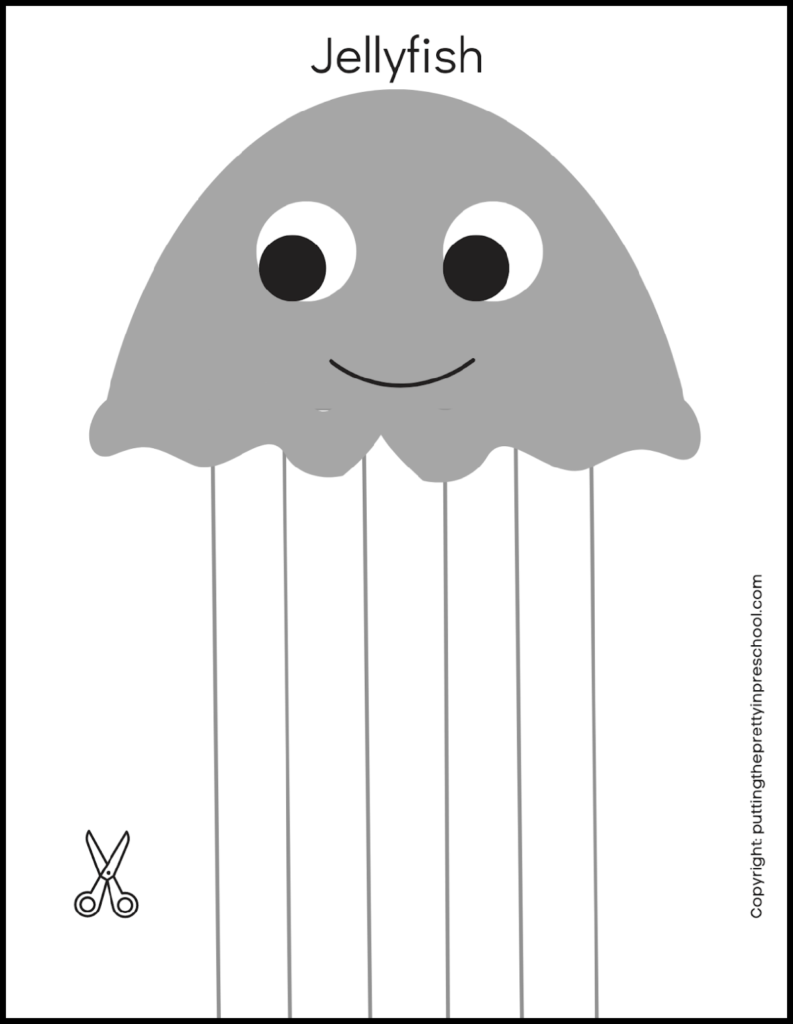
Scissor Skill Jellyfish

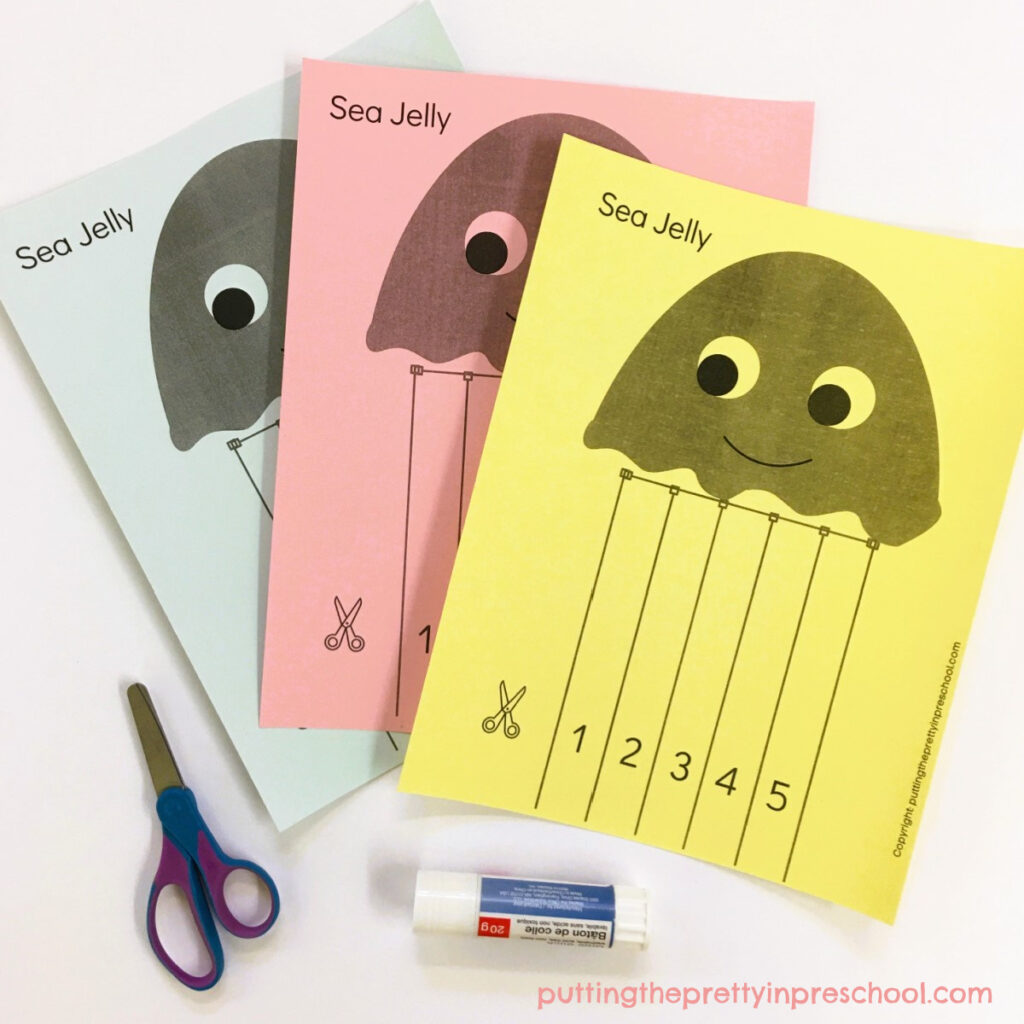
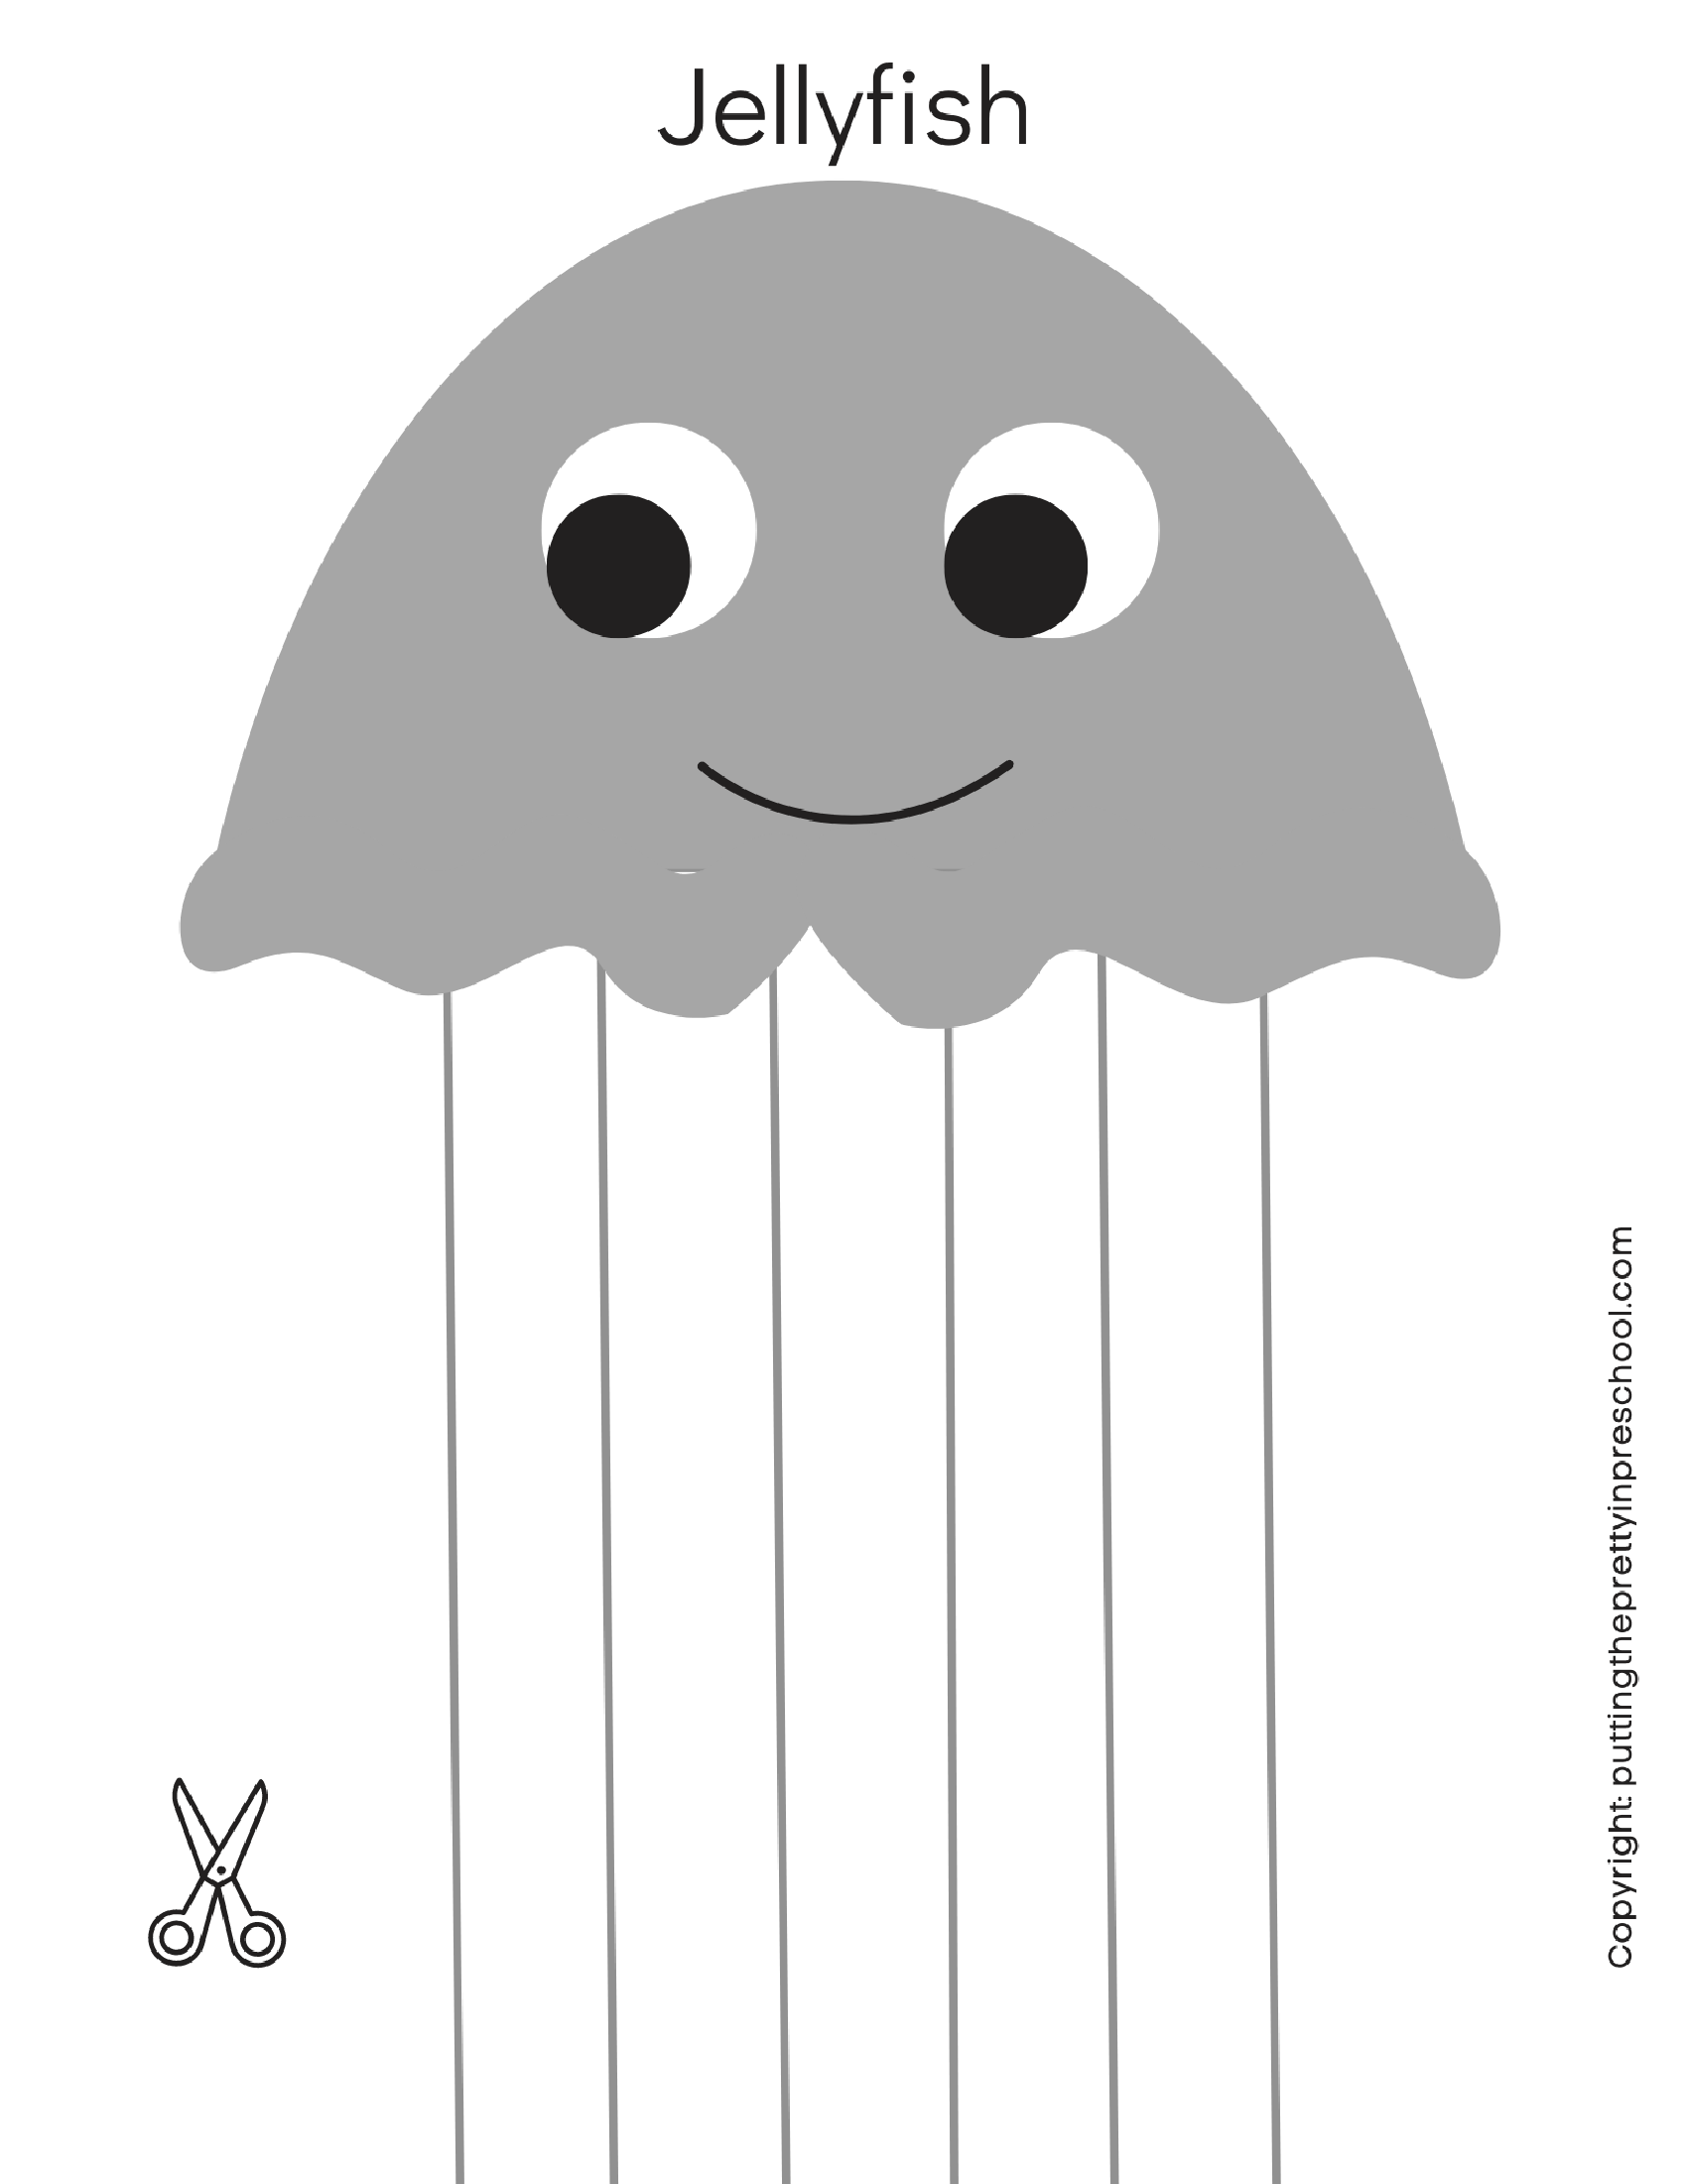
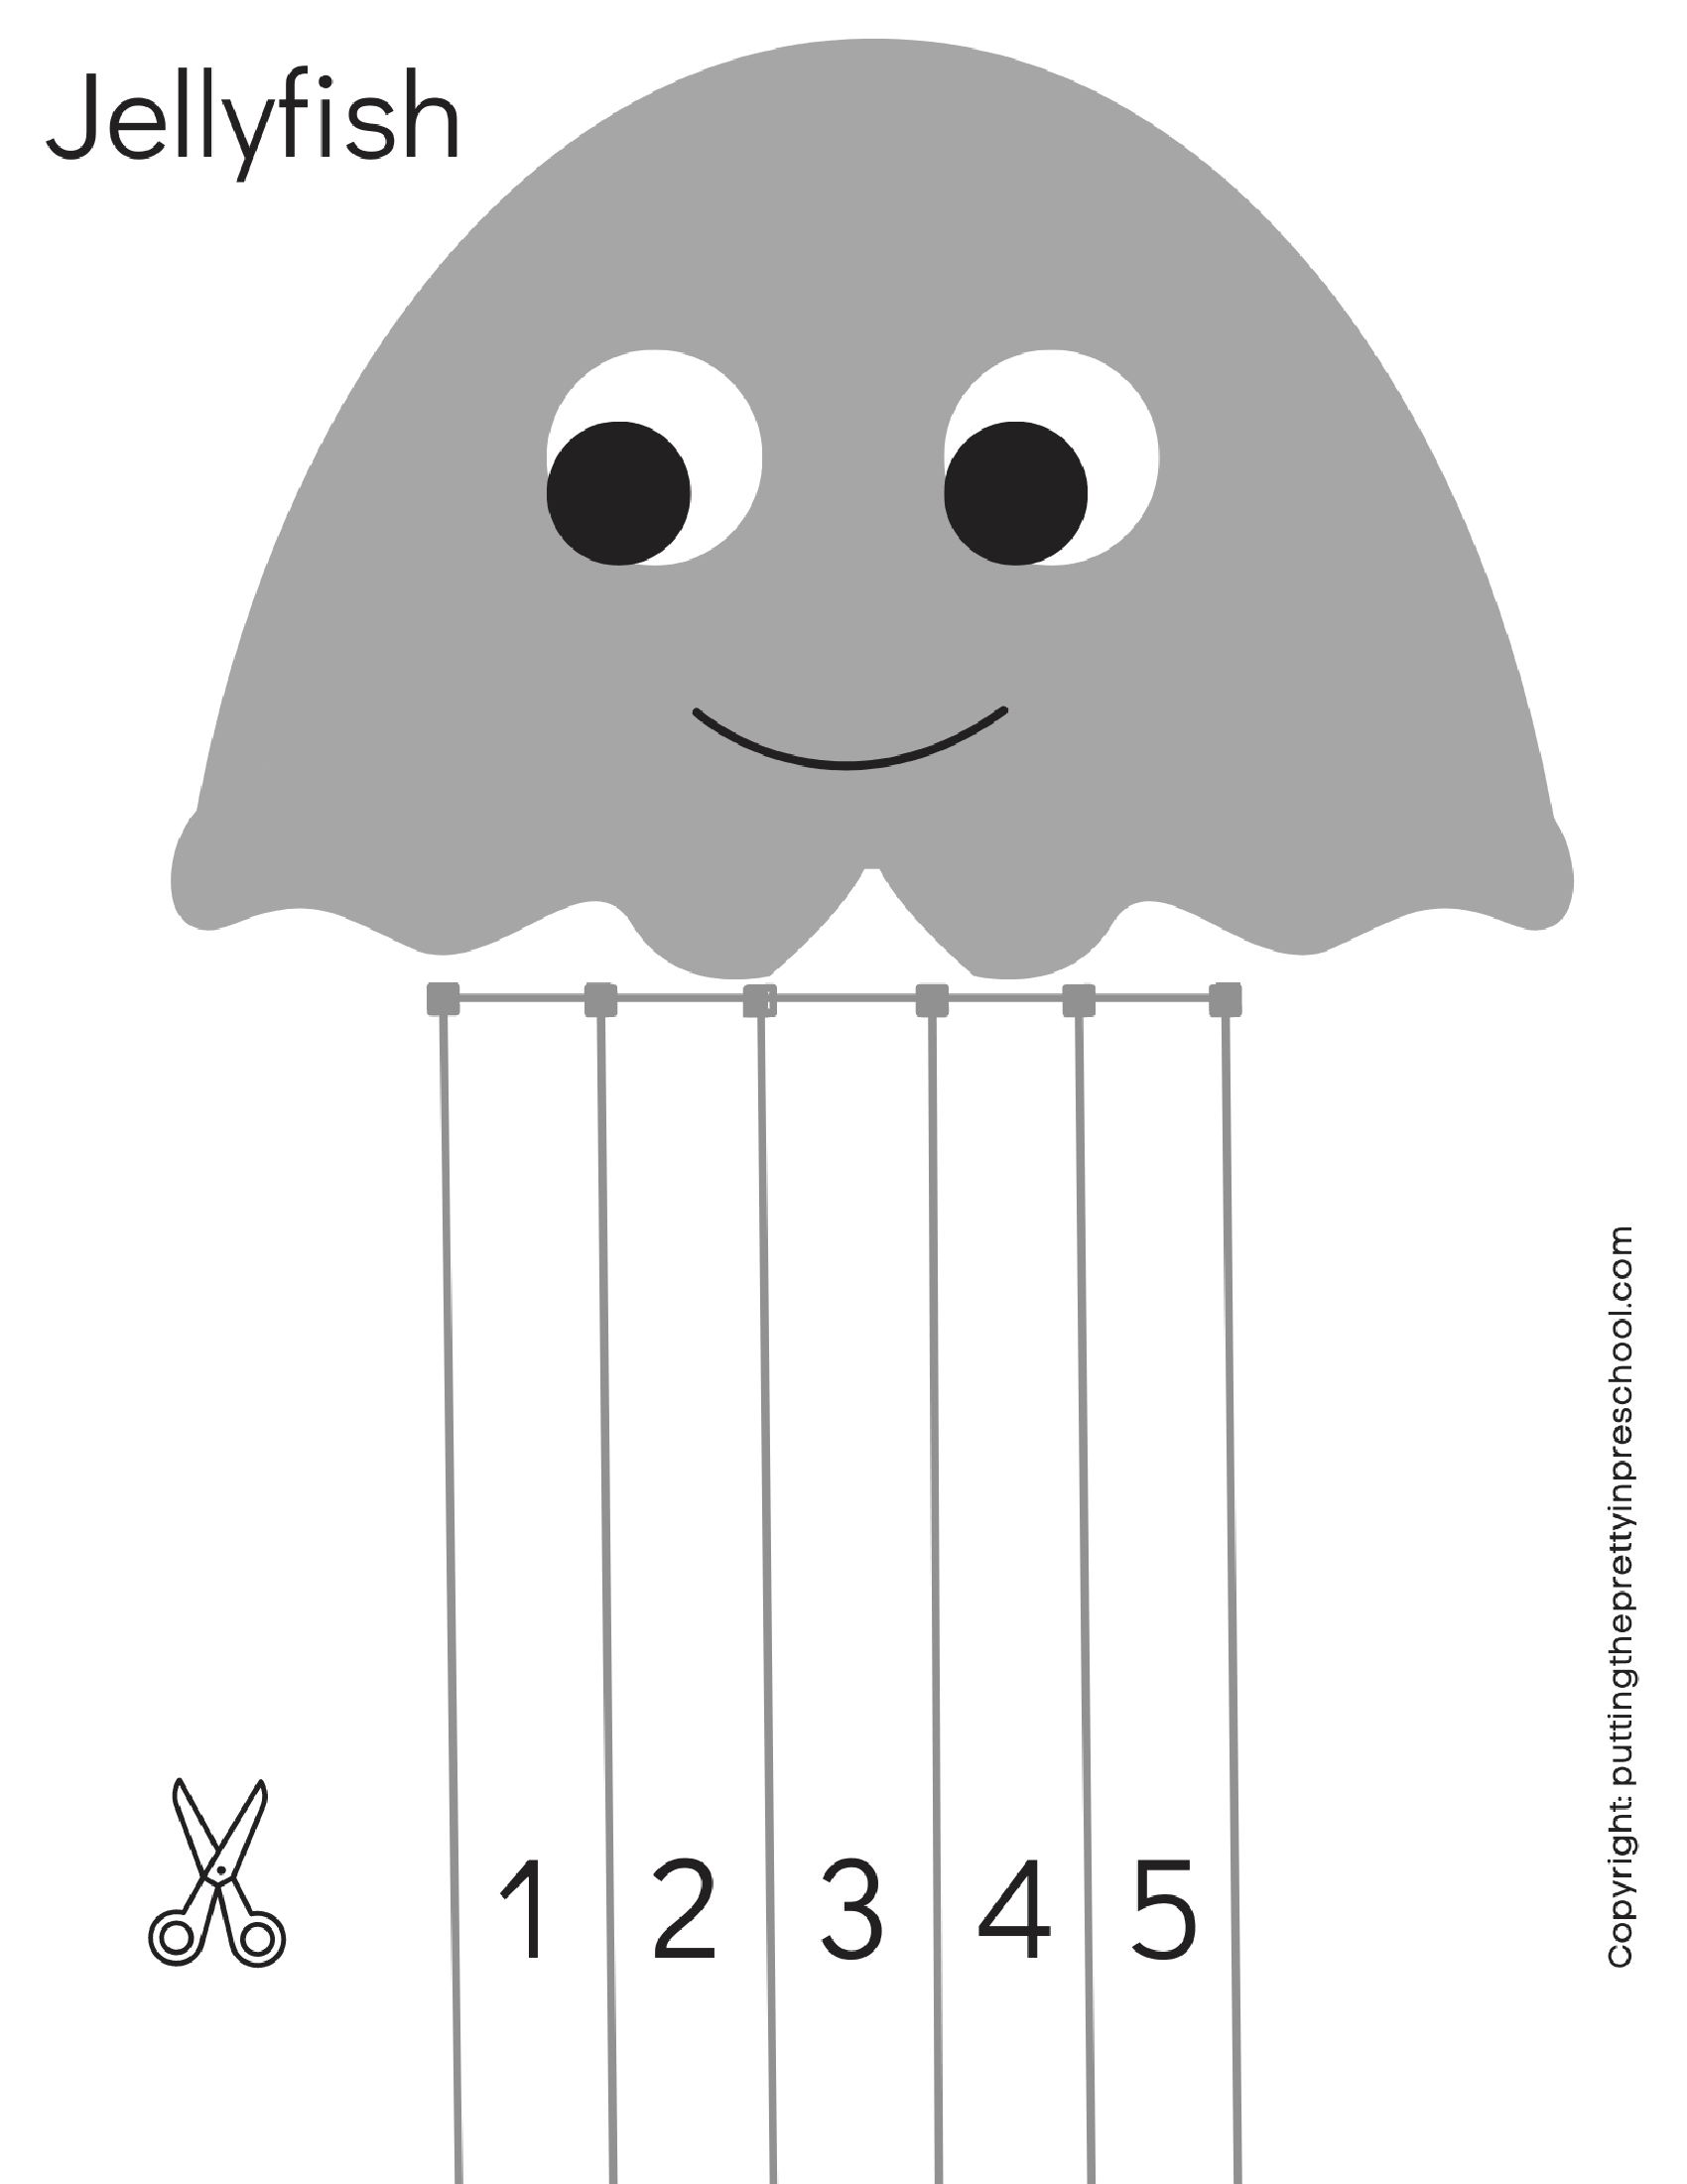
Here’s an easy jellyfish scissor skills project to download for your little learners. Invite participants to cut out along the lines to create sea jelly tentacles, and then cut out the bell-shaped body.

_______

Free Jellyfish PrintableDownload

(This printable is for individual or one classroom use only.)

_______

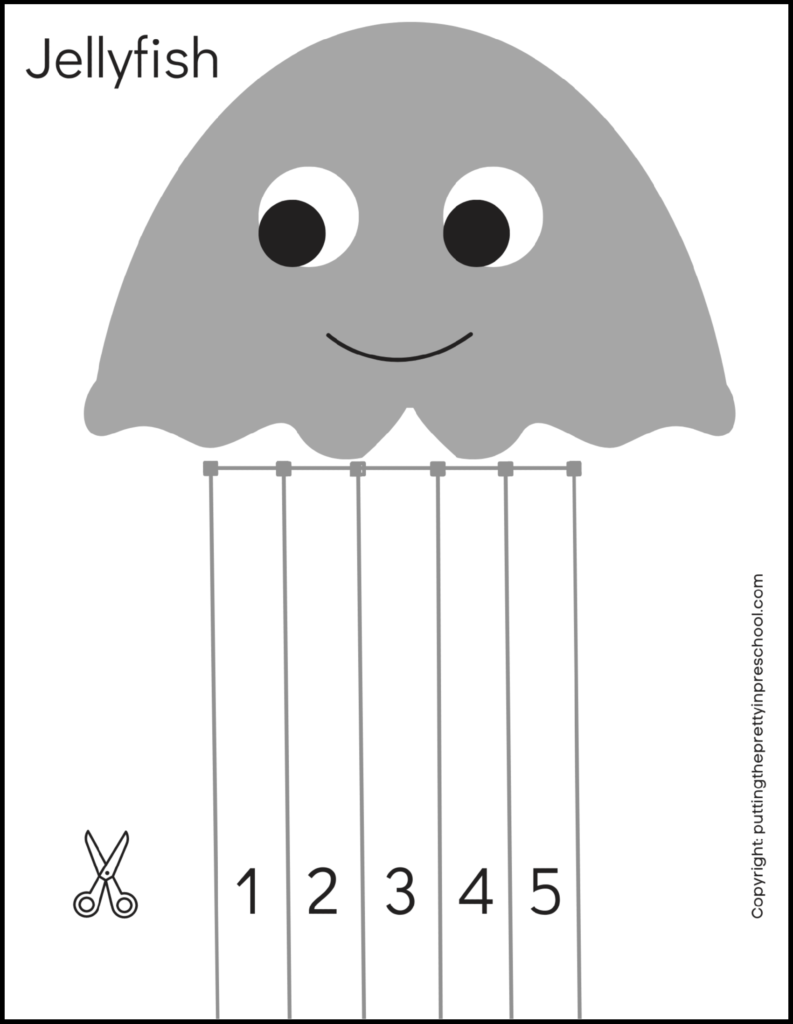
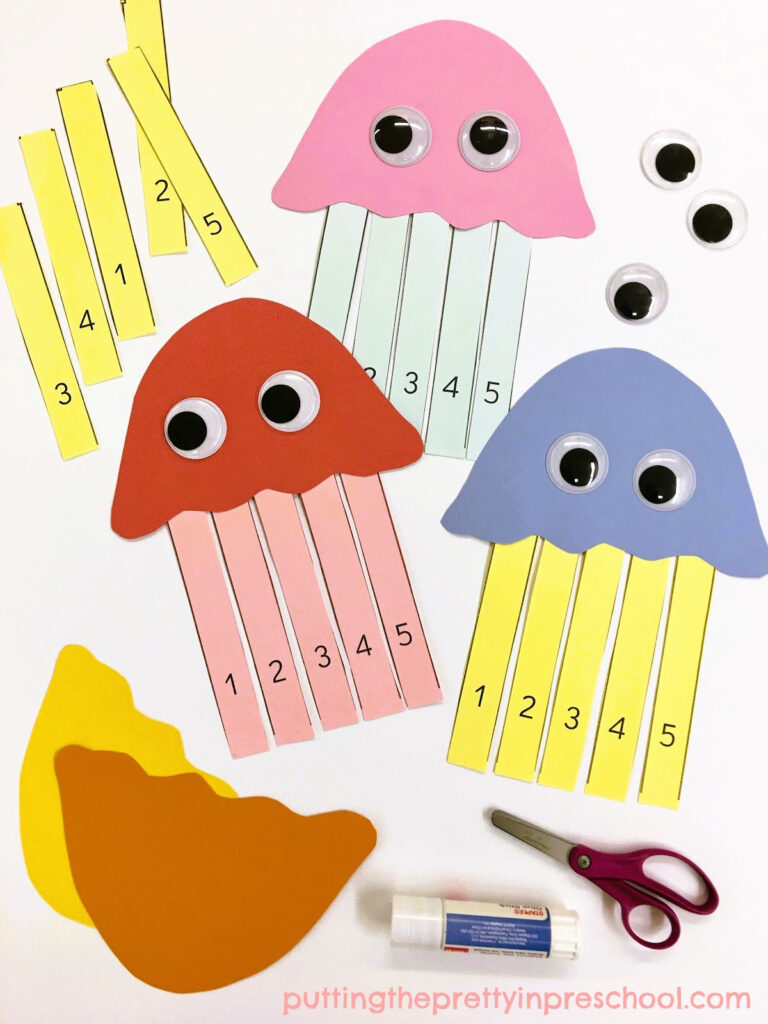
In this next activity, trace and cut out jellyfish bells from colored cardstock paper, and then print and snip apart the numbered tentacles. Invite little learners to glue tentacles to their jellyfish bell in order from one to five. Use this second printable for the project.

Download this free jellyfish math template for little learners to create a paper craft, practice scissor skills, and order numbers form one to five.

_______

Free Jellyfish Math PrintableDownload

(This printable is for individual or one classroom use only.)

_______

Invite little learners to practice scissor skills and math concepts by completing a paper craft jellyfish with numbered tentacles.

_______

Or simply photocopy the jellyfish printable on pastel-colored paper or cardstock to add pops of color to the activity.

Invite little learners to practice scissor skills and math concepts by completing a paper craft jellyfish with numbered tentacles.

_______

More Jellyfish Math

Use paper jellyfish or jellyfish figurines in counting rhymes and songs.

_______

Light Table Jellyfish

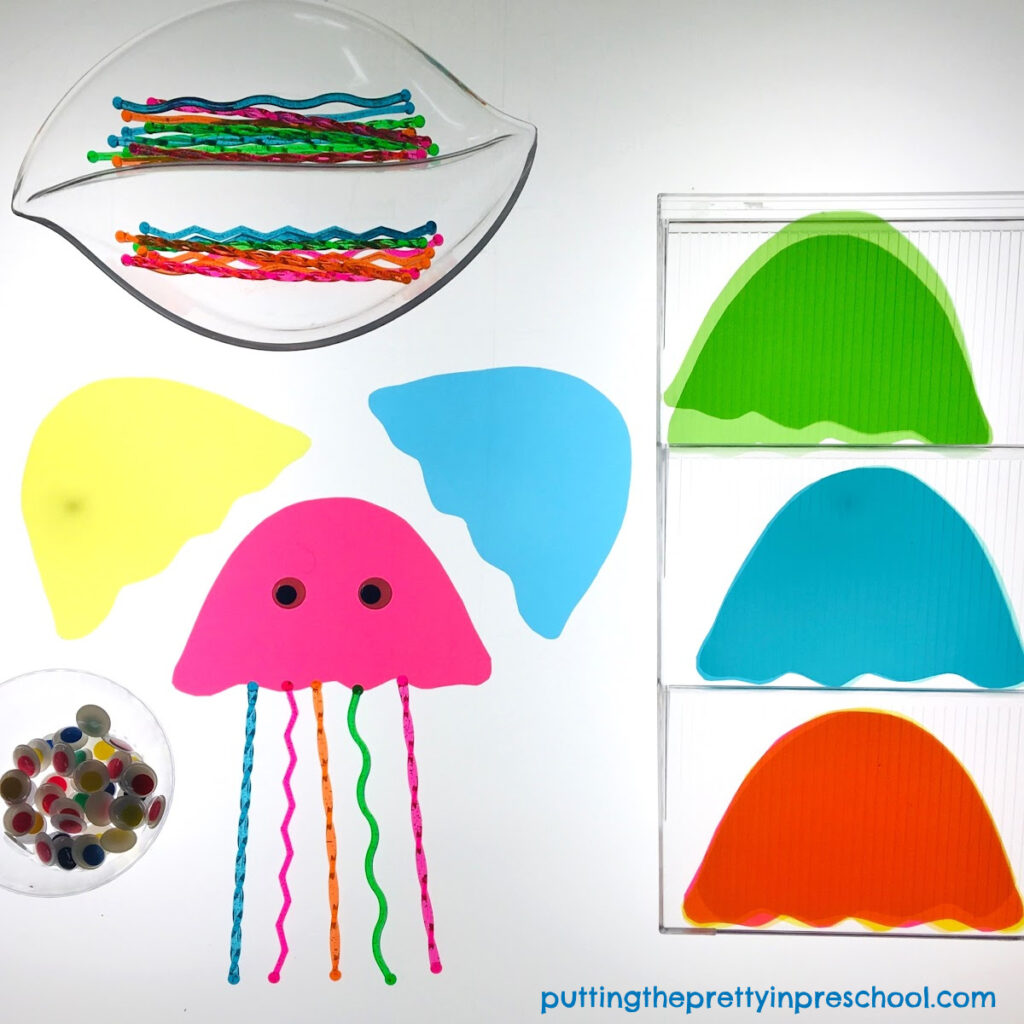
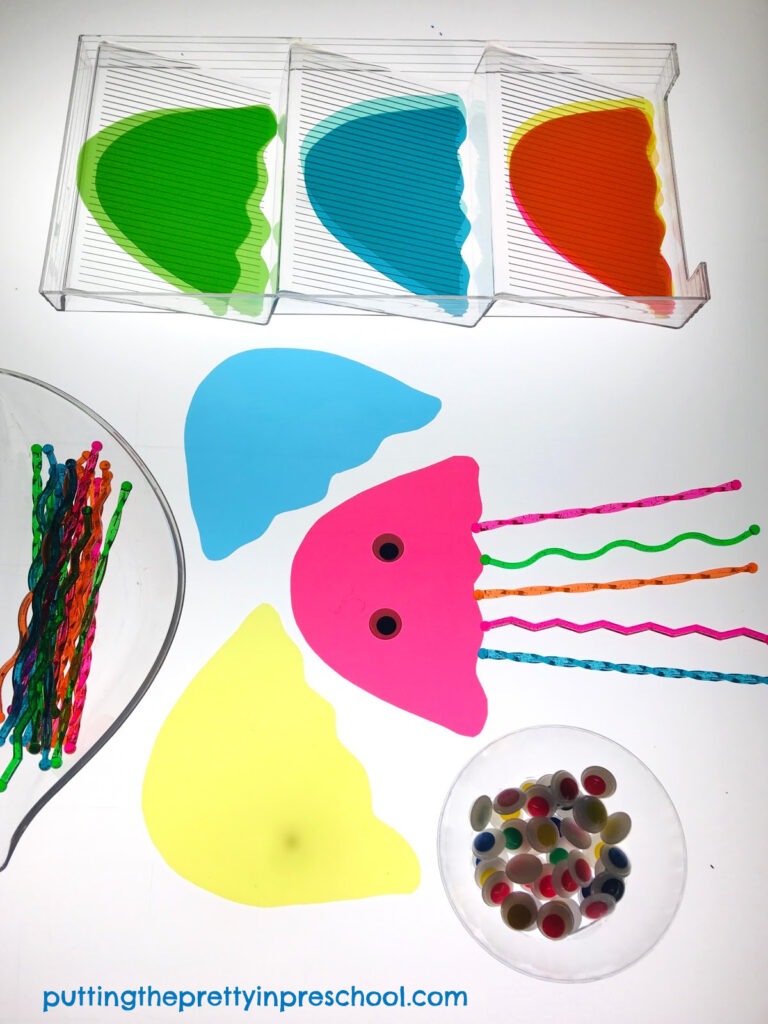
Invitation to create jellyfish on a light table with transparent stir sticks and page divider cut outs. Wiggly eyes are the finishing touch.

_______

Invite little learners to create jellyfish on a light table with transparent page divider cutouts and stir sticks.

Invitation to create jellyfish on a light table with transparent stir sticks and page divider cut outs. Wiggly eyes are the finishing touch.

_______

Jellyfish Water Play

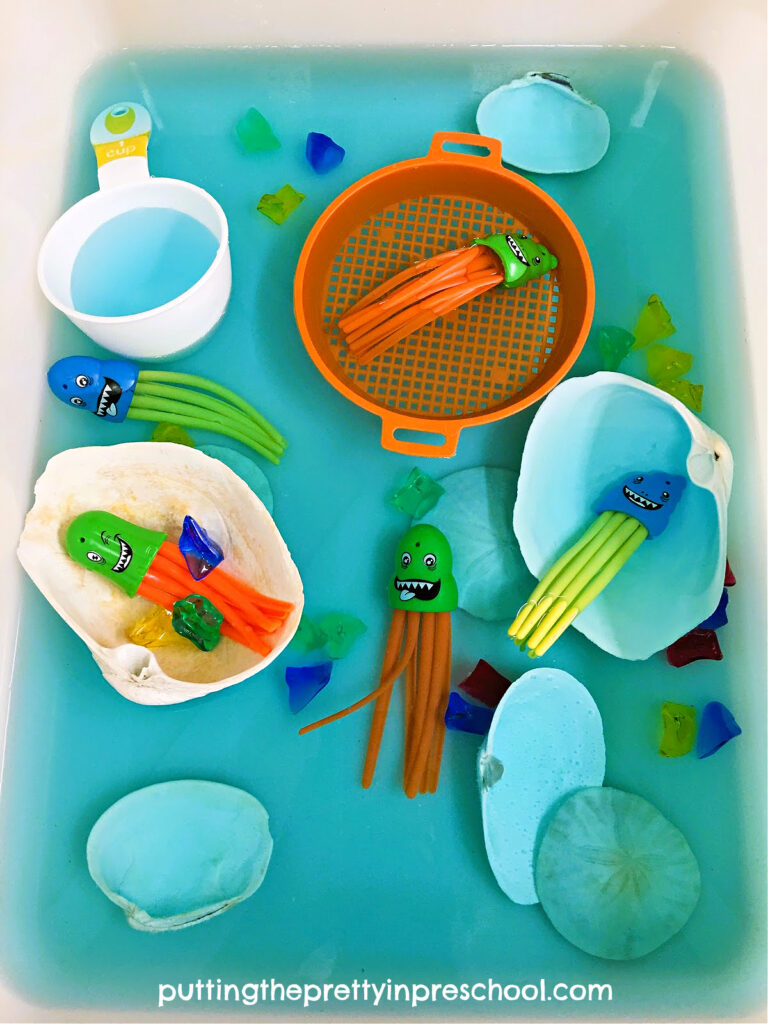
Include jellyfish dive toys, fishing nets, strainers, and foam numbers in a water table, tuff tray, or bus tub. Little learners can count, sort, and scoop the colored jellyfish in the bin.

Include this easy-to-set-up jellyfish water play activity with dive toys, large shells, sand dollars, and acrylic gems in your next ocean theme.

_______

Related:

Sea Turtle Theme Activities

Octopus Theme Activities

Sea Star Theme Activities

_______

[Read more…] about Jellyfish Theme Activities
Tweet
Share
Share
Pin

Filed Under: art, crafts, display, light table, literacy, Math, music, ocean, preschool, science, sensory, themes Tagged With: jellyfish, papercrafts, scissor skills, sensory bin, water play

  • « Go to Previous Page
  • Page 1
  • Interim pages omitted …
  • Page 5
  • Page 6
  • Page 7
  • Page 8
  • Page 9
  • Interim pages omitted …
  • Page 13
  • Go to Next Page »

Primary Sidebar

Hi, I'm Annette Kaminsky, a preschool teacher who loves sharing learning through play activities for young children. Thanks for visiting my site. Feel free to stay awhile!

Subscribe Via Email

Recent Posts

  • Teacher Appreciation A to Z Alphabet June 21, 2026
  • Expanding Balloon Science Experiment May 18, 2026
  • Earth Day Spin Painting April 21, 2026
  • Easter Bunny Scavenger Hunt April 4, 2026
  • Celebrate Diversity Coloring Pages March 1, 2026
  • Lunar New Year Lantern Craft February 11, 2026
  • Black History Month Positive Affirmations Art January 29, 2026
  • Snowflake Cafe Dramatic Play Set January 19, 2026
  • Pastel Christmas Letterhead and Envelope December 20, 2025
  • December Kindness Activities November 30, 2025

Categories

Topics

apples bunnies butterflies Chinese New Year Christmas Christmas craft color colors dramatic play Easter fall flowers hearts holiday jewelry leaves leprechauns light table loose parts painting paper crafts playdough pretend play printables printmaking process art pumpkins rice bin scented playdough science experiment scissor skills sensory bin sensory play sensory tray shamrocks skeletons snakes snowflakes spiders spring St. Patrick's Day sunflowers tablescapes Valentine's Day water play
Copyright © 2026 · Lifestyle Pro on Genesis Framework · WordPress · Log in