• Skip to secondary menu
  • Skip to main content
  • Skip to primary sidebar

Putting The Pretty In Preschool

Finding Beauty In Everyday Early Childhood Experiences

  • Home
  • About Me
  • Winter
  • Chinese New Year
  • Blog
  • Contact Me
  • Black History Month
  • SHOP
  • Valentine’s Day

science

Lilac Flower Sensory Trays

June 9, 2022 by Annette Kaminsky Leave a Comment

Tweet
Share
Share
Pin
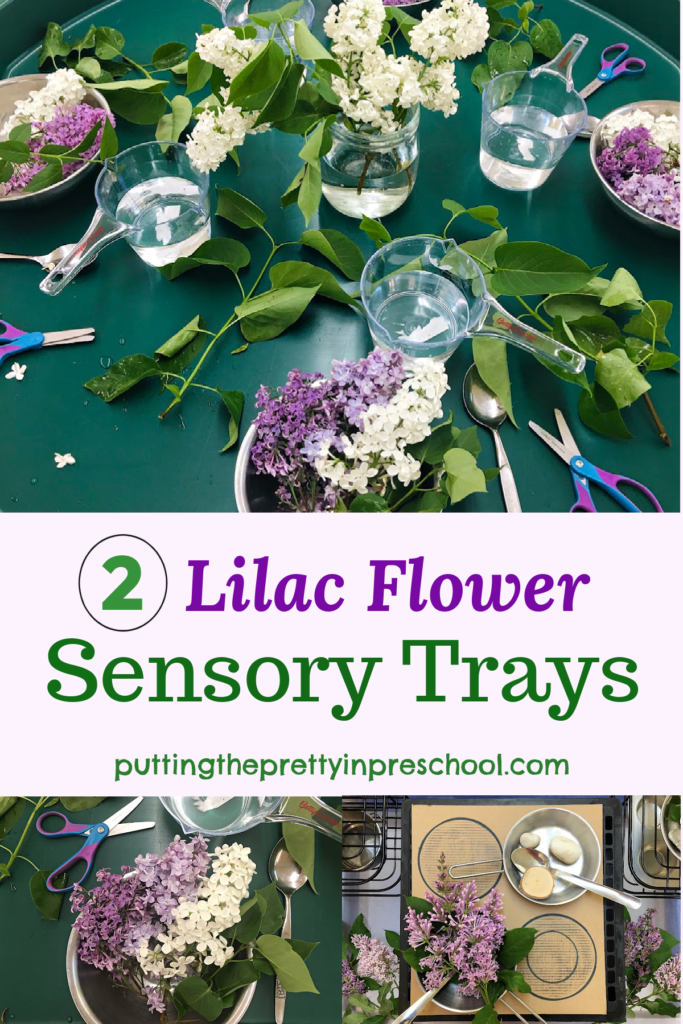
Two low-cost lilac flower sensory trays your early learners will love to explore. The DIY mud kitchen is a must-try!

_______

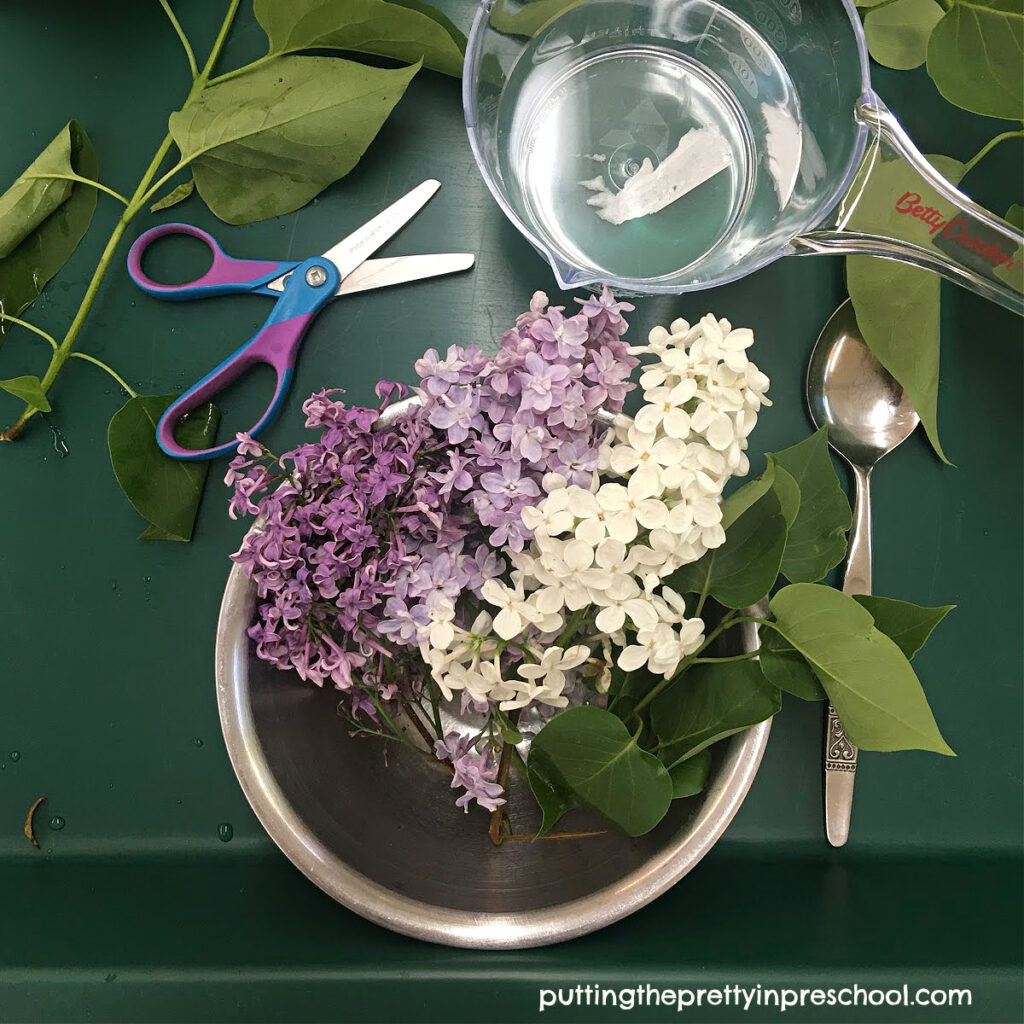
It is safe to say that our city is a late bloomer when it comes to plants popping up in spring. So when large, showy lilac blooms finally appear, I am more than ready to enjoy them. With these lilac flower sensory trays, their magnificent beauty and fragrant aroma are celebrated.

Before using natural materials with early learners, the first thing I do is check if the items I would like to introduce are poisonous or toxic. I was super excited to find that no lilac parts contain chemicals or toxins that are harmful to people or animals. This makes them safe for sensory tray play.

And when washed, lilac flowers are edible, with flavors that vary from grass-like, lilac, or no flavor at all.

_______

Lilac Flower Tuff Tray

As is often featured on this blog, this lilac flower sensory tray is easy-peasy to set up. You can use supplies commonly at your fingertips. Gather the following for the tray:

  • metal bowls
  • tablespoons
  • children’s scissors
  • containers with water
  • lilac foliage and sprigs in purple, lavender, and white
  • a bouquet of lilacs
Lilac flowers are the stars of this aromatic sensory play invitation.

_______

Set up stations in a tuff tray or sensory tub. For each station, include a metal bowl, lilac sprigs, a container with water, a pair of children’s scissors, and a large spoon. Place a bouquet of lilacs in the center for added visual appeal.

_______
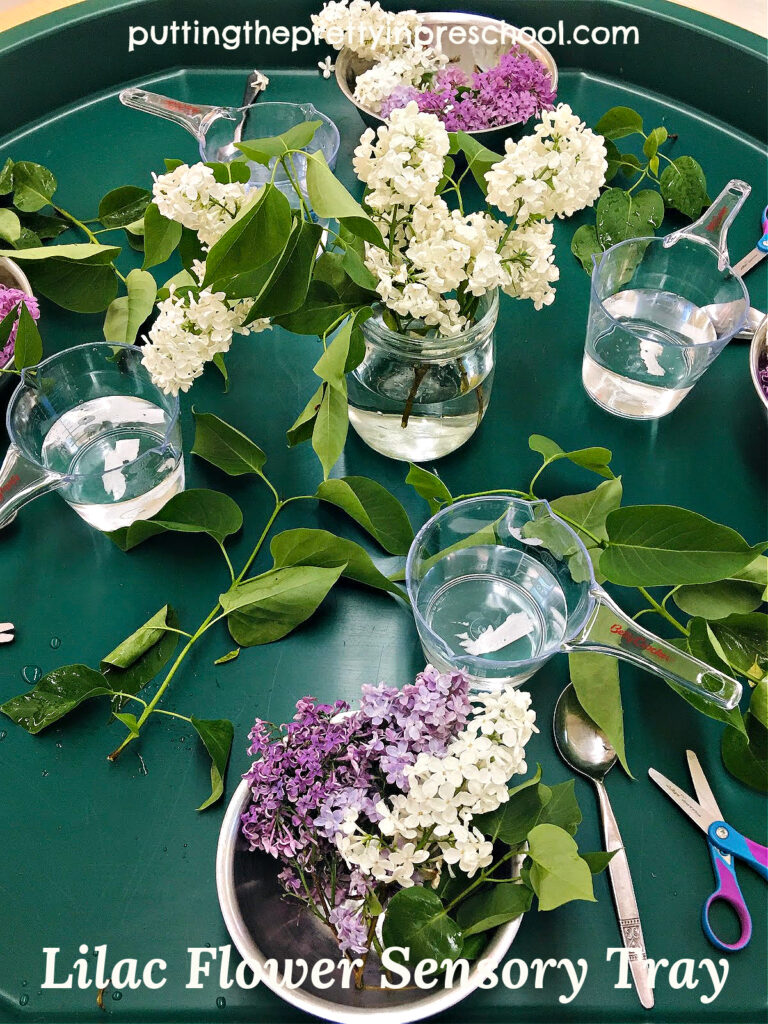
Lilac flowers are the stars of this aromatic tuff tray play invitation.

_______

Invite little learners to explore. They will be thoroughly engrossed in cutting lilacs, pouring water, and making delicious “lilac soup.”
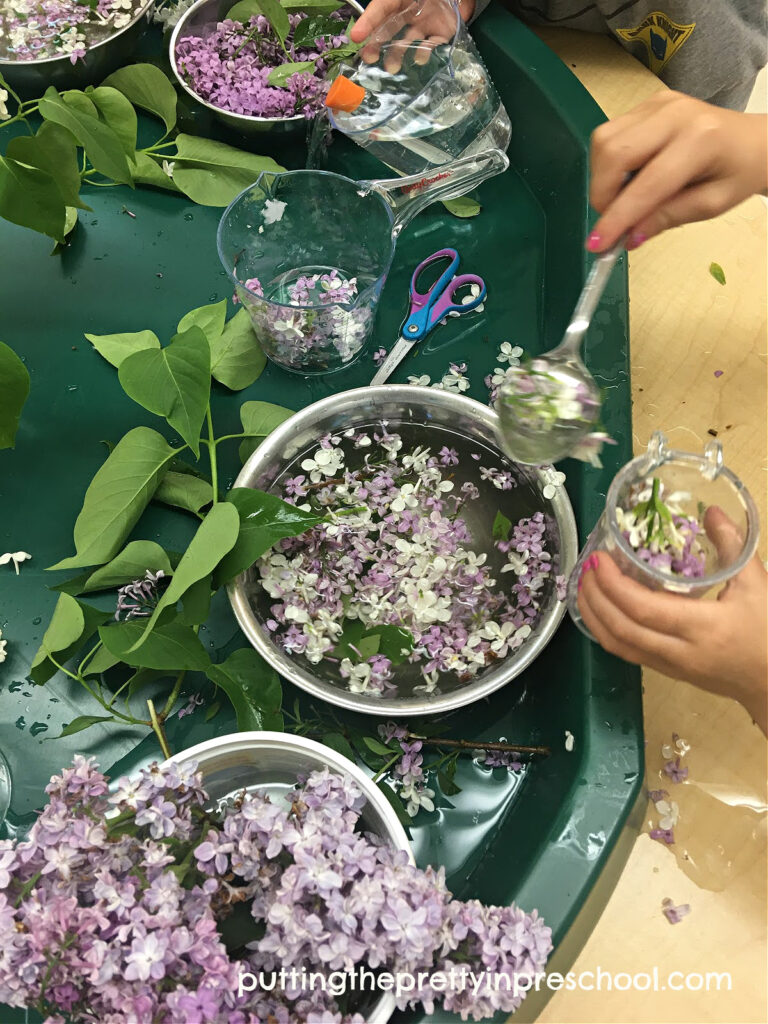
Oh-so-fun lilac flower sensory play in a tuff tray.

_______

Note: Lilacs come in a range of purple, pink, and white colors. The Spruce website features an array of gorgeous colors in a blog post titled “14 Beautiful Types Of Lilac.”
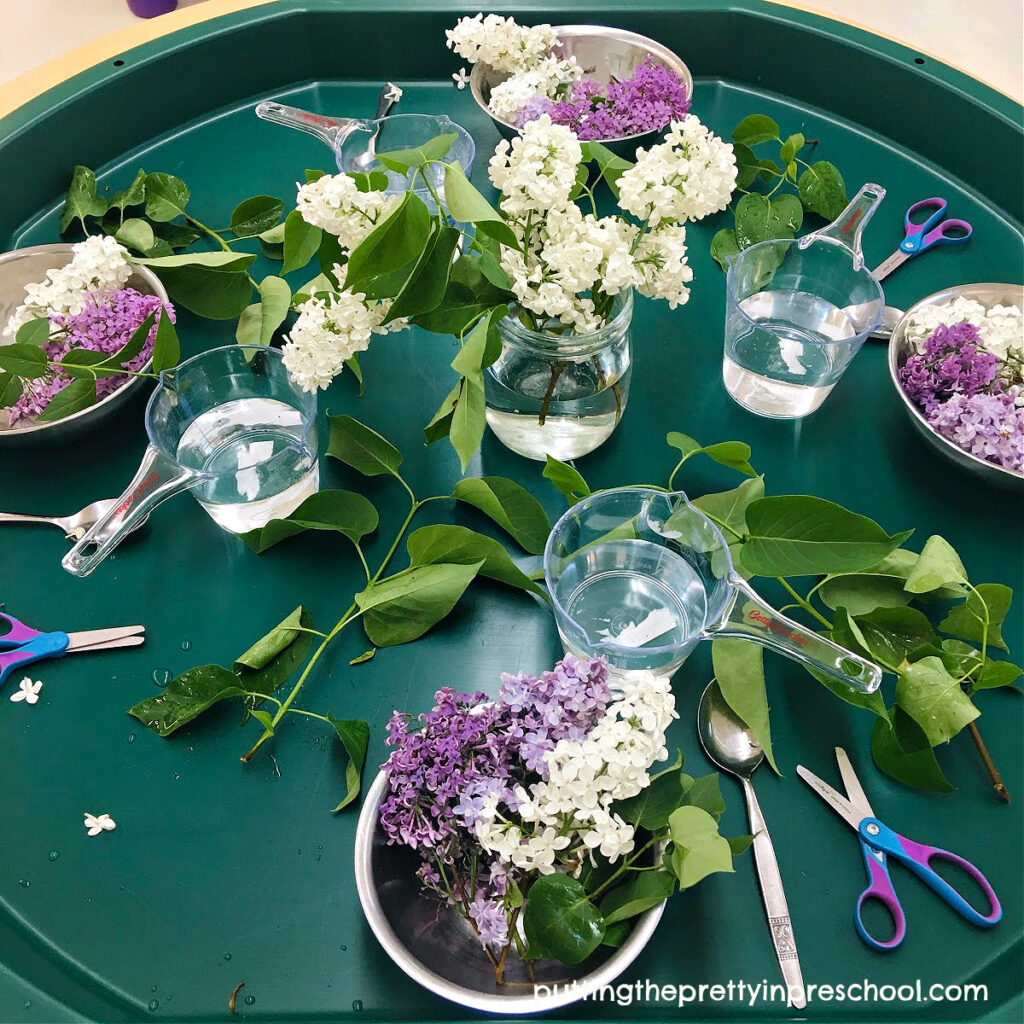
Lilac flowers are the stars of this aromatic sensory play invitation.

_______

Pop-Up Lilac Flower Mud Kitchen
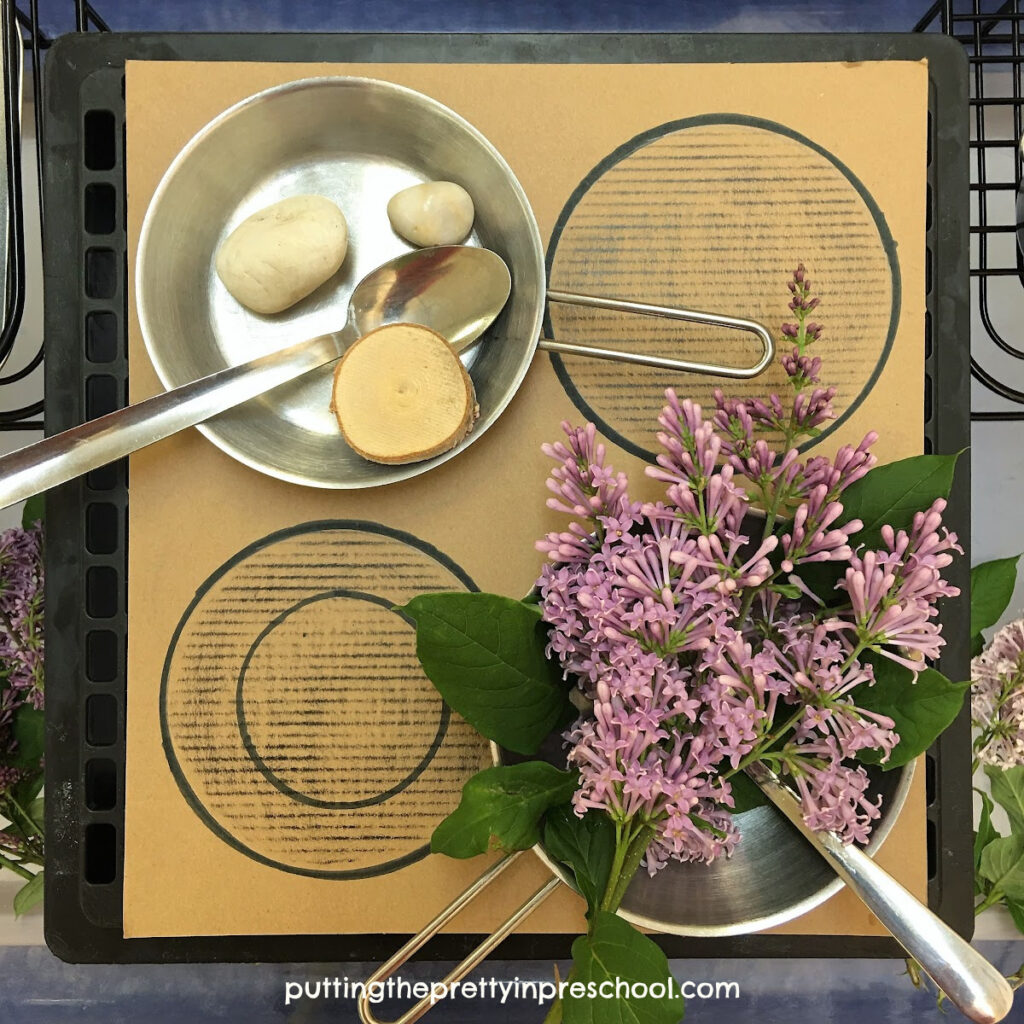
How to set up a pop-up mud kitchen in minutes. A nature-based sensory activity your little learners will love.

_______

Another easy way to celebrate lilacs is to offer them in a pop-up mud kitchen:

Set a crate and small wire shelves in a sensory table or tray.

With a black felt pen, draw four stove burners on a section of cardboard.

Set the cardboard “stove top” on the crate.

Add metal pots, bowls, muffin tins, and spoons to the table/tray. Include a selection of smooth stones and tiny wood slices.
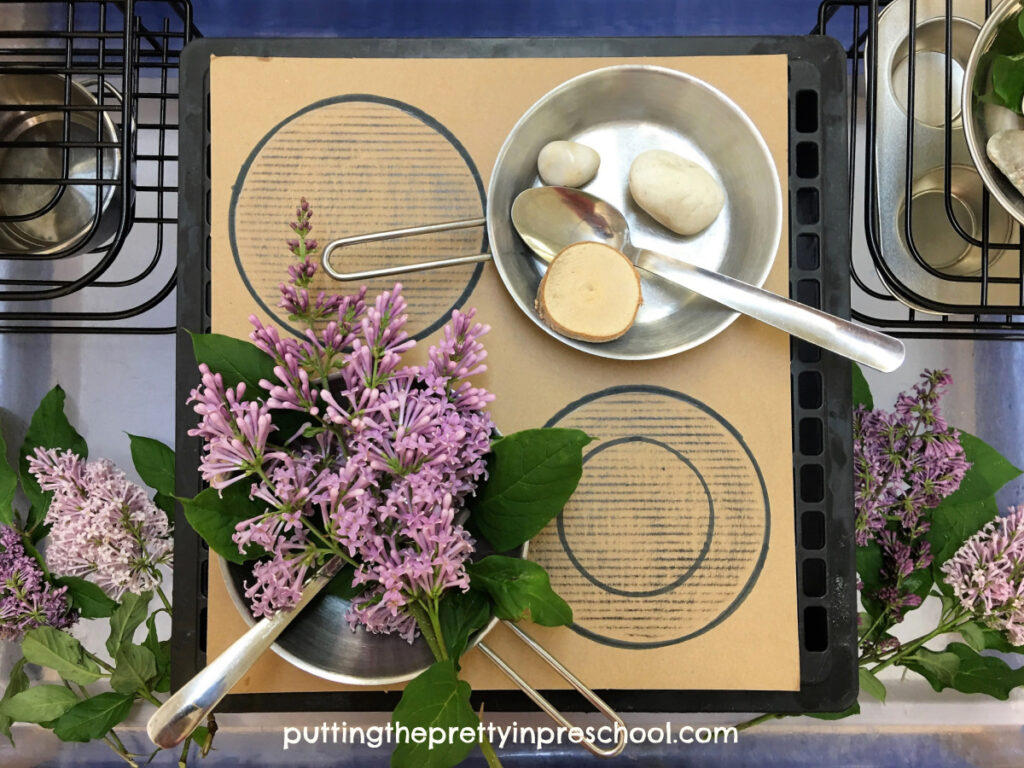
This DIY mud kitchen is a must-try. Aromatic lilac flowers accentuate the nature-based play invitation.

_____

Your little charges will love investigating this sensory invitation too!

Note: Both lilac flower sensory trays can be offered indoors or outdoors. And a current in-season flower can be used instead of lilacs.
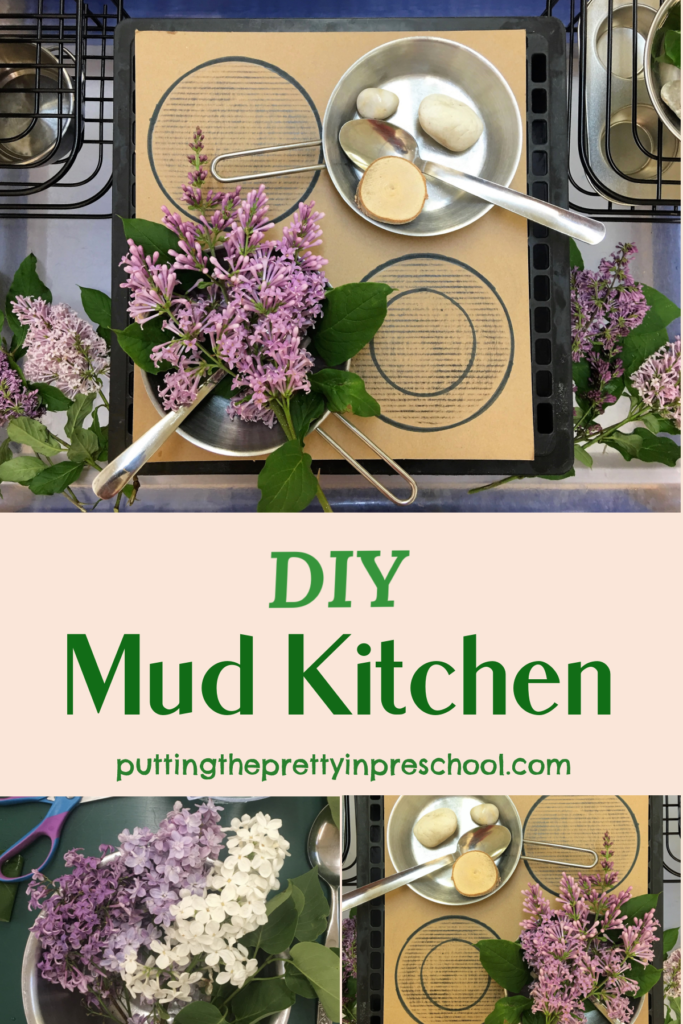
Set up this "do it yourself" mud kitchen in minutes! Use it indoors or outdoors.

_______

Related: Flower Theme Activities

_______

[Read more…] about Lilac Flower Sensory Trays
Tweet
Share
Share
Pin

Filed Under: gardening, preschool, pretend play, science, sensory, spring, summer Tagged With: flowers, lilacs, mud kitchen, sensory play, sensory tray

Felt Marker Color Exploration

May 1, 2022 by Annette Kaminsky Leave a Comment

Tweet
Share
Share
Pin
Create beautiful hues with this felt marker color exploration invitation. The activty is easy and economical to set up!

_______

So – many – beautiful – hues! That‘s what your little learners will create while engaging in this felt marker color exploration invitation. The activity is easy and economical to set up and the science experiment is as interesting to children as any other project out there.

_______

Follow me on Pinterest for more early learning ideas.

_______

Supplies to Collect

Gather the following supplies. Most can be found in the kitchen, so you probably already have them!

  • plastic tablecloth
  • water-based felt markers
  • office paper
  • craft foam
  • paper towels
  • clear plastic or white styrofoam egg cartons
  • compartment trays
  • scissors
  • jug of water

_______

Create beautiful hues with this felt marker color exploration invitation. The activity is easy and economical to set up!

_______

The Felt Marker Color Exploration Set Up

First, cover a table with a plastic tablecloth.

Next cut paper, paper towels, and craft foam into 2-inch x 3-inch strips.

For each participant, fill sections of an egg carton with water. Or add water to empty tempera block trays.

Then set up stations with strips of paper and foam, and a water-filled egg carton or compartment tray.

Add a set of water-based felt markers to each spot.

_______

Exploring Color With Felt Pens And Markers

An easy and economical felt marker color exploration activity your children will love to do!

_______

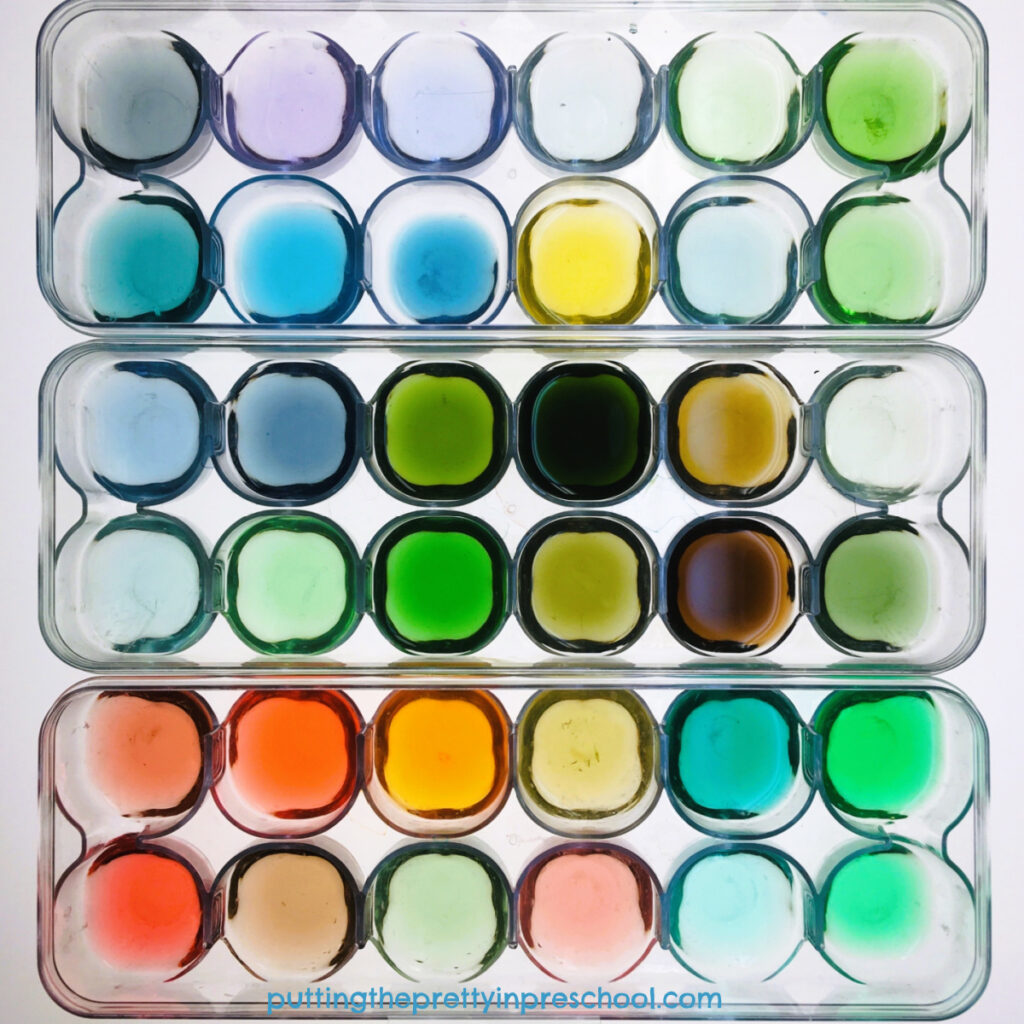
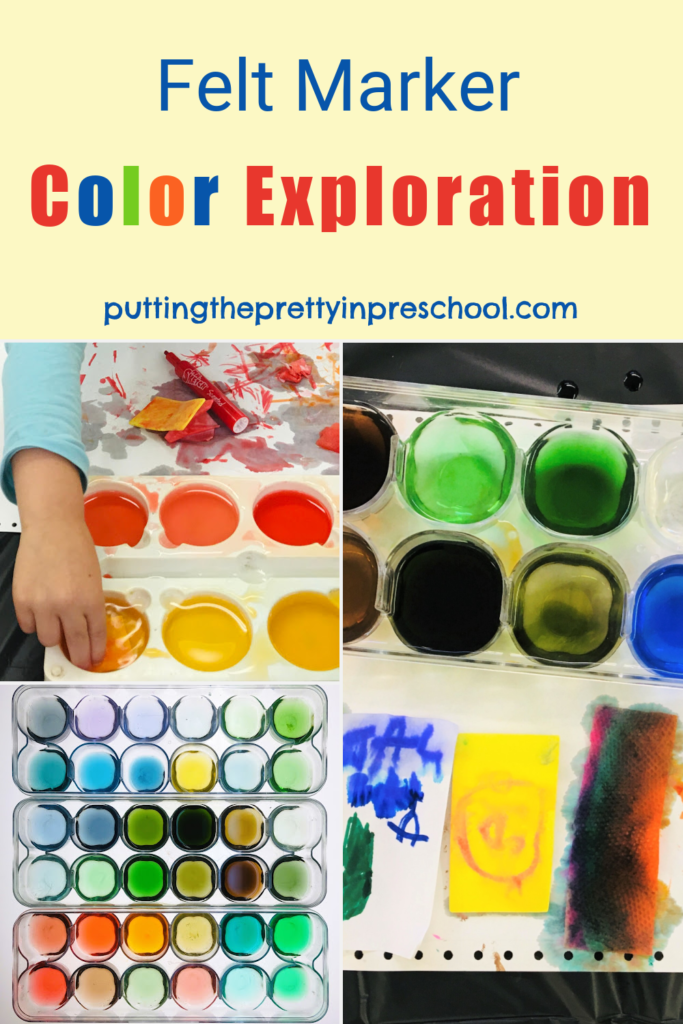
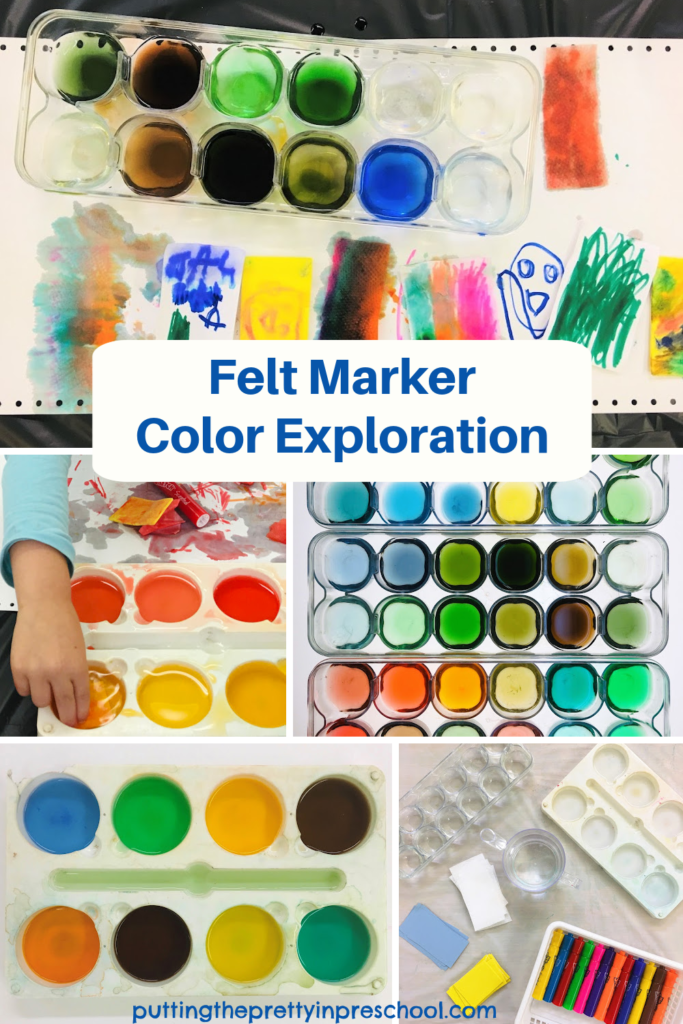
Invite participants to decorate foam and paper strips with felt markers, and then dip the strips into egg carton sections. The water will turn a variety of colors, resulting in exquisite transient art. Such a fun science experiment with an artistic flair!

The colored water in the clear egg cartons below is the work of several students. I was so impressed with the many colors they created. The plastic egg cartons are set on a light table so the hues display clearly. Aren’t they gorgeous?

So many beautiful hues can be created with this felt marker color exploration activity.

_______

Related:

  • Color Explosion Science Experiment
  • Candy Cane Science Experiment
  • Shamrock Dissolving Candy Experiment

_______

[Read more…] about Felt Marker Color Exploration
Tweet
Share
Share
Pin

Filed Under: art, light table, preschool, science, sensory Tagged With: colors, felt markers, science experiment, sensory play

Floating Egg Science Experiment

March 25, 2022 by Annette Kaminsky Leave a Comment

Tweet
Share
Share
Pin
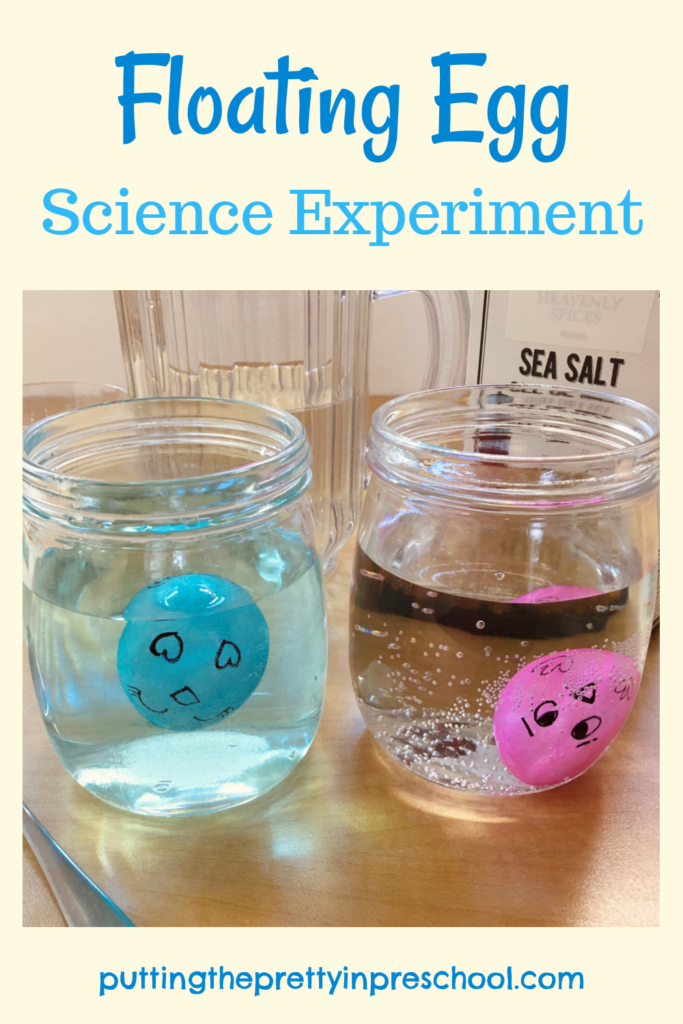
How to perform a simple floating egg science experiment with easy-to-gather supplies. Decorated eggs add artistic flare to this activity.

_______

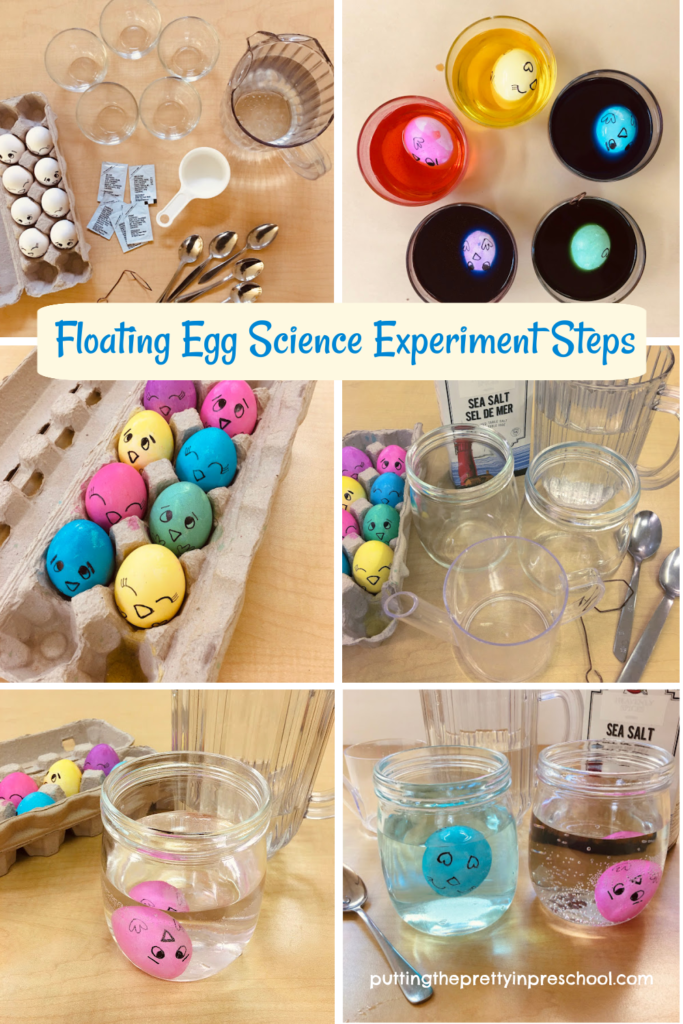
In a whole range of egg colors with expressive faces drawn on, this floating egg science experiment includes a dose of art and drama. The experiment is simple to do and promises to be a huge hit with your little learners.

_______

Supplies To Collect

The supplies for this dramatic science experiment are easy to procure, as you probably already have them in your home. Gather the following:

  • eggs
  • salt
  • pitcher of water
  • egg carton
  • two 500 ml glass jars
  • tablespoons
  • egg dipper
  • store-bought egg dying kit
  • black permanent felt pen

_______

Follow me on Pinterest for more early learning ideas.

_______

Performing The Floating Egg Science Experiment

Steps to perform a simple floating egg science experiment with easy-to-gather supplies. Drawing and egg coloring are included in this activity.

_______

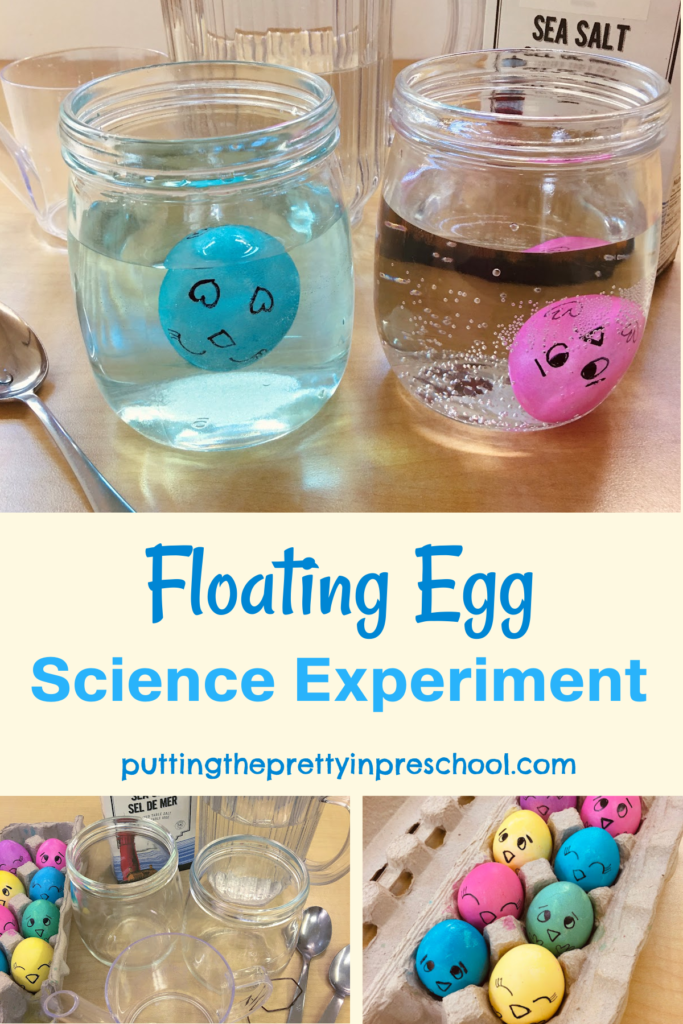
With a permanent felt pen, carefully draw chick feet and a worried face on one side of the eggs selected for the experiment. Draw feet and a happy face on the other side of each egg.

Note: Crayons can be used instead to decorate the eggs.

Then dye the eggs in different colors. I use color tablets from a store-bought kit for the eggs, but you could use a home recipe.

Carefully drop the color-dyed eggs back in the egg carton, using an egg dipper if available. Let the eggs dry.

Pour 1½ cups water into two jars.

Add 3 tablespoons salt to one jar, and stir it into the liquid. Add no salt to the other.

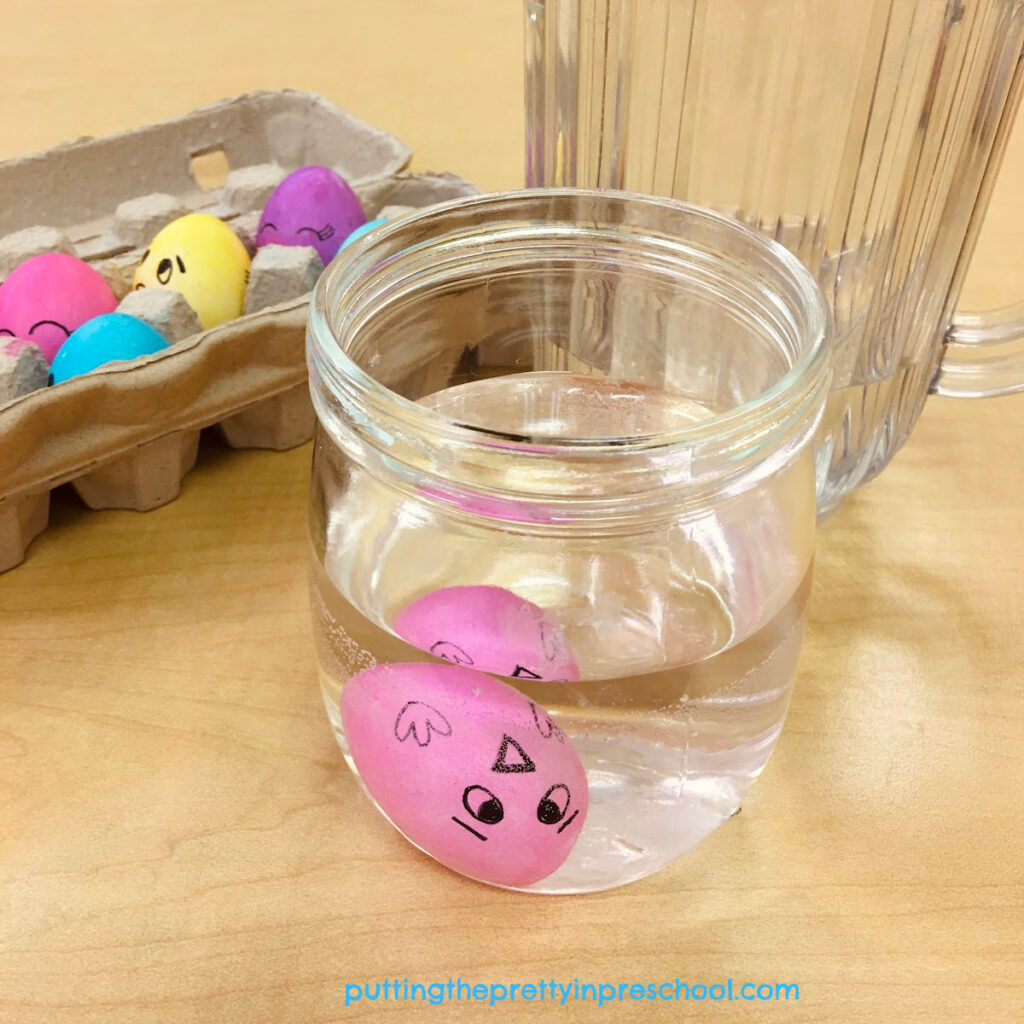
Pick a decorated egg to gently drop into the unsalted jar of water. Observe if it floats or sinks. Then scoop the egg out of the liquid and have participants pick the feeling the “chick egg” might be experiencing: (worried, scared.)

Simple and fun floating egg science experiment with easy-to-gather supplies. Egg decorating adds an artistic element to this activity.

_______

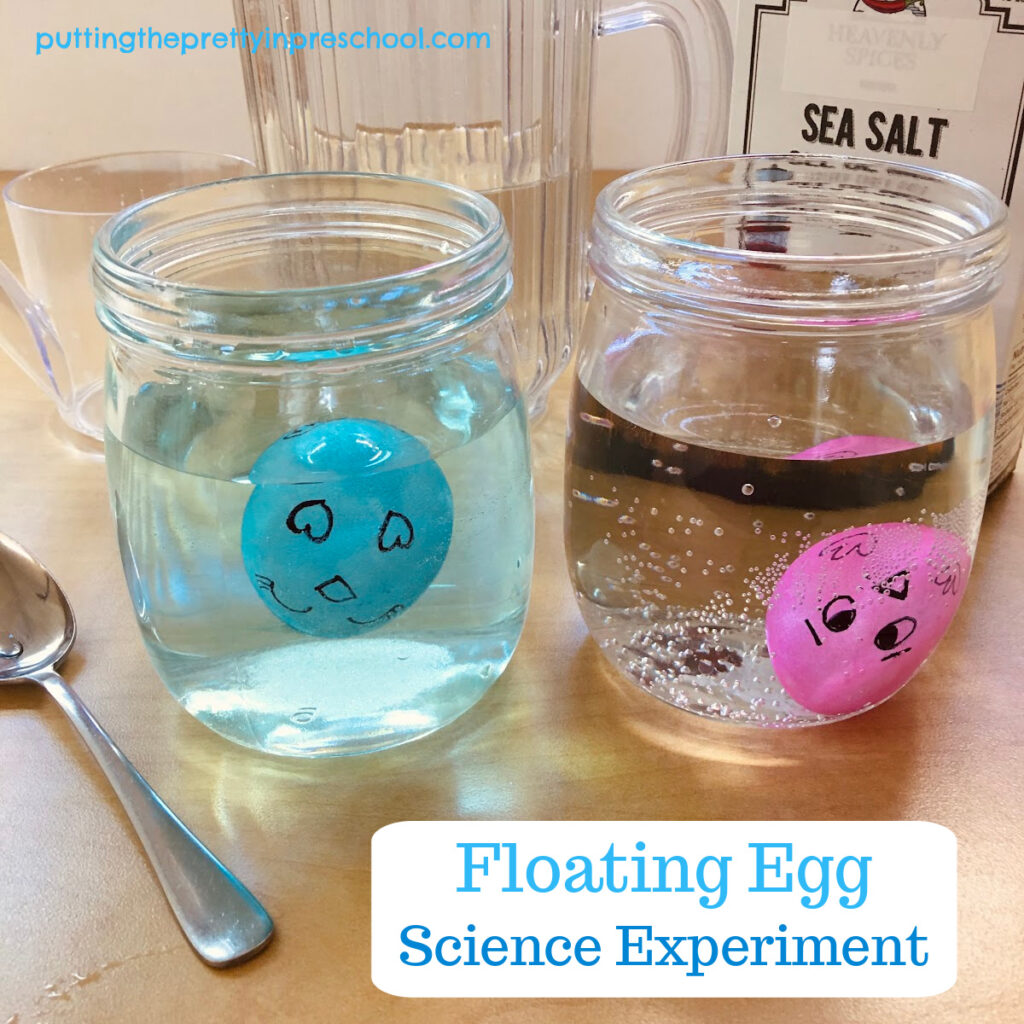
Carefully drop the same egg into the saltwater jar. Observe if the egg now floats or sinks again. Have participants pick the feeling the “chick egg” is probably experiencing: (relief, happiness.)

Simple and fun floating egg science experiment with easy-to-gather supplies. Egg decorating adds an artistic element to this activity.

_______

Try this science experiment with other colored eggs. Participants may enjoy picking an egg in their favorite color to drop in the jars.

_______

Related: Reptile Egg Science Experiment

_______

The Science Behind This Experiment

An egg is denser than water, so it sinks. But when salt is added to water, it increases the density of the liquid. When enough salt is added, a raw egg will float.

How to perform a simple floating egg science experiment with easy-to-gather supplies. Decorated eggs add artistic flare to this activity.

_______

Floating Egg Experiment Extensions

This floating egg experiment could be extended by:

  • using large and small-sized eggs, and recording how much salt needs to be added to a jar for each one to float.
  • dying the eggs in different methods.
  • reading a picture book about feelings before or after performing the experiment.

_______

[Read more…] about Floating Egg Science Experiment
Tweet
Share
Share
Pin

Filed Under: art, Easter, literacy, preschool, science, sensory Tagged With: eggs, feelings, science experiment, sensory play

Shamrock Dissolving Candy Experiment

March 5, 2022 by Annette Kaminsky Leave a Comment

Tweet
Share
Share
Pin
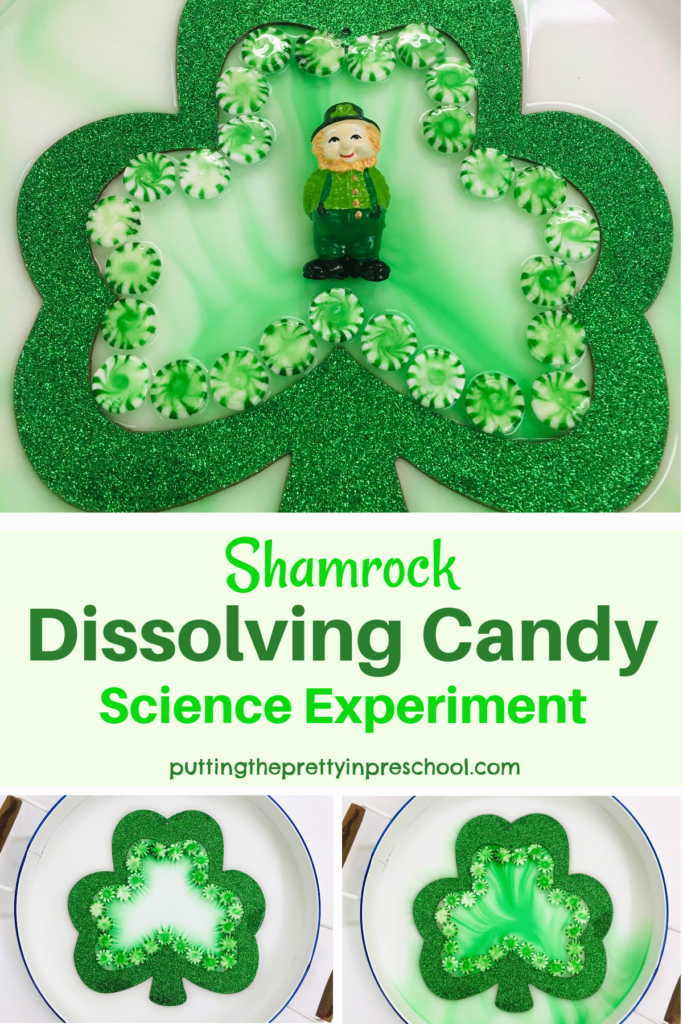
Try this stunning, easy-to-perform shamrock dissolving candy science experiment today! It brings a WOW factor.

_______

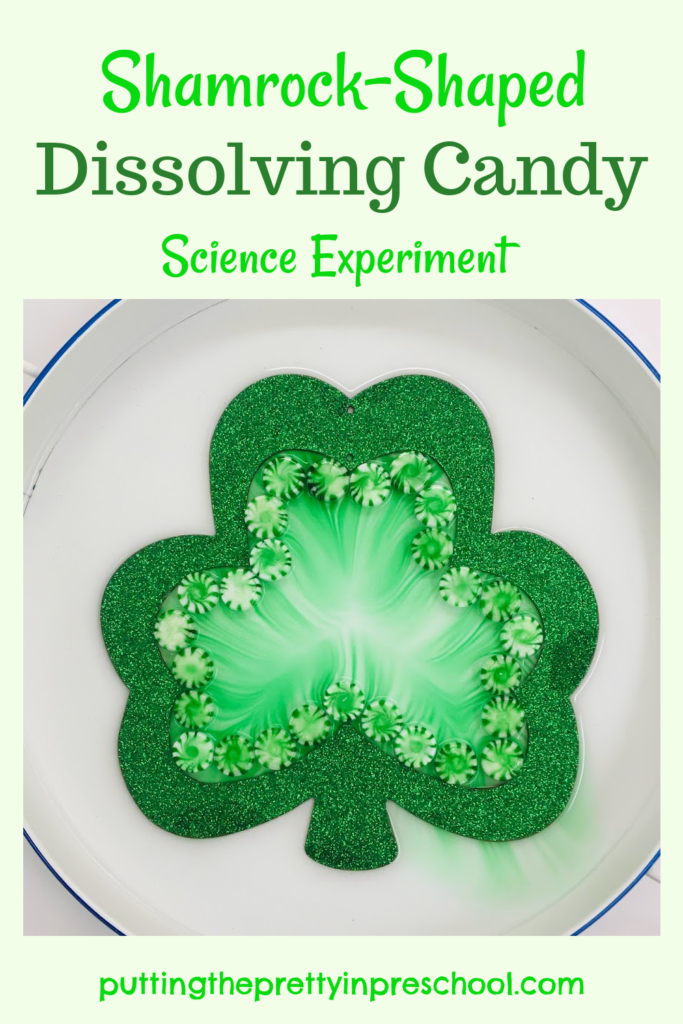
Lately, I cannot get enough of candy color science. So, in addition to previous endeavors, I tried a shamrock dissolving candy experiment. It’s got all the WOW factor similar experiments offer.

Since it is difficult to find a clear or white shamrock-shaped plate or pan, a shamrock outline taken from a St. Patrick’s Day wall decoration helps create the aesthetic appeal. And it does the job beautifully!

_______

Follow me on Pinterest for more early learning ideas.

_______

Supplies To Collect

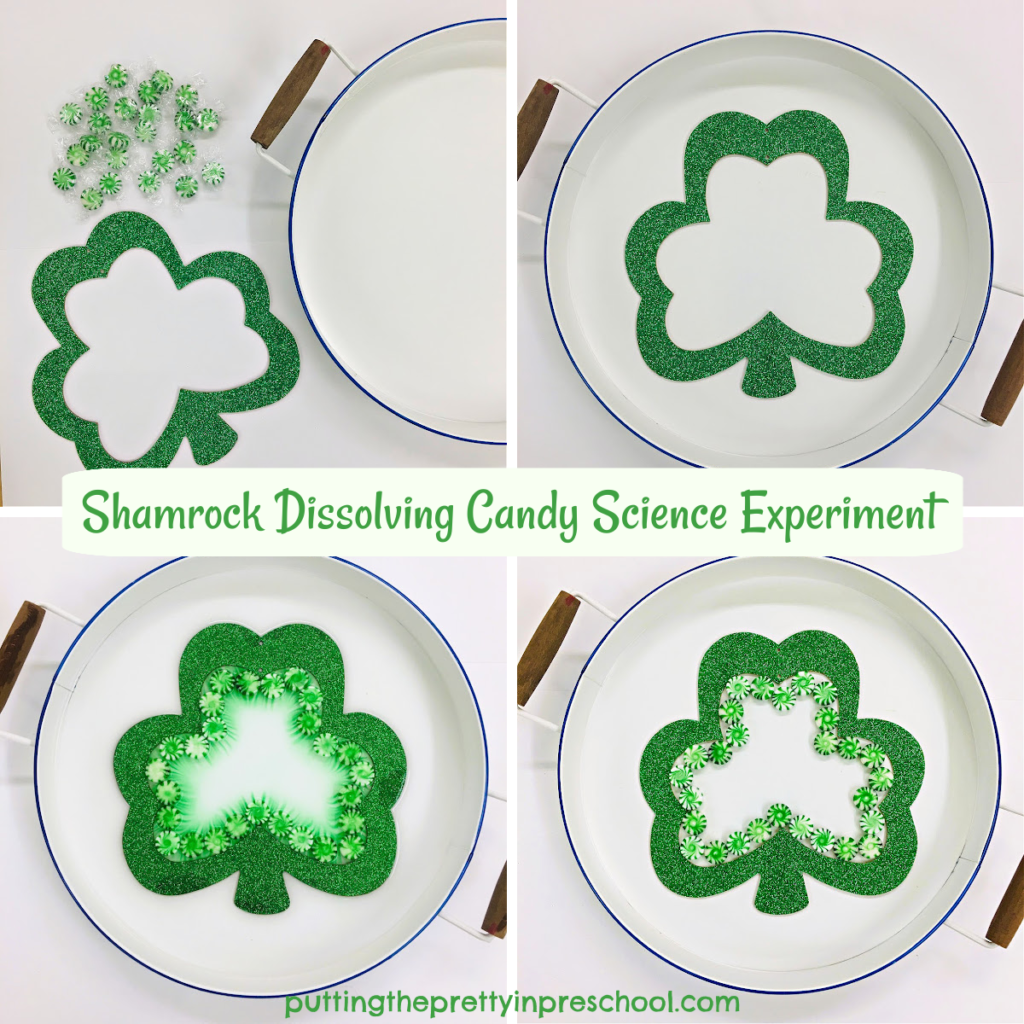
Supplies for a science experiment couldn’t be any easier to gather. Just four items are needed:

  • shamrock outline
  • striped green and white candies
  • round, square, or rectangular leak-proof tray
  • measuring cup
Steps to perform a shamrock dissolving candy science experiment that delivers a WOW factor.

_______

Performing The Shamrock Dissolving Candy Experiment

First, set the shamrock outline in the center of a tray that is a little larger than the clover shape.

Next, position the striped candies next to each other around the inside of the shamrock.

Then, fill a 500 ml measuring cup with warm water.

Slowly pour the warm water into the tray, aiming for the area near the rim. Cover just the bottom of the tray with liquid.

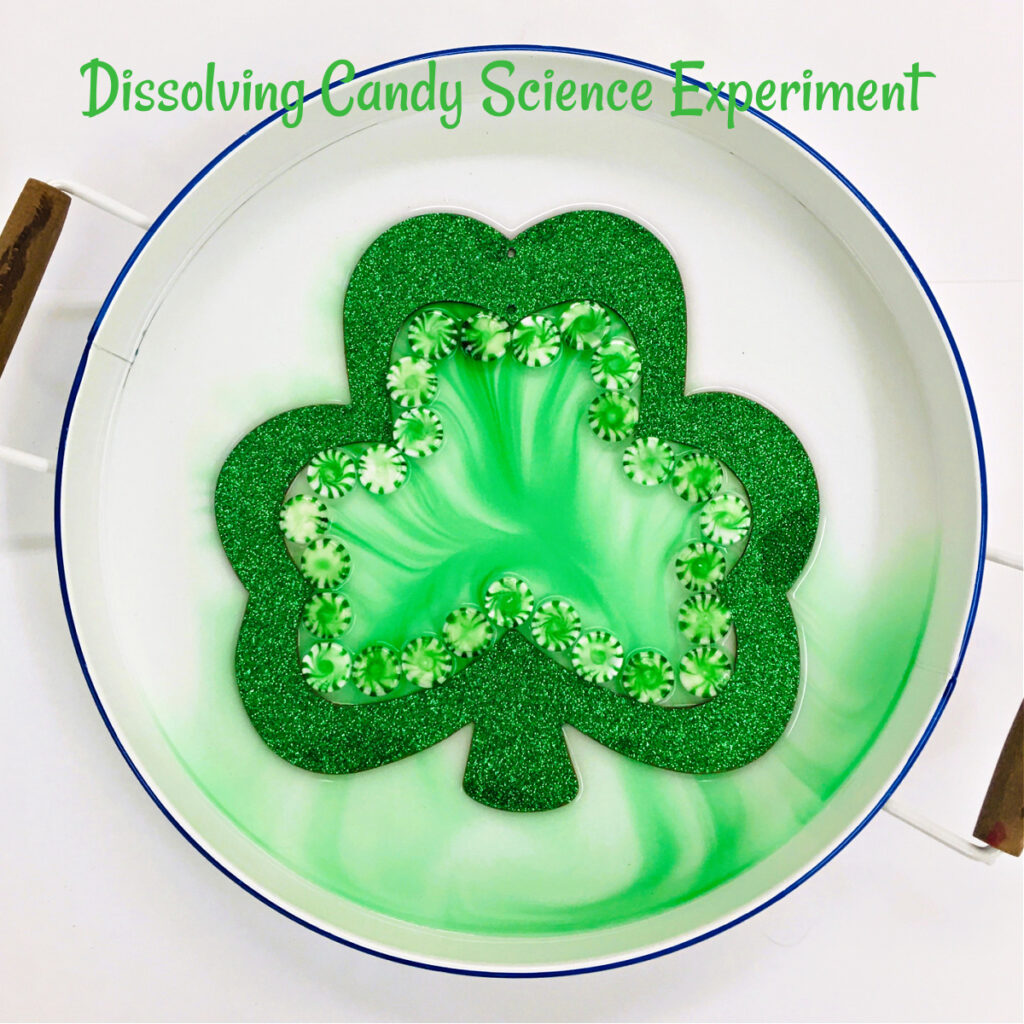
Watch what happens!

This stunning, easy-to-perform shamrock dissolving candy science experiment delivers a WOW factor.

_______

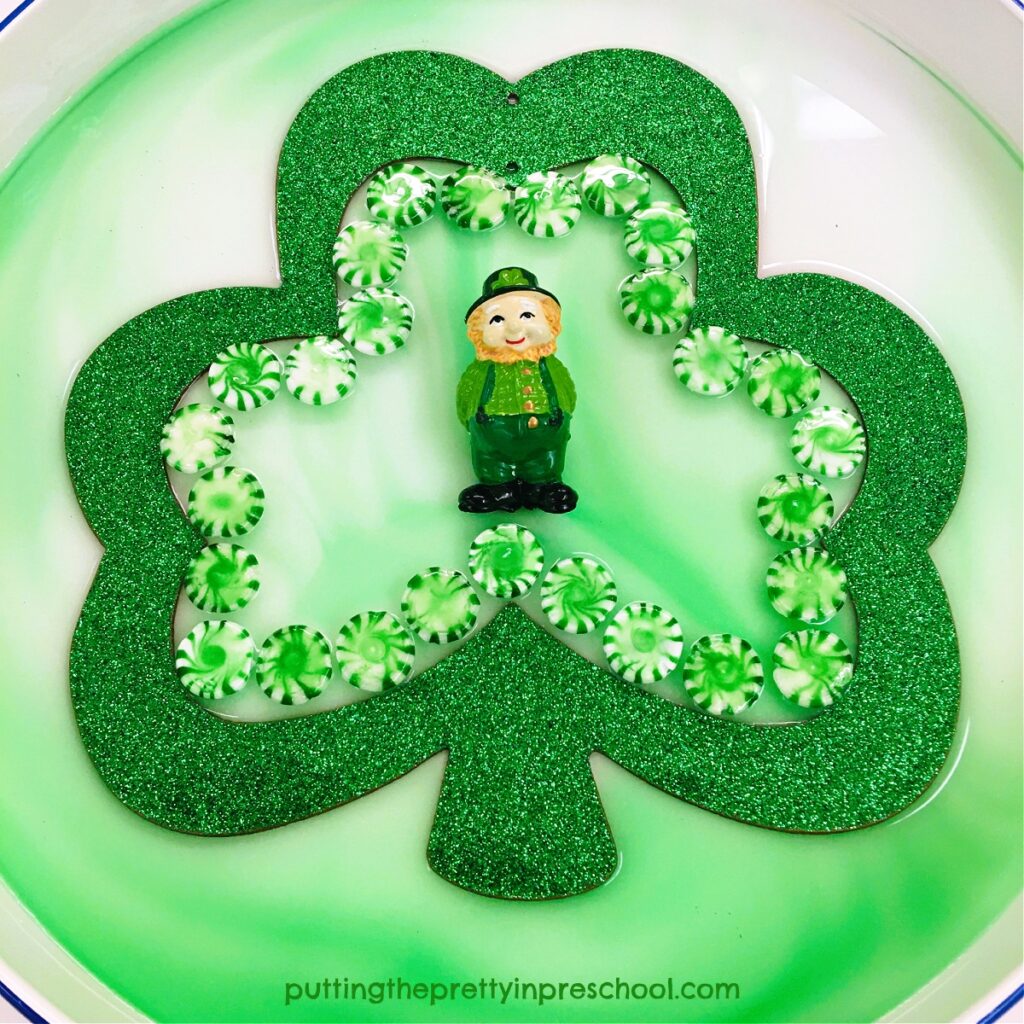
After the color has spread from the candies into different patterns, a leprechaun could be floated in the center of the shamrock outline for added visual appeal.

The leprechaun is the finishing touch to this stunning, easy-to-perform shamrock dissolving candy science experiment.

_______

Participants may wish to taste the colored water. It will likely have a noticeable mint flavor. The candies will slowly dissolve, but a few could be scooped up for tasting as well.

Note: The shamrock outline can be washed and dried afterward, and used as a  tracer.

_______

The Science Behind This Candy Science Experiment

The candies are made of sugar. The water breaks the sugar molecules apart. Then the food colors move through the water from areas of higher sugar concentration (near the candy) to areas with less sugar (the center and rim of the tray.) When the sugar concentration is the same in all areas, the colors stop moving.

Water temperature is a variant in this experiment. Sugar dissolves quicker in warm water, and food coloring moves at a faster pace.

This science experiment is so easy to set up and has immediate results, perfect for little learners. And participants get to use their senses of sight, smell, taste, and touch. Try it today!

Try this stunning, easy-to-perform shamrock dissolving candy Science experiment today! It brings a WOW factor.

_______

Related: Blue Candy Cane Science Experiment

              Heart-Shaped Dissolving Candy Science

_______

[Read more…] about Shamrock Dissolving Candy Experiment
Tweet
Share
Share
Pin

Filed Under: preschool, science, St. Patrick's Day Tagged With: candy science, leprechauns, science experiment, shamrocks, St. Patrick's Day

Heart-Shaped Dissolving Candy Science

February 20, 2022 by Annette Kaminsky Leave a Comment

Tweet
Share
Share
Pin
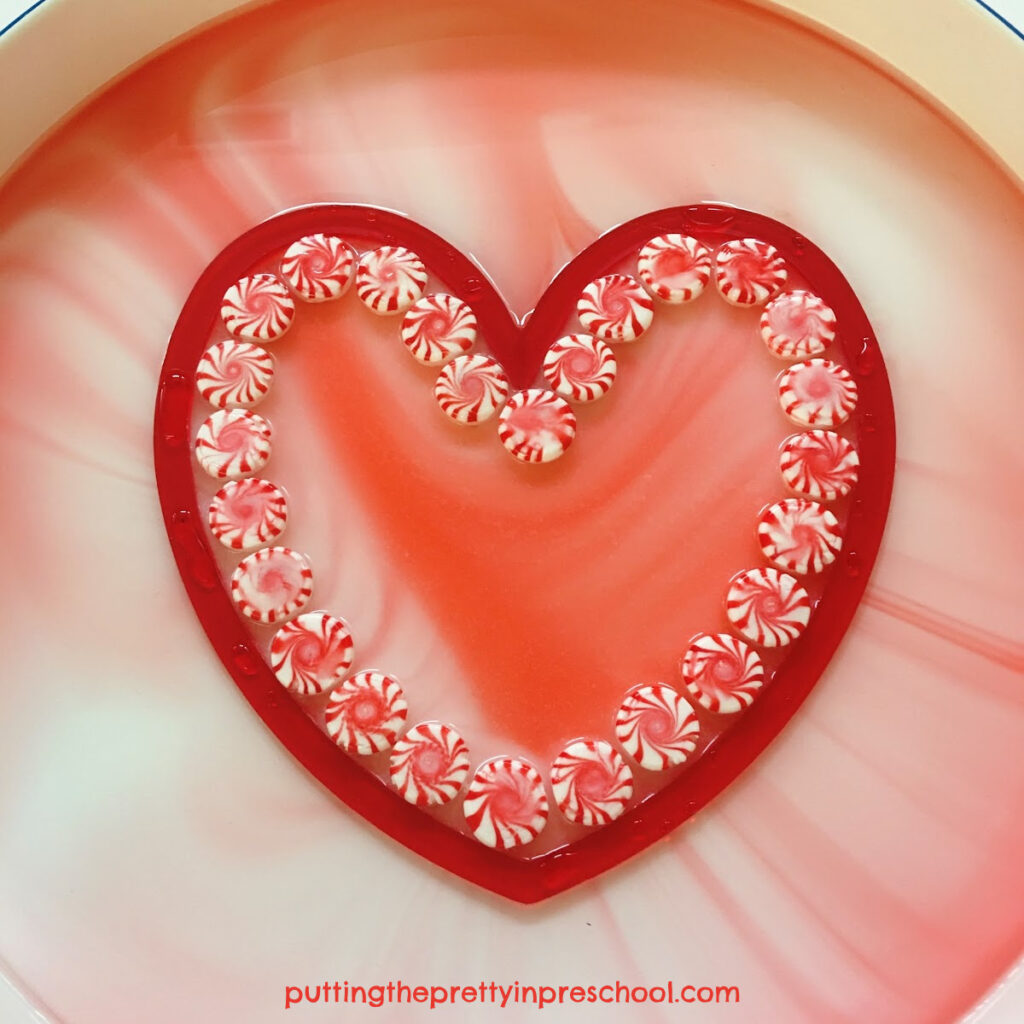
How to perform a heart-shaped dissolving candy science experiment. A simple experiment with amazing results.

_______

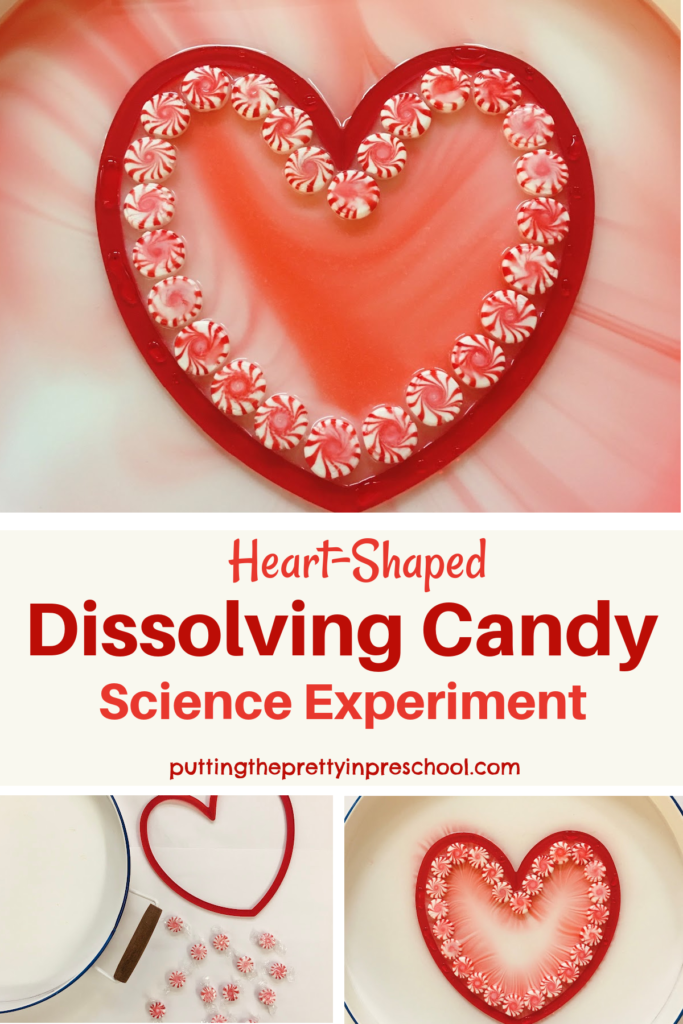
Valentine’s Day has passed, but it is Heart Month in Canada and the United States. So I am squeezing in this heart-shaped dissolving candy science experiment before I put all the valentine items away for the season. It’s an easy and fun experiment for all ages, so be sure to give it a try.

_______

Follow me on Pinterest for more early learning ideas.

_______

Supplies To Collect

There are just four items to gather for this fascinating color experiment that I cannot get enough of:

  • round, square, or rectangular tray (white or clear)
  • striped red and white candies
  • plastic or wooden heart outline
  • measuring cup with a spout

_______

The Heart-Shaped Dissolving Candy Science Experiment

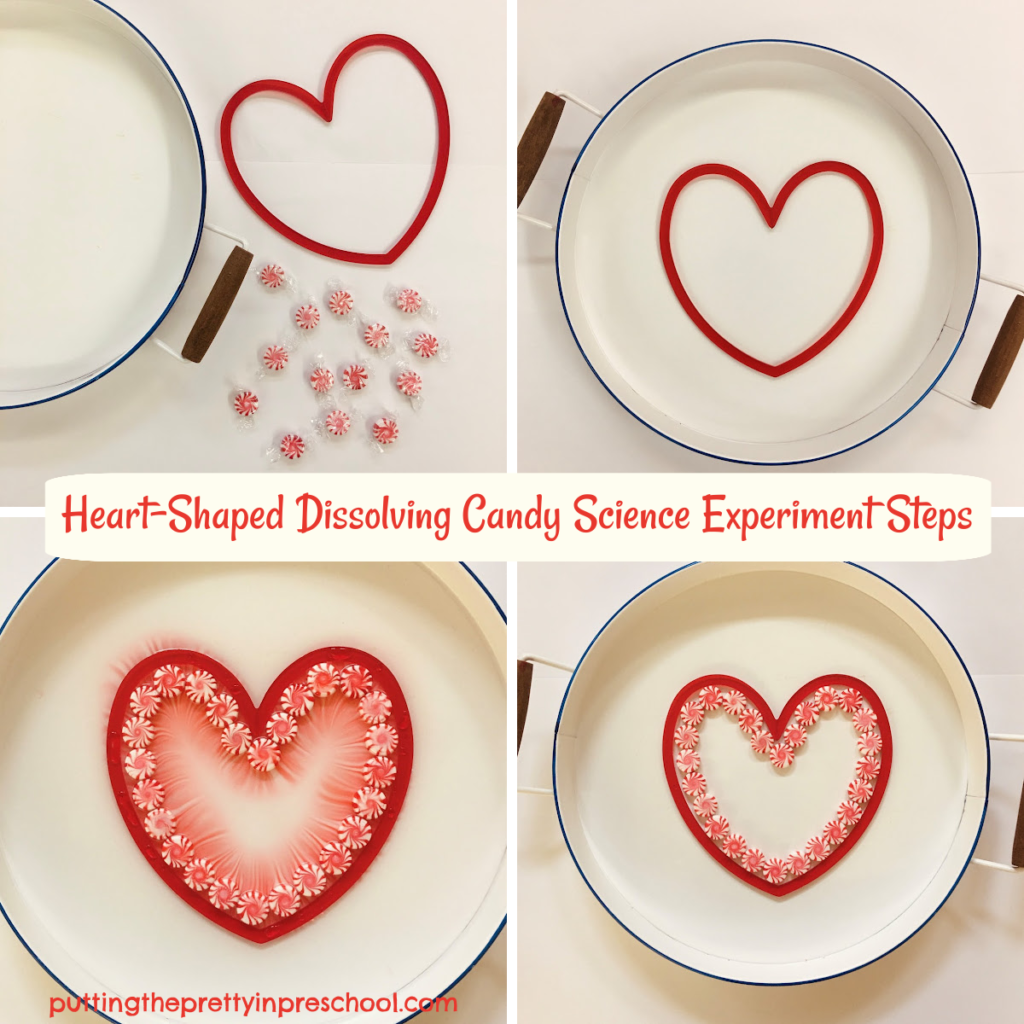
Easy steps to perform a heart-shaped dissolving candy science experiment.

_______

First, pick a large heart outline. A wooden or plastic heart would work, or you could cut one from a generous piece of red craft foam. I used one that was previously part of a heart-themed wall hanging.

Place the outline in a white or clear tray that is slightly bigger than the heart.

Next, lay candies around the inside of the heart outline. Featured here are Starlight Mints purchased at a Dollar Store. They have flat sides, so seem destined for this experiment!

Then fill a 500 ml cup with a spout with warm water. Or use a large cup or water bottle.

Slowly pour the water into the bin. Add just enough liquid so the bottom is covered.

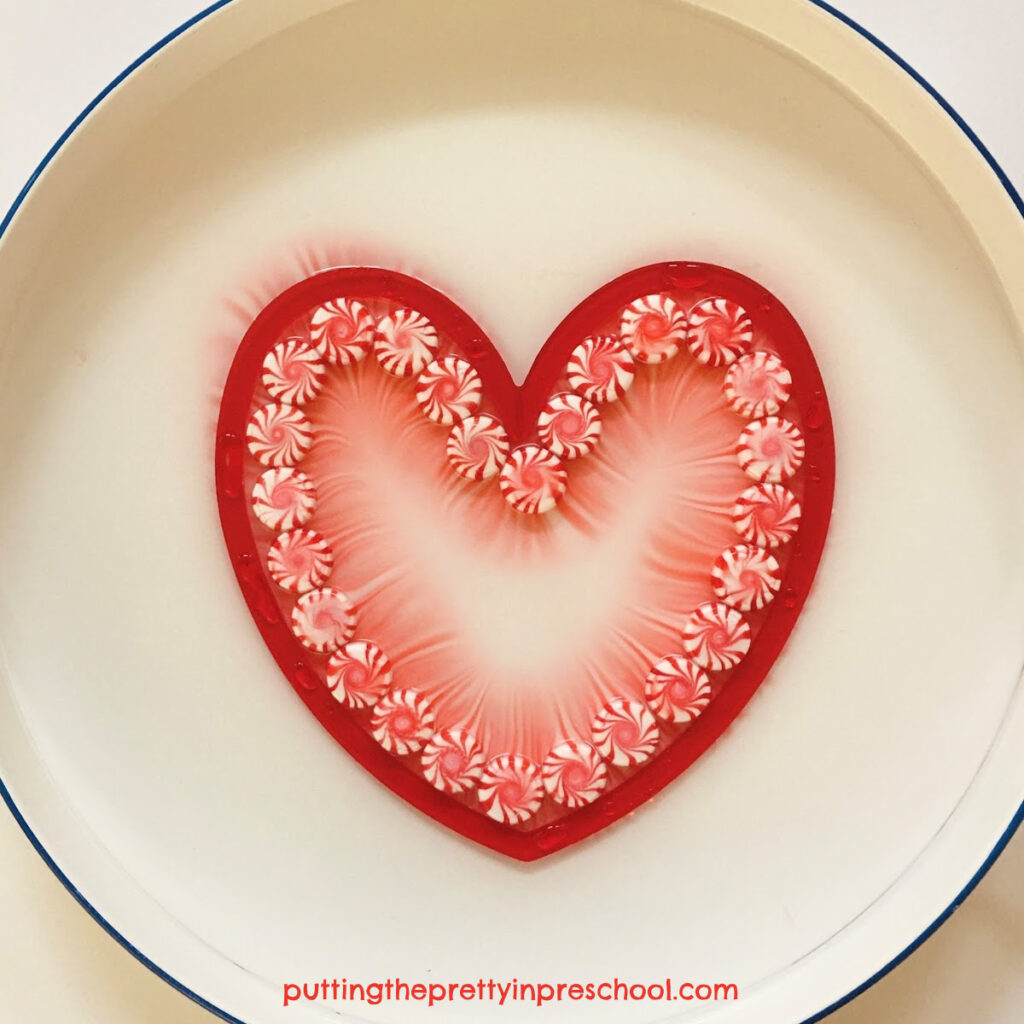
Watch what happens! And have your camera ready to snap some stunning pictures.

An easy to perform heart-shaped dissolving candy science experiment. A simple experiment with amazing results.

_______

Try this heart-shaped dissolving candy science experiment today! It is simple and brings the WOW factor.

_______

For the science behind this experiment, visit my blogpost Candy Cane Science Experiment.

_______

Side Note: I wasn’t sure what to call the heart shape I feature in this science experiment. One of the search words for suggestions I used was heart rims. Who knew that you could get heart-patterned rims for car tires!

If you give this heart-shaped dissolving candy science experiment a try, tag me on Instagram and I will share your post in my stories.

_______

Related: Blue Candy Cane Science Experiment

_______

[Read more…] about Heart-Shaped Dissolving Candy Science
Tweet
Share
Share
Pin

Filed Under: preschool, science, Valentine's Day Tagged With: candies, hearts, science experiment

  • « Go to Previous Page
  • Page 1
  • Interim pages omitted …
  • Page 11
  • Page 12
  • Page 13
  • Page 14
  • Page 15
  • Interim pages omitted …
  • Page 18
  • Go to Next Page »

Primary Sidebar

Hi, I'm Annette Kaminsky, a preschool teacher who loves sharing learning through play activities for young children. Thanks for visiting my site. Feel free to stay awhile!

Subscribe Via Email

Recent Posts

  • Teacher Appreciation A to Z Alphabet June 21, 2026
  • Expanding Balloon Science Experiment May 18, 2026
  • Earth Day Spin Painting April 21, 2026
  • Easter Bunny Scavenger Hunt April 4, 2026
  • Celebrate Diversity Coloring Pages March 1, 2026
  • Lunar New Year Lantern Craft February 11, 2026
  • Black History Month Positive Affirmations Art January 29, 2026
  • Snowflake Cafe Dramatic Play Set January 19, 2026
  • Pastel Christmas Letterhead and Envelope December 20, 2025
  • December Kindness Activities November 30, 2025

Categories

Topics

apples bunnies butterflies Chinese New Year Christmas Christmas craft color colors dramatic play Easter fall flowers hearts holiday jewelry leaves leprechauns light table loose parts painting paper crafts playdough pretend play printables printmaking process art pumpkins rice bin scented playdough science experiment scissor skills sensory bin sensory play sensory tray shamrocks skeletons snakes snowflakes spiders spring St. Patrick's Day sunflowers tablescapes Valentine's Day water play

Copyright © 2026 · Lifestyle Pro on Genesis Framework · WordPress · Log in