• Skip to secondary menu
  • Skip to main content
  • Skip to primary sidebar

Putting The Pretty In Preschool

Finding Beauty In Everyday Early Childhood Experiences

  • Home
  • About Me
  • Winter
  • Chinese New Year
  • Blog
  • Valentine’s Day
  • Contact Me
  • Easter Activities

painting

Fall Drip Ice Cake

November 9, 2024 by Annette Kaminsky Leave a Comment

_______

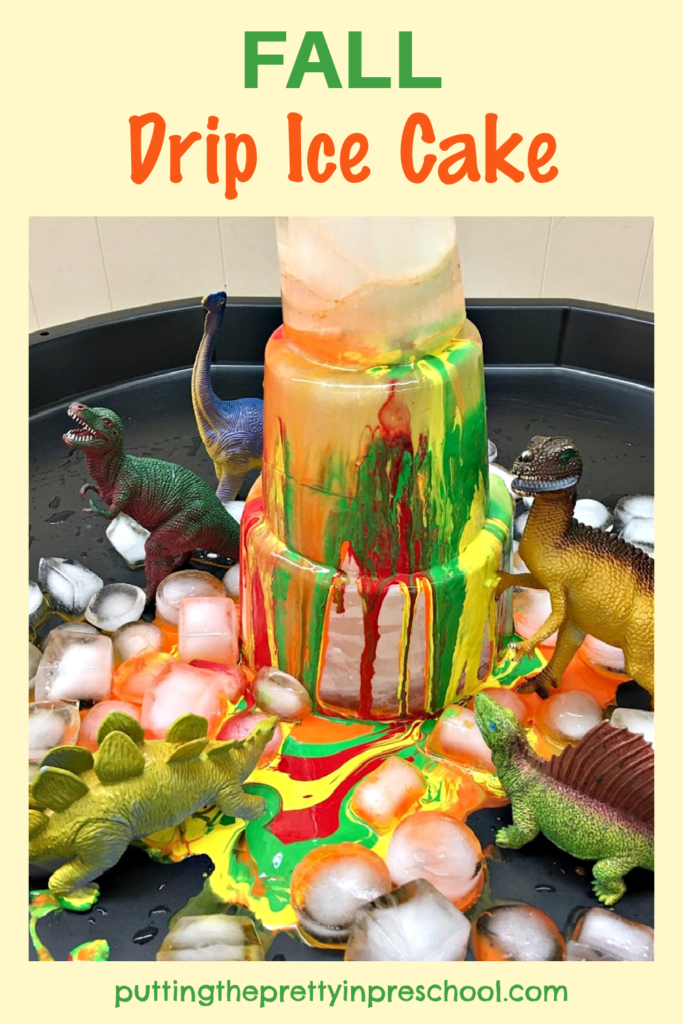
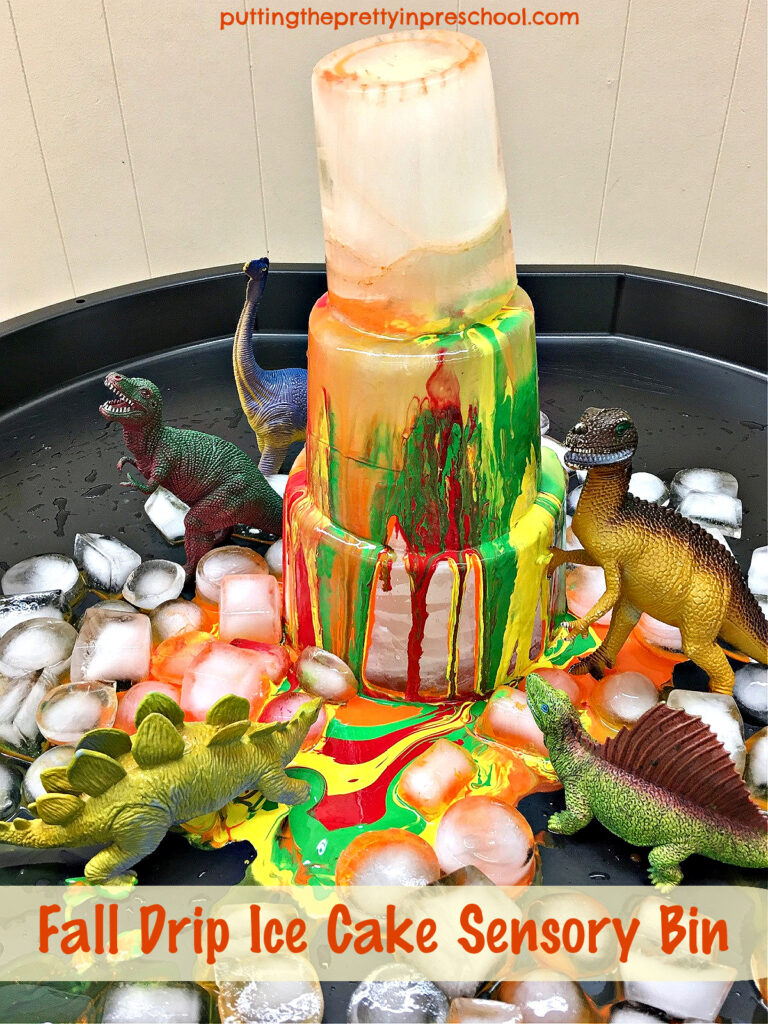
This fall drip ice cake sensory bin combines fall colors with ice and dinosaurs. It is suitable for a winter theme about ice or could be incorporated into a fall or dinosaur theme. It would be an inviting activity outside on a hot summer day.

_______

Supplies To Collect

Gather the following easy-to-find, inexpensive supplies for this super fun sensory bin:

  • ice cube molds
  • empty round food storage containers
  • small bottles
  • tempera paints
  • stir sticks
  • sensory tray
  • dinosaur figurines

_______

Follow me on Pinterest for more early learning activities.

_______

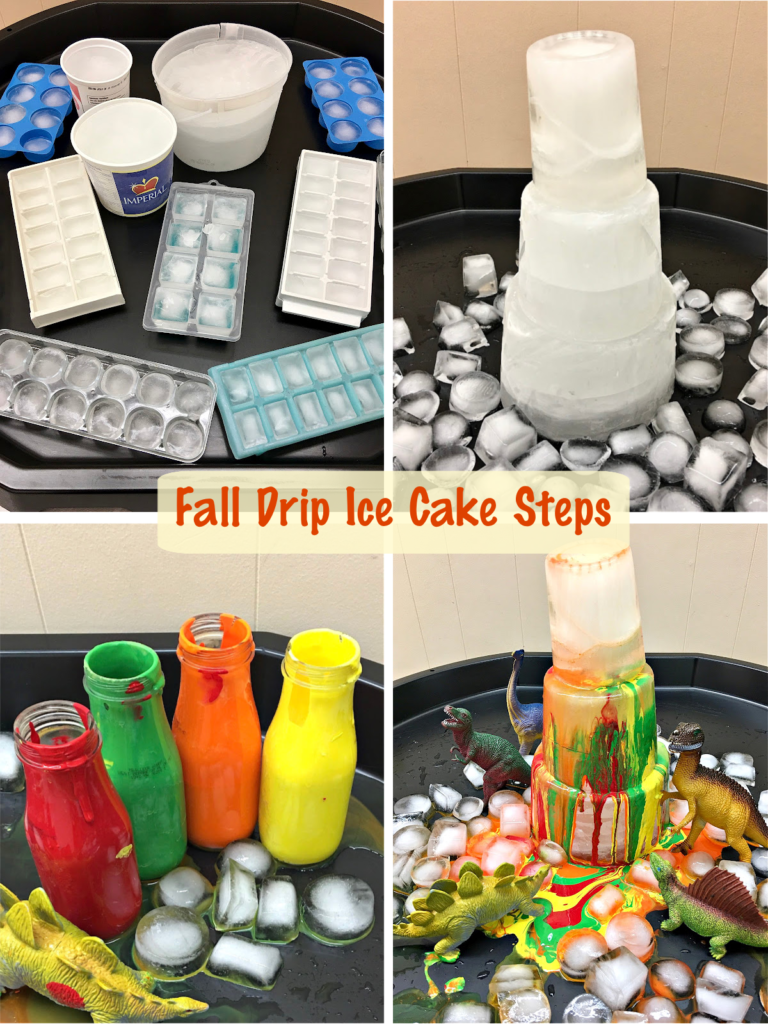
Preparing the Fall Drip Ice Cake Sensory Bin

To prepare this autumn drip ice cake sensory play experience first freeze water into ice shapes. Use molds such as Ice cube trays, margarine and yogurt containers, and an ice cream pail. Allow one or two days for the freezing to be complete.

Next, pick a sensory bin to use. A large active world tray is up to the task and provides ample room to explore accessories. A round saucer sled is smaller but also works well as a sensory bin.

Then add tempera paints in fall colors to small bottles. Leave a little room in the bottles to stir in water. This slightly thins the paints and makes them easier to pour.

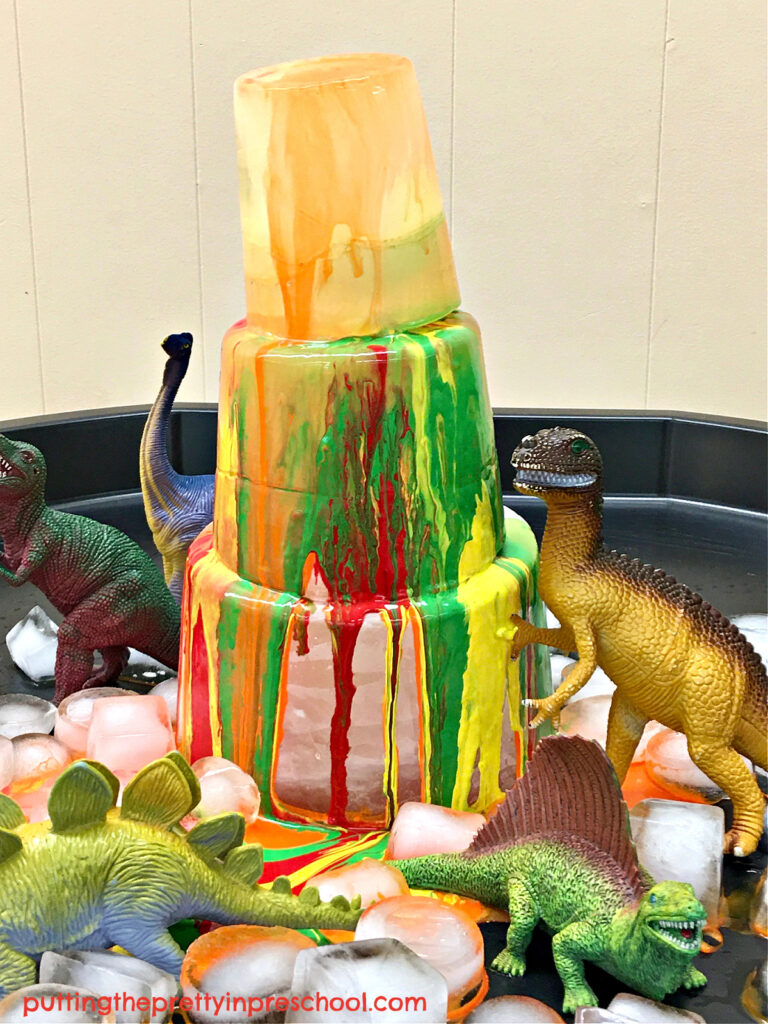
When the ice shapes are thoroughly frozen stack the large ones on top of each other to create a three or four-tier cake.

_______

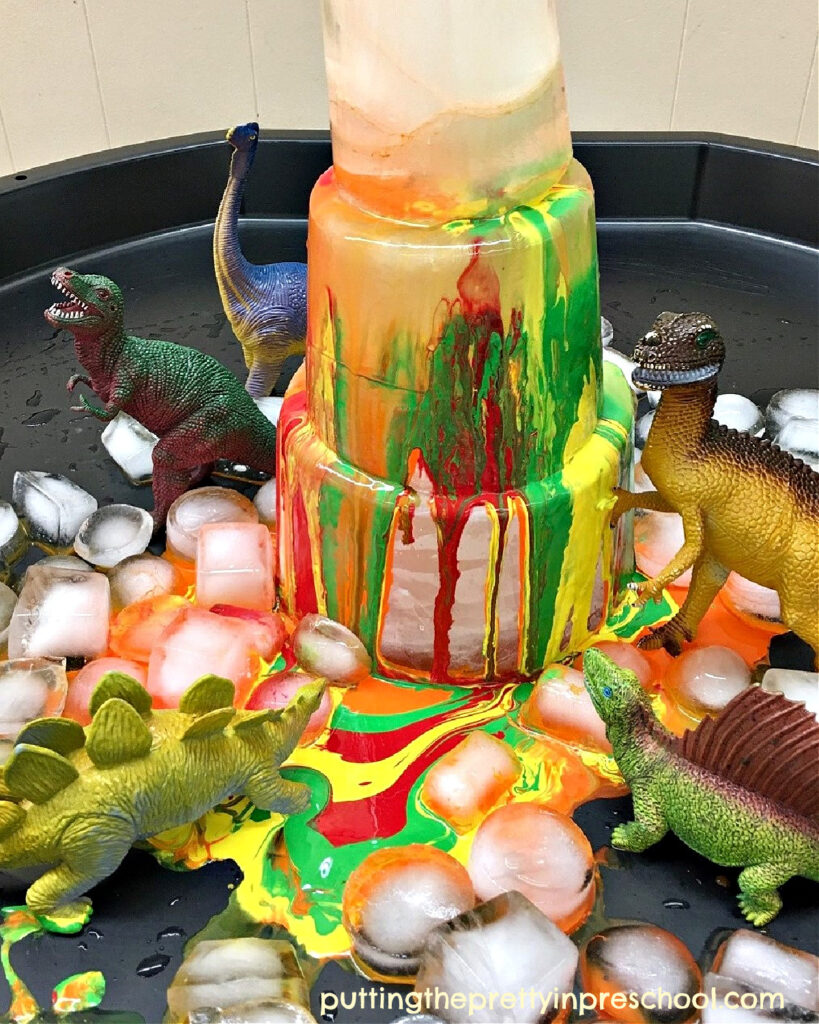
Afterward, spread ice cubes in various sizes around the cake in the bin. Then set dinosaur figurines among the cubes.

_______

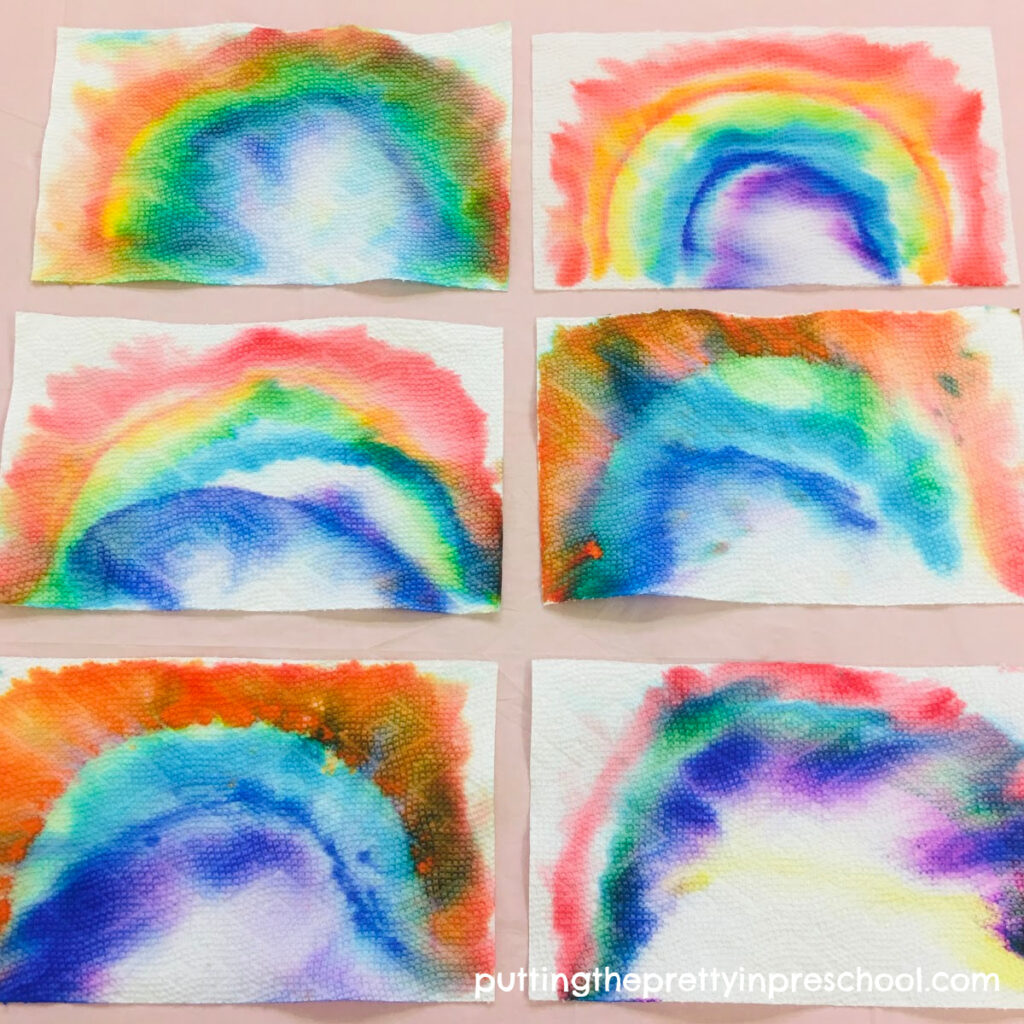
Related: Paint Pour Ice Cake Winter Sensory Play

_______

The Fall Drip Ice Cake Sensory Invitation

To offer the fall drip ice cake sensory invitation gather participants around the bin.

Invite them to take turns pouring paint over the ice cake.

_______

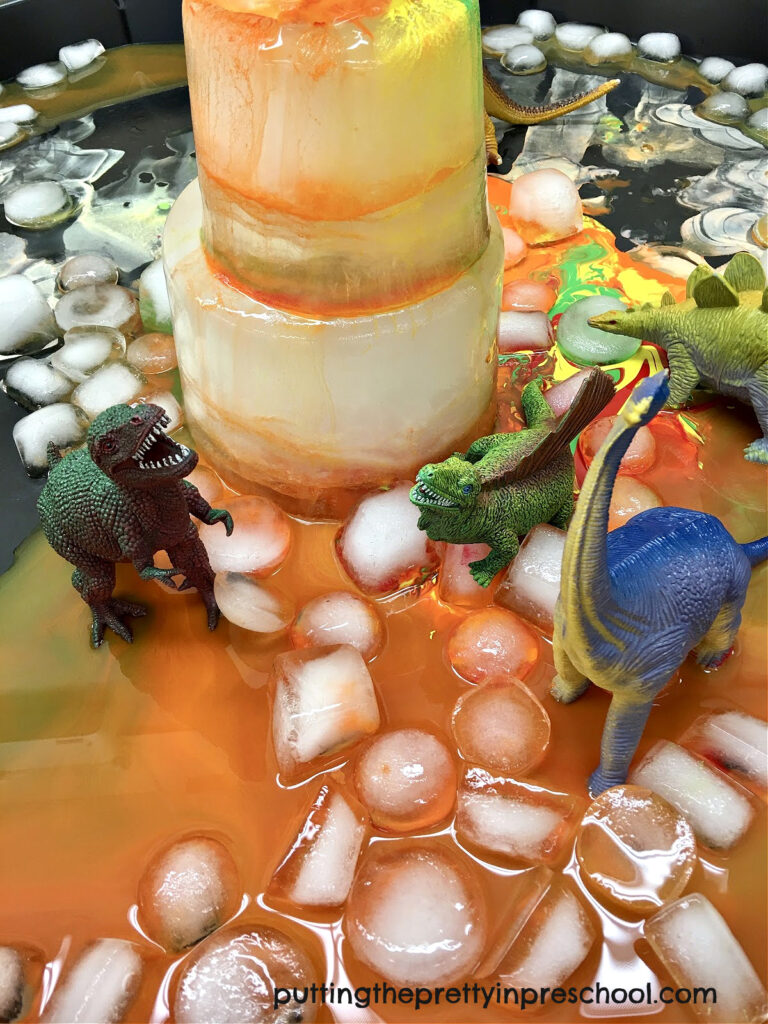
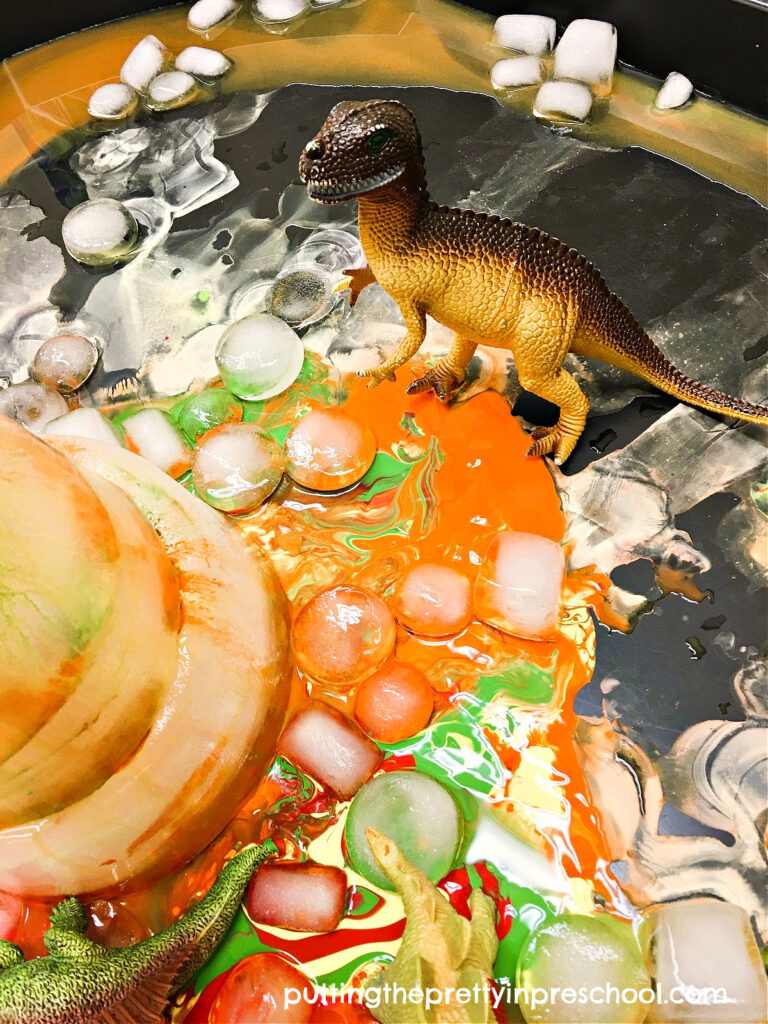
When the bottles are empty, allow everyone to explore the paint-covered ice cake, frozen cubes, and dinosaurs in the bin.

_______

This icy sensory invitation incorporating fall colors and dinosaur figurines is bound to be a favorite.

_______

_______

_______

_______

More Fall Activities

Fall Tablescape Pretend Play

Fall Leaf Salad Spinner Art

Fall Scissor Skills Activities

_______

[Read more…] about Fall Drip Ice Cake

Filed Under: autumn, dinosaurs, fall, preschool, science, sensory Tagged With: dinosaurs, ice cubes, painting, sensory bin, sensory tray

Spider Web Doily Art

October 16, 2024 by Annette Kaminsky Leave a Comment

_______

Arty spider webs are everywhere during this time of year, and doilies are an exquisite supply for creating web décor. These spider web doily art projects are color-infused with gorgeous seasonal hues using a crayon-resist painting technique.

_______

Spider Web Doily Art Supplies

_______

Gather the following supplies for this anything-but-creepy spider-themed art project:

  • paper doilies in a variety of sizes and shapes
  • watercolor tempera paint cakes
  • white crayon
  • pencil
  • ruler
  • paint brush
  • paint pot
  • scissors
  • spider figurine
  • glue gun
  • waterproof table cover

_______

Follow me on Pinterest for more early learning ideas.

_______

Creating Spider Web Doily Art

To create beautiful watercolor doily art first cover an art table with a waterproof tablecloth.

Next, select a doily to use as a canvas for painting.

Then, use a pencil and ruler to draw faint straight lines that radiate from a focal point in the center of the doily. Draw over the white lines with a white crayon or any color. Add silky curved connecting lines with the crayon to complete the web.

Note: When offering this activity to early learners, you may wish to draw the webs on the doilies and have them paint over them.

_______

Afterward, set watercolor tempera cakes in the colors of your choice in a paint tray. I love the pink, purple, orange, and gold hues spotted on web décor on recent shopping trips and use these colors.

Fill a paint pot with water, wet the tempera cakes, and paint over the drawn spider web. Spread the color over the whole doily or up to the lacy edging.

Note: Liquid watercolors are a luminous alternative for this painting activity.

When the arty web is dry use a glue gun to add a spider figurine in a matching or contrasting color. Adhere the paper spider web to a contrasting cardstock paper hue if desired.

_______

If using a large round doily, it’s a nice look to cut out a section of the web to become your finished design.

_______

Variations of the Spider Web Doily Art

Round or rectangular craft doilies are easy to find, but heart doilies also work wonderfully as a canvas for a spider web art activity. In addition to being super lacy, they remind us to give spiders some much-needed love.

_______

Crochet doilies make perfect ready-made spider webs. Left unpainted, white or cream-colored ones look like natural webs. It is superbly satisfying to add color to them, as watercolor paints soak in very well. For a stunning look display a color-infused web and spider figurine on a mirror.

_______

More Spectacular Doily Art

In addition to providing the canvas for spider web doily art, use the exquisite paper shapes in a novel way for more painting fun. In the projects below, doilies are placed on paper, and the lacy cutouts are carefully filled with watercolor tempera paints. A beautiful design appears after the doily is lifted off.

_______

In this second project, the area above the doily is painted too. When the doily is removed, the design is so realistic it looks exactly like the paper doily.

_______

_______

More Spider Activities

Spider Theme Activities

Green Huntsman Spider Activities

_______

[Read more…] about Spider Web Doily Art

Filed Under: art, autumn, crafts, preschool, science Tagged With: painting, spiders, watercolors

String Painting Snake Art

August 5, 2024 by Annette Kaminsky Leave a Comment

_______

This string painting snake art is perfect for a reptile theme. In addition to enhancing the topic of snakes, it offers children a novel way to paint.

_______

Follow me on Pinterest for more early learning ideas.

_______

Supplies To Collect

_______

Gather the following supplies for this simple string painting activity:

  • sturdy paper
  • tempera paint
  • small disposable plates
  • yarn
  • scissors
  • clothespins
  • spoons
  • waterproof table cover

_______

Preparing The String Painting Snake Art Activity

To set up this novel string art activity, cover a table with a waterproof table cover.

Then spoon tempera paint into small disposable plates.

Next, cut the yarn into lengths about 6 to 8 inches long.

Afterward, attach a clothespin to the end of each strip of yarn.

Set the paint dishes, prepared string, and sturdy pieces of paper onto the art table and the activity is ready to go.

_______

The String Painting Snake Art Project

_______

To create snake-like painted shapes, lay a string on a paint-filled plate, draping the clothespin attached end over the edge.

Use a spoon to press down on the string to ensure it is covered in paint.

Next, carefully lift off the string and lay it on the paper in a snake-like, serpentine pattern.

Then gently put the string back in the same color of paint.

Repeat the process with more paint colors to create snakes in additional hues.

_______

Variations of the String Art Project

After participants have completed a snake art project, invite them to explore more string painting techniques:

  • Dragging the string across the paper covers it more quickly, and allows for paint mixing.
  • Using fingers to manipulate the string instead of clothespins adds a tactile experience.
  • Experimenting with thick and thin string, and longer and shorter pieces creates different effects.
  • Spooning paint on the paper first, and dragging the string through it is another way to paint.

_______

_______

_______

Related:

Northern Lights Squish Painting

Balloon Painting Flower Art

_______

Apple Print Activities

Corn Syrup Paint Sunflowers

Eye Dropper Pumpkin Art

_______

Painting with Corn

Cauliflower Paint Prints

_______

_______

More Reptile-themed Activities

Reptile Theme Activities

Black Playdough Snakes

Reptile Egg Science

Paper Chain Snake Craft

Reptile Active World Tray

Reptile Pet Store Center

_______

[Read more…] about String Painting Snake Art

Filed Under: art, reptiles, science, themes Tagged With: painting, printmaking, snakes

Balloon Painting Flower Art

July 28, 2024 by Annette Kaminsky Leave a Comment

_______

This balloon painting flower art is quick and easy to do and can make a room look cozier in no time. It is an unexpected, novel way to create art. Since children love activities with balloons, they’ll surely enjoy participating in this art invitation.

_______

Supplies To Collect

Gather the following supplies for this large-scale art project:

  • round balloons
  • tempera paints in a variety of colors
  • paper plates
  • 18-inch x 24-inch sturdy paper
  • paintbrushes and paint pots
  • sponge dish wands
  • thin metallic garland
  • white glue and glue paddle
  • scissors
  • waterproof table cover

_______

_______

Balloon Painting Flower Art Set Up

To set up this art project, start by covering an art table with a waterproof table cover.

Next, blow up round balloons to about 1/3 their usual size. Small balloons work fine for this project.

Then pour tempera paint in a variety of colors onto paper plates.

Afterward, drop paint into small plates or paint pot lids and add a sponge dish wand into each one.

Set out the paint trays, balloons, dish wands, and large sheets of sturdy paper on the art table. Your painting invitation is now ready to go.

_______

The Balloon Painting Flower Art Project

_______

To create eye-catching balloon art flowers, press a balloon into one of the paint colors, lift it off, and carefully press it down onto a piece of sturdy paper.

Tip: The firmer a paint-dipped balloon is pressed on paper, the bigger the print. Pressing the balloon down gently creates a smaller print.

_______

Continue to make balloon prints. It’s fun to create flowers in hues of blue and green in addition to more commonly seen colors.

_______

Afterward, dip a sponge dish wand into a contrasting paint color and stamp a circle in the center of each flower-shaped print.

_______

When the roundish prints are dry, cut them out.

Then dip a paintbrush into a pot of green tempera and paint leaves and stems on a large sheet of cardstock paper.

For a shimmery look, add a line of white glue to each leaf and press on a strip of thin metallic garland.

_______

Next, glue the round, bold, balloon-painted flowers on top of the stems using white glue or a glue gun.

To embellish the flower centers, add a circle of glue to each one and affix a strip of thin metallic garland to each of them.

_______

You will have large-scale, stunning flower art ready for display.

_______

_______

Related:

Tulip Art Painting Project

Dish Wand Print Flower Art

Flower Theme Activities

Mother’s Day Crafts and Gifts

_______

[Read more…] about Balloon Painting Flower Art

Filed Under: art, display, flowers, preschool, summer Tagged With: balloons, flowers, painting, printmaking

Watercolor Rainbows With Markers

April 6, 2024 by Annette Kaminsky Leave a Comment

_______

Making watercolor rainbows with markers is one of the easiest and most fun art activities for early learners to do.  Preparation time is minimal, and the art project is stunning every time.

_______

Supplies To Collect

Only the following few supplies are needed for this gorgeous watercolor art project:

  • eye droppers or pipettes
  • paper towel roll
  • set of 10 water-based markers
  • paint pot with water
  • ice cream pail lid
  • reusable tablecover

_______

_______

Follow me on Pinterest for more early learning ideas.

_______

The Watercolor Rainbows With Markers Art Project

To offer this fun watercolor art project, set out a sample rainbow drawing, a paper towel roll sheet, and a set of water-based markers.

Discuss the colors of the rainbow, and the acronym ROYGBIV. Explain that this acronym stands for the order of colors in a rainbow: red, orange, yellow, green, blue, indigo, and violet.

Invite participants to draw a rainbow, starting with a red curved line near the edges of their paper towel sheet.

Tip: To make it easier for young children, draw a large red half circle on each paper towel sheet using an ice cream pail lid as a guide. Then ask participants to draw in the rest of the curved lines of the rainbow.

_______

After each child has finished their rainbow drawing, direct them to a table with eye droppers or pipettes and paint pots filled with water. Ask participants to drop water on their rainbow with the droppers. They will absolutely love this part of the art activity.

Let the beautiful rainbow art dry overnight and display it.

_______

Note: Children may draw their rainbows in a unique color pattern. That is just fine…the rainbows will look beautiful in any color order.

_______

More Eye Dropper Art

Eye Dropper Leaf Art

Gorgeous Eye Dropper Art

Eye Dropper Pumpkin Art

Eye Dropper Heart Art

_______

More Watercolor Art

Watercolor Apples With Markers

Pump Bottle Watercolor Art

Unicorn Watercolor Art

Watercolor Planets With Markers

Crayon Resist Watercolor Shamrock

_______

[Read more…] about Watercolor Rainbows With Markers

Filed Under: art, preschool, science, sensory, weather Tagged With: painting, rainbows, watercolors, weather

Squish Painting Shamrock Art

March 15, 2024 by Annette Kaminsky Leave a Comment

_______

This March I needed to get new art up quickly, and decided to have my little learners participate in a squish painting shamrock art project. Squish painting is a quick and satisfying art activity that little children love to do. Using folded hearts for the art project, the shamrock art is effortless to create.

_______

Follow me on Pinterest for more early learning ideas.

_______

Supplies To Collect

Gather the following supplies for this seasonal squish art activity:

  • magenta, green, and white tempera paint
  • magenta and green cardstock paper
  • manila tag paper
  • ruler, pencil, and scissors
  • paint pots and spoons

_______

_______

The Squish Painting Art Project

To prepare this activity, start by tracing and cutting out hearts from sturdy paper. Manila tag paper works well for the project. It comes in 9 x 12-inch, 12 x 18-inch, or even 18 x 24-inch paper sizes. The larger-sized paper allows for cutting bigger hearts.

When finished with the cutting part, fold the hearts in half. 

Next, mix a little yellow into the green tempera paint to create a lighter brighter color.

Then set out green and white paint pots, and add a spoon to each one.

_______

Invite participants to spoon each paint color onto their hearts, then fold one side over the other.

Have children rub their hands over their heart halves to smooth out the paint.

Finally, ask them to open their hearts to see the new design created.

Shamrock Art Display

_______

To make a shamrock using the squish-painted hearts, group the hearts into three leaflets. Glue them to a large cardstock background or tape them to a wall. Then cut a long, thin petiole from green cardstock paper. Affix the petiole to the shamrock design.

_______

Variation of the Squish Painting Shamrock Art Project

_______

Introduce a new tempera paint color for an interesting way to vary this squish painting shamrock art project. Since shamrock plants also come in a purple variety called purple oxalis, using magenta paint instead of green is a natural fit for changing up the activity. 

_______

Related:

Shamrock Leaf Print Art

St. Patrick’s Day Sheep Craft

Shamrock Paper Plate Lion

Leprechaun Gnome Craft

_______

[Read more…] about Squish Painting Shamrock Art

Filed Under: art, display, gardening, preschool, St. Patrick's Day Tagged With: painting, shamrocks, St. Patrick's Day

Polar Scene Snow Painting

February 6, 2024 by Annette Kaminsky Leave a Comment

_______

This polar scene snow painting activity was a last minute set up after a group discussion about igloos and the possibility of making one. We just happened to have a lot of snow in our city that week, so it was a good fit. Save this idea for the next time you have snow…the art and sensory activity is sure to be a hit.

_______

Follow me on Pinterest for more early learning ideas.

Follow me on Pinterest for more early learning ideas.

Supplies to Collect

Just the following few supplies are needed for this polar scene snow painting activity:

  • sensory tray
  • bus tub
  • large bowl
  • polar animal figurines
  • ice cubes or acrylic ice cubes
  • snow
  • paint pots and paintbrushes
  • neon food coloring or liquid food colors
  • stage light (optional)

_______

Polar Scene Snow Painting

_______

To set up this snowy sensory set up, the first thing to do is to select a sensory tray. For this activity, I picked a large active world tray. It is gernously-sized, and has room for six to eight children to paint at a time. For three to four children, a smaller tray or bin would work just fine.

Next, fill a bus tub or similar-sized utility box with snow and pour it into the bin.

Afterward, pack a salad bowl-sized metal bowl full of snow and let it sit for a few minutes.

Then tip the bowl over in the center of the snow-filled tray to create an igloo. Pack more snow around the dome if necessary to ensure a rounded shape.

Dig a little hole in one part of the igloo to become an entrance.

Then add ice cubes or acrylic ice cubes around the snow house.

_______

Next, generously squirt neon food colors such as green, pink, and purple into paint pots half-filled with water. Add a paintbrush to each pot.

Note: The food color choices are inspired by hues displayed in northern lights, which frequently flood the arctic skies and illuminate the land.

Finally, invite your little charges to paint the igloo and snow.

_______

To extend this transient art invitation and add ambiance, set up a stage light and position it to shine on the igloo and animal figurines while the children are participating in the polar scene snow painting activity.

_______

Children may wish to paint the animal figurines during the art and sensory experience. The paint washes off easily with a little soap and water.

_______

More Northern Lights-inspired Activities

Igloo “Glamping” Pretend Play

Polar Bear Small World

Northern Lights Squish Painting

_______

[Read more…] about Polar Scene Snow Painting

Filed Under: art, preschool, science, sensory, winter Tagged With: northern lights, painting, polar animals, polar bears, snow

Snowflake Reindeer Craft

December 21, 2023 by Annette Kaminsky Leave a Comment

_______

This snowflake reindeer craft is a fun Christmas one to include in your rotation of festive activities. It gives little learners a chance to use scissors and paint and help create an animal craft. Download the free printable to make this craft super easy to put together.

The original plan for this activity was to create a neutral snowflake reindeer paper craft. The neutral paper proved to be a little hard to cut into snowflakes, so my little charges moved on to cutting shapes from coffee filters instead. This led to painting them in pink, purple, and turquoise hues, not anywhere near actual reindeer colors. So we ended up making brown red-nosed reindeer, and others in turquoise, pink, and purple hues.

_______

Snowflake Reindeer Craft Supplies

_______

Gather the following supplies to make this cute snowflake reindeer craft:

  • round coffee filters
  • brown, pink, purple, and turquoise liquid watercolors or tempera paint blocks
  • paint pots
  • paintbrushes
  • brown, turquoise, purple, white, cream, and grey cardstock paper
  • red, pink, and teal pompoms
  • wiggly eyes
  • glue stick
  • white glue
  • scissors

_______

The Snowflake Reindeer Craft

To make the reindeer craft, start by having participants fold and cut coffee filters into snowflake designs. A lovely blog post by supermakeit.com shows how to create them.

Next, invite participants to paint a snowflake light brown, using liquid watercolor paint or tempera blocks made wet with water.

_______

While the painted coffee filter snowflakes are drying, cut reindeer heads and legs from brown cardstock, and antlers from cream-colored cardstock. Older children can do this themselves. Feel free to download this pattern to make craft preparation easier.

_______

Reindeer Craft PatternDownload

This printable is for individual or one classroom use only.

_______

Afterward, have participants use a glue stick to adhere their decorated snowflake to the center of 8 ½ x 11-inch or 12-inch x 12-inch cardstock paper.

Then guide them in using their glue stick to tack on the reindeer’s head, antlers, and legs.

Finally, have them use white glue to adhere two wiggly eyes and a red pompom nose to their reindeer.

_______

In addition to having children paint snowflakes in a neutral hue, set out a few other paint colors. Purple, pink, and turquoise are good color choices for painting them. Offer complementary-colored cardstock for the reindeer heads, antlers, noses, and legs.

_______

More Christmas Crafts

Paper Airplane Christmas Craft

Spin Painting Poinsettia Craft

Paper Bag Christmas Ornaments

Monochromatic Christmas Tree Art

CD Case Christmas Craft

Christmas Sheep Craft

Washi Tape Christmas Pots

Handprint Angel Craft

Turtle Christmas Craft

Christmas Tree Art

Christmas Dove Art

Handprint Angel Christmas Keepsake

Woodland Fox Treat Holder

_______

[Read more…] about Snowflake Reindeer Craft

Filed Under: art, Christmas, crafts, preschool, winter Tagged With: coffee filters, painting, paper crafts, reindeer, scissor skills, snowflakes

Spin Painting Poinsettia Craft

December 17, 2023 by Annette Kaminsky Leave a Comment

_______

Gorgeous new poinsettia varieties have been developed in recent years, and this spin painting poinsettia craft is based on a spotted poinsettia newcomer. Native to Mexico, poinsettias are prevalent during the Christmas season, and this craft is a beautiful way to include them. The craft gives children an opportunity to participate in two well-loved process art activities: spin painting and spatter painting.

_______

Follow me on Pinterest for more early learning ideas.

_______

Supplies To Collect

Just a few supplies are needed for this simple speckled poinsettia craft:

  • pale green or creamy white cardstock paper
  • decorative cardstock paper
  • red and pink tempera paint
  • paint pots and spoons
  • old toothbrushes
  • salad spinner
  • scissors and pencil
  • glue stick or glue gun
  • adhesive gem stickers
  • art tablecloth

_______

_______

Starting The Spin Painting Poinsettia Craft

To make this beautiful spin painting poinsettia craft, start by cutting a circle from pale green or creamy white cardstock. It should fit just inside the bottom of your salad spinner basket.

Next, place the circle at the bottom of the salad spinner. On a table covered with an art tablecloth, use spoons to drop in red and pink tempera paint.

Tip: If you do not have pink tempera paint, mix a little white tempera into a pot of red and you’ll have a nice pink color to use.

Give the salad spinner a good spin and take a peek. You can choose to add more spoonfuls of paint if you wish and give it another spin.

_______

Afterward, take the paint-filled circle out of the spinner and spatter pink and red paint on it using toothbrushes. Then let the process art project thoroughly dry.

_______

Carefully cut poinsettia leaves from the decorated circle. Feel free to download this poinsettia pattern to make your crafting easier.

_______

Poinsettia Craft Pattern PrintableDownload

This printable is for individual or one classroom use only.

_______

Note: A little paint may chip off during the cutting. But you’ll have plenty left to give your poinsettia leaves a spotted look.

_______

Assembling The Poinsettia

To assemble the poinsettia, choose a decorative piece of cardstock paper to use as a background.

Then choose four painted and cut leaves and glue them on. Affix them in the shape of an X, leaving a little space in the center.

Afterward, glue the other four leaves in between.

Finally, add three to five medium-sized adhesive gems to the center.

_______

Variations of the Spin Painting Poinsettia Craft

In addition to making a great wall art project, this poinsettia craft would look superb on a holiday greeting card.

_______

_______

Novelty poinsettias come in a wide range of colors, and the carstock leaves could be brush-painted in hues such as vibrant red or orange, salmon pink, or peach. The color possibilities for this poinsettia holiday craft project are endless.

_______

More Christmas Crafts

Paper Bag Christmas Ornaments

Monochromatic Christmas Tree Art

CD Case Christmas Craft

Christmas Sheep Craft

Washi Tape Christmas Pots

Handprint Angel Craft

Turtle Christmas Craft

Christmas Tree Art

Christmas Dove Art

Handprint Angel Christmas Keepsake

Woodland Fox Treat Holder

_______

[Read more…] about Spin Painting Poinsettia Craft

Filed Under: art, Christmas, crafts, flowers, preschool Tagged With: painting, poinsettias, spin art

Eye Dropper Pumpkin Art

October 26, 2023 by Annette Kaminsky Leave a Comment

_______

This eye dropper pumpkin art project is super easy to set up and loads of fun to do. Participants will want to make a few watercolor-painted pumpkins, so you will end up with a bunch of pumpkin art to display at home or in the classroom.

_______

Follow me on Pinterest for more early learning activities.

_______

Supplies To Collect

Gather the following supplies for this no-fuss pumpkin art project:

  • liquid watercolors
  • eye droppers or pipettes
  • paint pots
  • non-permanent black marker
  • permanent black marker
  • paper towel roll
  • pumpkin template
  • scissors and pencil
  • newspaper or waterproof tablecloth

_______

_______

Eye Dropper Pumpkin Art Preparation

Preparation for this eye dropper pumpkin art project is super quick. Start by tracing pumpkins onto one or two sheets of paper towel. Choosing a thick paper towel brand is recommended.

Next, mix liquid food colors and water into paint pots, and add an eye dropper or pipette to each one. In this project, my colors of choice are orange, yellow, and magenta, as they go nicely together.

Afterward, cover an art table with newspaper or a waterproof tablecloth.

Then set up art stations with liquid watercolor pots, eye droppers or pipettes, and paper towel pumpkins.

_______

The Eye Dropper Pumpkin Art

To create the gorgeous eye dropper art, invite your little learners to draw a mouth, nose, and eyes on a paper towel pumpkin using a black permanent marker.

Then direct your little charges to use the eye droppers or pipettes to squirt all three colors on their pumpkins. In no time the large fruits will be covered in brilliant hues.

_______

Let the arty pumpkins dry in the spot they were created or move them to a new place to do so. The painted pumpkins will likely be very wet, but by the end of the day, they will be totally dry.

_______

Eye Dropper Scary Pumpkin

If children use a non-permanent black marker to draw a face on their pumpkin before wetting it with liquid watercolors, the marker color will bleed during the art process. The pumpkins will have an ominous, scary look.

_______

Rainbow Pumpkin Art

You can choose to skip having your little artists draw a face on the paper towel pumpkin and get them right to work squirting liquid food colors on it. Adding a few more watercolor hues makes creating a rainbow pumpkin possible.

_______

Paper Towel Rainbow Art

If you run out of paper towel pumpkins for your eager art session participants, allow them to spread watercolors directly on rectangular or square sections of a disposable towel roll. They’ll be happy to use these as a canvas to continue exploring this watercolor painting technique.

_______

More Pumpkin Activities

Pumpkin Painting Process Art

Glow In The Dark Pumpkin Art

Pumpkin Tablescape Pretend Play

Edible Playdough Pumpkins

Pumpkin Color Activities

Pumpkin Playdough Activities

_______

[Read more…] about Eye Dropper Pumpkin Art

Filed Under: art, autumn, fall, gardening, preschool Tagged With: painting, process art, pumpkins, watercolors

  • Page 1
  • Page 2
  • Page 3
  • Interim pages omitted …
  • Page 6
  • Go to Next Page »

Primary Sidebar

Hi, I'm Annette Kaminsky. I am a preschool teacher who loves to share easy and fun early learning activities. Thanks for visiting my blog. Feel free to stay awhile!

Subscribe Via Email

Recent Posts

  • Salt and Ice Science Experiment May 20, 2025
  • Airplane Rice Sensory Bin May 16, 2025
  • Salt Painting Planet Art May 3, 2025
  • Spring Bunny Sensory Bin April 19, 2025
  • Tin Foil Egg Printing April 17, 2025
  • Lentil Easter Bunny Sensory Bin April 15, 2025
  • Unicorn Store Dramatic Play Center March 25, 2025
  • Easter Store Dramatic Play Center March 23, 2025
  • Origami Heart Wreath February 28, 2025
  • Black History Month Mixed Media Art February 26, 2025

Categories

Topics

block play bunnies butterflies Chinese New Year Christmas Christmas craft color colors dramatic play Easter flowers hearts holiday jewelry leaves leprechauns light table loose parts painting paper crafts playdough pretend play printables printmaking process art pumpkins rice bin scented playdough science experiment scissor skills sensory bin sensory play sensory tray shamrocks skeletons snakes snowflakes spiders spring St. Patrick's Day sunflowers tablescapes trees Valentine's Day water play

Copyright © 2025 · Lifestyle Pro on Genesis Framework · WordPress · Log in