• Skip to secondary menu
  • Skip to main content
  • Skip to primary sidebar

Putting The Pretty In Preschool

Finding Beauty In Everyday Early Childhood Experiences

  • Home
  • About Me
  • Winter
  • Chinese New Year
  • Blog
  • Contact Me
  • Black History Month
  • SHOP
  • Valentine’s Day

science

Snowy Owl Sensory Bin

January 13, 2024 by Annette Kaminsky Leave a Comment

Tweet
Share
Share
Pin

_______

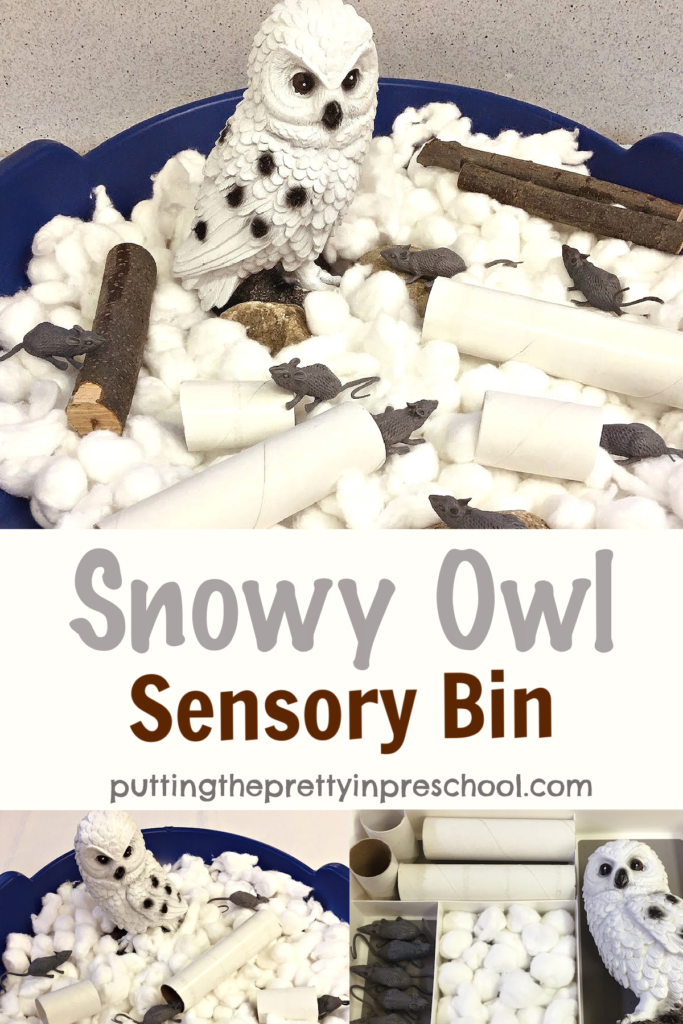
This snowy owl sensory bin is a fun way to teach about predators and prey and can be set up in minutes. There are plenty of mice in the hide-and-seek bin, but there’s nothing to be afraid of in this winter play invitation.

_______

Follow me on Pinterest for more early learning ideas.

_______

Snowy Owls and Mice

Snowy owls live in polar regions, but some make their way further south. The majestic birds have excellent vision and exceptional hearing ability and can detect mice and other rodents traveling through tunnels beneath snow in winter. Hunting by day or night, they can dive through the snow, grab a mouse with their talons, and then swallow it whole.

_______

Snowy Owl Sensory Bin Supplies
_______

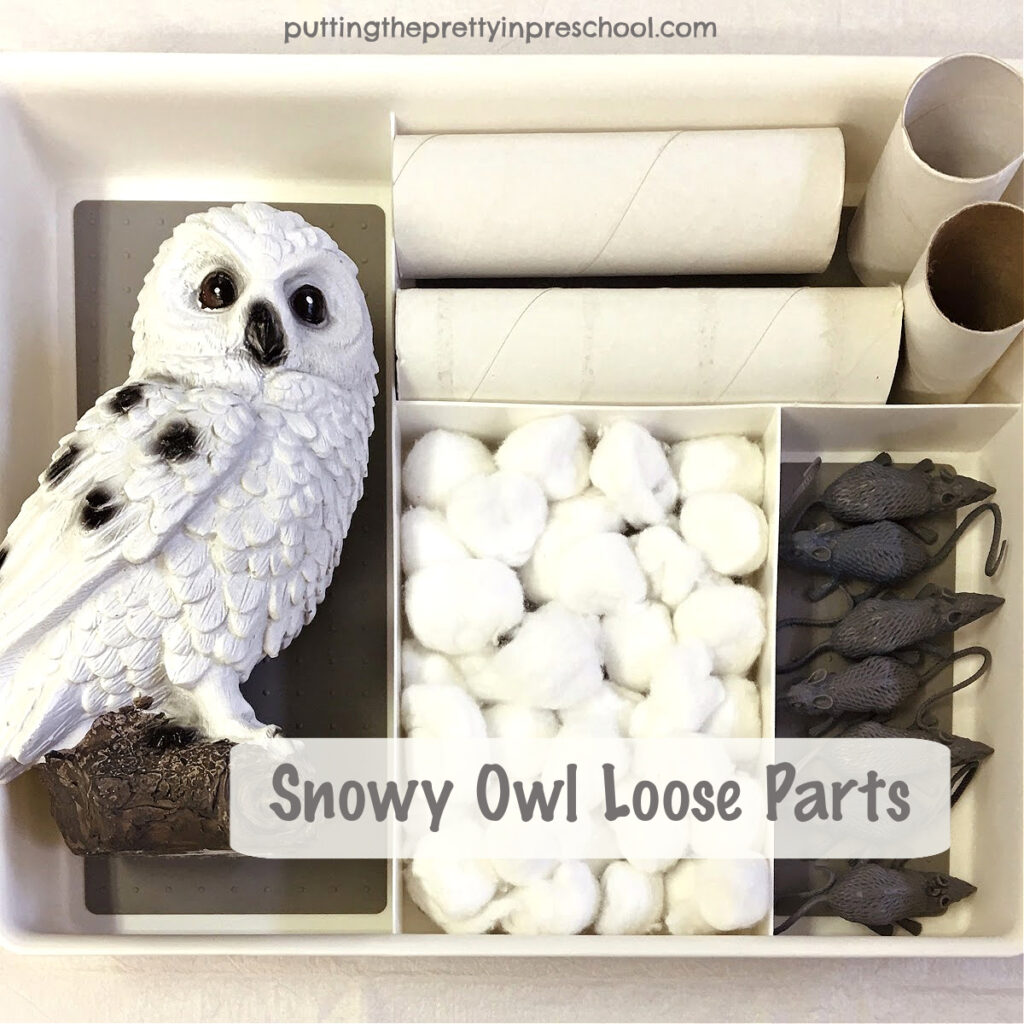
Just a few supplies are in this cheeky snowy owl sensory bin:

  • cotton balls
  • paper towel rolls
  • toy mice
  • owl figurine
  • rocks
  • small logs

_______

The Snowy Owl Sensory Bin

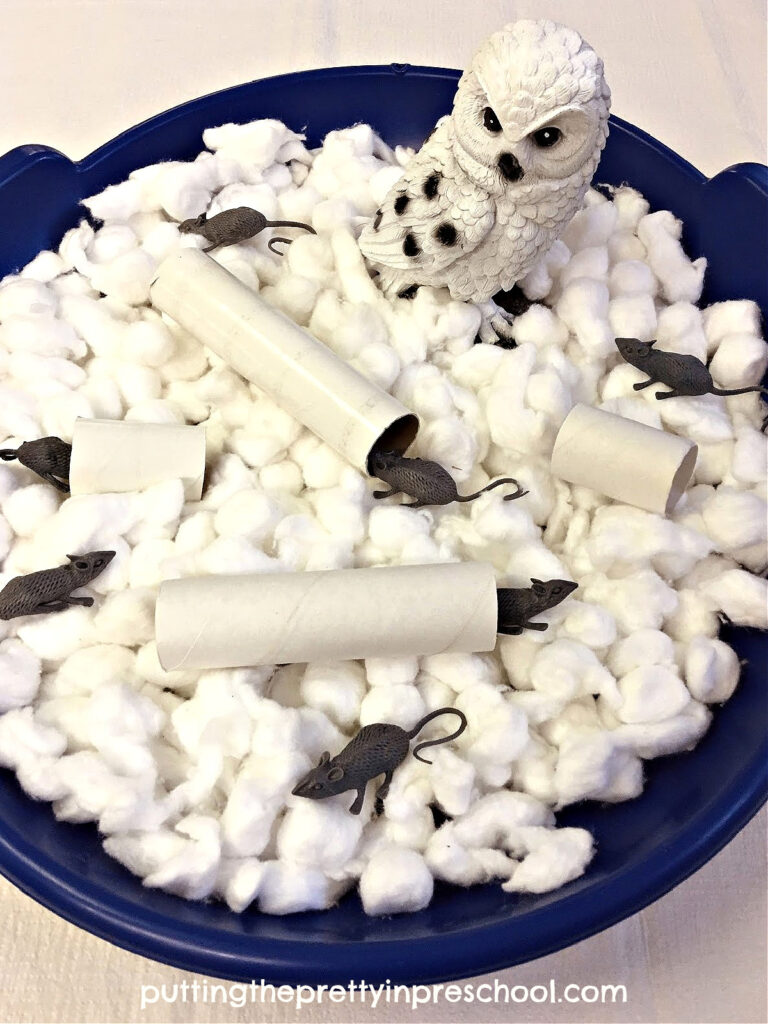
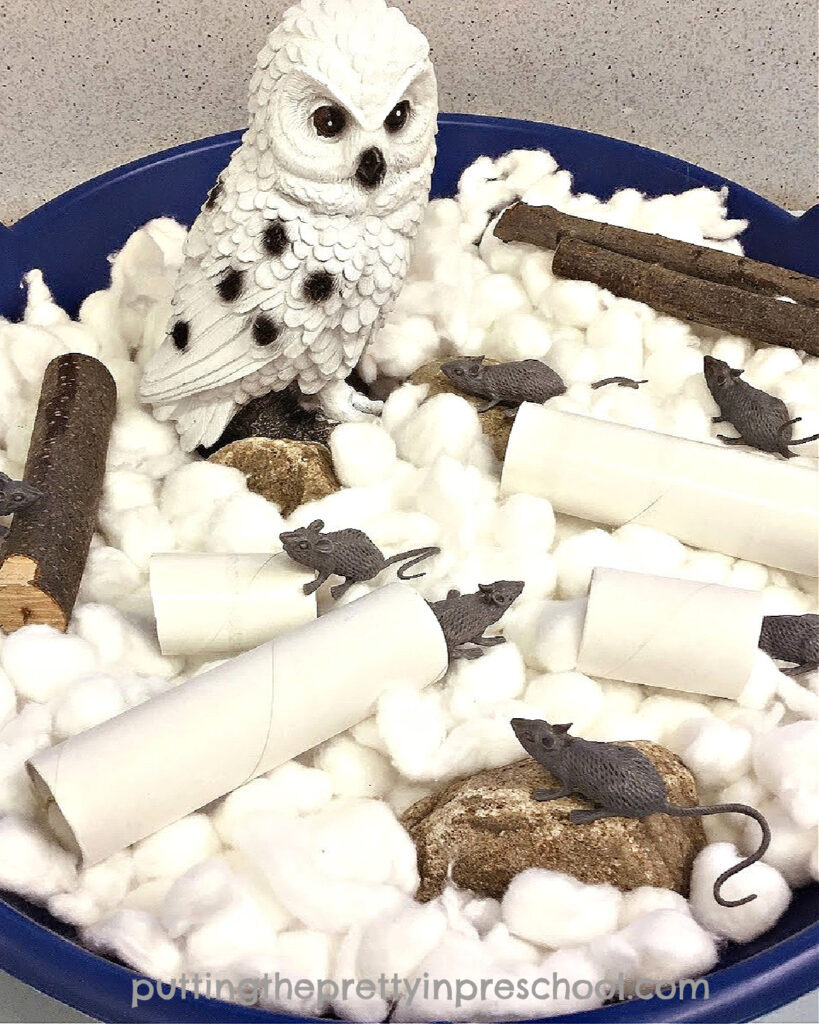
A round saucer sled works well as a bin for this winter white sensory activity. It is big enough to hold a variety of supplies, but small enough to be easy to fill.
_______

A large snowy owl figurine is the main character in the bin. A stuffed animal owl would be an awesome alternative.

Cotton balls spread out in the bin represent snow.

Paper towel rolls cut to shorter lengths or left whole serve as tunnels. The paper rolls signify how mice dig tunnels in the snow and travel through them to find food on the ground to eat during the snowy months. The scurrying mice also use them to get to their underground burrows.

Mice come in a variety of colors, such as white, brown, or grey. In this sensory setup, steel grey rubber mice are the snowy owl prey.
_______

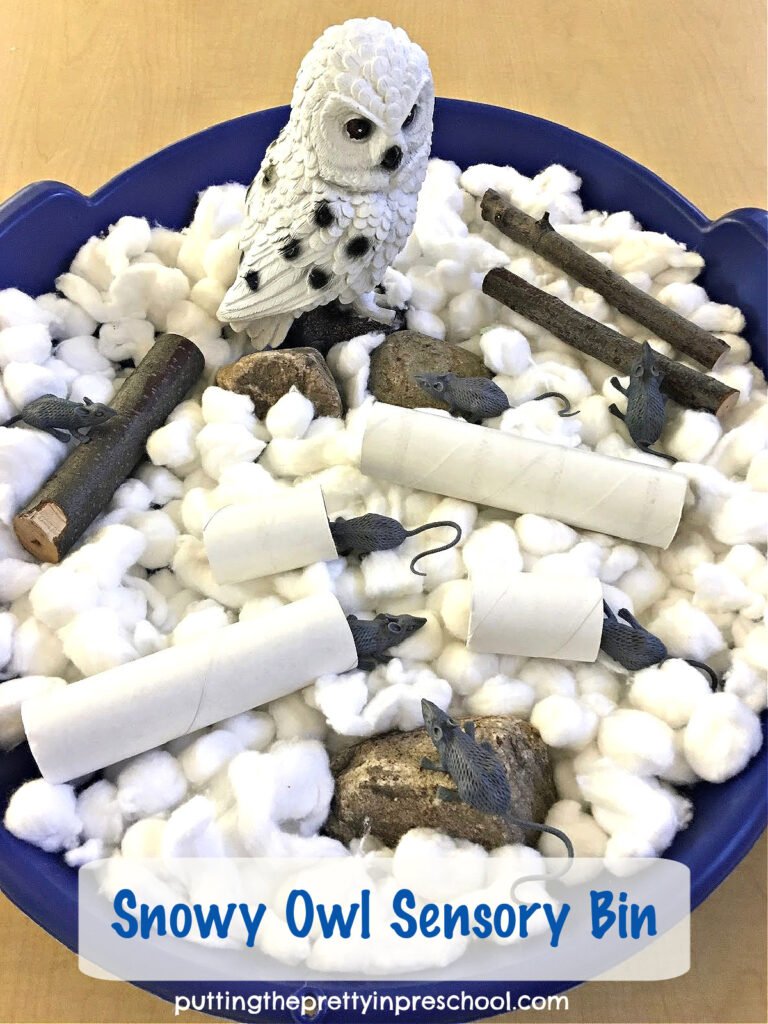
Many snowy owls live far north above the tree line and never see a tree during their lifetime. Some snowy owls venture further south, still choosing open areas to live in. Perched on a high vantage post such as a tree or fencepost, they scan the surrounding area for prey such as mice to eat. Thus a few rocks and logs are added to this second sensory bin.

_______

Snowy Owl Sensory Bin Learning Opportunities
_______

This snowy owl sensory bin play invitation is perfect for learning facts about snowy owls and mice, and learning about predators and prey. Discussing hard and soft, long and short, and heavy and light items facilitates language. Practice in counting mice and developing eye-hand coordination when taking mice in and out of their tunnels are other educational benefits.

_______

Related: If you like this post, check out my Fall Forest Sensory Bin activity. It’s filled with cute little mice too!

_______

More Polar Animal Activities

Winter-themed Treasure Blocks

Igloo Camping Pretend Play

Polar Bear Small World

Winter Sensory Trays

Winter Wreath Paper Plate Craft

Scissor Skill Snow Cutting Activities

_______

[Read more…] about Snowy Owl Sensory Bin
Tweet
Share
Share
Pin

Filed Under: preschool, pretend play, science, sensory, winter Tagged With: mice, owls, sensory bin, sensory tray

Candy Cane Wreath Experiment

December 20, 2023 by Annette Kaminsky Leave a Comment

Tweet
Share
Share
Pin

_______

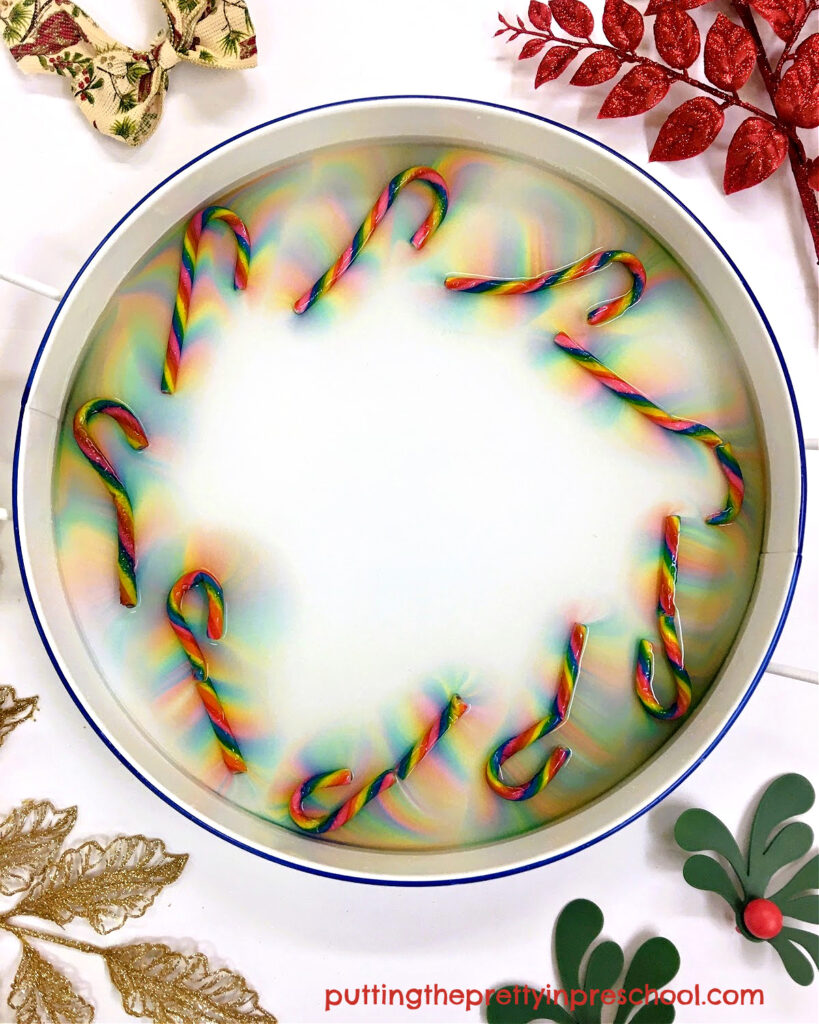
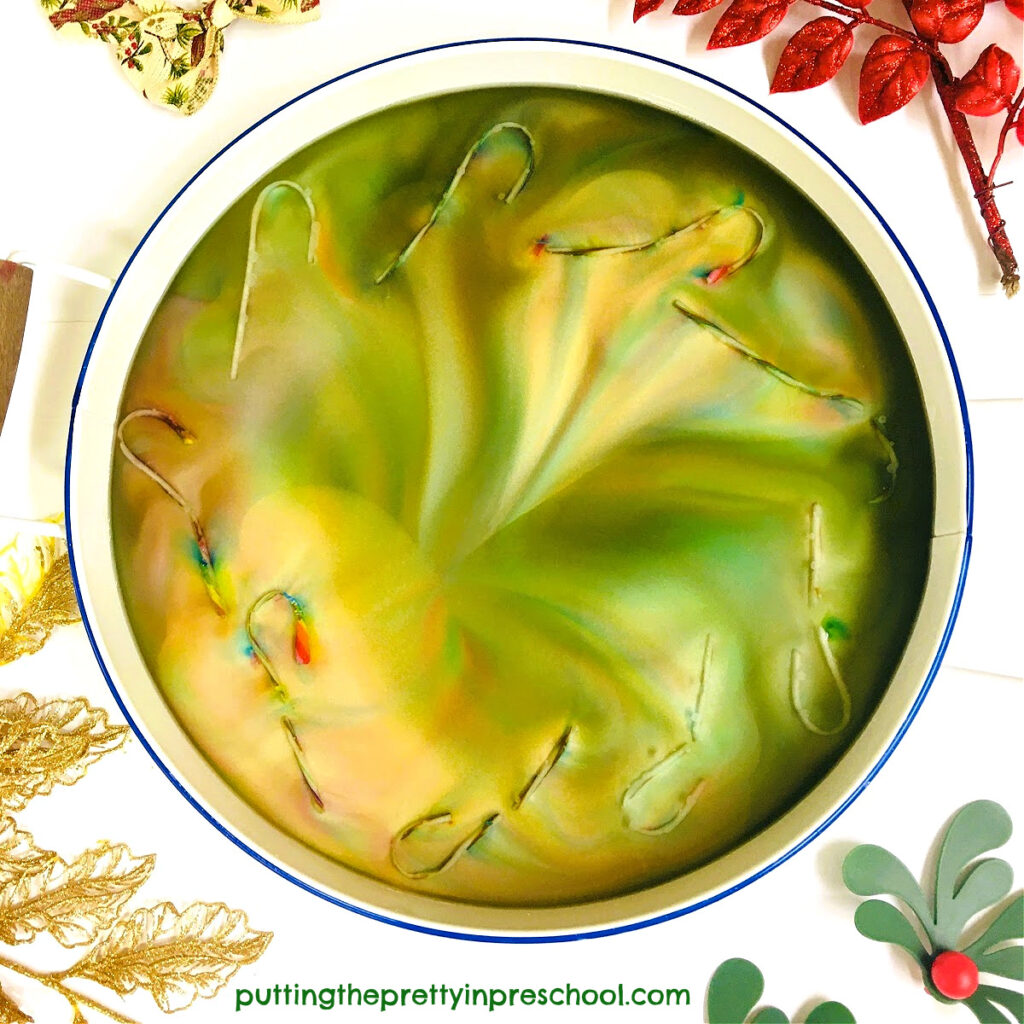
It’s tradition for me to do a candy cane science experiment every December, and each year I arrange the candy canes in a new way or change up the sizes and colors of the sweet treat. In this post, I debut my latest design, a candy cane wreath experiment.

_______

Follow me on Pinterest for more early learning ideas.

_______

Supplies to Collect

Gathering supplies for this simple science experiment couldn’t be any easier. Just select an edged waterproof tray, and purchase a package of candy canes. You may have some on hand already. Then fill a pitcher or large glass with water and you are good to go.

_______

The Candy Cane Wreath Experiment

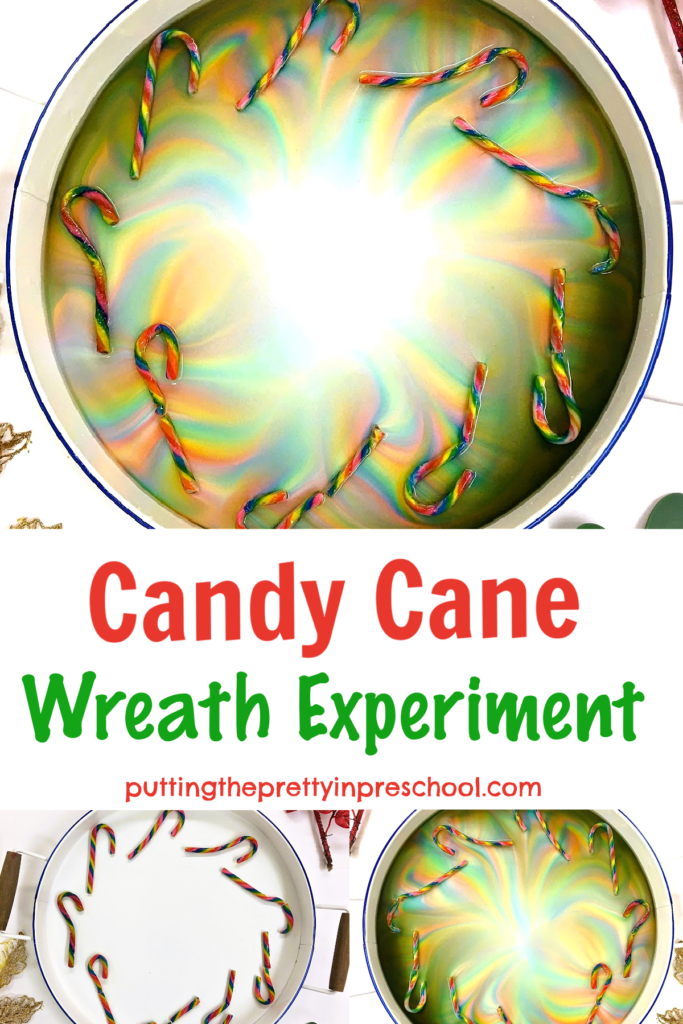
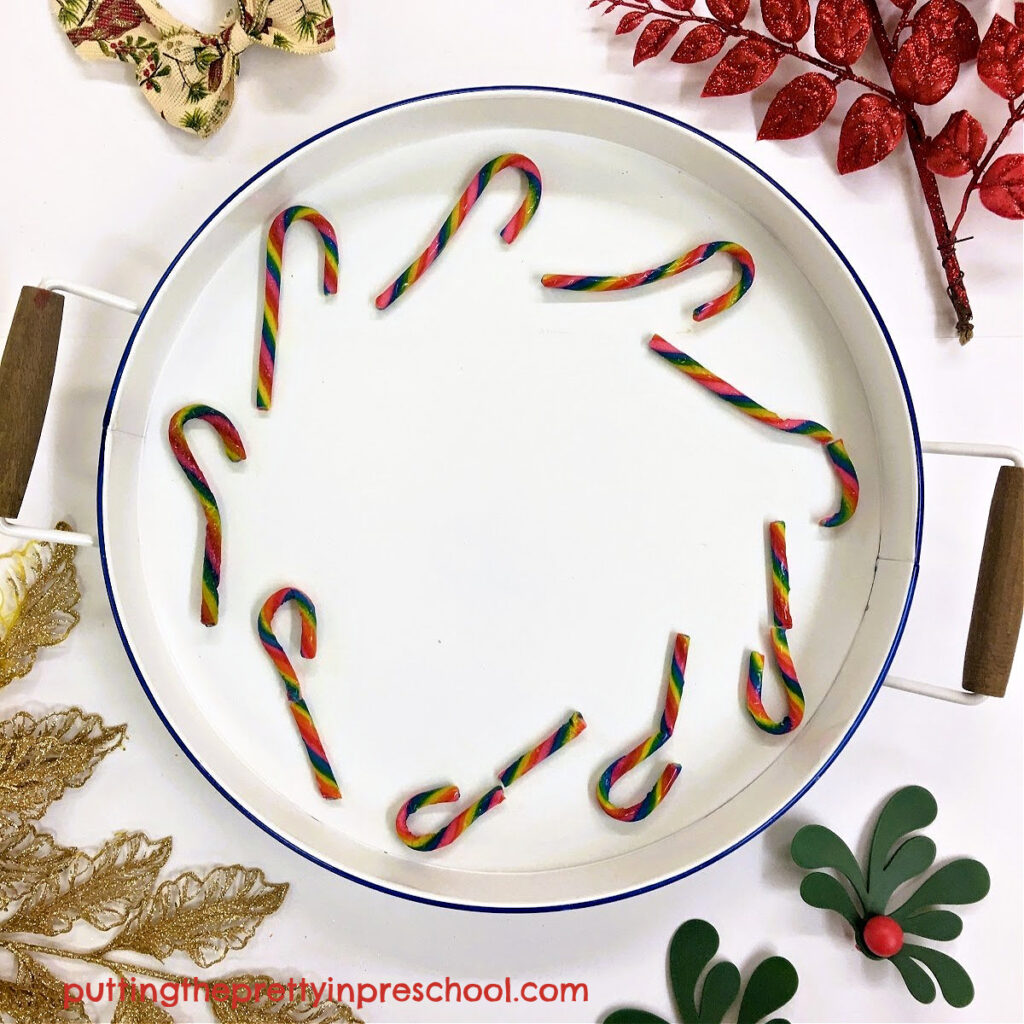
To perform this inexpensive color science experiment, arrange candy canes around the edge of a waterproof tray in a wreath-like shape.

_______

If you look closely, you’ll notice one or two broken candy canes in the tray and a few oddly shaped ones. This science experiment is the perfect use for them, as I wouldn’t have wanted to hand those out as treats.

Next, slowly pour water into the tray until the candy canes are just covered in liquid.

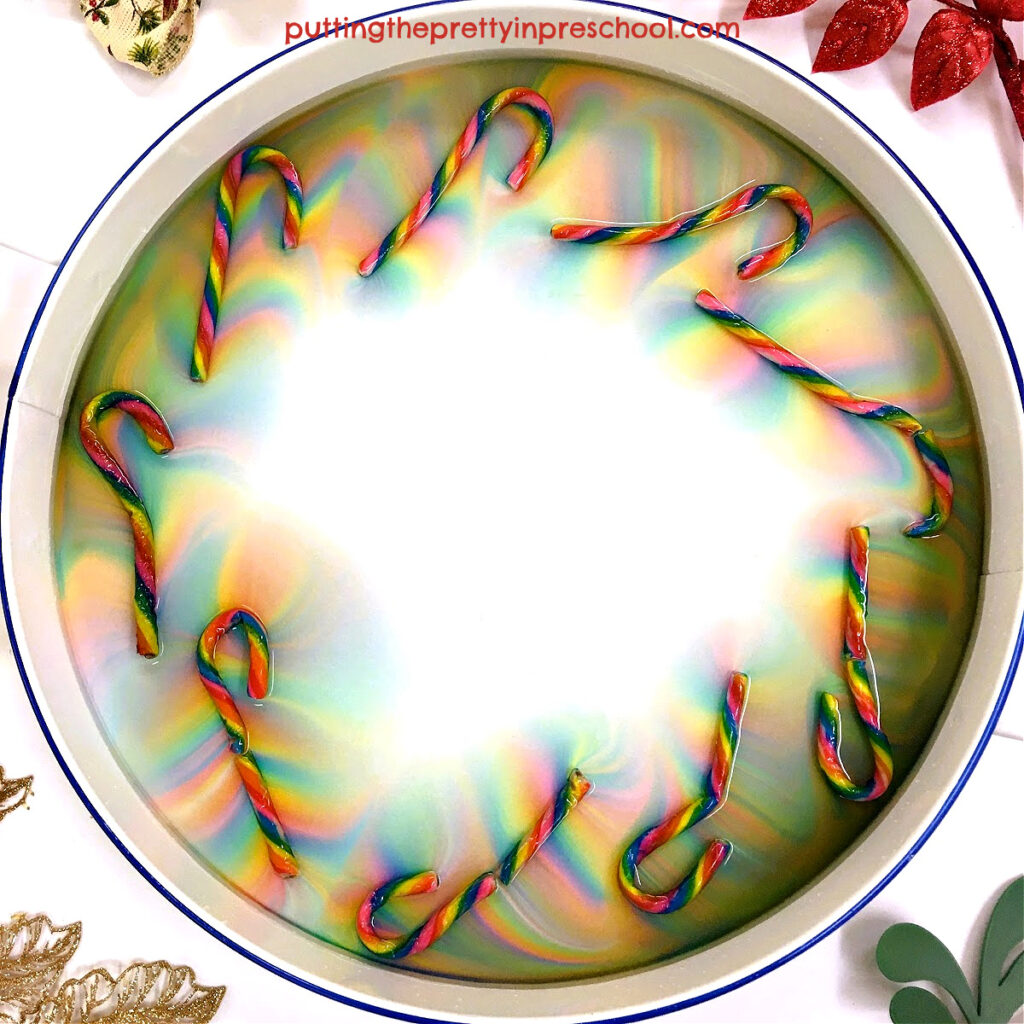
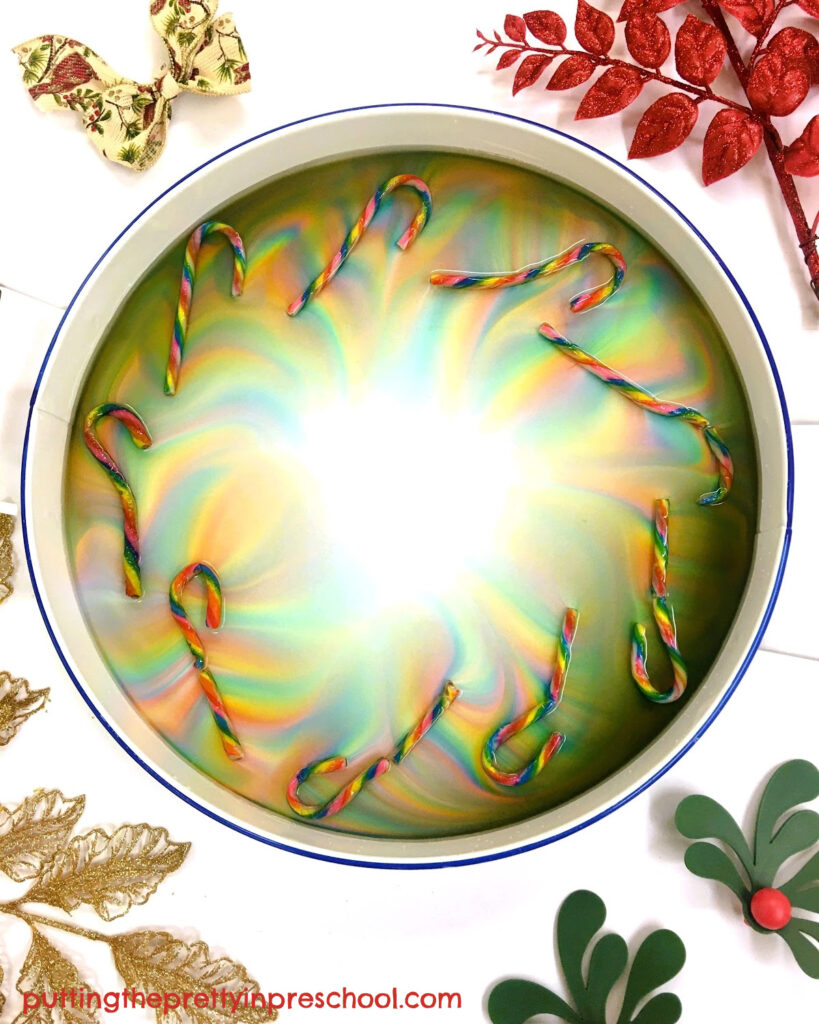
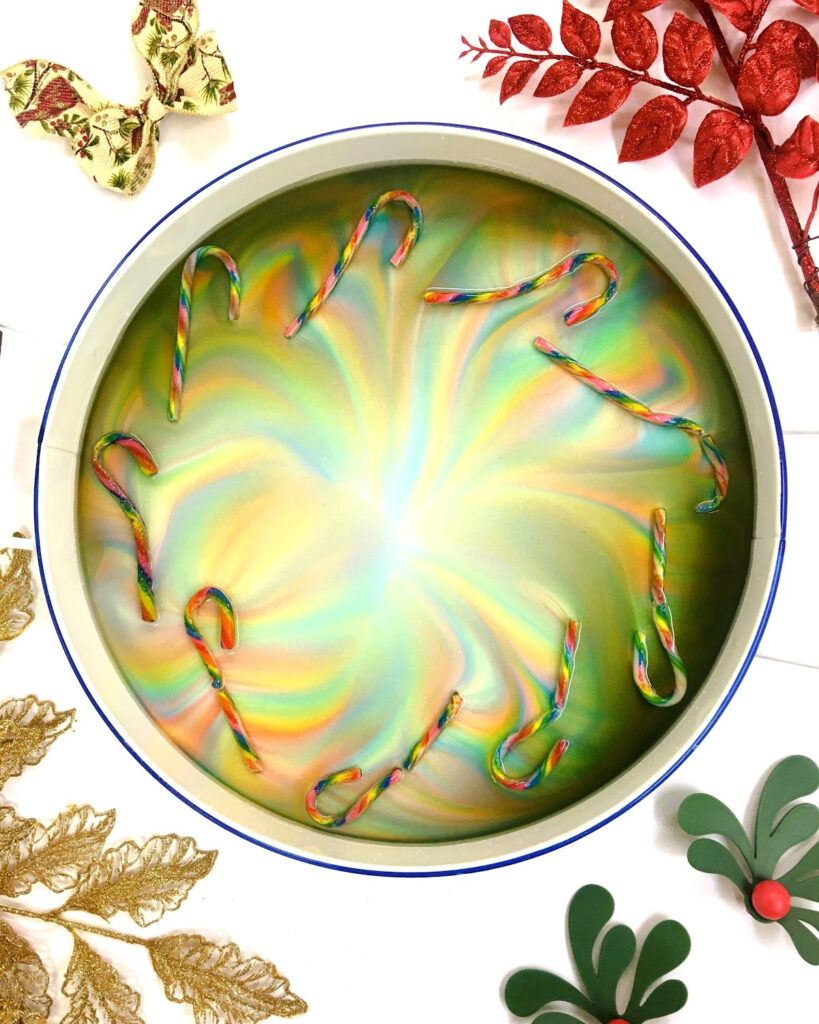
Then watch what happens. You’ll see the candy cane colors slowly spread through the water.

_______

Note: The color changes happen quickly. Stay by the science experiment and have your camera ready to snap a few pictures.

_______

_______

_______

After a little while, you can carry on with other activities and periodically check in on the experiment to see even more color changes and view the candy canes melting away.

_______

The Science Behind This Candy Cane Color Experiment

Candy canes are made of sugar. The water breaks the sugar molecules apart. Then the food colors move through the water away from areas of higher sugar concentration (near the candy) to areas with less sugar. When the sugar concentration is the same in all areas, the colors stop moving.

_______

More Candy Cane Activities

Candy Cane Playdough Tray

Mini Candy Cane Tree Experiment

Christmas Peppermint Sensory Bin

Blue Candy Cane Science Experiment

_______

[Read more…] about Candy Cane Wreath Experiment
Tweet
Share
Share
Pin

Filed Under: Christmas, preschool, science, sensory Tagged With: candy canes, candy science, science experiment

Melted Candy Gingerbread Ornaments

December 12, 2023 by Annette Kaminsky Leave a Comment

Tweet
Share
Share
Pin

_______

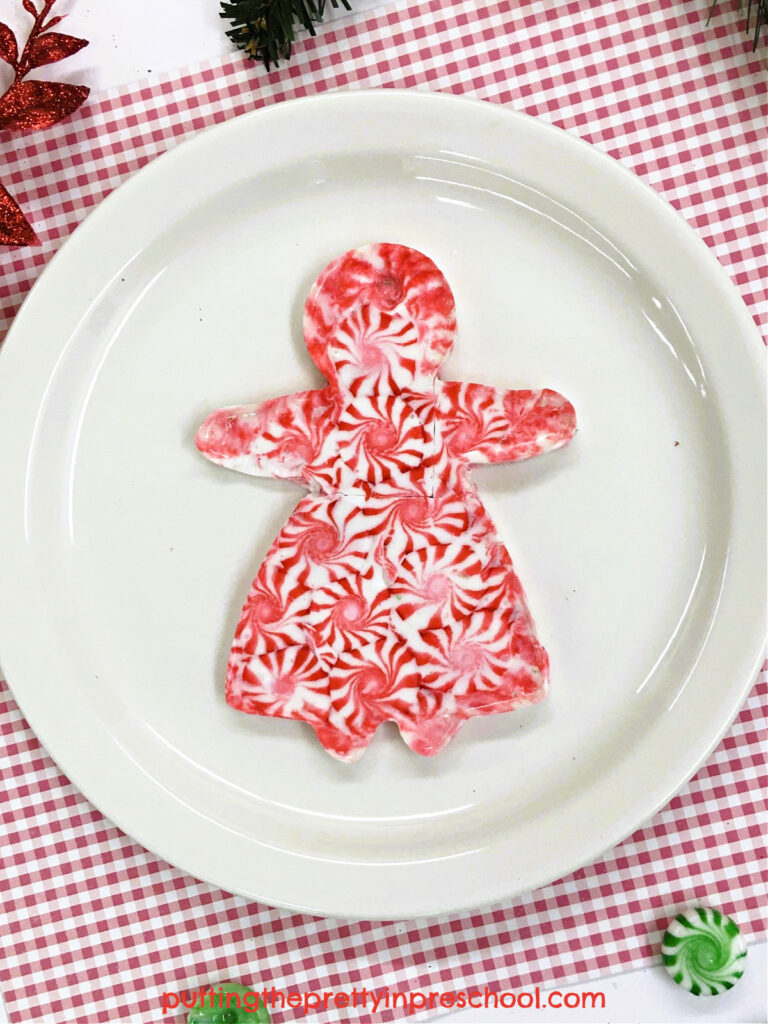
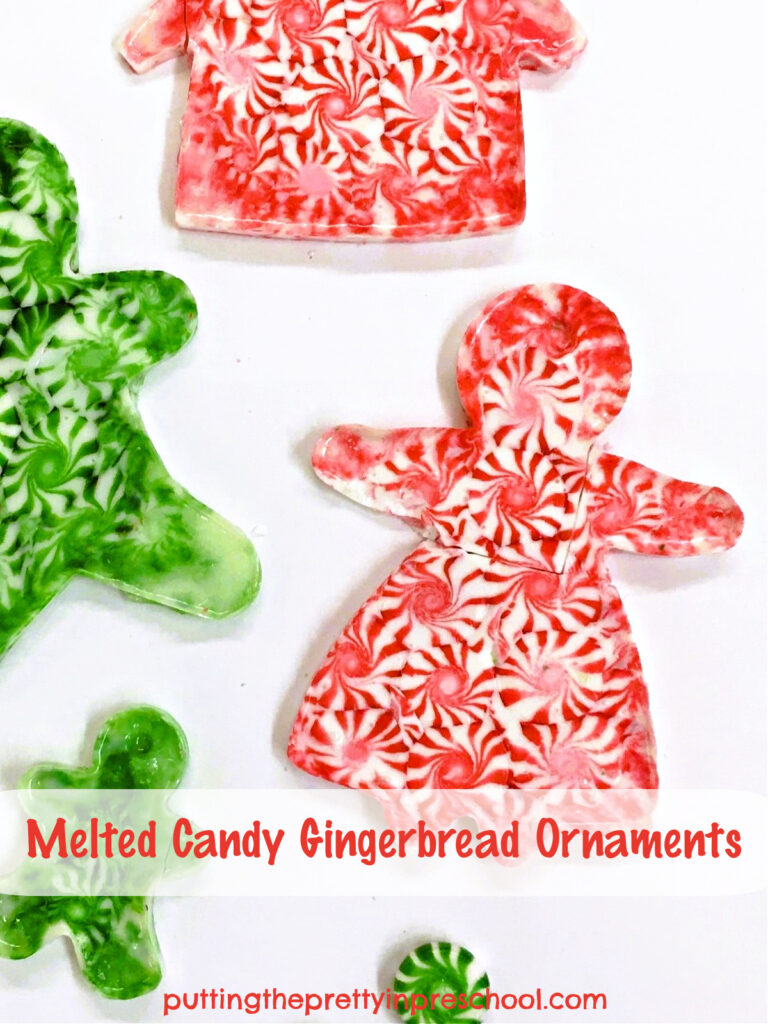
Making melted candy gingerbread ornaments was something I’ve wanted to try ever since viewing a beautiful four-sided, sweet-tasting red and white gingerbread house on Twitter a few years ago. It’s an eye-pleasing baking activity and a festive science experiment so I highly recommend giving the activity a go.

_______

Follow me on Pinterest for more early learning activities.

_______

Melted Candy Ornament Supplies

_______

Gather the following supplies for this simple candy science activity:

  • red and/or green striped round peppermint candies
  • metal gingerbread cookie cutters
  • no-stick cooking spray
  • parchment or wax paper
  • cookie pans
  • cutting board
  • knife
  • vegetable oil
  • wooden skewer

_______

Melted Candy Gingerbread Ornament Tips

Before trying this minty STEAM activity, I read a few blog posts about making melted peppermint candy designs. This detailed Melted Peppermint Candy Ornaments post by onelittleproject.com was particularly helpful and had great tips.

_______

Making The Melted Candy Christmas Ornaments

_______

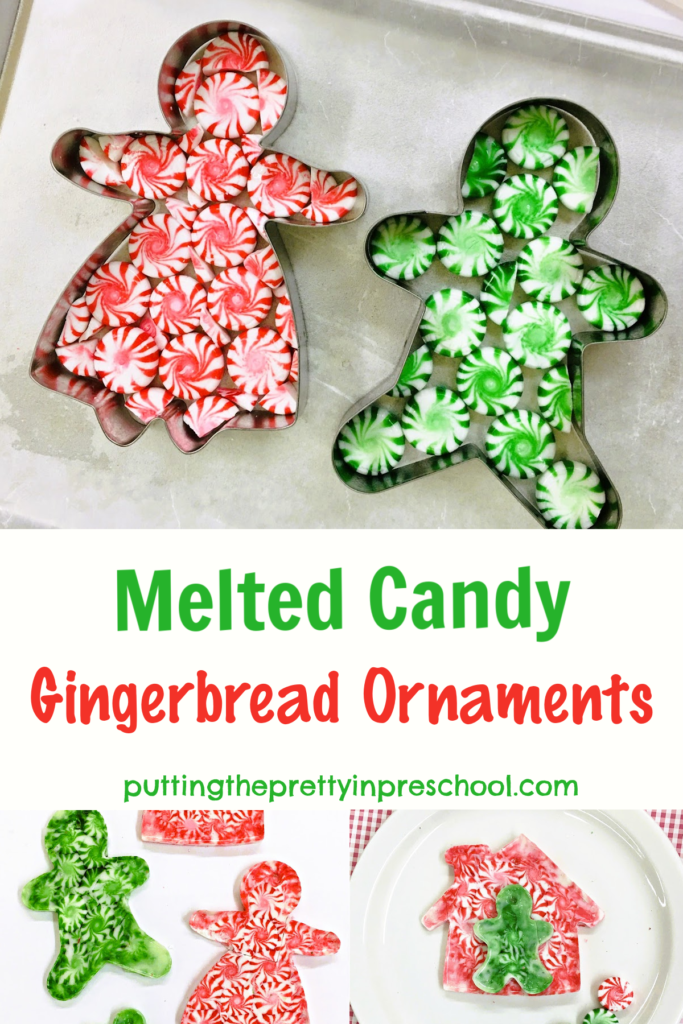
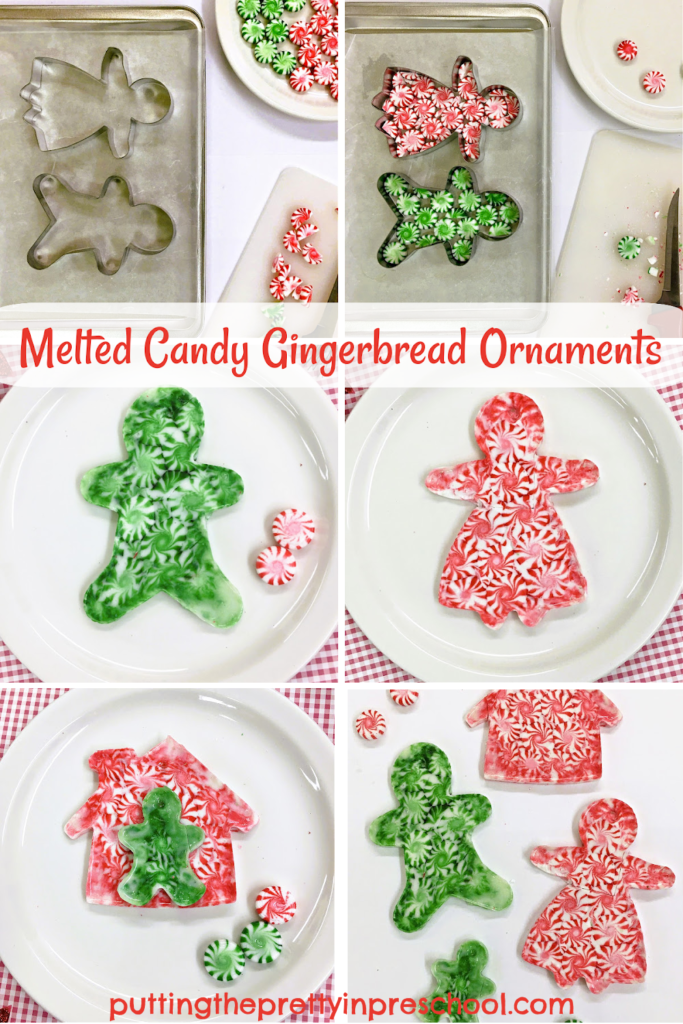
To make the melted gingerbread candy ornaments, start by picking out metal cookie cutters for the task. Generously sized gingerbread people and a house were my cookie cutters of choice.

Spray the cookie cutters with no-stick cooking spray.

Next, add parchment paper to one or more cookie pans and set the greased cookie cutters on the pans.

Then insert unwrapped red or green striped peppermint candies inside the cookie cutter shapes. For larger spaces, cut candies into halves or quarters on a cutting board and use the smaller pieces to fill in the gaps.

_______

Baking The Melted Candy Gingerbread Ornaments

To bake the candy gingerbread ornaments, set the oven temperature to 350 degrees.

Next, put the peppermint candy-filled cookie cutters in the oven and heat them for around six minutes.

Stay by the oven and make sure to turn the oven light on to view the candies melting. It’s okay to take a peek…the sweet creations won’t jump out of the oven. But they will melt down if they are in the oven too long.

When the candies are joined together and a little of the melted candy starts seeping around the cookie cutter edges, take the baking pans out of the oven.

_______

After around two minutes, dip a wooden skewer in vegetable oil and carefully make a little hole near the top of each decoration so a string can be drawn through.  Then let the eye-catching creations cool for around fifteen minutes.

Before the ornaments cool completely, carefully pull away the sides of the cookie cutters from the candy shapes and gently push them out. Oh-so-carefully break off melted bits around the peppermint ornaments if there are any.

Let the beautiful striped ornaments cool completely.

_______

How The Melted Gingerbread Ornaments Turned Out

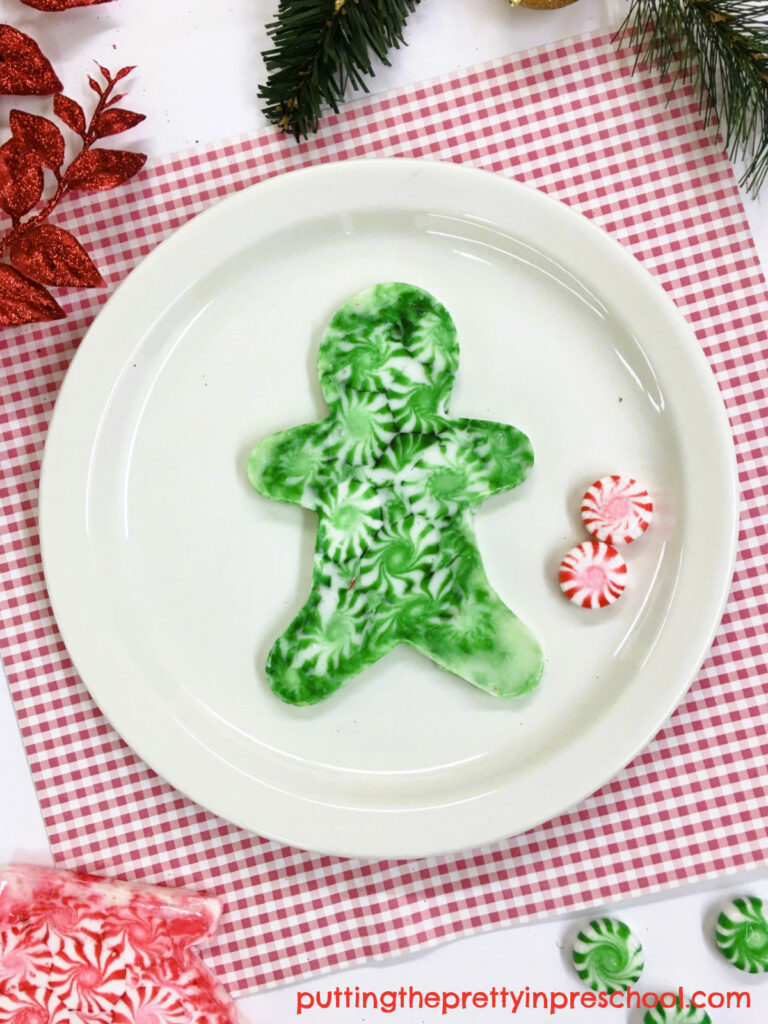
This is where I need to come clean. My candy gingerbread ornaments didn’t turn out perfectly. Each one had one broken bit. The red and white gingerbread person had two broken bits.

_______

But as a first try at making melted candy ornaments, I considered it a success. I determined afterward that I had left the candied shapes in the oven just a little too long (probably eight minutes) and needed to be even more careful in removing them from the cookie cutters after baking. So a second attempt would likely be more successful.

The activity did turn out well enough that I would confidently be able to introduce it to family members or a group of preschool students. The patterned ornaments were fun to put back together as mini puzzles, and they would be tasty treats broken down into small bits and shared. Broken ornaments could be crushed and infused with playdough or baked in a peppermint cookie recipe when the science experiment was over. And there could be a conversation about stripes, patterns, halves, quarters, and the smell and taste of peppermint.

Striped peppermint candies are economical to buy, and I’ll surely give this stunning melted candy gingerbread ornaments STEAM activity another go. How about you? Will you give it a try?

_______

More Peppermint Candy Activities

Christmas Peppermint Sensory Bin

Candy Cane Tree Experiment

_______

[Read more…] about Melted Candy Gingerbread Ornaments
Tweet
Share
Share
Pin

Filed Under: Christmas, Food Art, preschool, science, sensory Tagged With: decorations, gingerbread, science experiment

Skeleton Sunflower Seed Bin

October 30, 2023 by Annette Kaminsky Leave a Comment

Tweet
Share
Share
Pin

_______

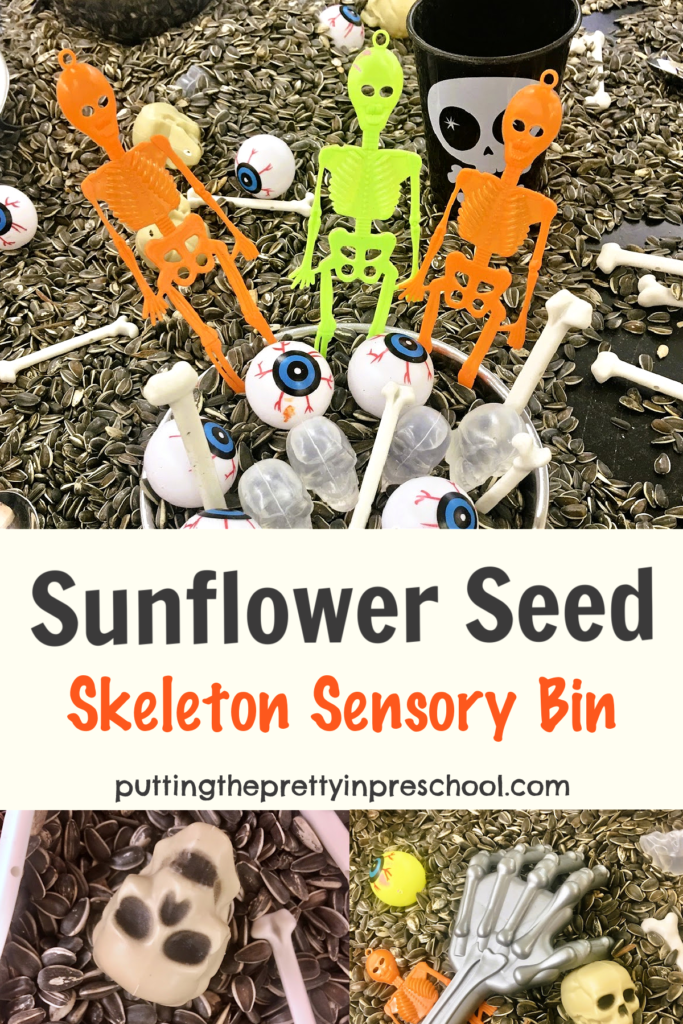
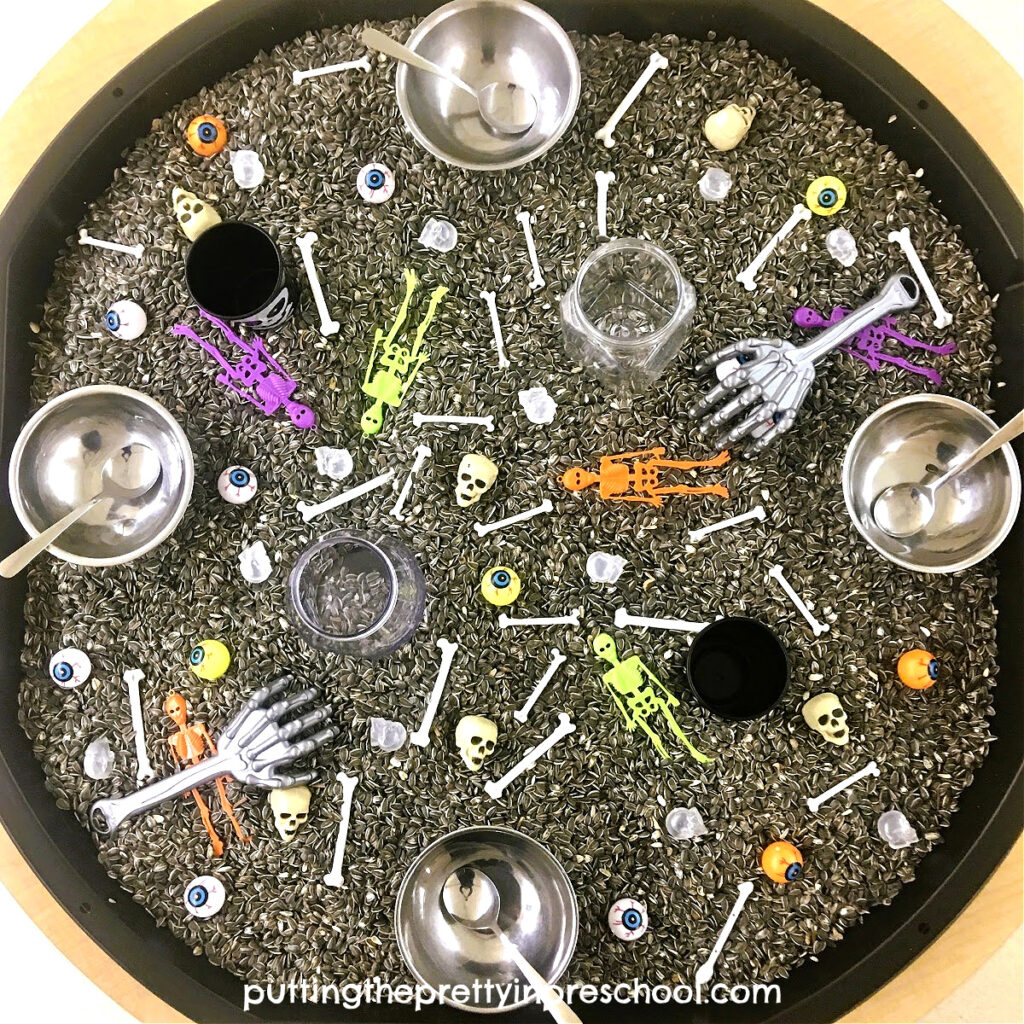
If you need an easy sensory bin idea for a skeleton theme, this skeleton sunflower seed bin is for you. Set it up in minutes, and you’ll have a super engaging sensory invitation your little learners will be happy to explore.

_______

Follow me on Pinterest for more early learning ideas.

_______

Supplies To Collect

_______

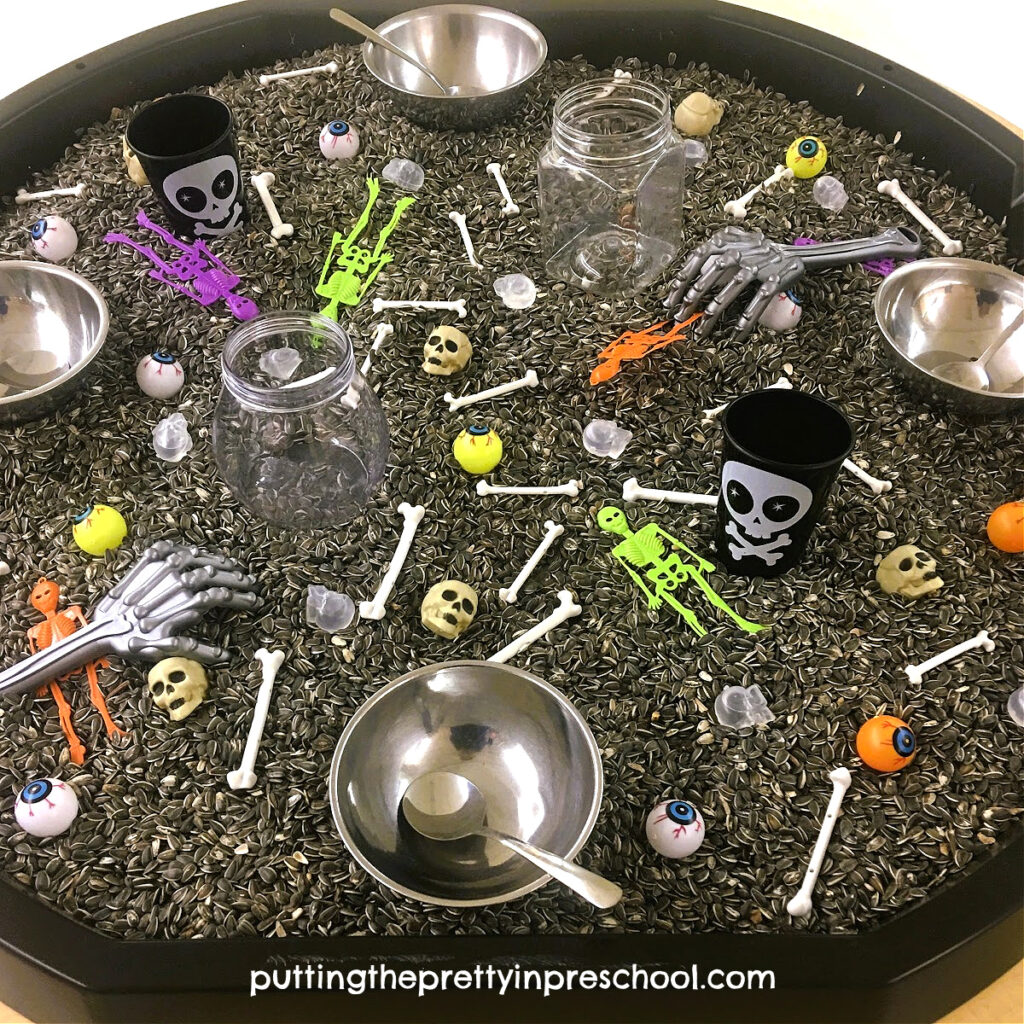
The following supplies are in the sunflower seed sensory bin:

  • sunflower seeds
  • skeleton figurines
  • skeleton arm scoops
  • toy bones
  • skull reusable ice cubes
  • toy eyeballs in different colors
  • skull treat holders
  • skull cups
  • clear non-breakable jars
  • silver bowls and serving spoons

_______

The Skeleton Sunflower Seed Bin

_______

Striped sunflower seeds are the base for this seedy skeleton bin. They are economical to buy and provide a unique sensory experience. In my active world tray, two large bags of seeds work nicely. For a smaller bin such as a bus tub or saucer sled, one large bag would be enough.

The sunflower seeds bring plenty of color, so there is no need to dye anything. This saves a lot of preparation time.

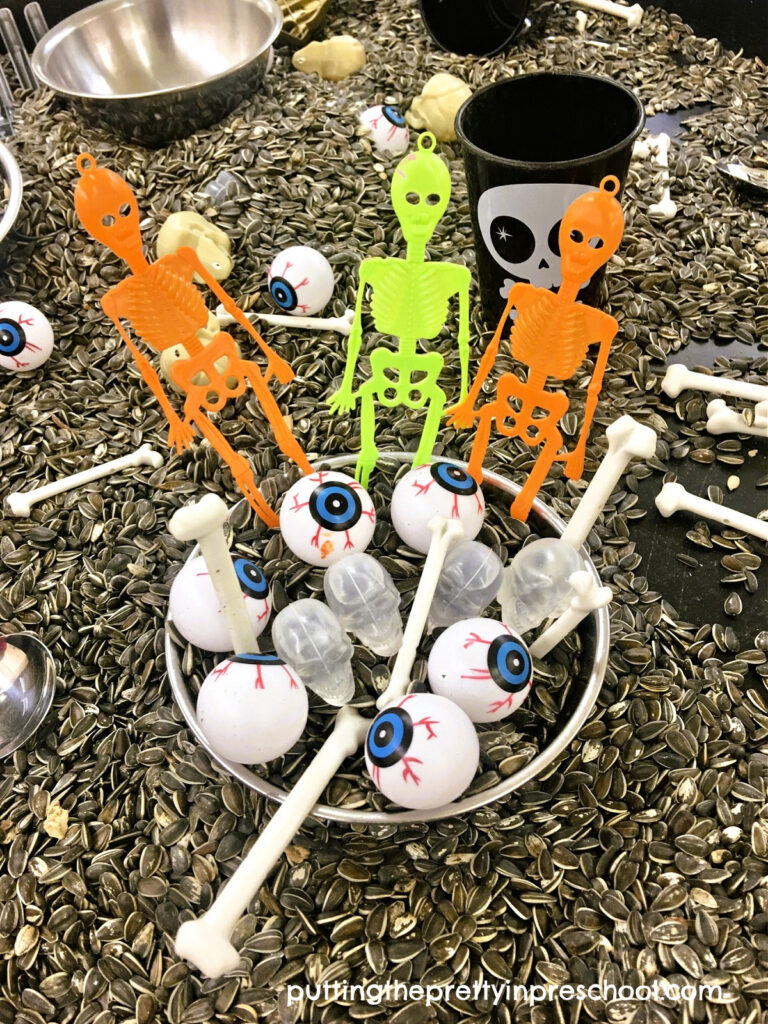
The toy skeletons, skulls, and bones are supplies easily scooped up at dollar and party stores, or the seasonal section of a big box store.

_______

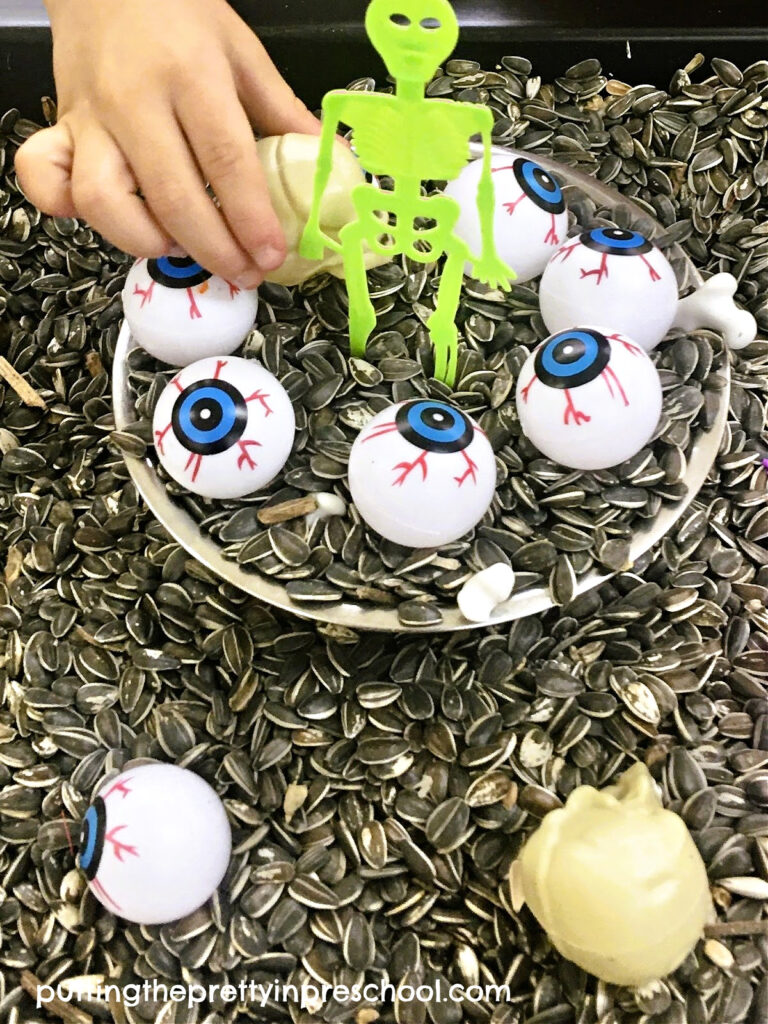
It’s always nice to see the excited look of children when they discover a new sensory bin invitation, and their reaction to this bin did not disappoint. There was lots of imaginative and creative play.

_______

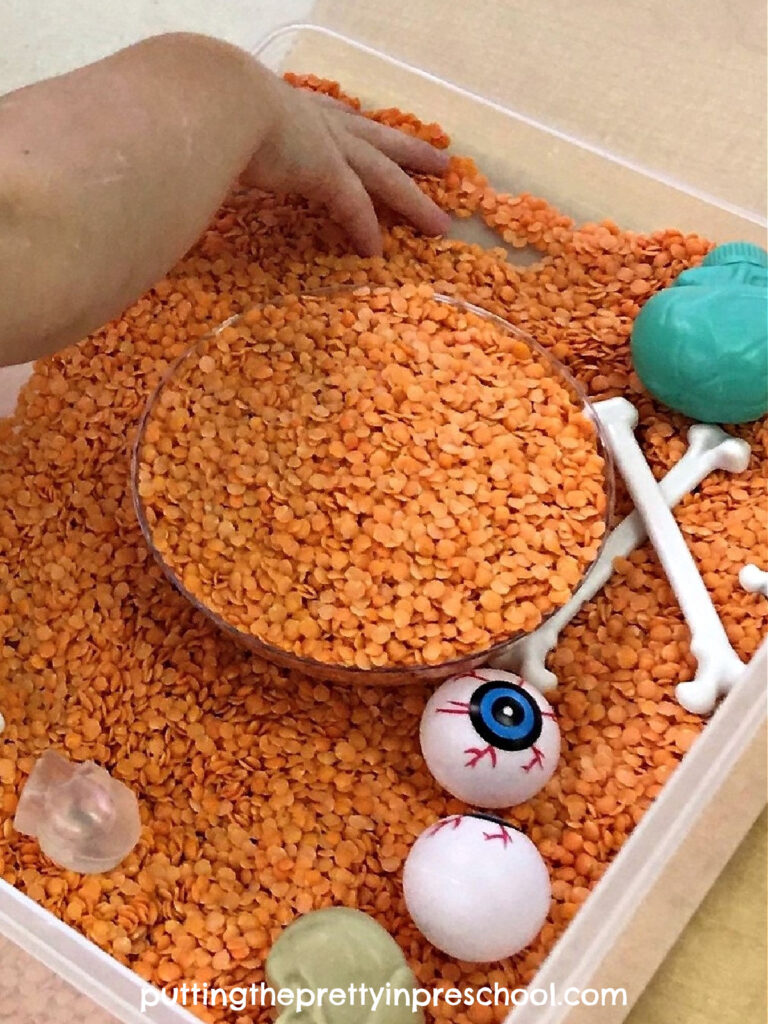
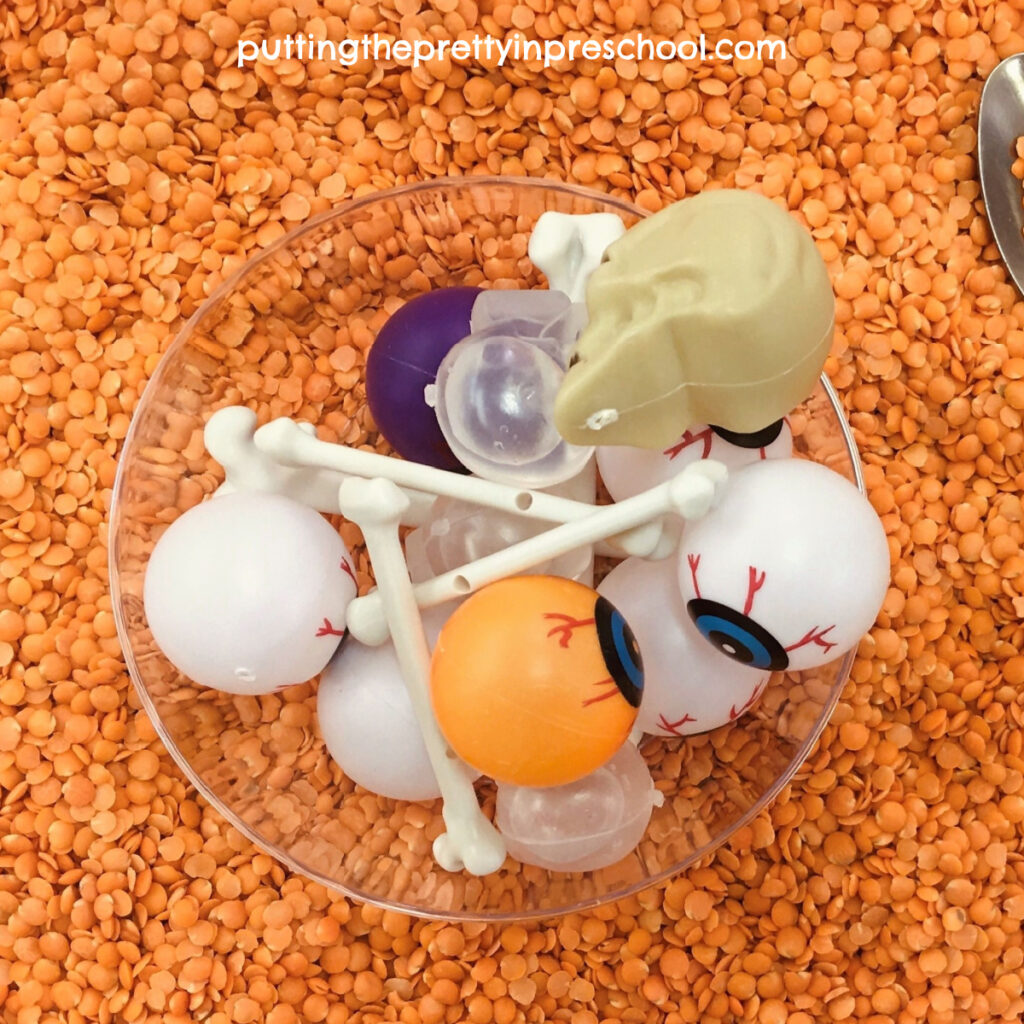
Skeleton Lentil Bin Sensory Play

To keep the interest in skeleton sensory play going, offer the same supplies in a lentil-based bin. The red lentils are another base ingredient that brings its own color to the sensory invitation.

_______

_______

More Sunflower Seed Sensory Play

After children have had plenty of time to explore the skeleton-themed accessories, swap them out for a pumpkin or sunflower and dinosaur-themed bin using the same striped sunflower seeds as a base.

_______

More Skeleton Activities

Skeleton Preschool Theme

Glam Skeleton Sensory Bin

Skeleton and Eyeball Waterplay

Glam Skeleton Playdough Tray

Floral Decorated Skeleton

Skeleton Treasure Blocks

Spaghetti and Eyeball Sensory Bin
Q-tip Skeleton Craft

_______

[Read more…] about Skeleton Sunflower Seed Bin
Tweet
Share
Share
Pin

Filed Under: autumn, fall, preschool, science, sensory Tagged With: lentils, sensory bin, sensory play, sensory tray, skeletons, skulls, sunflower seeds

Pumpkin Sensory Activities

October 29, 2023 by Annette Kaminsky Leave a Comment

Tweet
Share
Share
Pin

_______

Pumpkin carving is a fun annual activity, and children love to get it on it. After the large fruits are carved or sliced, there are a few effortless, super-engaging pumpkin sensory activities children can do before saying goodbye to the showy gourds.

_______

Pumpkin Cross-Section Exploration

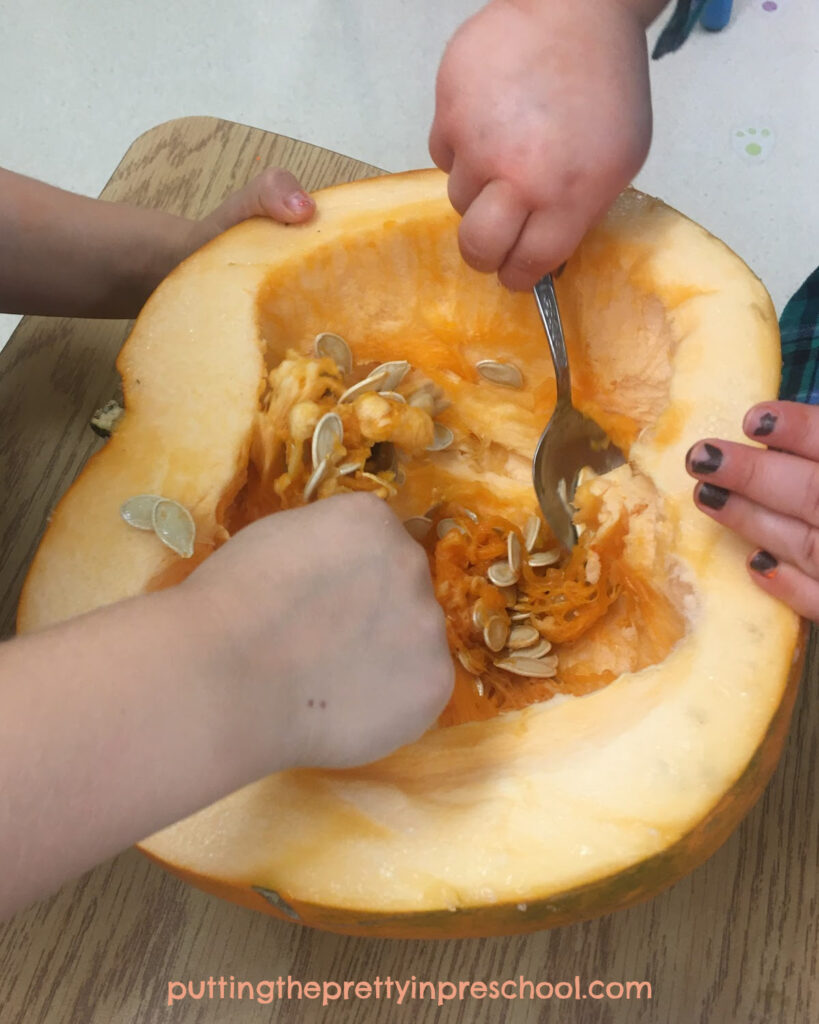
If you happen to have a very lop-sided pumpkin that wasn’t chosen for carving, use a sharp knife to carefully cut it from top to bottom into two cross-sections for everyone to view. This provides your little charges a novel way to investigate the inside of a pumpkin, and it is much easier for them to scoop out and feel the fibrous strands and pumpkin seeds this way.

_______

When the fruity exploration is over, store the pumpkin parts and slimy pumpkin seed mixture in the fridge for more sensory play at another time.

_______

Follow me on Pinterest for more early learning ideas.

_______

Pumpkin Sensory Bin
_______

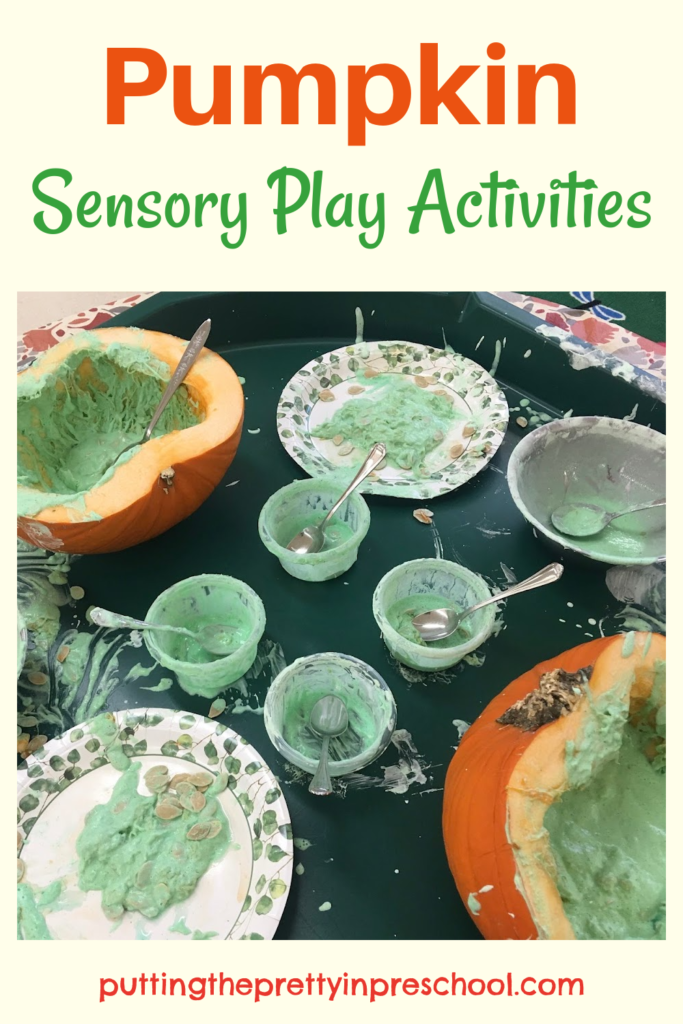
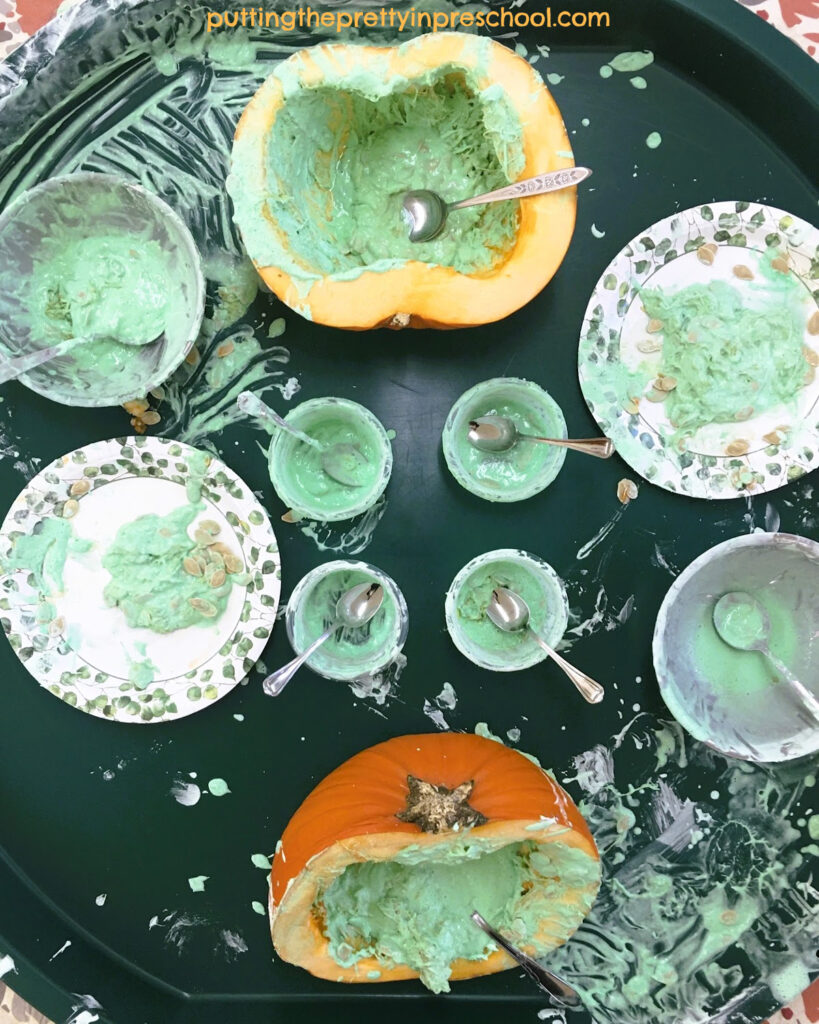
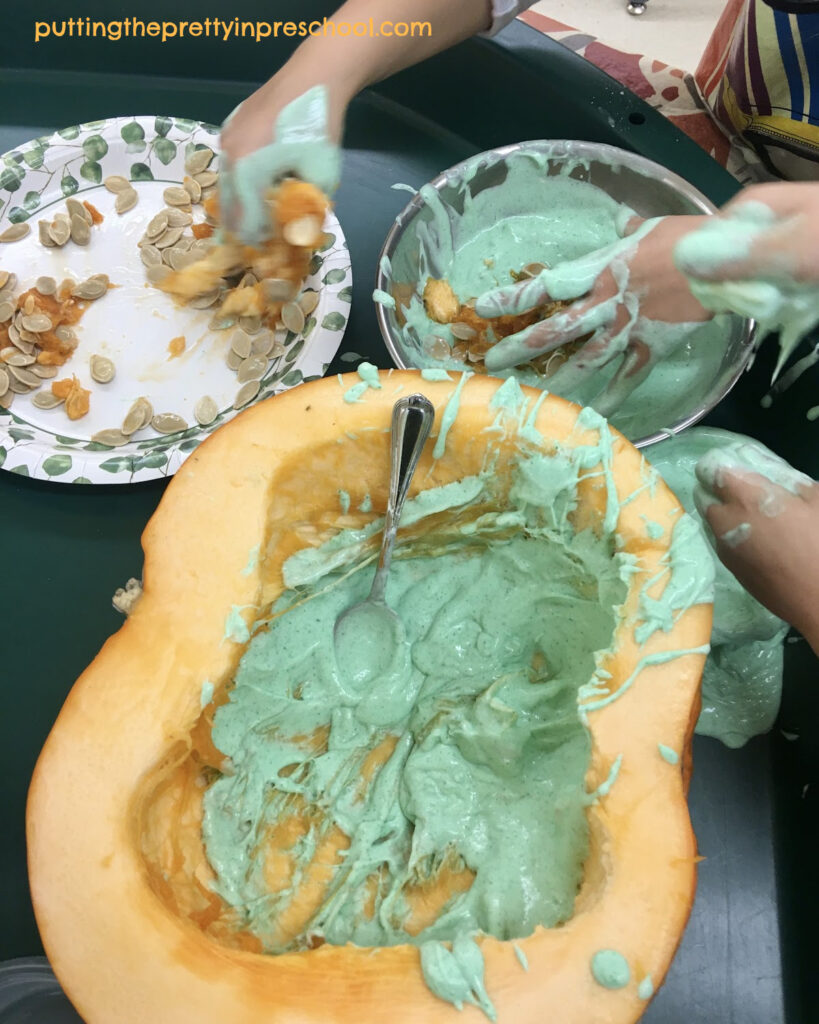
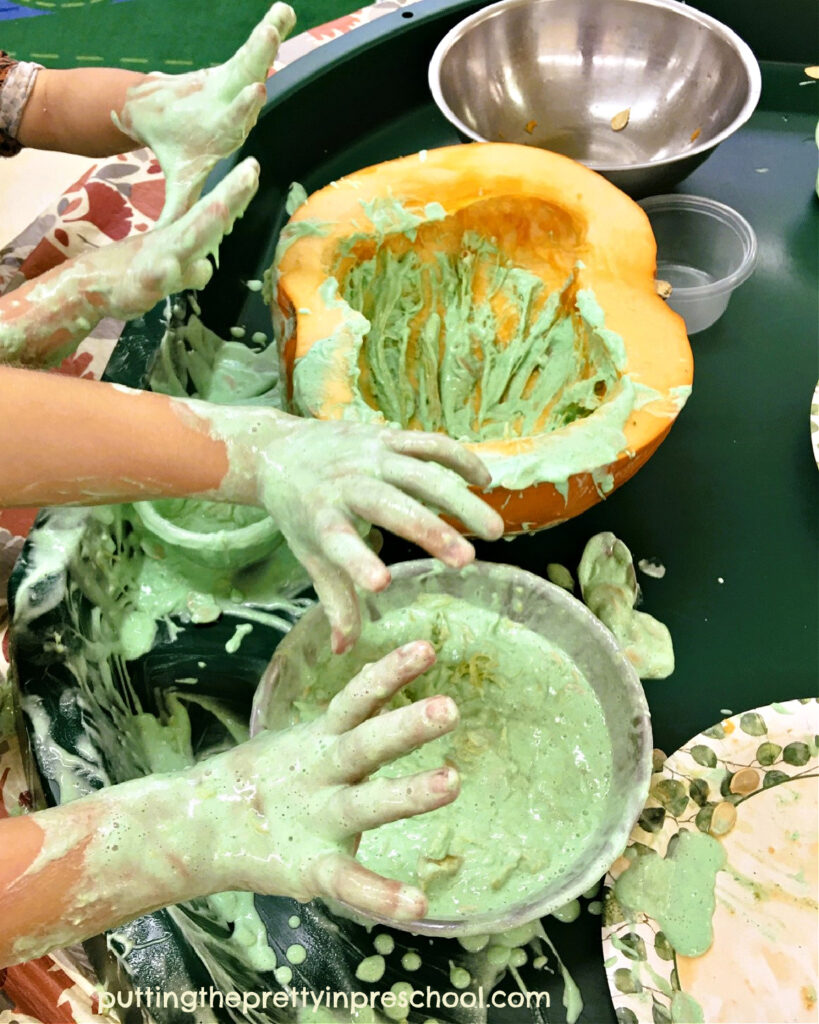
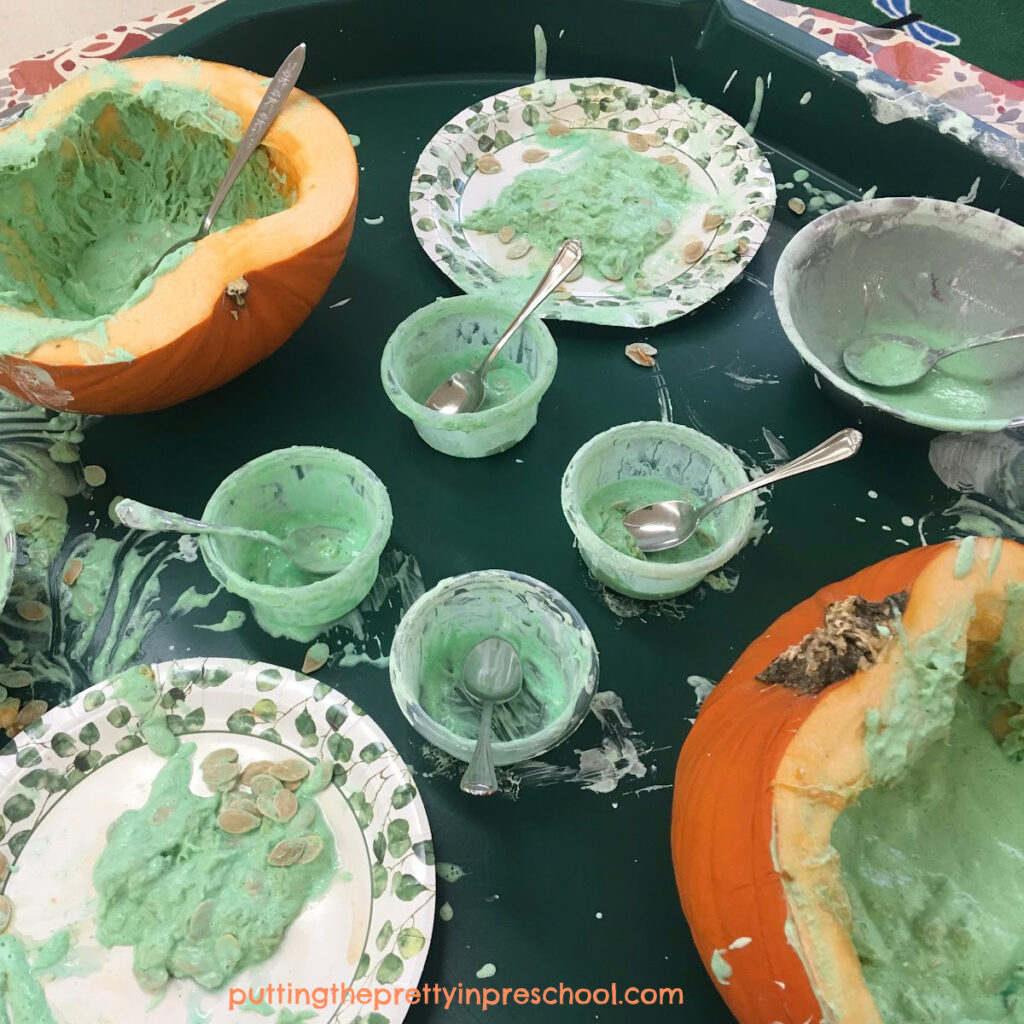
To set up a tantalizing pumpkin sensory bin activity, first place two pumpkin halves into a generous-sized container. A large green active world tray is up to the task and color coordinates with the pumpkin parts perfectly.

Next, set tablespoons, serving bowls, and food storage containers in the bin.

Then add non-breakable or disposable plates with a slimy pumpkin seed and fibrous strand mixture to the sensory play center.

_______

Afterward, make a goopy, cornstarch and hair conditioner mixture for the bin. Green apple playdough thinned with a bit of water works well for the slimy mixture, and you can use older playdough which has been stored in the fridge for it.

An alternative is to mix a cup or two of cornstarch with half the amount of water to get a thick but flowing consistency, and then squirt and blend in about half a bottle of apple-scented hair conditioner to make it slippery and aromatic. Add more cornstarch or water if needed. Squirt in a generous amount of green food coloring to give the mixture a deeper green hue.

_______

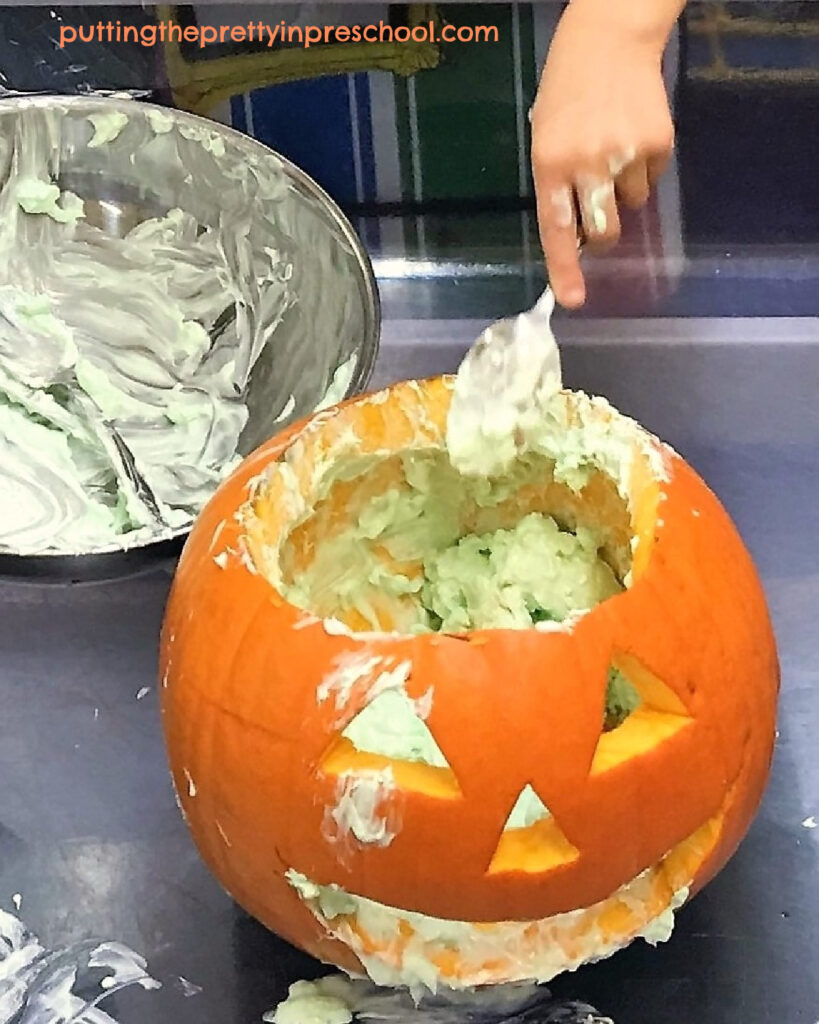
Finally, scoop the cornstarch and green apple conditioner mixture into the pumpkin halves and invite your little learners to explore the bin.

_______

Note: Apples and pumpkins are commonly used together in pies, as their scents and tastes are complementary. The two scents also work nicely together in sensory play.

_______

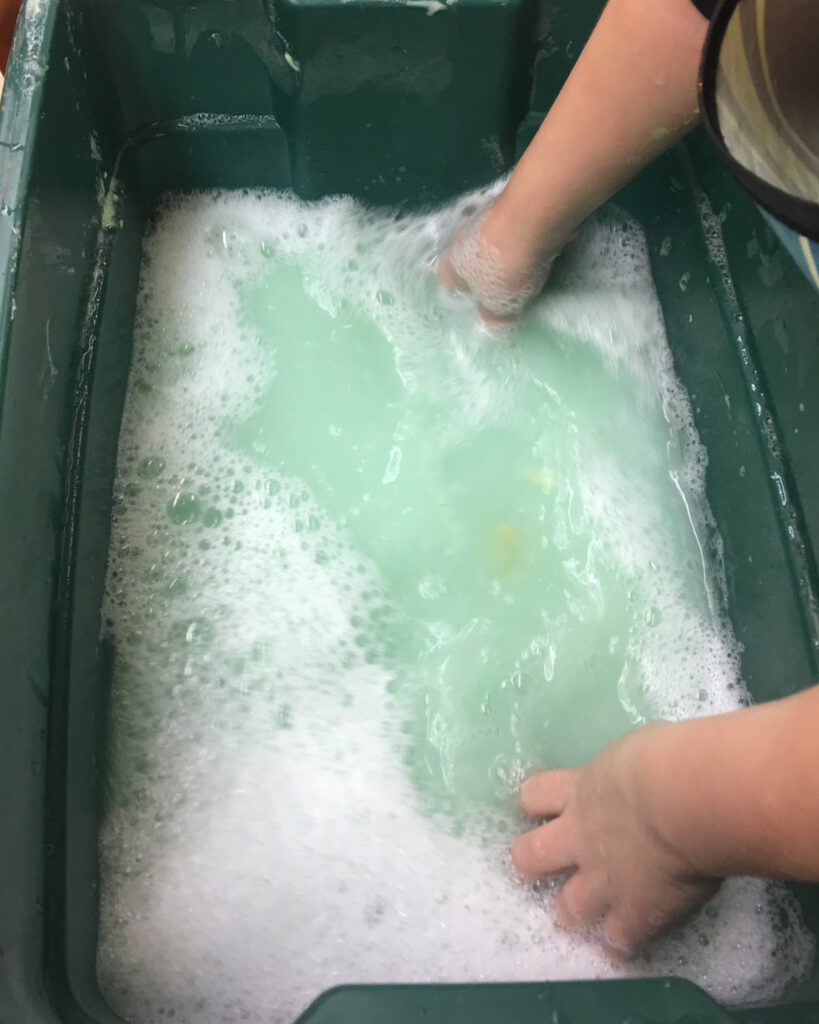
Washing up afterward is part of the fun, as your little charges will love seeing the water turn green.

_______

Green Apple Goop Pumpkin Play

_______

In this tactile autumn activity, green apple playdough, often called cloud dough, is turned into a goopy mixture with the addition of a little water. Just scoop the thinned dough into a serving bowl and set it in a sensory table next to a carved and hollowed-out pumpkin for your little learners to use in hands-on play.

_______

Golf Tee Pumpkin Play

_______

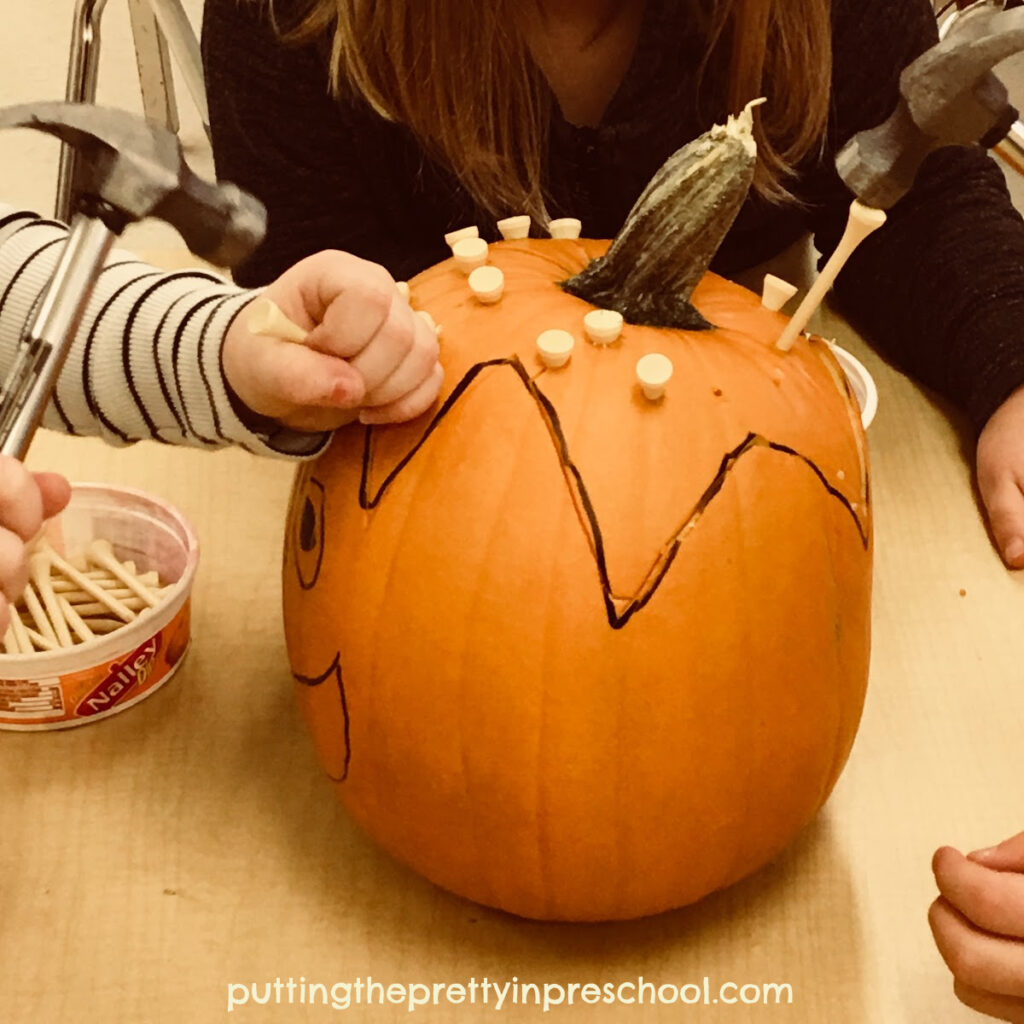
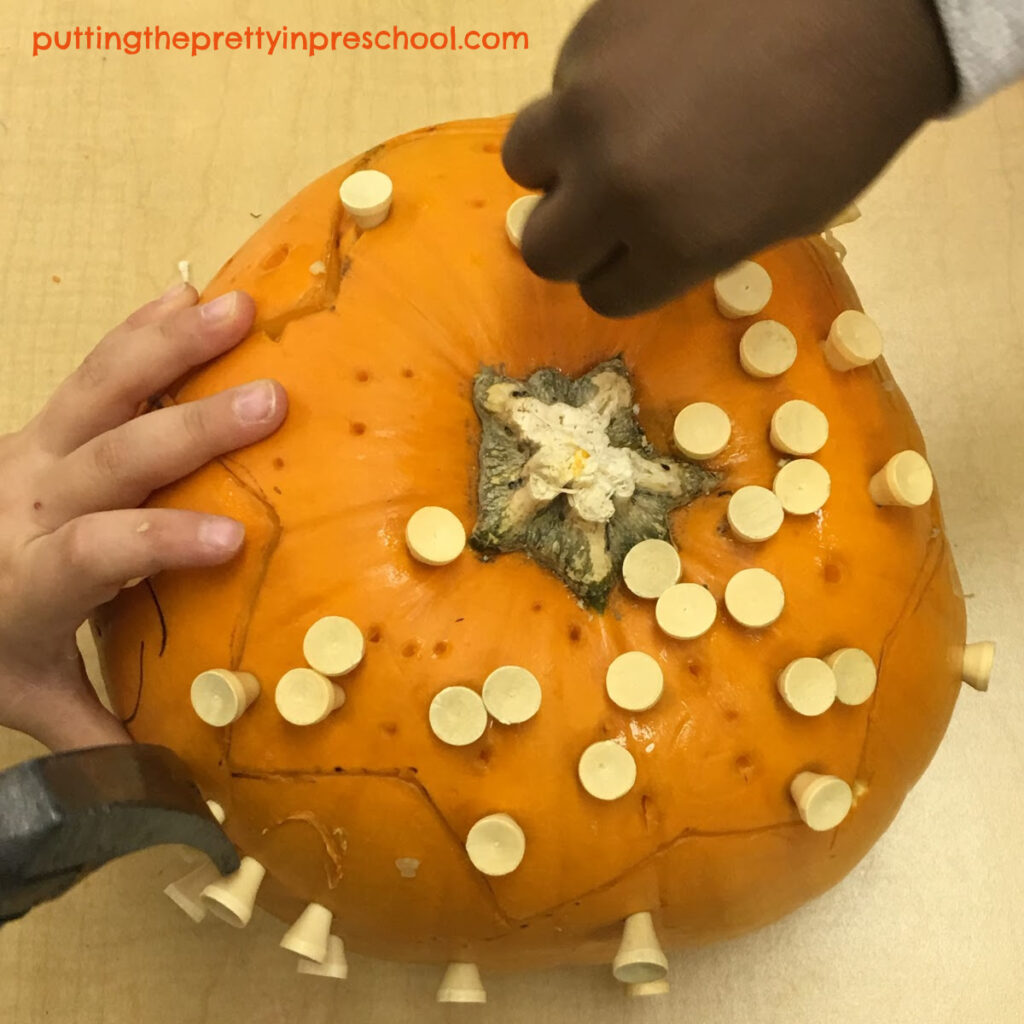
This last pumpkin sensory activity is less messy than the above slimy, goopy versions. Simply set a carved or uncarved pumpkin out on a table along with small, child-sized hammers and a container of golf tees. Invite little learners to use a hammer to gently pound the golf tees into the pumpkin. This is a great activity for practicing eye-hand coordination. Two children can share in this activity at a time, providing an opportunity for cooperative, synergetic play.

_______

_______

Thanksgiving Printables

Shop Thanksgiving printables in my Etsy shop “Skills N Smiles“:

_______

_______

More Pumpkin Activities

Edible Playdough Pumpkins

Eye Dropper Pumpkin Art

Pumpkin Painting Process Art

Pumpkin Tablescape Pretend Play

Glow In The Dark Pumpkin Art

Pumpkin Color Activities

Pumpkin Playdough Activities

_______

[Read more…] about Pumpkin Sensory Activities
Tweet
Share
Share
Pin

Filed Under: apples, autumn, fall, gardening, preschool, pumpkins, science, sensory Tagged With: apples, pumpkins, sensory bin, sensory play, sensory tray

  • « Go to Previous Page
  • Page 1
  • Interim pages omitted …
  • Page 5
  • Page 6
  • Page 7
  • Page 8
  • Page 9
  • Interim pages omitted …
  • Page 18
  • Go to Next Page »

Primary Sidebar

Hi, I'm Annette Kaminsky, a preschool teacher who loves sharing learning through play activities for young children. Thanks for visiting my site. Feel free to stay awhile!

Subscribe Via Email

Recent Posts

  • Teacher Appreciation A to Z Alphabet June 21, 2026
  • Expanding Balloon Science Experiment May 18, 2026
  • Earth Day Spin Painting April 21, 2026
  • Easter Bunny Scavenger Hunt April 4, 2026
  • Celebrate Diversity Coloring Pages March 1, 2026
  • Lunar New Year Lantern Craft February 11, 2026
  • Black History Month Positive Affirmations Art January 29, 2026
  • Snowflake Cafe Dramatic Play Set January 19, 2026
  • Pastel Christmas Letterhead and Envelope December 20, 2025
  • December Kindness Activities November 30, 2025

Categories

Topics

apples bunnies butterflies Chinese New Year Christmas Christmas craft color colors dramatic play Easter fall flowers hearts holiday jewelry leaves leprechauns light table loose parts painting paper crafts playdough pretend play printables printmaking process art pumpkins rice bin scented playdough science experiment scissor skills sensory bin sensory play sensory tray shamrocks skeletons snakes snowflakes spiders spring St. Patrick's Day sunflowers tablescapes Valentine's Day water play

Copyright © 2026 · Lifestyle Pro on Genesis Framework · WordPress · Log in