• Skip to secondary menu
  • Skip to main content
  • Skip to primary sidebar

Putting The Pretty In Preschool

Finding Beauty In Everyday Early Childhood Experiences

  • Home
  • About Me
  • Winter
  • Chinese New Year
  • Blog
  • Valentine’s Day
  • Contact Me
  • Easter Activities

printmaking

Tin Foil Egg Printing

April 17, 2025 by Annette Kaminsky Leave a Comment

_______

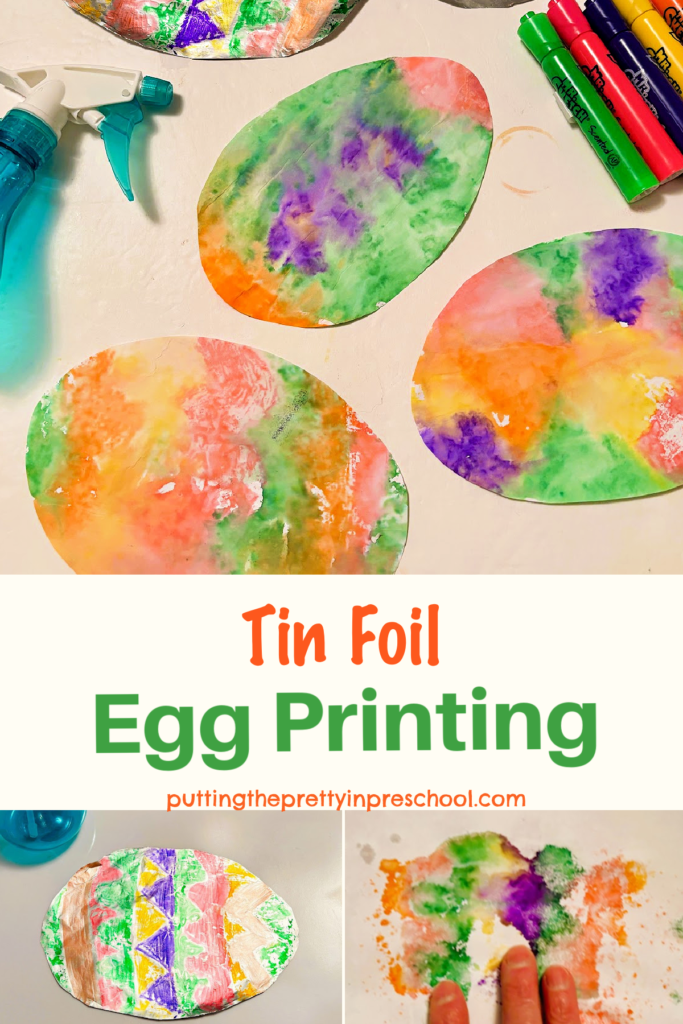
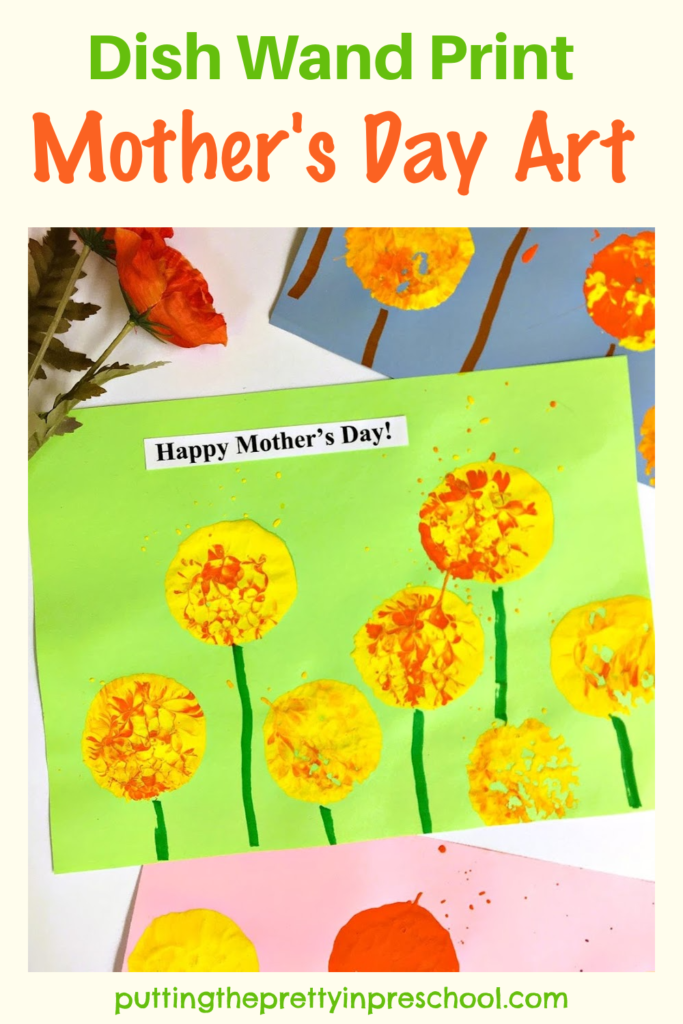
This tin foil egg printing art project is easy to set up and oh-so-much fun. Just a few basic supplies are needed for this creative spring activity.

_______

Tin Foil Egg Printing Supplies

_______

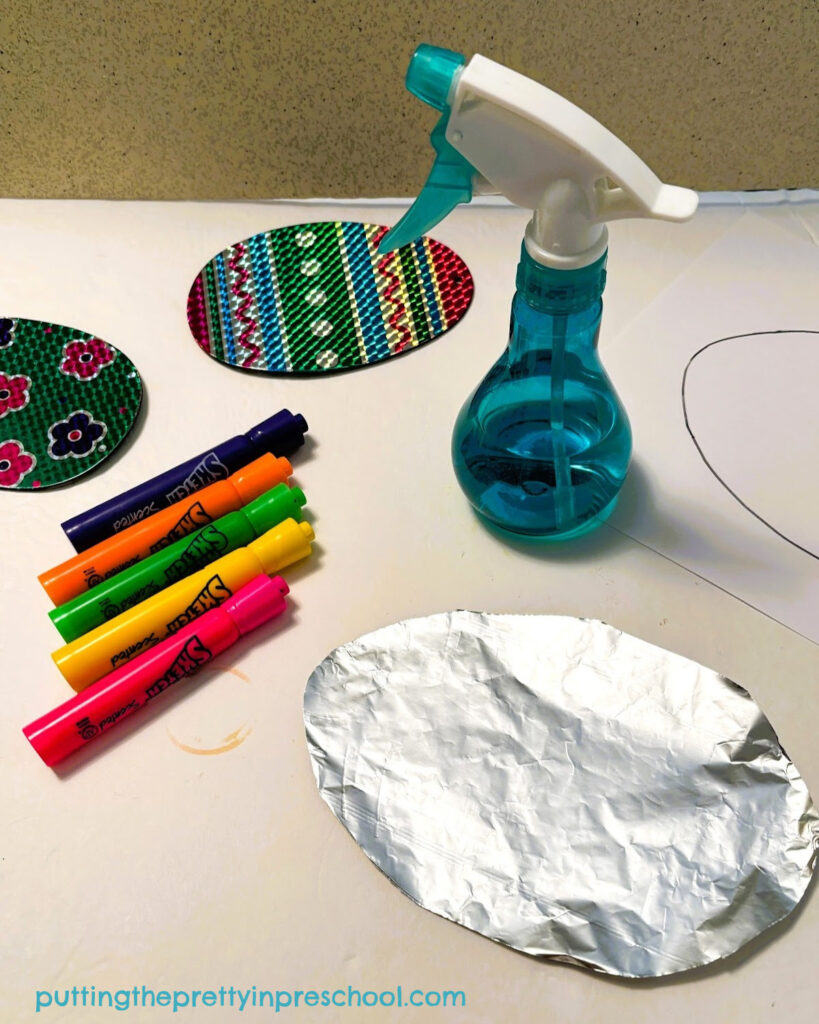
Gather the following supplies for this egg-themed art project:

  • tin foil roll (also called aluminum foil)
  • water-based marker
  • spray bottle
  • 8 ½ x 11-inch paper
  • scissors
  • tray

_______

Follow me on Pinterest for more early learning activities.

_______

Tin Foil Egg Printing Instructions

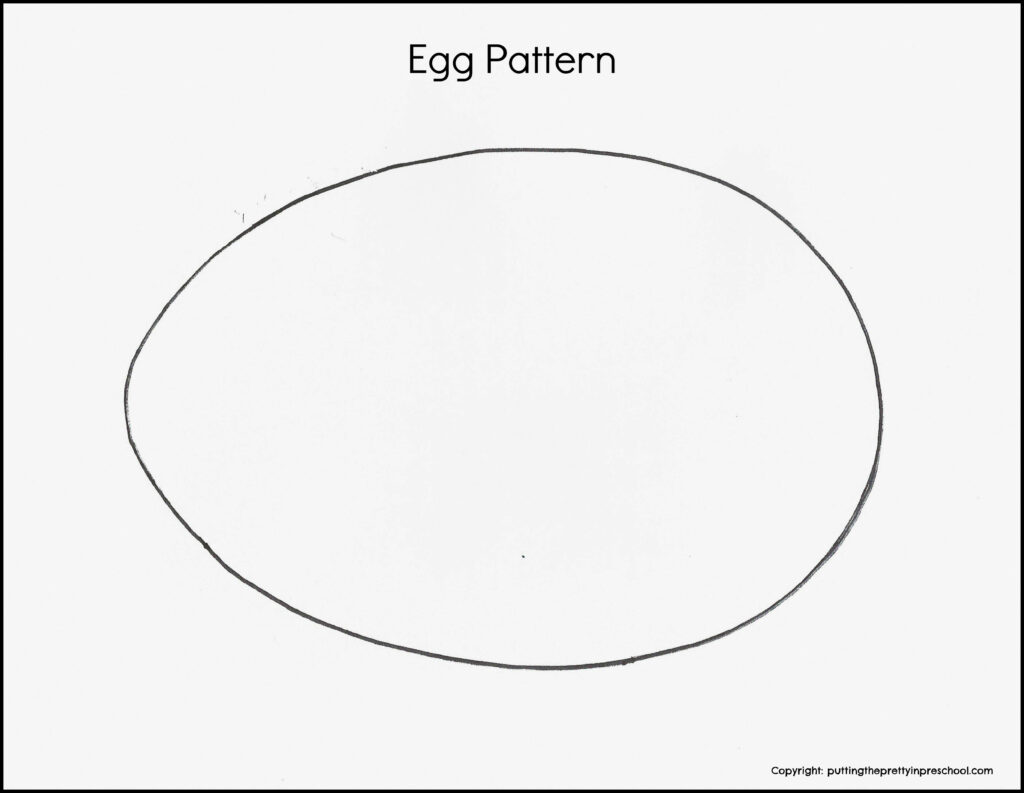
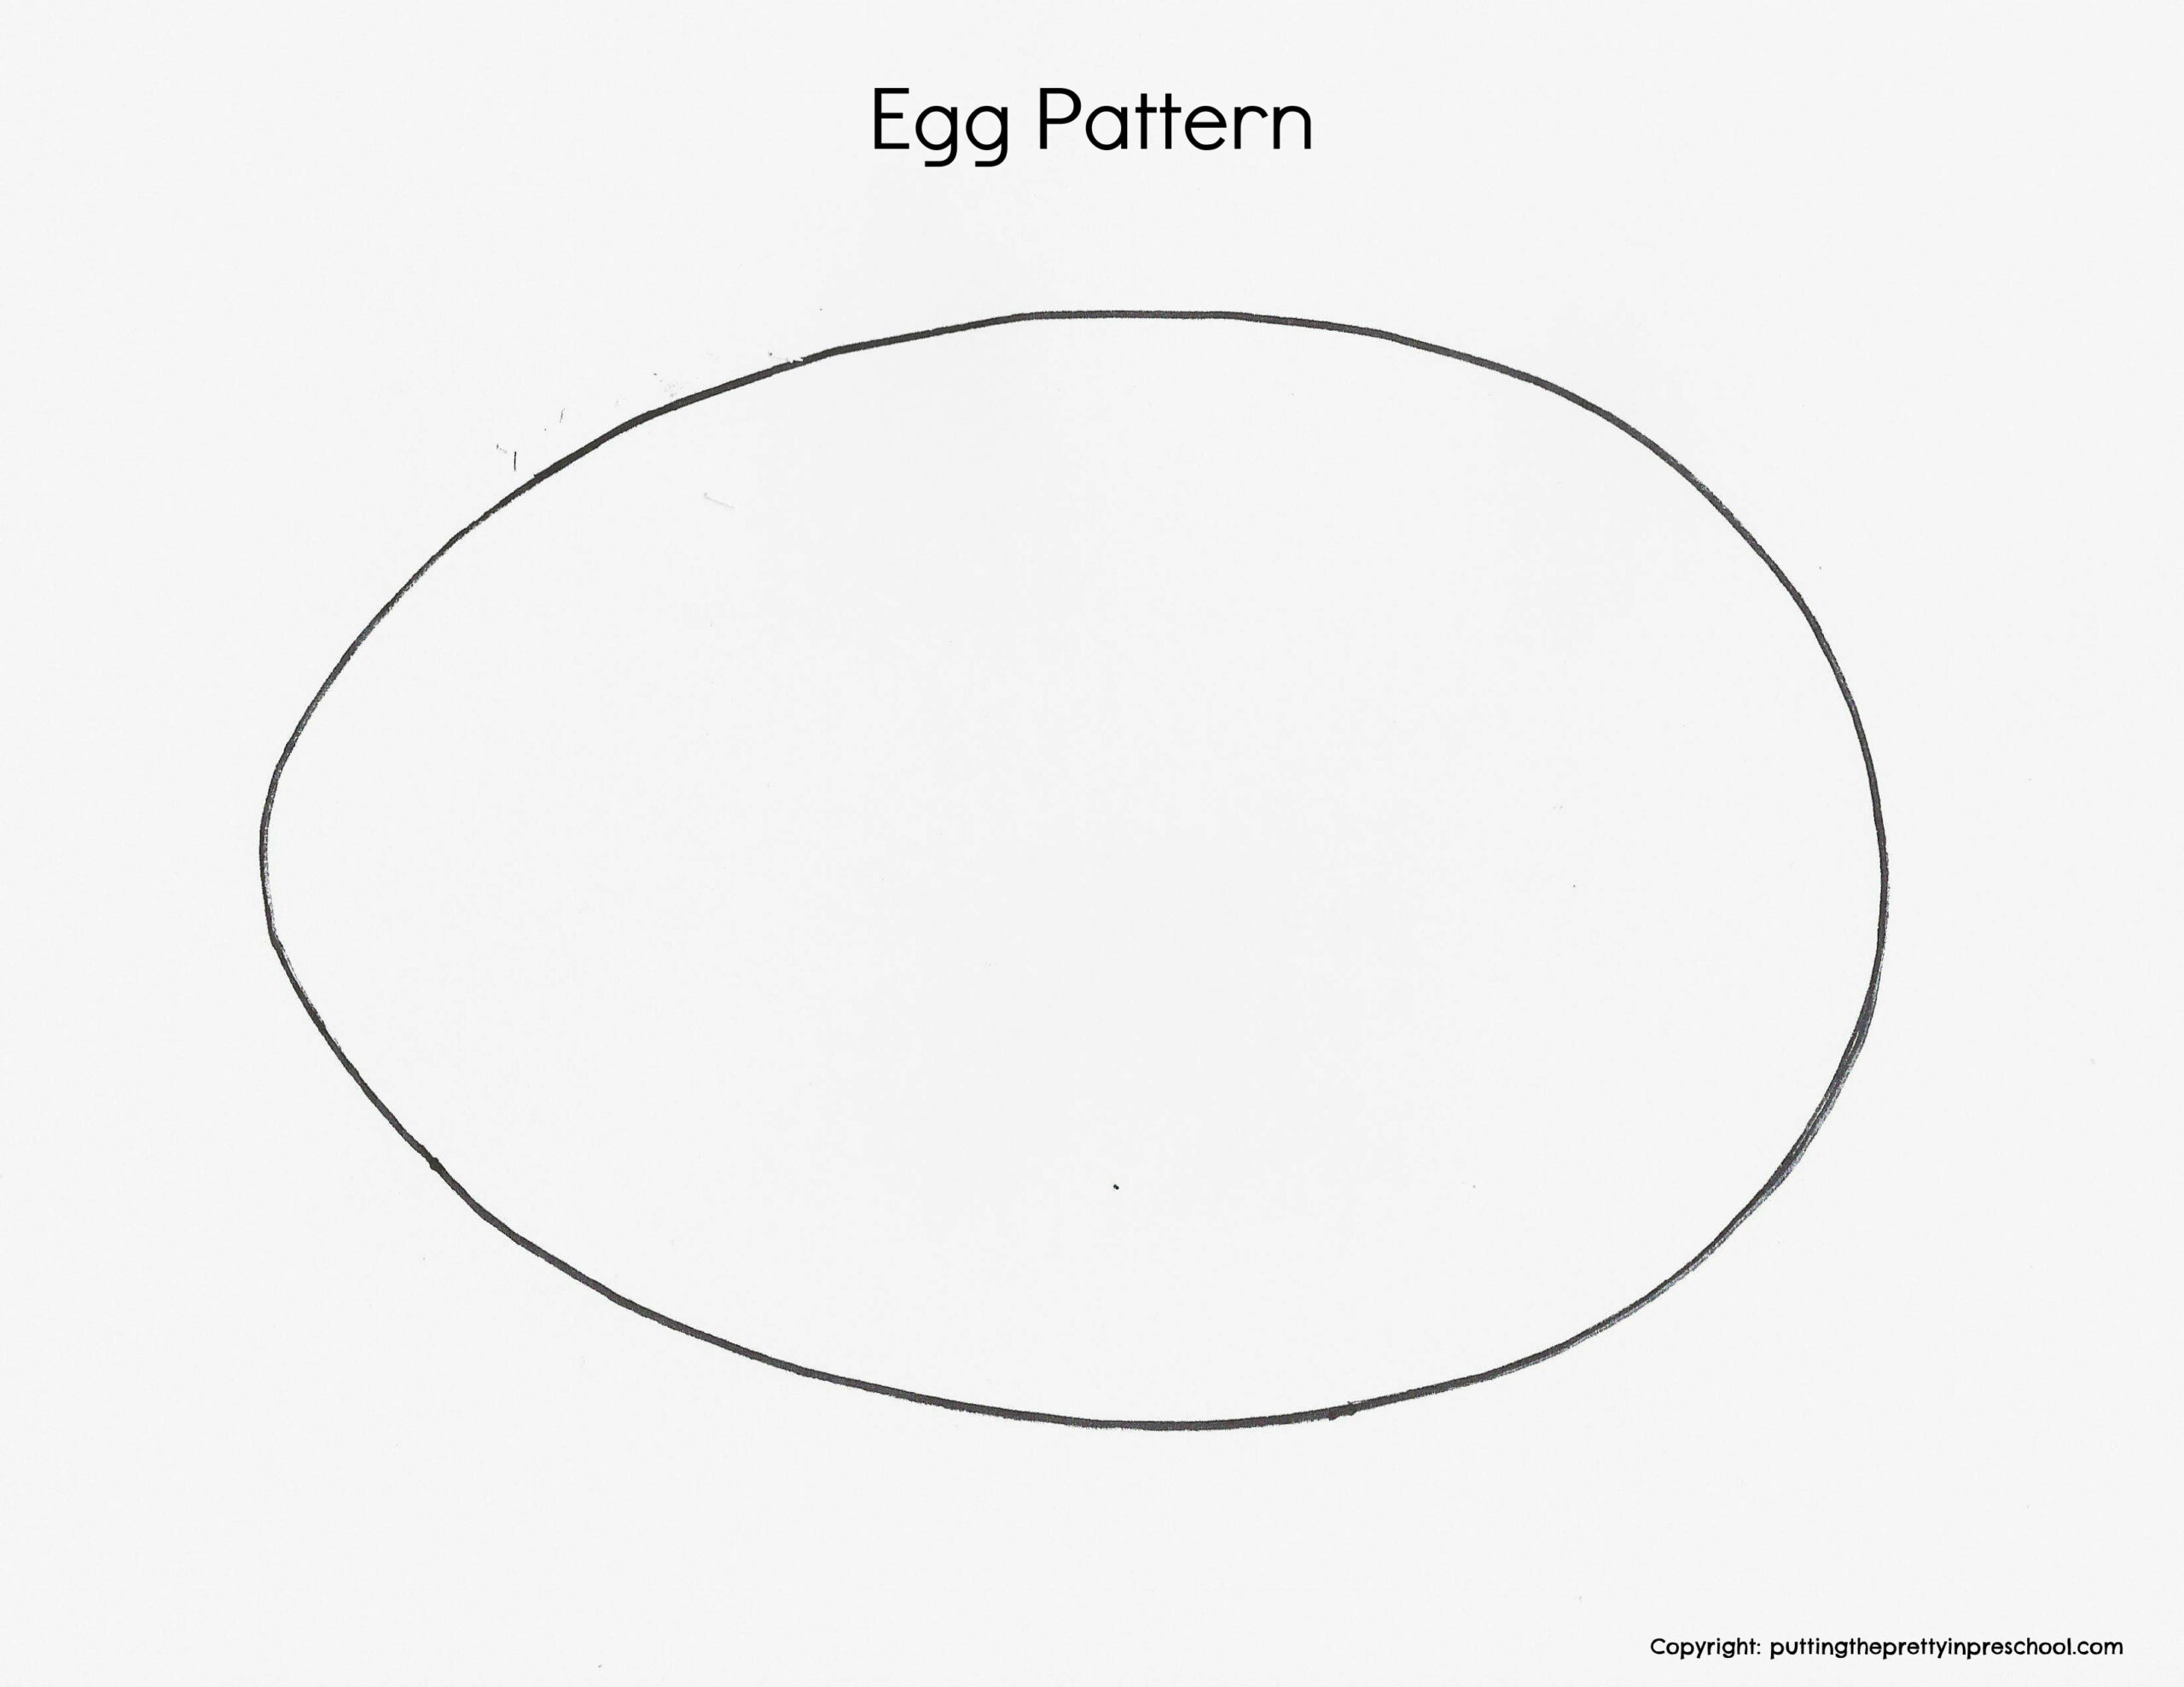
For this printing art project, first cut eggs from tin foil (commonly called aluminum foil). Select strong tin foil if you have it available. Feel free to download this printable to use as a pattern.

_______

Egg PrintableDownload

_______

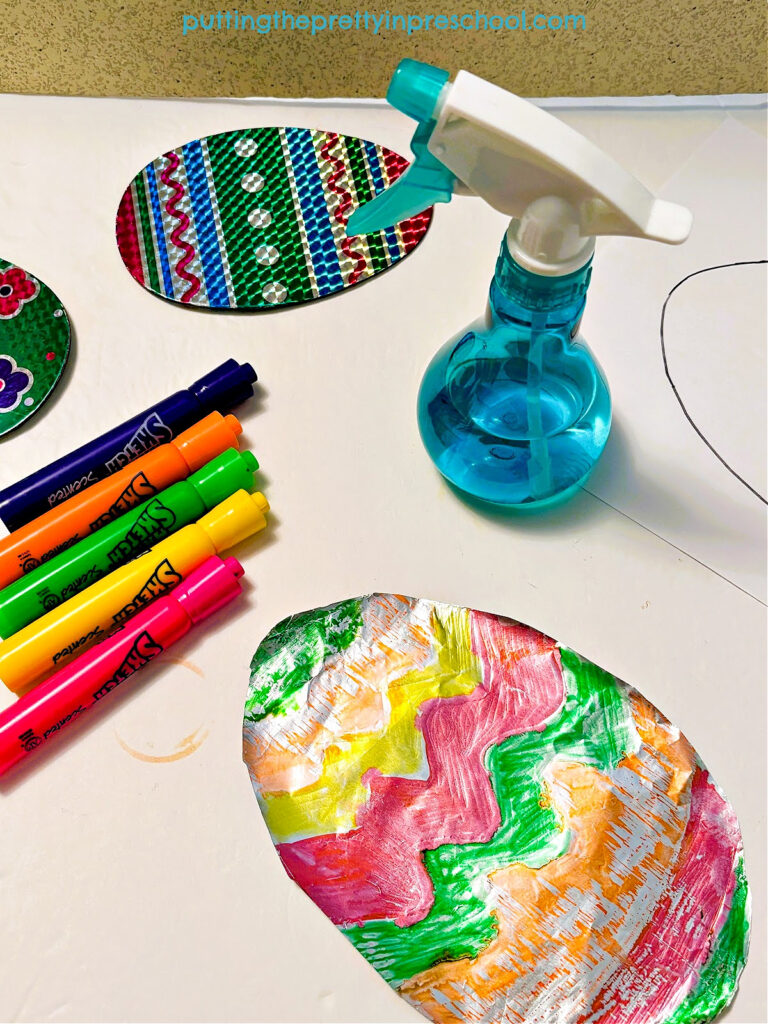
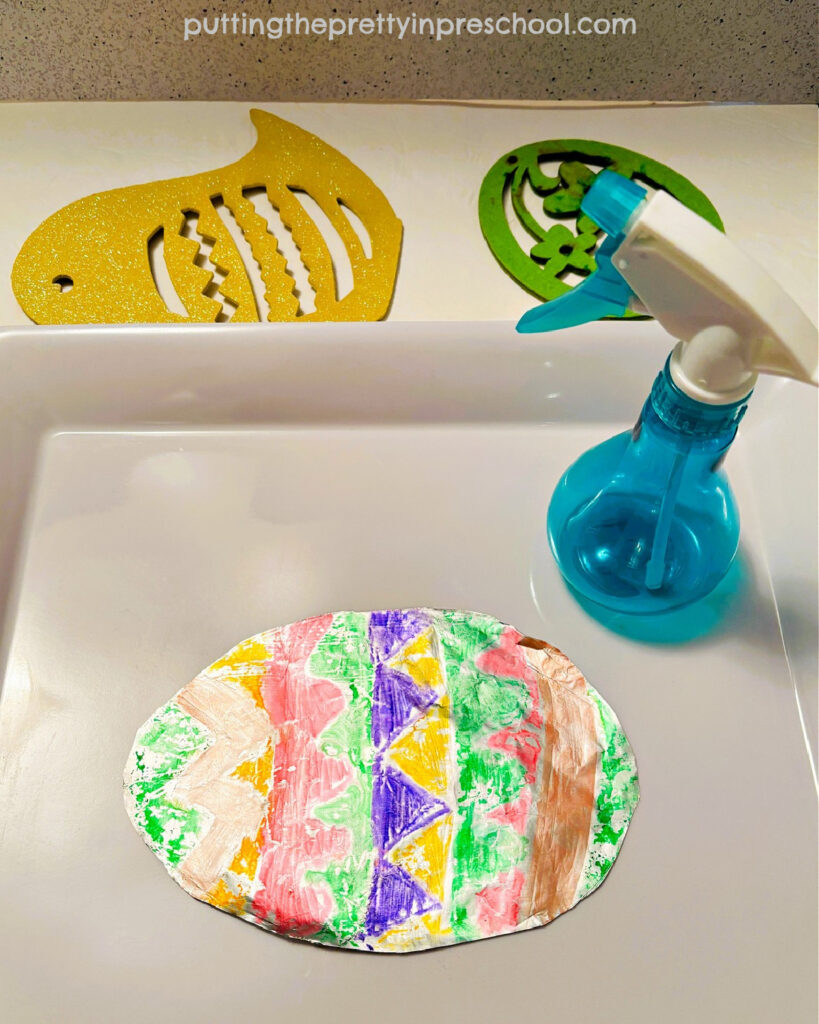
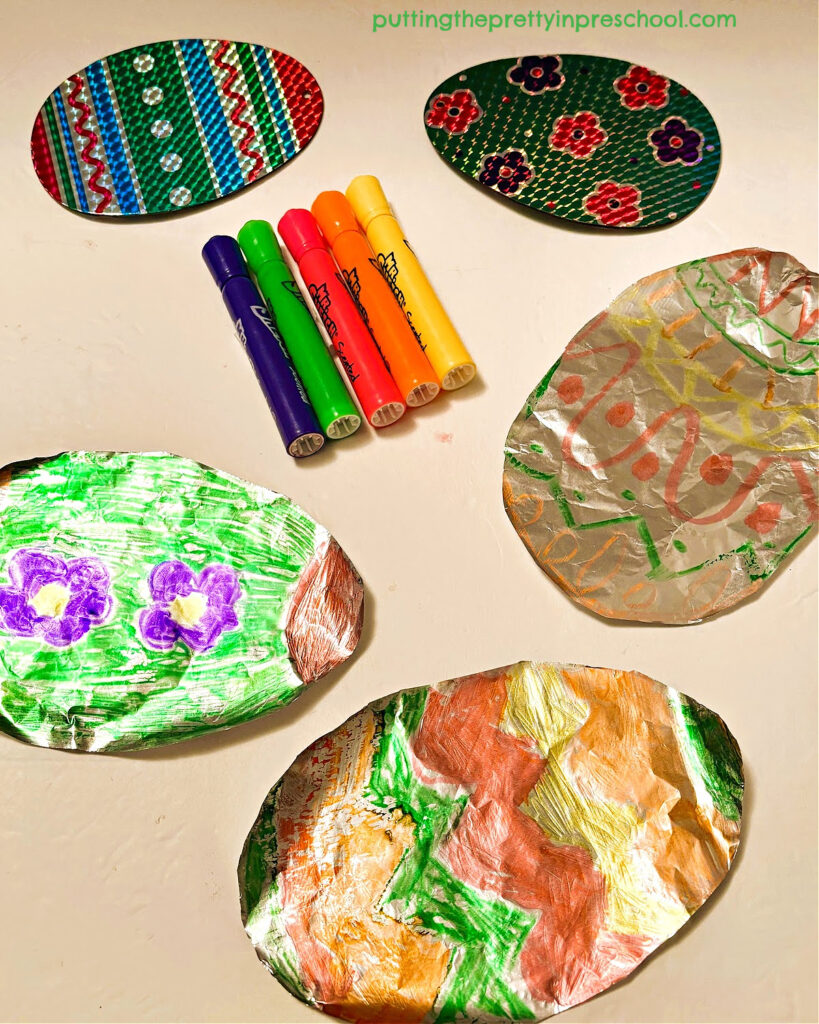
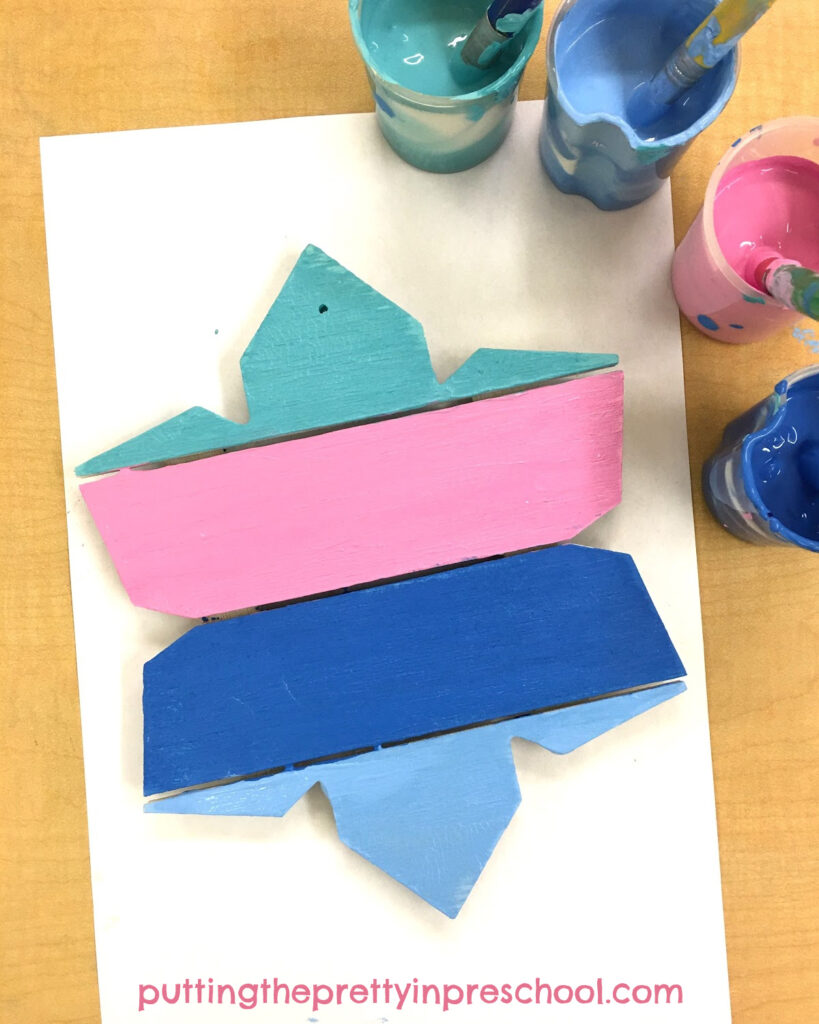
Next, color a foil egg (a unique, unexpected canvas) with water-based markers. Set out a few decorated eggs to offer inspiration.

_______

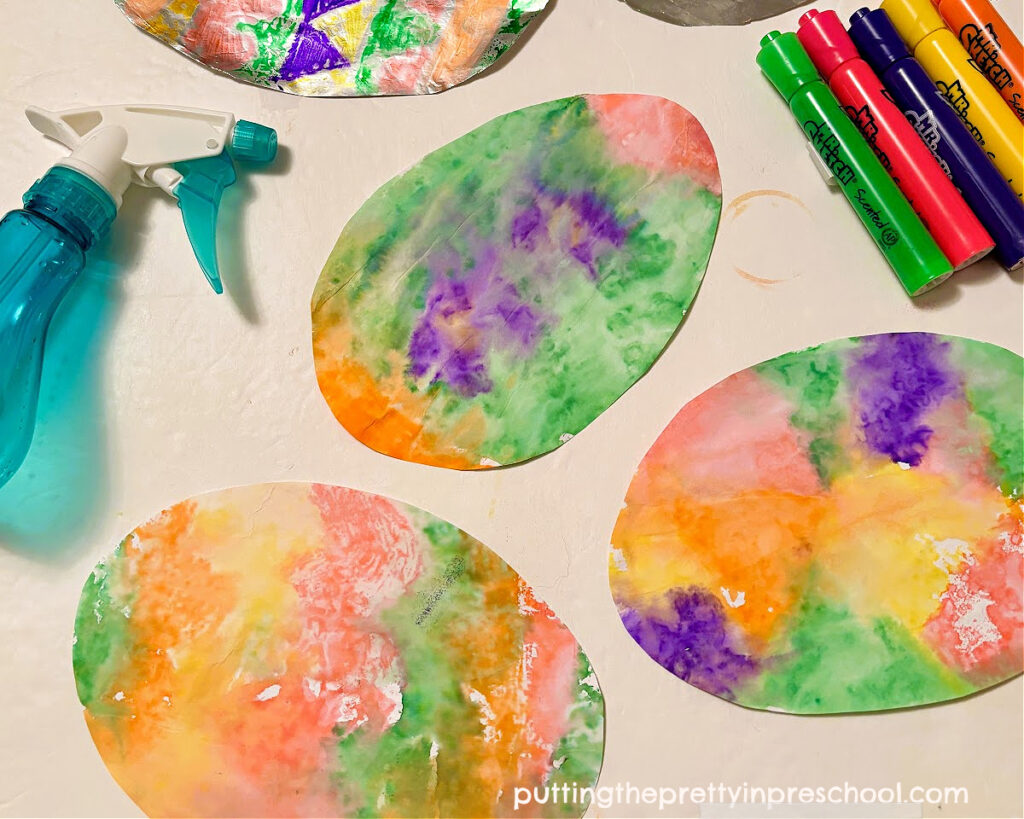
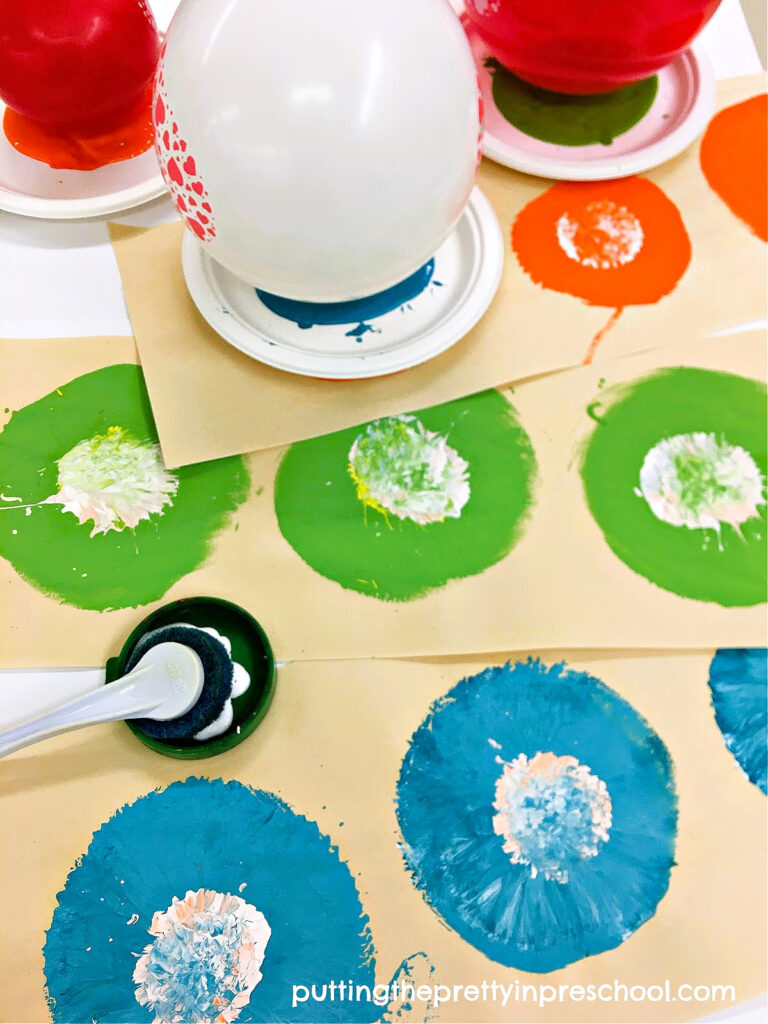
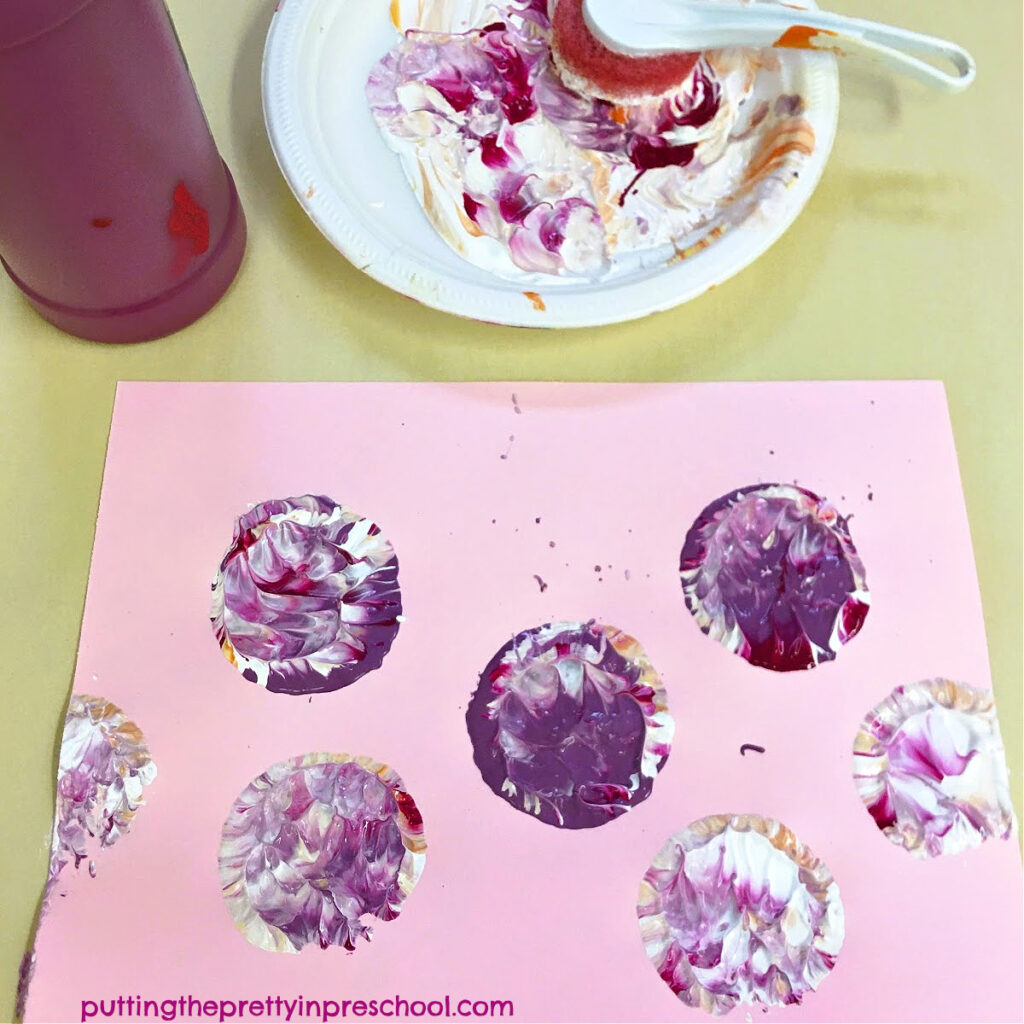
Then place the egg in a low-edged, flat tray and spray it with a small bottle filled with water. Give each area of the egg a little squirt. (Young children will love this step.)

_______

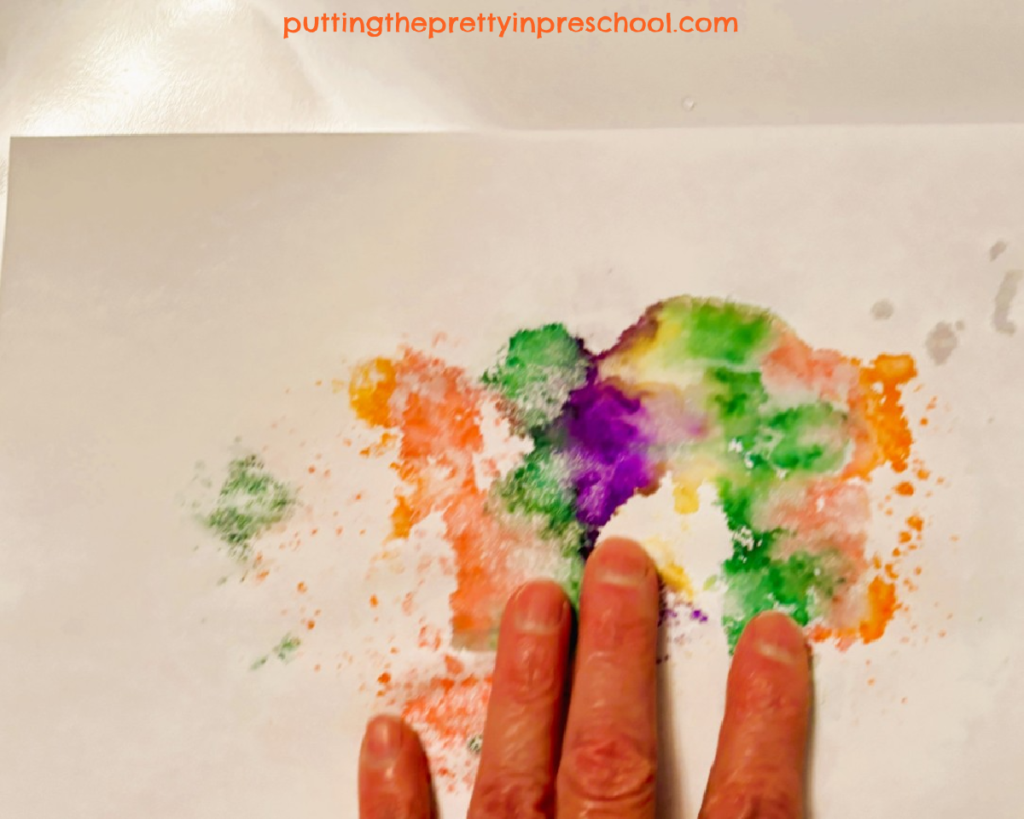
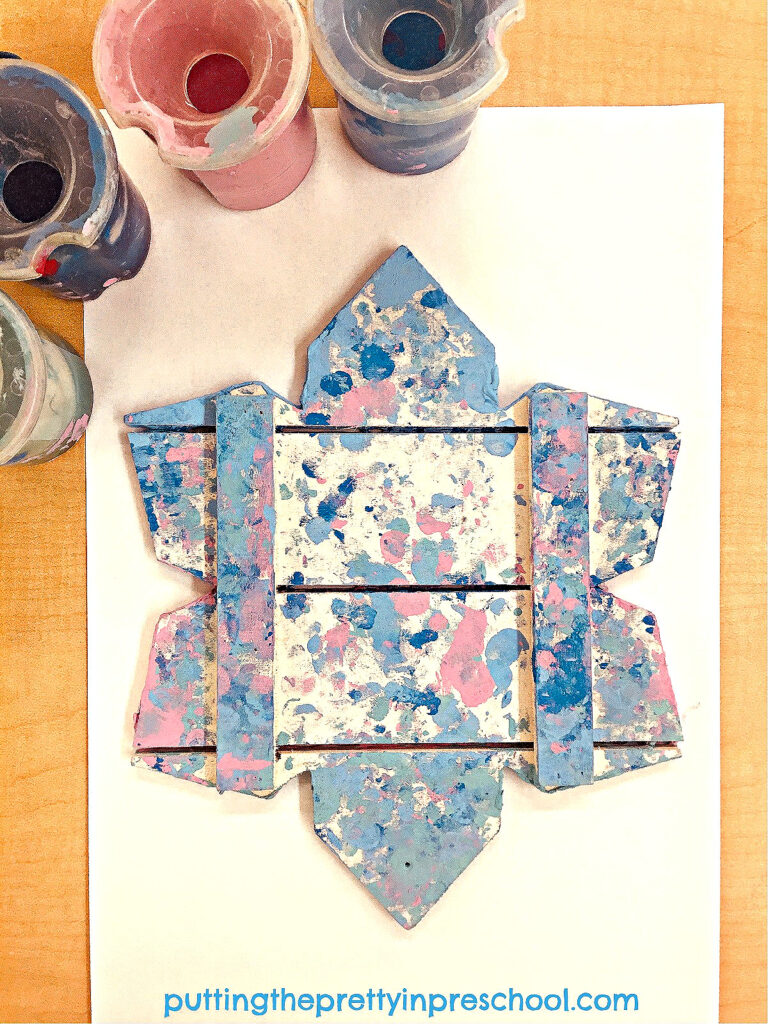
Afterward, lay an 8 ½ x 11-inch sheet of paper over the wet foil egg and firmly rub over the egg. The marker colors will transfer over to the paper.

Tips: Sturdy paper works best for this activity. Watercolor paper or cardstock is a good choice. In addition, the foil eggs are reusable as a printmaking base if dried with a cloth or paper towel after each use.

_______

_______

_______

_______

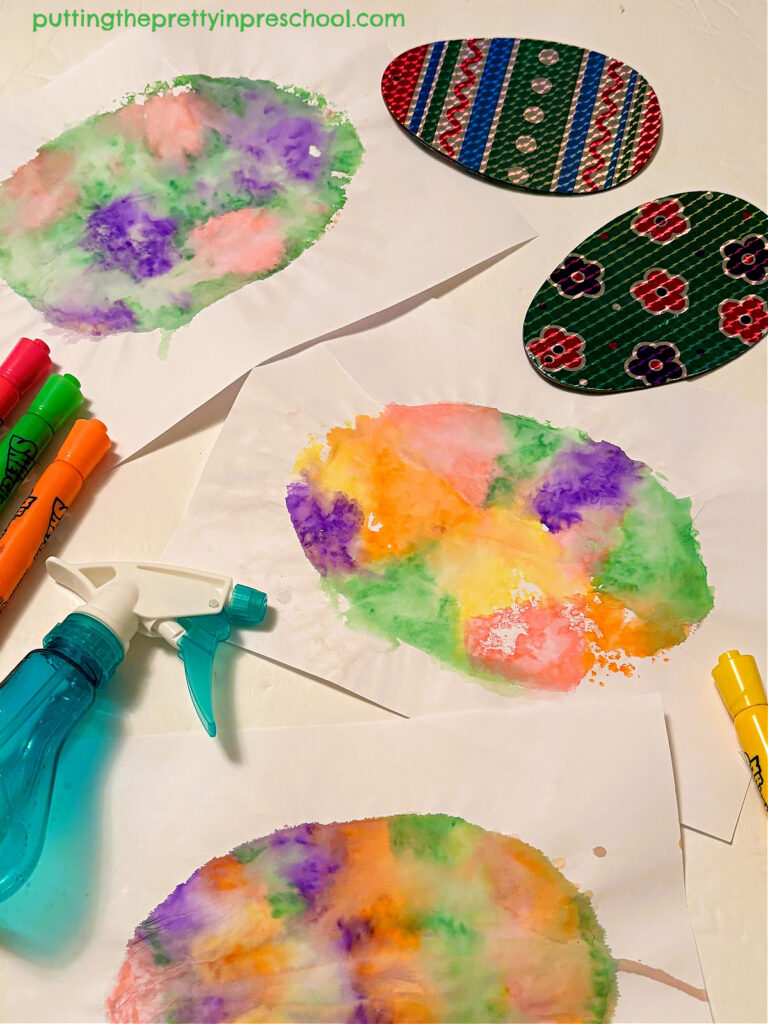
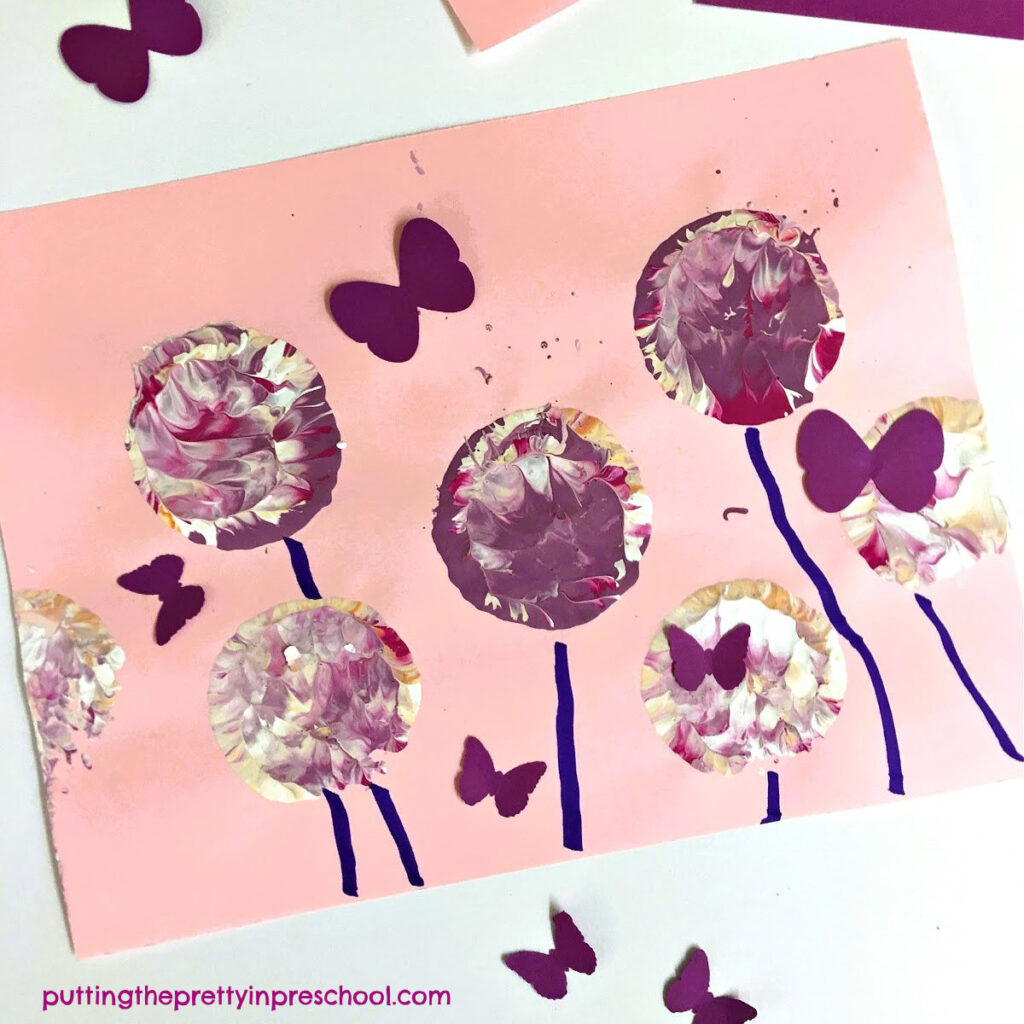
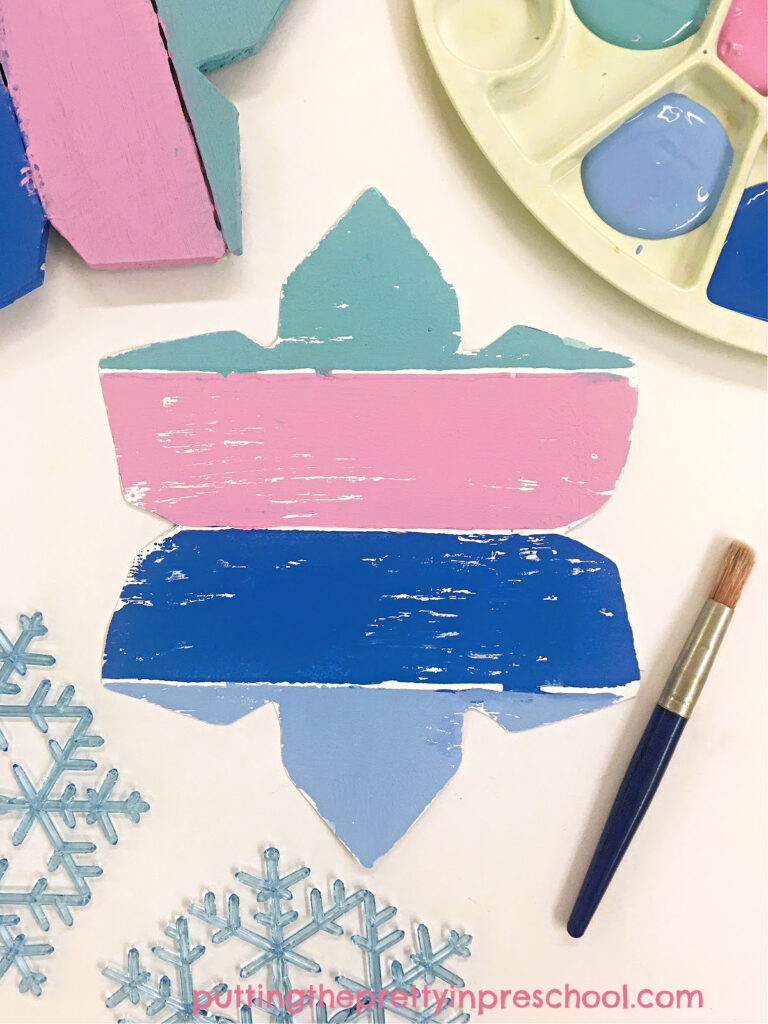
Lastly, cut the printed egg out with scissors after the paper has dried.

_______

_______

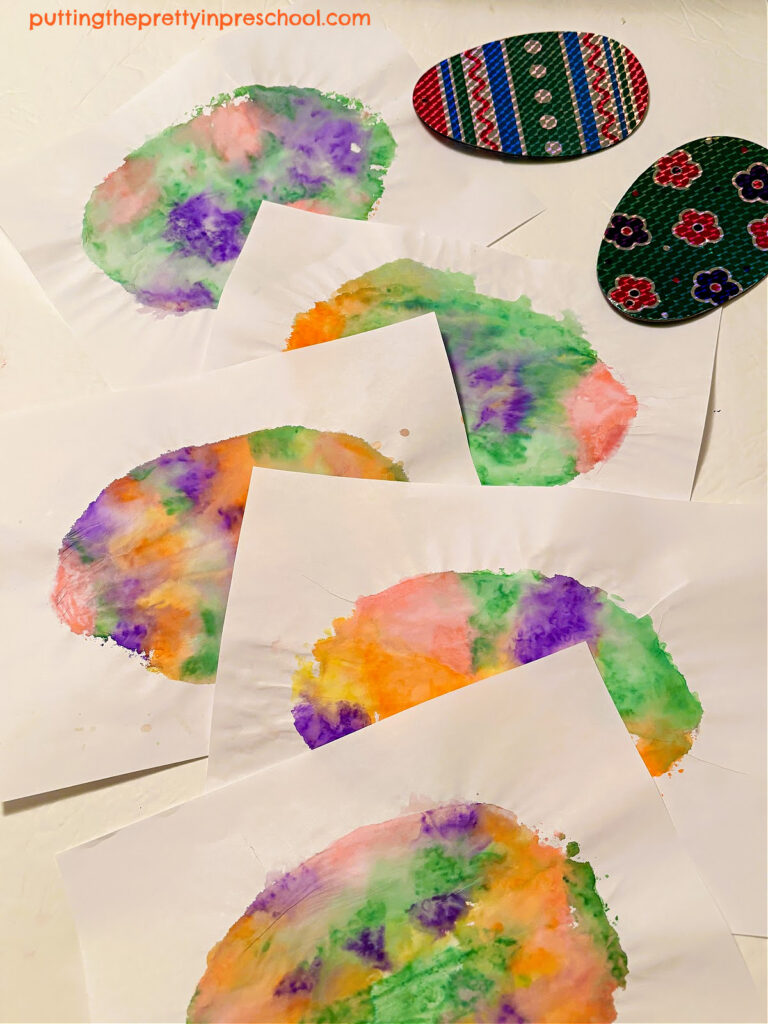
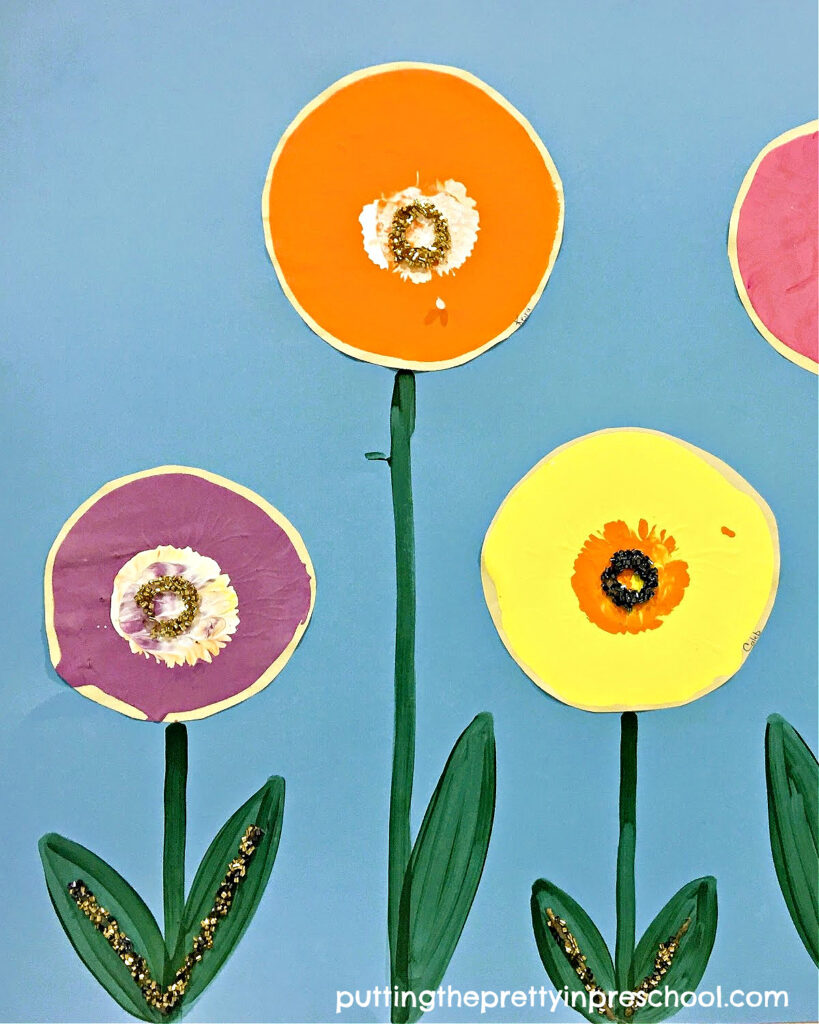
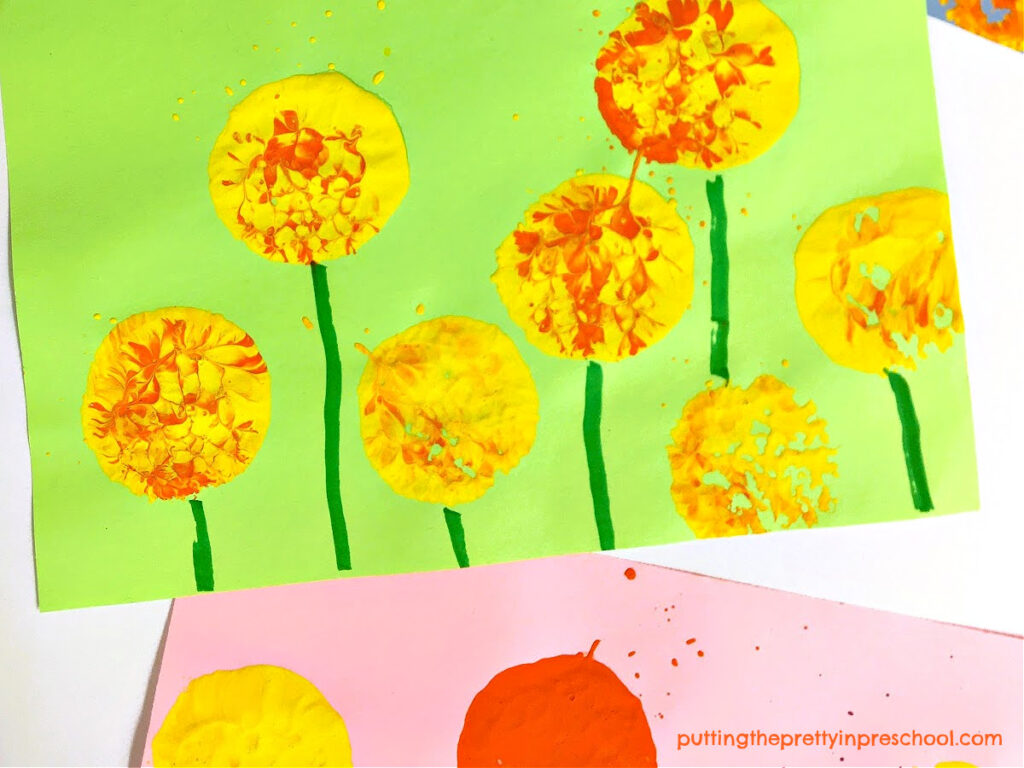
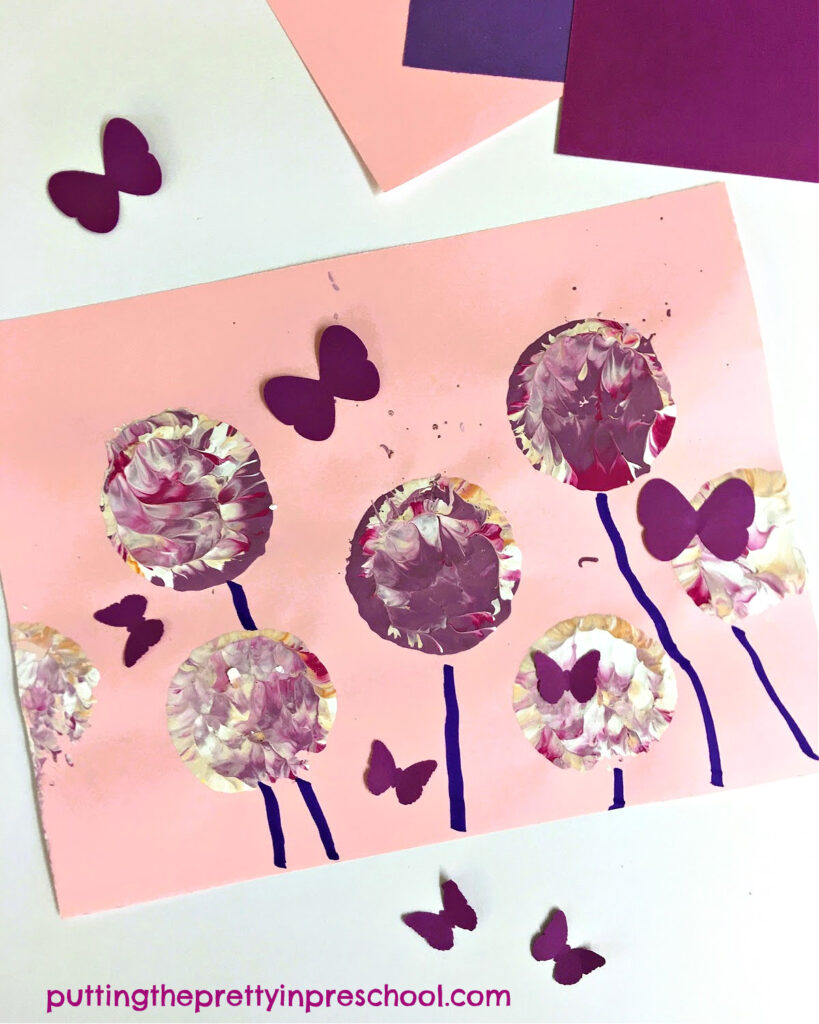
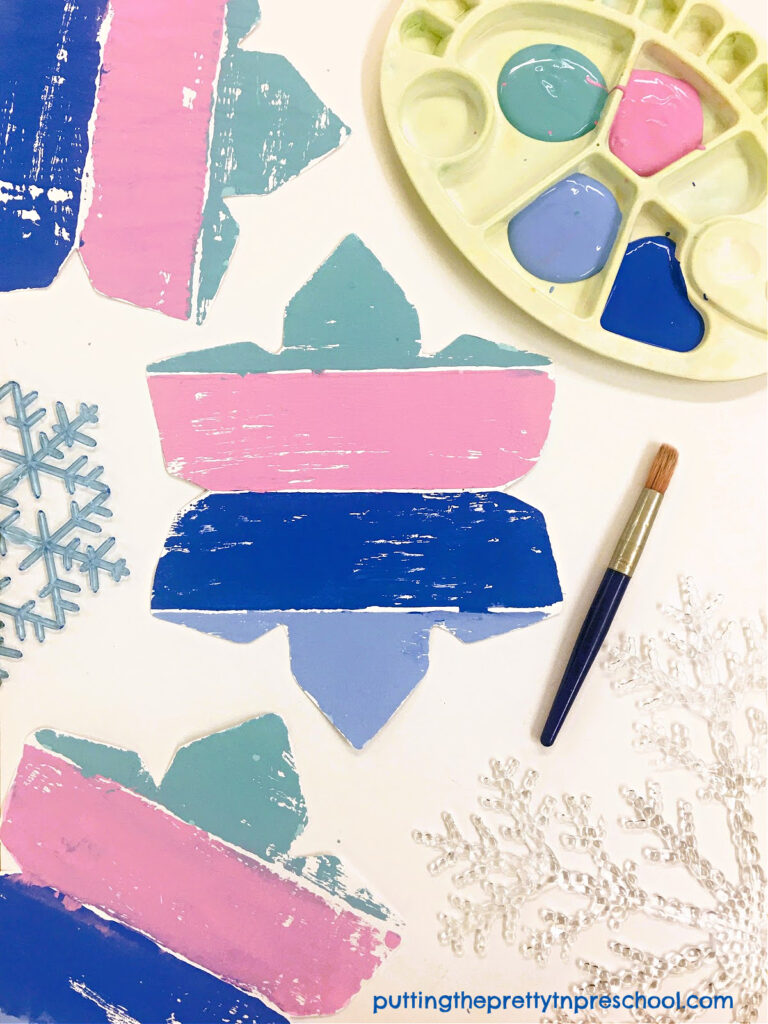
A group of printed eggs would look lovely in a garland or mounted on complementary hues of cardstock.

Some decorated foil eggs could be left as is. The marker colors will dry, and the eggs will look lovely this way, too.

_______

What do you think of this activity?

_______

_______

More Easter Art Activities

Silhouette Bunny Art
Easter Transient Art
Bunny Rolling Pin Art
Dot Marker Easter Bunnies
Chick Headband Craft
Bunny Ombre Art

_______

[Read more…] about Tin Foil Egg Printing

Filed Under: art, Easter, spring Tagged With: Easter, eggs, printables, printmaking, spring

String Painting Snake Art

August 5, 2024 by Annette Kaminsky Leave a Comment

_______

This string painting snake art is perfect for a reptile theme. In addition to enhancing the topic of snakes, it offers children a novel way to paint.

_______

Follow me on Pinterest for more early learning ideas.

_______

Supplies To Collect

_______

Gather the following supplies for this simple string painting activity:

  • sturdy paper
  • tempera paint
  • small disposable plates
  • yarn
  • scissors
  • clothespins
  • spoons
  • waterproof table cover

_______

Preparing The String Painting Snake Art Activity

To set up this novel string art activity, cover a table with a waterproof table cover.

Then spoon tempera paint into small disposable plates.

Next, cut the yarn into lengths about 6 to 8 inches long.

Afterward, attach a clothespin to the end of each strip of yarn.

Set the paint dishes, prepared string, and sturdy pieces of paper onto the art table and the activity is ready to go.

_______

The String Painting Snake Art Project

_______

To create snake-like painted shapes, lay a string on a paint-filled plate, draping the clothespin attached end over the edge.

Use a spoon to press down on the string to ensure it is covered in paint.

Next, carefully lift off the string and lay it on the paper in a snake-like, serpentine pattern.

Then gently put the string back in the same color of paint.

Repeat the process with more paint colors to create snakes in additional hues.

_______

Variations of the String Art Project

After participants have completed a snake art project, invite them to explore more string painting techniques:

  • Dragging the string across the paper covers it more quickly, and allows for paint mixing.
  • Using fingers to manipulate the string instead of clothespins adds a tactile experience.
  • Experimenting with thick and thin string, and longer and shorter pieces creates different effects.
  • Spooning paint on the paper first, and dragging the string through it is another way to paint.

_______

_______

_______

Related:

Northern Lights Squish Painting

Balloon Painting Flower Art

_______

Apple Print Activities

Corn Syrup Paint Sunflowers

Eye Dropper Pumpkin Art

_______

Painting with Corn

Cauliflower Paint Prints

_______

_______

More Reptile-themed Activities

Reptile Theme Activities

Black Playdough Snakes

Reptile Egg Science

Paper Chain Snake Craft

Reptile Active World Tray

Reptile Pet Store Center

_______

[Read more…] about String Painting Snake Art

Filed Under: art, reptiles, science, themes Tagged With: painting, printmaking, snakes

Balloon Painting Flower Art

July 28, 2024 by Annette Kaminsky Leave a Comment

_______

This balloon painting flower art is quick and easy to do and can make a room look cozier in no time. It is an unexpected, novel way to create art. Since children love activities with balloons, they’ll surely enjoy participating in this art invitation.

_______

Supplies To Collect

Gather the following supplies for this large-scale art project:

  • round balloons
  • tempera paints in a variety of colors
  • paper plates
  • 18-inch x 24-inch sturdy paper
  • paintbrushes and paint pots
  • sponge dish wands
  • thin metallic garland
  • white glue and glue paddle
  • scissors
  • waterproof table cover

_______

_______

Balloon Painting Flower Art Set Up

To set up this art project, start by covering an art table with a waterproof table cover.

Next, blow up round balloons to about 1/3 their usual size. Small balloons work fine for this project.

Then pour tempera paint in a variety of colors onto paper plates.

Afterward, drop paint into small plates or paint pot lids and add a sponge dish wand into each one.

Set out the paint trays, balloons, dish wands, and large sheets of sturdy paper on the art table. Your painting invitation is now ready to go.

_______

The Balloon Painting Flower Art Project

_______

To create eye-catching balloon art flowers, press a balloon into one of the paint colors, lift it off, and carefully press it down onto a piece of sturdy paper.

Tip: The firmer a paint-dipped balloon is pressed on paper, the bigger the print. Pressing the balloon down gently creates a smaller print.

_______

Continue to make balloon prints. It’s fun to create flowers in hues of blue and green in addition to more commonly seen colors.

_______

Afterward, dip a sponge dish wand into a contrasting paint color and stamp a circle in the center of each flower-shaped print.

_______

When the roundish prints are dry, cut them out.

Then dip a paintbrush into a pot of green tempera and paint leaves and stems on a large sheet of cardstock paper.

For a shimmery look, add a line of white glue to each leaf and press on a strip of thin metallic garland.

_______

Next, glue the round, bold, balloon-painted flowers on top of the stems using white glue or a glue gun.

To embellish the flower centers, add a circle of glue to each one and affix a strip of thin metallic garland to each of them.

_______

You will have large-scale, stunning flower art ready for display.

_______

_______

Related:

Tulip Art Painting Project

Dish Wand Print Flower Art

Flower Theme Activities

Mother’s Day Crafts and Gifts

_______

[Read more…] about Balloon Painting Flower Art

Filed Under: art, display, flowers, preschool, summer Tagged With: balloons, flowers, painting, printmaking

Dish Wand Print Flower Art

May 5, 2024 by Annette Kaminsky Leave a Comment

_______

This dish wand print flower art project is so easy to do. Grab some round sponge dish wands at a dollar store and a few basic art supplies and you are good to go.

_______

Supplies To Collect

Gather the following for this dish wand print flower art activity:

  • round sponge dish wands
  • tempera paint in a variety of colors
  • fade-resistant cardstock or construction paper
  • paint dishes
  • markers
  • table cover

_______

Follow me on Pinterest for more early learning ideas.

_______

_______

The Dish Wand Print Flower Art Project

To begin this pretty flower art project, pour tempera paint on paint dishes in colors of your choice. Add a little bit of white or yellow paint to your hues to lighten and brighten them if desired.

Next, place a round sponge dish wand in each paint-filled dish.

Then set out 9-inch x 12-inch sheets of construction paper by the paint trays. 8 1/2 x 11-inch cardstock paper works fine too.

_______

Invite participants to make flower prints with the sponge dish wands by dipping them in a color of paint and pressing them on the art paper.

After the dish wand flower prints dry, ask children to use markers to draw a stem below each sponged flower.

_______

Two different paint colors for each flower look nice. In the art piece above the two-toned flower prints are created by using yellow paint first. Afterward, each flower gets an additional color with a wand dipped in orange paint.

_______

Swirling a little magenta and purple paint into white paint before using a dish wand is another way to create two-toned flower art.

_______

Finishing Touches

Enhance this dish wand print flower art project by adding a saying or including paper embellishments.

_______

Add a “Happy Mother’s Day” greeting for a beautiful Mother’s Day keepsake craft.

_______

Glue on a few paper-punched butterflies in a complementary hue for an elegant look.

_______

More Activities With Flowers

Contact Paper Flower Art

Petunia Flower Sensory Tray

Flower Stand Dramatic Play Center

Lilac Flower Sensory Tray

Flower Planting Sensory Tray

Flower Theme Activities

‘

_______

[Read more…] about Dish Wand Print Flower Art

Filed Under: art, flowers, Mother's Day, preschool, summer Tagged With: flowers, keepsakes, printmaking

Giant Snowflake Printmaking

January 26, 2024 by Annette Kaminsky Leave a Comment

_______

This giant snowflake printmaking project gives children a chance to paint on a different canvas and practice a printmaking technique in an ombre color scheme. A large, slatted wooden snowflake is the inspiration and unique find for this printmaking activity.

_______

Follow me on Pinterest for more early learning ideas.

_______

Snowflake Printmaking Craft Supplies

For this gigantic snowflake printmaking activity, gather the following supplies:

  • large slatted wooden snowflake
  • turquoise, red, blue, and white tempera paints
  • paint pots and paintbrushes
  • spoons
  • large sheets of paper

_______

The Giant Snowflake Printmaking Process

_______

To do this snowflake printmaking activity, select a large, wooden snowflake for the canvas. This oversized snowflake with four wooden slats works perfectly for an ombre painting activity.

Next, choose tempera paint colors. In this ombre design, the chosen colors are shades of blue, pink, and turquoise.

Then stir white paint into the red, blue, and turquoise temperas to create hues to your liking. Varying amounts of white mixed with blue tempera paint make the light and medium blue hues. White added to red makes a pastel pink shade. And white added to turquoise makes the lighter hue.

_______

Afterward, set out the paints in pots and add a paintbrush to each one.

Paint each slat a different paint color. Apply the colors generously, and make sure to give the outside edges an extra good coat.

_______

Finally, carefully flip the wooden snowflake over onto an 11-inch x 14-inch piece of sturdy art paper, or an 11-inch x 17-inch piece of copy paper. Press firmly on all parts of the unpainted side of the snowflake, and then lift it off carefully.

_______

Tip: You may want to make two prints for your first try with this painting technique. The tempera paint will transfer over better on the second try.

When the paint print snowflake is dry, trim the top and bottom edges of the paper. Or cut the colorful snowflake out.

_______

The wooden snowflake canvas can be used over and over if you are introducing this printmaking activity to a group of children.

Large printed snowflakes positioned at different angles display beautifully together.

_______

Helping Little Learners Experience The Printmaking Process

Little learners will need help when performing this giant snowflake printmaking activity in the following ways:

  • painting each slat the appropriate color
  • applying paint to all areas of the wooden canvas
  • flipping the snowflake over to make a print on paper

In this activity, they can label and match colors, learn about an ombre color scheme, and practice a printmaking art activity.

_______

Variations Of This Giant Snowflake Printmaking Activity

To follow up this art experience, invite participants to paint the snowflake canvas any way they would like to allow for individual creativity.

A second idea is to offer wooden snowflakes in a smaller size. This gives little learners a chance to make snowflake prints independently.

_______

More Winter Activities

Winter Playdough Recipe

Spray Paint Snowflake Silhouette

Blue Candy Cane Science Experiment

Winter-themed Treasure Blocks

Igloo Camping Pretend Play

Polar Bear Small World

Winter Sensory Trays

Painting Ice and Snow

Winter Wreath Paper Plate Craft

Ice Drum Musical Instruments

_______

[Read more…] about Giant Snowflake Printmaking

Filed Under: art, preschool, winter Tagged With: color, loose parts, printmaking, snowflakes

Zucchini Leaf Paint Prints

September 2, 2023 by Annette Kaminsky Leave a Comment

How to make large zucchini leaf paint prints in fall colors. This is an all-ages garden art activity that everyone will enjoy giving a try.
How to make large zucchini leaf paint prints in fall colors. This is an all-ages garden art activity everyone will enjoy giving a try.

_______

Fall is a popular time to do art activities with leaves. Aside from picking tree leaves to work with, don’t overlook garden plants as interesting subjects for leaf art projects. For instance, the zucchini plant is one with large, curvy leaves that beg to be used in painting or drawing projects. In this post, the garden plant is featured in a stunning zucchini leaf paint prints art activity.

Zucchini ready to be harvested in mid summer.

_______

Zucchini is a green summer squash with large yellow star-shaped flowers and silver-speckled leaves. All parts of the zucchini plant can be eaten, and it is a common food in many cultures.

A gorgeous star-shaped flower on a zucchini plant.

_______

Follow me on Pinterest for more early learning ideas.

_______

Supplies To Collect

Gather the following supplies for zucchini leaf print art:

  • zucchini leaves
  • tempera paint in fall colors
  • paintbrush
  • paper towel sheets
  • garden or disposable gloves
  • 11 x 14-inch sturdy art paper
  • waterproof tablecloth or large sheet of manilla paper

_______

Making The Zucchini Leaf Paint Prints

As this is a painting activity, first lay down a waterproof tablecloth. A large sheet of manilla paper also works fine.

Next, fill paint pots with red, green, yellow, and orange tempera paint.

A large, silver-speckled zucchini leaf ready to paint for a leaf printmaking activity.

_______

Then set up a station with a zucchini leaf, a paintbrush, and a paper towel sheet. Add pots filled with red, yellow, green, and orange paint.

Put on gloves and paint the leaf, dabbing excess paint onto a paper towel sheet between colors.

A zucchini leaf is a good subject for a printmaking activity. The painted leaf makes a beautiful paint print.

_______

When the leaf is covered in paint, carefully flip it over on a large sheet of all-purpose art paper, gently pressing all parts of the leaf down.  

A leaf print in fall colors made with a large zucchini leaf and tempera paint. An all-ages art activity everyone will enjoy.

_______

If the leaf is covered with a lot of paint, a second print can be made with it. The print has a little less paint but looks equally beautiful.

How to make a leaf print in fall colors with a large zucchini leaf and tempera paint. An all-ages art activity everyone will enjoy.

_______

Note: The stem and back of the zucchini leaf are a little prickly, so wearing a pair of garden or disposable gloves is advisable.

_______

Zucchini Leaf Tracing

Zucchini leaves have interesting curves and edges and also make good subjects for tracing. Before painting the zucchini leaf, trace around it and then color it in with crayons or pencil crayons. Or use the zucchini leaf template below to paint or color.

A free zucchini leaf template for art and craft activities.

_______

Zucchini Leaf PrintableDownload

This printable is for individual or one classroom use only.

_______

Zucchini Leaf Transient Art

Once the printmaking activity is done, the painted leaf can be displayed for a few days or even a couple of weeks. Although the leaf isn’t flat at the start, it becomes very flat afterward, making it easy to work with in a wall display.

Or you can just paint the leaf as a transient art project without using it for printmaking

A painted zucchini leaf used in printmaking can be displayed for a few days or weeks as transient art.

_______

Pumpkin Leaf Transient Art

A pumpkin leaf also makes a great canvas, as it is large and uniquely shaped. As a transient art activity, set out a pumpkin leaf for a painting activity. You may want to tape the back of the leaf down to make it a little flatter before using it as a canvas.

A large pumpkin leaf on a vine can be picked and used in a transient art painting activity.

_______

Paint a large pumpkin leaf canvas with fall-colored tempera paints for a beautiful transient art project.

_______

Related:

Maple Leaf Activities

Spin Painting Maple Leaf Art

Horse Chestnut Leaf Art Activities

_______

[Read more…] about Zucchini Leaf Paint Prints

Filed Under: art, autumn, display, gardening, preschool, science Tagged With: gardening, leaves, painting, printmaking, pumpkin, zucchini

Shamrock Leaf Print Art

March 12, 2023 by Annette Kaminsky Leave a Comment

How to make beautiful shamrock leaf print art with sprigs from an Oxalis Regnelli plant. An easy-to-do all-ages art project.

_______

Shamrock leaf print art is an activity I’ve wanted to try for a few years now, and this spring I carved out time for it. The art project is easy and enjoyable to do, and I am sure you will like it too.

A good time to try this leaf print art activity is around St. Patrick’s Day, as shamrock plants are plentiful in stores then. The compound leaves on the plant look like the shamrock symbol that the country of Ireland is known for. Irish people think shamrocks represent good luck, and they are prominent in clothing, decorations, and tableware during St. Patrick’s Day celebrations.

An Oxalis Regnelli shamrock plant with compound leaves composed of three triangular leaflets.

_______

The shamrock plant I found is called Oxalis Regnellii, which comes from Africa and some parts of the Americas. It has delicate leaves with three triangle-shaped leaflets. The leaves fold up neatly on overcast days and anytime it is dark, and open up when they are exposed to sunlight. The tiny, white, long-stemmed flowers have five petals.

A tiny white flower on an Oxalis Regnellii plant.

_______

Follow me on Pinterest for more early learning ideas.

_______

Supplies To Collect

Gather the following supplies for this nature-based art project:

  • shamrock plant
  • green and purple acrylic or tempera paint
  • paint pots
  • paintbrushes
  • purple and green pencil crayons
  • all-purpose art paper
  • green and purple construction paper
  • newspaper or manila paper
  • magnifying glasses

_______

Making The Shamrock Leaf Print Art

Before using the shamrock leaves for printmaking, give participants a chance to study the plant. Offer magnifying glasses to view the leaves and dainty flowers with yellow stamens. Set the plant out in a sunny place and then put it in a dark area to see how its leaves fold down and spread out depending on how much sunlight the plant is getting.

To prepare the art activity, snip a few leaves off the plant to use for making paint prints.

Steps to make beautiful shamrock leaf print art. This is an easy-to-do all-ages nature art project

_______

Next, lay down newspaper sheets or a large piece of manilla paper for participants to work on.

Then add an art station with a sheet of all-purpose art paper, leaf sprig, paintbrush, and green acrylic paint for each participant. My paper size is an 11-inch x 14-inch inch sheet cut in half, creating a 7-inch x 11-inch piece to work on.

Note: Non-toxic tempera paint is a good choice for young children taking part in the activity.

Afterward, invite participants to brush the tops of the leaflets on their sprig thoroughly with green paint, flip the leaf over, and carefully press the painted sides down on the paper.  Have them gently rub their fingers over the leaflets and pat the edges down to transfer as much paint to the paper as possible.

Beautiful shamrock leaf print art with leaves from the Oxalis Regnelli plant. This is a nature art project that is perfect for St. Patrick's Day.

_______

Then ask everyone to slowly lift their leaf off the paper canvas and repaint it to make more leaf prints. The shamrock leaves are delicate, but when handled gently they can be used a few times. If someone’s leaf tears, offer a new sprig to use.

When the paint prints are dry, ask participants to use a pencil crayon to add stems to the leaves.

As a finishing touch, mount each shamrock leaf print art project on a similar-colored construction paper background.

_______

Making Purple Shamrock Leaf Print Art

A purple shamrock, called Oxalis Triangularis, has similarly shaped leaves and flowers as the Oxalis Regnallii. This purple shamrock showcases deep purple, dark-edged leaves that respond to darkness and light in the same way.

A purple shamrock plant with compound leaves composed of three triangular leaflets.

_______

With purple acrylic or tempera paint, let participants create shamrock prints just as they were made in green.

Beautiful shamrock leaf print art with leaves from the Oxalis Regnelli plant. This is a nature art project that is perfect for St. Patrick's Day.

_______

If there are any leaves left on the plant after the printmaking activity is done, add them to a playdough activity. Or have someone without pets take the plant home to care for.

Note: All Oxalis plants are toxic to dogs, cats, and grazing animals such as horses and must be kept out of their reach. These plants are slightly toxic to humans. Make sure to supervise all shamrock leaf activities closely so that no one ingests the leaves.

How to make beautiful shamrock leaf print art with sprigs from an Oxalis Regnelli plant. An easy-to-do all-ages art project.

_______

More Shamrock-themed Activities:

Shamrock Paper Plate Lion

Shamrock Dissolving Candy Experiment

St. Patrick’s Day Painted Shamrock

Shamrock Rolling Pin Art

Scissor Skill Shamrock Collage

[Read more…] about Shamrock Leaf Print Art

Filed Under: art, playdough, preschool, science, sensory, spring, St. Patrick's Day Tagged With: art, leaf prints, leaves, printmaking, shamrocks, St. Patrick's Day

Gadget Printmaking Poppy Art

November 10, 2022 by Annette Kaminsky Leave a Comment

Try this beautiful gadget printmaking poppy art project today! It introduces participants to a new and unusual way to paint.

_______

It started with a large dot print made with a pie pan, tempera paint, and a paintbrush. The intent was to make a simple red poppy print with a black round center. But afterward, I decided to add paint markings with gadgets to add more color and definition. The result is super striking gadget printmaking poppy art that’s easy and fun to do.

This poppy art is perfect for a Remembrance Day project. Red poppies are a symbol of lives lost to war since World War I. They especially serve as reminders of this each year on November 11, the Remembrance Day holiday in our country.

How to make stunning gadget printmaking poppy art.

_______

Follow me on Pinterest for more early learning ideas.

_______

Poppy Art Supplies

Gadgets used as painting tools make interesting prints, and you can find them all over your home. Here are the gadgets I use for this large-scale art activity:

  • 9-inch round cake or pie pan
  • Jumbo circular bubble wand and tray
  • ground meat chopper
  • spools
  • bottle sponge brush
  • round sponge brush

A few simple supplies complete the list of items needed to make poppy art:

  • tempera paint colors in bright red, yellow, green, pink, and orange
  • 12-inch x 16-inch sturdy white paper
  • green construction paper
  • green marker
  • ruler
  • scissors
  • glue stick
  • flat plate or tray

_______

Gadget Printmaking Poppy Art Steps

Simple steps to create beautiful poppy art with a gadget printmaking technique. The art project introduces participants to a new and unusual way to paint.

_______

First, lay out a large sheet of sturdy paper on a table.

Next, pour red paint on a tray or flat plate. Dip the bottom of a round cake or pie pan in the paint, and press it down on the paper background to make the flower head.

Then dip a bubble wand into orange paint and press it in the middle of the dot. The bubble wand tray holds the paint perfectly for this step.

Afterward, press a sponge bottle brush into the green paint, and make a print in the center.

Then dip a spool into black paint, and press it into the very center of the flower.

Bubble wand, sponge bottle brush, and spool paint prints add color and definition to this gadget printmaking poppy art project.

_______

Next, draw on a stem with a green marker. If desired, use a ruler to keep the stem line straight.

Finally, cut a simple leaf from green fadeless construction paper, and glue it onto the stem.

_______

Poppy Art Color Variations

The gadgets and paint colors used for enhancing the red poppies can be varied. In this art project, a bubble wand, bottle brush, and two spools are the gadgets used.

Try this beautiful gadget printmaking poppy art project today! It introduces participants to a new and unusual way to paint.

_______

A ground meat chopper paint print adds detail to the flower center below.

A bubble wand and ground meat chopper paint print add color and definition to this gadget printmaking poppy art project.

_______

Remembrance Day Poppy Art

Simple steps to create beautiful Remembrance Day poppy art with a gadget printmaking technique. The art project introduces participants to a new and unusual way to paint.

_______

This next project employs the bubble wand tray for the large dot print. The tray is not as big as the cake or pie pan, so can be used with a smaller-sized paper base. And it has a scalloped edge, adding character to the poppy dot. This design is my pick for the official Remembrance Day art project for this year.

For the flower center, dip a round sponge brush or small round sponge into black paint, and press it in the middle of the red dot print. Then press a sponge bottle brush into yellow paint, and make a print on top of the black circle. Finish off with a black spool print in the center of the flower.

Tip: Letting the red and black paint dry for a few hours helps the yellow sponge bottle print stand out and remain bright.

Create this beautiful Remembrance Day poppy art with a gadget printmaking technique. The art project introduces participants to a new and unusual way to paint.

_______

_______

More Gadget Printmaking Poppy Art Ideas

Instead of using only red for the large flower petal dot, introduce a few more color choices, such as yellow and orange. The colors will blend in nicely to make red-orange hues, adding shading and texture.

And since poppies come in a variety of colors, you could choose an entirely new color scheme for this project.

Bubble wand, sponge, meat chopper, bottle brush, and spool prints add highlights and detail to the poppy flower art. And the gadget painting technique introduces participants to a new and unusual way to do painting and printmaking.

_______

How to make stunning gadget printmaking poppy art.

_______

Bubble wand, sponge bottle brush, and spool paint prints add color and definition to this gadget printmaking poppy art project.

_______

More Remembrance Day Art Projects

Remembrance Day Butterfly Craft

Remembrance Day Poppy Art

_______

[Read more…] about Gadget Printmaking Poppy Art

Filed Under: art, autumn, fall, gardening, preschool, Remembrance Day Tagged With: flowers, poppies, printmaking, Remembrance Day

Apple Print Activities

October 16, 2021 by Annette Kaminsky Leave a Comment

Apple print activities. Dip and paint apple halves and slices and press them onto art paper. Save some prints for fingerplays and counting.

_______

Apples are so plentiful in fall and come in many sizes and colors. Besides enjoying the crunchy, juicy fruits in pies, squares, and drinks, set aside some for apple print activities.

To start off, show early learners a selection of apples in contrasting colors. A green Granny Smith, a yellow golden delicious, and a red royal gala apple make good fruits to set out and discuss. They are also easy to find in stores.

Little learners would be excited to taste the apples. Cut some into chunks and invite children to taste apples in all three colors.

Follow me on Pinterest for more early learning ideas.

Pick an inexpensive apple to use for the craft. I picked a smaller-sized apple on sale at a local produce store. Cut some apples in half from top to bottom, and slice others horizontally. Have early learners notice the seeds, and count them. Highlight the star shape in the horizontally cut apples.

Then invite children to use the apples for printmaking.

_______

Supplies To Collect

  • green, red, and yellow tempera paints
  • 12-inch x 18-inch sturdy art paper
  • small plates or trays
  • paintbrushes
  • apple halves

_______

Making Apple Prints

Pour a little red, green, and yellow paint in small flat dessert dishes or disposable plates. Add a little yellow to the green paint to lighten and brighten the color.

Allow little ones to dip apples into the paints, and make prints on the paper.

Fun and easy printmaking with apples.

_______

Another way to do this activity is to have early learners paint the apple halves instead, and then press them on the paper. It is easier to control the amount of paint on the apples this way.

Apple printmaking with green, red, and yellow tempera paints.

_______

Tip: After each painting experience, apple pieces can be rinsed and used again by another child.

_______

More Apple Print Activities

Apples often come in two different colors, like red and green, or yellow and red. To extend the painting experience, invite children to paint each apple half in a different color, and make prints with them.

Add some fun by making apple prints in two different colors.

_______

Thin the paints. Invite little learners to make prints on sections of paper towel roll. The absorbency and texture of the towels give the prints a unique look.

Make two-colored apple prints on absorbant paper towel.

_______

Instead of using apple halves, set out apple slices for the children to use. They work well too!

Printmaking using apple slices on a section of absorbant paper towel.

_______

After the paintings are dry, cut out a few prints to use in fingerplays and counting activities.

Cut apple paint prints used in fingerplays and counting activities.

_______

And the apple prints would make great additions to an apple tree or a wreath craft.

_______

[Read more…] about Apple Print Activities

Filed Under: apples, art, autumn, Math, preschool Tagged With: apples, colors, counting, printmaking

New Year’s Countdown Activities

December 30, 2020 by Annette Kaminsky Leave a Comment

Art and math New Year's countdown activities. Printmaking with fringed toilet rolls, collage art, and number matching opportunities.

_______

These New Year’s countdown activities give practice in number recognition and counting down from 10 to 1. And how fun is it for early learners to print fireworks with fringed toilet paper rolls!

_______

Printmaking Fireworks

Supplies needed:

  • Happy New Year printable (downloadable below)
  • scissors
  • toilet paper rolls
  • magenta, yellow, and light blue tempera paint
  • small plates or container lids
  • paintbrushes

_______

Happy New Year Printable

New Year's Countdown template to use for art and math activities with young children. Invitation to add paint print fireworks, count down from 10 t0 1 and match numbers.

_______

Download this “Happy New Year” printable for the fireworks art activity. It can be printed on 8 1/2 inch x 11-inch paper, or 11-inch by 17-inch paper.

_______

Happy New Year PrintableDownload

This printable is for individual or one classroom use only.

_______

The Printmaking Invitation

Do the following steps to paint print fireworks:

Cut fringes into one end of three toilet paper rolls.

Bend the fringes on each paper roll outward.

Pour magenta, yellow, and light blue paint into small plates or lids.

Set out the paints, paper rolls, and paper on a table.

Ask your little learner to dip the fringed end of each paper roll into a color of paint and make a firework print on the paper.

Encourage your little one to add more prints in each paint color to the page.

Invitation to paint fireworks with fringed toilet paper rolls.

_______

Tip: Try this on a practice sheet first.

For added control, fringed ends can be painted with a brush instead of being dipped in paint.

New Year's fireworks printmaking with fringed toilet paper rolls.

_______

Fireworks paint prints made with fringed toilet paper rolls.

_______

To incorporate number recognition and matching practice, ask your early learner to cover the numbers 10 to 1 with numeric stickers.

Number matching on a New Year's countdown printable.

_______

Dot Marker New Year’s Countdown

Another way to use the New Year’s Countdown printable is to let your little learner decorate it with paper stars. Then ask your little one to count down the numbers from ten to one, dabbing each numeral with a dot marker as it is spoken.

Dot marker New Year's countdown invitation.

_______

Dot marker New Year's countdown activity.

_______

These New Year’s countdown activities will be sure to help your early learner start the new year off on a positive note. Let the counting begin!

_______

New Year's countdown printmaking and number matching printable.

_______

More New Year’s Activities

New Year’s Eve Sensory Tray

New Year’s All Gold Sensory Activity

New Year’s Crafts

New Year’s Sensory Tray

New Year’s Art and Math Activities

_______

[Read more…] about New Year’s Countdown Activities

Filed Under: art, Math, New Year's, preschool Tagged With: Happy New Year, New Year's Eve, painting, printables, printmaking

  • Page 1
  • Page 2
  • Go to Next Page »

Primary Sidebar

Hi, I'm Annette Kaminsky. I am a preschool teacher who loves to share easy and fun early learning activities. Thanks for visiting my blog. Feel free to stay awhile!

Subscribe Via Email

Recent Posts

  • Salt and Ice Science Experiment May 20, 2025
  • Airplane Rice Sensory Bin May 16, 2025
  • Salt Painting Planet Art May 3, 2025
  • Spring Bunny Sensory Bin April 19, 2025
  • Tin Foil Egg Printing April 17, 2025
  • Lentil Easter Bunny Sensory Bin April 15, 2025
  • Unicorn Store Dramatic Play Center March 25, 2025
  • Easter Store Dramatic Play Center March 23, 2025
  • Origami Heart Wreath February 28, 2025
  • Black History Month Mixed Media Art February 26, 2025

Categories

Topics

block play bunnies butterflies Chinese New Year Christmas Christmas craft color colors dramatic play Easter flowers hearts holiday jewelry leaves leprechauns light table loose parts painting paper crafts playdough pretend play printables printmaking process art pumpkins rice bin scented playdough science experiment scissor skills sensory bin sensory play sensory tray shamrocks skeletons snakes snowflakes spiders spring St. Patrick's Day sunflowers tablescapes trees Valentine's Day water play

Copyright © 2025 · Lifestyle Pro on Genesis Framework · WordPress · Log in