• Skip to secondary menu
  • Skip to main content
  • Skip to primary sidebar

Putting The Pretty In Preschool

Finding Beauty In Everyday Early Childhood Experiences

  • Home
  • About Me
  • Winter
  • Chinese New Year
  • Blog
  • Contact Me
  • Black History Month
  • SHOP
  • Valentine’s Day

art

Dot Marker Easter Bunnies

April 8, 2023 by Annette Kaminsky Leave a Comment

Tweet
Share
Share
Pin
These super easy and fun dot marker Easter bunnies are created on canvas board. This is an all-ages silhouette bunny art project.

_______

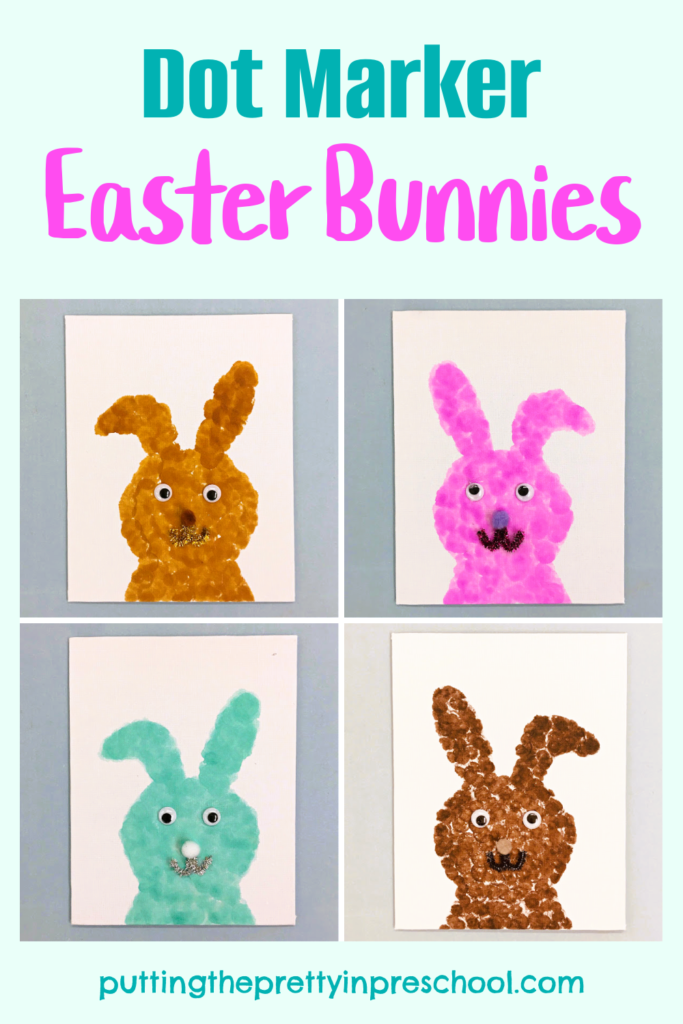
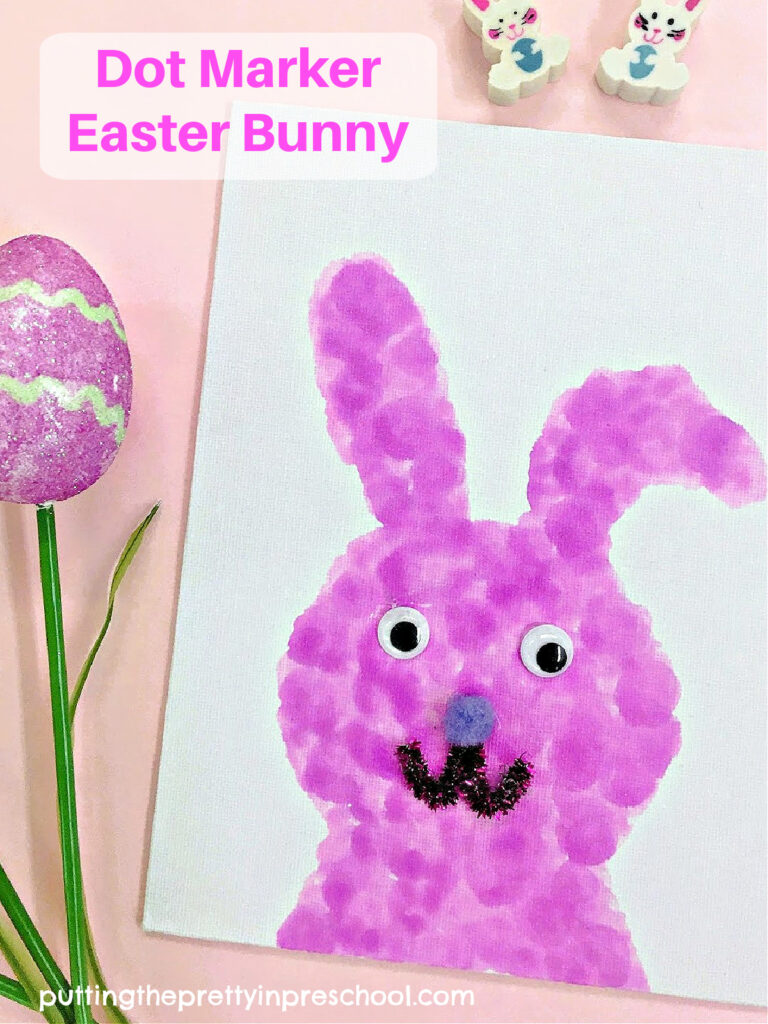
These dot marker Easter bunnies are easy and fun to create. This project is the third in a series of silhouette bunny canvas art activities on my blog, all completed with dot markers. Long-eared fluffy-tailed bunnies make the perfect subject for the art technique.

_______

Follow me on Pinterest for more early learning ideas.

_______

Supplies To Collect

Try making these dot marker silhouette bunnies in a few different colors. This easy-to-do bunny art project displays well.

_______

Using dot markers on a canvas board is a satisfying way to create art. Gather the following supplies to do it:

  • 6-inch x 8-inch canvas board
  • non-toxic dot markers
  • bunny silhouette template
  • pipe cleaners
  • wiggly eyes
  • buttons
  • scissors and pencil
  • glue gun or white glue

_______

Making the Dot Marker Canvas Art Project

Steps to create bunny silhouette art with dot markers, a template, and canvas board. Give this art project a try today.

_______

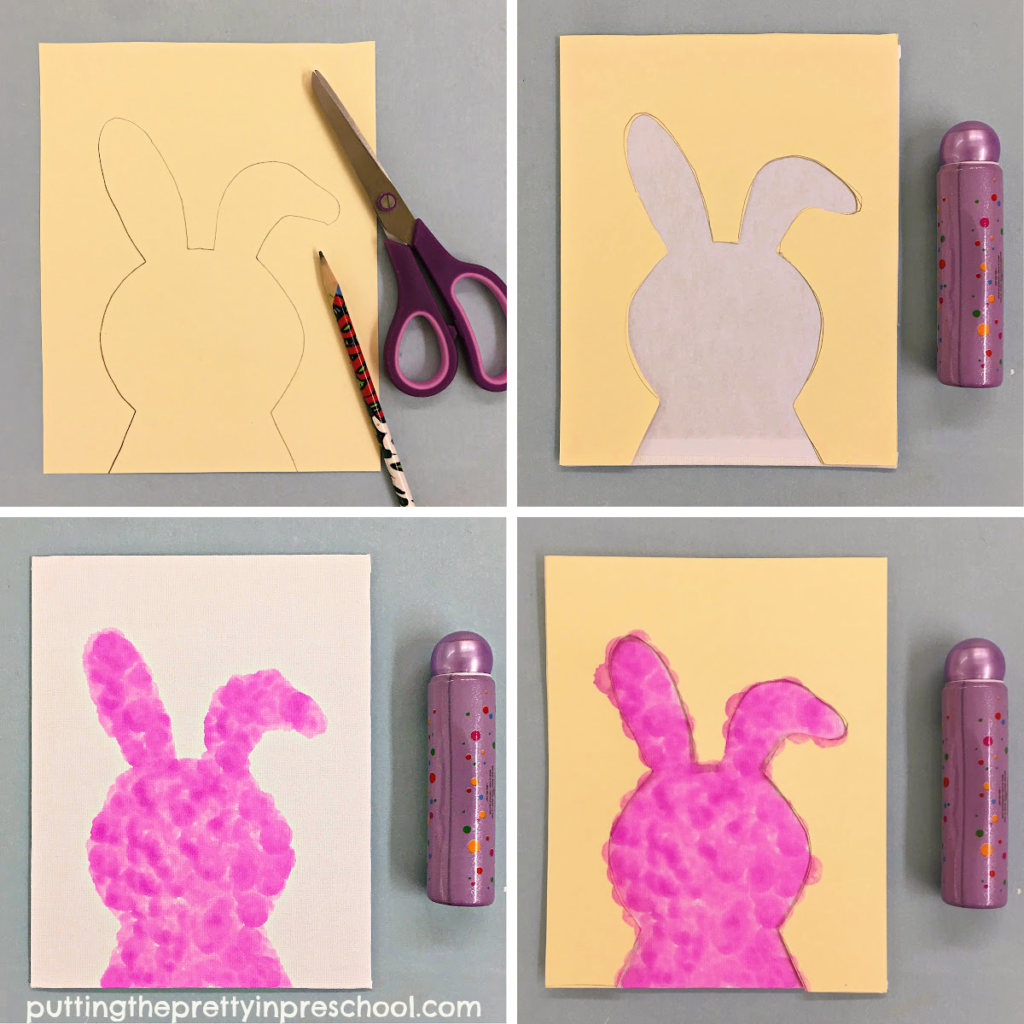
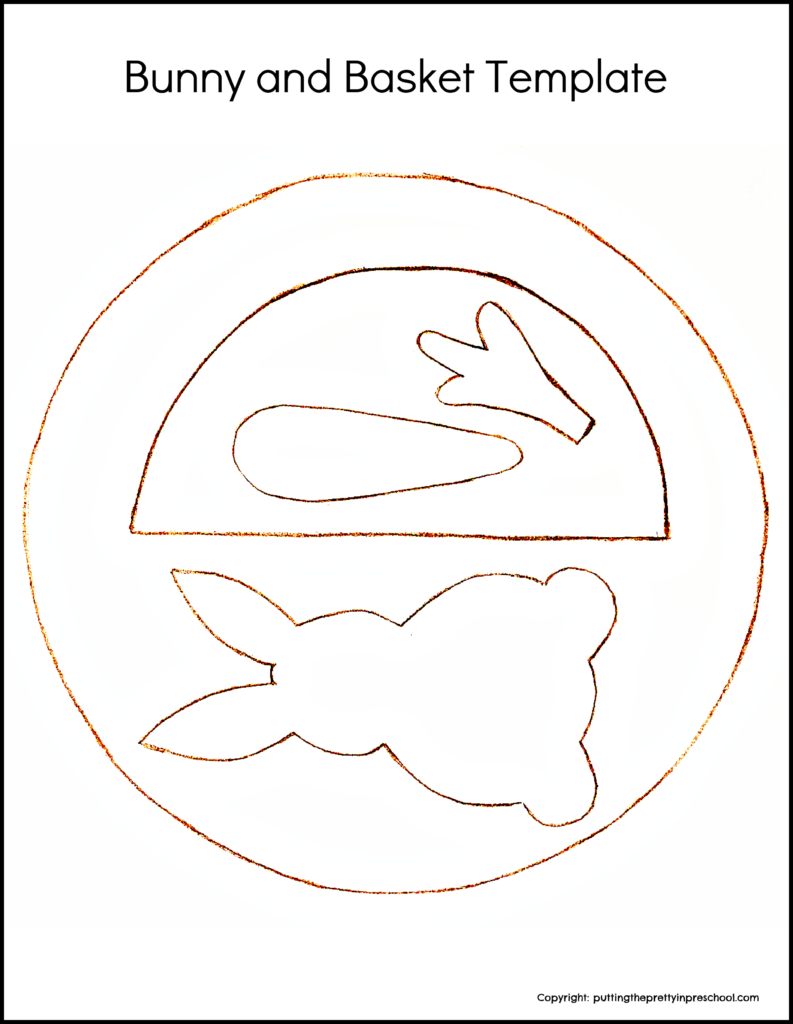
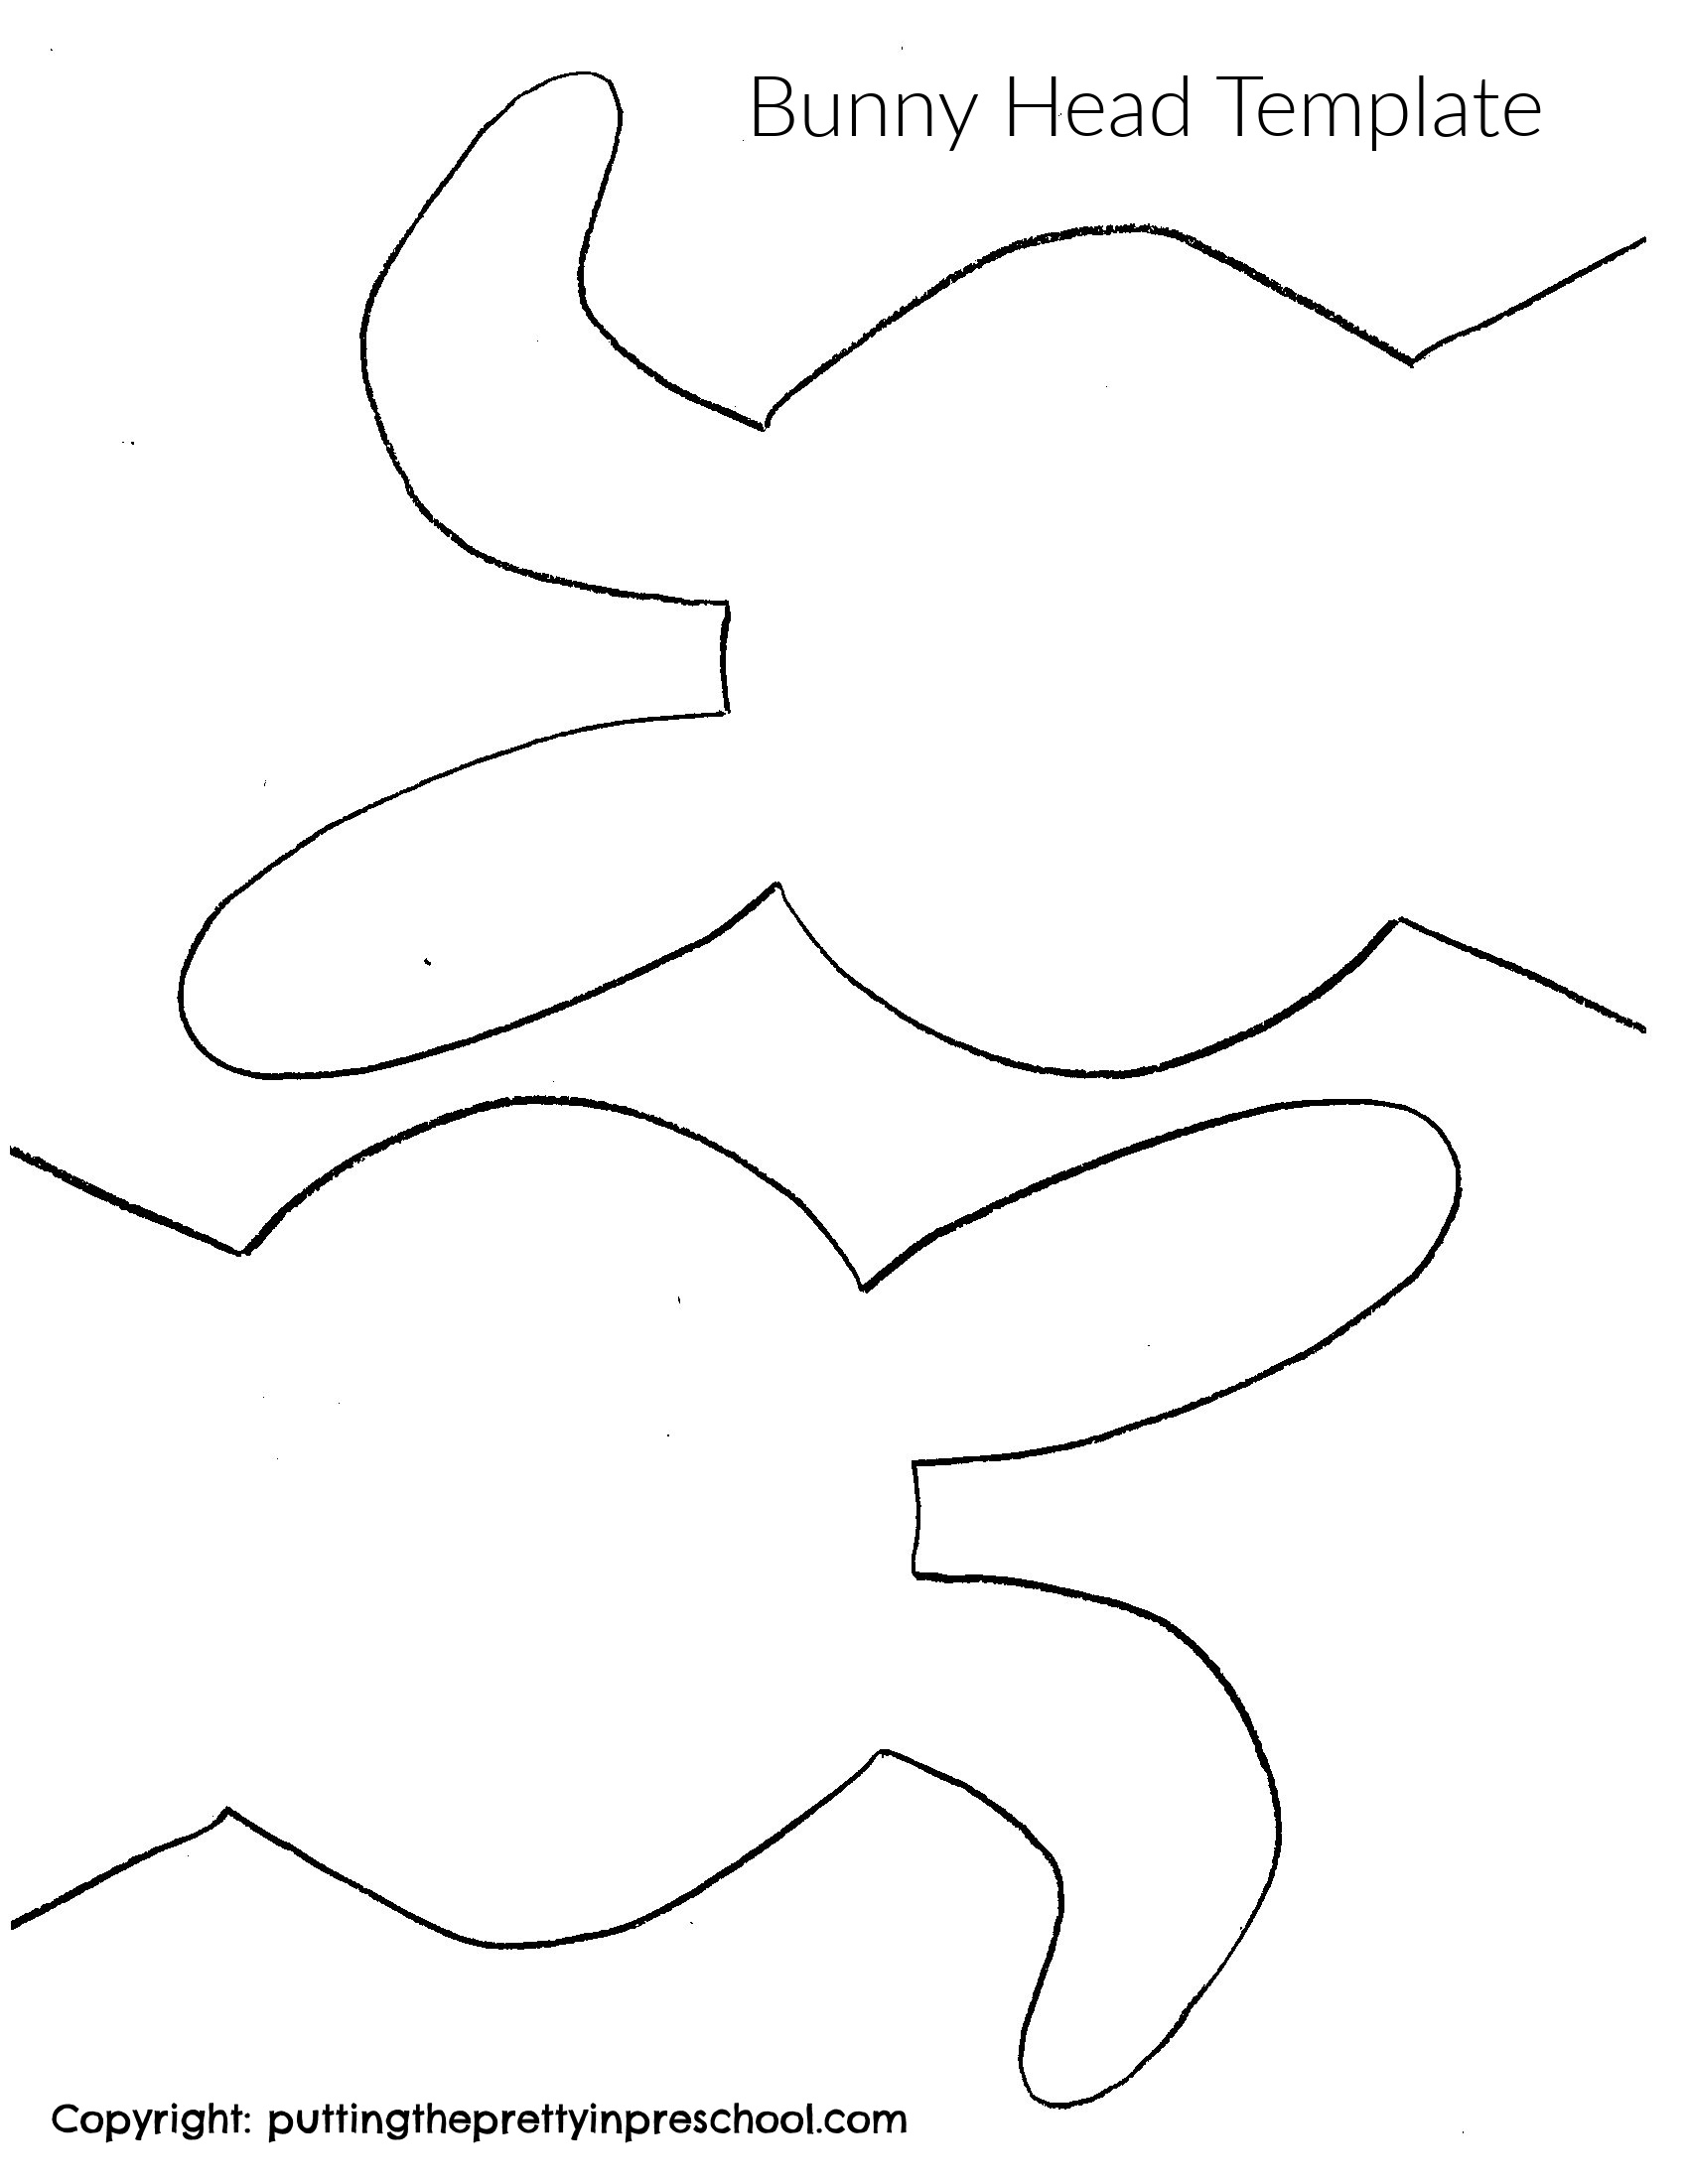
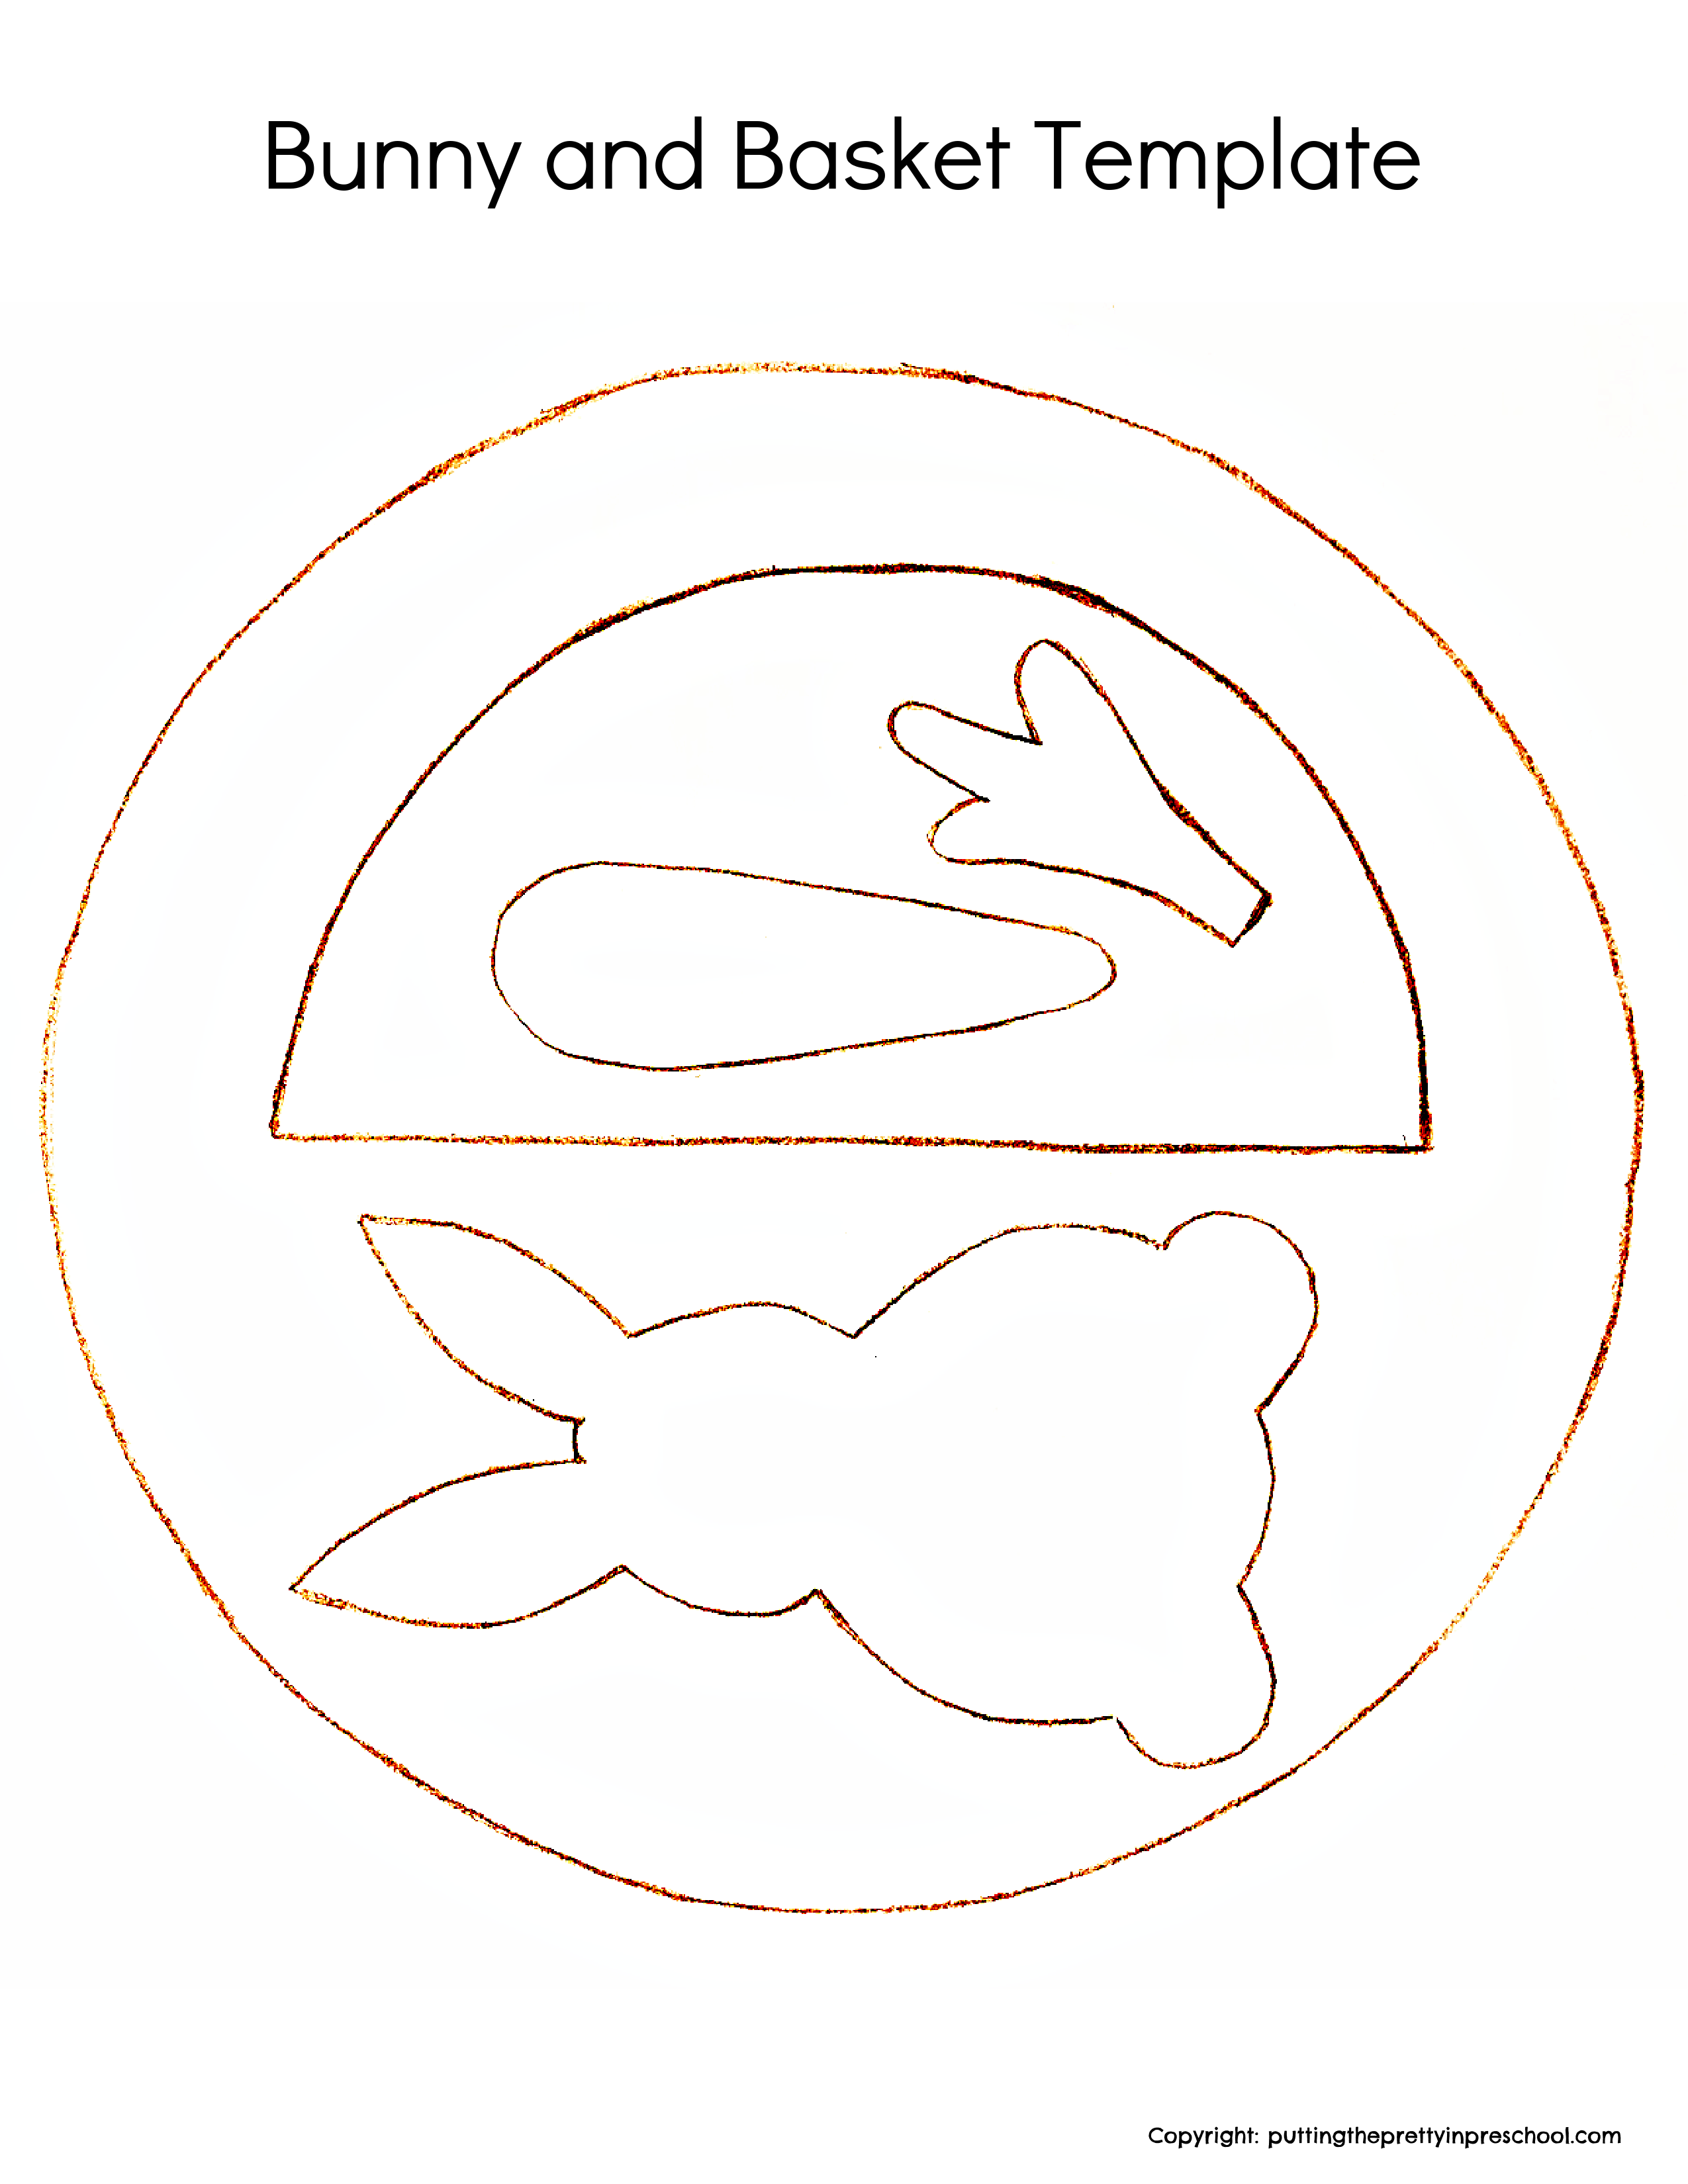
First, cut out a bunny head and shoulders template from sturdy paper in a size that fits the canvas board of choice. A smaller canvas size works well for this project and is easy and economical to purchase at a dollar store.

Next, lay the bunny template on the canvas.

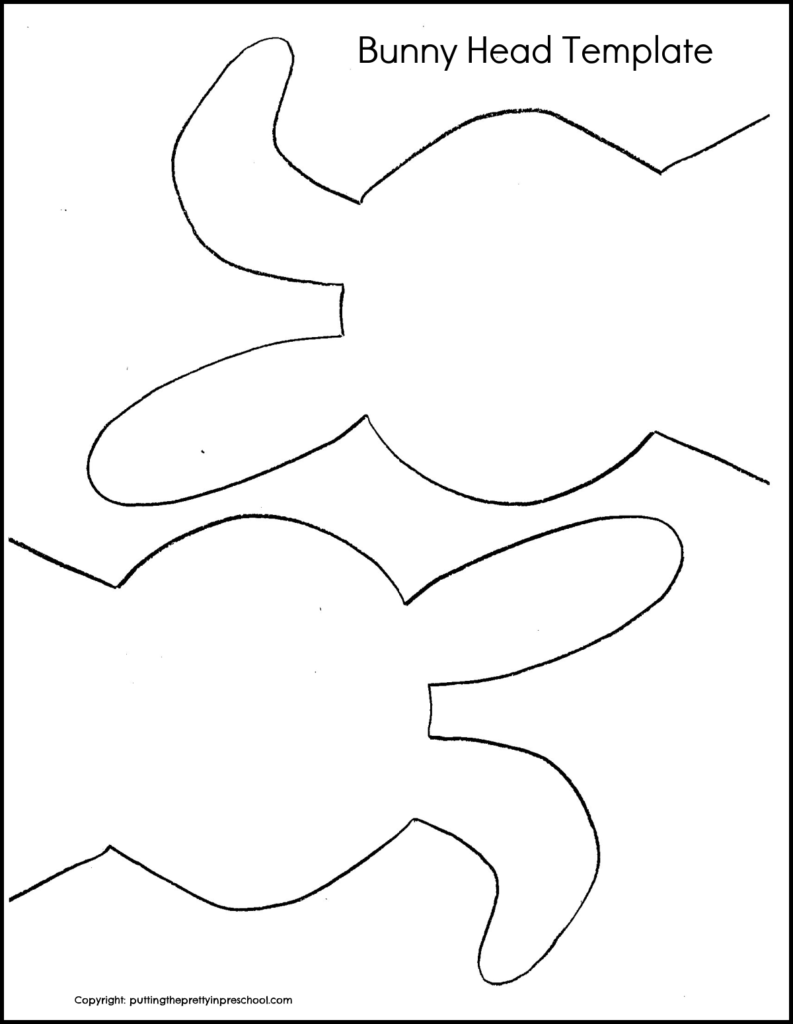
Feel free to download this bunny template to use for the canvas art project.

Download this bunny head template to make a spring bunny wreath craft.

_______

Bunny Head PrintableDownload

This bunny head template is for individual and one classroom use only,

_______

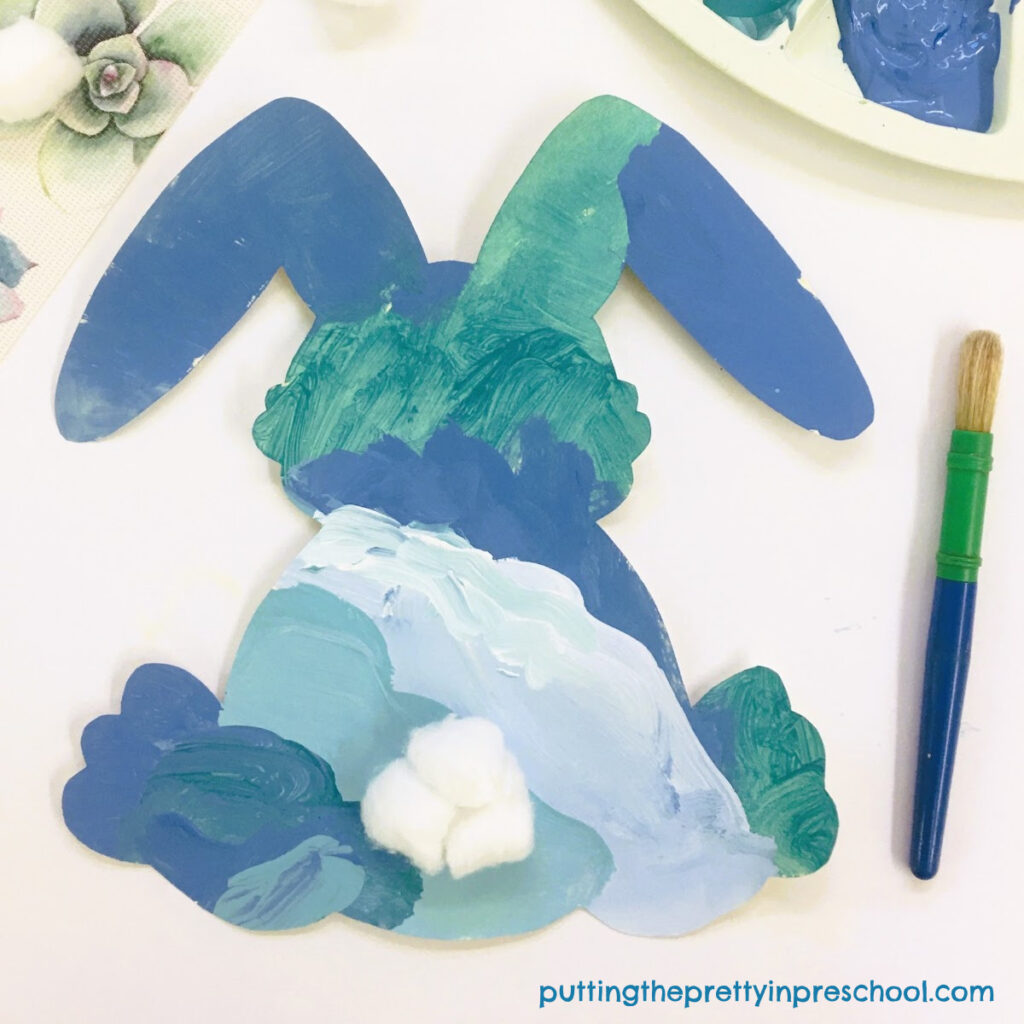
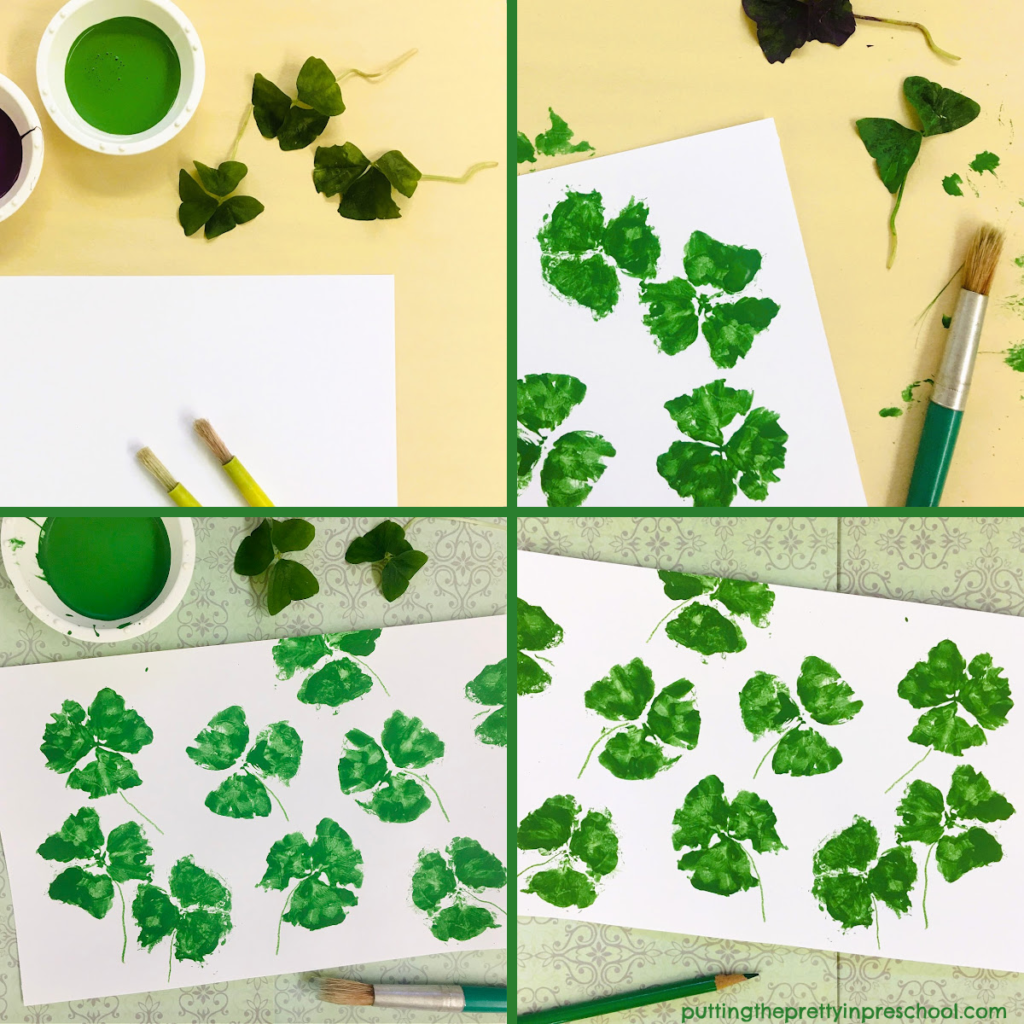
Then select a dot marker color of choice and fill in the bunny-shaped cutout. For my first bunny, I used a purple shimmer dot marker. On the canvas, it has a purply-pink hue.

Tip: Lighter-hued dot markers work best for this art project.

Afterward, take off the cardboard cutout and let the silhouette bunny design dry. Dot marker art dries quickly, even on a canvas, so it won’t take long.

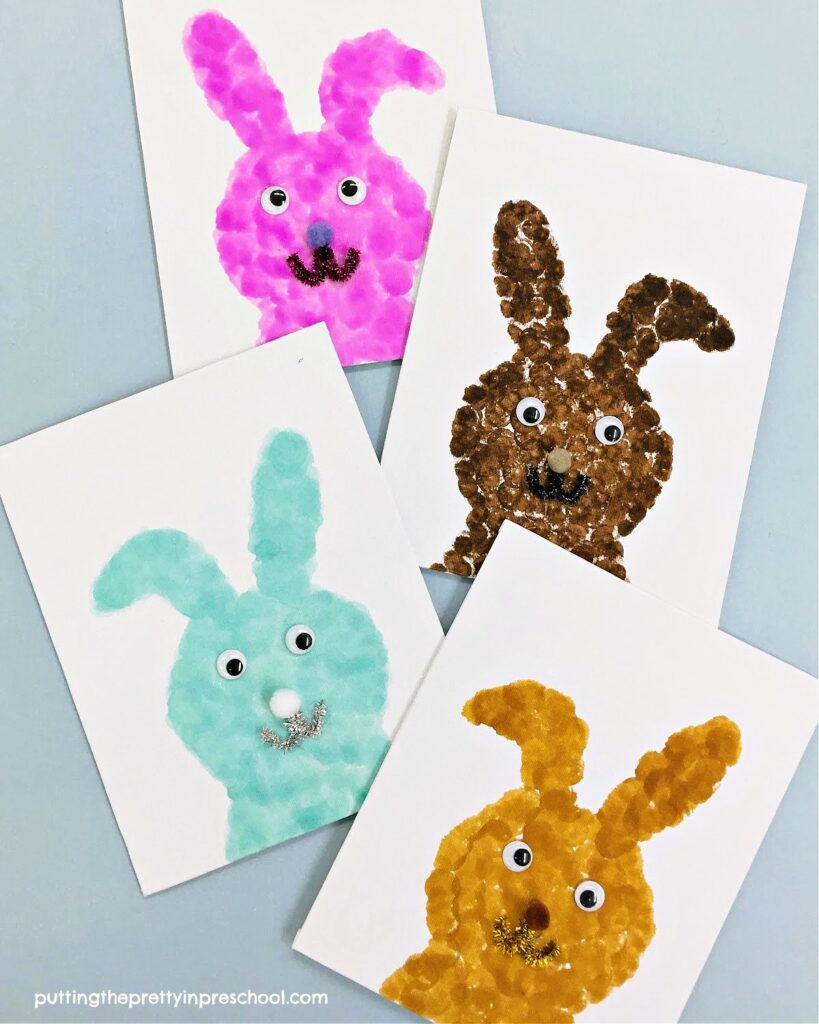
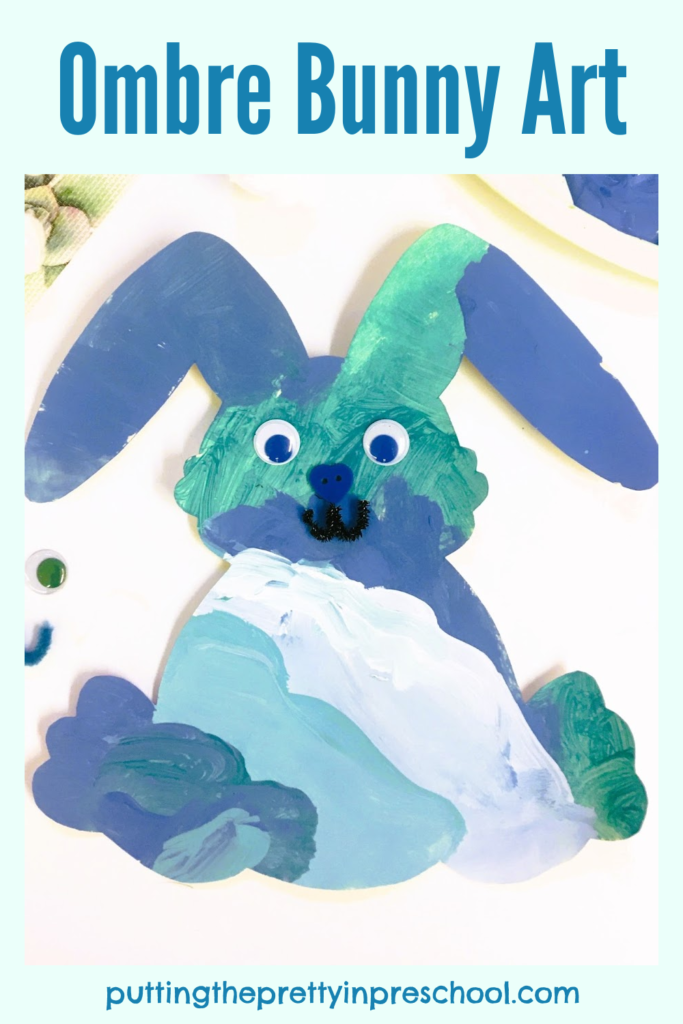
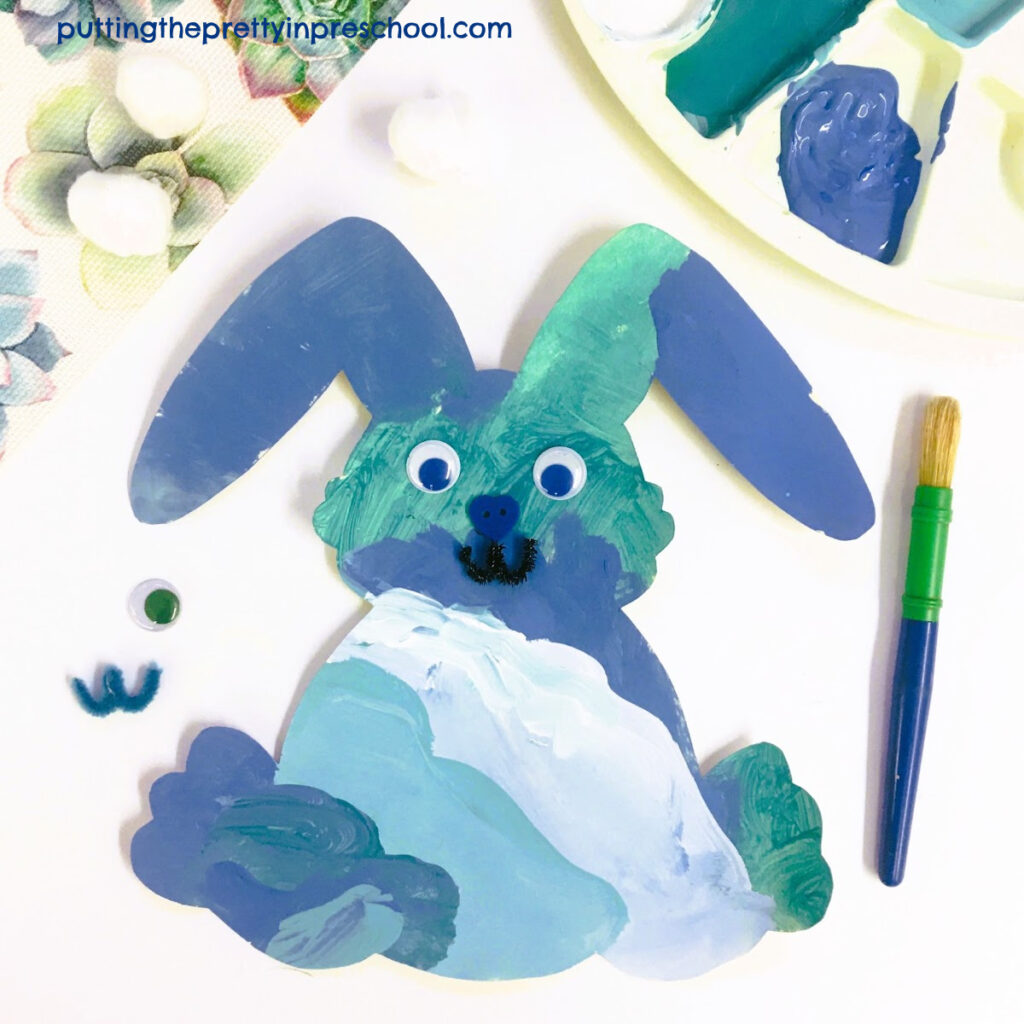
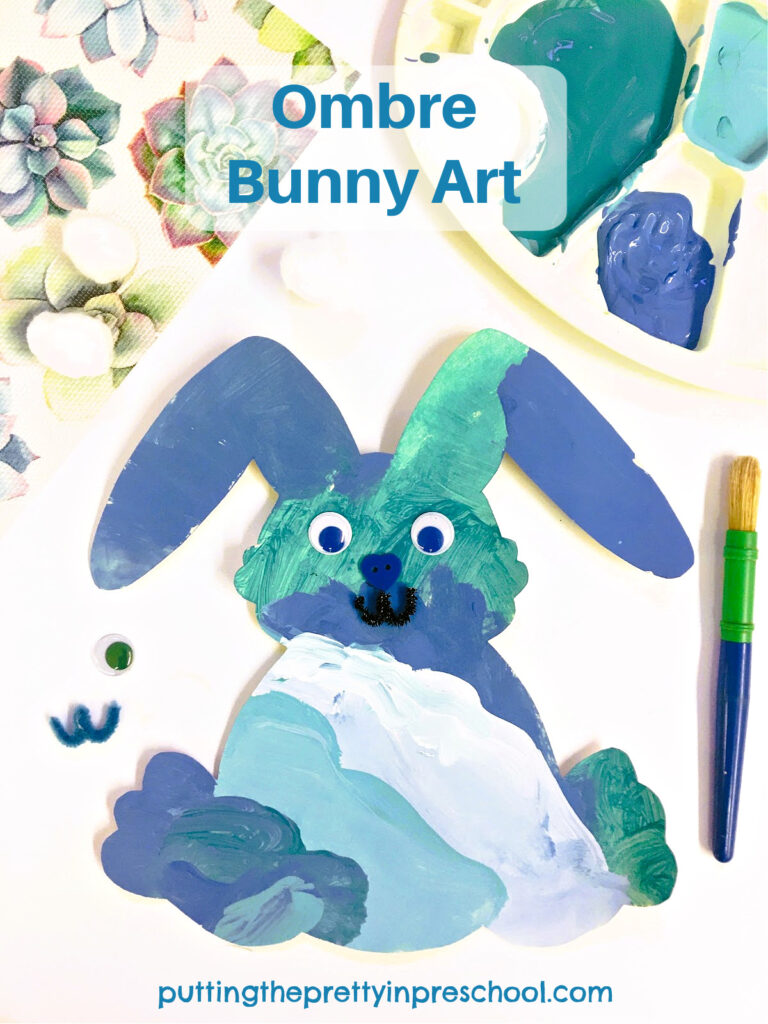
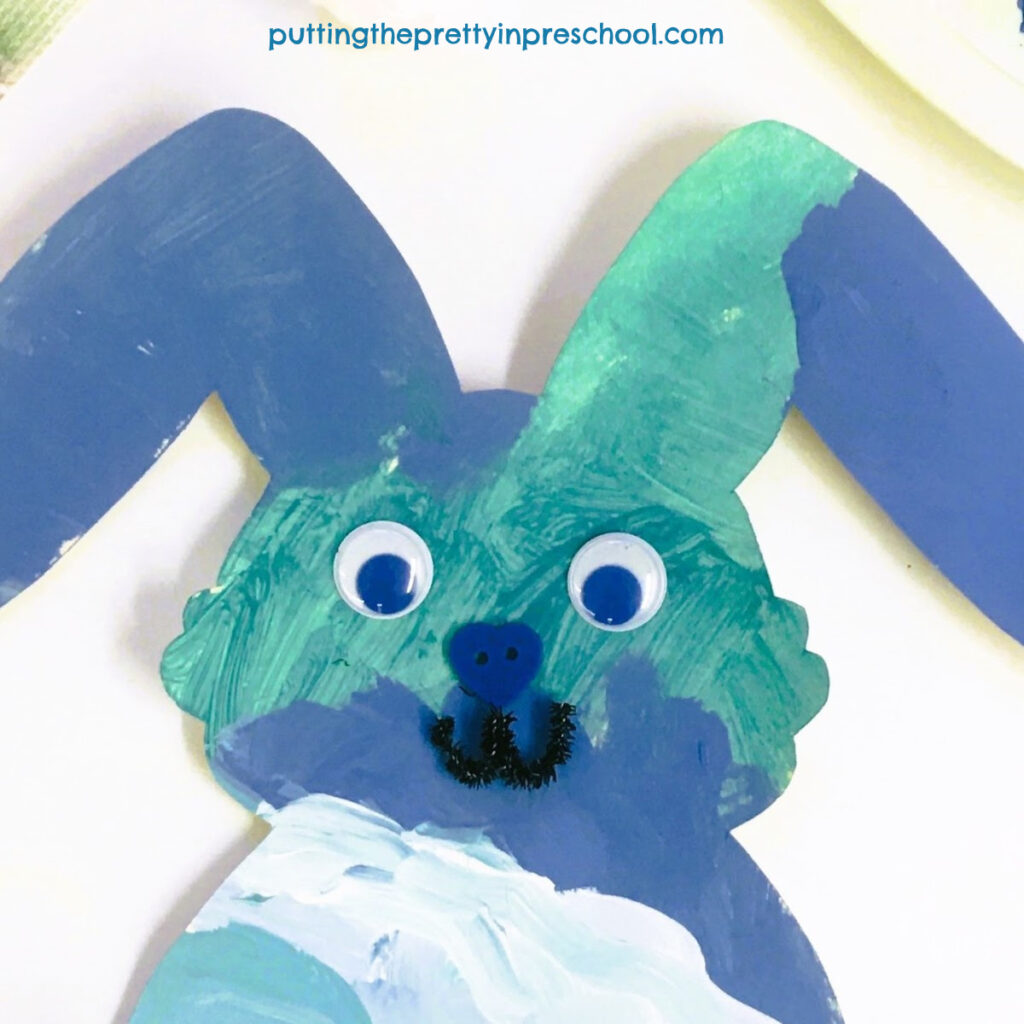
Finally, using white glue or a glue gun, affix two wiggly eyes, a button nose, and a curved pipe cleaner mouth to create a bunny face.

Make this easy and fun dot marker Easter bunny art activity today. It's an all-ages bunny-themed spring art project everyone will love.

_______

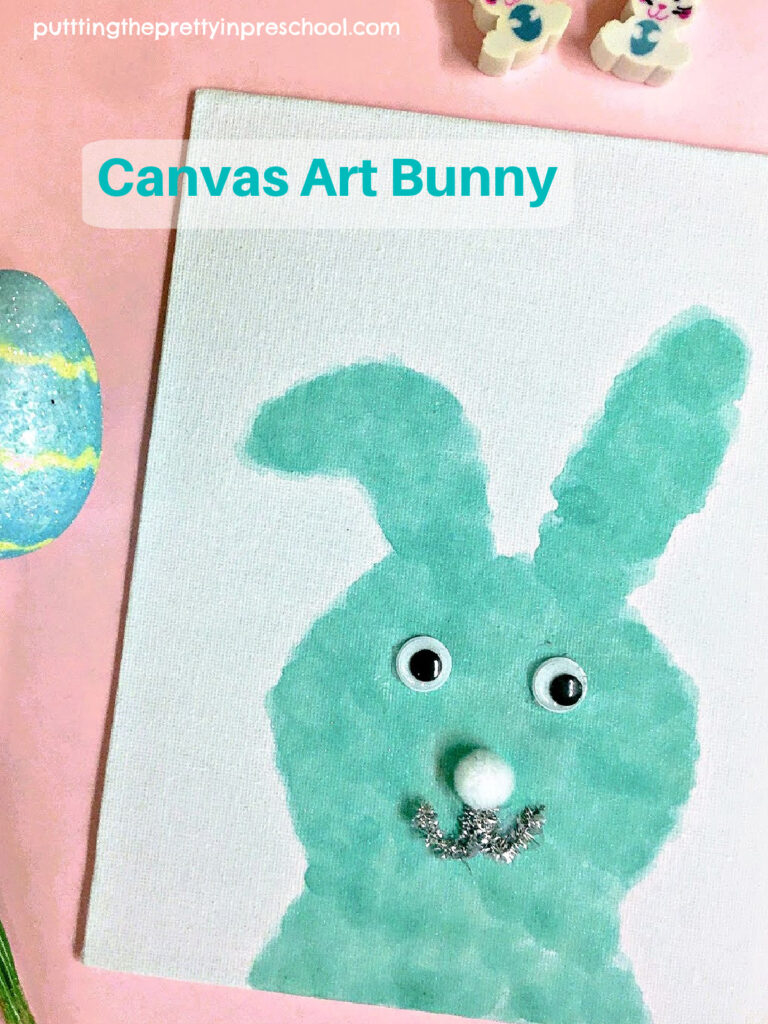
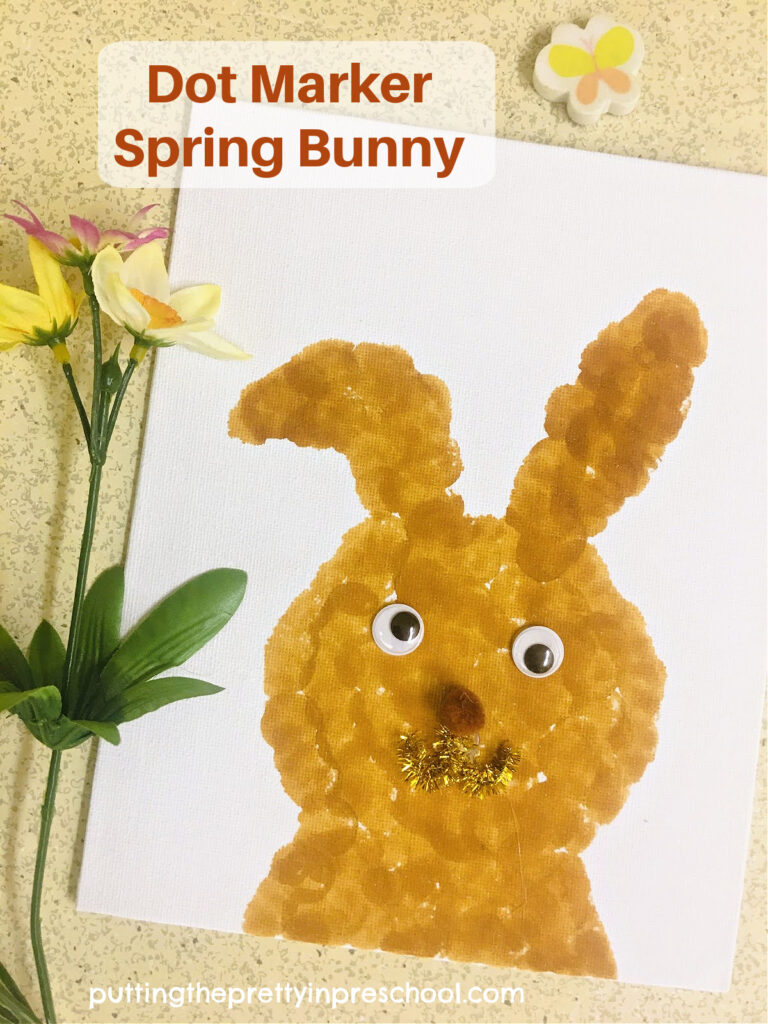
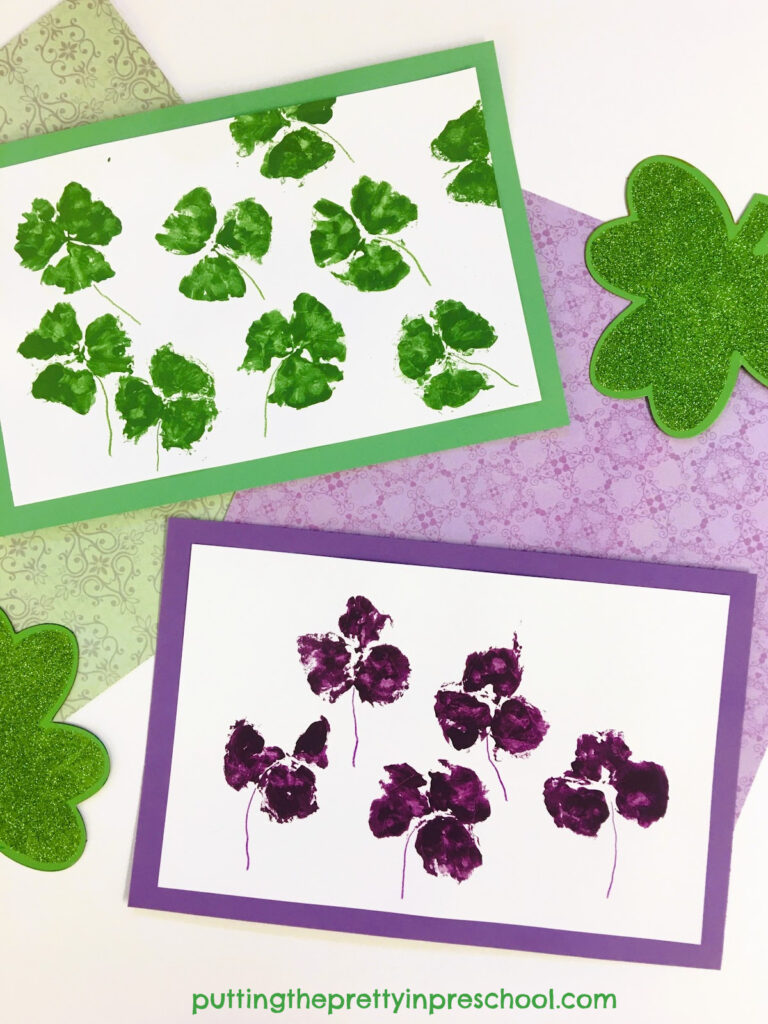
This art project is so much fun, you may wish to create bunny art in a few different colors. Displayed together, the bunnies make quite a statement. You can also use two or more dot marker colors to create each silhouette.

Make this easy and fun canvas art bunny today. It's an all-ages bunny-themed spring art project everyone will love.

_______

Make this easy and fun dot marker spring bunny art activity today. It's an all-ages bunny-themed art project everyone will love.

_______

_______

More Silhouette Bunny Canvas Art Activities

Spring Bunny Canvas Art

Silhouette Bunny Art

_______

[Read more…] about Dot Marker Easter Bunnies
Tweet
Share
Share
Pin

Filed Under: art, Easter, preschool, spring Tagged With: bunnies, canvas art, dot markers, Easter, spring

Paper Plate Easter Basket

April 2, 2023 by Annette Kaminsky Leave a Comment

Tweet
Share
Share
Pin
This bunny-themed paper plate Easter basket is easy to make and makes a great party favor or gift idea for your little learners.

_______

This paper plate Easter basket craft is inspired by an Easter purse spotted on a shopping trip. I wanted to make one for each of my preschoolers as part of their Easter party favors, and here’s what I came up with.

_______

Follow me on Pinterest for more early learning ideas.

_______

Supplies To Collect

There are only a few supplies to collect for this bunny and carrot-themed craft. Gather the following items:

  • paper plates
  • green dot markers
  • orange and green construction paper
  • stuffed bunnies
  • scissors, ruler, and pencil
  • glue stick and glue gun
Stuffed bunnies cut from garland and paper carrots are highlights of a paper plate Easter basket craft that is sure to please.

_______

Making The Paper Plate Easter Basket Craft

The first thing to do in making a few of these paper plate Easter baskets is to cut out sections of paper plates to create half-circle openings and handles. There are different kinds of paper plates, and I recommend choosing a sturdy version.

This bunny-themed paper plate Easter basket is easy to make and makes a great party favor or gift idea for your little learners.

_______

Next, give two of the plates to each child who will get a basket, and ask the little charges to decorate the bottom half of their plates with a green dot marker.

Note: Instead of using dot markers, participants can decorate the basket sides with crayons, paint, and/or Easter stickers.

Afterward, cut carrots from orange construction paper, and carrot tops from green construction paper. With a glue gun or glue stick, adhere the carrot tops to the carrots.

Just insert Easter grass and a few chocolate eggs into this paper plate Easter basket. It is sure to be a big hit as a party favor.

_______

Cutting and putting together the paper carrots take a little time. When this task is done, the basket sides will be dry and ready to be assembled. Use a glue gun to carefully adhere the decorated half of each pair of cut plates together so that the openings and basket handles match. Leave the handles unglued.

Then glue two carrots on each side of every basket. Make sure the carrots on one side of the baskets align with the carrots on the other side.

Next add a small stuffed bunny to each basket. My bunnies are from a disassembled Easter garland snapped up at a party store. Fortunately, it was easy to remove each bunny from the garland, and the yellow, pink, and blue stuffies are safe to use in the paper plate Easter baskets.

Before handing out the baskets to your little charges, add Easter grass and wrapped chocolate eggs to them. The children will be delighted with the craft and treats!

Just insert Easter grass and a few chocolate eggs into this paper plate Easter basket. It is sure to be a big hit as a party favor.

_______

To help make this craft, feel free to download this basket, bunny, and carrot template to use as a guideline. Happy crafting!

A free Easter basket template to make a paper basket with carrot decorations and a bunny inside.

_______

Bunny and Basket PrintableDownload

This printable is for individual or one classroom use only.

_______

Related: 

Spring Basket Cupcakes

Bunny Candy Art

_______

[Read more…] about Paper Plate Easter Basket
Tweet
Share
Share
Pin

Filed Under: art, crafts, Easter, party, preschool, spring Tagged With: bunnies, Easter, paper crafts, party

Ombre Bunny Art

March 25, 2023 by Annette Kaminsky Leave a Comment

Tweet
Share
Share
Pin
Create ombre bunny art with shades of teal and blue paint. This is an easy-to-do, striking spring bunny art project.

_______

When doing a similar bunny art project year after year it’s nice to vary the color scheme. In this spring painting activity, shades of teal and blue are used to create ombre bunny art.

________

Follow me on Pinterest for more early learning ideas.

_______

Supplies To Collect

Shades of blue tempera paint are used to decorate this ombre bunny, This is an easy-to-do art project that you are sure to love.

_______

For this simple painting project, gather the following supplies:

  • teal and deep blue tempera paint
  • white tempera paint
  • paint pots
  • paintbrush
  • paint palette
  • bunny template
  • manilla tag paper
  • wiggly eyes
  • black pipe cleaner
  • blue button
  • cotton balls
  • spoons
  • scissors and pencil
  • white glue or glue gun

_______

The Ombre Bunny Art Project

Create ombre bunny art with shades of teal and blue paint. This is an easy-to-do, striking spring bunny art project.

_______

To start off, pick a bunny template to trace and cut out from manila tag paper, or another sturdy kind. My bunny design was traced from a dollar store wall plaque.

Then select a deep color of teal paint and add it to three paint pots. In two of the pots, stir in varying amounts of white paint. Pour dark blue paint into a fourth paint pot and mix in some white.

Afterward, spoon the blue paint shades and a little white into a paint palette.

Set the paint palette, bunny template, and paintbrush on an art table protected with newspapers or a disposable tablecloth.

Brushing on blue shades from dark to light or light to dark will create an ombre effect.

When the painting is dry, use a glue stick or glue gun to adhere two wiggly eyes, a button nose, and a bent pipe cleaner mouth to create a bunny face.

Wiggly eyes, a button nose, and a pipe cleaner mouth create a bunny face.

_______

Or glue one or more cotton balls to the bottom of the bunny to fashion a bunny tail.

A cotton ball tail accents this easy-to-do ombre-painted spring bunny art project you are sure to love.

_______

A pink, purple, or green color palette would also look pretty on this ombre bunny art project.

_______

More Bunny Art

Spring Bunny Canvas Art

Bunny Rolling Pin Art

Silhouette Bunny Art

_______

[Read more…] about Ombre Bunny Art
Tweet
Share
Share
Pin

Filed Under: art, Easter, preschool, spring Tagged With: bunnies, Easter, painting, spring

Shamrock Leaf Print Art

March 12, 2023 by Annette Kaminsky Leave a Comment

Tweet
Share
Share
Pin
How to make beautiful shamrock leaf print art with sprigs from an Oxalis Regnelli plant. An easy-to-do all-ages art project.

_______

Shamrock leaf print art is an activity I’ve wanted to try for a few years now, and this spring I carved out time for it. The art project is easy and enjoyable to do, and I am sure you will like it too.

A good time to try this leaf print art activity is around St. Patrick’s Day, as shamrock plants are plentiful in stores then. The compound leaves on the plant look like the shamrock symbol that the country of Ireland is known for. Irish people think shamrocks represent good luck, and they are prominent in clothing, decorations, and tableware during St. Patrick’s Day celebrations.

An Oxalis Regnelli shamrock plant with compound leaves composed of three triangular leaflets.

_______

The shamrock plant I found is called Oxalis Regnellii, which comes from Africa and some parts of the Americas. It has delicate leaves with three triangle-shaped leaflets. The leaves fold up neatly on overcast days and anytime it is dark, and open up when they are exposed to sunlight. The tiny, white, long-stemmed flowers have five petals.

A tiny white flower on an Oxalis Regnellii plant.

_______

Follow me on Pinterest for more early learning ideas.

_______

Supplies To Collect

Gather the following supplies for this nature-based art project:

  • shamrock plant
  • green and purple acrylic or tempera paint
  • paint pots
  • paintbrushes
  • purple and green pencil crayons
  • all-purpose art paper
  • green and purple construction paper
  • newspaper or manila paper
  • magnifying glasses

_______

Making The Shamrock Leaf Print Art

Before using the shamrock leaves for printmaking, give participants a chance to study the plant. Offer magnifying glasses to view the leaves and dainty flowers with yellow stamens. Set the plant out in a sunny place and then put it in a dark area to see how its leaves fold down and spread out depending on how much sunlight the plant is getting.

To prepare the art activity, snip a few leaves off the plant to use for making paint prints.

Steps to make beautiful shamrock leaf print art. This is an easy-to-do all-ages nature art project

_______

Next, lay down newspaper sheets or a large piece of manilla paper for participants to work on.

Then add an art station with a sheet of all-purpose art paper, leaf sprig, paintbrush, and green acrylic paint for each participant. My paper size is an 11-inch x 14-inch inch sheet cut in half, creating a 7-inch x 11-inch piece to work on.

Note: Non-toxic tempera paint is a good choice for young children taking part in the activity.

Afterward, invite participants to brush the tops of the leaflets on their sprig thoroughly with green paint, flip the leaf over, and carefully press the painted sides down on the paper.  Have them gently rub their fingers over the leaflets and pat the edges down to transfer as much paint to the paper as possible.

Beautiful shamrock leaf print art with leaves from the Oxalis Regnelli plant. This is a nature art project that is perfect for St. Patrick's Day.

_______

Then ask everyone to slowly lift their leaf off the paper canvas and repaint it to make more leaf prints. The shamrock leaves are delicate, but when handled gently they can be used a few times. If someone’s leaf tears, offer a new sprig to use.

When the paint prints are dry, ask participants to use a pencil crayon to add stems to the leaves.

As a finishing touch, mount each shamrock leaf print art project on a similar-colored construction paper background.

_______

Making Purple Shamrock Leaf Print Art

A purple shamrock, called Oxalis Triangularis, has similarly shaped leaves and flowers as the Oxalis Regnallii. This purple shamrock showcases deep purple, dark-edged leaves that respond to darkness and light in the same way.

A purple shamrock plant with compound leaves composed of three triangular leaflets.

_______

With purple acrylic or tempera paint, let participants create shamrock prints just as they were made in green.

Beautiful shamrock leaf print art with leaves from the Oxalis Regnelli plant. This is a nature art project that is perfect for St. Patrick's Day.

_______

If there are any leaves left on the plant after the printmaking activity is done, add them to a playdough activity. Or have someone without pets take the plant home to care for.

Note: All Oxalis plants are toxic to dogs, cats, and grazing animals such as horses and must be kept out of their reach. These plants are slightly toxic to humans. Make sure to supervise all shamrock leaf activities closely so that no one ingests the leaves.

How to make beautiful shamrock leaf print art with sprigs from an Oxalis Regnelli plant. An easy-to-do all-ages art project.

_______

More Shamrock-themed Activities:

Shamrock Paper Plate Lion

Shamrock Dissolving Candy Experiment

St. Patrick’s Day Painted Shamrock

Shamrock Rolling Pin Art

Scissor Skill Shamrock Collage

[Read more…] about Shamrock Leaf Print Art
Tweet
Share
Share
Pin

Filed Under: art, playdough, preschool, science, sensory, spring, St. Patrick's Day Tagged With: art, leaf prints, leaves, printmaking, shamrocks, St. Patrick's Day

Squeegee Painting Heart Art

March 10, 2023 by Annette Kaminsky Leave a Comment

Tweet
Share
Share
Pin
This squeegee painting heart art project gives participants a chance to spread the paint in a new way. An all-ages process art activity.

_______

This super fun squeegee painting heart art project is bound to be one of your children’s favorites. Using a squeegee instead of a paintbrush offers participants a new way to move paint around a canvas.

_______

Follow me on Pinterest for more early learning ideas.

_______

Supplies To Collect

Gather the following supplies for this abstract art project:

  • tempera paints in a variety of colors
  • paint pots and spoons
  • cardstock paper
  • squeegee
  • heart template
  • pencil and scissors
  • newspapers or a plastic tablecloth

_______

Preparing The Squeegee Painting Heart Art Activity

How to paint with a squeegee to create beautiful heart art. This is an all-ages process art activity with collaborative possibilities.

_______

To prepare this unique process art activity, trace and cut hearts from sturdy cardstock paper.

Then cover an art table with newspapers or a plastic tablecloth.

Next, set out a workstation for each participant with tempera-filled paint pots. Add a teaspoon to scoop paint into each one.

Note: I feature paints in red, pink, magenta, and white hues. Any color scheme would work wonderfully with this art project.

Afterward, add a paper heart canvas and squeegee to each workspace.

_______

The Squeegee Painting Heart Art Process

How to paint with a squeegee to create beautiful heart art. This is an all-ages process art activity with collaborative possibilities.

_______

Invite participants to spoon blobs of paint on different areas of their hearts. The blobs can be large or small. They can be dotted randomly or placed strategically around a heart.

Note: Paint can be squirted from paint bottles instead of spooned from paint pots. Smaller-sized bottles work best for this method.

Afterward, have them use a squeegee to move the paint around. You can suggest sliding the squeegee downward or from side to side. Using the squeegee in random motions is just fine too.

A super fun squeegee painting technique to create a hombre heart. This is an a;ll-ages process art project.

_______

A super fun squeegee painting technique to create a hombre heart. This is an a;ll-ages process art project.

_______

Note: The longer the squeegee scrapes over the paper, the more the colors will blend.

An oh-so-fun squeegee painting activity that offers participants a new way to spread the paint. It is a top ten process art project.

_______

After participants have had a chance to paint one or more heart-shaped canvases, set out large sheets of sturdy paper for them to work on.

Squeegee painting on huge sheets of paper is a great process art project to take outdoors. The canvases can be set out on a flat ground surface or tacked to a fence. Large canvases also lend themselves to collaborative art projects.

_______

What do you think about this squeegee painting project? Do you think it is a top ten process art activity for children? Let me know in a comment below.

This super fun squeegee painting heart art activity offers participants a chance to spread paint with a squeegee instead of a paintbrush. This is an all-ages process art project.

_______

Related:

Salad Spinner Heart Art

Eye Dropper Heart Art

Valentine’s Day Process Art

_______

[Read more…] about Squeegee Painting Heart Art
Tweet
Share
Share
Pin

Filed Under: art, preschool, Valentine's Day Tagged With: hearts, painting, process art, squeegee painitng, Valentine's Day

  • « Go to Previous Page
  • Page 1
  • Interim pages omitted …
  • Page 11
  • Page 12
  • Page 13
  • Page 14
  • Page 15
  • Interim pages omitted …
  • Page 35
  • Go to Next Page »

Primary Sidebar

Hi, I'm Annette Kaminsky, a preschool teacher who loves sharing learning through play activities for young children. Thanks for visiting my site. Feel free to stay awhile!

Subscribe Via Email

Recent Posts

  • Celebrate Diversity Coloring Pages March 1, 2026
  • Lunar New Year Lantern Craft February 11, 2026
  • Black History Month Positive Affirmations Art January 29, 2026
  • Snowflake Cafe Dramatic Play Set January 19, 2026
  • Pastel Christmas Letterhead and Envelope December 20, 2025
  • December Kindness Activities November 30, 2025
  • Fall Forest Sensory Bin November 30, 2025
  • DIY Turkey Bowling Game November 25, 2025
  • Fall Leaf Crown Paper Crafts November 23, 2025
  • Colors of Fall Sensory Bin October 13, 2025

Categories

Topics

apples block play bunnies Chinese New Year Christmas Christmas craft color colors dramatic play Easter fall flowers hearts holiday jewelry leaves leprechauns light table loose parts painting paper crafts playdough pretend play printables printmaking process art pumpkins rice bin scented playdough science experiment scissor skills sensory bin sensory play sensory tray shamrocks skeletons snakes snowflakes spiders spring St. Patrick's Day sunflowers tablescapes Valentine's Day water play

Copyright © 2026 · Lifestyle Pro on Genesis Framework · WordPress · Log in