• Skip to secondary menu
  • Skip to main content
  • Skip to primary sidebar

Putting The Pretty In Preschool

Finding Beauty In Everyday Early Childhood Experiences

  • Home
  • About Me
  • Winter
  • Chinese New Year
  • Blog
  • Contact Me
  • Black History Month
  • SHOP
  • Valentine’s Day

display

Watercolor Planets With Markers

August 17, 2022 by Annette Kaminsky Leave a Comment

Tweet
Share
Share
Pin
This stunning "watercolor planets with markers" art project is a must-try. It's an all-ages process art activity that displays well.

_______

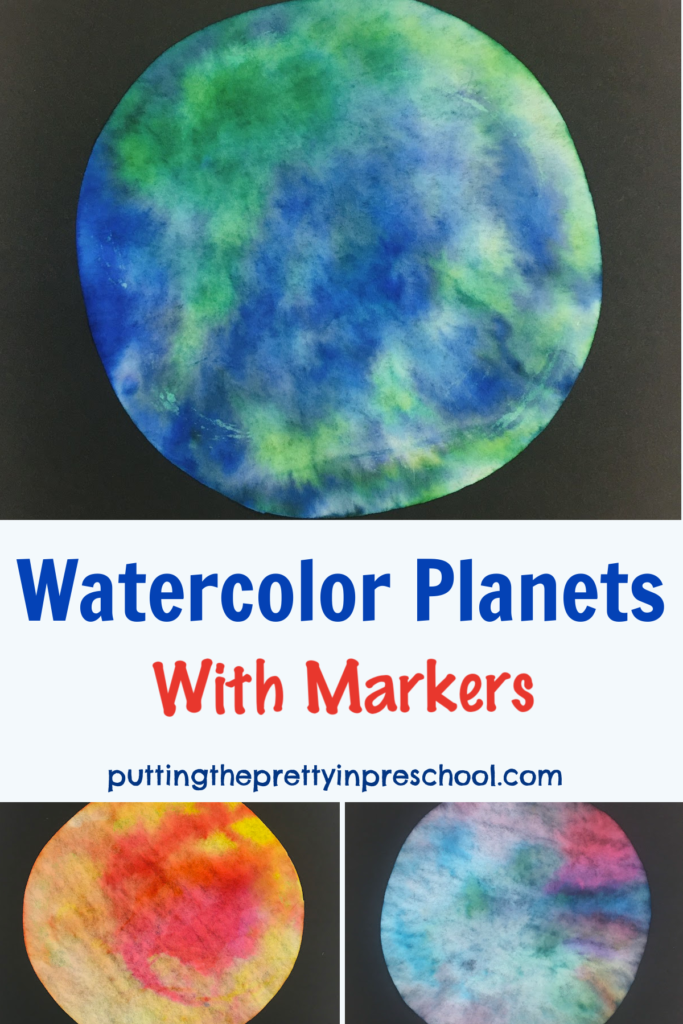
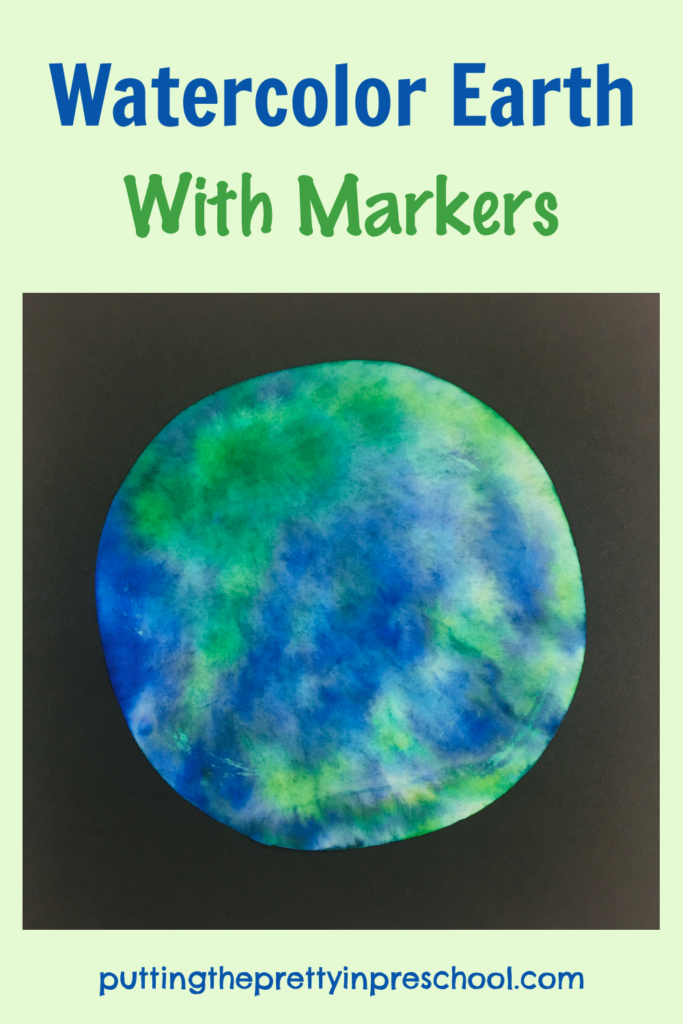
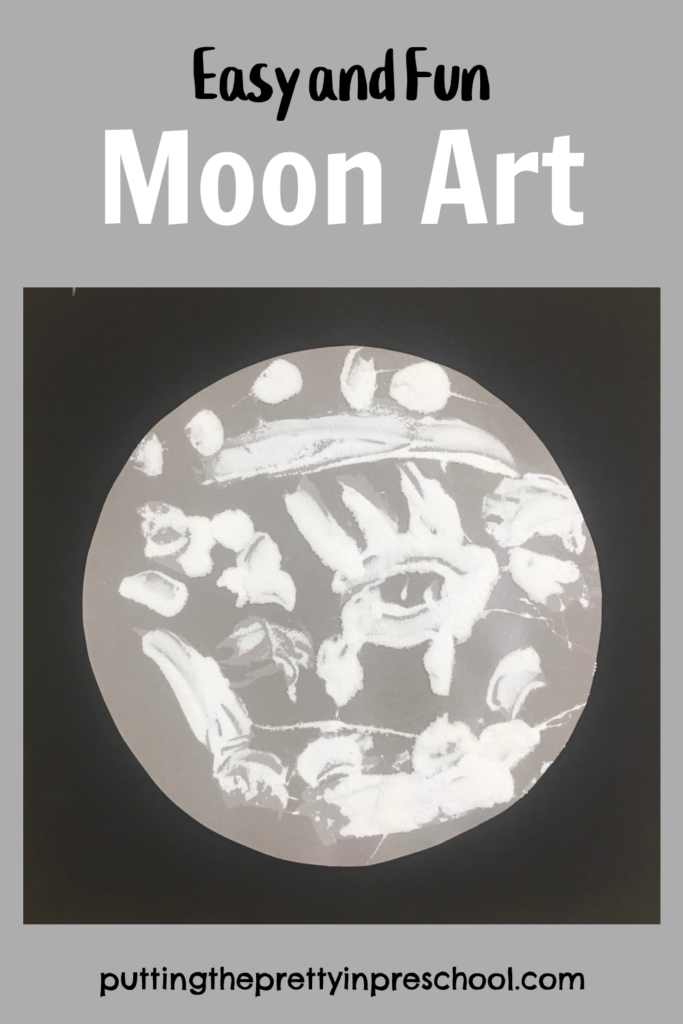
Creating watercolor planets with markers is an easy and satisfying process art activity with stunning results. Your little learners will absolutely love doing it. And if you need a quick, beautiful bulletin board or wall display, this project checks that box.

_______

Supplies To Collect

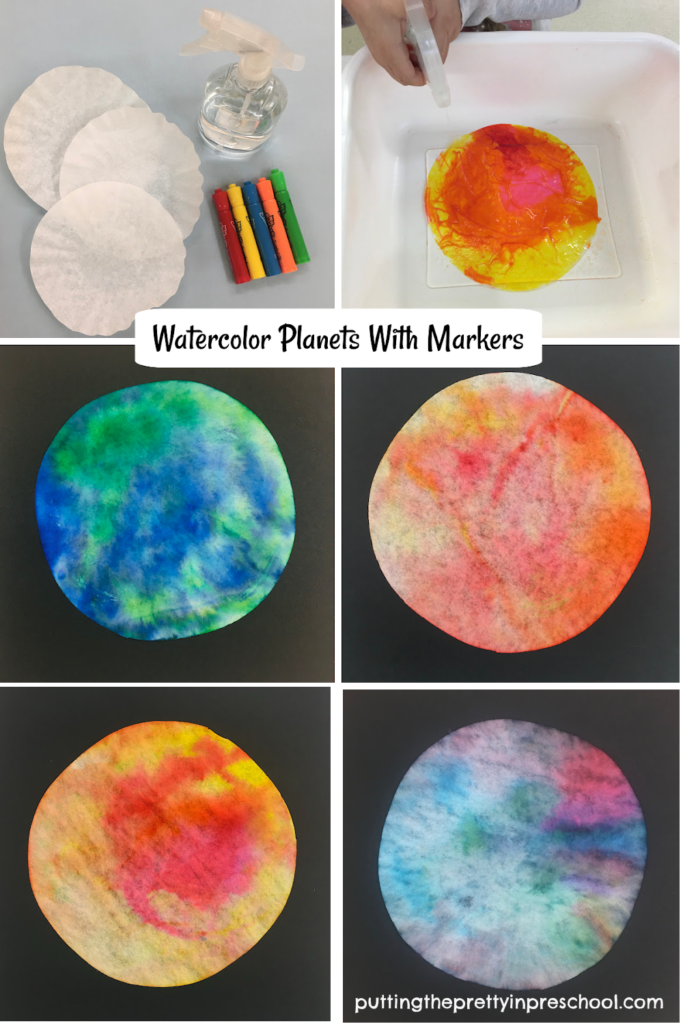
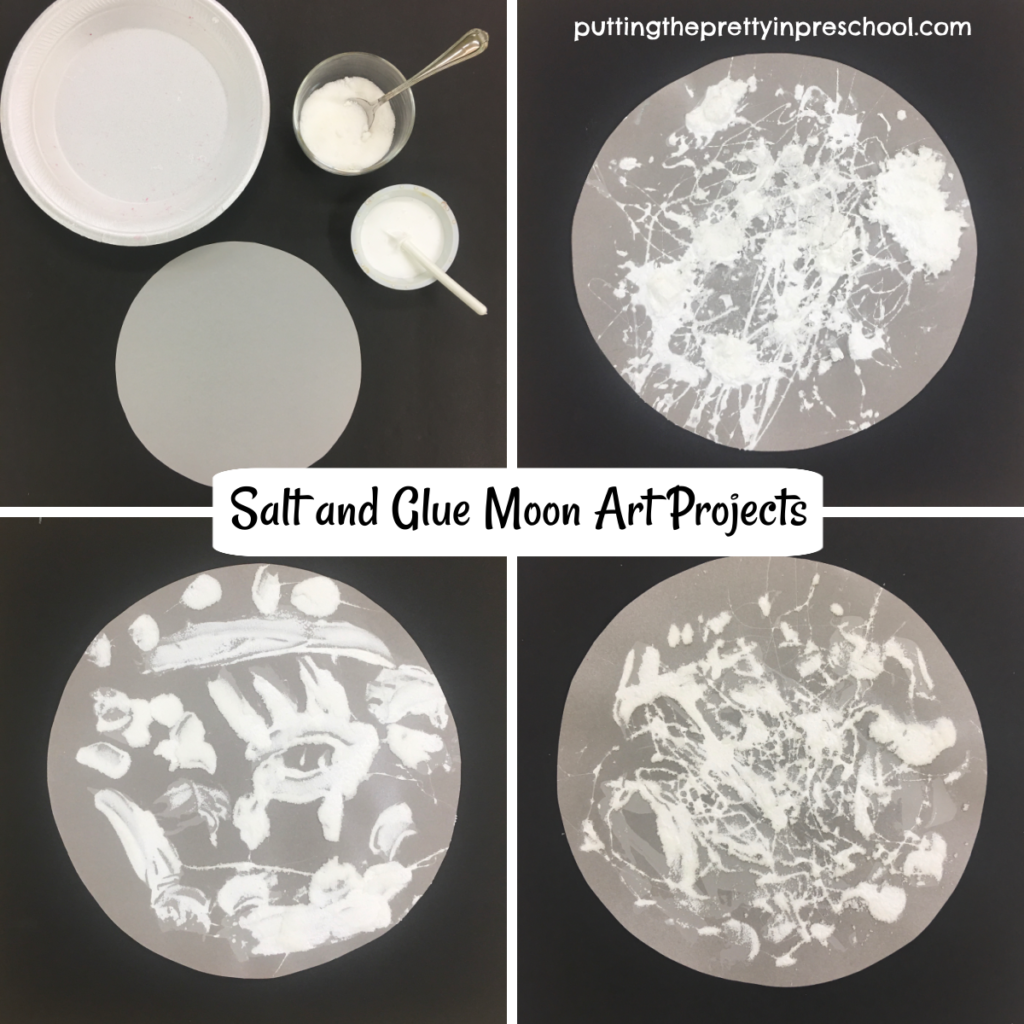
Gather the following supplies for this art activity:

  • 8-inch diameter paper basket coffee filters
  • water-based markers
  • 12-inch x 12-inch black cardstock paper
  • spray bottle
  • plastic tub
  • hot glue gun

_______

Follow me on Pinterest for more early learning ideas.

_______

Creating Watercolor Planets With Markers

First, flatten basket-shaped coffee filters, and set them on a table with water-based markers.

Invite little learners to decorate their paper circles any way they wish.

Steps to create stunning watercolor planets with markers. This all-ages process art looks beautiful displayed together.

_______

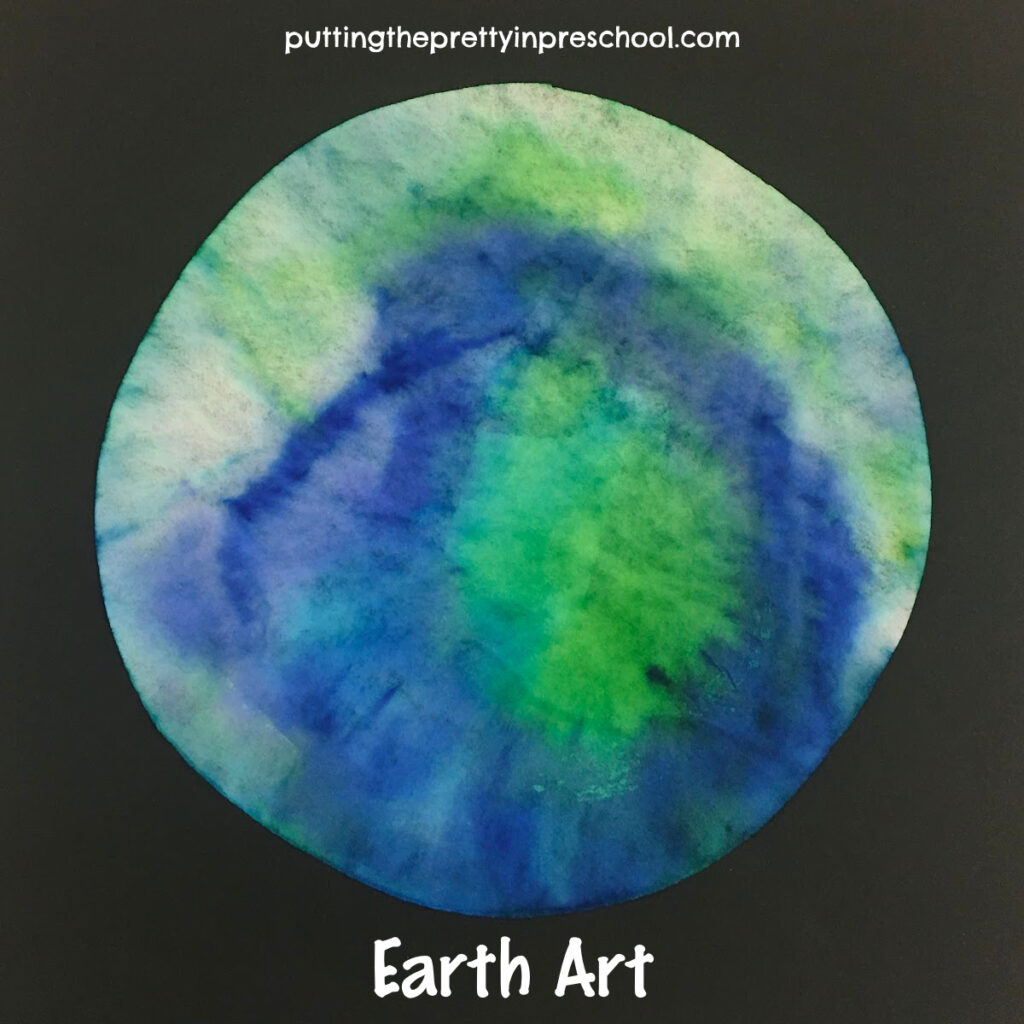
Tip: Offer analogous colors, which are groups of three colors positioned next to each other on the color wheel. Because these colors complement each other, they work well in process art projects.

Create watercolor earth art with just markers and water. A quick and easy process art project everyone will love.
Planet Earth With Blue and Green Markers

_______

Create watercolor planet Jupiter art with just markers and water. A quick and easy process art project everyone will love.
Planet Jupiter With Red, Orange, and Yellow Markers

_______

Afterward, have everyone take turns wetting their project with a spray bottle filled with water. When doing this, place the decorated circles in a small tub to be sprayed.

Tip: Your little charges may want to soak their circular canvas with lots of water, but just giving the colorful coffee filters a few squirts results in nice art pieces for display.

Next, dry the paper circles on a flat surface covered with a plastic tablecloth or tarp.

Finally, mount the round planets on a 12-inch x 12-inch square piece of black cardstock, or sturdy paper that is 8 ½ x 11 inches in size. Using a hot glue gun works well.

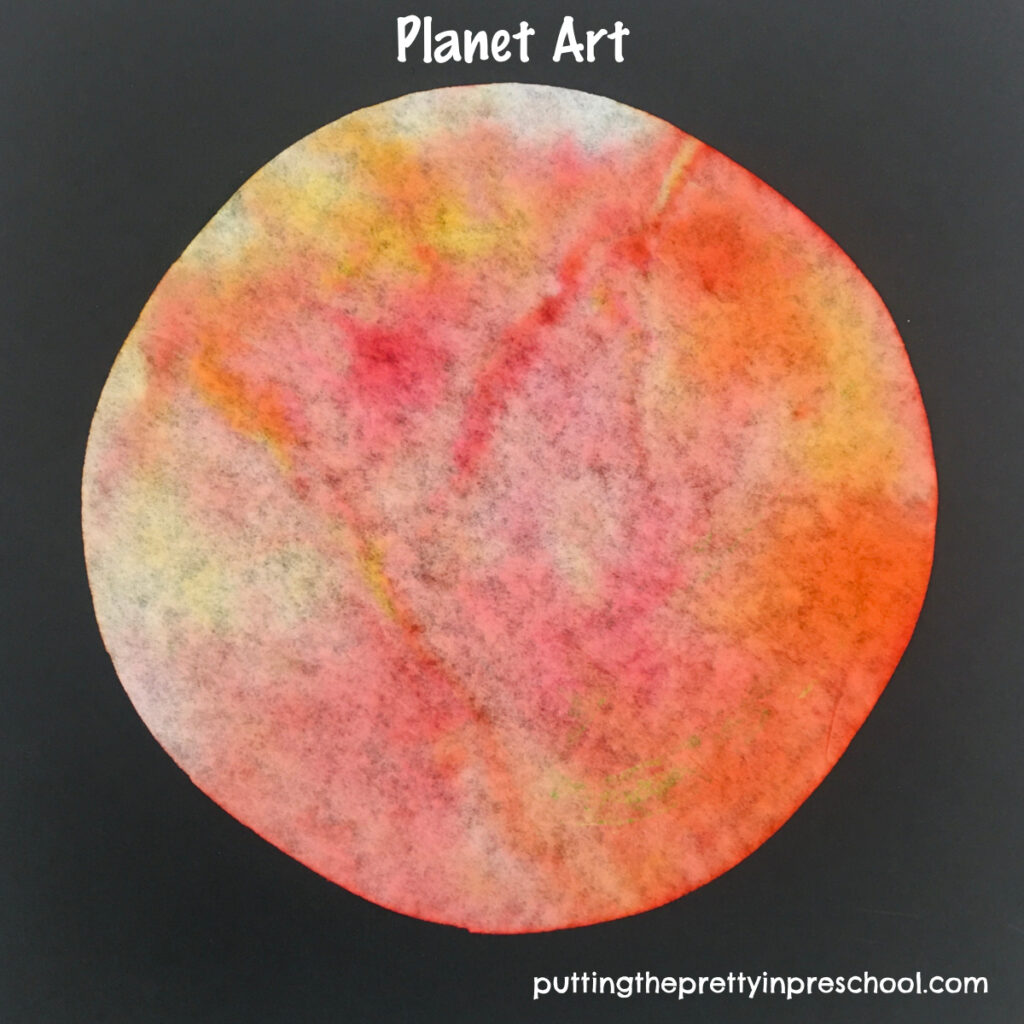
This process art project looks amazing displayed in a group.

_______

Create watercolor earth art with just markers and water. A quick and easy process art project everyone will love.

_______

More Watercolor Planet Process Art

Because little learners love the spraying water part of this art activity, invite them to make more colorful planets without restrictions. They may spray the color right out of the circles after decorating them, but they enjoy doing this soooo much. Have them try black or dark green markers. Early learners are sure to be excited about the new colors that will be revealed.

_______

More Space Theme Activities

Earth Day Heart Art

Scented Moon Playdough

Salt and Glue Moon Art

Outer Space Pretend Play

Space Theme Loose Parts Play

Starry Sky Sensory Bin

Moon Colors Art Project

Space Restaurant Dramatic Play

Space Father’s Day Craft

Earth Day Bead Craft

_______

[Read more…] about Watercolor Planets With Markers
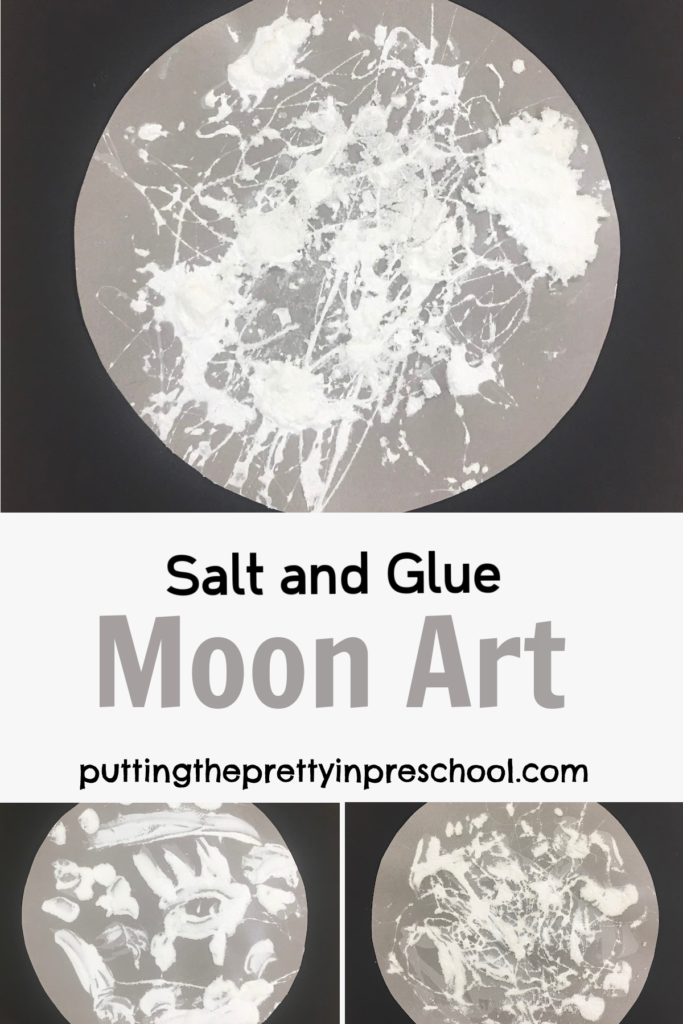
Tweet
Share
Share
Pin

Filed Under: art, display, Earth Day, preschool, space Tagged With: earth craft, Earth Day, painting, planets, process art, space

Salt And Glue Moon Art

August 8, 2022 by Annette Kaminsky Leave a Comment

Tweet
Share
Share
Pin
Try this stunning salt and glue moon art activity. It's a process art project that displays well. Ten moon facts are included in the post.

_______

This salt and glue moon art activity is a simple way to create a realistic moon in its natural colors. It’s easy for little learners to do, and looks showy when displayed.

To help set the tone for the art activity, here are ten fun facts about the moon’s surface to share.

_______

Ten Moon Facts

  • The moon usually appears bright whitish, silvery gray, or pale yellow. This is because its surface is illuminated by the sun.
  • Close up, the moon is colored in shades of gray, with a little bit of black and white. There are tinges of orange, blue, or green in some parts.
  • The moon is rocky and bumpy.
  • There are light and dark areas on it’s surface.
  • The dark areas are huge craters filled primarily with basalt lava that has cooled and formed smooth, dark plains. Much of the lava is rich in magnesium and iron, which is the reason for the dark color.
  • The lighter areas are highlands with mountains and many craters. The highlands are low in iron and rich in calcium, giving them a lighter color.
  • There are volcanic domes and shield volcanoes, as well as channel-like depressions on the moon.
  • The moon is covered in a thin layer of moon dust, which is a dark grey color.
  • There are traces of water in the form of water ice at the moon’s poles. Water molecules have recently been discovered on the sunlit side of the moon.
  • From earth, we always see the same side of the moon.
An easy-to-do moon art activity with a salt and glue technique. The art project looks stunning on display.

_______

Powerful telescopes, space probes that orbit or land on the moon, spacecraft that circle the moon, and robotic rovers are some ways the moon is regularly explored. Twelve astronauts have had the chance to walk on the moon and see it up close.

_______

Moon Art Supplies

Just a few supplies are needed for this striking moon art project:

  • 8 ½ inch x 11- inch gray cardstock paper
  • 12 x 12-inch black cardstock paper
  • white glue
  • glue paddles
  • disposable plates
  • table salt
  • small bowls or paint cups
  • spray adhesive
  • hot glue gun

_______

The Salt And Glue Moon Art Process

To prepare for the activity, cut circles about 8 ½ inches in diameter from gray cardstock.

Next, set up a station for each child participating with a

  • gray cardstock paper circle
  • small bowl of salt and a teaspoon
  • container of white glue and glue paddle
  • disposable plate
Stunning moon art made with a salt and glue art technique. Teach facts about the moon while doing this process art activity.

_______

Invite little learners to drizzle white glue on their circle-shaped paper.

Then have them sprinkle salt from a teaspoon over the glue, and shake excess salt onto their disposable plate.

Let the art projects dry overnight.

An easy-to-do moon art activity with a salt and glue technique. The art project looks stunning on display.

_______

To help preserve the moon art, spray each salted circle with adhesive spray. Hairspray works fine for this task too.

When thoroughly dry, adhere each paper moon to a black cardstock or construction paper background using a hot glue gun.

Display the stunning art projects on a bulletin board or wall. They will look amazing!

_______

Follow me on Pinterest for more early learning ideas.

_______

Little learners may have their own thoughts about the art they are creating. One of my students pretended he was making “The North Pole.” This led to a discussion about who was on Santa’s nice and naughty list!

Another student asked if he could taste the salt. After saying it was ok to taste a little of it, we discussed that it is a good choice to ask if it is safe to taste an art supply before doing it. We also talked about how there is a lot of salt in many playdough recipes, but we only use a little bit to season food.

Try this stunning salt and glue moon art activity. It's a process art project that displays well. Ten moon facts are included in the post.

_______

Related:

Scented Moon Playdough

Starry Sky Sensory Bin

Space Father’s Day Craft

Space Restaurant Dramatic Play

Watercolor Planets With Markers

Outer Space Pretend Play

Earth Day Heart Art

Earth Day Craft

Moon Colors Art Project

Space Loose Parts Play

Space Theme Light Table

_______

[Read more…] about Salt And Glue Moon Art
Tweet
Share
Share
Pin

Filed Under: art, display, preschool, science, space Tagged With: moon, process art

Jelly Bean Theme

April 16, 2022 by Annette Kaminsky Leave a Comment

Tweet
Share
Share
Pin

_______

A few weeks ago, I set out to make an Easter display that would work for a wall art tree. I thought of incorporating the “Jelly Bean Prayer,” and wondered if there was such a thing as a jelly bean tree. To my delight, an online search revealed a variety of references to “jelly bean tree,” and provided inspiration for other activities. So in addition to changing up the display, I came up with this fun and tasty Jelly Bean Theme. The post includes free printables and a few facts about the colorful candy.

_____

10 Jelly Bean Facts

  • Jelly beans are bite-sized candies with hard, crunchy shells and soft, chewy centers.
  • These sweet candies are associated with Easter in Canada and the United States.
  • Part of the appeal is their egg shape and tiny size. This makes them terrific Easter egg fillers.
  • There are eight basic colors and flavors, which often have a fruity taste.
  • Over time, jelly beans were created in many different color schemes, often matching seasonal celebrations.
  • Jelly beans became popular in the 1960s.
  • The most common order for eating the candies is: red, purple, green, yellow, and black.
  • Jelly beans are used as an art medium, and there are mosaic art pieces made with them.
  • President Ronald Reagan liked them a lot, so artist Peter Rocha made a jelly bean portrait of the president.
  • There is a National Jelly Bean Day (in the US) on April 22.

_______

Follow me on Pinterest for more early learning ideas.

_______

Jelly Bean Theme Activities

There are a number of easy, educational jellybean activities to do at home or school.

Tasting Jelly Beans

Give participants jelly beans in the colors red, purple, green, yellow, and black. Chart the order each child eats the jellybeans.

What order would you eat these jelly beans in? Try this candy tasting activity and record the results.

_______

Incorporate language and math sequencing by describing color and taste, and using words such as first, next, and last.

_______

Jelly Bean Sorting

Invite children to sort jelly beans by color. This flower-shaped paint palette is perfect for individual color sorting.

A flower-shaped paint palette makes the perfect tray to sort jelly beans by color.

_______

Candies On Display

Jelly beans look attractive stored in mason jars. The filled jars could be part of a tablescape display or food table.

Store jelly beans in jars for a tablescape or food table display. Have a "Guess The Number Of Jelly Beans In The Jar" contest.

_______

How Many Jelly Beans Are In The Jar?

Fill a jar with jelly beans, and have participants guess the number of candies in the jar. Then count the jellybeans together. For early learners, a baby food jar or small bottle would be a good size to use.

_______

Cupcake Liner Easter Party Favors

Add pipe cleaner handles to sturdy Easter-themed cupcake liners. Fill the liners with Easter-colored jelly beans and hand them out as Easter basket party favors. Or fill plastic Easter eggs with jelly beans.

_______

Jelly Bean Prayer Wall Display

Over-sized paper jelly beans for a "Jelly Bean Prayer" tree display. Download the free printable for art, book-making, and display opportunities.

_______

Download this free template for a Jelly Bean Prayer tree display. I used it to cut out large jelly beans from different colors of cardstock paper. Then I wrote a line of the prayer on each one and added them to a tree theme wall display.

Download this oversized jelly bean template for art, book-making, and display use.

_______

Jelly Bean PrintableDownload

This printable is for individual or one classroom use only.

_______

Jelly Bean Art

Use this same printable for children to paint or color and cut out gigantic paper jelly beans.

Or have children dictate or write a page for a jelly bean storybook, and then decorate the background.

_______

J Is For Jelly Bean Craft

Invite children to glue jelly beans onto a paper letter J. How fun!

"J Is For Jelly Beans" in this tasty craft. Reinforce the letter J sound with this fun and easy activity.

_______

Jelly Bean Tree Craft

Print copies of this tree template on white cardstock paper. Set them on an art table along with white glue and jelly beans. Invite children to glue jelly beans on the tree.

This could also be a transient art activity offered in a tray.

How fun! Decorate a tree template with jelly beans. Glue the tasty candies on for a finished project. Free tree printable available.

_______

Jelly Bean Artists

There are artists who work with jelly beans as a medium, or as a subject in their art. Who knew?

Peter Rocha and Kristen Cummings are two notable jelly bean artists. Their creations can be viewed on the Jelly Belly Company’s “The Jelly Belly Bean Art Gallery” web page. Their candy art can also be viewed on my Pinterest Board Jelly Bean Kids Activities/Jelly Bean Artists.

_______

Storybooks Incorporating Jelly Beans

The flavorful candies make an entertaining subject for storybooks. Here are a few books incorporating jelly beans:

Arthur’s Jelly Beans by Marc Brown 

Arthur and his friends participate in a “Spring Fling” party, which includes a jelly bean hunt of course!

Jellybean Mouse by Philip Roy

Happy the mouse isn’t excited to go on a laundromat errand but discovers a jellybean machine once there. The day’s adventure becomes just the excitement the spunky mouse is seeking.

The Jellybeans And The Big Dance by Laura Numeroff and Nate Evans

A group of girls with different interests meet at a dance studio, and slowly become friends. They eventually discover that just as jellybeans come in different flavors but go well together, they get along great. They decide to call themselves “The Jellybeans.”

There are three more books in this friendship and team-building series:

  • The Jellybeans and the Big Book Bonanza
  • The Jellybeans and the Big Camp Kickoff
  • The Jellybeans and the Big Art Adventure

Jelly Bean Tree by Toni Yuli

This story isn’t about jelly beans, but the main character, a giraffe, is called Jelly Bean. It’s reason enough to include the colorfully illustrated, endearing story in the theme.

_______

[Read more…] about Jelly Bean Theme
Tweet
Share
Share
Pin

Filed Under: art, crafts, display, Easter, literacy, Math, party, preschool, sensory, spring, themes, trees Tagged With: art, crafts, jelly beans, sensory tray

Three Black History Month Crafts

February 26, 2022 by Annette Kaminsky Leave a Comment

Tweet
Share
Share
Pin
Three vibrant, easy-to-make Black History Month crafts. Pick one or all three paper crafts to celebrate the theme.

_______

These three, easy Black History Month crafts feature ribbons in vibrant patterns and colors and lots of hearts! I’ve always admired the rich-toned clothing that black people can wear. And they absolutely shine adorned with metallic gold and silver jewelry. They can get away with so many color schemes that elude me because of my fair skin!

The bold fabric colors and patterns not only look striking but carry meaning in African culture. The designs are a means of storytelling, communicating messages from particular people groups. Textiles are also used as backdrops for important public ceremonies. And they are dynamic collectible artworks.

_______

Follow me on Pinterest for more early learning ideas.

_______

Kindness Heart Wreath

This wreath with skin-toned hearts communicates that all lives matter and that everyone deserves to be treated with kindness.

Black History Month ribbon and skin-toned hearts are the highlights of this easy-to-make "kindness" wreath craft.

_______

Supplies to Gather:

  • 9-inch paper plate
  • cardstock in skin tones
  • Black History Month ribbon
  • heart paper punch
  • glue stick
  • glue gun

Cut out the center of the paper plate, and cut or punch hearts in skin tones from cardstock.

Invite your little learner to glue hearts around the paper plate rim, leaving a little room at the top or bottom.

Cut a 26-inch piece of ribbon. Tie it into a bow and glue it on the top or bottom of the wreath with a hot glue gun.

Note: The hearts could also be punched from Black History Month colors: black, red, yellow, and green.

Black History Month ribbon and skin-toned hearts are the highlights of this easy-to-make "kindness" wreath craft.

_______

Heart Banner Craft

The same skin-toned hearts can be used to decorate an attractive, display-worthy banner honoring Black History Month.

Three vibrant, easy-to-make Black History Month crafts. Pick one or all three paper crafts to celebrate the theme.

_______

Supplies To Gather

  • 9 x l2-inch sheet of fade-resistant construction paper
  • thin Black History Month ribbon
  • 12-inch strip of jute twine
  • black felt pen
  • scissors
  • glue stick
  • glue gun

Choose a color of construction paper that complements the ribbon. Cut a triangle out of one end.

With a hot glue gun, add a ribbon edge to the top and bottom of the sturdy paper.

Write the words “Black History Month” in the center.

Invite your little learner to glue skin-toned hearts around the words.

Use a hot glue gun to adhere the jute twine to the upper back of the craft for a hanger.

Hang the craft project on a wall as a banner.

Note: The words on the banner can be changed to “Kindness Matters” or “Everyone Is Special.” This would make the craft project suitable for any time of the year.

_______

Black History Month Heart

This heart craft takes full advantage of the vibrant, geometrically patterned ribbon, and looks striking on display.

Make this stunning Black History Month heart craft to honor this important celebration.

_______

Supplies To Gather

  • two pieces of 9 x 12-inch fadeless construction paper
  • heart tracer
  • Black History Month ribbon in various colors, patterns, and widths
  • plain ribbon
  • glue stick
  • hot glue gun
  • scissors
Steps to make a stunning Black History Month heart craft to honor the important celebration.

_______

Cut ribbon into strips that are about 13 inches long.

Help your little learner pick and glue pieces of ribbon to one sheet of paper using a glue stick.

Afterward, trim the ribbon so it is even with the paper edges with a good pair of scissors.

Using a heart tracer, cut a large heart from the other piece of construction paper.

With a hot glue gun, adhere the cut paper outline to the fabric enhanced paper. Display the finished project on a wall with the caption “Black History Month.”

_______

Three vibrant, easy-to-make Black History Month crafts. Pick one or all three paper crafts to celebrate the theme.

_______

These three ethnic ribbon-enhanced crafts would look amazing displayed as a group. Each individual craft would work wonderfully as a classroom project.

_______

_______

Black History Month Positive Affirmations

This Black History Month printable set has coloring pages with 18 positive affirmations and 4 editable pages. Many creative patterns inspired by African art are possible, all with basic art supplies. Two bulletin board headers make displaying the stunning finished artwork super easy. Download this easy-to-use printable set at my Etsy Skills N Smiles shop for an everyday low price.

_______

See the blog post Black History Month Positive Affirmations Art for more infomation.

_______

_______

Related:

Black History Month Paper Craft

Celebrate Diversity Butterfly Craft

Make this gorgeous handprint butterfly craft to recognize Black History Month and celebrate diversity.

_______

Celebrate Diversity Yarn Heart

Make this gorgeous skin-toned yarn heart craft to recognize Black History Month and celebrate diversity.

_______

[Read more…] about Three Black History Month Crafts
Tweet
Share
Share
Pin

Filed Under: art, Black History Month, crafts, display, preschool Tagged With: Black History Month, hearts, multicultural, paper crafts

Heart Doily Gnome Valentines

February 5, 2022 by Annette Kaminsky 4 Comments

Tweet
Share
Share
Pin
Super fun heart doily gnome valentines the whole family can make. Free printable included for easy crafting.

_______

These adorable heart doily gnome valentines will add a major dose of cuteness to your holiday décor. Little learners can review shapes while you work on the project. And wouldn’t the valentine crafts look great displayed together on a classroom wall? To make the papercraft super easy, I’ve included a free printable for downloading below.

_______

Follow me on Pinterest for more early learning ideas.

_______

Supplies To Collect

For the gnome valentines, gather the following supplies:

  • 4-inch red paper heart doilies
  • 6-inch white paper heart doilies
  • red, white, and grey cardstock
  • cardstock in different flesh tones
  • valentine scrapbook paper
  • 8 ½ x 11-inch cardstock or construction paper
  • heart paper punch
  • black felt pen
  • glue stick

_______

Making The Heart Doily Gnome Valentines

Steps to create an adorable heart doily gnome valentine.

_______

There’s a bit of cutting to do in order to set up this valentine gnome craft. The good news is that it can be completely made of paper, keeping the project low cost. If desired, download this free template for the shapes.

Heart gnome template to use to make adorable gnome valentines.

_______

Heart Gnome Valentine PrintableDownload

This printable is for individual or one classroom use only.

_______

Tip: Construction paper or cardstock works best for the papercraft.

Cut an oval nose and two circle hands from flesh-colored paper, and punch or cut a small heart “pom pom” from white. Snip a heart valentine (the smallest one on the template) from red paper, and two oval shoes from grey. Finally, cut a curved, pointy hat from the scrapbook paper of choice.

Using a glue stick, adhere the red heart doily upside down near the bottom of an 8 ½ x 11-inch sheet of sturdy paper. This heart will be the lower body of the gnome.

Glue the large white heart right side up halfway over the red lacy one to serve as a beard.

Note: The heart doilies help make for an exquisite craft, but they can easily be substituted with paper ones. Included on the template are two heart shapes that can be used instead.

Center the flesh-colored oval in the middle of the top of the white heart for the nose.

Creating this huggable valentine gnome will be fun for the whole family. Free printable included for easy crafting.

_______

Paste on the scrapbook paper hat.

Write a message on the smaller red heart with a black felt pen. Then glue it to the white one.

Adhere the circles to serve as hands holding the valentine heart, and the white heart to the tip of the curved hat for a pom pom.

Glue the grey ovals on the bottom of the red doily heart to become shoes.

_______

Multicultural Heart Doily Gnome Valentines

Multicultural heart doily valentine gnomes that are fun for the whole family to make. Free printable included for easy crafting.

_______

The heart gnomes can be crafted in different flesh tones, making the project multicultural. And while putting together this craft with little learners, heart, circle, and oval shapes can be discussed.

Adorable multicultural gnome valentine with exquisite heart doilies taking center stage.

_______

Tip: Paint samples work well for the nose and hands, as they come in so many flesh tones.

_______

Sweet multicultural gnome valentine with exquisite heart doilies taking center stage.

_______

Six Gnome Facts

Gnome ornaments and crafts have been extremely popular in the last few years. If you are interested in finding out a little more about these mythical beings, here are a few facts:

  • Gnomes are legendary creatures originating in European stories.
  • They are small men with pointy hats and long, white beards.
  • These imaginative creatures live in dark, rural places such as forests or underground burrows.
  • Gnomes are considered to be industrious, kind, and wise.
  • Guarding the earth and wildlife is important to gnomes.
  • Garden gnomes originated in Germany in the mid-1800s and are prevalent today.

_______

You are going to love creating these huggable gnomes! Tag me on Instagram with your creations and I’ll share them in my stories!

_______

Multicultural heart doily gnome valentines that are fun for the whole family to make. Free printable included for easy crafting.

_______

More Valentine’s Day Activities

Valentine’s Day Light Table

Valentine’s Day Treasure Blocks

Valentine’s Day Water Play

Valentine’s Day Gingerbread Cookies

Valentine’s Day Musical Instruments

Valentine’s Day Playdough Activities

Valentine’s Day Jewelry on the Light Table

Valentine’s Day Sensory Tubes

Woolly Valentine’s Day Crafts

Valentine’s Day Process Art

Ladybug Wand Craft

Scissor Skill Heart Collage

Painting With Chocolate

_______

[Read more…] about Heart Doily Gnome Valentines
Tweet
Share
Share
Pin

Filed Under: art, display, preschool, Valentine's Day Tagged With: gnomes, hearts, paper crafts, Valentine's Day, valentines

  • « Go to Previous Page
  • Page 1
  • Interim pages omitted …
  • Page 3
  • Page 4
  • Page 5
  • Page 6
  • Page 7
  • Page 8
  • Go to Next Page »

Primary Sidebar

Hi, I'm Annette Kaminsky, a preschool teacher who loves sharing learning through play activities for young children. Thanks for visiting my site. Feel free to stay awhile!

Subscribe Via Email

Recent Posts

  • Expanding Balloon Science Experiment May 18, 2026
  • Earth Day Spin Painting April 21, 2026
  • Easter Bunny Scavenger Hunt April 4, 2026
  • Celebrate Diversity Coloring Pages March 1, 2026
  • Lunar New Year Lantern Craft February 11, 2026
  • Black History Month Positive Affirmations Art January 29, 2026
  • Snowflake Cafe Dramatic Play Set January 19, 2026
  • Pastel Christmas Letterhead and Envelope December 20, 2025
  • December Kindness Activities November 30, 2025
  • Fall Forest Sensory Bin November 30, 2025

Categories

Topics

apples bunnies butterflies Chinese New Year Christmas Christmas craft color colors dramatic play Easter fall flowers hearts holiday jewelry leaves leprechauns light table loose parts painting paper crafts playdough pretend play printables printmaking process art pumpkins rice bin scented playdough science experiment scissor skills sensory bin sensory play sensory tray shamrocks skeletons snakes snowflakes spiders spring St. Patrick's Day sunflowers tablescapes Valentine's Day water play

Copyright © 2026 · Lifestyle Pro on Genesis Framework · WordPress · Log in