• Skip to secondary menu
  • Skip to main content
  • Skip to primary sidebar

Putting The Pretty In Preschool

Finding Beauty In Everyday Early Childhood Experiences

  • Home
  • About Me
  • Winter
  • Chinese New Year
  • Blog
  • Valentine’s Day
  • Contact Me
  • Easter Activities

autumn

Felt Marker Chromatography Experiment

October 30, 2021 by Annette Kaminsky Leave a Comment

_______

This felt marker chromatography experiment uses supplies from the kitchen, has quick results, and can be tailored to a variety of topics. Creativity and center play are easily incorporated. And the experiment is super family-friendly.

_______

Basic Felt Marker Chromatography Experiment

See what colors felt pens are really made up of with this felt pen chromatography experiment.

_______

The simplest version of this experiment is to draw three filled-in circles with nonpermanent felt pens near the bottom of a section of paper towel.

Add a thin layer of water with 2.5 ml salt stirred into a measuring cup or jar. Place the towel with the colored side down into the container. The water level should sit just below the felt pen colors.

Simply watch what happens!

After the color movement stops, remove the paper towel from the container and let it dry flat. Discuss the color changes/new color results.

_______

Felt Marker Chromatography Experiment Scary House

Scary house imaginative play with a felt pen experiment chromatogram.

_______

Although I am not into scary things and don’t do much frightening stuff with my preschool students, this version of the experiment produces a house that bats and spiders might like to inhabit. And here’s where the creative element kicks into high gear.

Draw the outline of a house on a paper towel section with a black nonpermanent felt marker. Trim the edges with scissors. Then add a thin line of black to the bottom of the house with the marker. Pour a little water with a bit of salt added into an ice cream pail. Position the paper towel so it reaches the bottom of the pail but does not slide in. Watch the immediate results. Then check back periodically to note more color changes.

This easy-to-do felt pen chromatography experiment has stunning results.

_______

When the colors have finished spreading, take the paper towel out of the pail, and dry it flat.

The color on my paper towel chromatogram stopped just short of the top of the house. I decided to wet the top a bit so the color filled in completely. That made the design ready to be a placemat for pumpkins, bats, and spiders.

Try this easy-to-do felt pen chromatography "scary house" experiment. It has possibilities for art and imaginaive play.

_______

Two Different Marker Chromatography Experiment

Try this easy felt pen chromatography experiment using a permanent and nonpermanent felt pen.

_______

Using both permanent and nonpermanent black felt markers produces nice results too. For this second version, draw the house on the paper towel with a black permanent marker. Then fill in the thin line of color at the bottom with a nonpermanent felt one. Finish the experiment with the same process as above.

As with the first project, the resulting colors did not spread to the very top of the paper towel house. So I wet the top of this chromatogram too. The color record looks like a house on fire to me, so adding people, pets, firefighters, and orange, black, and clear gems creates another imaginative play invitation.

Sensory and imaginative play with a felt pen experiment chromatogram.

_______

Firefighter diorama created with a felt pen experiment chromatogram.

_______

Interpreting The Felt Marker Chromatography Experiment

The Merriam-Webster dictionary defines chromatography as “a process in which a chemical mixture carried by a liquid or gas is separated into components as a result of differential distribution of the solutes as they flow around or over a stationary liquid or solid phase.”

Although each felt marker appears to be just one color, the hues are actually made up of different chemicals called pigments. As saltwater seeps up stationary paper towels, the pigments move up with it. New colors appear because some pigments travel faster than others, and certain colors are less soluble and/or adhere to the paper towel more.

Each color-infused paper towel is called a chromatogram, a graphic record of the separation of colors into different pigments by chromatography.

_______

[Read more…] about Felt Marker Chromatography Experiment

Filed Under: art, autumn, fall, preschool, pretend play, science, sensory Tagged With: bats, colors, loose parts, pumpkin, science experiment, sensory play, spiders

Apple Print Activities

October 16, 2021 by Annette Kaminsky Leave a Comment

Apple print activities. Dip and paint apple halves and slices and press them onto art paper. Save some prints for fingerplays and counting.

_______

Apples are so plentiful in fall and come in many sizes and colors. Besides enjoying the crunchy, juicy fruits in pies, squares, and drinks, set aside some for apple print activities.

To start off, show early learners a selection of apples in contrasting colors. A green Granny Smith, a yellow golden delicious, and a red royal gala apple make good fruits to set out and discuss. They are also easy to find in stores.

Little learners would be excited to taste the apples. Cut some into chunks and invite children to taste apples in all three colors.

Follow me on Pinterest for more early learning ideas.

Pick an inexpensive apple to use for the craft. I picked a smaller-sized apple on sale at a local produce store. Cut some apples in half from top to bottom, and slice others horizontally. Have early learners notice the seeds, and count them. Highlight the star shape in the horizontally cut apples.

Then invite children to use the apples for printmaking.

_______

Supplies To Collect

  • green, red, and yellow tempera paints
  • 12-inch x 18-inch sturdy art paper
  • small plates or trays
  • paintbrushes
  • apple halves

_______

Making Apple Prints

Pour a little red, green, and yellow paint in small flat dessert dishes or disposable plates. Add a little yellow to the green paint to lighten and brighten the color.

Allow little ones to dip apples into the paints, and make prints on the paper.

Fun and easy printmaking with apples.

_______

Another way to do this activity is to have early learners paint the apple halves instead, and then press them on the paper. It is easier to control the amount of paint on the apples this way.

Apple printmaking with green, red, and yellow tempera paints.

_______

Tip: After each painting experience, apple pieces can be rinsed and used again by another child.

_______

More Apple Print Activities

Apples often come in two different colors, like red and green, or yellow and red. To extend the painting experience, invite children to paint each apple half in a different color, and make prints with them.

Add some fun by making apple prints in two different colors.

_______

Thin the paints. Invite little learners to make prints on sections of paper towel roll. The absorbency and texture of the towels give the prints a unique look.

Make two-colored apple prints on absorbant paper towel.

_______

Instead of using apple halves, set out apple slices for the children to use. They work well too!

Printmaking using apple slices on a section of absorbant paper towel.

_______

After the paintings are dry, cut out a few prints to use in fingerplays and counting activities.

Cut apple paint prints used in fingerplays and counting activities.

_______

And the apple prints would make great additions to an apple tree or a wreath craft.

_______

[Read more…] about Apple Print Activities

Filed Under: apples, art, autumn, Math, preschool Tagged With: apples, colors, counting, printmaking

Frozen 2 Inspired Sensory Bin

November 26, 2020 by Annette Kaminsky Leave a Comment

Frozen 2 inspired sensory bin with pumpkins, apples, leaves, rocks, and craft supplies. A reindeer, snowman, and people characters complete the bin.

_______

When I came across the Frozen II-based storybook “We’ll Always Have Each Other” earlier this year, I immediately fell in love with the fall color scheme. The rich red and orange forest colors, peppered with gold, green, and purple got me super excited about putting together a Frozen II-inspired sensory bin.

This endearing story written by John Edwards touches on pumpkins, the changing seasons, and the close friendship between Olaf and Anna. The line “life may get harder sometimes, but we’ll stay strong for each other” seems even more relevant today than when it was written more than a year ago.

_______

Sensory Bin Color Guide

These papers were my color guide for choosing craft supplies and loose parts for the vibrant sensory bin. I used leaf punches in two different sizes to turn cardstock into tiny leaves to sprinkle in the bin.

The color guide for a Frozen 2 inspired sensory bin.

_______

Loose Parts Tray

This tray shows the supplies collected.

Frozen 2 inspired loose parts tray.

_______

Included are:

  • paper leaves
  • foil leaves
  • leaf gems
  • round gems
  • feathers
  • pom poms
  • red apple gems
  • green rubber apples
  • craft pumpkins
  • rocks
  • a flower

_______

Here’s a close up of the base:

Close up photo of the Frozen 2 inspired sensory base.

_______

Frozen II-Inspired Sensory Bin

Olaf, Anna, Kristoff, and Sven would feel perfectly at home in this Frozen II-inspired sensory bin.

Fall sensory bin inspired by the Frozen 2 based storybook "We'll Always Have Each Other."

_______

Or add your little learner’s favorite characters for fall-themed sensory play.

_______

[Read more…] about Frozen 2 Inspired Sensory Bin

Filed Under: apples, autumn, fall, friends, literacy, preschool, pretend play, sensory Tagged With: apples, Frozen inspired, looseparts, pumpkins

Pumpkin Color Activities

November 23, 2020 by Annette Kaminsky Leave a Comment

Pumpkin facts and color activities. Anatomy, color matching, and art activities.

_______

Although orange pumpkins are traditional, and most grocery stores focus on selling them, these dramatic fruits come in many other hues. Diversely colored pumpkins can be scouted out at farmer’s markets and garden centers in autumn. They are intriguing in pumpkin color activities for little learners.

_______

Pumpkin Display

First, set out pumpkins on a shelf for little ones to view. The contrasting colors make a striking display. Discuss pumpkin color, size, shape, and texture.

Pumpkins in mint, cream, black, yellow, and green colors.

_______

Color Matching

Move the pumpkins to a table and invite early learners to add color words.

Color matching with mint, orange, green, cream, and black pumpkins.

_______

Pumpkin Anatomy

Display a cross-section of each variety collected, and talk about pumpkin anatomy.

Pumpkin anatomy diagram showing the stem, skin, pulp, seeds, and fibrous strands.

_______

Notice that some pumpkins have larger cavities than others, and certain pumpkins contain more seeds. Study flesh colors together, and invite little learners to feel the pumpkin insides.

Black pumpkin cross-section showing pulp and seeds.

_______

Yellow pumpkin showing pulp and seeds.

_______

Green pumpkin showing pulp and seeds.

_______

Spider Web Crayon Rubbings

Have children do a spider web crayon rubbing on a uniquely colored paper pumpkin. A few spiders hanging around add excitement to the activity.

Crayon rubbings of spider webs on colored pumpkins. An all-ages art activity.

_______

Pumpkin Painting

Offer tempera paint for little ones to slather on a small pumpkin. Have everyone generously sprinkle on gold glitter for a finishing touch. The decorated pumpkins make showy take-home art, perfect for displaying on front steps or a porch.

Tempera painted pumpkins sprinkled with gold glitter.

_______

10 Fast Pumpkin Facts

  • Pumpkins are native to Mexico but have been embraced all over the world.
  • Pumpkin harvest season peaks in October.
  • Pumpkins come in various shades of orange, but can also be white, black, deep green, light green, yellow, blue, soft pink, cream, striped, or speckled.
  • Uniquely colored pumpkins have different purposes. White pumpkins are perfect for art projects.
  • Cinderella, Blue Doll, Baby Bear, Crystal Star, and Midnight Black are some of many creative pumpkin names.
  • Some pumpkins are smooth. Others feel rough and may have warts.
  • The world’s heaviest pumpkin weighed 2323 pounds.
  • Water makes up 90% of pumpkins.
  • Pumpkins are treated as a vegetable in many recipes but are actually a fruit.
  • Pumpkins are a source of vitamin A, C, and E, and zinc, folate, potassium, and fiber. They contain antioxidants.

_______

Pumpkin Vocabulary List

Download a list of pumpkin vocabulary words to use with your early learners.

Pumpkin Vocabulary ListDownload

_______

To get more ideas for pumpkin color activities, view a slideshow from Better Homes And Gardens entitled: Types Of Pumpkins.

_______

More Pumpkin Activities

Eye Dropper Pumpkin Art

Pumpkin Painting Process Art

Pumpkin Tablescape Pretend Play

Edible Playdough Pumpkins

Pumpkin Playdough Activities

Pumpkin Collage Art

_______

[Read more…] about Pumpkin Color Activities

Filed Under: art, autumn, display, fall, literacy, preschool, science, sensory, Thanksgiving Day Tagged With: colors, painting, pumpkins, Thanksgiving Day

Beet Science And Sensory Activities

November 22, 2020 by Annette Kaminsky Leave a Comment

Beet science and sensory activities. Beet washing station, ordering beets by size, and growing new greens and roots. Links to two festive recipes.

_______

This fall at a greenhouse a display of golden beets caught my attention. They weren’t on my list to buy, but I couldn’t stop thinking about them after I got home. So on my next visit to the garden center, I purchased golden beets and a red bunch too. The showy vegetable-inspired beet science and sensory activities can be introduced on the fly.

_______

Beet Washing Station

Set one or both kinds of beets in a tray with water and a vegetable brush. Invite your early learner to scrub the beets to make their color shine.

Beet washing station with red beets.

_______

Red and golden beets in a beet washing station.

_______

Size Ordering With Beets

Encourage your little learner to order golden beets from largest to smallest.

Size ordering golden beets from largest to smallest.

_______

Growing Beet Greens

After removing the greens, set two beets upright in a small, clear bowl of water. In the following days, observe the earthy vegetables with your early learner. You will be amazed to see glossy new beet leaves growing, and a tangle of roots!

Science experiment to see if red beets can grow new greens.

_______

New greens and roots growing on beets placed in a container of water.

_______

Related: Carrot Theme Activities

_______

Beet Recipes

Beets are filled with nutrients such as vitamin C, iron, manganese, folate, and potassium. They are a source of fibre and contain antioxidants that are especially good for the eyes. And… the greens are equally nutritious. After your little one participates in beet science and sensory activities, try the following recipes:

Thanksgiving Beets Recipe

Christmas Beets Recipes

Cooking is science too!

_______

[Read more…] about Beet Science And Sensory Activities

Filed Under: autumn, fall, gardening, preschool, science, sensory, Thanksgiving Day Tagged With: beets, Christmas, measurement, Thanksgiving Day

Sunflower Seed Sensory Bin Activities

November 21, 2020 by Annette Kaminsky Leave a Comment

Three sunflower seed sensory bins. Dinosaurs, sunflowers, pumpkins, sand toys, and loose parts are highlights of the bins.

_______

A sunflower seed sensory bin is a fantastic way for early learners to explore these edible seeds, and use them in play. The seed base is a natural fit for fall and pumpkin-themed accessories. Here are three sensory bin suggestions brimming with these dramatic seeds.

_______

Sunflower And Sand Toy Bin

Sand toys, sunflowers, and fall-themed gems in a sunflower seed sensory bin.

_______

Add shovels. pails, sieves, watering cans, leaf gems, round fall-themed gems, and craft sunflowers in different sizes and colors to a sunflower seed base. This bin works well as a spring gardening center. Or extend summer into fall by offering the bin to your little learners in September.

_______

Pumpkin And Sunflower Seed Sensory Bin

Pumpkin-themed loose parts and sunflowers shine in this sunflower seed sensory bin. Spiders and mice add fun to the tray.

_______

Rubber mice and spider gems liven up this pumpkin and sunflower seed sensory bin. Other items in this sure to delight bin are:

  • craft sunflowers in different sizes and colors
  • pumpkin gems
  • pumpkin ice cubes
  • leaf gems
  • orange, black, and clear gems
  • black and orange cups
  • pumpkin-shaped dish
  • pumpkin cookie cutters
  • orange spoon
Fall-themed tinker tray with sunflowers, mice, spiders, gems, and pumpkin loose parts.

_______

Dinosaur And Sunflower Sensory Bin

Dinosaurs and sunflowers may seem like an unlikely combination. The inspiration for this bin came from viewing Lewis Lavoie’s stunning works of art entitled “Sunflower Beast”, and “Sunflower Bed.”

Easy to put together sunflower seed sensory bin with sunflowers and dinosaurs.

_______

The bin was introduced to my preschoolers a few years back. I made sure there was a stegosaurus or two in the mix. The children had a blast playing with dinosaurs, sunflowers, and loose parts in the seedy base. Your early learners would embrace this bin too.

Below, a volcanic mountain adds interest to the play.

_______

Note: For these sunflower seed sensory bin activities, I used striped sunflower seeds.  I purchased two 7.5 lb bags at a local pet store, which filled a large sensory table. For a smaller bin, one 7.5 lb bag would be enough.

_______

Which bin is your favorite? Share below in a comment.

_______

[Read more…] about Sunflower Seed Sensory Bin Activities

Filed Under: art, autumn, dinosaurs, fall, gardening, preschool, sensory Tagged With: dinsosuars, playdough, pumpkins, sensory bin, sunflower seeds, sunflowers

Butterfly Sunflower Papercraft

November 15, 2020 by Annette Kaminsky Leave a Comment

A butterfly sunflower papercraft that is sure to wow. The sunflower head has a scrunched tissue center surrounded by paper butterflies.

_______

This butterfly sunflower papercraft is easy to make and is sure to be a parent pleaser. It’s an all-around showy harvest craft. I did it with my preschoolers this fall and sent it home around Canadian Thanksgiving Day. I’ve included a downloadable pattern for the craft in the post.

_______

Supplies To Collect

Paper supplies needed to make a butterfly-themed sunflower craft.

_______

  • 8 ½ x 11-inch cardstock paper in various shades of yellow
  • 9 x 12-inch green and yellow fade-resistant construction paper
  • 12 x 18-inch fade-resistant construction paper in shades of blue
  • brown construction paper
  • brown tissue paper
  • butterfly paper punches
  • white glue
  • glue stick
  • scissors

_______

Making The Butterfly Sunflower Papercraft

Punch butterflies from different shades of yellow cardstock paper.

Cut large circles from yellow construction paper, and smaller ones from sturdy brown paper.

Cut stems and leaves from green construction paper.

Snip brown tissue paper into small squares.

_______

Here’s a downloaded sunflower pattern:

Pattern to make a papercraft butterfly.

_______

Sunflower Pattern DownloadDownload

This printable is for individual and one classroom use only.

_______

Set up stations with a brown circle, tissue paper squares, and white glue. Have your early learners scrunch tissue paper squares, dip them in glue, and press them onto a brown circle.

Set up to scrunch tissue paper and dip it in glue to add it to a circle.

_______

Brown scrunched tissue glued on to a circle.

_______

After the tissue paper circles dry, ask your little ones to stick theirs on the center of a large yellow circle with a glue stick.

Set out a variety of shades and sizes of yellow paper butterflies for gluing all around the brown circle.

A sunflower head with a scrunched tissue center surrounded by paper butterflies.

_______

Guide each child in gluing a stem and two leaves onto a 12 x 18-inch piece of construction paper, and then adding the yellow and brown circular sunflower head.

Easy to make butterfly sunflower papercraft. The sunflower head has a scrunched tissue center surrounded by paper butterflies.

_______

Words such as Happy Thanksgiving or Gratitude could be added to the sunflower picture. I chose to leave the craft wordless and tell parents it was a Thanksgiving Day craft.

Thanksgiving Day inspired easy to make butterfly sunflower papercraft. The sunflower head has a scrunched tissue center surrounded by paper butterflies.

_______

The butterfly sunflower papercraft makes an attractive harvest or “Happy Thanksgiving” bulletin board display.

Happy Thanksgiving bulletin board display with butterfly-themed paper sunflowers.

_______

Related: Handprint Turkeys

_______

[Read more…] about Butterfly Sunflower Papercraft

Filed Under: art, autumn, display, fall, preschool, Thanksgiving Day Tagged With: harvest, paper crafts, sunflowers, Thanksgiving Day

Maple Leaf Activities

November 1, 2020 by Annette Kaminsky Leave a Comment

Maple leaf paint print activities. Art, math, and display ideas for maple leaves.

_______

Maple trees flourish in eastern Canada and turn vibrant colors in autumn. But I happily settled for these deep green maple leaves from a tree that can survive our harsh Alberta winters. When painted, they produce striking leaf prints. The prints look stunning displayed but can also be used for other maple leaf activities.

Green maple leaves.

_______

Maple Leaf Activities

Leaf Prints

Early learners can join in making maple leaf prints. Set out orange, yellow, and red tempera paints, paintbrushes, and large pieces of sturdy paper. Invite your little learners to paint the leaves, turn them over, and press them onto the paper. Encourage them to gently rub all over each leaf before removing them.

Invitation to paint maple leaves to make leaf prints.

_______

Tempera paint maple leaf prints.

_______

Glitter can be sprinkled on the leaf prints to add a dose of glam before they dry.

Glitter added to tempera paint maple leaf prints.

_______

Painting the back of a leaf, and pressing it on paper clearly reveals the midrib and veins.

Maple leaf paint print with red tempera paint.

_______

Unexpected colors of paint, such as black or blue can be offered.

Maple leaf paint prints with blue tempera paint.

_______

Maple leaf paint print with black tempera paint.

_______

After the leaf prints dry, cut some out for other activities.

_______

Maple Leaf Person

Have your little learners bring a leaf to life by adding wiggly eyes and a permanent felt pen smile.

Crafted paint print maple leaf person with wiggly eyes and a permanent felt pen smile.

_______

Canadian Flag Art

The maple leaf is part of our Canadian flag, so it’s extra special to me.

Your early learners can help make a leaf print Canadian flag. Select a big red leaf to glue onto the center of a large, rectangular piece of paper. Have children take turns adding smaller, red leaves on each side to complete the flag.

Canadian flag art made with maple leaf paint prints.

_______

Maple Leaf Math

Select different sized crafted leaves for your early learners to order from smallest to largest.

Leaf size ordering with different sized maple leaf paint prints.

_______

Use some leaves for counting fingerplays.

Counting leaves with maple leaf paint prints.

_______

Leaf Art Displays

Mount cut leaves onto a white piece of paper with double-sided tape. Add a paper background in a contrasting color. Display the art on a shelf or wall.

Displayed maple leaf paint print art. Cut prints are attached to a paper background with double-sided tape.

_______

Hang trimmed maple leaves from a twig tree, or a decorative branch hung on a wall.

Leaf display on a twig made with maple leaf paint prints.

_______

Do you have a favorite tree to introduce early learning activities with? Share in the comments section below.

_______

[Read more…] about Maple Leaf Activities

Filed Under: art, autumn, Canada Day, display, Math, preschool, trees Tagged With: counting, leaf prints, leaves, maple leaves, printmaking

Spooky Hands Craft

October 29, 2020 by Annette Kaminsky Leave a Comment

Easy to make spooky hands craft using shiny white corn syrup paint, Q-tips, and nail art. A seasonal, all-ages activity that is sure to stun.

_______

This shiny spooky hands craft is effortless to do and uses easy-to-gather materials. The supplies for this project can be found at your local grocery and dollar stores.

_______

Supplies To Collect

  • white corn syrup
  • orange, green, and purple food coloring
  • paint containers and brushes
  • spoons
  • spider-themed fake nails
  • skull-themed fake nails
  • polka dot fake nails
  • Q-Tips
  • spider gems
  • sturdy white paper
  • black permanent felt pen
  • scissors

_______

Taste safe corn syrup paint ingredients.

_______

Traced hands and supplies needed to make spider, skull, and skeleton hand-themed crafts.

_______

Making The Spooky Hands Craft

Using a permanent felt pen, help your early learners trace their hands on a sturdy piece of white paper. Stitches can be drawn on one of the hands. Assist with cutting the shapes out.

Together, mix a few drops of food coloring into containers of white corn syrup with spoons. A bit of yellow food coloring added to green makes it lighter and brighter. A few drops of yellow and red can be stirred to make orange. Combining red and blue makes purple.

Set out the paper hands, corn syrup paint, and paintbrushes. Invite your little learners to decorate each hand in one shiny color.

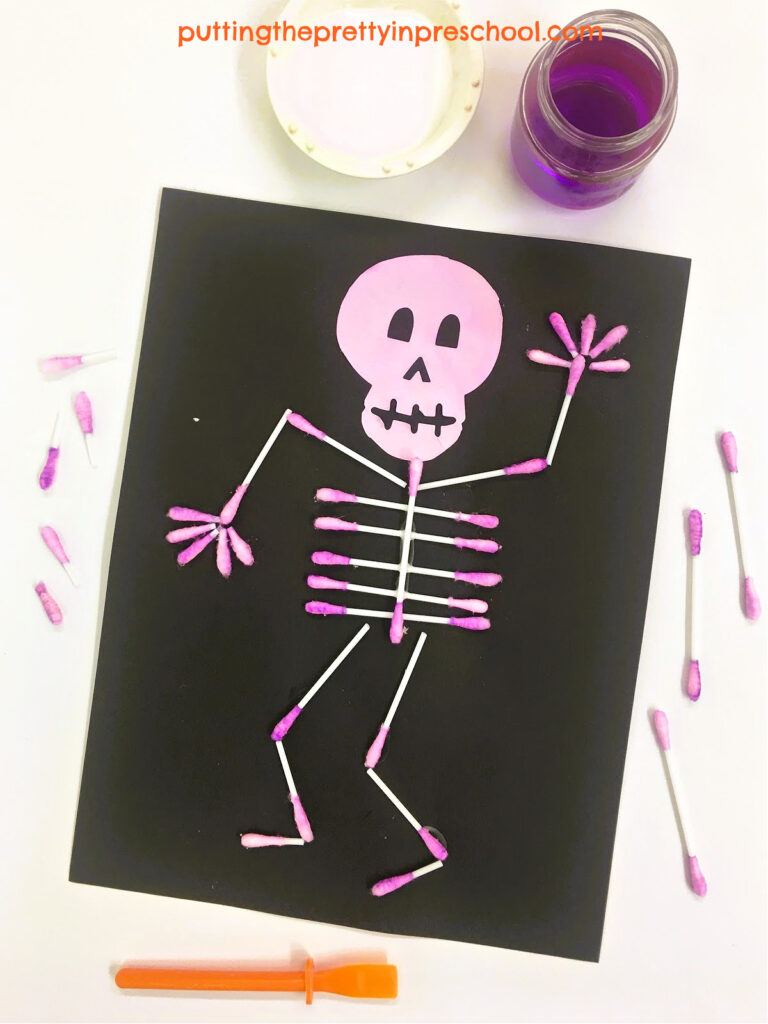
Add fake nails, Q-tips, and spiders. Let your little learners stick the loose parts into their tacky, painted hands.

_______

Supplies needed to create a green skeleton-themed painted hand.

_______

Supplies needed to create an orange, spider-themed hand.

_______

Supplies needed to create a purple spooky hand with stitches.

_______

Allow the sticky projects generous time to dry.

_______

Green painted hand, decorated with Q-tip bones and orange skull-themed nails.

_______

Orange painted hand, decorated with spiders and spider-themed nails.

_______

Purple painted hand with stitches drawn on and polka dot nails.

_______

Other paint colors and nail art can be used to take advantage of seasonal supplies and make the craft project your own.

This spooky hands craft is easy and fun…the perfect combination! Which hand theme is your favorite? Share in the comments section below.

_______

Spooky hand art using shiny, taste-safe paint and spider and skeleton-themed loose parts.

_______

[Read more…] about Spooky Hands Craft

Filed Under: art, autumn, party, preschool, sensory Tagged With: #spooky hands, loose parts, painting, skeletons, skulls, spiders

Celery Science Experiment

October 14, 2020 by Annette Kaminsky 2 Comments

Celery and food coloring science experiment.

_______

This classic and colorful celery science experiment is easy to do and has quick results. It works well as a “color-changing celery tree” activity in autumn but is awesome to perform at any time of the year. Your early learner will be thrilled with the speedy and dramatic results of the experiment.

_______

Supplies To Collect

  • leafy celery stalks
  • glasses or jars
  • food coloring hues
  • pitcher with water
  • knife
  • cutting board
Celery and food coloring experiment supplies.

_______

Procedure

Cut the bottoms from celery stalks.

Invite your early learner to generously squirt food coloring hues into glasses or jars, and add about 4 centimeters of water to each one.

Have your child place a celery stalk in each container, and use it to stir the liquids.  

Set the jars or glasses with celery on a table or windowsill.

Celery xylem are clearly visible in this closeup photo.

_______

Invite your little learner to look at the celery after a couple of hours. There will be a noticeable change in celery stalk and leaf colors.

Observe the celery with your child the following day. The leaves will be a darker shade of the water hue their stalk was set in than the day before. Colored lines running from the bottom of the stalks to the leaf tips will be clearly visible.

Add a little more water to each container if needed. Study the celery together a day or two later. The leaves and lines on the stalks will be a deeper color still.

Try the experiment with other food coloring hues. The leafy inner stalks below are dipped in turquoise, purple, and green-colored water.

Celery and food coloring experiment using turquoise, fuschia, and green colored water.

_______

Admire the transformed celery.

Color change in celery as a result of adding food coloring to the water.

_______

Variation Of The Celery Science Experiment

Cut off the ends of celery stalks, and split the bottom half of the stalks into two parts.

Celery stalks with ends cut off.

_______

Invite your child to squirt blue, yellow, and red food coloring into glasses or jars, and mix each hue with a bit of water.

Carefully place a section of one split celery stalk in red water, and the other in yellow. Put the bottom halves of another split celery stalk into yellow and blue water.

Celery stalks placed in two different jars of colored water.

_______

Observe the celery with your little one after a couple of hours, the next day, and two days later.

You will see colored lines that extend from the bottoms of the celery stalks to the leaves. Each stalk will have lines and leaves in two different colors.

Color change in celery as a result of adding food coloring to the water.

_______

The Science Behind The Celery Color Change Experiment

Celery stalks lose water through their leaves. More water gets pulled up from their roots to thirsty leaf tips through a network of hollow tubes called xylem.

The normally invisible process of water transport becomes visible when water accessible to celery stalks is colored.

Color change in celery as a result of adding food coloring to the water.

_______

The little dots on these celery slices are xylem tubes.

The colored dots on these celery slices are xylem tubes that transport water.

_______

Color change in celery as a result of adding food coloring to the water.

_______

[Read more…] about Celery Science Experiment

Filed Under: autumn, gardening, science, sensory, trees Tagged With: celery, color, experiment

  • « Go to Previous Page
  • Page 1
  • Interim pages omitted …
  • Page 3
  • Page 4
  • Page 5
  • Page 6
  • Go to Next Page »

Primary Sidebar

Hi, I'm Annette Kaminsky. I am a preschool teacher who loves to share easy and fun early learning activities. Thanks for visiting my blog. Feel free to stay awhile!

Subscribe Via Email

Recent Posts

  • Salt Painting Planet Art May 3, 2025
  • Spring Bunny Sensory Bin April 19, 2025
  • Tin Foil Egg Printing April 17, 2025
  • Lentil Easter Bunny Sensory Bin April 15, 2025
  • Unicorn Store Dramatic Play Center March 25, 2025
  • Easter Store Dramatic Play Center March 23, 2025
  • Origami Heart Wreath February 28, 2025
  • Black History Month Mixed Media Art February 26, 2025
  • Pink Shirt Day Necklace Craft February 20, 2025
  • Origami Heart Valentines February 9, 2025

Categories

Topics

block play bunnies butterflies Chinese New Year Christmas Christmas craft color colors dramatic play Easter flowers hearts holiday jewelry leaves leprechauns light table loose parts painting paper crafts playdough pretend play printables printmaking process art pumpkins rice bin scented playdough science experiment scissor skills sensory bin sensory play sensory tray shamrocks skeletons snakes snowflakes spiders spring St. Patrick's Day sunflowers tablescapes trees Valentine's Day water play

Copyright © 2025 · Lifestyle Pro on Genesis Framework · WordPress · Log in