_______
Living in central Alberta, Canada, reptiles such as snakes and lizards are uncommon for us to see. Unless we visit the local zoo or have access to an animal presentation, we will likely never see one. So it is natural for little learners to be afraid of these creatures. Hands-on activities with reptile figurines help alleviate young children’s fears about snakes and lizards. In addition to offering these exotic animals in a sensory tray, they are interesting accessories to include in a reptile theme playdough tray.
_______
Follow me on Pinterest for more early learning ideas.
_______
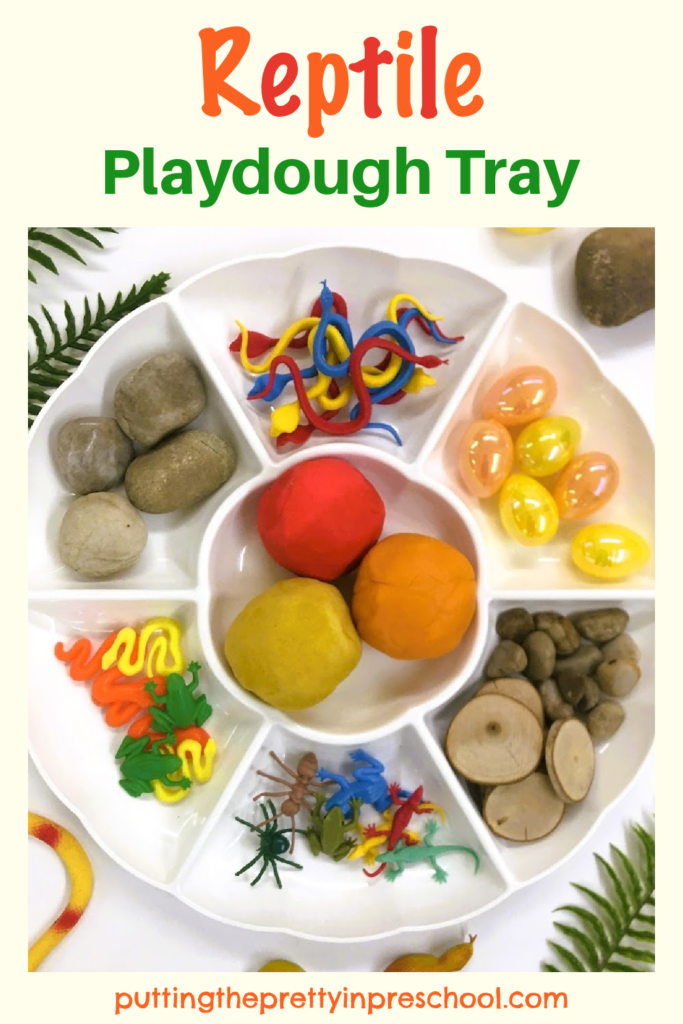
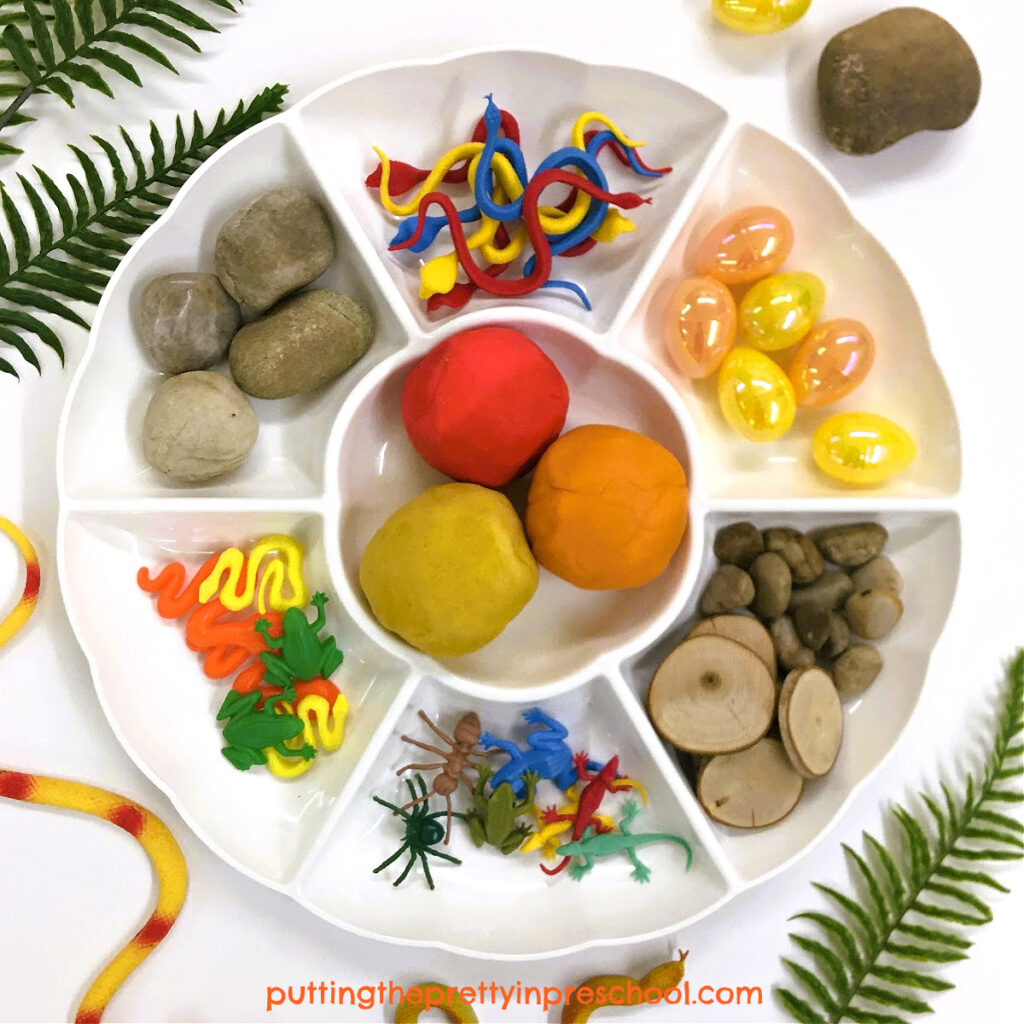
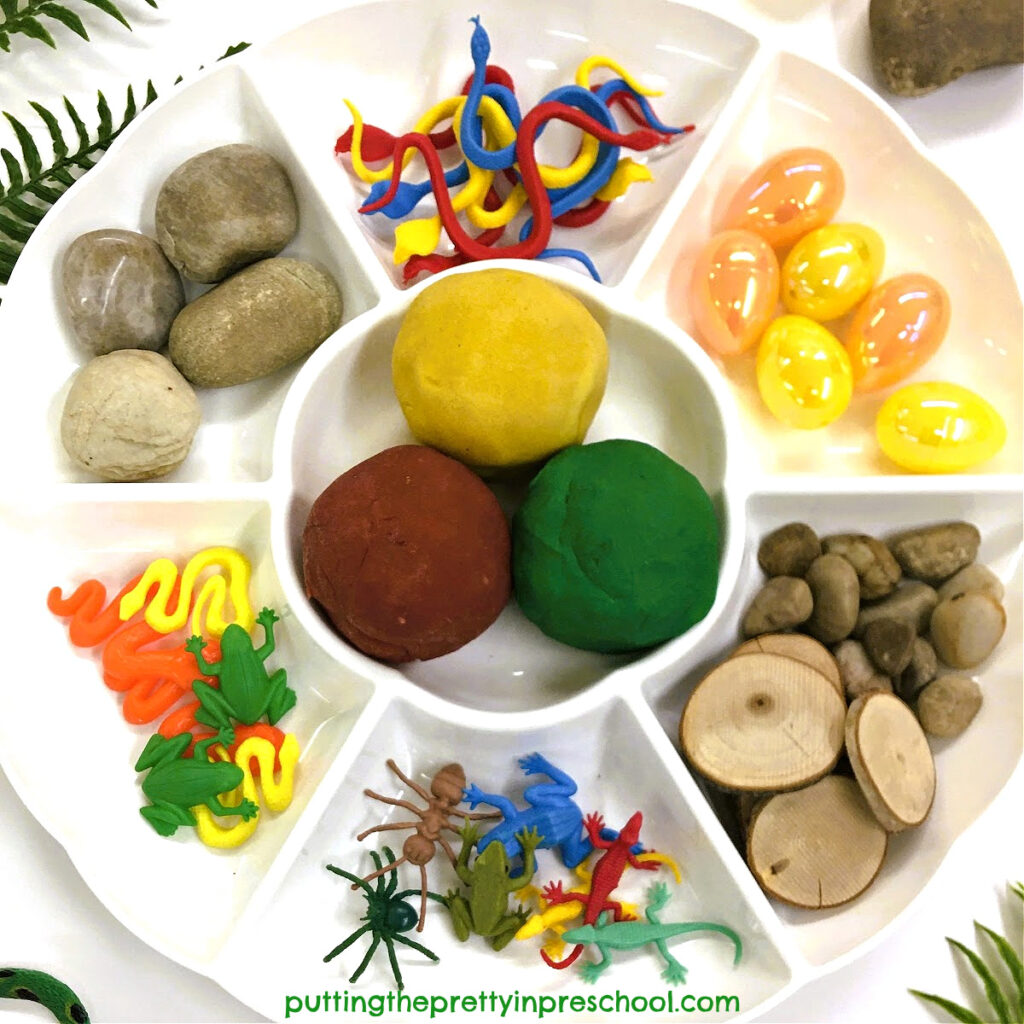
Reptile Theme Playdough Tray Supplies
The following supplies are included in this colorful, unique playdough invitation:
- snake and lizard figurines
- frog and insect figurines
- snake, lizard, and frog playdough molds
- rocks and stones
- wood slices
- refillable eggs
- divided compartment serving tray
_______
The Reptile Theme Playdough Tray
To keep supplies neat, organized, and attractive, one of my go-to methods is to add them to a divided compartment serving tray.
_______
Although I include many homemade playdough recipes on this blog, I feature store-bought playdough in this modeling dough play invitation. Someone had donated a bunch of different colors to me, and since lizards and snakes come in all kinds of patterns and hues, this activity seemed like the perfect way to start using them.
Miniature snake and lizard figurines and playdough molds allow little learners to create creatures of their own from playdough, and make animal prints. Manipulating the little figurines exposes them to animals they may have a natural fear of.
_______
Thin wood slices and small rocks and stones in the tray are natural materials found in the habitats snakes and lizards live in.
Frog, insect, and spider figurines represent prey snakes and lizards eat.
Finally, the small refillable eggs are reminders that lizards and most snakes hatch from eggs.

_______
This reptile theme playdough tray is a perfect beginning activity for learning about snakes and lizards and is superb for working on color recognition, counting, eye-hand coordination, and hand and finger strength.
Adding pictures of real snakes and lizards for little learners to view would provide opportunities to discuss and make patterns and allow for more discussions about the colors these reptiles display.
_______
More Reptile Activities
_______
More Themed Playdough Trays
White Lilacs and Black Playdough
_______
_______
_______
[Read more…] about Reptile Theme Playdough Tray