• Skip to secondary menu
  • Skip to main content
  • Skip to primary sidebar

Putting The Pretty In Preschool

Finding Beauty In Everyday Early Childhood Experiences

  • Home
  • About Me
  • Winter
  • Chinese New Year
  • Blog
  • Valentine’s Day
  • Contact Me
  • Easter Activities

science

Jellyfish Theme Activities

August 29, 2023 by Annette Kaminsky Leave a Comment

Jellyfish theme with art, math, scissor skill, water play, and light table activities. Interestng jellyfish facts and free printables included.

_______

It was clear jellyfish that got me interested in this unique sea creature, and are the inspiration behind this jellyfish theme post. Three transparent jellyfish crafts are included in the theme, along with scissor skills, math, and water play ideas.

Sea jelly is the proper name for jellyfish since these creatures are not fish. Fish have a face, brains, tails, fins, and backbone, which sea jellies don’t have. But since most people still use the term jellyfish and find activities by searching this name, I’m using both words in my facts and activities.

_______

Follow me on Pinterest for more early learning ideas.

_______

Fascinating Jellyfish Facts

Here are ten interesting facts about jellyfish:

  • Sea jellies are found in waters all over the world: cold or warm, shallow or deep, near shore or deep in the ocean.
  • These graceful creatures have a bell-shaped body, with oral arms and tentacles that look like streamers.
  • Jellyfish come in many colors and are often luminescent.
  • The tiny stinging cells on their tentacles capture prey. The tentacles can also sting people.
  • Inside the bell, sea jellies have a mouth to eat food with.
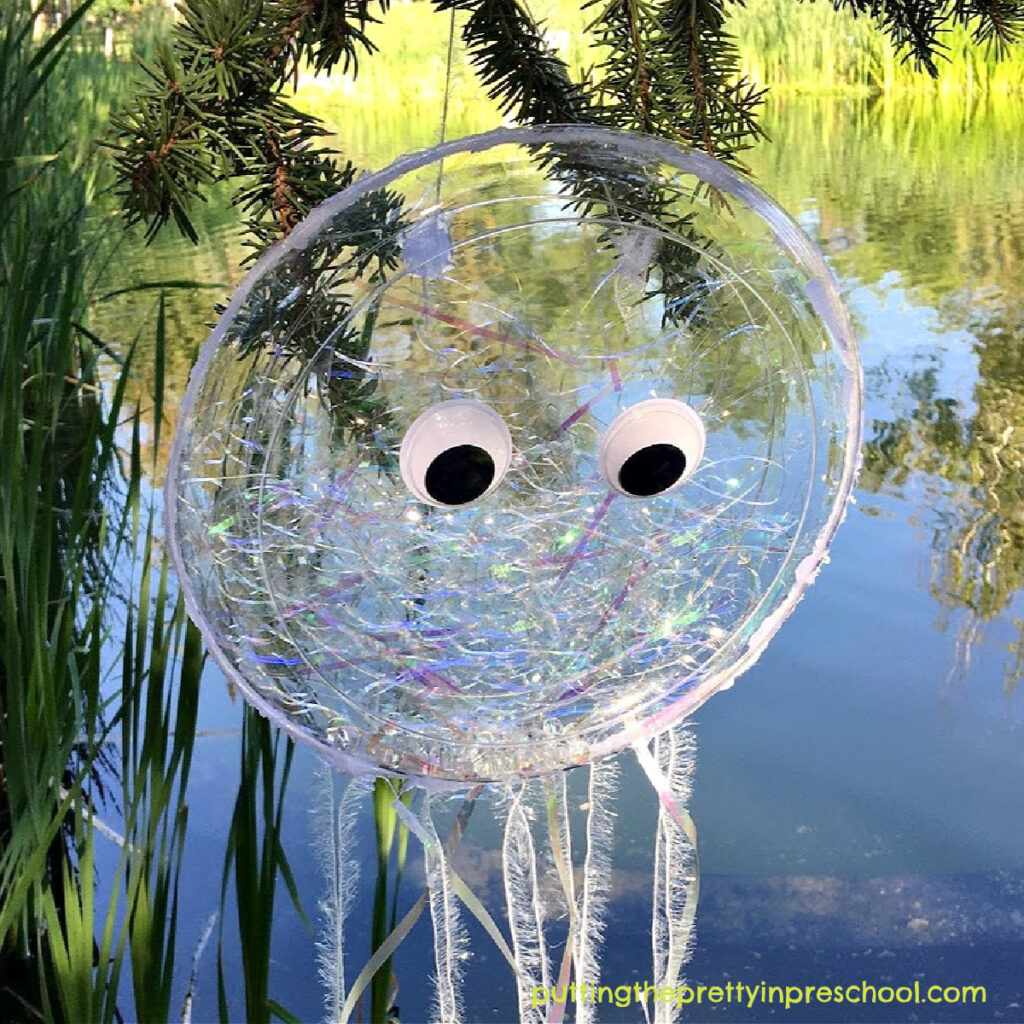
Make this sparkly iridescent jellyfish craft that doubles as an ocean drum and movement prop, It displays beautifully indoors or outdoors.

_______

  • These floaty creatures eat fish, crabs, shrimp, tiny plants, and zooplankton.
  • Their predators are large fish, sea turtles, and sometimes other jellyfish.
  • Sea Jellies are slow swimmers, pulsing along. They often get overpowered by strong currents that carry them along.
  • From small to humungous, sea jellies come in many different sizes and shapes.
  • The Portuguese Man Of War is the biggest sea jelly. Nomeus fish live in their deadly tentacles and do not get eaten. The tiny fish help attract large prey that this massive sea jelly ends up eating.
  • Jellyfish live for just under two days to under a year.

For more facts about sea jellies, view the blog post “Jellies” on montereybayaquarium.org.

_______

Iridescent Jellyfish Crafts

These three jellyfish crafts are inspired by the moon jelly, which has a transparent, umbrella-shaped bell. Iridescent craft supplies shine in the stringy crafts.

Supplies To Collect
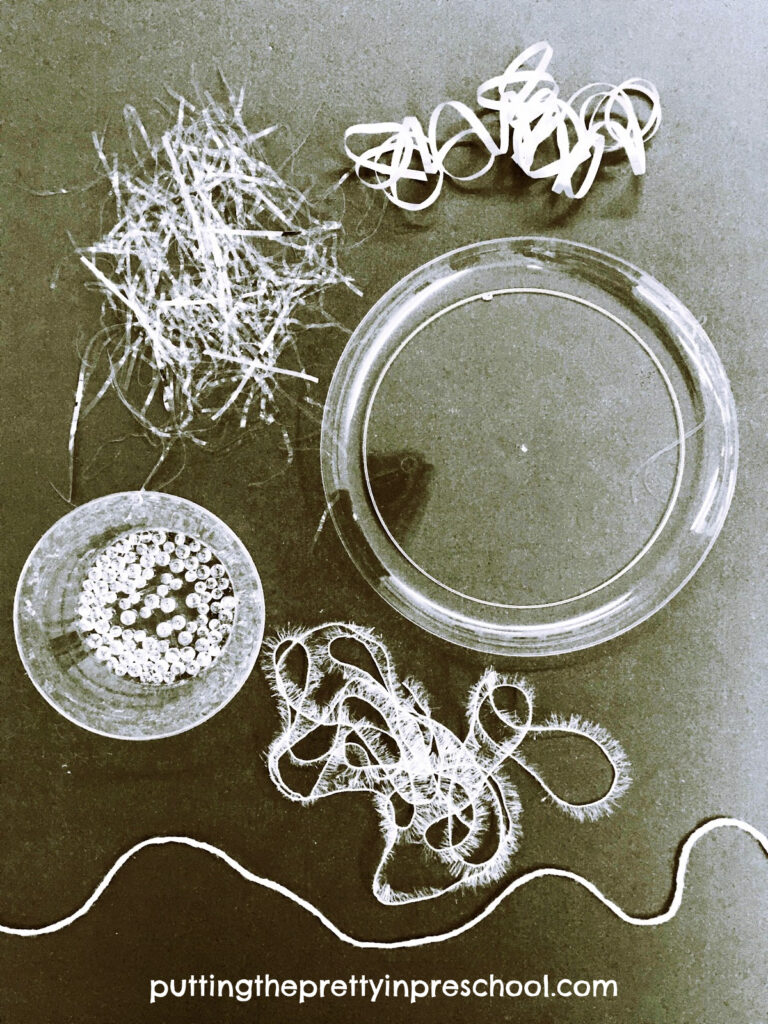
Simple supplies to create three different transparent jellyfish crafts. Iridescent craft supplies take center stage in the projects.

_______

Gather the following supplies for the transparent sea jelly crafts:

  • two clear disposable dinner plates
  • opaque or clear transparent disposable drinking cup
  • clear dessert bowl
  • iridescent beads
  • two kinds of sparkly, textured, thin yarn
  • iridescent curly ribbon
  • iridescent metallic shreds
  • glue gun
  • wiggly eyes

_______

Clear Plate Jellyfish
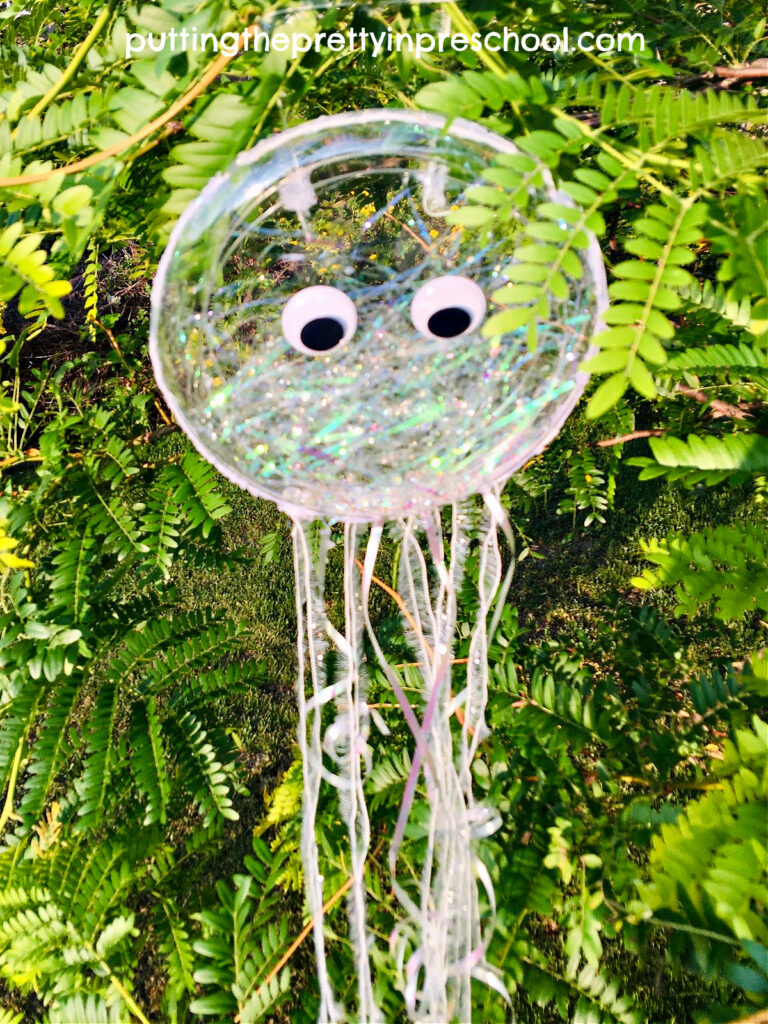
Create this stunning iridescent jellyfish craft using clear disposable plates and iridescent craft supplies. Great for music, movement, and language arts activities.

_______

To make this large jellyfish, start by positioning one clear dinner plate right side up, and laying metallic shreds and a small handful of iridescent beads on it.

Next, cut strips of sparkly and /or iridescent yarn and curly ribbon and glue them in a row at the bottom of the plate using the glue gun.

Then glue the second dinner plate upside down on top of the first one by applying hot glue to the edge of one or both plates.

Lastly, glue two large wiggly eyes to one of the plates, and affix a yarn strip to hang the jellyfish on the other side.
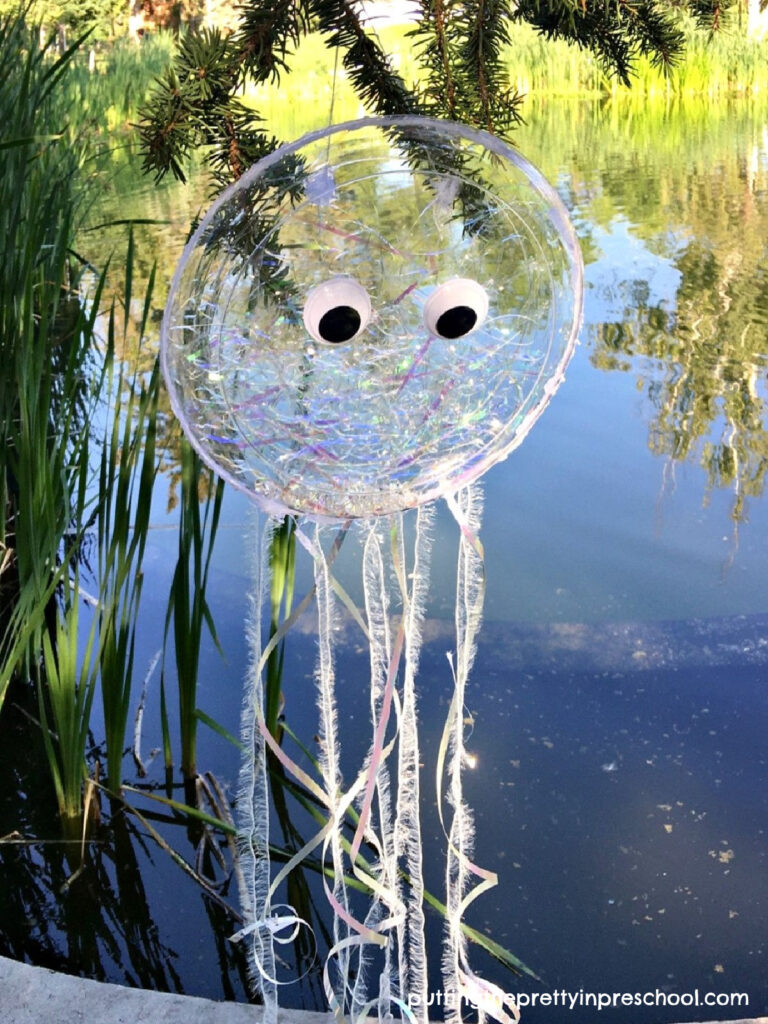
Make this sparkly iridescent jellyfish craft that doubles as an ocean drum and movement prop, It displays beautifully indoors or outdoors.

_______

This jellyfish looks beautiful displayed in the classroom in a sunny spot, or outside on a tree. The crafted jellyfish also makes an ocean drum musical instrument and can be a unique accessory for language arts. music, and movement activities.

_______

Dessert Bowl Jellyfish
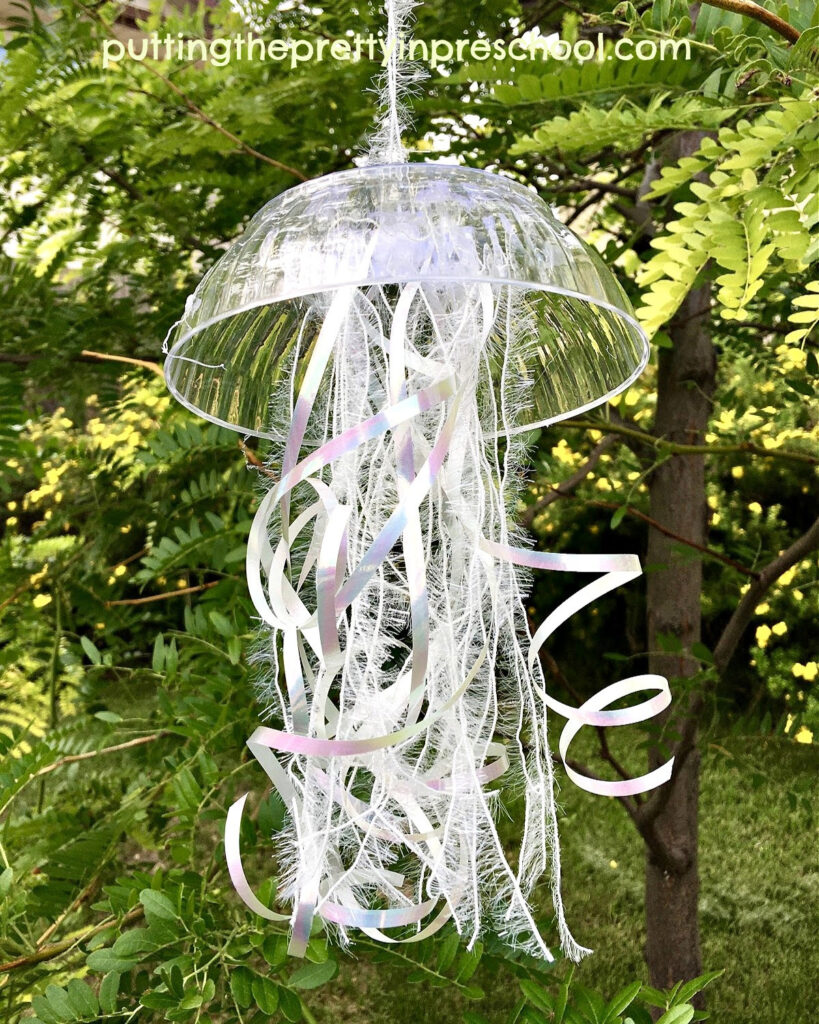
Design this simple hanging jellyfish craft using gorgeous, iridescent supplies. Display it is a sunny location for maximum shine.

_______

This second jellyfish craft most replicates the moon jelly shape and is so easy to make. Just glue one end of the yarn and curly ribbon strips to the inside of the bowl so that they hang down like jellyfish arms and tentacles. Affix a loop to hang on the bottom of the bowl, and this sea jelly is ready to be displayed.

Hanging outside at night, it looks like a sea jelly floating deep in the ocean.
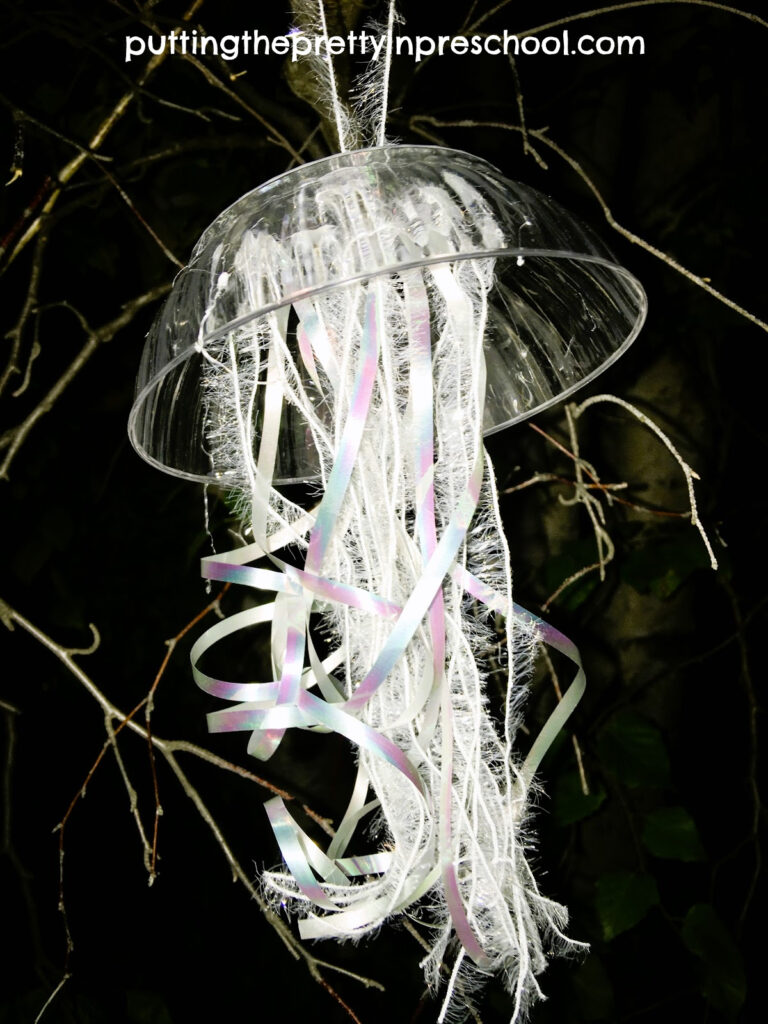
Design this hanging jellyfish craft using gorgeous, iridescent supplies. Displayed at night, it looks like a sea jelly floating in deep ocean waters.

_______

Disposable Cup Jellyfish

Design this cute jellyfish cup craft using iridescent supplies. Display it indoors or outdoors to add ambiance to an ocean creature theme.

_______

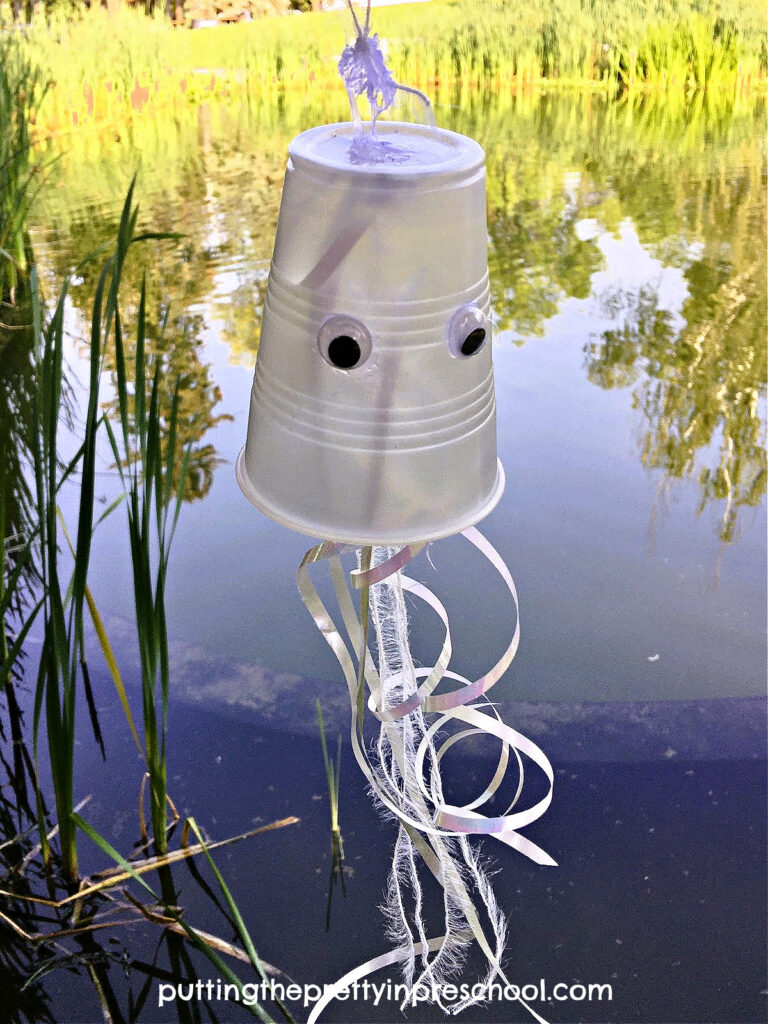
Make this craft just like the one above using a clear or opaque disposable cup instead of the dessert bowl. Add wiggly eyes for the finishing touch.
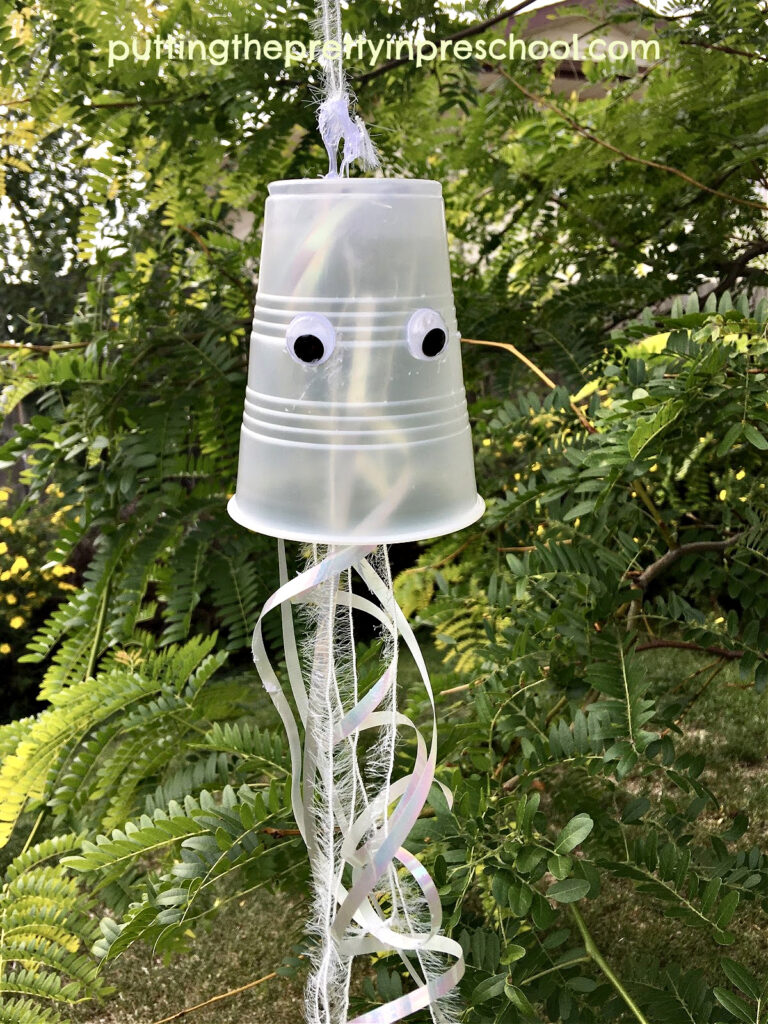
Design this simple jellyfish cup craft using gorgeous, iridescent supplies. Display it is a sunny location for maximum shine.

_______

More Jellyfish Activities

Scissor Skill Jellyfish

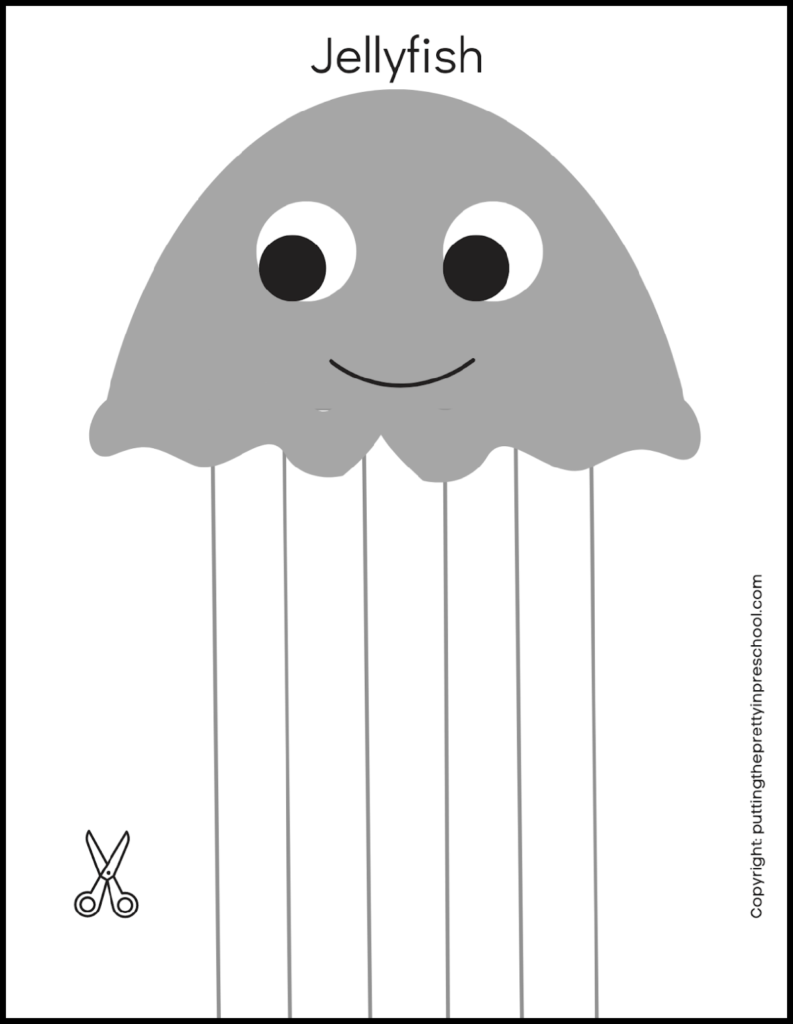
Here’s an easy jellyfish scissor skills project to download for your little learners. Invite participants to cut out along the lines to create sea jelly tentacles, and then cut out the bell-shaped body.
_______

Free Jellyfish PrintableDownload

(This printable is for individual or one classroom use only.)

_______

In this next activity, trace and cut out jellyfish bells from colored cardstock paper, and then print and snip apart the numbered tentacles. Invite little learners to glue tentacles to their jellyfish bell in order from one to five. Use this second printable for the project.
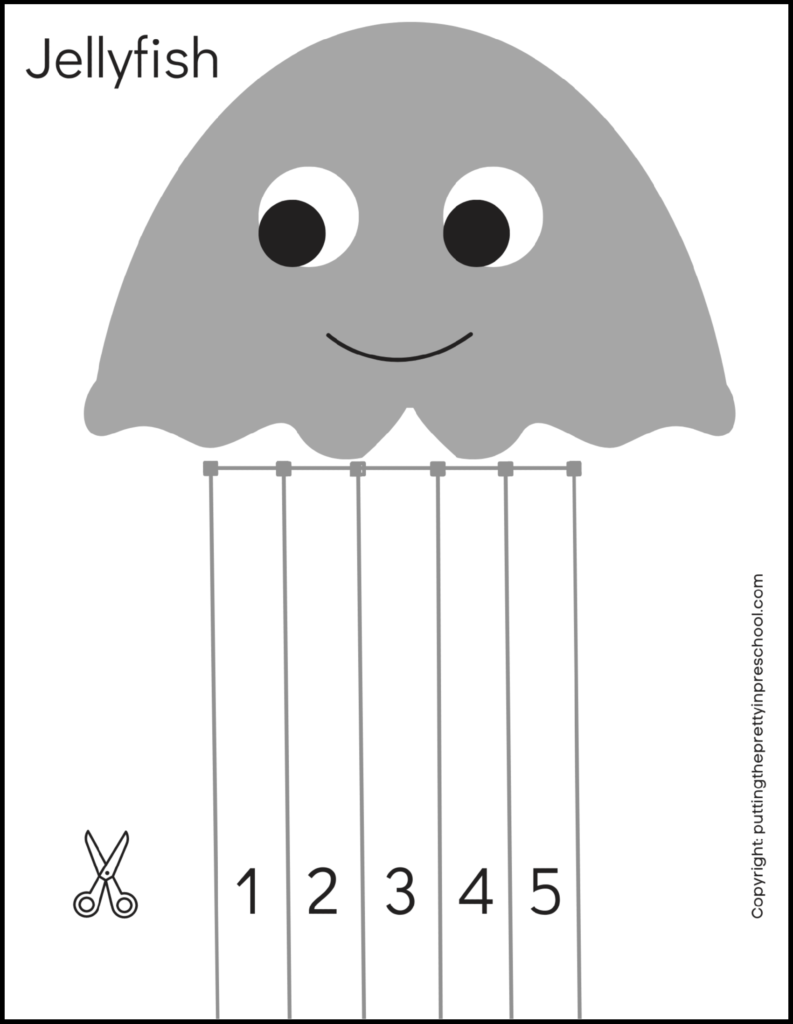
Download this free jellyfish math template for little learners to create a paper craft, practice scissor skills, and order numbers form one to five.

_______

Free Jellyfish Math PrintableDownload

(This printable is for individual or one classroom use only.)

_______
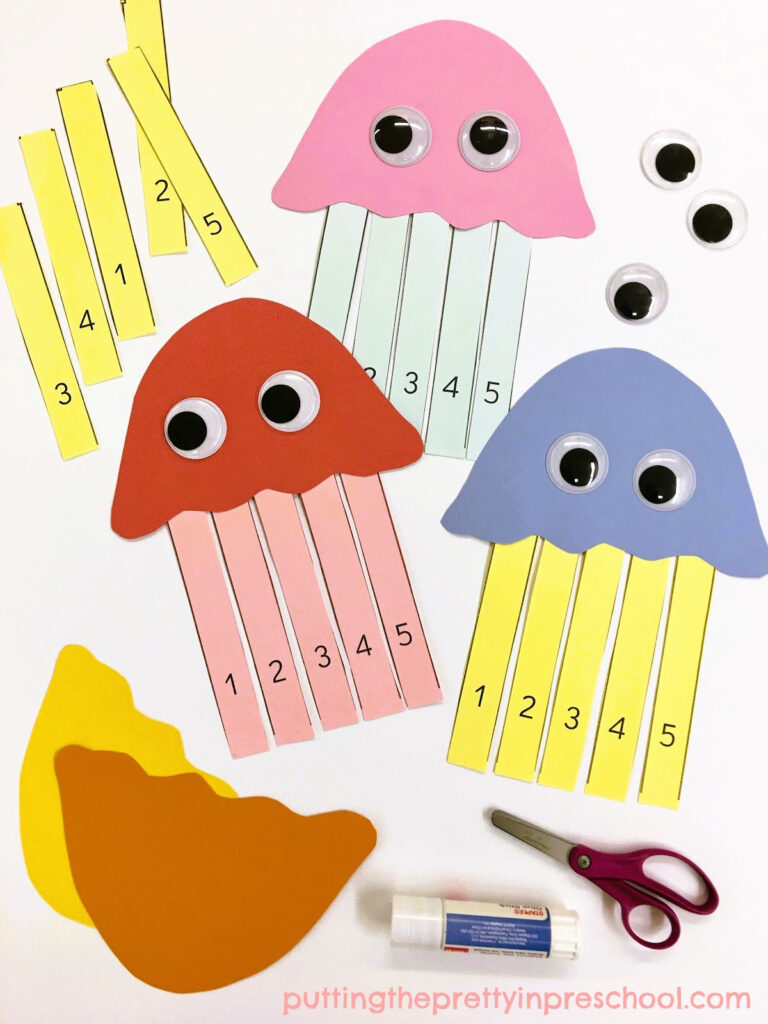
Invite little learners to practice scissor skills and math concepts by completing a paper craft jellyfish with numbered tentacles.

_______

Or simply photocopy the jellyfish printable on pastel-colored paper or cardstock to add pops of color to the activity.
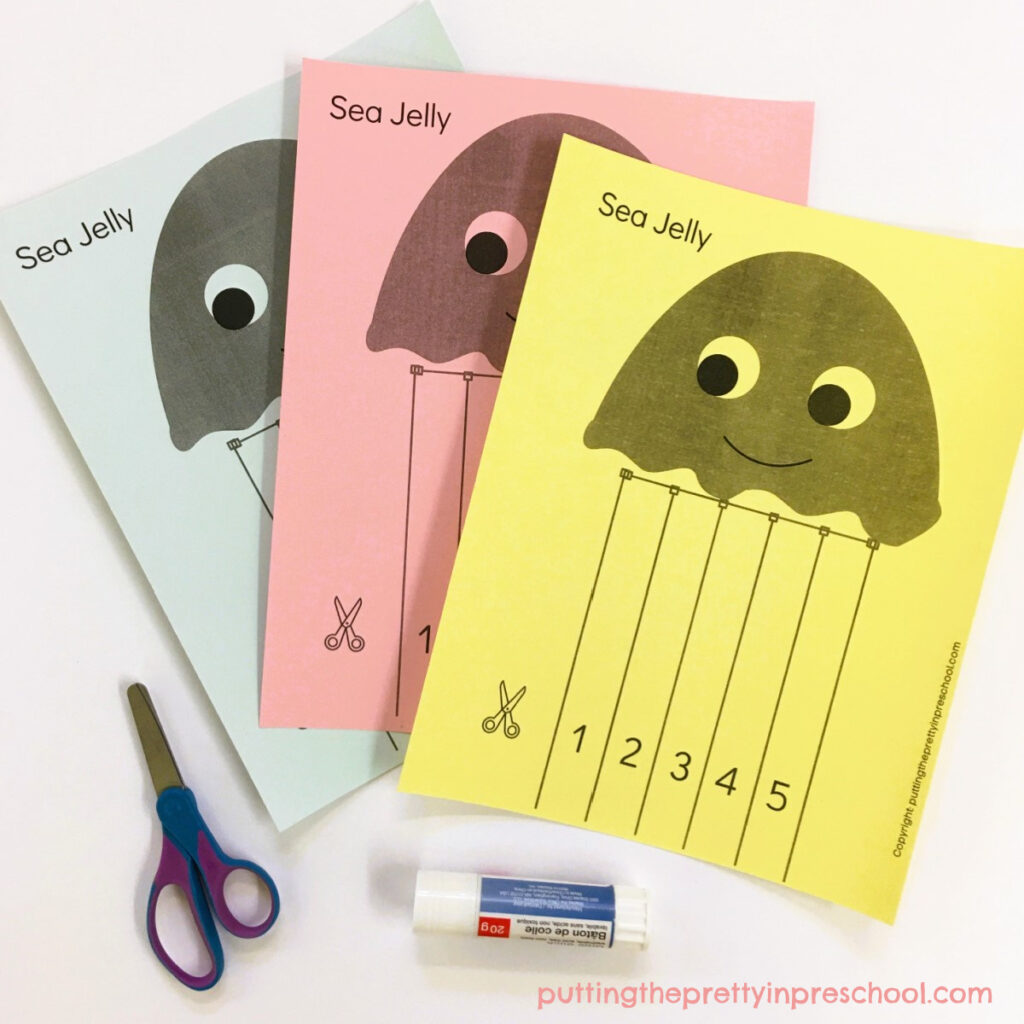
Invite little learners to practice scissor skills and math concepts by completing a paper craft jellyfish with numbered tentacles.

_______

More Jellyfish Math

Use paper jellyfish or jellyfish figurines in counting rhymes and songs.

_______

Light Table Jellyfish
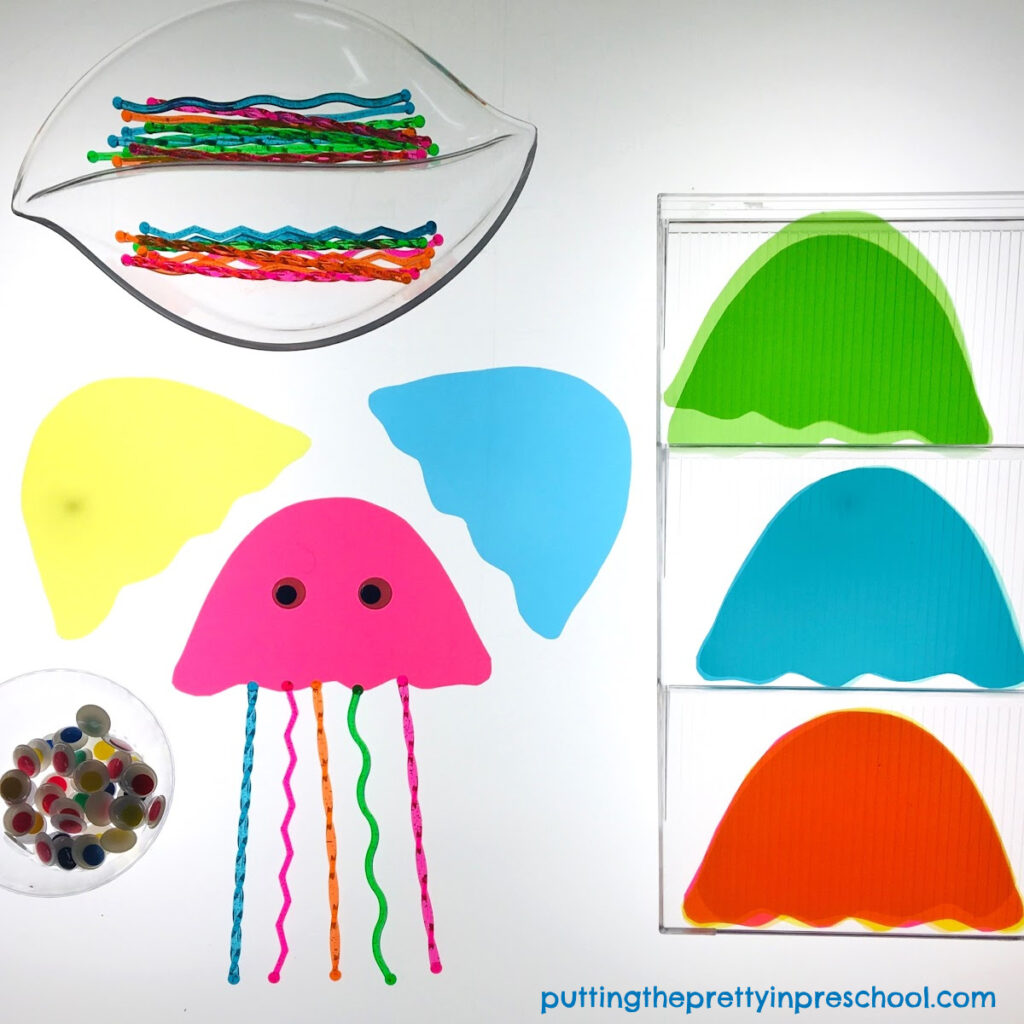
Invitation to create jellyfish on a light table with transparent stir sticks and page divider cut outs. Wiggly eyes are the finishing touch.

_______

Invite little learners to create jellyfish on a light table with transparent page divider cutouts and stir sticks.
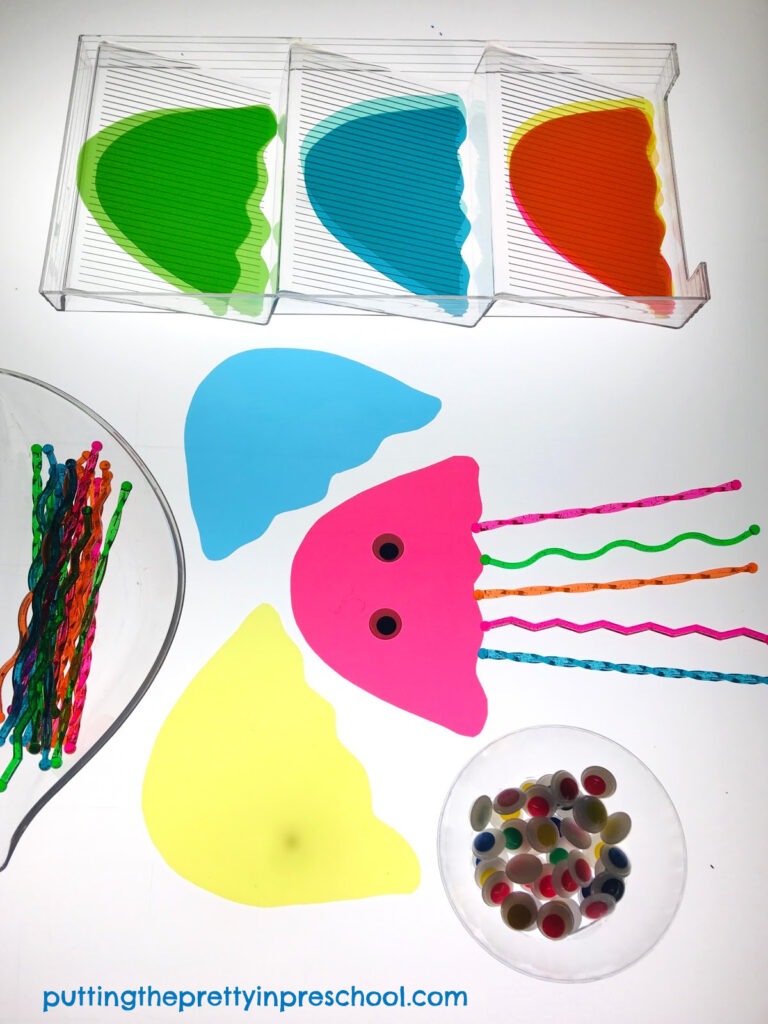
Invitation to create jellyfish on a light table with transparent stir sticks and page divider cut outs. Wiggly eyes are the finishing touch.

_______

Jellyfish Water Play

Include jellyfish dive toys, fishing nets, strainers, and foam numbers in a water table, tuff tray, or bus tub. Little learners can count, sort, and scoop the colored jellyfish in the bin.
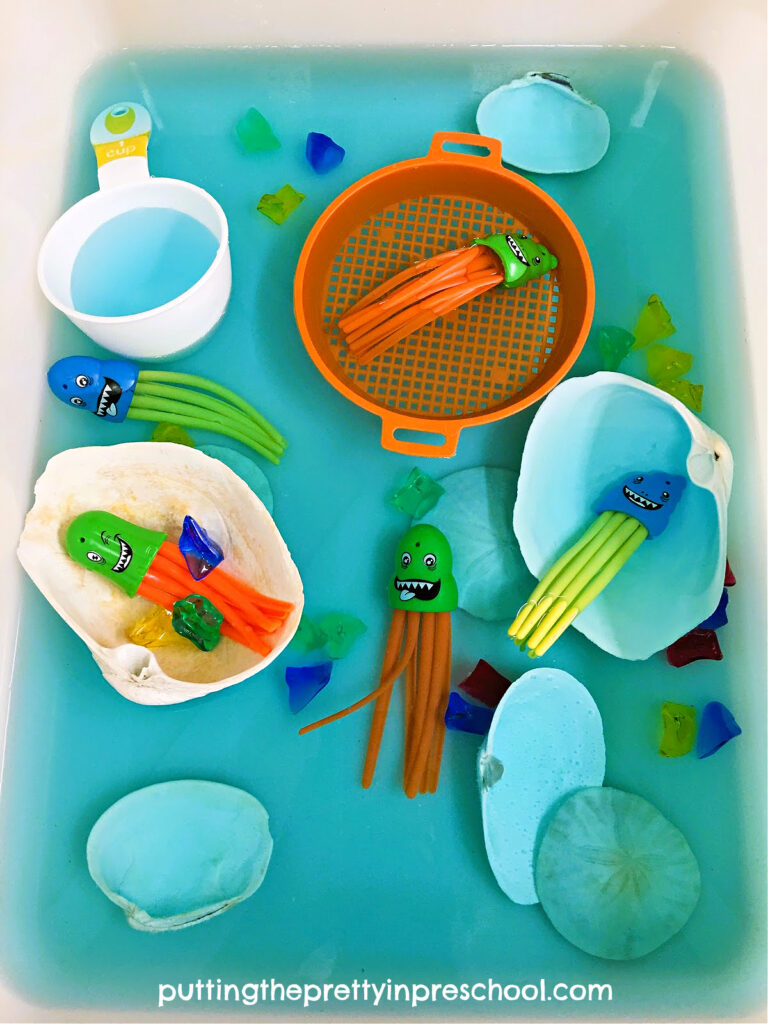
Include this easy-to-set-up jellyfish water play activity with dive toys, large shells, sand dollars, and acrylic gems in your next ocean theme.

_______

Related:

Sea Turtle Theme Activities

Octopus Theme Activities

Sea Star Theme Activities

_______

[Read more…] about Jellyfish Theme Activities
Filed Under: art, crafts, display, light table, literacy, Math, music, ocean, preschool, science, sensory, themes Tagged With: jellyfish, papercrafts, scissor skills, sensory bin, water play

Dyed Peony Science Experiment

July 2, 2023 by Annette Kaminsky Leave a Comment

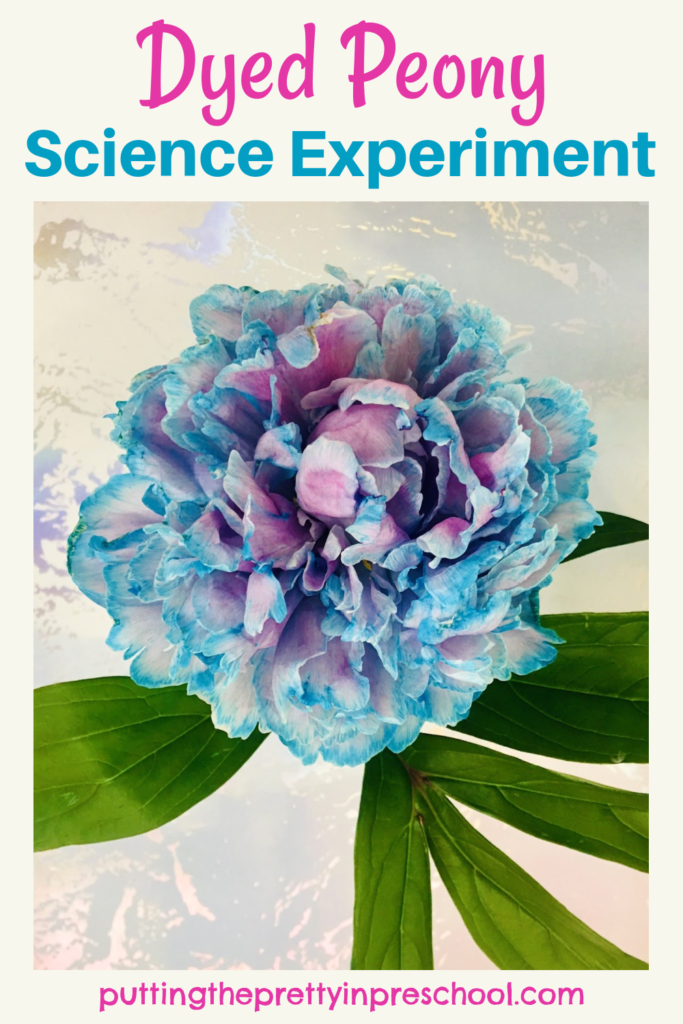
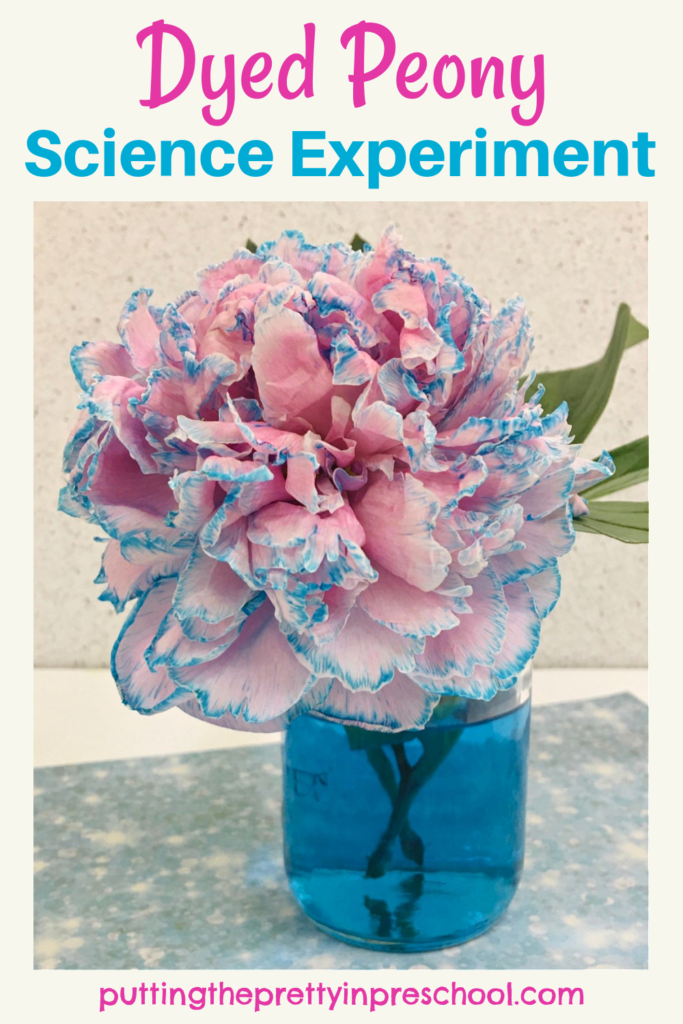
This simple dyed peony science experiment shows how water travels through plants. An all-ages activity everyone will enjoy.

_______

Peony plants have large, bold flowers that grow profusely during the blossoming season. It’s always sad to see them go so I try to snap a few pictures before they drop off.

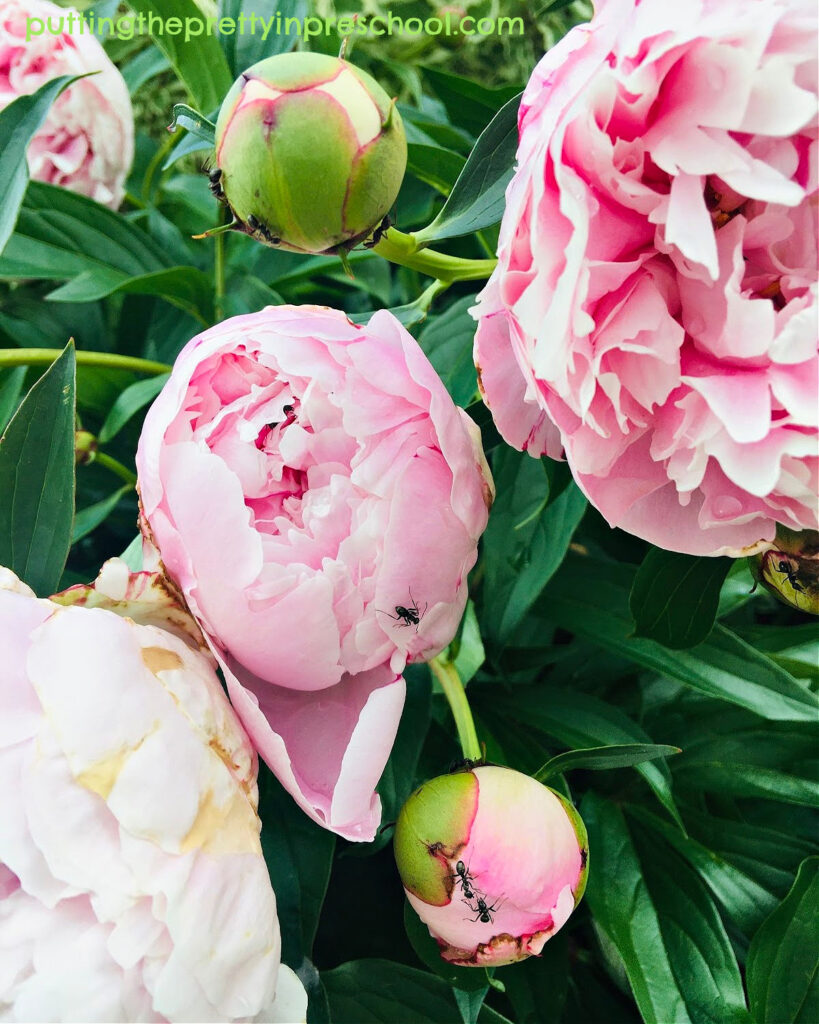
Don’t get scared off by the ants in this picture I took! Ants eat peony nectar and help keep peonies safe by attacking bud-eating insects.

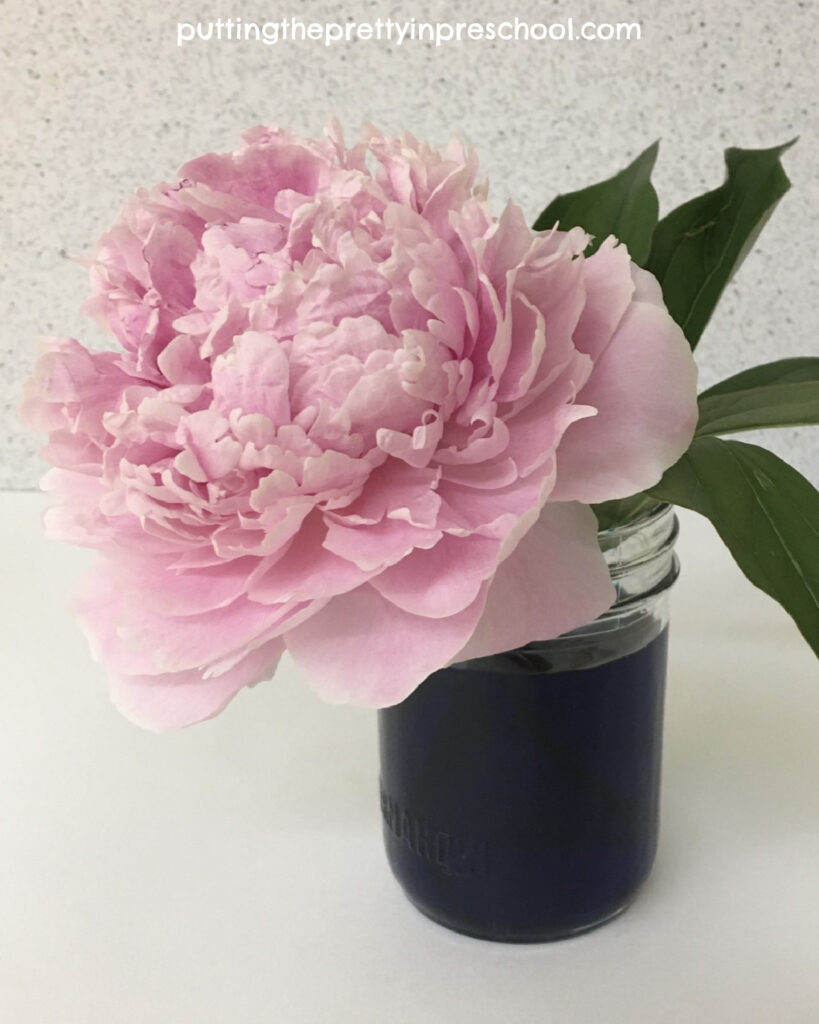
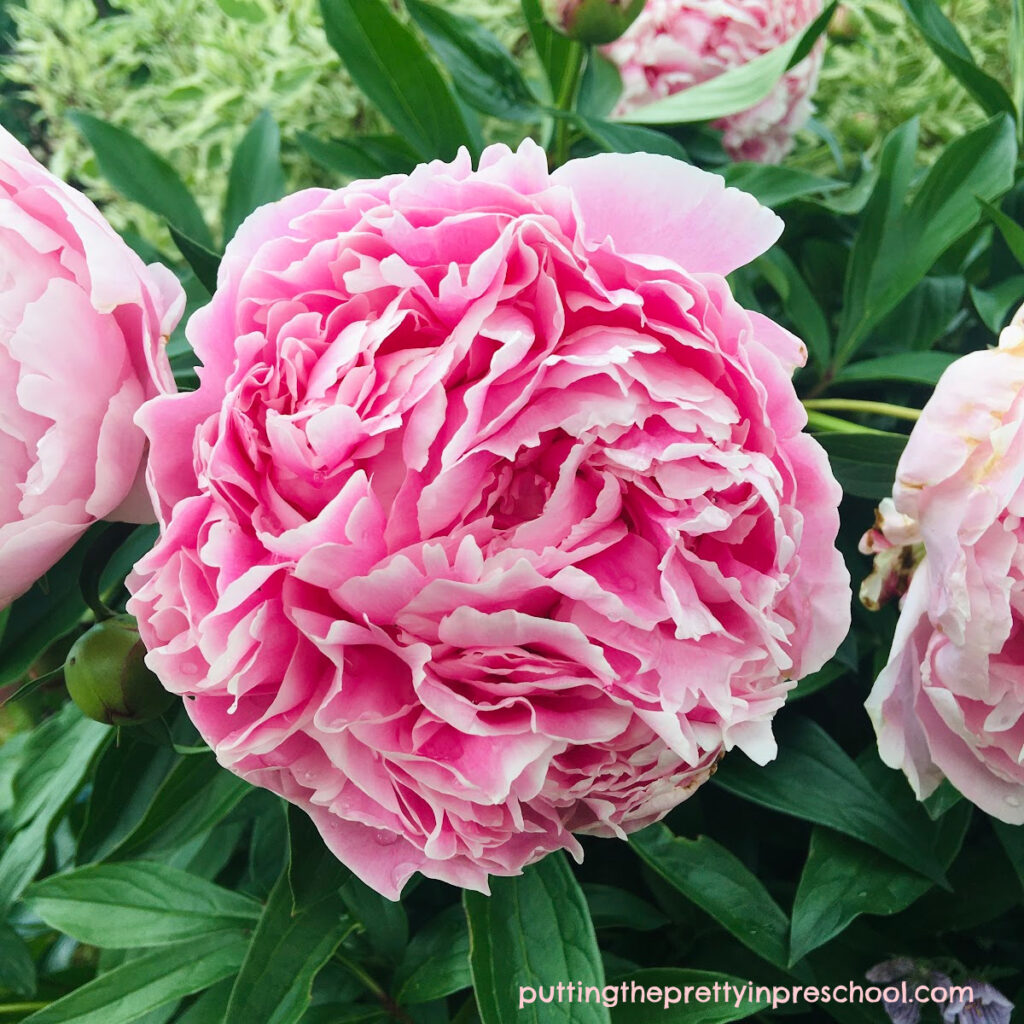
Pretty light pink peony flowers and buds. Peony blooms are showstoppers during the summer season.

_______

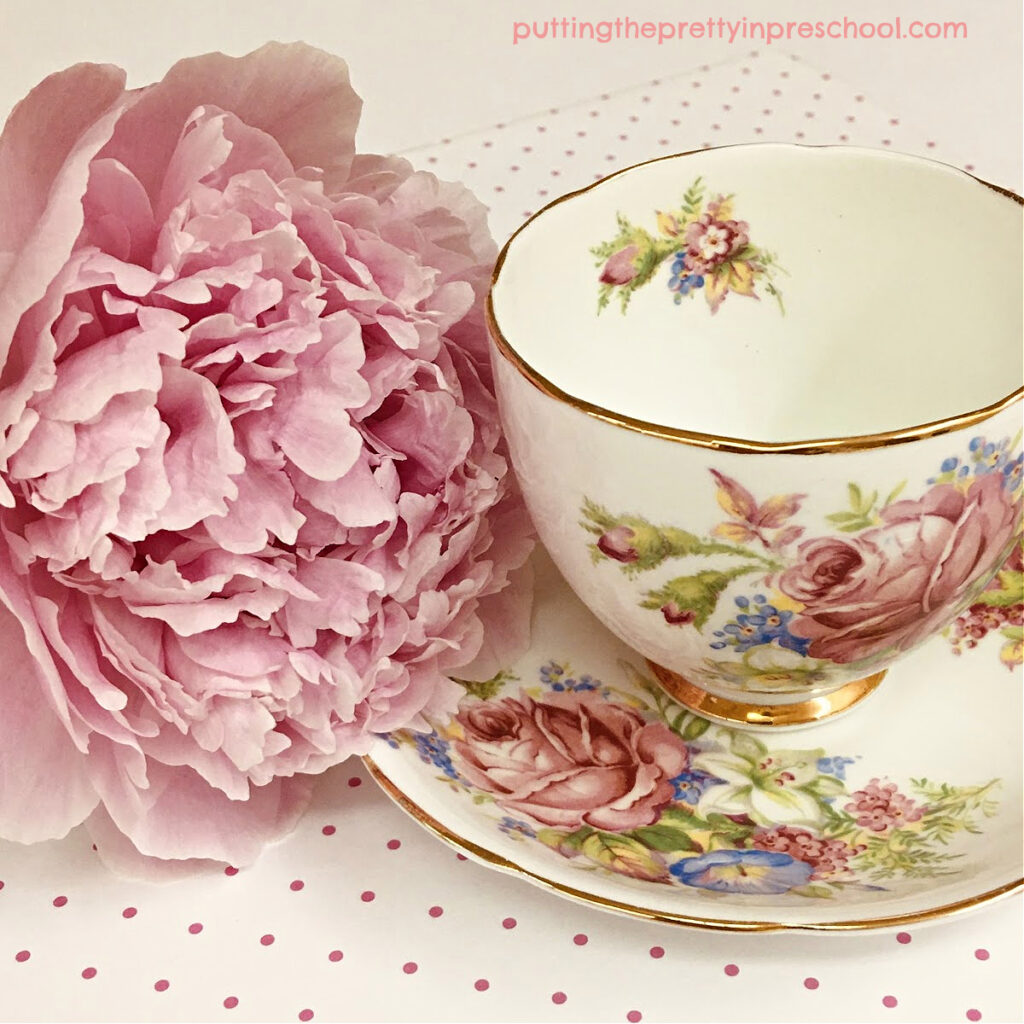
After taking a peony and thrifted vintage teacup photo, I realized that a saved flower in a jar of water would provide the perfect opportunity for a dyed peony science experiment. Peony flowers have a dense cluster of petals, similar to carnations, so I wondered if the experiment would turn out as well. It worked wonderfully, so I highly recommend giving it a try.

A pretty in pink peony bloom complements a thrifted vintage teacup.

_______

Follow me on Pinterest for more learning ideas.

_______

Supplies To Collect

All you need is a few supplies to perform this oh-so-easy, nature science experiment. Gather the following:

  • peony flower stem with leaves
  • clear jar or vase with water
  • neon blue food coloring
  • spoon

_______

The Dyed Peony Science Experiment

To perform this simple science experiment, fill a small, clear jar at least half full of water.

Add 10 or more drops of neon blue food coloring and stir it in. I use a blue hue, but any color of food coloring would work nicely.

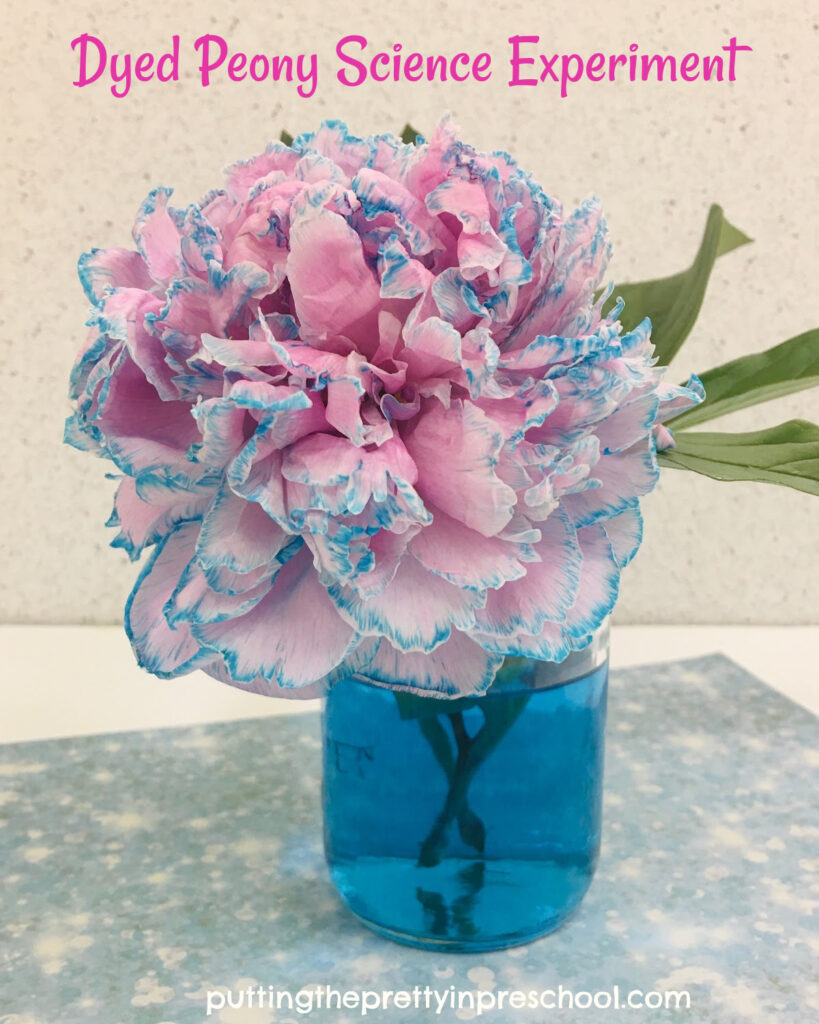
Try this easy-to-do dyed peony science experiment today. This activity shows how water travels up peony stems and flows through leaves and petals.

_______

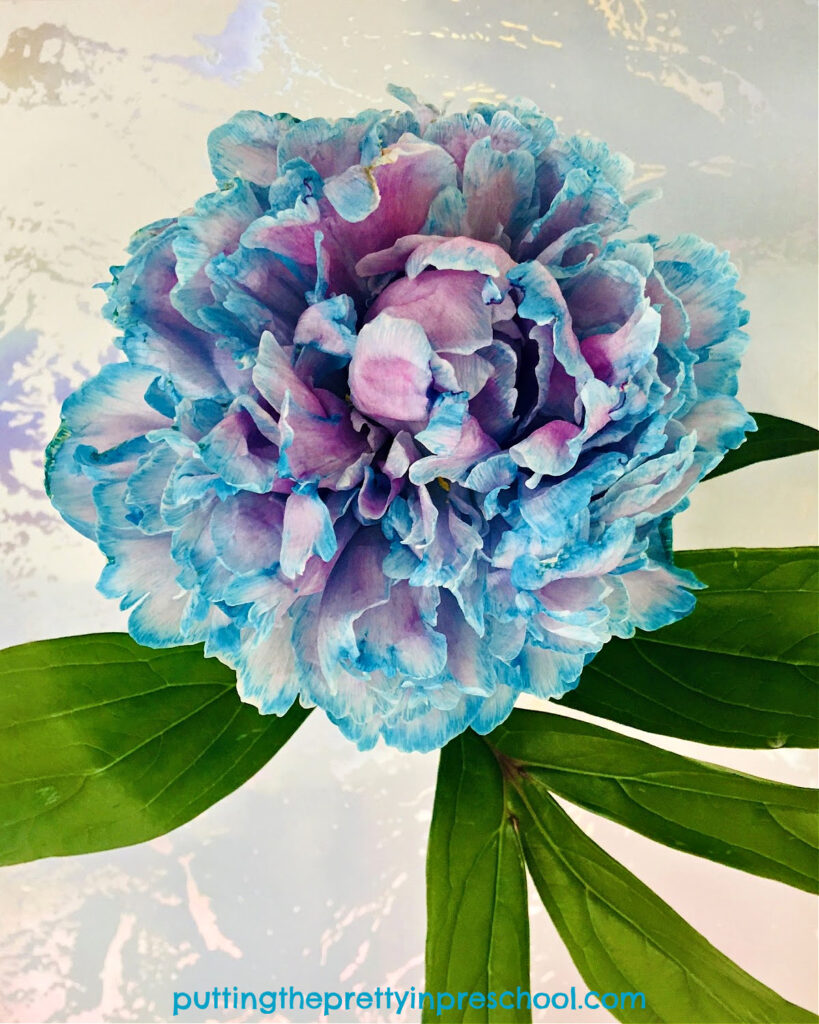
Set the sprig in the colored water overnight and observe it the next day. You’ll notice that the edges of the peony flower petals have turned blue.

Check the plant once a day after that to spot more color changes.

This simple dyed peony science experiment shows how water travels through plants. An all-ages activity everyone will enjoy.

_______

Try this easy-to-do dyed peony science experiment today. This activity shows how water travels up peony stems and flows through leaves and petals.

_______

Tell your little charges that coloring the water blue helps us see how water travels up the stem of a plant into the flower leaves and petals.

Note: The leaves and stems of my peony plant are dark, so it is difficult to see water travel up them. Choosing a plant with lighter leaves would show water travel through these plant parts better.

Large, light pink peony blooms are showstoppers during the summer season.

_______

The Importance of Water For Plants

Along with light, air, and good soil, water is super important to a plant’s growth and survival:

  • Plants are made of mostly water, and it helps them stay firm.
  • Plants cool down by releasing water from their stems and leaves. This helps them regulate their temperature.
  • Water carries important nutrients that help plants grow.
  • Sunlight, carbon dioxide from the air, and water are necessary for photosynthesis, which is how the leaves of plants create energy to survive.

_______

This simple dyed peony science experiment shows how water travels through plants. An all-ages activity everyone will enjoy.

_______

If you have an abundance of peonies, why not try this dyed peony science experiment with a variety of food coloring hues? Or you could perform it with carnations, which are easy to find and economical to buy.

Related:

Celery Science Experiment

_______

[Read more…] about Dyed Peony Science Experiment

Filed Under: gardening, preschool, science, sensory, summer Tagged With: color experiment, flowers, science experiment

Magnet Science Tuff Tray

June 10, 2023 by Annette Kaminsky Leave a Comment

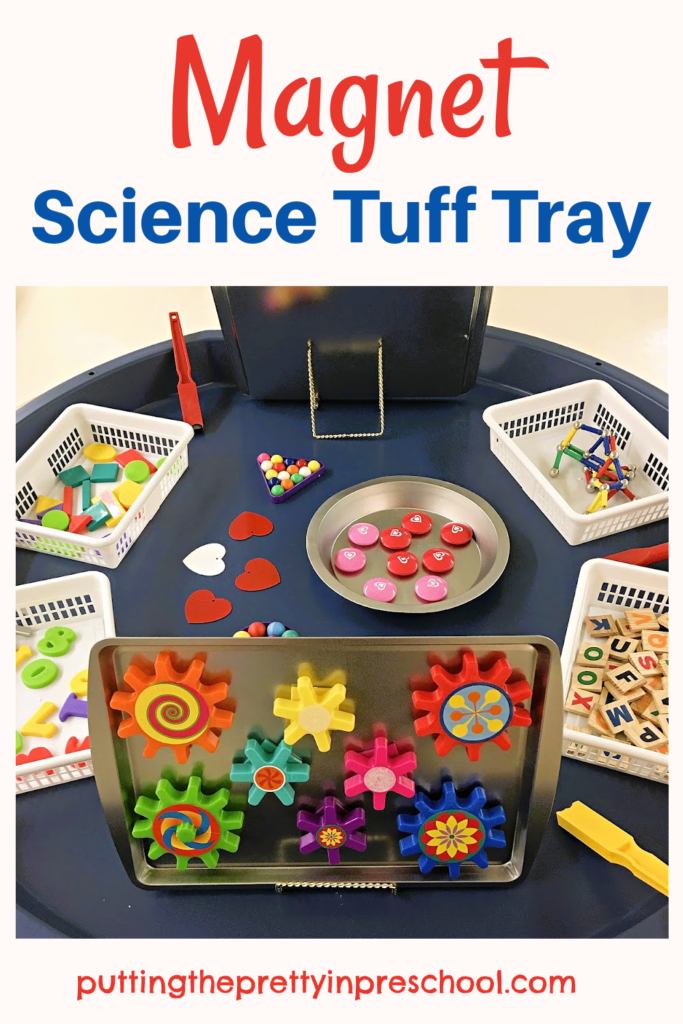
How to set up an easy magnet science tuff tray. A simple, hands-on science center your little learners will love to explore.

_______

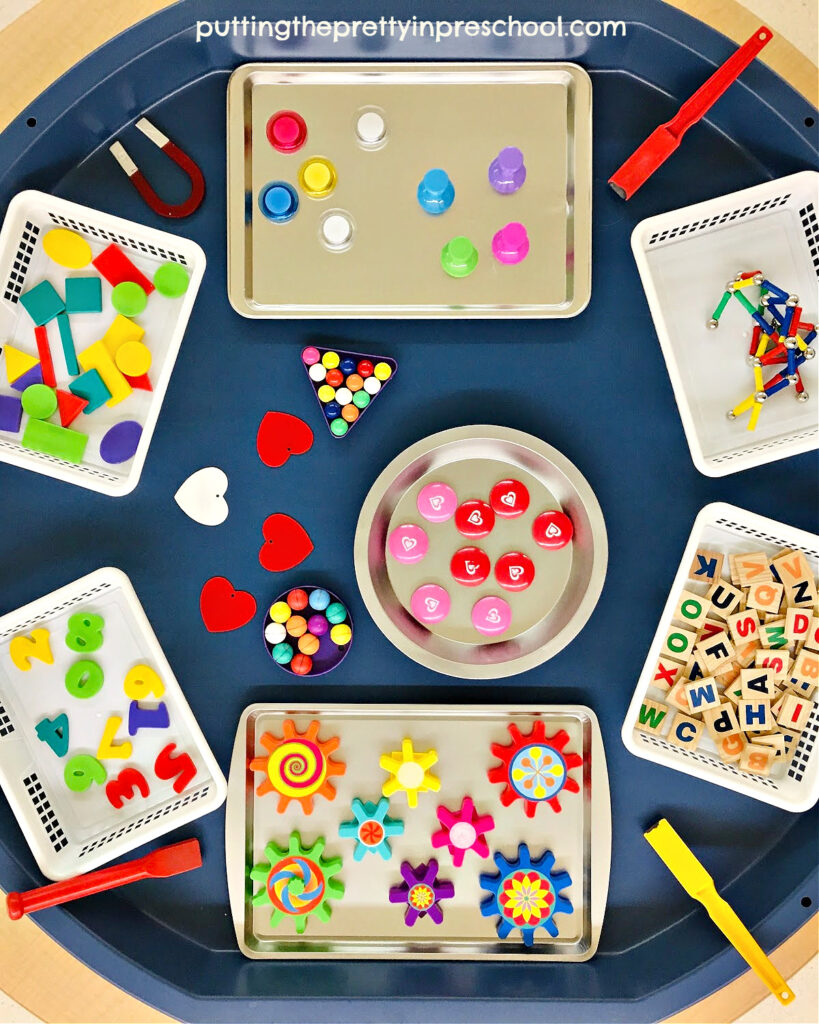
Children love to explore magnets, and setting up this magnetic science tuff tray is an easy way to offer a variety of magnets and accessories for them to investigate. The tray allows little learners to get in on a low-maintenance, hands-on, intriguing science activity.

_______

Supplies To Collect

How to set up an easy magnet science tuff tray. A simple, hands-on science center your little learners will love to explore.

_______

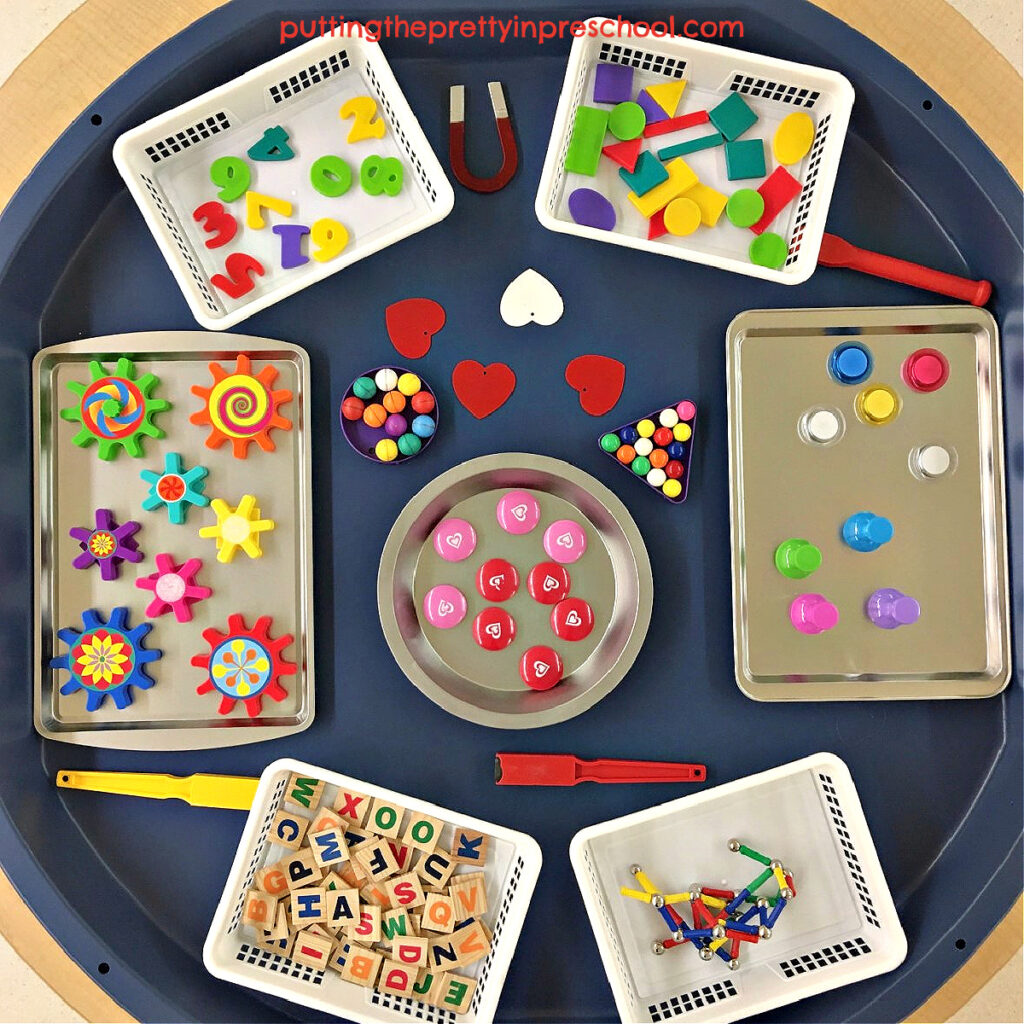
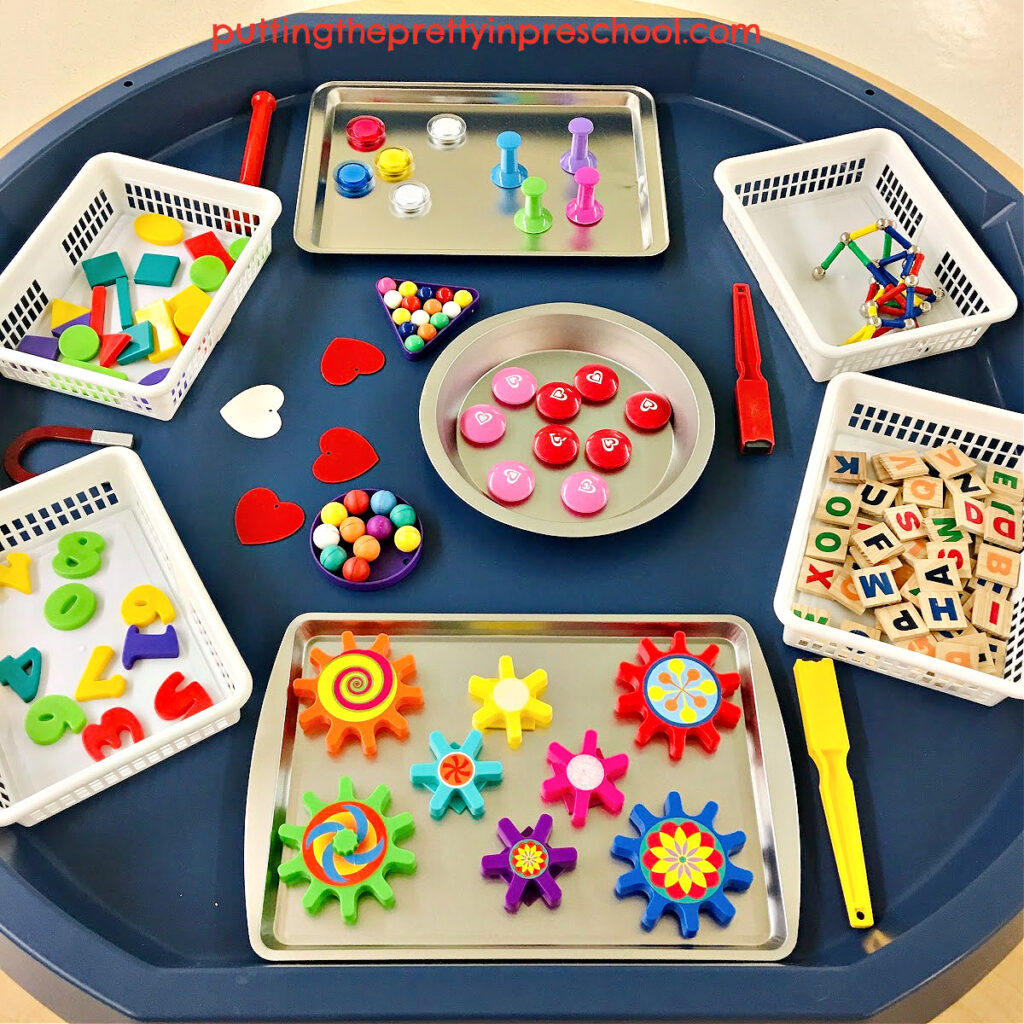
Look for magnets of all kinds and in all places when setting up a magnet-themed tuff tray. Here’s what’s in my tray:

  • number and shape magnets
  • magnetic alphabet letter tiles
  • ball magnets
  • square magnets
  • horseshoe magnets
  • wand magnets
  • fridge magnets
  • magnetic tic tac toe game pieces
  • stick and ball magnet toy
  • magnetic gears
  • metal hearts
  • recycled juice can lids
  • baskets
  • round cake pan
  • cookie pans
  • easel display stands

_______

The Magnetic Science Tuff Tray

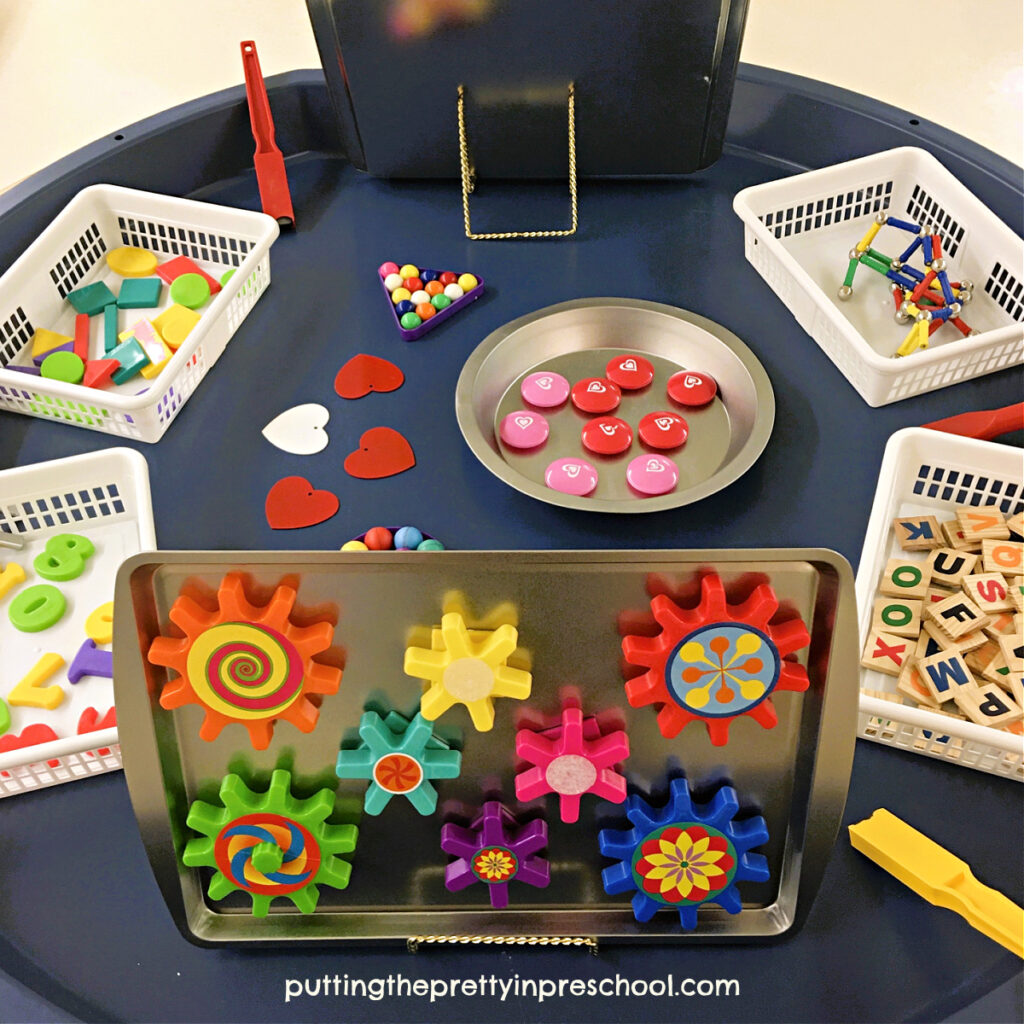
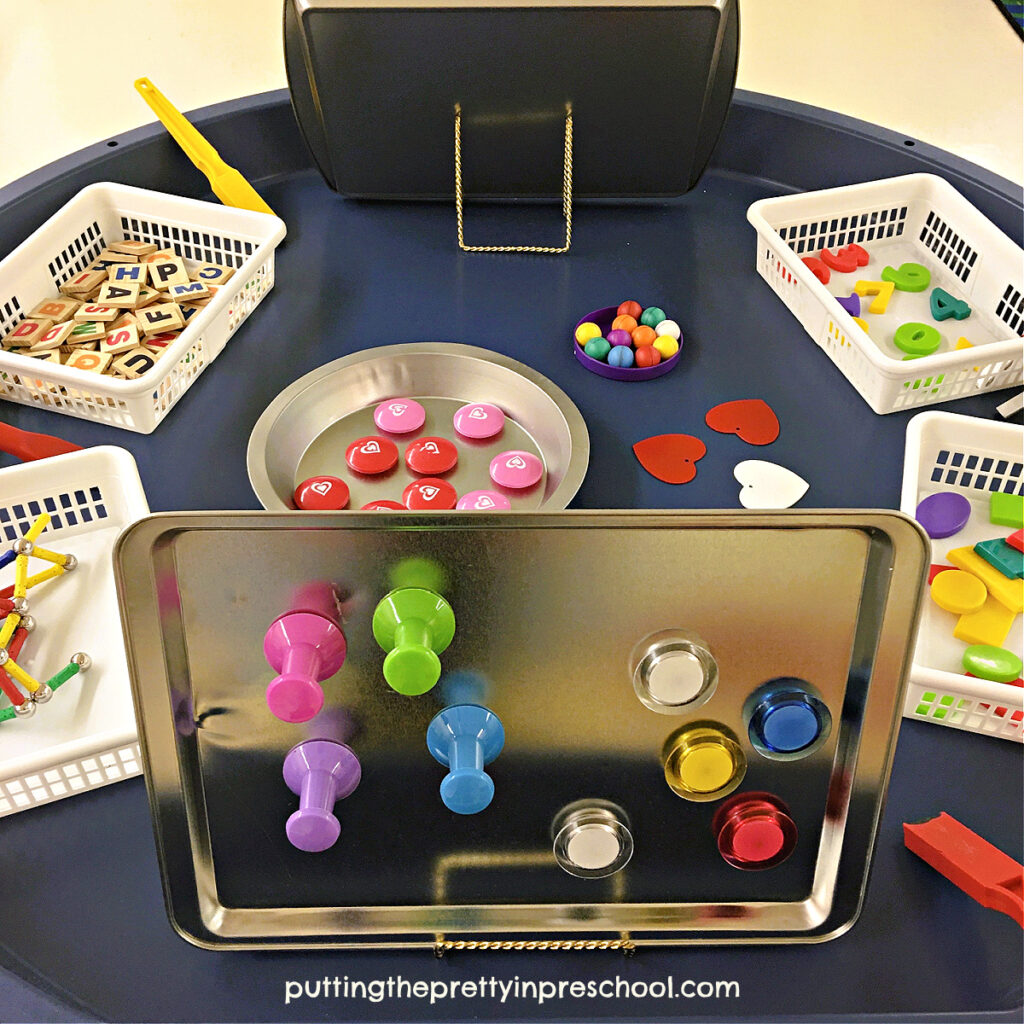
This magnetic tuff tray is filled with different kinds of magnets for early learners to explore. Aside from magnets purchased from learning supply stores, it includes unexpected items such as game pieces and fridge magnets.

A simple magnet science active world tuff tray for early learners to explore. An easy set up and clean up activity center.

_______

The number and shape magnets were borrowed from a game. They provide opportunities for counting and number and shape recognition.

The magnetic alphabet letter tiles give young children a chance to name letters, say letter sounds, and spell names and other words.

Set up this simple magnet exploration tuff tray in minutes to offer your little learners a hands-on magnet science activity to explore.

_______

Little learners love spinning objects, which makes the magnetic gears an excellent fit.

Cookie pans set in art stands allow for vertical surfaces to work on.

Introducing magnets such as horseshoe and bar magnets on different days encourages continued interest in the center.

It is a good idea to check local dollar stores for supplies to add. My fridge magnets and magnetic tic tac toe pieces were purchased at dollar stores.

Set up this simple magnet exploration tuff tray in minutes to offer your little learners a hands-on magnet science activity to explore.

_______

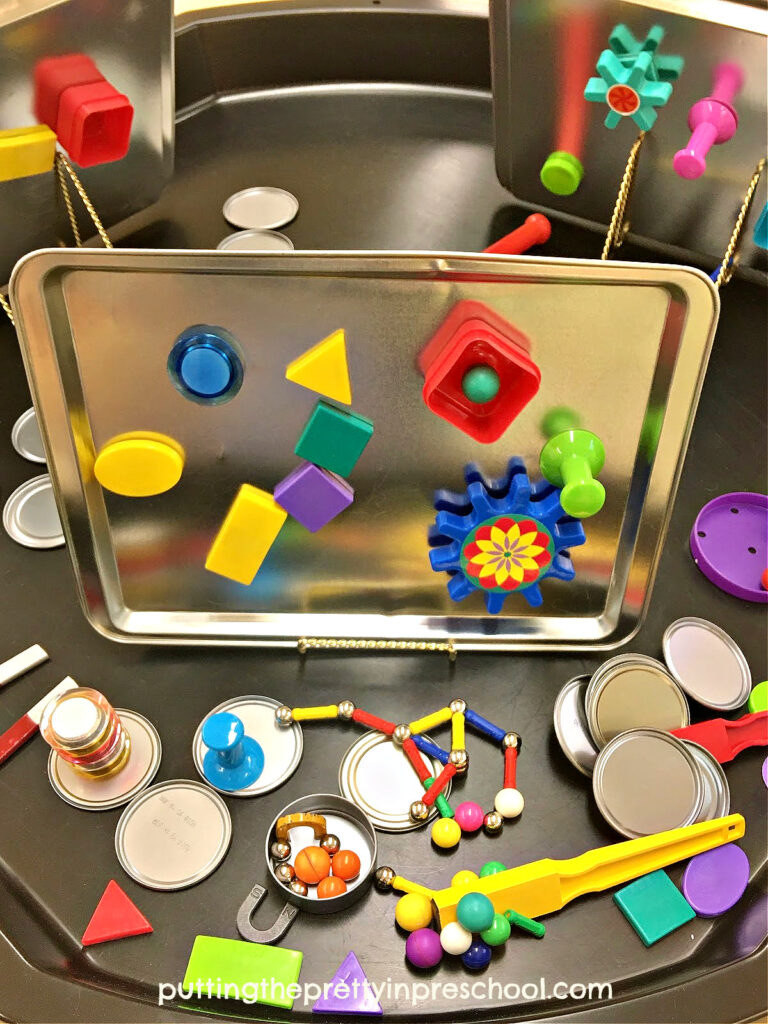
After early learners have had a chance to explore the tray, it will likely look something like the one below.

A fun magnet tuff tray to offer your little learners a hands-on magnet science activity to explore. Set up and cleanup for this activity is super easy.

_______

Many of the supplies for this magnetic science tuff tray are arranged in baskets. It is a terrific sorting and classifying activity to have the little learners arrange supplies back into the storage containers when they are finished exploring the tray.

_______

Magnet Science Tuff Tray Opportunities For Learning

A simple magnet science active world tuff tray for early learners to explore. An easy set up and clean up activity center.

_______

There are many opportunities for learning in this magnet science tuff tray. Aside from the educational benefits mentioned above, early learners can

  • make and test predictions
  • develop critical thinking
  • learn about magnetic poles
  • investigate magnetic strength
  • explore balance and weight
  • sort items into magnetic and non-magnetic categories
  • create unique structures
  • enhance fine motor control when handling supplies

_______

Variations Of This Magnetic Tuff Tray

For additional learning through play with magnets, fill a storage bin with a base such as rice, beans, or chickpeas and add magnetic accessories. Hiding items in the sensory base makes for an exciting search-and-find activity.

And you can include non-magnetic items for further exploration.

_______

[Read more…] about Magnet Science Tuff Tray

Filed Under: Math, preschool, science, sensory Tagged With: magnets, sensory bin, sensory tray, tuff tray

Spin Painting Butterflies

May 19, 2023 by Annette Kaminsky Leave a Comment

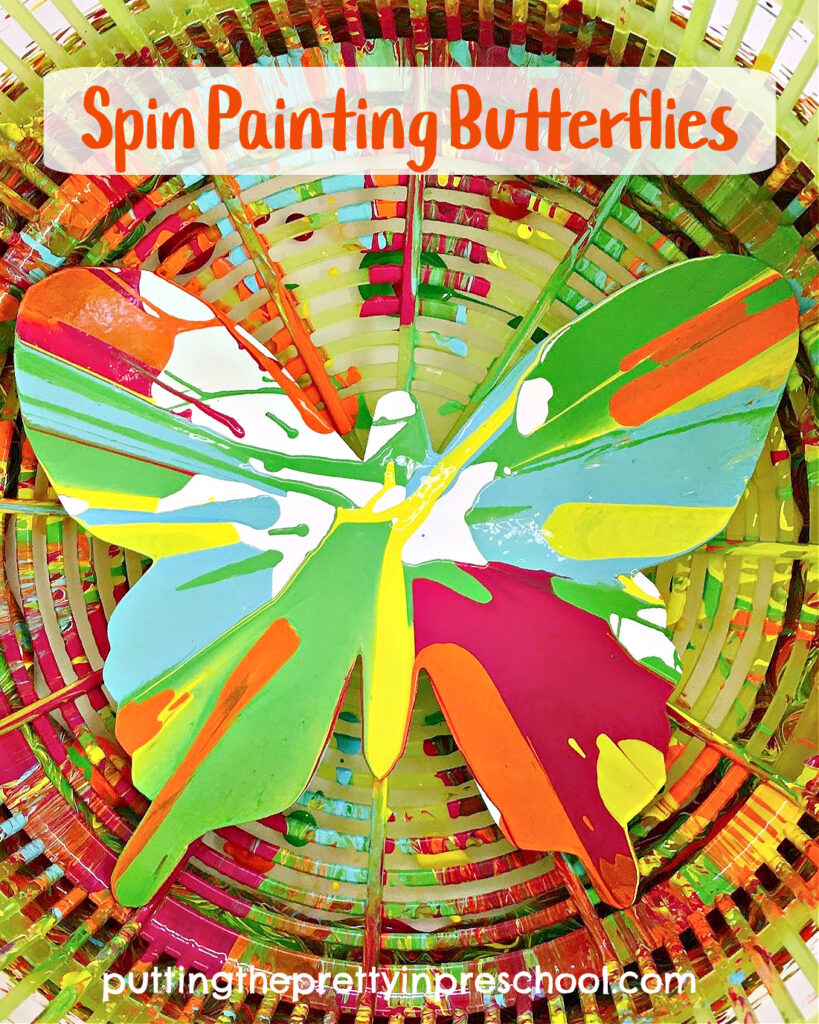
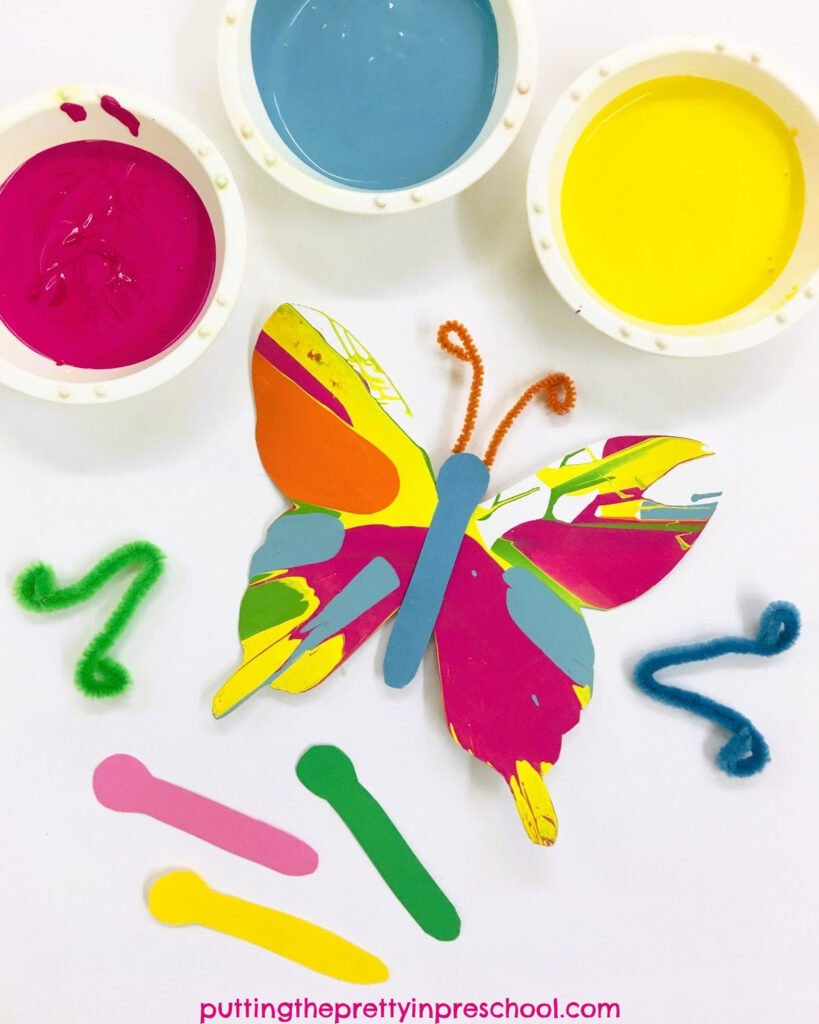
Create beautiful spin painting butterflies with a salad spinner. This is an all-ages, no-fail, super fun process art activity.
Create beautiful spin painting butterflies with a salad spinner. This is an all-ages, no-fail, super fun process arty activity.

_______

There are few art projects that are more exciting and fun than spin painting. And using a salad spinner is an easy and low mess way to create spin art. I’ve featured this painting technique in a few projects on my blog. In this post, I feature spin painting butterflies.

_______

Follow me on Pinterest for more early learning ideas.

_______

Supplies To Collect

Gather the following supplies for this art x science painting activity:

  • salad spinner
  • butterfly template
  • cardstock paper
  • pipe cleaners
  • tempera paint
  • paint pots
  • spoons
  • tape
  • white glue or glue gun

_______

Creating Spin Painting Butterflies

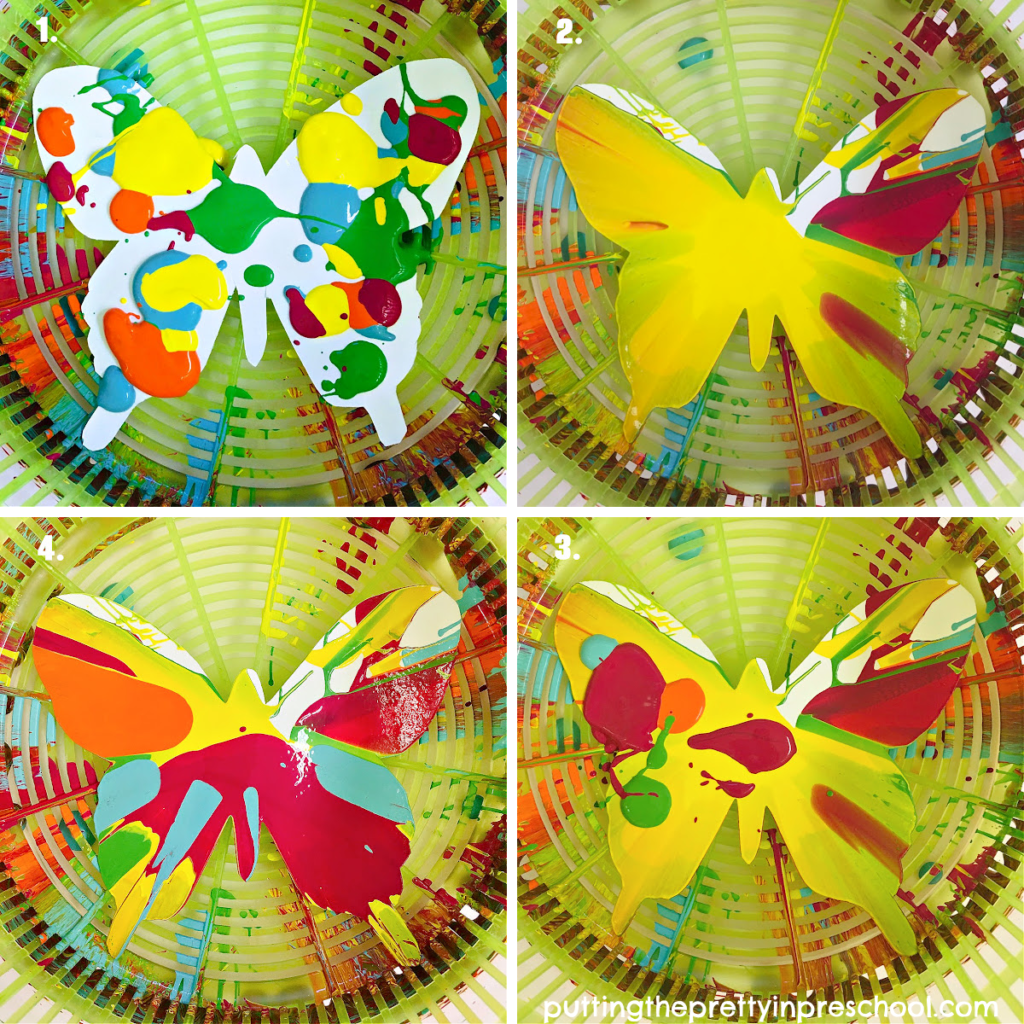
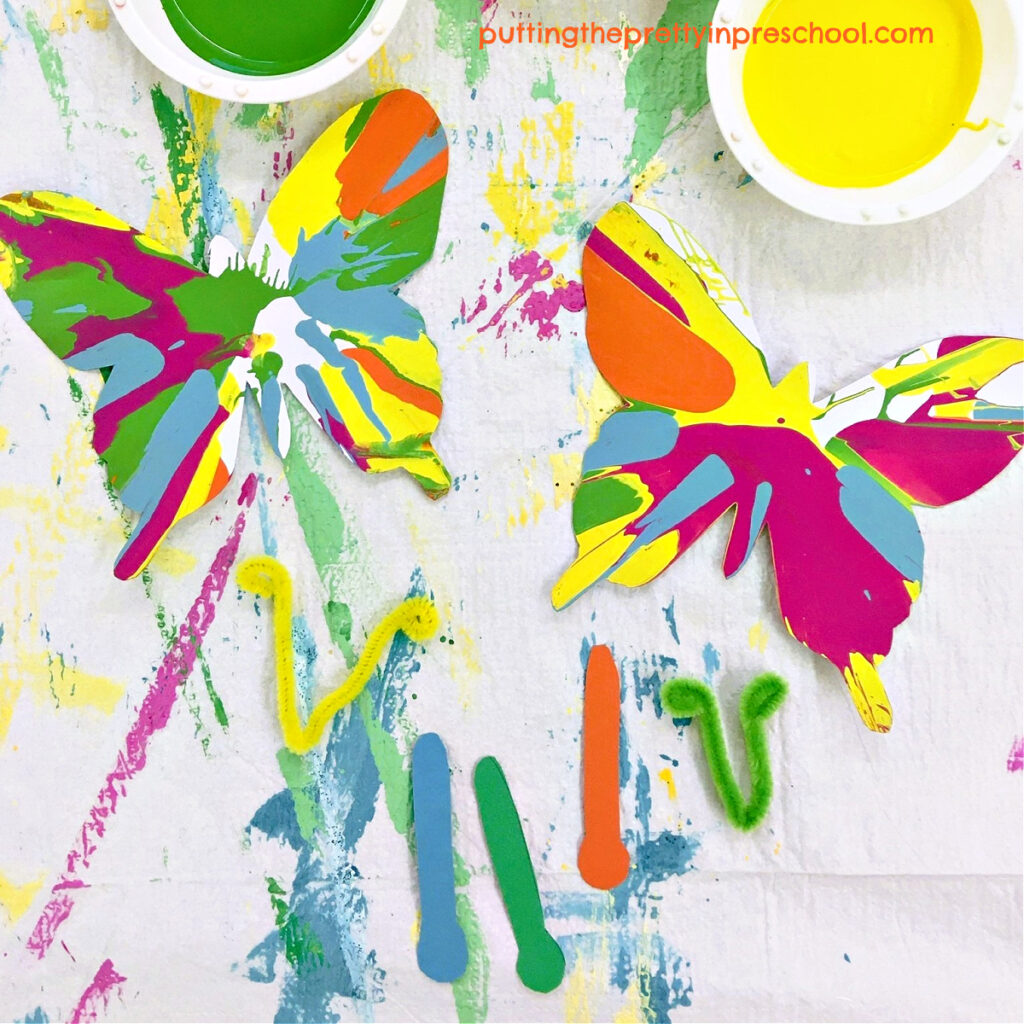
To create the spin art butterflies, design a butterfly template and trace it onto cardstock paper in the color of your choice. It is optimal for the butterflies to be the size of the bottom of the salad spinner. To help figure out the correct size, trace the bottom of the salad spinner basket onto a piece of paper. Lay the butterfly template on the circle and adjust its size if needed.

Then add a little piece of rolled-up tape to the bottom of one paper butterfly, and position it securely in the salad spinner basket.

Next, pour tempera paint colors of choice into paint pots. Add a little white or yellow paint to brighten up the colors if desired.

Afterward, spoon blobs of paint in a variety of colors onto the butterfly.

Create beautiful spin painting butterflies with a salad spinner. This is an all-ages, no-fail, super fun process arty activity.

_______

Then spin the salad spinner at a moderate rate. It is ideal for the butterfly to remain on the bottom of the spinner. Spinning it super fast may loosen the butterfly resulting in it sticking to the side of the basket. This will smudge up the paint.

Next, open the spinner and carefully lift out the butterfly. Remove the tape and let it dry.

Finally, cut out a one-piece butterfly head, thorax, and abdomen from a complementary piece of sturdy paper, and bend a pipe cleaner length into antennae. Glue both to the center of the butterfly using white glue or a glue gun.

Oh-so-fun salad spinner butterfly art activity. An easy-to-do, all-ages art activity.

_______

Invite each person participating in this activity to create one or two spin art butterflies.

_______

Spin Painting Butterfly Variations

After spinning the salad spinner the first time, you can choose to drop in more paint and spin again.

Create this spin painting butterfly in a few easy steps. This is a process art activity everyone in the family will love.

_______

After the first spin cycle, the butterfly in the above picture turned out mostly yellow. With a little more paint added and another round or two of spinning, the butterfly is more colorful.

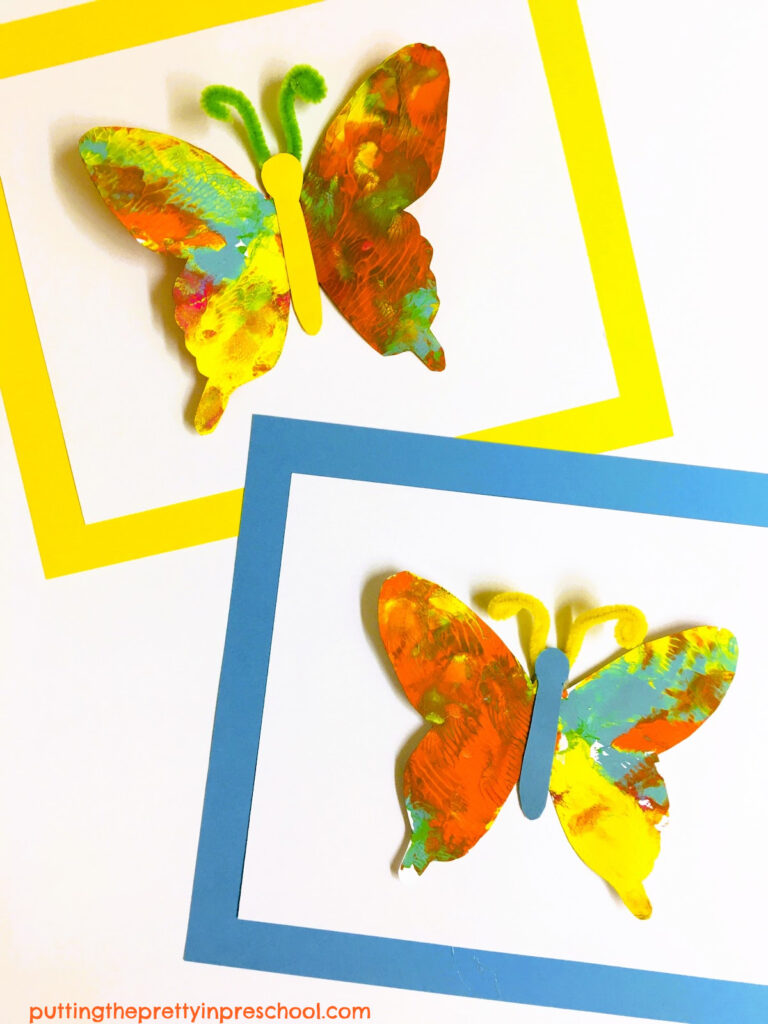
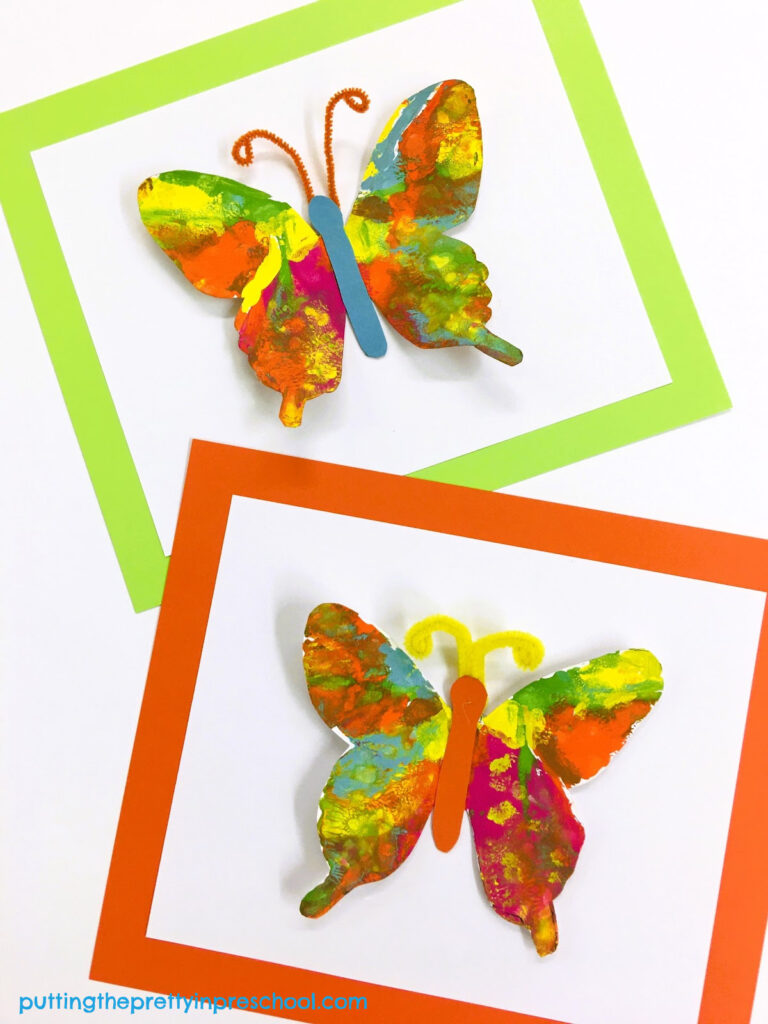
If the butterfly does stick to the side and the paint is smudged, make a print with it on a new piece of paper. Cut the butterfly out and use doubled sided tape to secure it onto a new piece of paper for a 3D effect. Add a cardstock frame for a finishing touch.

Butterfly paint prints look stunning when displayed on a cardstock background.

_______

Butterfly paint prints look stunning when displayed on a cardstock background.

_______

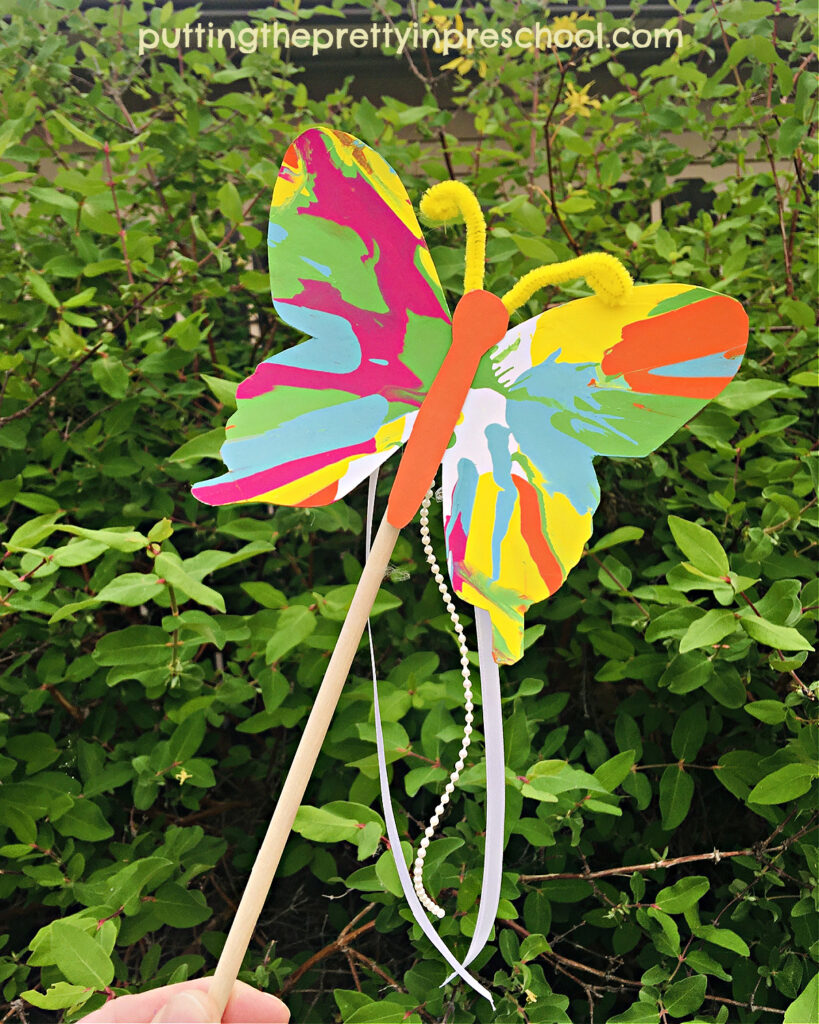
And gluing a painted butterfly, ribbon, and bead garland to a dowel makes an awesome butterfly wand.

Beautiful spin painitng butterfly wand craft your little learners will love. An all-ages process art project.

_______

The Science Behind Salad Spinner Art

Centrifugal force is used in creating salad spinner art. When the salad spinner is spun around, centrifugal force pushes the paint away from the center to the edges of the butterfly.

_______

How to create beautiful spin painting butterflies with a salad spinner. This is a super fun process art activity everyone will enjoy.

_______

Related:

Spin Painting Maple Leaf Art

Salad Spinner Heart Art

_______

[Read more…] about Spin Painting Butterflies

Filed Under: art, preschool, science, spring, summer Tagged With: butterflies, painting, spin art

Shamrock Leaf Print Art

March 12, 2023 by Annette Kaminsky Leave a Comment

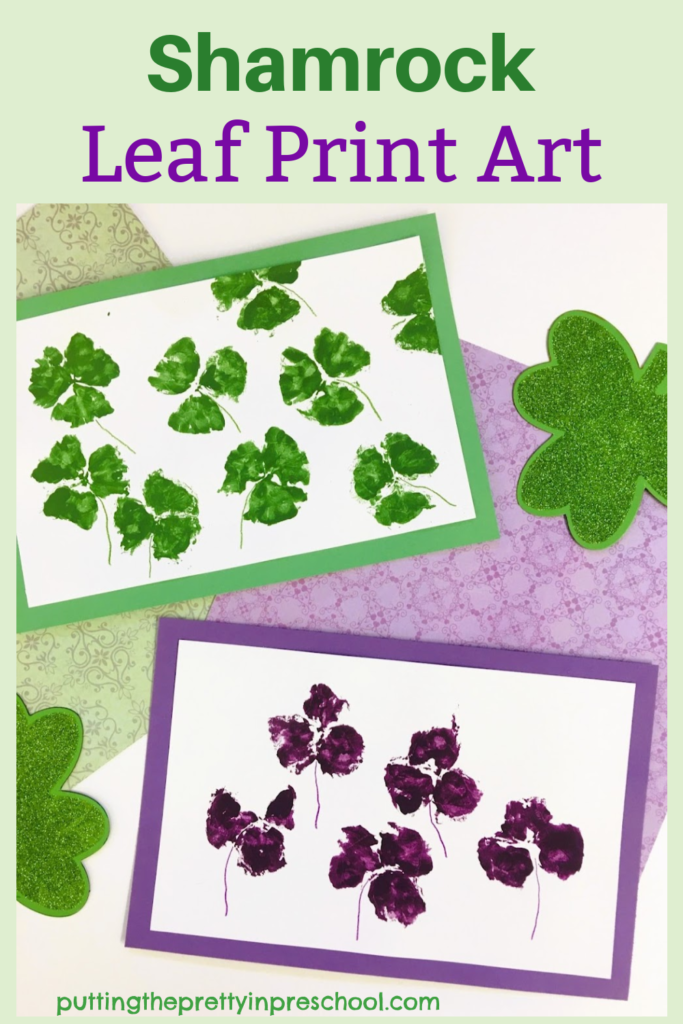
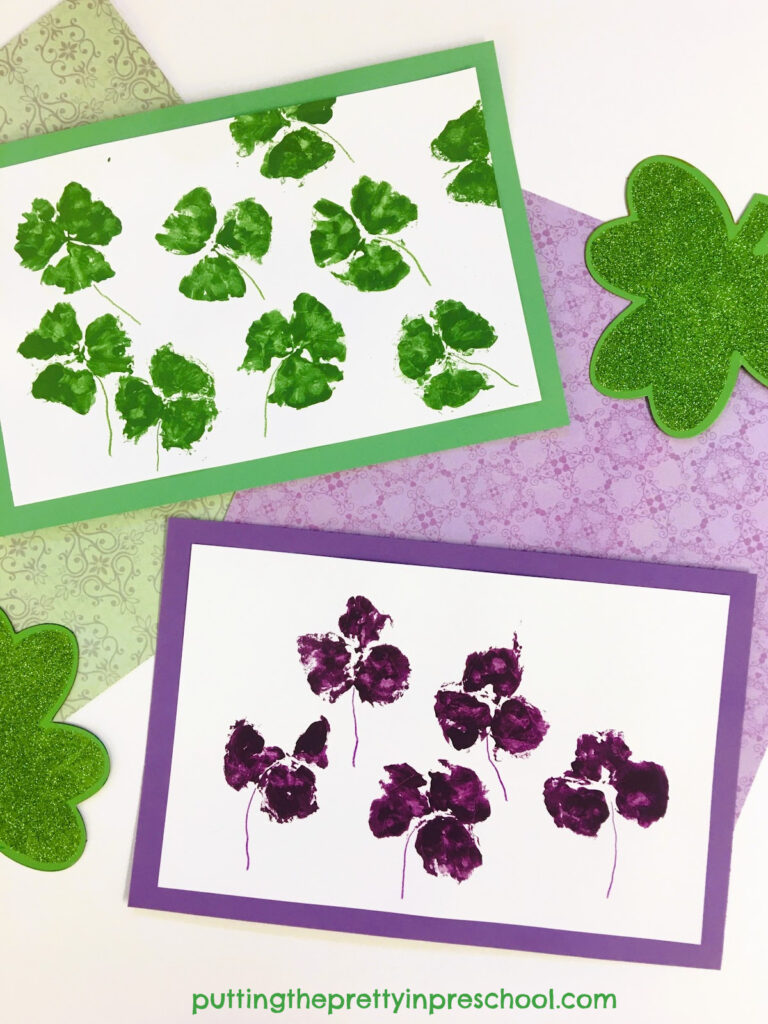
How to make beautiful shamrock leaf print art with sprigs from an Oxalis Regnelli plant. An easy-to-do all-ages art project.

_______

Shamrock leaf print art is an activity I’ve wanted to try for a few years now, and this spring I carved out time for it. The art project is easy and enjoyable to do, and I am sure you will like it too.

A good time to try this leaf print art activity is around St. Patrick’s Day, as shamrock plants are plentiful in stores then. The compound leaves on the plant look like the shamrock symbol that the country of Ireland is known for. Irish people think shamrocks represent good luck, and they are prominent in clothing, decorations, and tableware during St. Patrick’s Day celebrations.

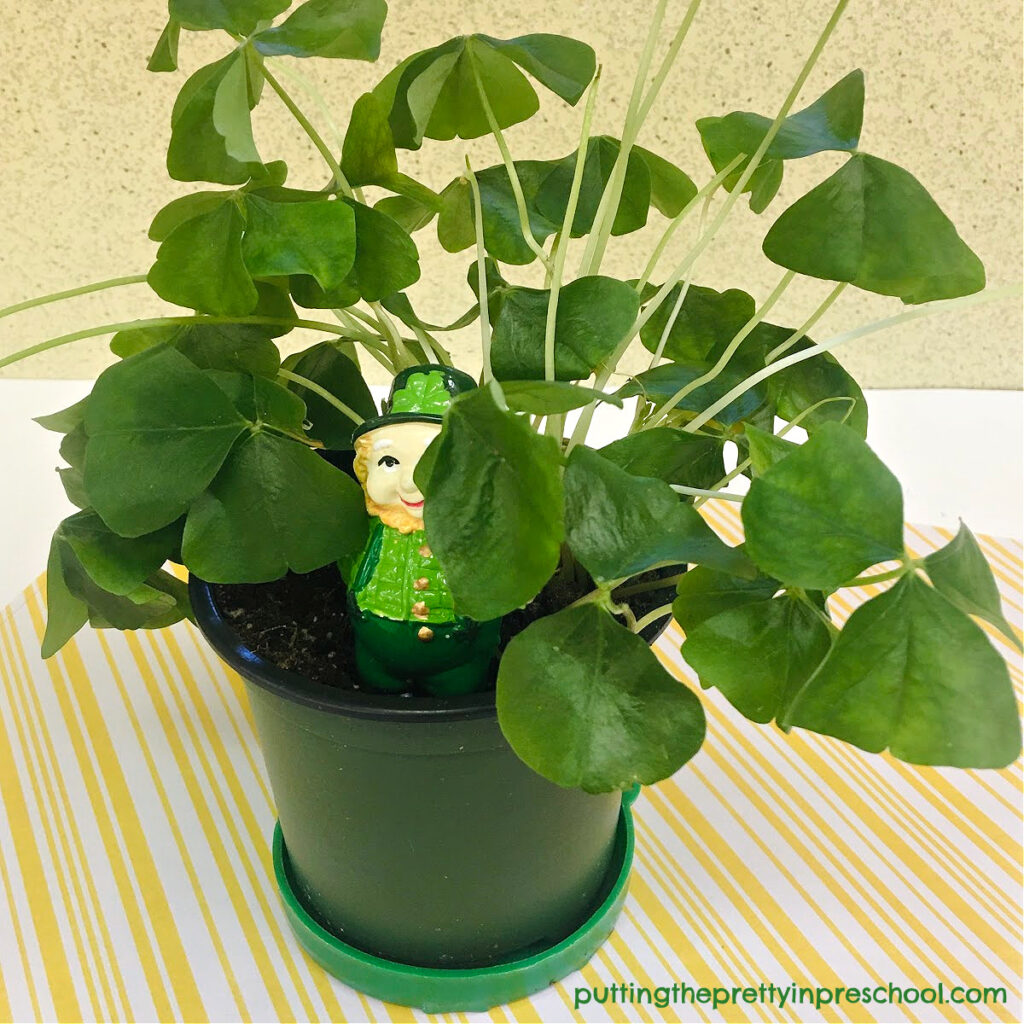
An Oxalis Regnelli shamrock plant with compound leaves composed of three triangular leaflets.

_______

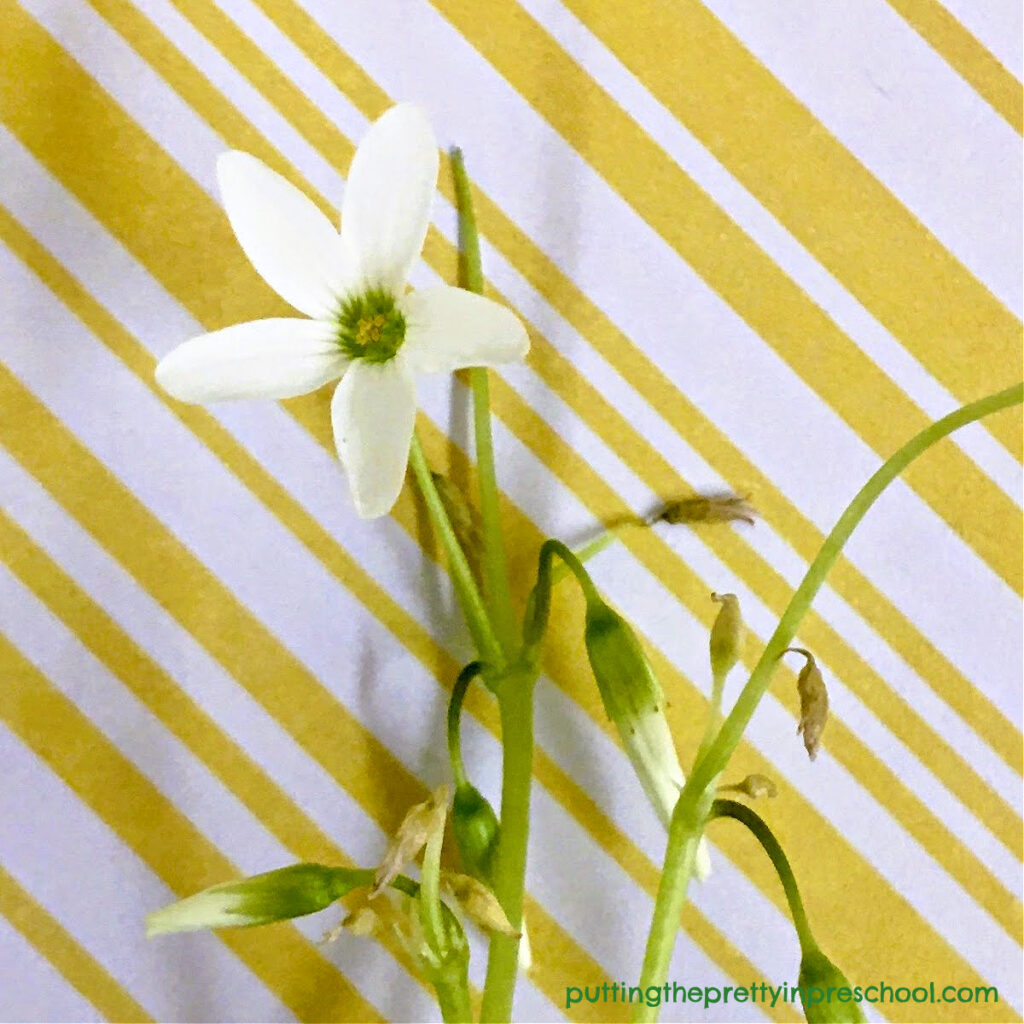
The shamrock plant I found is called Oxalis Regnellii, which comes from Africa and some parts of the Americas. It has delicate leaves with three triangle-shaped leaflets. The leaves fold up neatly on overcast days and anytime it is dark, and open up when they are exposed to sunlight. The tiny, white, long-stemmed flowers have five petals.

A tiny white flower on an Oxalis Regnellii plant.

_______

Follow me on Pinterest for more early learning ideas.

_______

Supplies To Collect

Gather the following supplies for this nature-based art project:

  • shamrock plant
  • green and purple acrylic or tempera paint
  • paint pots
  • paintbrushes
  • purple and green pencil crayons
  • all-purpose art paper
  • green and purple construction paper
  • newspaper or manila paper
  • magnifying glasses

_______

Making The Shamrock Leaf Print Art

Before using the shamrock leaves for printmaking, give participants a chance to study the plant. Offer magnifying glasses to view the leaves and dainty flowers with yellow stamens. Set the plant out in a sunny place and then put it in a dark area to see how its leaves fold down and spread out depending on how much sunlight the plant is getting.

To prepare the art activity, snip a few leaves off the plant to use for making paint prints.

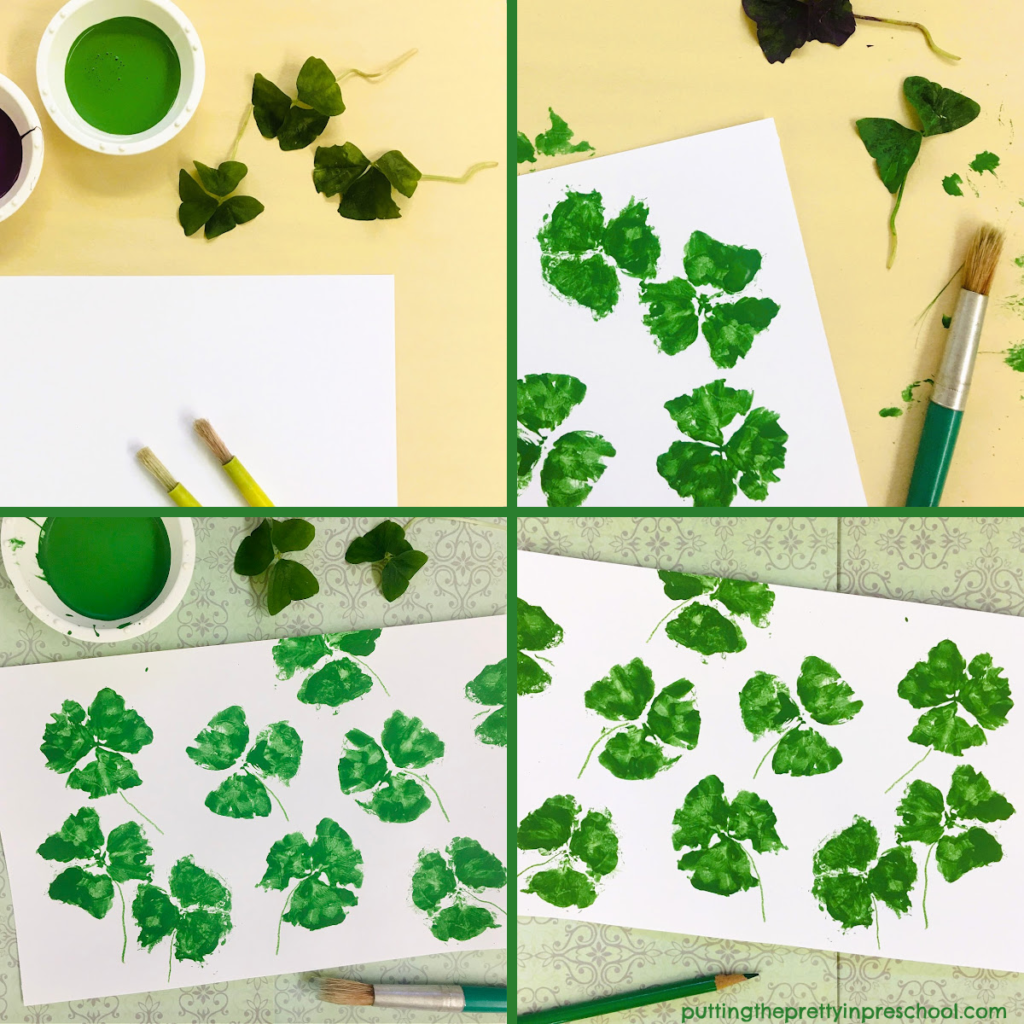
Steps to make beautiful shamrock leaf print art. This is an easy-to-do all-ages nature art project

_______

Next, lay down newspaper sheets or a large piece of manilla paper for participants to work on.

Then add an art station with a sheet of all-purpose art paper, leaf sprig, paintbrush, and green acrylic paint for each participant. My paper size is an 11-inch x 14-inch inch sheet cut in half, creating a 7-inch x 11-inch piece to work on.

Note: Non-toxic tempera paint is a good choice for young children taking part in the activity.

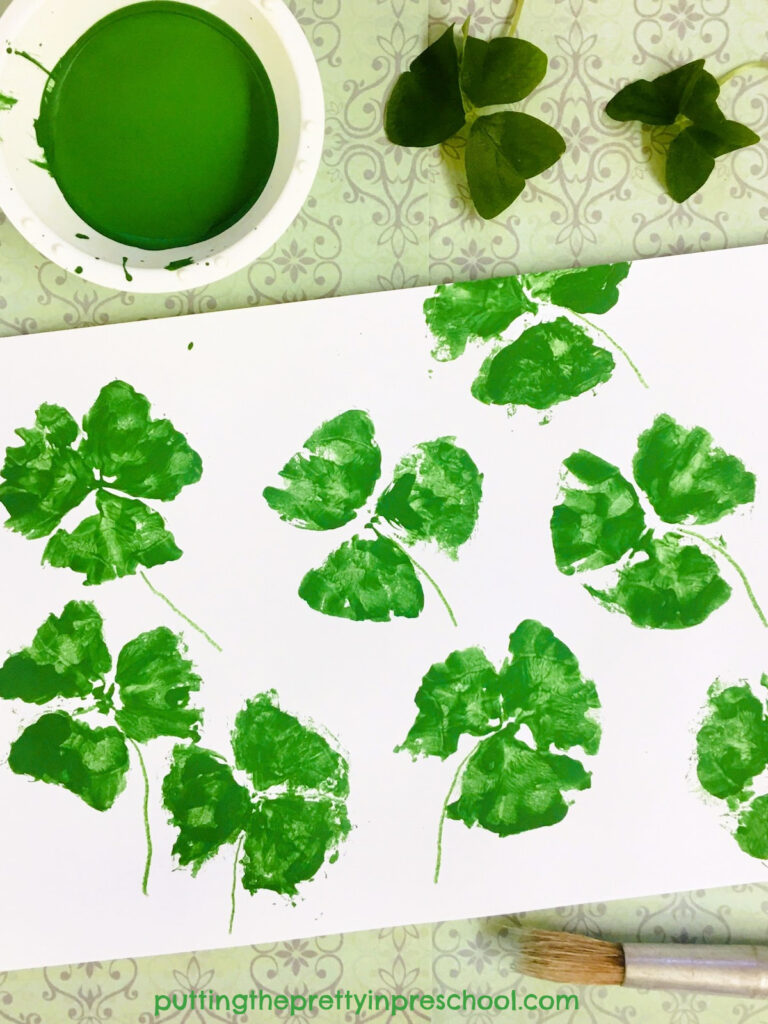
Afterward, invite participants to brush the tops of the leaflets on their sprig thoroughly with green paint, flip the leaf over, and carefully press the painted sides down on the paper.  Have them gently rub their fingers over the leaflets and pat the edges down to transfer as much paint to the paper as possible.

Beautiful shamrock leaf print art with leaves from the Oxalis Regnelli plant. This is a nature art project that is perfect for St. Patrick's Day.

_______

Then ask everyone to slowly lift their leaf off the paper canvas and repaint it to make more leaf prints. The shamrock leaves are delicate, but when handled gently they can be used a few times. If someone’s leaf tears, offer a new sprig to use.

When the paint prints are dry, ask participants to use a pencil crayon to add stems to the leaves.

As a finishing touch, mount each shamrock leaf print art project on a similar-colored construction paper background.

_______

Making Purple Shamrock Leaf Print Art

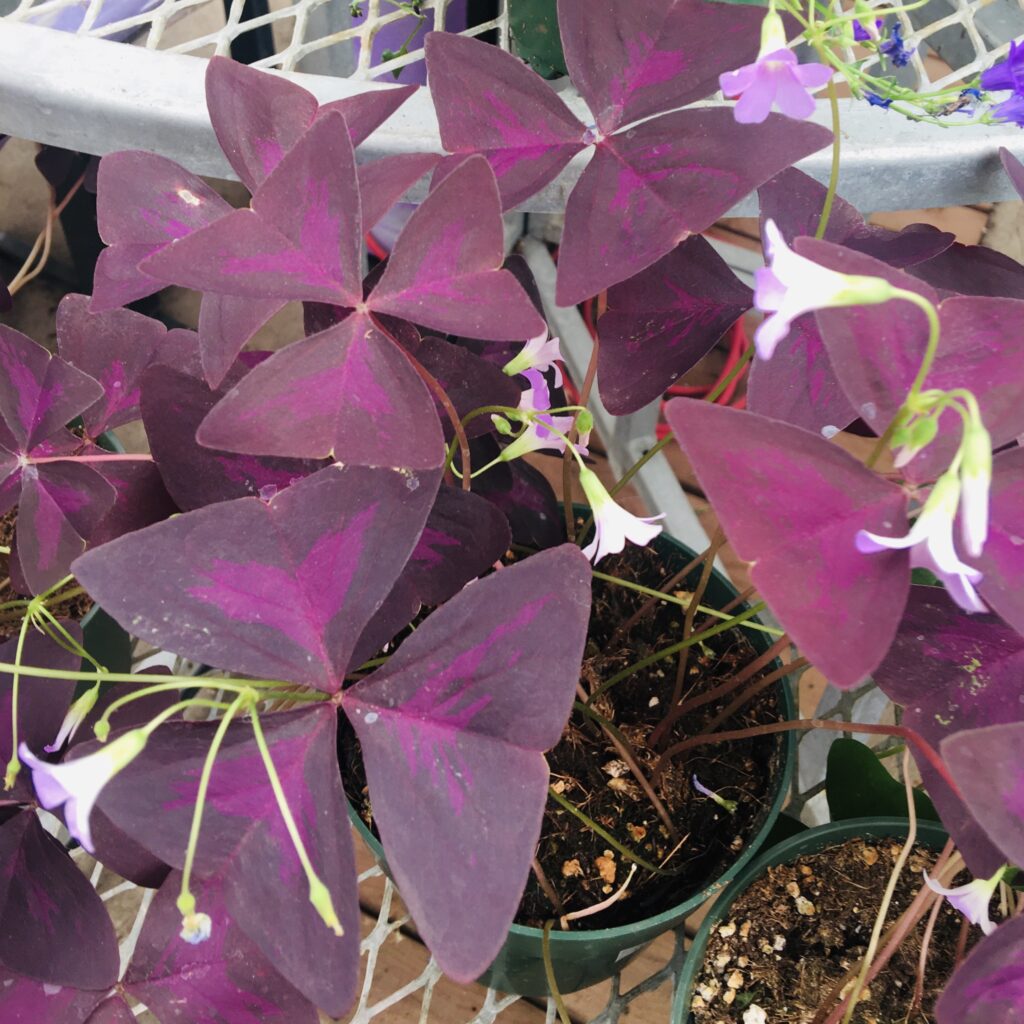
A purple shamrock, called Oxalis Triangularis, has similarly shaped leaves and flowers as the Oxalis Regnallii. This purple shamrock showcases deep purple, dark-edged leaves that respond to darkness and light in the same way.

A purple shamrock plant with compound leaves composed of three triangular leaflets.

_______

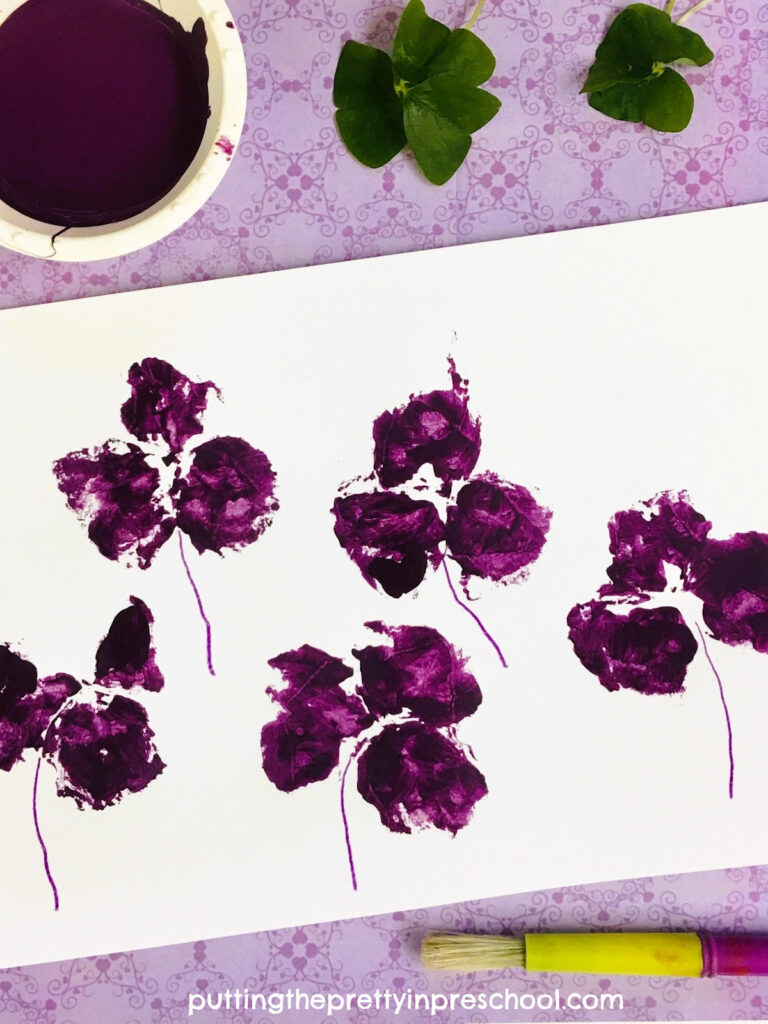
With purple acrylic or tempera paint, let participants create shamrock prints just as they were made in green.

Beautiful shamrock leaf print art with leaves from the Oxalis Regnelli plant. This is a nature art project that is perfect for St. Patrick's Day.

_______

If there are any leaves left on the plant after the printmaking activity is done, add them to a playdough activity. Or have someone without pets take the plant home to care for.

Note: All Oxalis plants are toxic to dogs, cats, and grazing animals such as horses and must be kept out of their reach. These plants are slightly toxic to humans. Make sure to supervise all shamrock leaf activities closely so that no one ingests the leaves.

How to make beautiful shamrock leaf print art with sprigs from an Oxalis Regnelli plant. An easy-to-do all-ages art project.

_______

More Shamrock-themed Activities:

Shamrock Paper Plate Lion

Shamrock Dissolving Candy Experiment

St. Patrick’s Day Painted Shamrock

Shamrock Rolling Pin Art

Scissor Skill Shamrock Collage

[Read more…] about Shamrock Leaf Print Art

Filed Under: art, playdough, preschool, science, sensory, spring, St. Patrick's Day Tagged With: art, leaf prints, leaves, printmaking, shamrocks, St. Patrick's Day

Polar Bear Small World

February 22, 2023 by Annette Kaminsky Leave a Comment

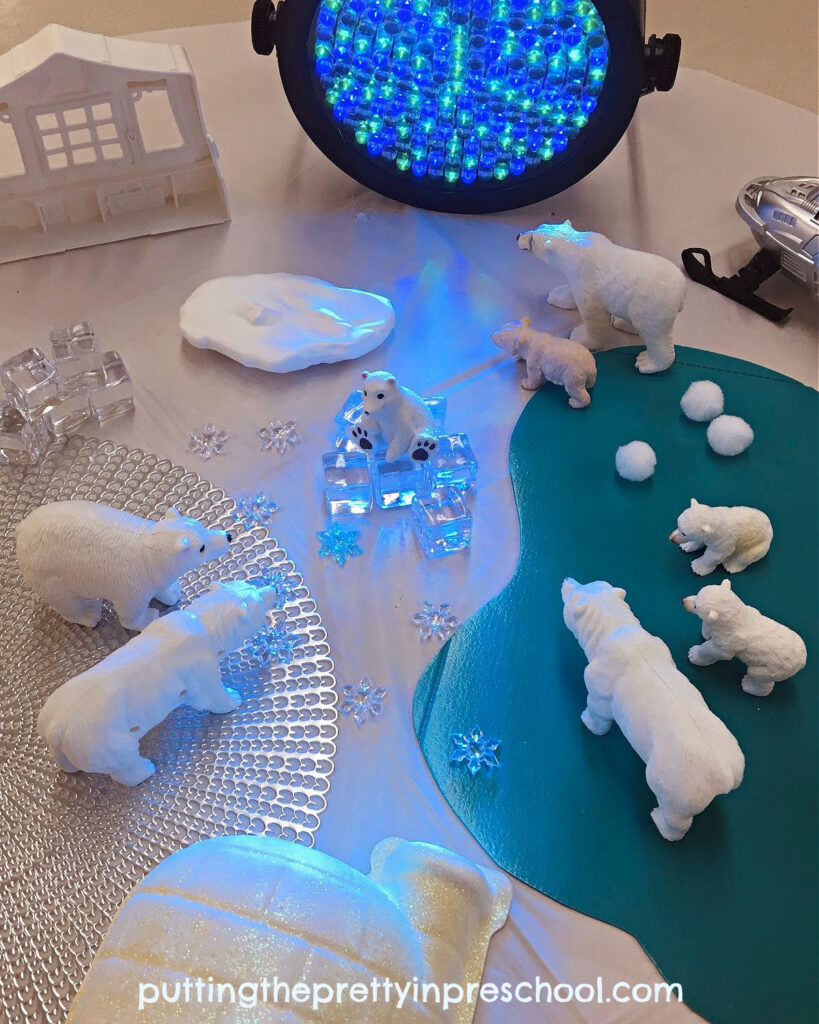
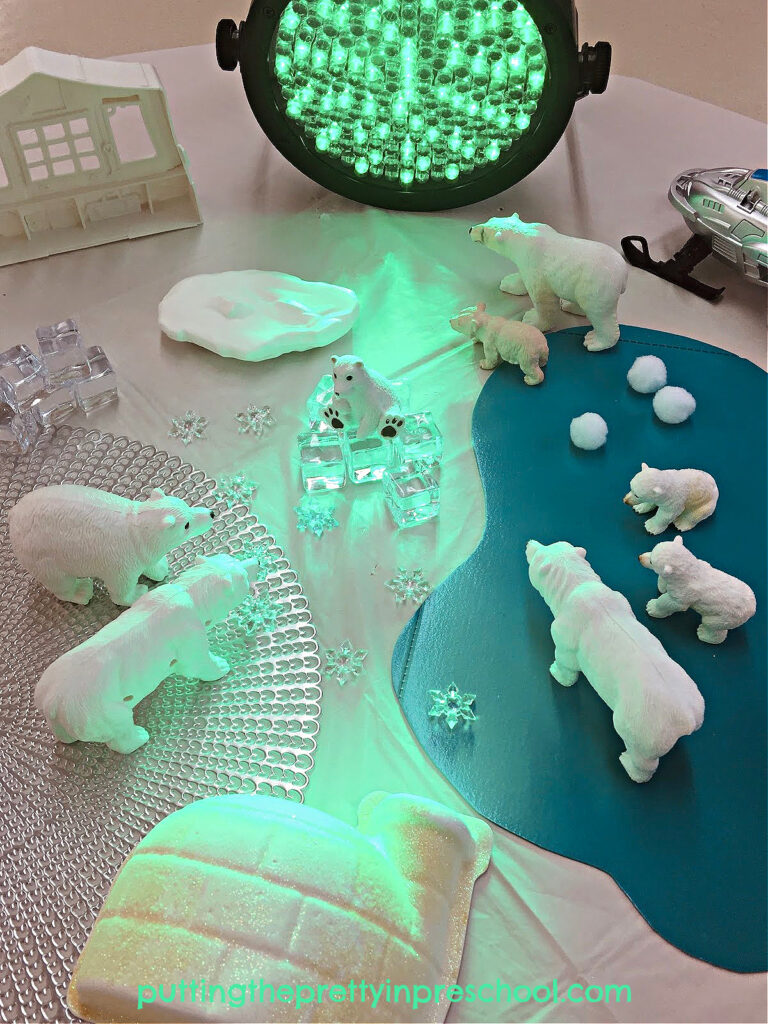
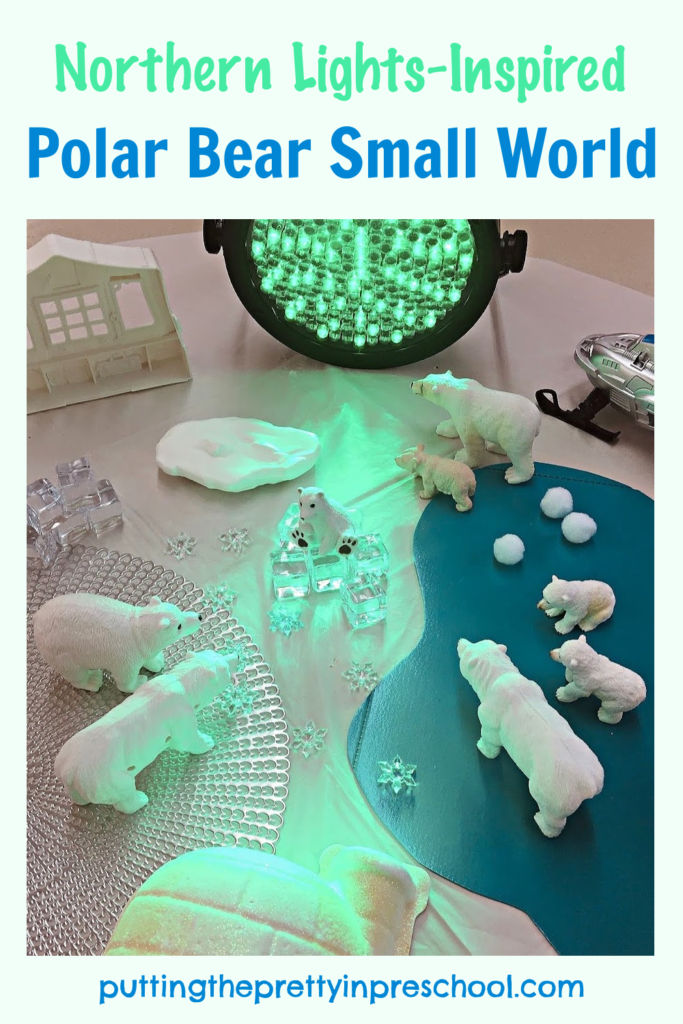
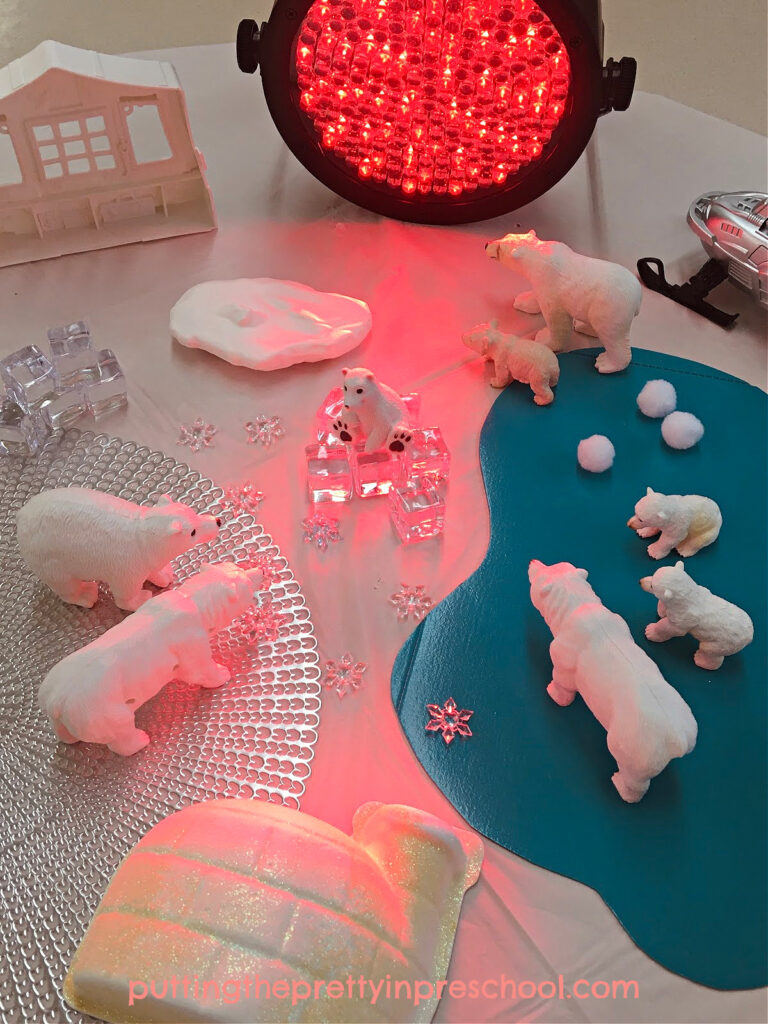
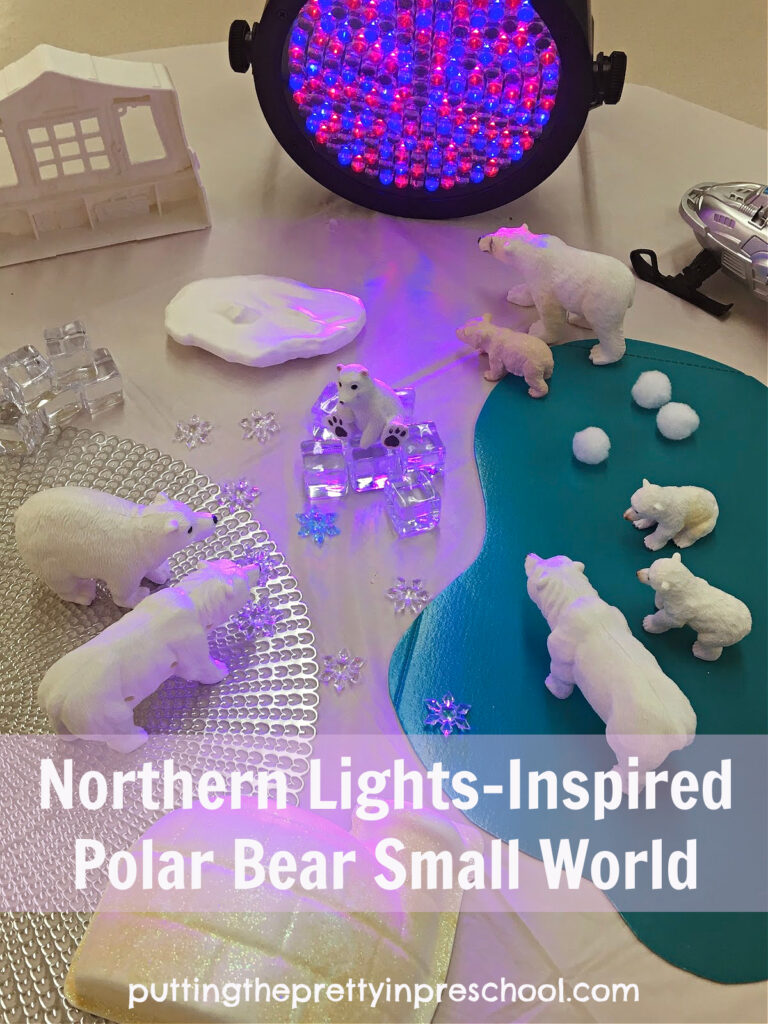
A professional stage light adds ambiance to this inviting northern lights-inspired polar bear small world.

_______

Two of the most majestic things to see in the Arctic are polar bears and northern lights. It is not uncommon to spot them depicted together in far north artworks. A memory of an award-winning painting of polar bears trekking across a snowy landscape lit up by northern lights is what inspired this lighted polar bear small world.

_______

Follow me on Pinterest for more early learning ideas.

_______

Supplies To Collect

This polar bear small world is inspired by northern lights, which are often visible in Arctic skies at night.

_______

To set up a mesmerizing polar bear small world, gather together the following supplies:

  • polar bear figurines
  • LED stage light
  • white pompoms
  • acrylic snowflakes
  • clear acrylic ice cubes
  • silver placemat
  • turquoise placemat
  • toy igloo, ice floe, tent, and snow vehicle
  • white tablecloth
  • scissors

_______

The Polar Bear Small World

A professional stage light adds interest to this northern lights-inspired polar bear small world.

_______

To put together this polar bear-themed small world, start by covering a table with a white tablecloth to create a “snowy” base.

Next, add placemats to represent ice and water. A silver placemat suggests ice. A turquoise placemat trimmed with scissors becomes “a body of water.”

Then set up a LED stage light at one end of the table.

Afterward, add polar bear figurines, pompom “snowballs,” acrylic snowflakes, and clear ice cubes.

If available, include arctic toys such as an igloo, ice floe, research tent, and snow vehicle. These will add imaginary play possibilities to the small world.

Finally, turn on the LED stage light to illuminate the scene. You can set the stage light to one color, or have it project alternating colors such as green, blue, red, and purple.

A professional stage light adds interest to this northern lights-inspired polar bear small world.

_______

For a stunning art activity and facts about northern lights, view the blog post “Northern Lights Squish Painting.”

To learn facts about polar bears and other arctic animals, visit the blog post “Arctic Animal Sensory Trays.”

_______

A professional stage light adds ambiance to this inviting northern lights-inspired polar bear small world.

_______

Related:

Winter Playdough Recipe

Spray Paint Snowflake Silhouette

Blue Candy Cane Science Experiment

Igloo Camping Pretend Play

Winter-themed Treasure Blocks

Winter Sensory Trays

Painting Ice and Snow

Ice Drum Musical Instruments

Winter Wreath Craft

Frozen-Inspired Shadow Box

Scissor Skill Snow Cutting Activities
Kid’s Winter Wonderland Play Tablescape

_______

[Read more…] about Polar Bear Small World

Filed Under: dramatic play, preschool, pretend play, science, sensory, winter Tagged With: light, northern lights, polar bears, small worlds

Loose Part Jewelry Heart

February 19, 2023 by Annette Kaminsky Leave a Comment

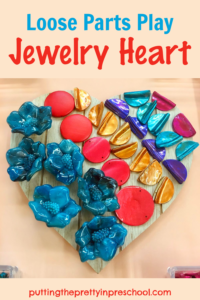
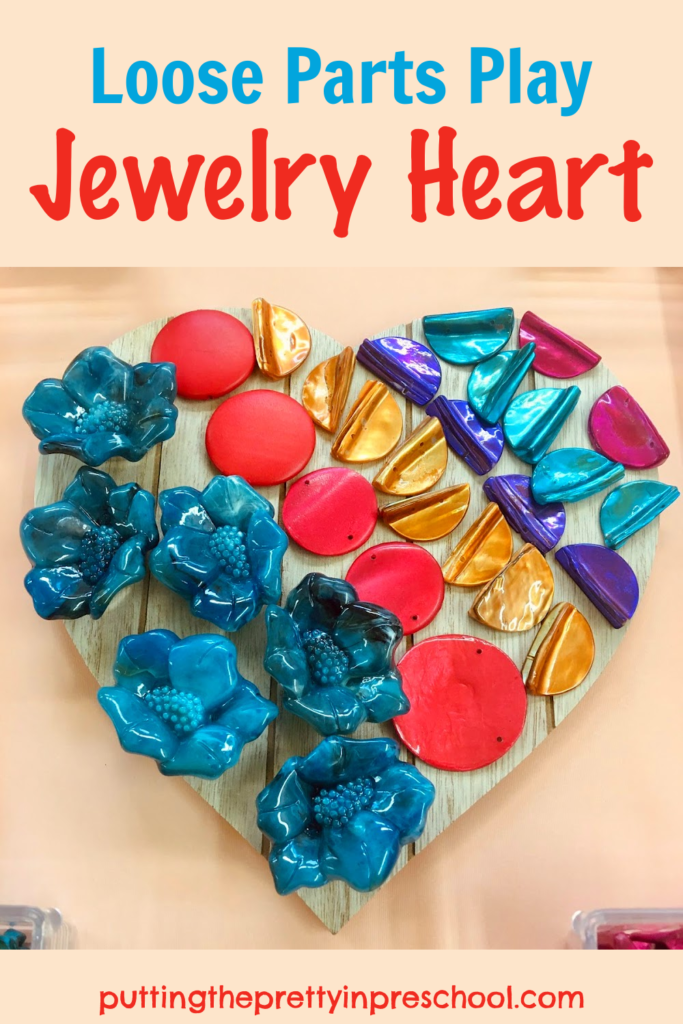
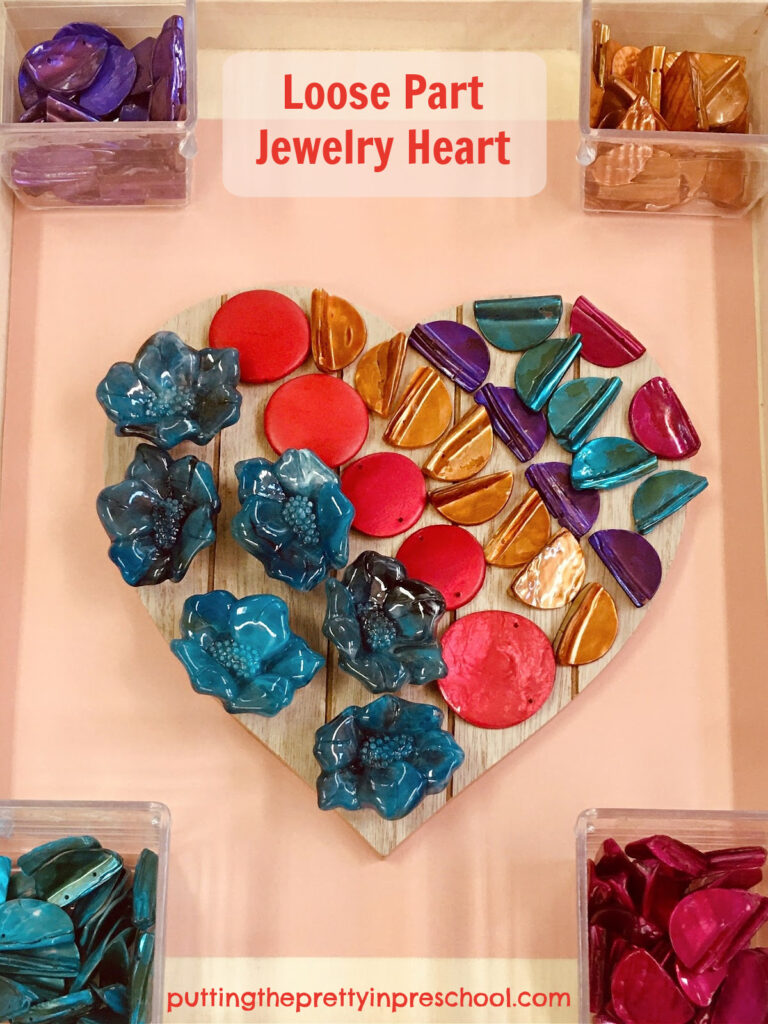
An invitation to create a loose-part jewelry heart with costume jewelry pieces. This is a gorgeous all-ages transient art project.

_______

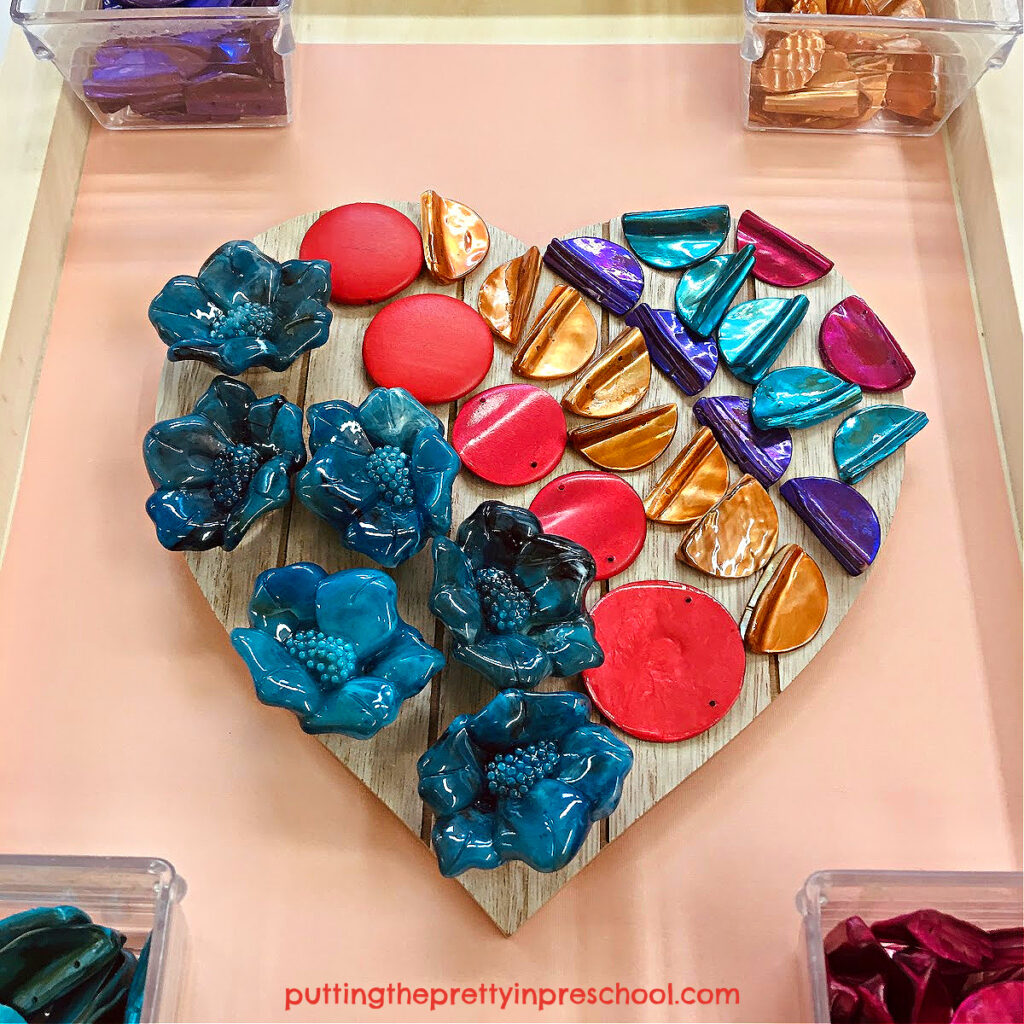
Do you have some costume jewelry you no longer wear? Have you picked up vintage jewelry at a garage sale or second-hand store? It will be perfect for this beautiful loose-part jewelry heart invitation to create.

_______

Follow me on Pinterest for more early learning ideas.

_______

Supplies To Collect

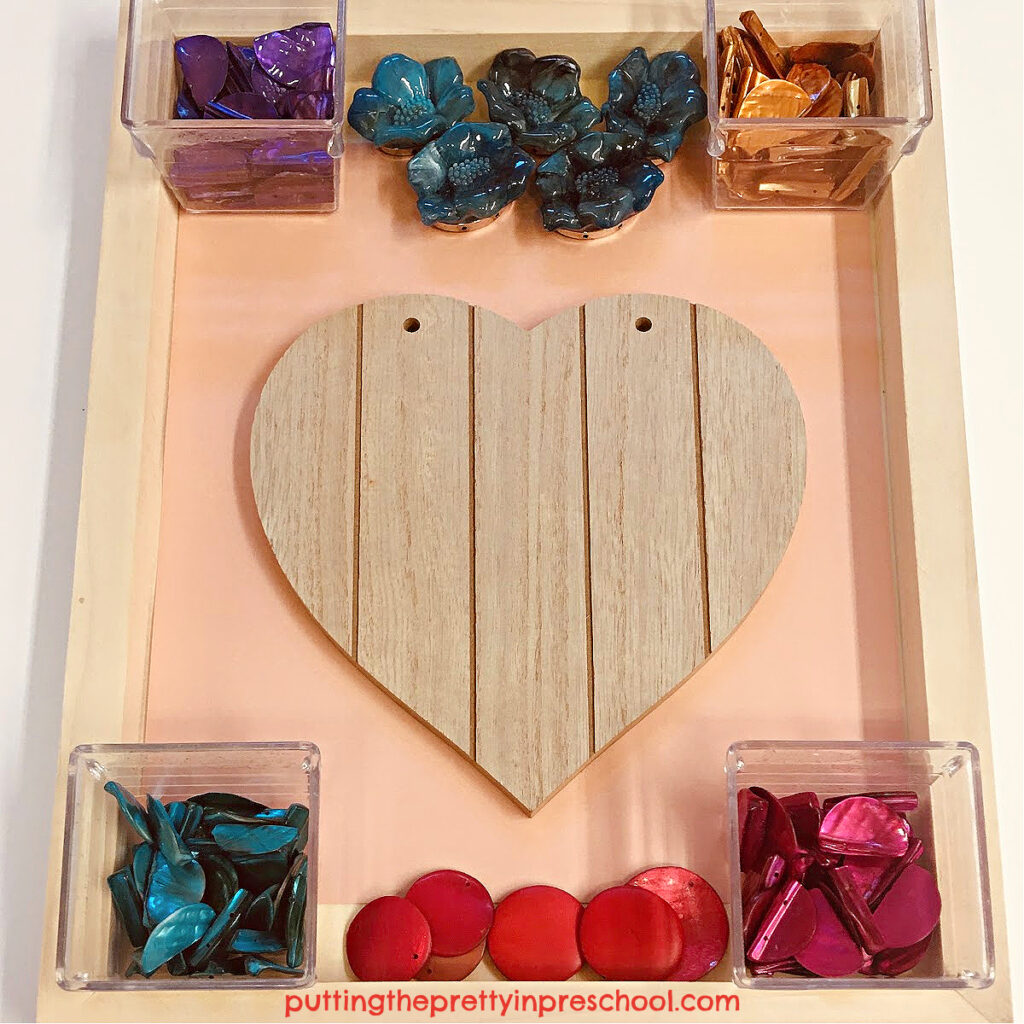
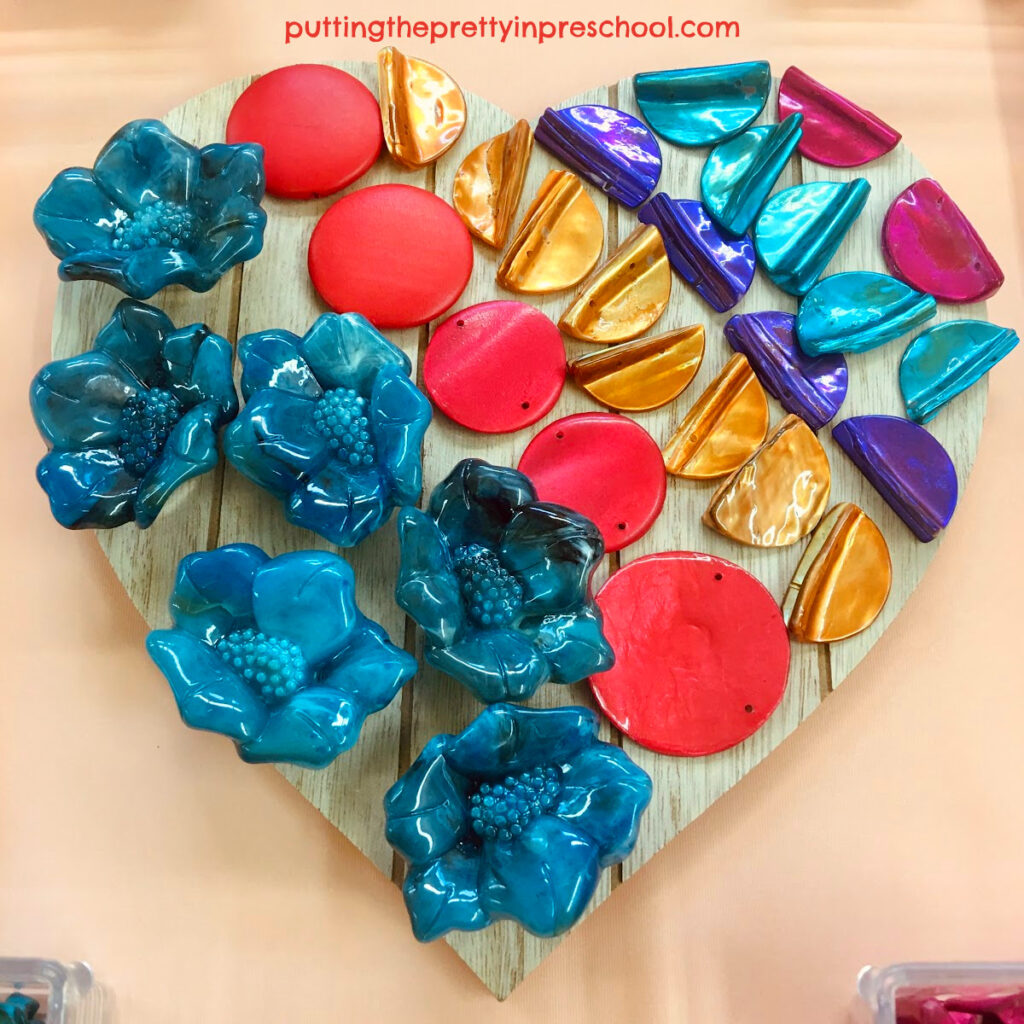
An invitation to create a gorgeous loose-part jewelry heart with costume jewelry pieces. This is an all-ages transient art project everyone will enjoy.

_______

For this easy-to-set-up transient heart art activity, gather the following supplies:

  • large wooden canvas frame
  • wood heart plaque
  • vintage costume jewelry
  • small containers

_______

The Loose Part Jewelry Heart Play Invitation

An invitation to create a loose-part jewelry heart with costume jewelry pieces. This is a gorgeous all-ages transient art project.

_______

To prepare this gorgeous loose part play invitation, first, select a large wooden canvas frame. My frame is approximately 12 inches wide and 16 inches long.

Flip the frame over and use the backside.

Note: A serving tray or an art frame with the back removed also work well for this activity.

Next, put a wood heart plaque inside the frame.

Then cut costume jewelry into pieces suitable for loose part play. Make sure there are no rough edges on the jewelry.

Place the jewelry bits into small containers and set them in the corners of the canvas frame. Add more jewelry pieces around the frame if available.

Finally, set the canvas frame on a table and invite little learners to take turns decorating the heart with jewelry treasures.

A gorgeous loose-part jewelry heart created with costume jewelry pieces. This is an all-ages transient art project everyone will enjoy.

_______

Benefits Of Loose Parts Play

In this loose part jewelry heart play invitation, early learners get to:

  • engage in open-ended play
  • practice sorting, counting, and color matching
  • strengthen finger muscles by moving and arranging jewelry pieces
  • experience beautiful objects with different colors and textures
  • create unique patterns and designs
  • focus on a task and be mindful
  • develop higher thinking skills

_______

A gorgeous loose-part jewelry heart created with costume jewelry pieces. This is an all-ages transient art project everyone will enjoy.

_______

More Loose Part Heart Decorating

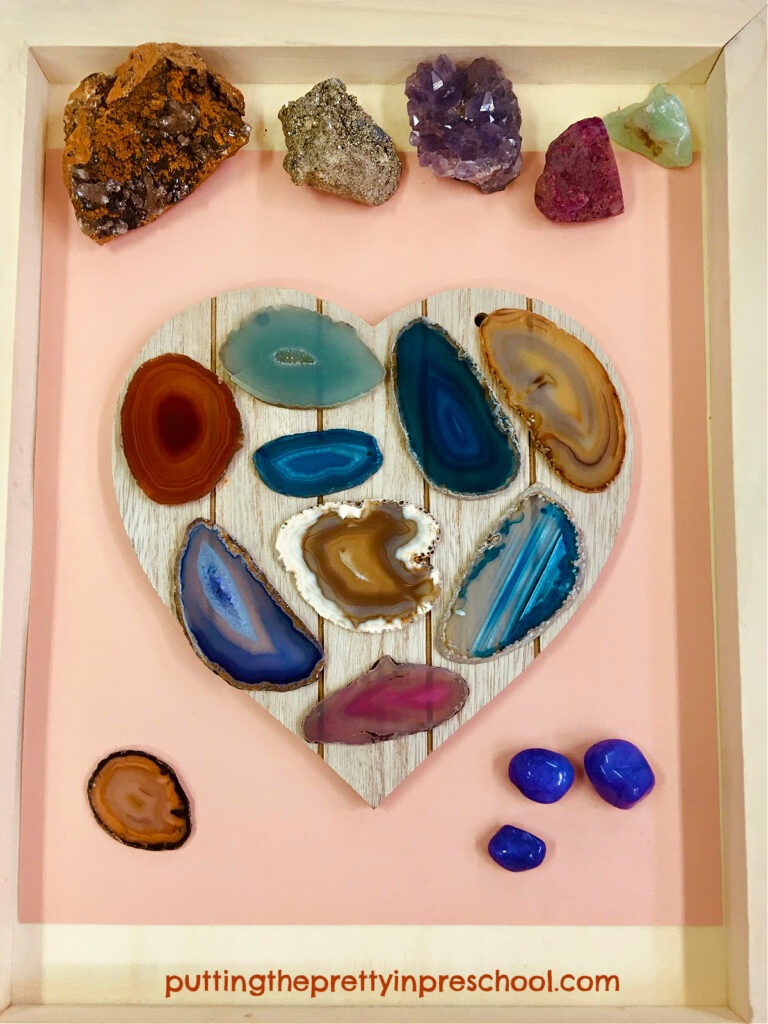
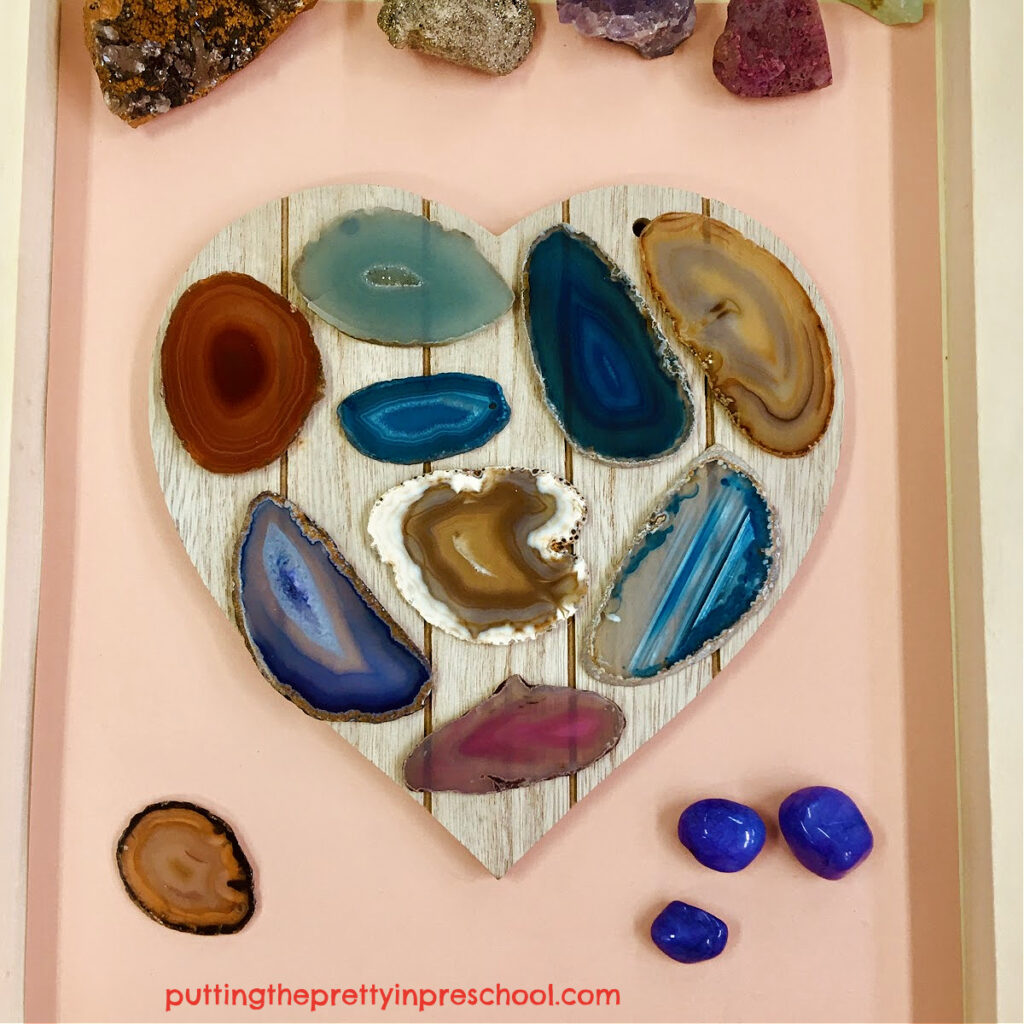
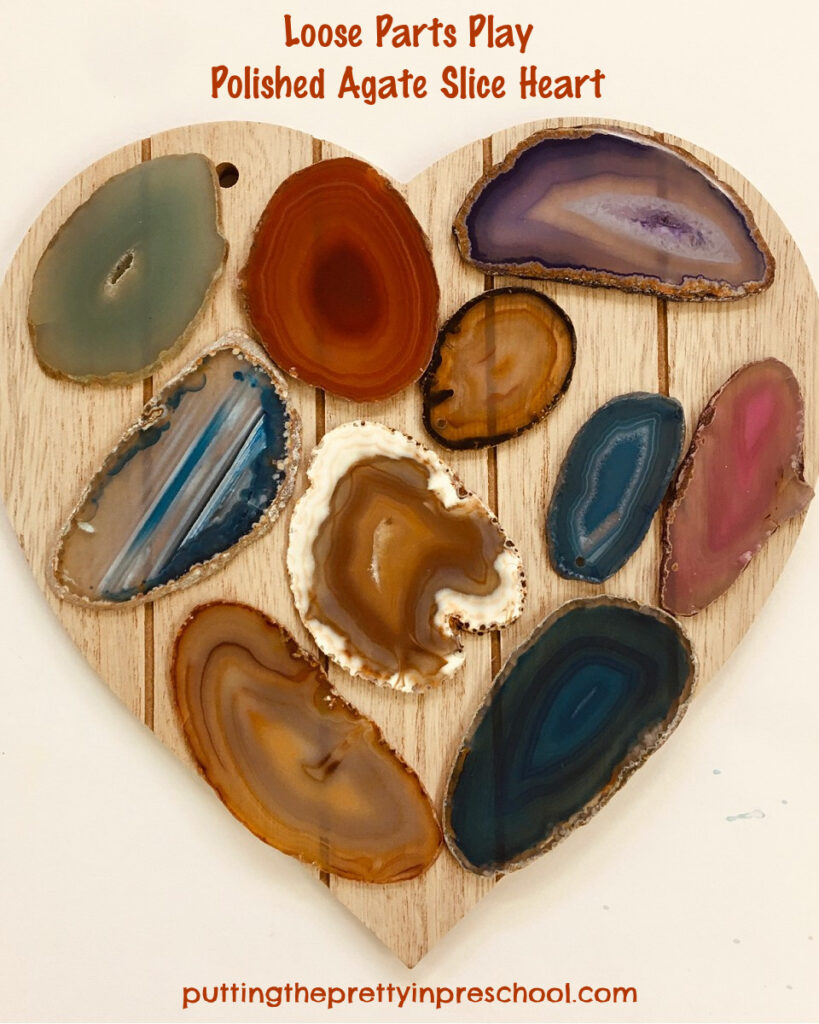
On another day, offer this loose part heart invitation to create with polished agate slices and precious rocks and gemstones.

A gorgeous loose-part precious rock heart created with polished agate slices. This is an all-ages transient art project everyone will enjoy.

_______

An invitation to create a loose-part precious rock heart with polished agate slices. This is a gorgeous all-ages transient art project.

_______

A gorgeous loose-part precious rock heart created with polished agate slices. This is an all-ages transient art project everyone will enjoy.

_______

Related:

Jewelry Sensory Tray

St. Patrick’s Jewelry Sensory Bin

_______

[Read more…] about Loose Part Jewelry Heart

Filed Under: art, Mother's Day, preschool, science, sensory, Valentine's Day Tagged With: hearts, jewelry, loose parts, rocks, transient art, Valentine's Day

Spray Paint Snowflake Silhouette

February 18, 2023 by Annette Kaminsky Leave a Comment

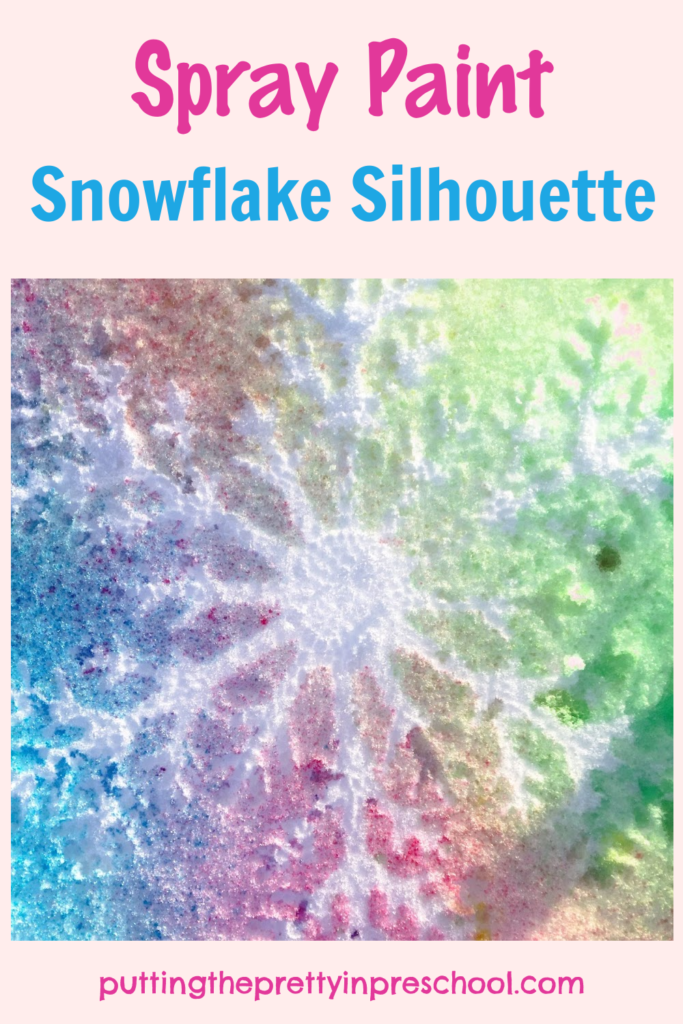
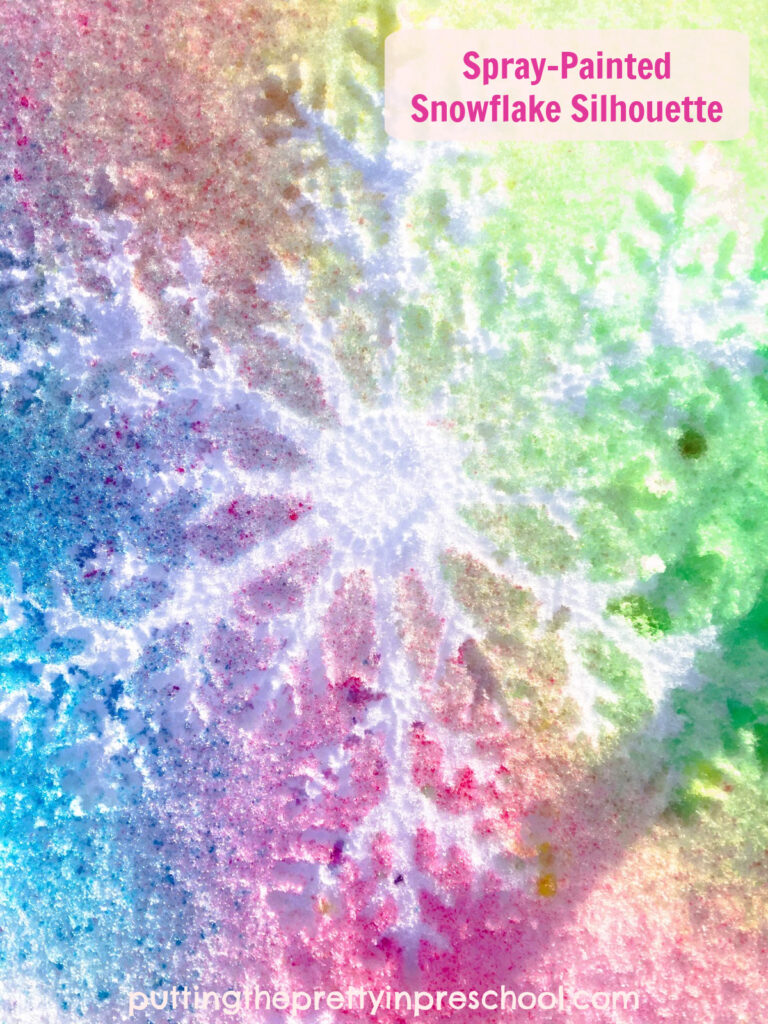
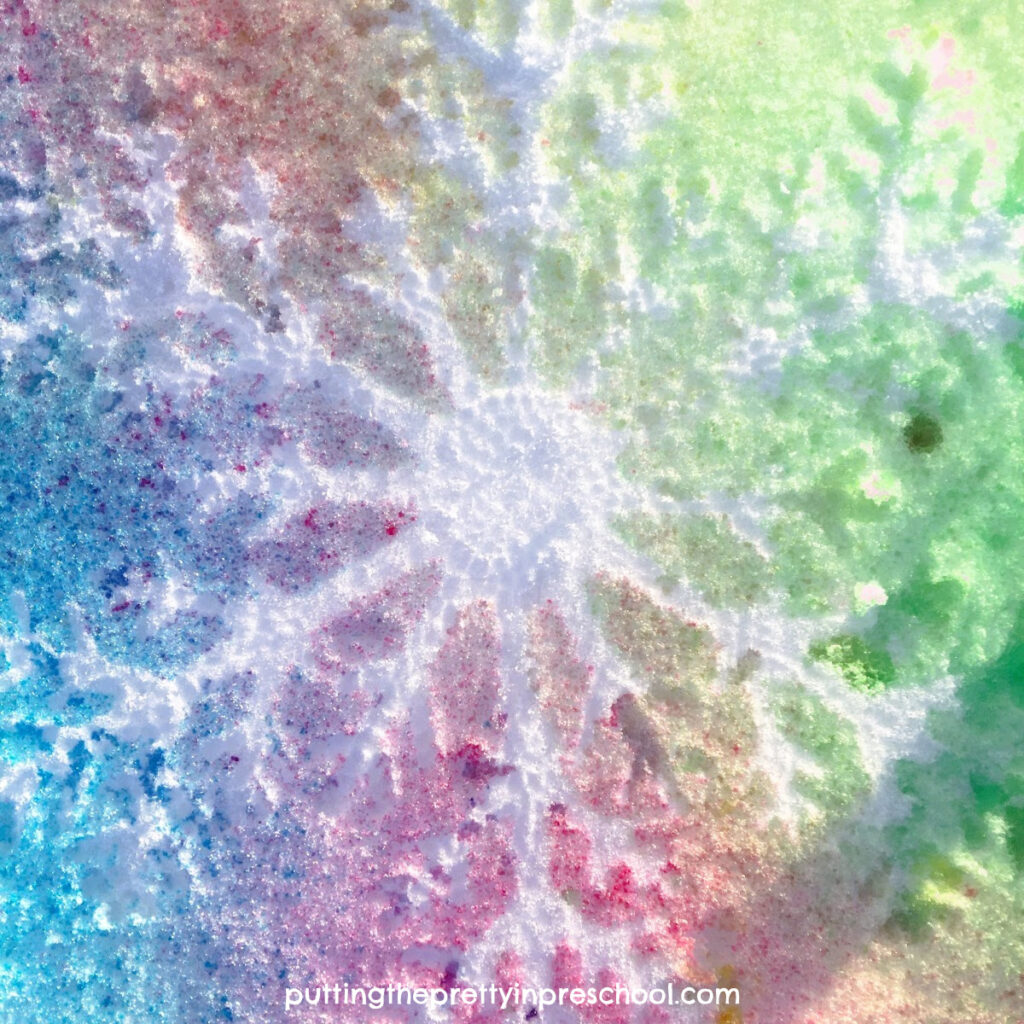
A beautiful spray paint snowflake silhouette outdoor transient art activity. Fun facts about snow are included in the post.
A beautiful spray paint snowflake silhouette outdoor transient art activity. Facts about snow are included in the post.

_______

If you are looking for an exciting and easy outdoor winter art activity, this spray paint snowflake silhouette project is a great choice.

_______

Follow me on Pinterest for more early learning ideas.

_______

Supplies to Collect

An invitation to create a spray paint snowflake silhouette outdoors. A quick and easy transient art activity with stunning results.

_______

On a day when there is fresh snow on the ground outdoors, gather the following supplies:

  • spray bottles
  • red, blue, green, and yellow food colors
  • large snowflake decoration
  • small towel
  • tray

_______

The Spray Paint Snowflake Silhouette Activity

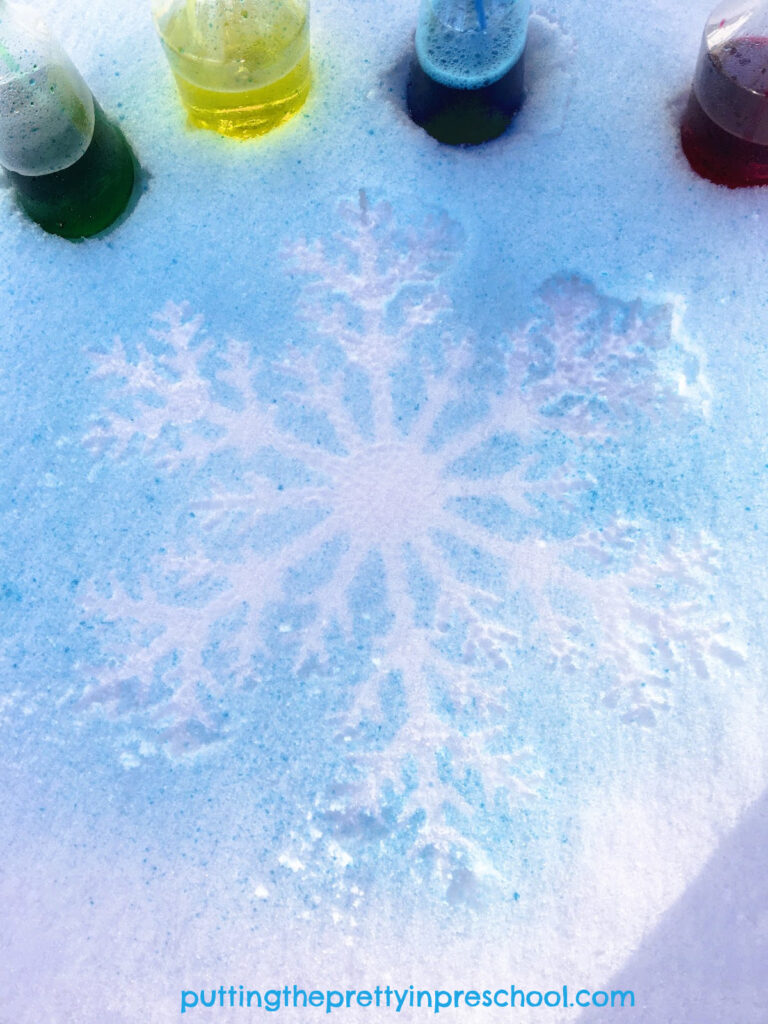
A beautiful blue background snowflake silhouette created with a spray paint technique. A quick and easy ourdoor transient art activity.

_______

This painting activity works best when there is a fresh layer of snow on the ground.

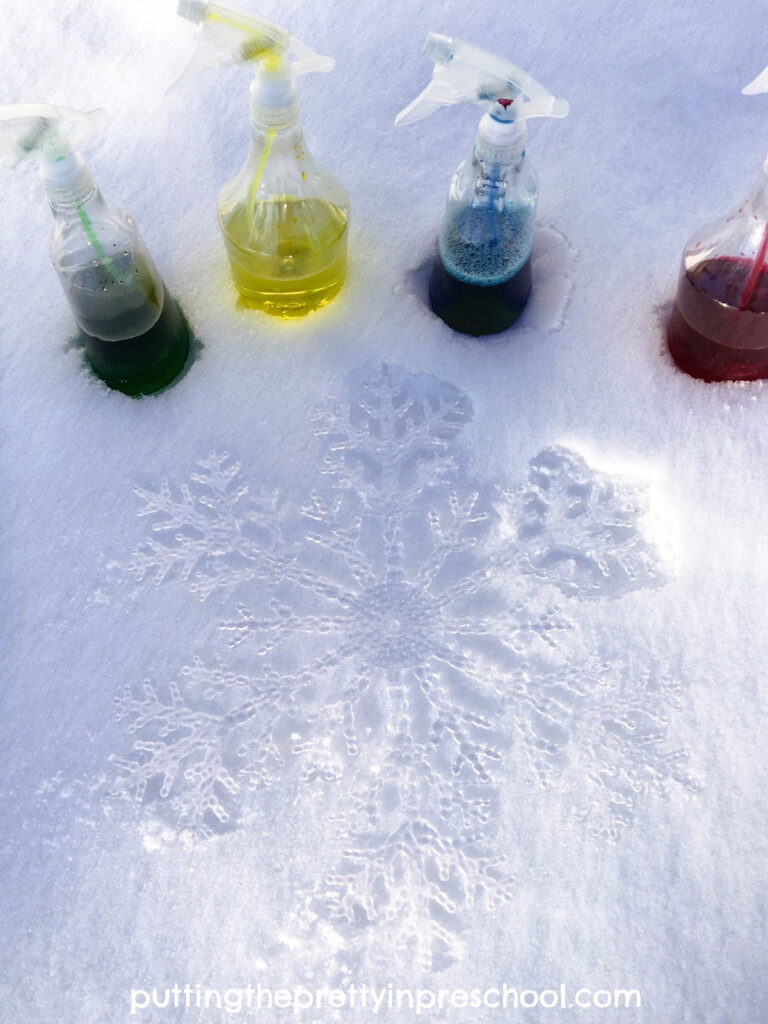
To do the art activity, fill spray bottles used only for craft activities at least half full of water. Then add a few drops of food color in each one, and mix it in. I use red, blue, green, and yellow food coloring.

Next, select a large snowflake decoration. I feature an economical 12-inch plastic one purchased at a dollar store.

Afterward, place the colored water-filled spray bottles, the snowflake decoration, and a small towel on a tray.

Then invite participants outside and take the tray of supplies with you.

Gather around a smooth patch of snow that no one has stepped over and gently place the snowflake decoration down.

Have everyone take turns spraying food color paint around the edges of the snowflake.

Afterward, gently lift the decoration off of the snow and admire the beautiful white snowflake silhouette.

A beautiful spray paint snowflake silhouette outdoor transient art activity. Facts about snow are included in the post.

_______

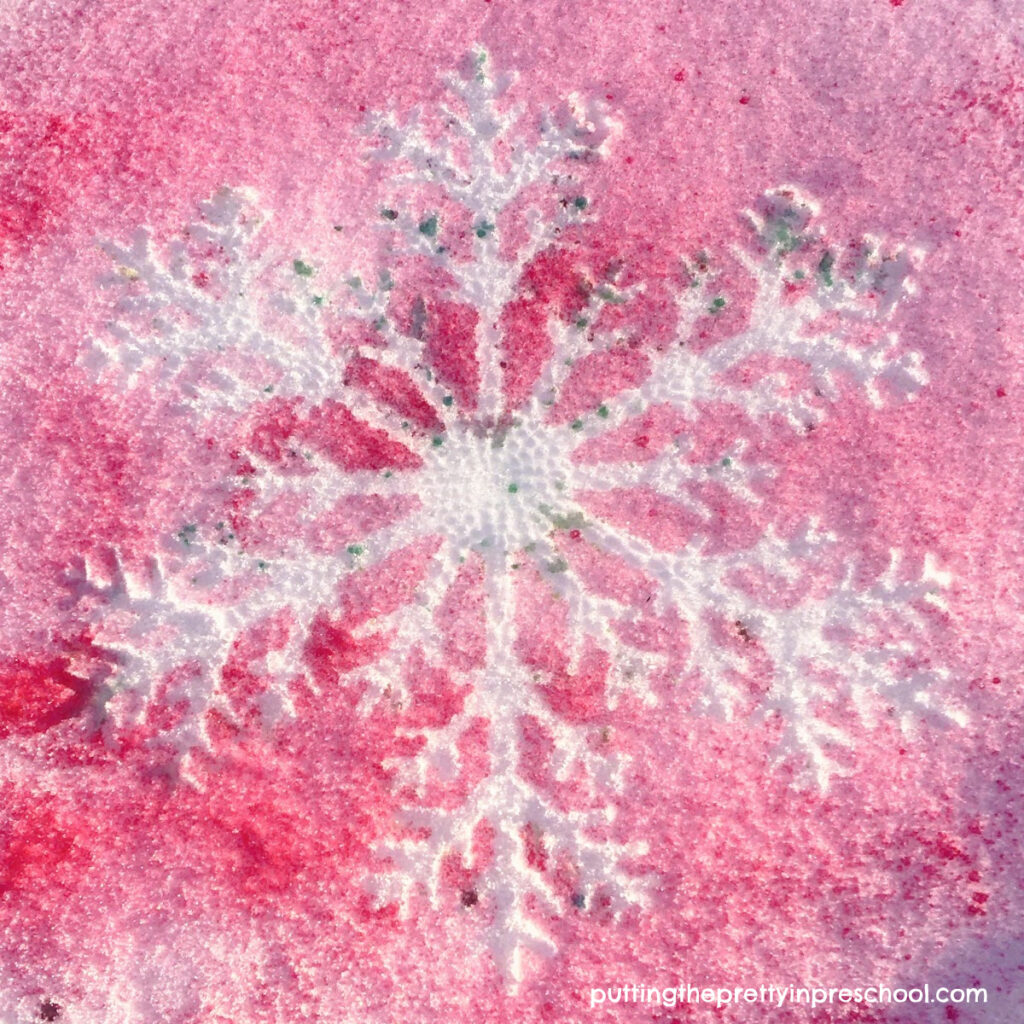
Wipe the decoration down with a towel and lay it down on another spot. Spray-paint the snow around it again. Drying the snowflake template is a tip I learned after trying this red background silhouette. There are a few drops of other colors on the red-framed flake as the decoration was used in the previous snowflake design.

A beautiful red background snowflake silhouette created with a spray paint technique. A quick and easy ourdoor transient art activity.

_______

If you have enough snowflake decorations and spray paint bottles, invite participants to spray paint their own snowflake silhouette.

_______

Spray Paint Snowflake Silhouette Benefits

In this snowflake painting activity, squirting a spray bottle develops finger muscles. And participants get the opportunity to create beautiful transient art outdoors during the winter season working cooperatively or on their own.

_______

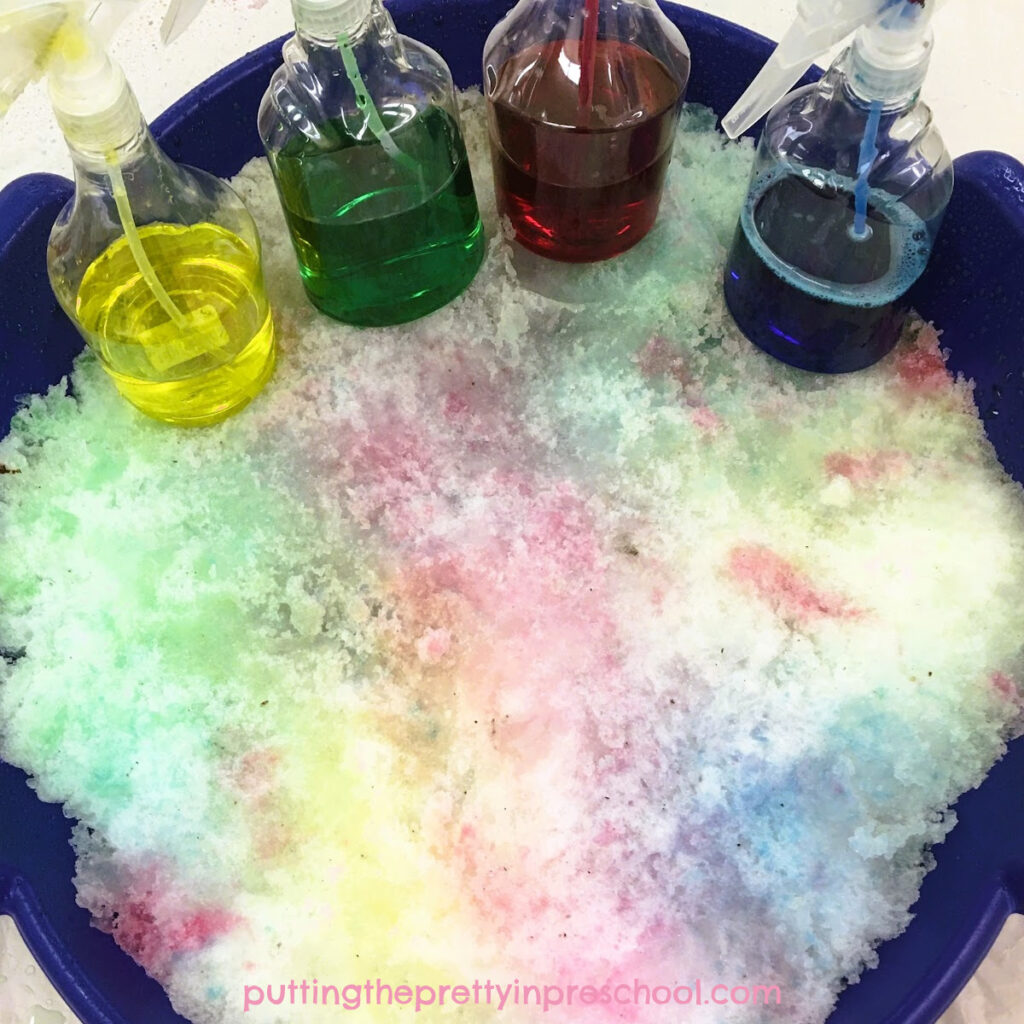
Spray Painting Snow Indoors

An invitation to spray paint snow indoors. This is a super fun winter transient art invitation.

_______

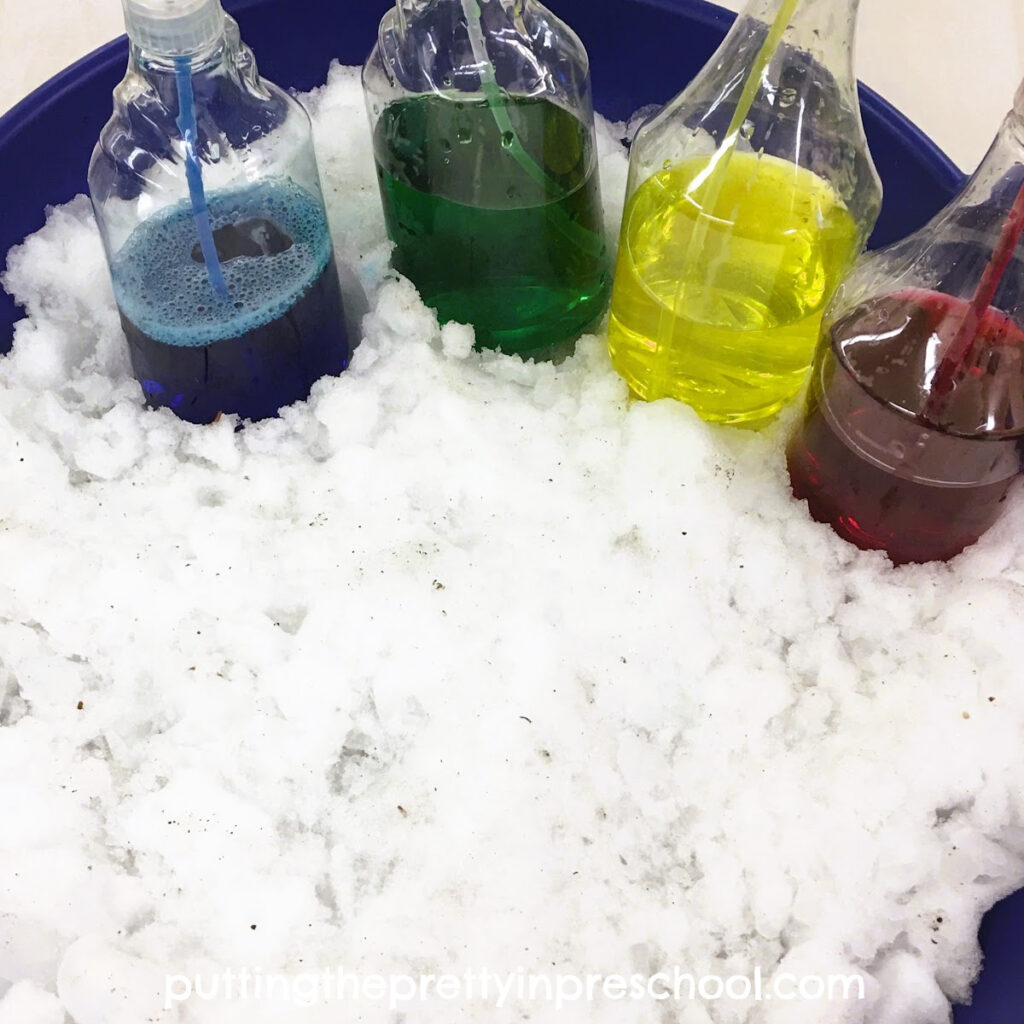
Originally, I hoped to offer this spray paint snowflake silhouette activity indoors. I  filled a round tub with snow and got the colored water spray paints ready. But the snow was too sticky and hard, and I couldn’t achieve a smooth snow surface to lay the snowflake decoration down on. But even without a snowflake decoration, the snow is enjoyable to spray paint indoors.

Take snow indoors and invite early learners to spray paint it with food coloring paint. A quick and easy sensory activity.

_______

Fun Facts About Snow

Snow is composed of many snowflakes. Tiny ice crystals clump together to make each snowflake.

The light reflecting off snow makes it appear white.

In cold weather, snow is powdery, while in warm weather it is sticky.

New snow absorbs sound waves, resulting in a quiet atmosphere.

Snow creates a wonderful playground for activities such as making snowballs, snow angels, snow forts, and snowmen.

Snow contains 95 % trapped air, and is a great insulator for animals who burrow under it.

When snow melts, it makes 1/10th the amount of water.

_______

A spray paint snowflake silhouette created outdoors. A quick and easy transient art activity with stunning results.

_______

Related:

Winter Playdough Recipe

Blue Candy Cane Science Experiment

Igloo Camping Pretend Play

Polar Bear Small World

Winter Sensory Trays

Painting Ice and Snow

Winter Wreath Paper Plate Craft

Ice Drum Musical Instruments

Frozen-Inspired Shadow Box

Scissor Skill Snow Cutting Activities
Kid’s Winter Wonderland Play Tablescape

_______

[Read more…] about Spray Paint Snowflake Silhouette

Filed Under: art, preschool, science, winter Tagged With: painting, snow, snowflakes, transient art

Snowman Theme Color Experiment

February 17, 2023 by Annette Kaminsky Leave a Comment

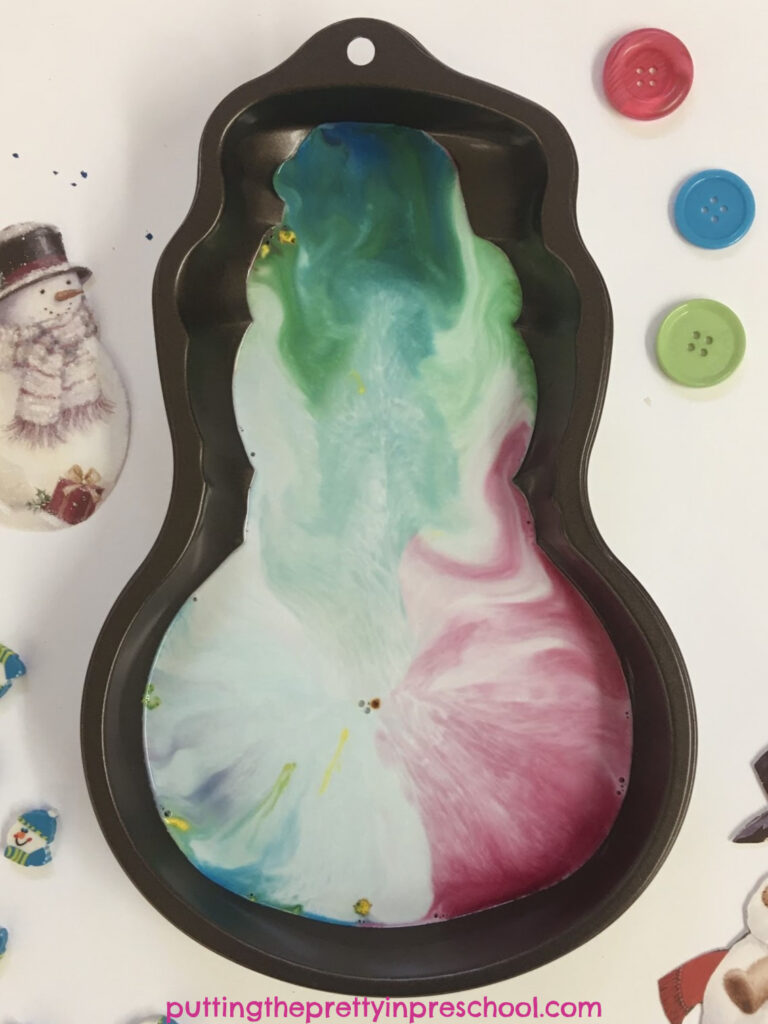
Try this magic creamer color experiment using half-and-half coffee cream. An easy-to-do science experiment with stunning results.

_______

It’s been a while back, but I promised to try the always-fun magic milk experiment with homo milk or cream. So here’s a post about a magic creamer snowman theme color experiment.

_______

Follow me on Pinterest for more early learning ideas.

_______

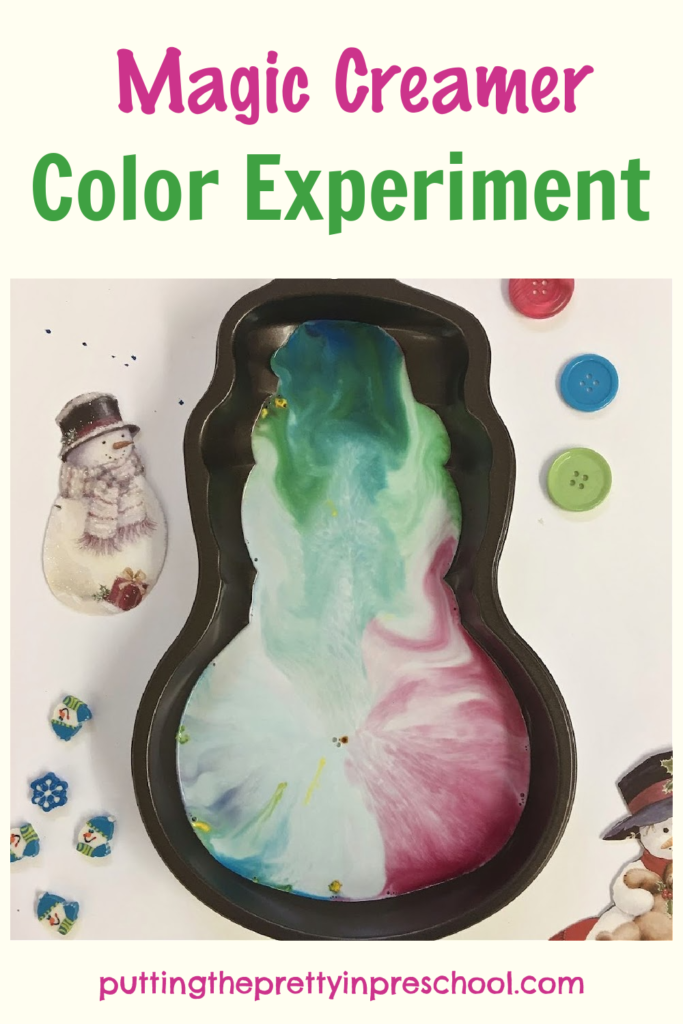
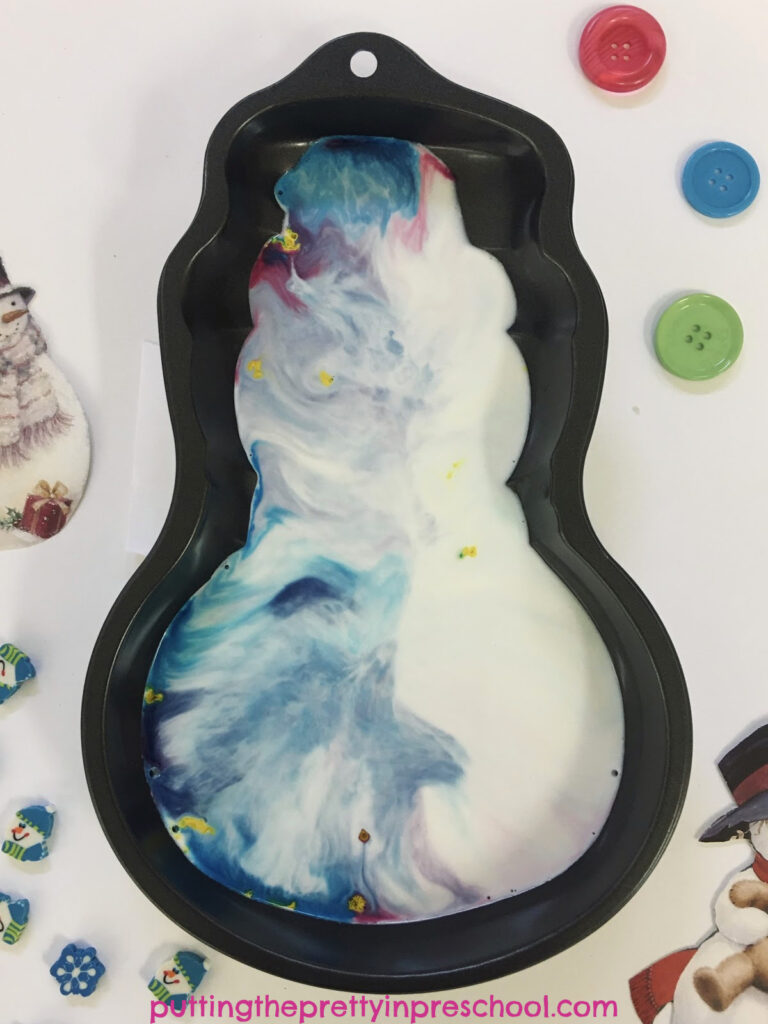
Watch the colors swirl and change in this stunning magic creamer color experiment. This is a crowd-pleasing science experiment.

_______

Supplies Collected
Collected in this winter-themed version is:

  • snowman cake pan
  • half-and-half (10% milk fat) creamer
  • red, yellow, and blue food coloring
  • liquid dish soap

_______

The Snowman Theme Color Experiment

Watch the colors swirl and change in this stunning magic creamer color experiment. This easy-to-do science experiment is sure to be a topic for conversation.

_______

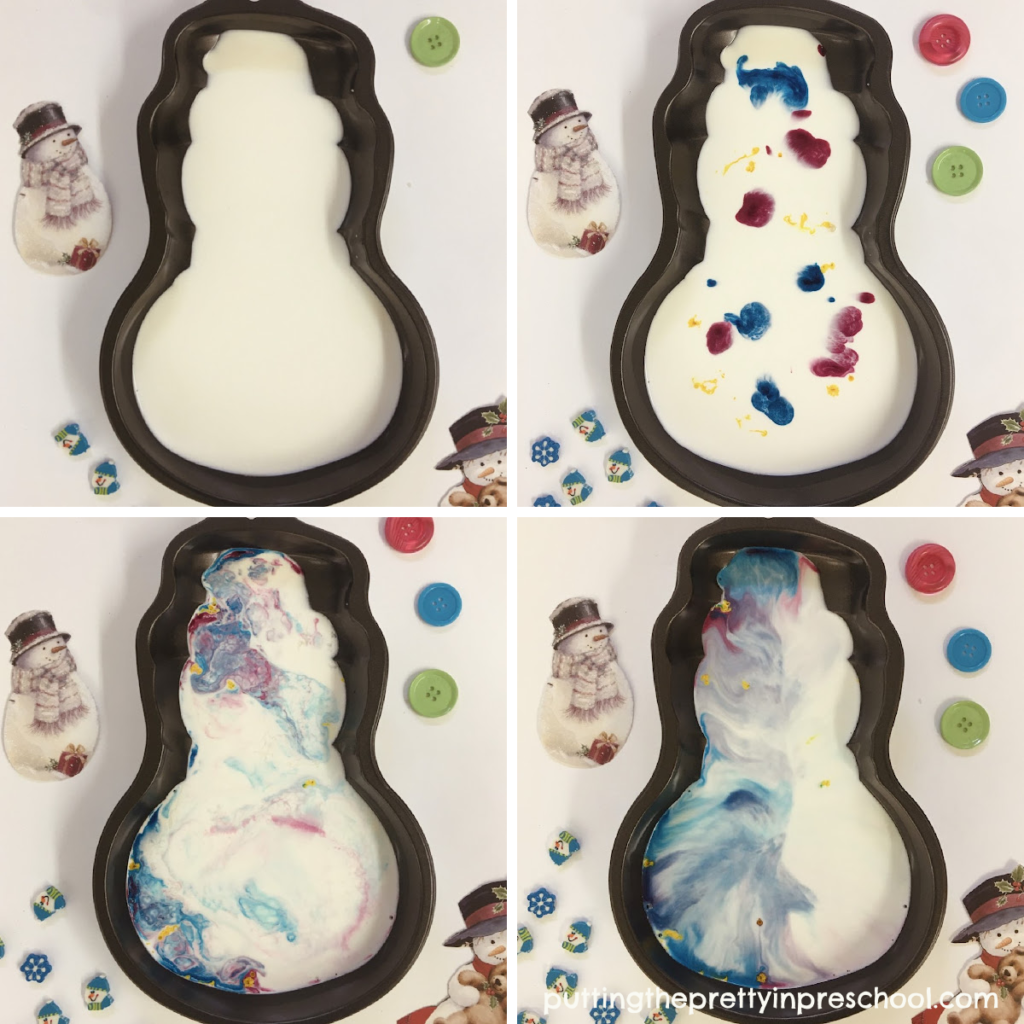
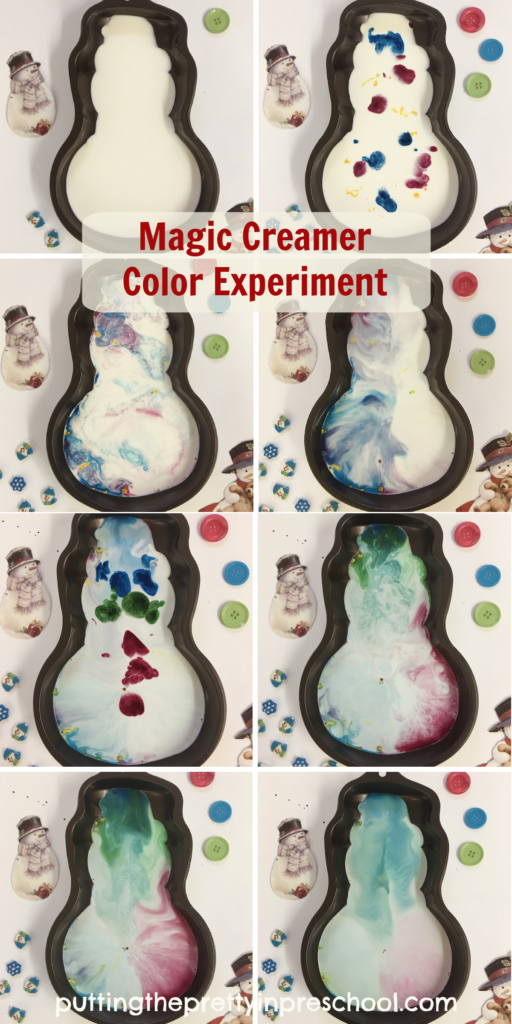
To perform this easy science experiment, pour a layer of half and half (10% milk fat) creamer into a cake pan or small bin. My pick for this experiment is a snowman cake pan. It is medium-sized and fits the amount of liquid I have on hand.

Note: Half and half cream is equal parts whole milk and light cream. It isn’t near as creamy as whipping cream but is creamier than the milk I’ve featured in past experiments. It is commonly used as a coffee creamer.

Next, add drops of red, yellow, and blue food coloring around the pan.

Then add drops of liquid dish soap onto some of the food coloring patches. The colors will immediately swirl around and make new color designs.

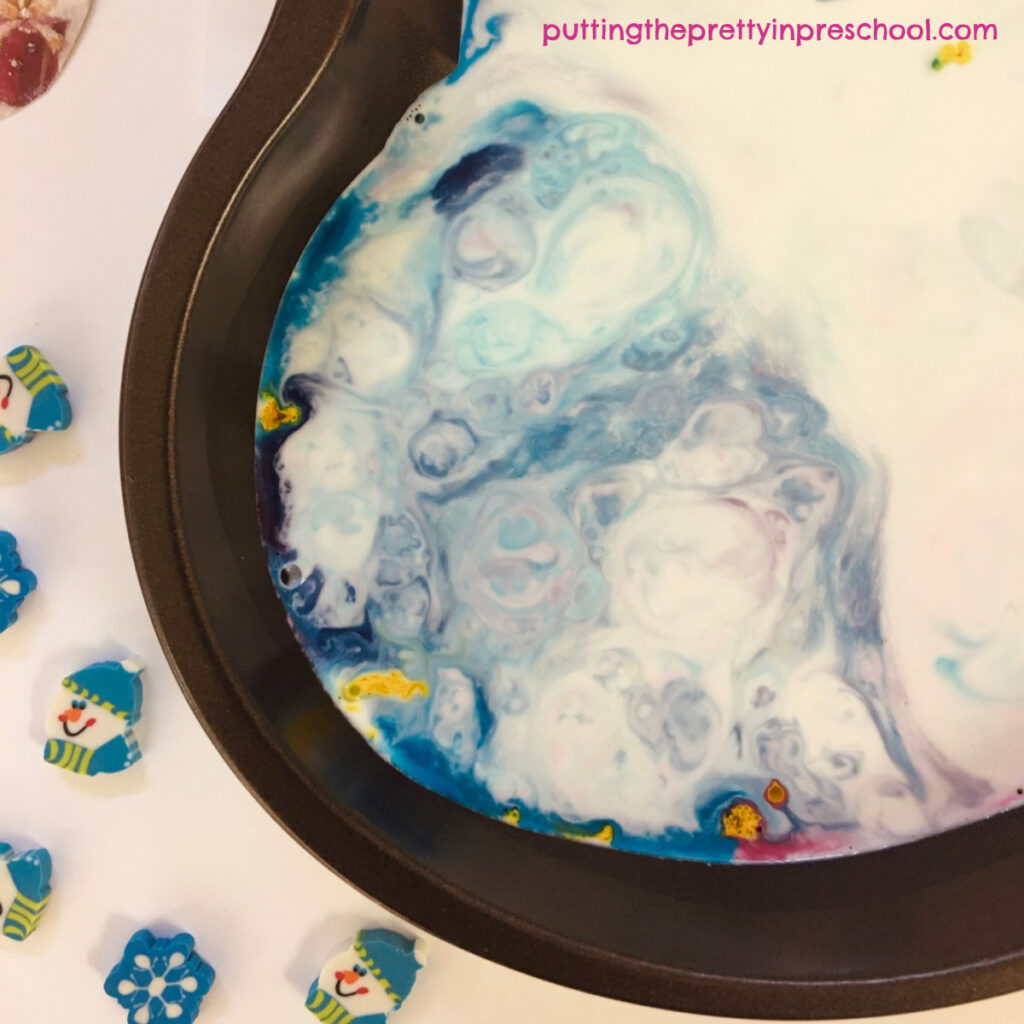
Close up, the color changes look super stunning.
A close-up view of the immerging designs created in a magic creamer color experiment. This easy science experiment is a crowd-pleaser.
_______

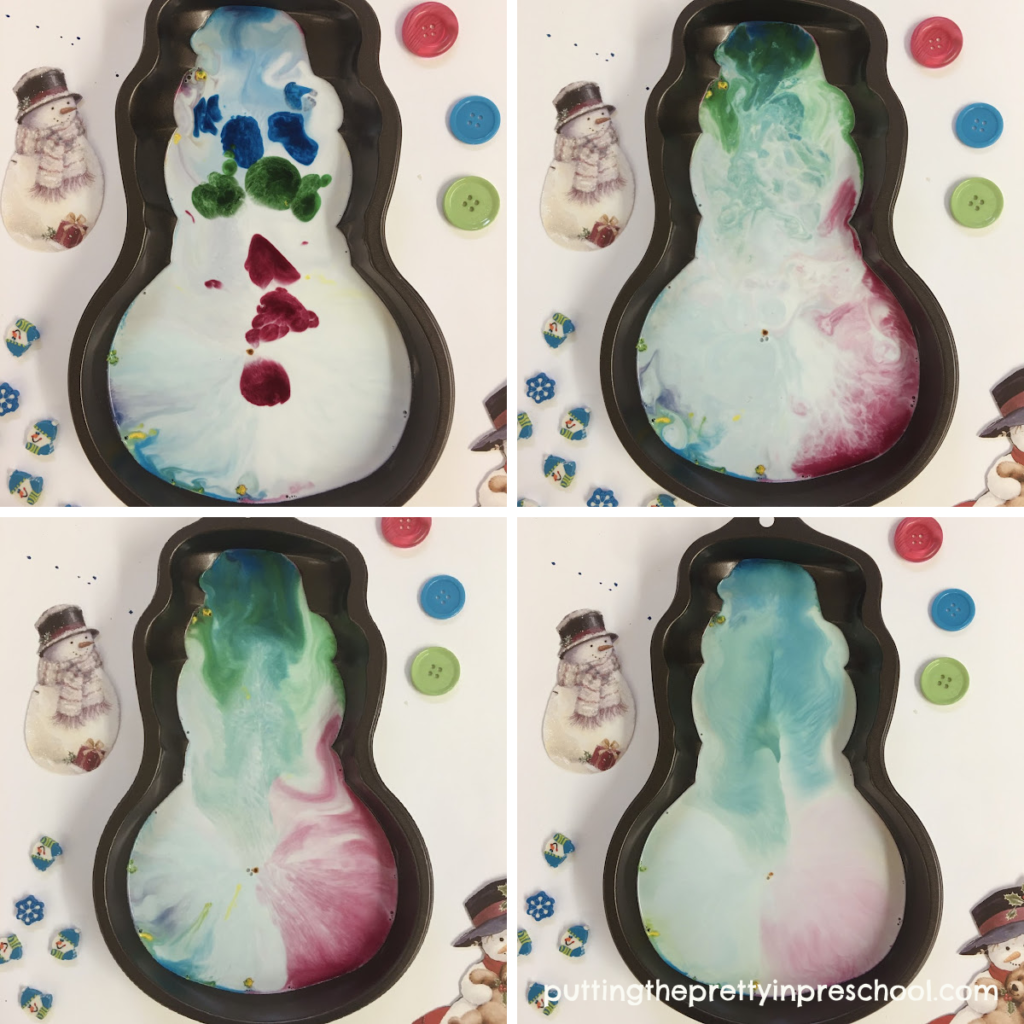
After the color movement slows down, check back occasionally and you will see new color patterns immerge. The color designs will keep changing for at least half an hour.

Watch the colors swirl and change in this stunning magic creamer color experiment. This easy-to-do science experiment is sure to be a topic for conversation.

_______

At this time, try adding a few more drops of food coloring. I try to make a snowman face and buttons.

Add more dish detergent drops and watch the colors move and change again.

Try this magic creamer color experiment using half-and-half coffee cream. An easy-to-do science experiment with stunning results.

_______

Interpreting This Color-Changing Science Experiment

Although half-and-half (10% milk fat) creamer is made of a significant amount of water, it also contains fat and protein. These are both sensitive to changes in the liquid. When dish soap is added to the pan, it breaks up the surface tension of the half-and-half liquid and is attracted to the fat molecules. The fat molecules try to scurry away but end up bonding with the soap molecules. The movement of the food coloring makes this process visible. As more and more soap and fat molecules bond, the color movement slows down and eventually stops.

Watch the colors swirl and change in this stunning magic creamer color experiment. This is a crowd-pleasing science experiment.

_______

Fat content in the half-and-half creamy liquid is super important in this science experiment.

The colors in the half-and-half coffee creamer experiment move at a slightly slower rate than 2% or 1 % milk, both of which I’ve tried successfully before. All three liquids show stunning color-swirling results.

_______

Related:

Color Explosion Science Experiment

_______

[Read more…] about Snowman Theme Color Experiment

Filed Under: preschool, science, sensory, winter Tagged With: color, color experiment, science experiment, snowmen

Candy Cane Tree Experiment

December 20, 2022 by Annette Kaminsky Leave a Comment

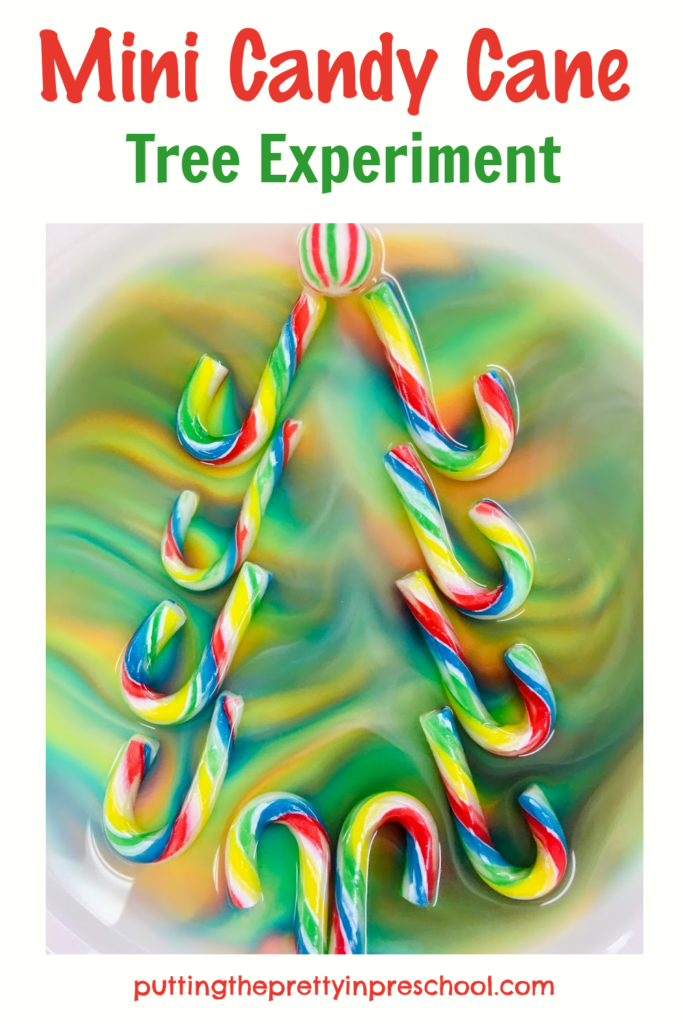
This mini candy cane tree experiment is a must-try. Just three supplies are needed for the simple science activity everyone will love.

_______

This candy cane tree experiment is easy to set up and is sure to be a conversation piece. It works well as a Christmas science activity, and also fits a forest theme.

_______

Follow me on Pinterest for more early learning ideas.

_______

Supplies To Collect

_______

For this simple science experiment, gather the following four supplies:

  • package of mini candy canes
  • one round striped candy
  • large flat white or cream-colored plate
  • flask of warm water

    _______

    The Candy Cane Tree Experiment

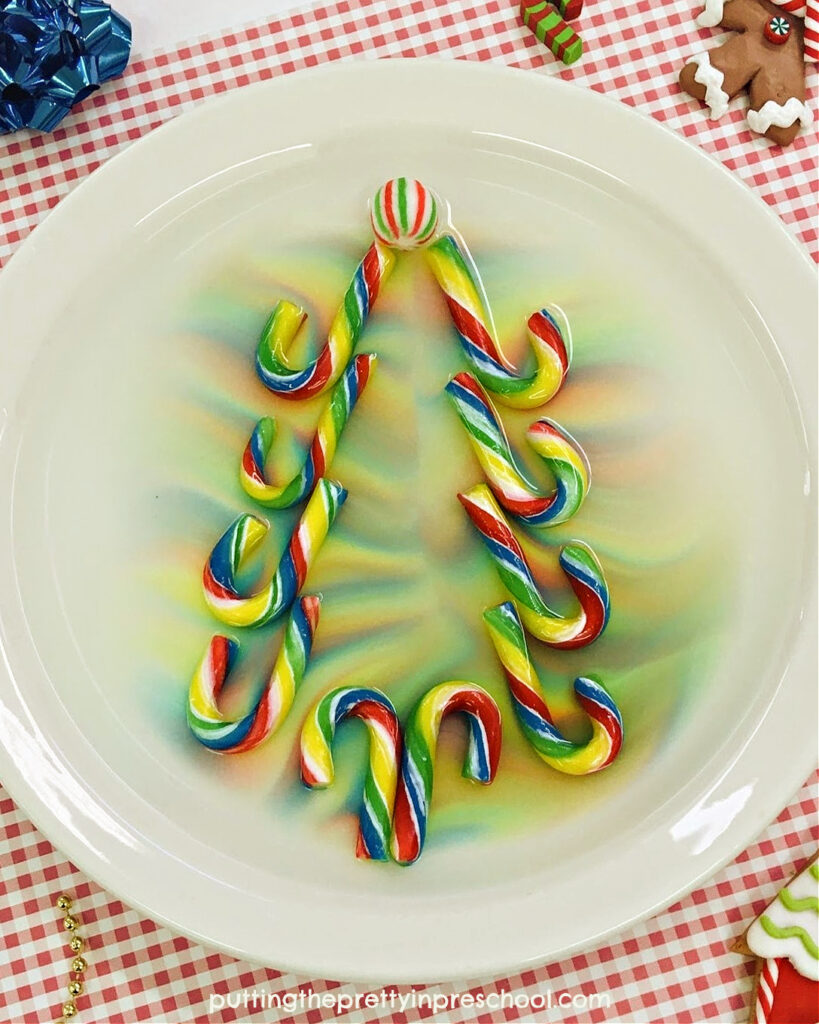
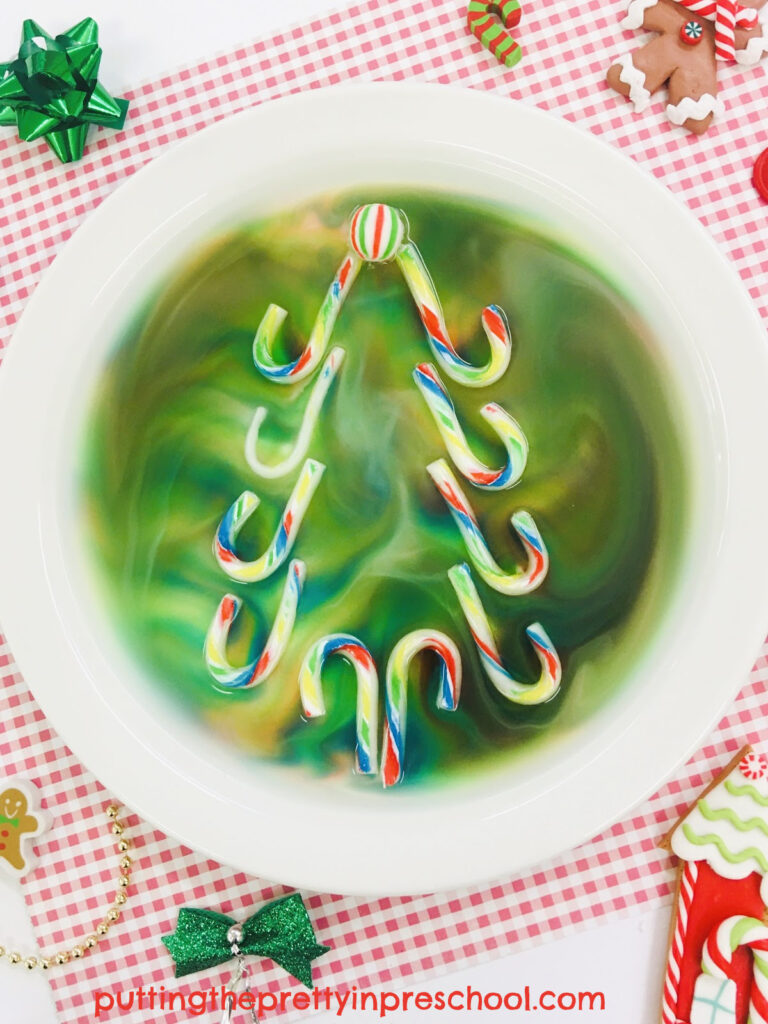
    Design a tree on a plate with mini candy canes. Pour water into the plate and watch what happens. Your audience will be wowed!

    _______

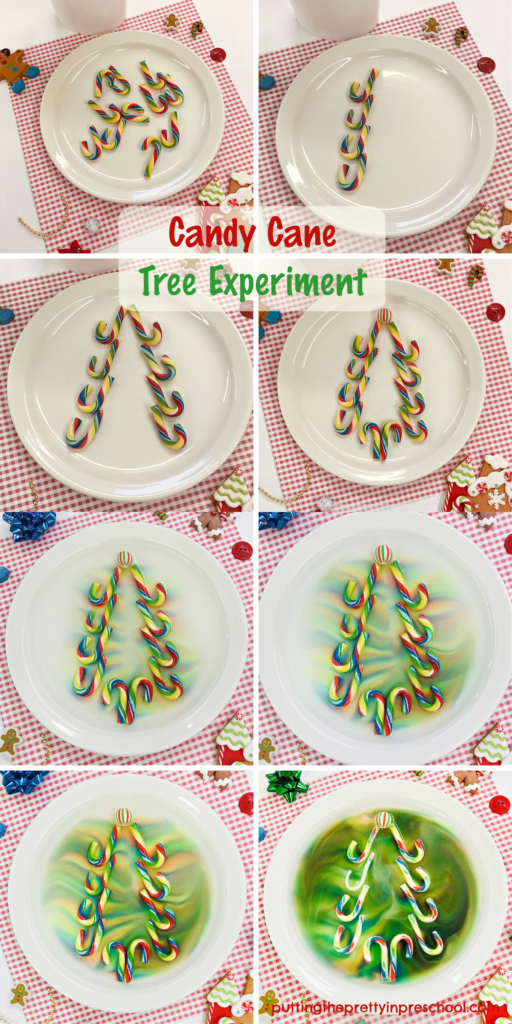
    To perform this showy science experiment, start by arranging mini candy canes on a plate in a Christmas/coniferous tree design. The colorful and fruity candy canes above were a great find at a Dollar Store.

    Next, set a round candy on top of the tree to be the tree topper.

    Then fill a flask with warm water.

    Carefully set the plate with the tree design on a table.

    Now the experiment is ready to be performed. Invite participants to gather around the candy tree. Slowly pour water from the flask into the plate and invite everyone to watch what happens. It’s that simple!

    Participants will be wowed at how the colors in the candy canes quickly spread through the water, making beautiful designs.

    Watch the colors explode from the candy cane tree in this super simple science experiment everyone will love.

    _______

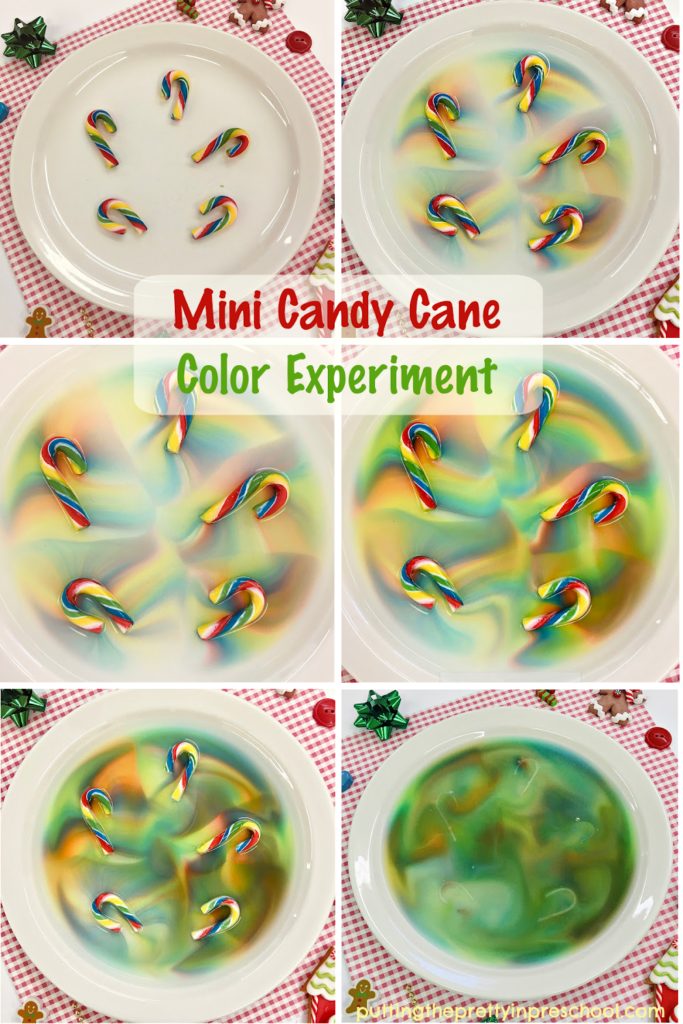
    Color changes will be instant. Over time the colors and their intensity will change.

    Watch the colors move and change in this super simple science experiment everyone will love. The activity is a must-try.

    _______

    Note: This tree-shaped experiment can be done with standard-sized candy canes in a large ridged serving tray.

    _______

    The Science Behind The Candy Cane Tree Experiment

    The candy canes are made of sugar. The water breaks the sugar molecules apart. Then the food colors move through the water from areas of higher sugar concentration (near the candy) to areas with less sugar (the center and rim of the tray.) When the sugar concentration is the same in all areas, the colors stop moving.

    Water temperature is a variant in this experiment. Sugar dissolves more quickly in warm water, and food coloring moves at a faster pace.

    Candy Cane Color Experiment Variations

    Watch the stunning color changes in this super simple mini candy cane science experiment. Try it today!

    _______

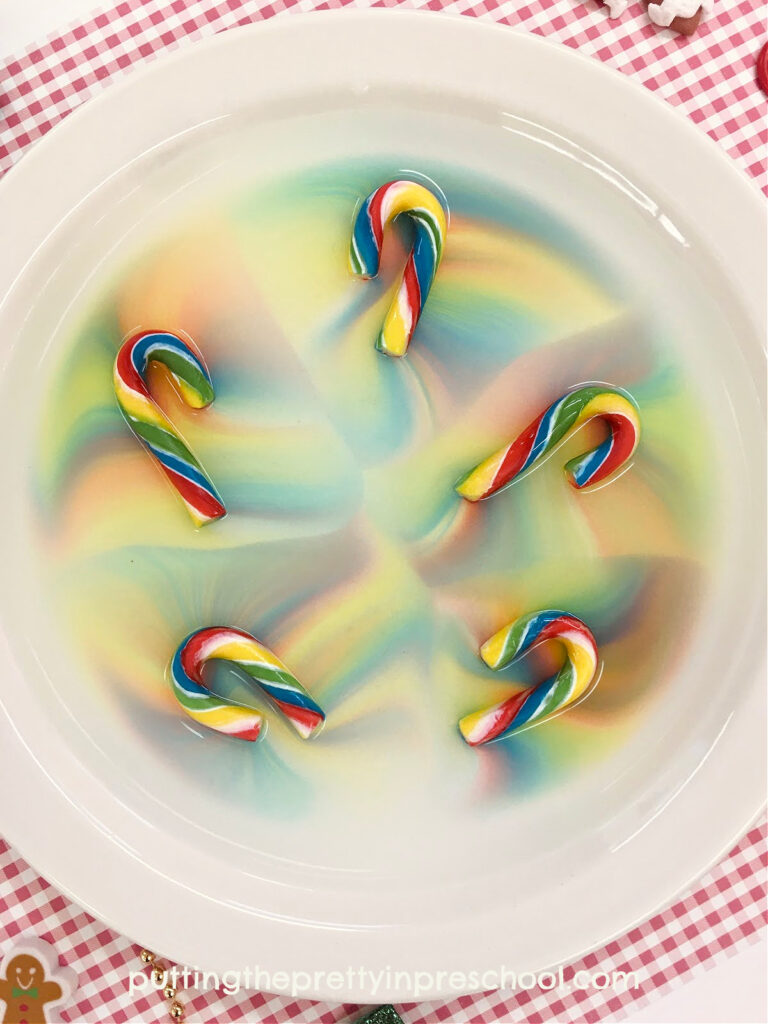
    You can forgo making a tree shape with the candy canes, and spread a few around a plate instead. The color movement is just as interesting in this more basic version.

    Watch beautiful colors emerge in this super simple science experiment with a serious WOW factor. Just thee supplies are needed to perform the experiment.

    _______

    Watch beautiful colors emerge in this super simple science experiment with a serious WOW factor. Just thee supplies are needed to perform the experiment.

    _______

    And if you have been following my blog for a while, you may have discovered that I have done a few other candy/candy cane color experiments. Here are more variations:

    Candy Cane Science Experiment

    Blue Candy Cane Science Experiment

    Shamrock Dissolving Candy Experiment

    _______

    This mini candy cane color experiment is a must-try. Just three supplies are needed for the simple science activity everyone will love.

    _______

    [Read more…] about Candy Cane Tree Experiment

    Filed Under: Christmas, preschool, science, sensory, trees Tagged With: candy canes, Christmas tree, science experiment, trees

    • « Go to Previous Page
    • Page 1
    • Page 2
    • Page 3
    • Page 4
    • Page 5
    • Page 6
    • Interim pages omitted …
    • Page 8
    • Go to Next Page »

    Primary Sidebar

    Hi, I'm Annette Kaminsky. I am a preschool teacher who loves to share easy and fun early learning activities. Thanks for visiting my blog. Feel free to stay awhile!

    Subscribe Via Email

    Recent Posts

    • Salt Painting Planet Art May 3, 2025
    • Spring Bunny Sensory Bin April 19, 2025
    • Tin Foil Egg Printing April 17, 2025
    • Lentil Easter Bunny Sensory Bin April 15, 2025
    • Unicorn Store Dramatic Play Center March 25, 2025
    • Easter Store Dramatic Play Center March 23, 2025
    • Origami Heart Wreath February 28, 2025
    • Black History Month Mixed Media Art February 26, 2025
    • Pink Shirt Day Necklace Craft February 20, 2025
    • Origami Heart Valentines February 9, 2025

    Categories

    Topics

    block play bunnies butterflies Chinese New Year Christmas Christmas craft color colors dramatic play Easter flowers hearts holiday jewelry leaves leprechauns light table loose parts painting paper crafts playdough pretend play printables printmaking process art pumpkins rice bin scented playdough science experiment scissor skills sensory bin sensory play sensory tray shamrocks skeletons snakes snowflakes spiders spring St. Patrick's Day sunflowers tablescapes trees Valentine's Day water play

    Copyright © 2025 · Lifestyle Pro on Genesis Framework · WordPress · Log in